Painting Brick Fireplace

This is the first in a five part series on renovating our living room:

1. Faux painting brick over a previously painted white brick fireplace (this post)
2. Lightening up a room in 5 steps
3. Painting decorative graphics on a wall
4. Preparing to Install Antique Heart Pine Floors (and living to tell about it!)
5. Installing Heart Pine Floors and the Final Reveal

I know the trend lately is to paint fireplace brick white. Especially if the brick is an ugly bright red or some other ugly color. Iโ€™m pretty sure that is why our fireplace was painted in the first place.

Painting Brick Fireplace
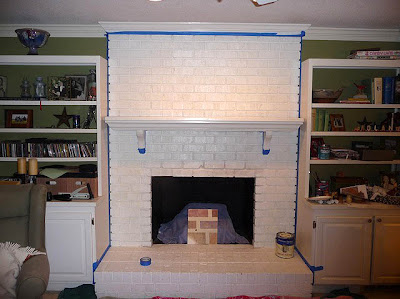
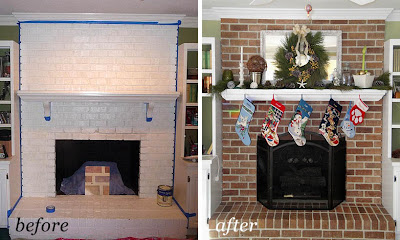
Before Shot

Painting Brick Fireplace

But, the fact that our fireplace, mantle and the built-in bookshelves on both sides of our fireplace are white, made for an overwhelming amount of white on that one wall. I thought about painting the mantle, but only briefly. I really wanted the warmth and contrast of bricks to set off all the white in our living room.

I stumbled across a few websites showing painted brick here and here. Then I thought, โ€œIf someone can do it, then there is a 95% chance that I can do it too!โ€

I wasnโ€™t sure how it would turn out, but in the end I am amazed by how real it looks. And, how easy it was to do! The true test came when I fooled the builder of our house (he has lived on our street for over 30 years) into thinking I had stripped the paint off the bricks! Sweet success.

This is a relatively easy project. It took several hours, but can be done in sections.

Painting Brick Fireplace Materials Needed:

TSP cleaner
Scrub brush for use with TSP cleaner
Drop cloth
Newspapers
Painters Tape
Paint Roller and Tray
Stiff 2โ€ณ paint brush
Car wash sponge or large 6โ€ณ x 3โ€ณ sized sponge
Spray bottle with water
7 paper plates
Rags for clean Up
Acrylic Paint (see below for colors)

Before you do anything, buy some TSP (tri-sodium phosphate) cleaner at the hardware store and follow the directions to clean your brick. Be forewarned that you may actually like the color of your bricks once they are clean and dry! If you still hate the color, proceedโ€ฆ

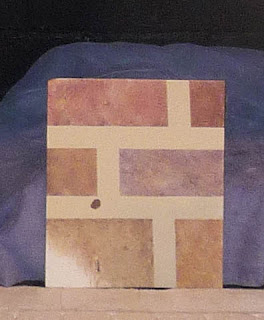
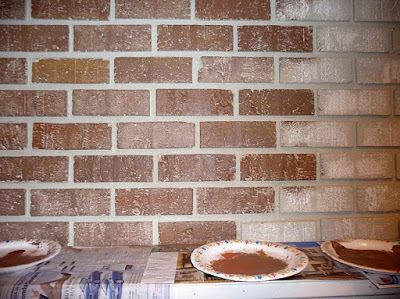
After working up a test board by playing with several color combinations, I chose a warm brown brick color. I also tweaked my mortar color before painting it on my fireplace.

Painting Brick Fireplace

I covered the mantle and bookcases by taping newspapers to them. Then, covered the floor with a drop cloth.

I mixed up a small container of my mortar color. I used some leftover latex satin taupe paint from our other house and added some black and a little dark brown to achieve the perfect mortar color.

My color looks like this warm gray cement color:

Painting Brick Fireplace

I painted all the mortar areas between the bricks with a 2โ€ณ paint brush.

Painting Brick Fireplace

As the mortar color dried, I mixed up a bucket of my base color for the bricks. Then poured it into a paint tray.

Painting Brick Fireplace

Then, I laid out my seven paper plates and filled the first one with a deep chocolate oops paint (Valspar Latex Eggshell Chestnut).

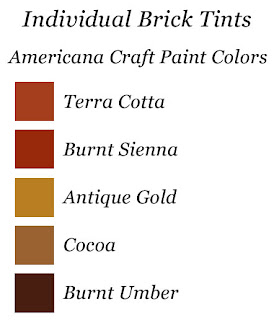
And poured a half dollar size of the following colors onto the other plates (one color per plate).

Painting Brick Fireplace

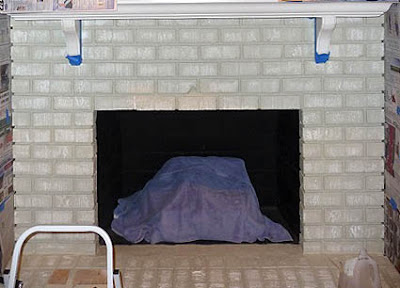
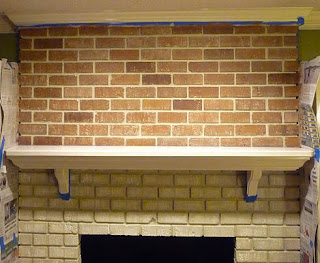
I used a paint roller to roll the base color onto small 3โ€ฒ x 3โ€ฒ sections of my fireplace. (Donโ€™t worry if the paint doesnโ€™t soak into all the grooves. Some of the white showing through made my bricks look old and rustic.)

While the base color was still wet, I covered my sponge with the Chestnut color. Then dipped the sponge into one or two of the brick tint colors. I sponged one brick at a time using the same color tints sporadically around the wall. Keeping the brick colors varied and random make them look real!

Painting Brick Fireplace

When the sponge needed to be reloaded with paint, I began with the chestnut color first, then added one or two new color tints to the sponge. You will have to refill the paper plates as you use up the paint.

I kept working in small sections, to be able to work while the base color was still wet (use the spray bottle of water to lightly wet the bricks if it dries too quick).

Painting Brick Fireplace

The best part was that if I didnโ€™t like a color, I could go back over it and try a different tint. Notice how I randomly dispersed the darker brown bricks. This is key to having a realistic look.

Painting Brick Fireplace

On the hearth I had to press more gently with the sponge since the mortar lines on our hearth were almost level with the bricks. I kept a wet rag near by to wipe up any wandering brick paint.

Painting Brick Fireplace
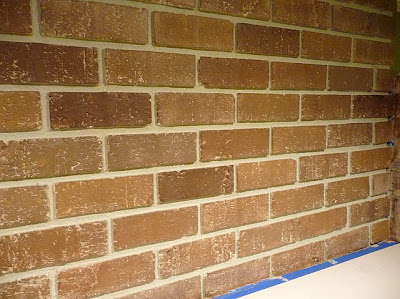
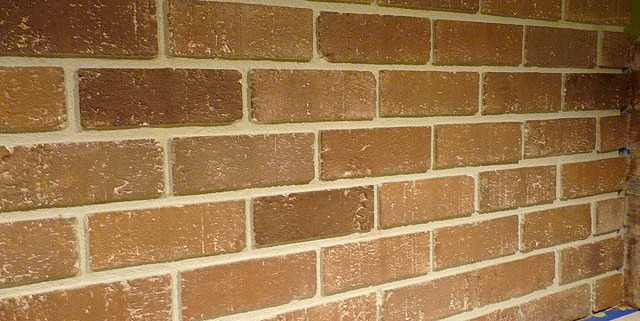
Close up picture of the bricks.
Notice how the white specks showing through really make the bricks
look like they are re-claimed and rustic.
Painting Brick Fireplace
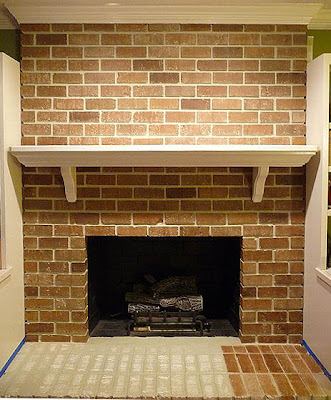
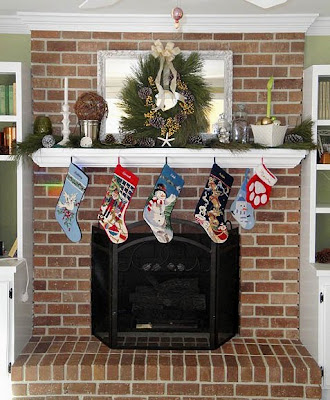
After Picture
Painting Brick Fireplace
Daylight picture after decorated for the holidays.
I canโ€™t believe what a huge difference painting the bricks made in our living room. It warmed up the space and actually made our fireplace recede into the room. Letโ€™s take one more look at the before and after:
Painting Brick Fireplace
Side note: The latex and acrylic paint has held up great (even after several fires using our gas logs.)ย  If you need to paint the bricks inside the firebox, you will need to use paint that is heat tolerant.

And for those wondering how long this took. Including the prep work (cleaning, taping, mixing colors) it took about 5 hours total. Not too bad since Iโ€™m a night owl and could watch DIY network while painting!

Be careful not to put anything heavy on the hearth for a few weeks while the paint hardens.

Next up in the series: 5 Ways to Lighten up a Dark Room.ย 
Followed by: Painting Decorative Graphics on Your Wall.
And I saved the best for last (coming soon): Installing Antique Reclaimed Heart Pine Flooring

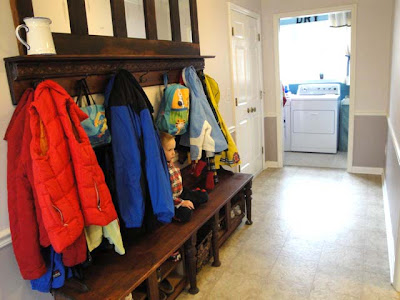
We have a great mudroom area in our house, but when we moved in we didnโ€™t have anywhere to store our shoes, and all we had to hang our coats on were a few peg hooks behind the door. Not very efficient or attractive in my opinion. (Especially when my toddler filled the pegs with shoes. Do you think he was trying to tell me something? Letโ€™s talk about this Coat Rack made from an Old Door.

But, soon, we had more storage for coats and shoes! Letโ€™s take a look at how I built this beauty:

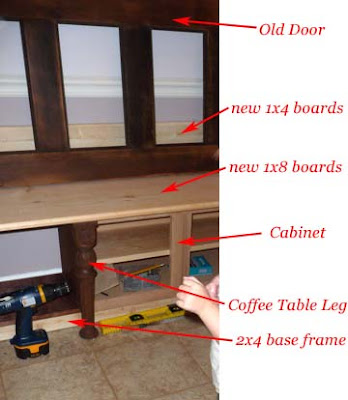
I started planning out the storage bench and coat rack at the same time. The coat rack was definitely the less involved project. Below is a picture as I was laying out the project.

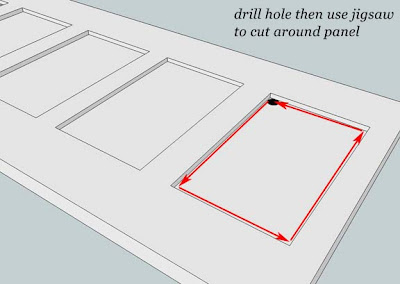
I started with a beautiful old antique door that had recessed panels. I cut the panels out with my jigsaw (if you have never cut out an interior shape, you always start by drilling a hole large enough to fit your jig saw blade in. Drill your hole in a corner, then insert your jigsaw and cut the rest of your shape.

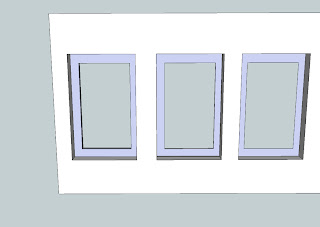
Next, I used my router to get rid of the edge of the recessed panels on the back side. As you can see in the Sketch Up drawing below, I left the edge on the front side to support the mirror.

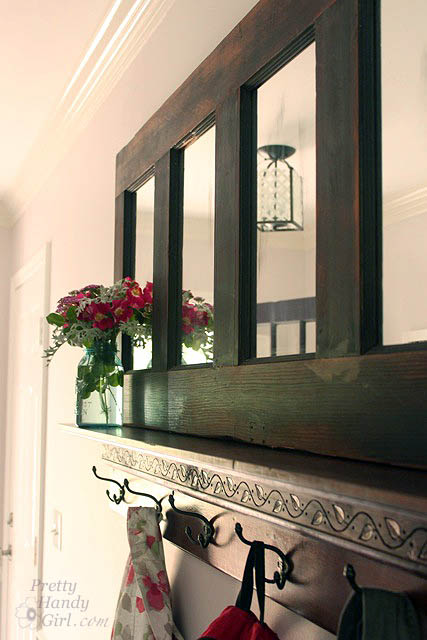
Then I could measure my opening and cut the mirror pieces to fit into the panels. I have a great resource for inexpensive mirror glass. I buy those cheap full length mirrors at discount stores like Target, Kmart or Walmart. Then I rip off the thin plastic frame and the paper backing. Use a glass cutter to score the front of the mirror and then snap the mirror in two pieces. ย Then continue to cut until it is down to the size needed.

If you have never cut glass before, here is a short 1 minute video tutorial:

Next I sanded some of the silver off the back of the mirror to try to distress it. It took a while to do, and Iโ€™m not exactly thrilled with the distressing. Recently I stumbled across a few posts where paint stripper was used to distress mirrors. I would definitely use this route next time.

After all the mirror panels were cut to size, I laid them in the recess panel holes from the back and then used a thick bead of caulk around the edges to hold the mirror in place.

Next I had to build the shelf that the door would rest on. I recently bought two wall shelfs and brackets from a yard sale. I used one 7โ€ณ deep shelf for the vertical edge (or backer board for the hooks to attach to.) I ripped the other shelf down to 5โ€ณ inches (on a table saw) and used that to rest on top of the other shelf. To attach the two I simply screwed down through the horizontal shelf and into the backer board every 2 feet or more.

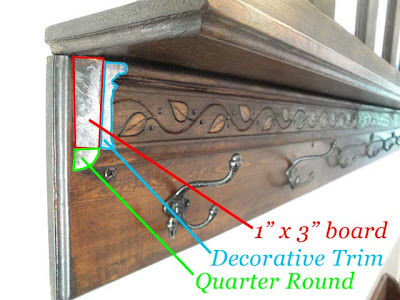
Then I added some decorative moulding using finish nails to secure them. You can see the different pieces on the edge.

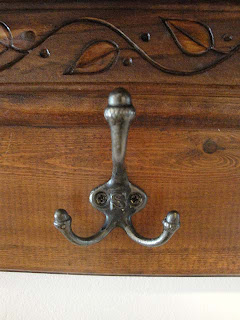
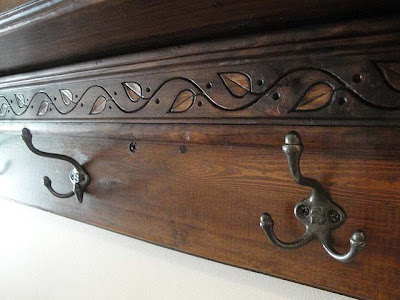
I scoured eBay for a week until I found the perfect antique coat hooks. They are adorable and can hold many coats with the three prongs.

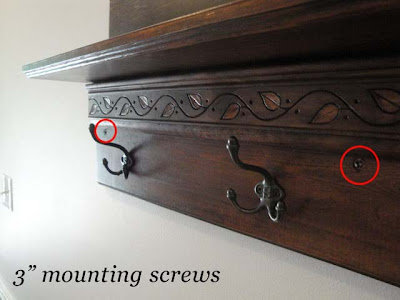
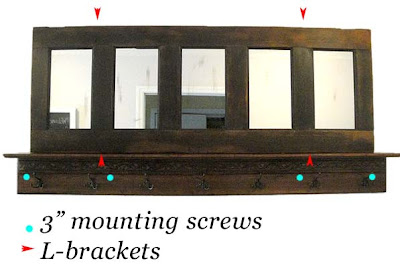
After everything was assembled, I located the studs in our mudroom wall and drilled holes into the backer board, then drove 3โ€ณ screws into the wall studs.

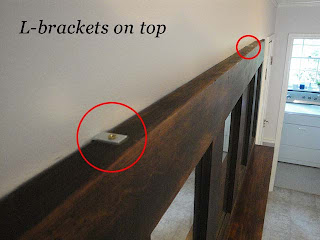
The antique door rests slightly on the shelf, but it is also held secure by four L brackets that are mounted on the top and bottom.

Be sure that your coat rack is safely secured to the wall for safety reasons.
For this project I donโ€™t recommend using wall anchors.
Take the time to find the studs, you will thank me four years from now when your coat rack is still holding up to children who can and will climb on anything!

I used Minwax Brazillian Rosewood gel stain to stain the bench and shelves. This was the stain color that matched the color of the antique door.

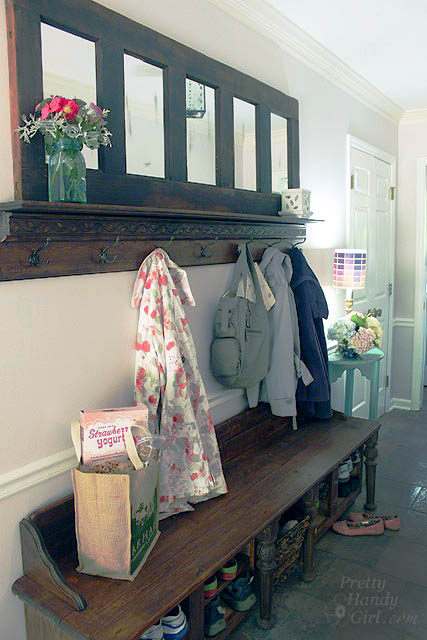
And there you have it! An antique coat rack to match my shoe storage bench.

I just love these eBay hooks! And the detailed moulding makes me happy.
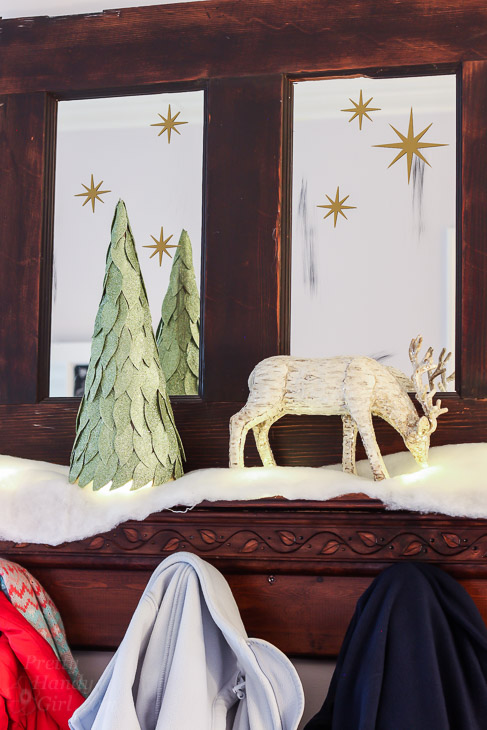
Plus, they allow space for decorating during the holidays!
Holiday Home Tour 2016 | Pretty Handy Girl

Plenty of storage for coats for a family of four or more!

Learn how to build the mudroom shoe storage bench here.


My best friend from elementary school will be flying in today from New York. I have a sweet little retreat all made up for her in our guest room. I promise to post pictures of the whole room in the near future (when the sun โ€“ and sons โ€“ cooperate with me.)
 
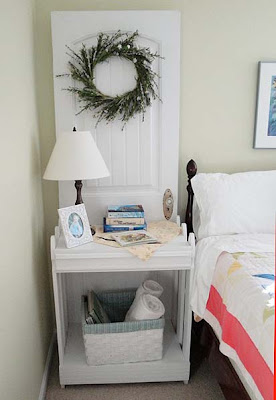
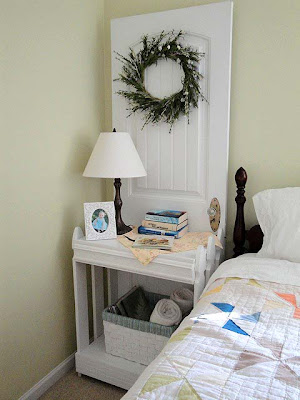
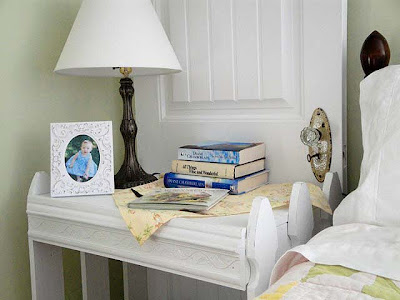
Our guest room is full of discarded treasures: a rebuilt curbside chair, an upholstered bench, a full size bed, and a little curved desk. But, one of the focal pieces in the guest room is a night stand made from a discarded door and leftover picket fence pieces.

 Isnโ€™t it fabulous?!

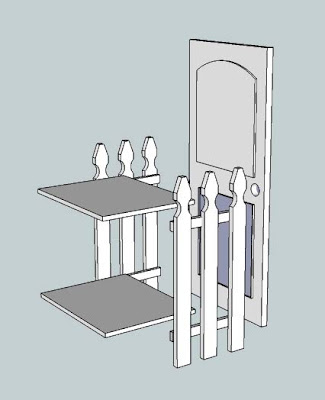
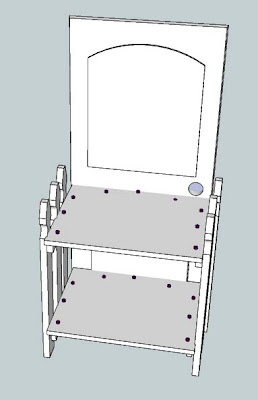
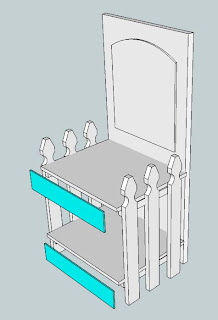
So, here is the tutorial for you. I hope you will excuse my first attempt at using Google Sketch Up. These sketches should give you a pretty good idea how to construct the night stand.
I started by cutting two boards for the shelves. They were cut to the width of the door and the depth of the picket fence sections.
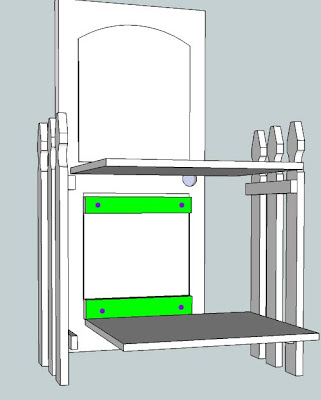
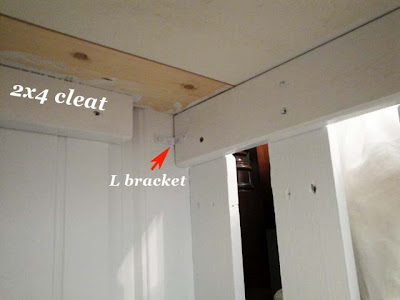
I cut two cleats out of 2โ€ณ x 4โ€ณ boards (shown in green).

And screwed them to the door (purple circles), making sure that the top of the cleats were level with the top of the horizontal cross boards on the picket fence.

I braced the picket fence pieces to the door using L-brackets.

I laid the two shelves on top of the cleats and cross boards. And drove screws down to hold it in place (purple circles).

Next, I cut some face boards (shown in aqua below) to the same width as the nightstand front.

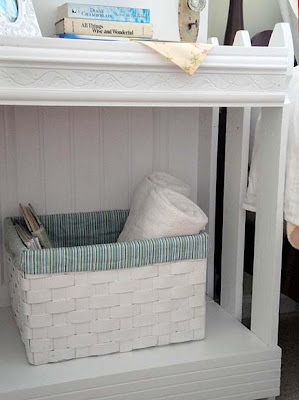
I used finish nails to nail them to the front, then added some decorative moulding to the face boards.

I used wood putty to fill all the screw and nail holes, and caulk to smooth the seams of the moulding (see here for more details on caulking and filling nail holes.)

Then I painted the nightstand white and accessorized it. Iโ€™m still deciding whether I should distress and glaze the nightstand. Feel free to give me your opinion. I am all ears.

Here is my door & picket fence nightstand, all ready for our first guest since re-decorating the guest room.

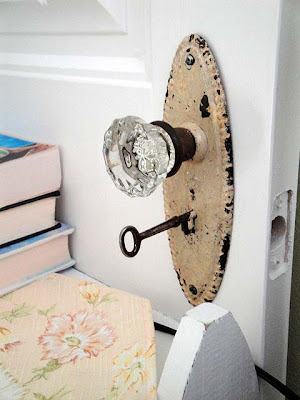
Glass knob and door plate was purchased at NoFo in Raleigh.
If you are ever in the Raleigh, NC area, you MUST eat at NoFo,
then shop upstairs after your meal. 
 
Some books written by my favorite author, Diane Chamberlain.
A goodwill lamp and a picture of my niece who lives too far away!*

*(bold comment solely for the purpose of guilting my sister into moving closer.)
Fresh towels and my Country Living magazines.

All beautified and ready for our visitor!

Sharing with the CSI Project White Challenge:

Visit thecsiproject.com
Top Ten Reasons to Do-It-Yourself

Top Ten Reasons to Do-It-Yourself

Top 10 Reasons to Do-It-Yourself!

Over the course of the last ten years writing this blog, Iโ€™ve met numerous people who have lamented that they wished they had skills like mine. Or have professed that they just didnโ€™t have it in their DNA to be handy. Consequently, Iโ€™ve spent a lot of time trying to persuade people that they are handy but just donโ€™t know it yet. Granted, growing up in a family of DIYers helped me take the leap of faith from paying someone else to fix, build, or create something to doing it myself.

If youโ€™re still on the fence about taking on a DIY project, let me give you the Top 10 Reasons to Do It Yourself:

    1. Save Money, Save Money, Save Money. (Do I need to emphasize this again?) When you do something yourself, you keep the money in your pocket that you would have paid otherwise. Why not create a jar and put money in there every time you save money doing it yourself versus buying or paying someone else? Did you know that taking on your own room renovation could save you as much as 50% of the cost to hire out?
    2. Try It. If you fail, Watch and Learn. Youโ€™re sink faucet is leaking or your toilet is running. You get ready to pick up the phone to call the plumber but then you remember the bill last time he was at your house. If you are trying to repair something, you will either fix the problem or need to call a repair person anyway. (That being said, recognize your limitations. Donโ€™t take on a complicated electrical project if you donโ€™t know what the black, white, or green wires are!) Go ahead and call that repair person, but stick around and watch how the repair is made. Ask questions. A lot of times you will realize that you could have done the repair yourself and next time you will!
    3. Help is All Around You. If you can read and able to follow directions, there is a 95% chance that you will succeed at your DIY project. There are so many resources to assist you. Here are just a few:
        • Instruction manuals that come with the fixture to install
        • Online resources, try googling โ€œhow-toโ€ instructions for the project
        • Ask a professional or home improvement store employee for advice
        • Search for instructional videos on Youtube.com
        • Check out a DIY book at your library
        • Buy a DIY book at your local home improvement store
        • Ask a friend, family member, or neighbor who you know has the skills
    4. The Time is Now. You can complete your project now instead of waiting for someone else to do it.
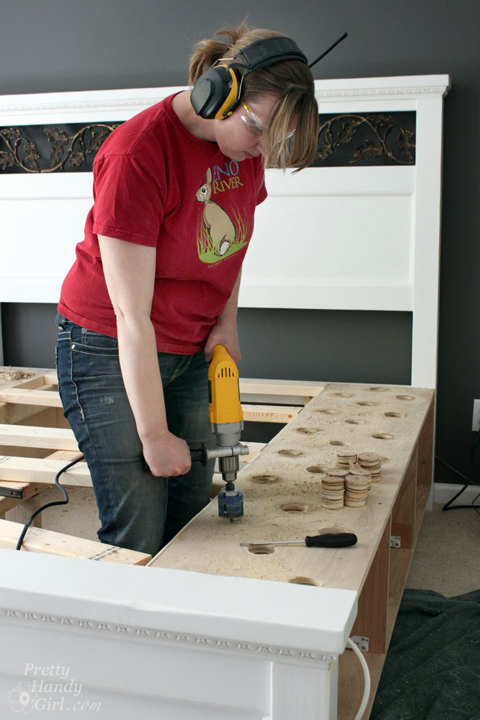
    5. Get into Your Zone. You may love the process of working with your hands. If you are a parent, youโ€™ll appreciate the fact that unlike children, wood and building is predictable. The materials will bend to your will (or tools.) Personally I find DIY projects relaxing.Modified King Size Farmhouse Bed with Storage Drawers | Pretty Handy Girl
    6. Prevent Alzheimerโ€™s Disease. Learn something new. Studies have shown, that challenging your mind improves your brain functioning and prevents Alzheimerโ€™s.
    7. Lose weight. If you involve yourself in a DIY project, you will probably sweat a little! You will likely be climbing, moving, and generally using your body. Engaging in a DIY project will definitely get you off the computer and keep you moving until the project is done. Talk about finishing your move goals!
    8. Discover a New Skill. How do you know you canโ€™t tile or paint or build? If you never try, you wonโ€™t know if you actually have a talent for DIY.
    9. Bragging rights. Simple, but if you DIY something, you must brag about it to the world.
    10. Sense of Accomplishment. Do you remember the last time you tackled something new or difficult? Wasnโ€™t the sense of accomplishment you go when you succeeded HUGE?

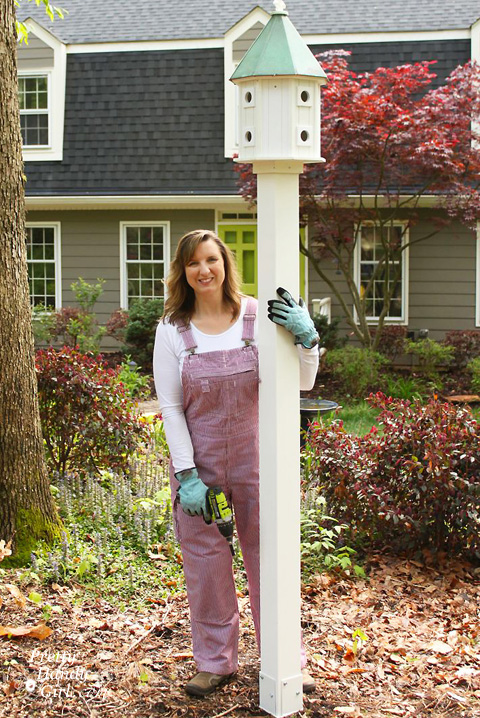
Install a Post Mounted Birdhouse | Pretty Handy Girl

Thatโ€™s the Top 10 Reasons to Do-It-Yourself! Did I forget any? If so, leave me a comment below.

Tomorrow youโ€™ll get your third step in this Guide to Learn How to DIY Anything! Be sure to check your email inbox, itโ€™s going to be a good one.

Ready to jump into your next DIY project now? Youโ€™ll find an entire gallery of projects to try here: