Outdoor solar lights

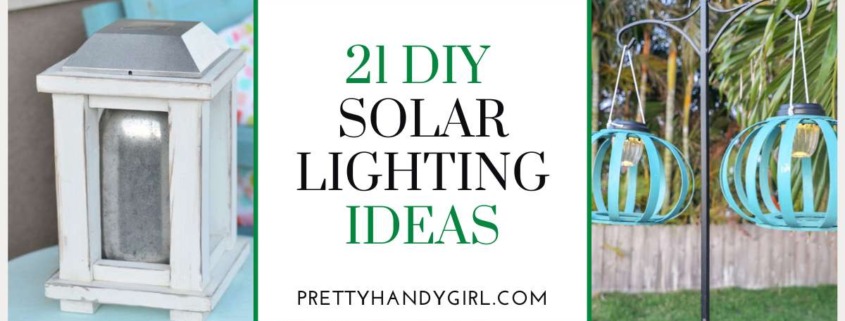
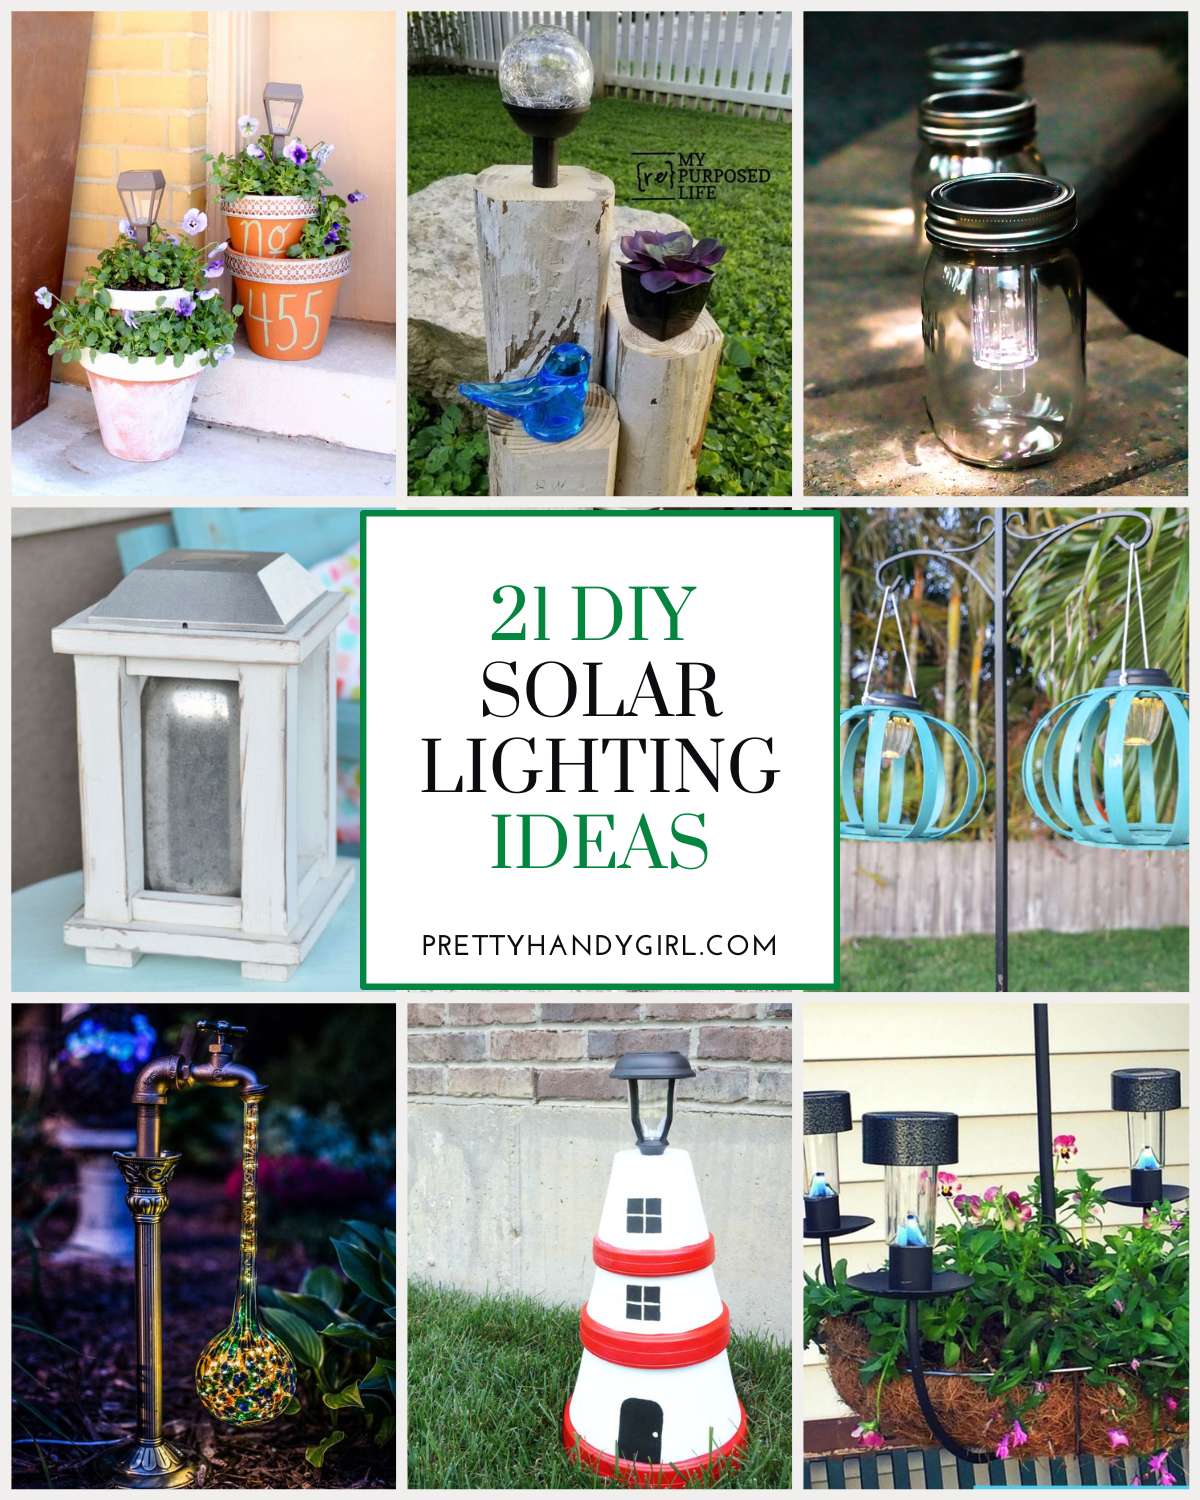
21 DIY solar light ideas to brighten up your outdoor space. From mason jar lanterns to solar-powered chandeliers in every style and budget.

These DIY projects not only add a unique touch to your outdoor decor, but they also utilize the power of the sun to light up your space at night.

So, letโ€™s dive in and explore these innovative ways to add solar lights to your home.

Outdoor solar lights

DIY Solar Lights

With so many DIY solar light ideas out there, it can be overwhelming to choose which ones to try. In this article, we will explore solar lights that are easy to make and will enhance the look of your outdoor area.

Whether youโ€™re looking for something simple or more elaborate, thereโ€™s sure to be a solar light idea that will suit your needs. So, letโ€™s get started!


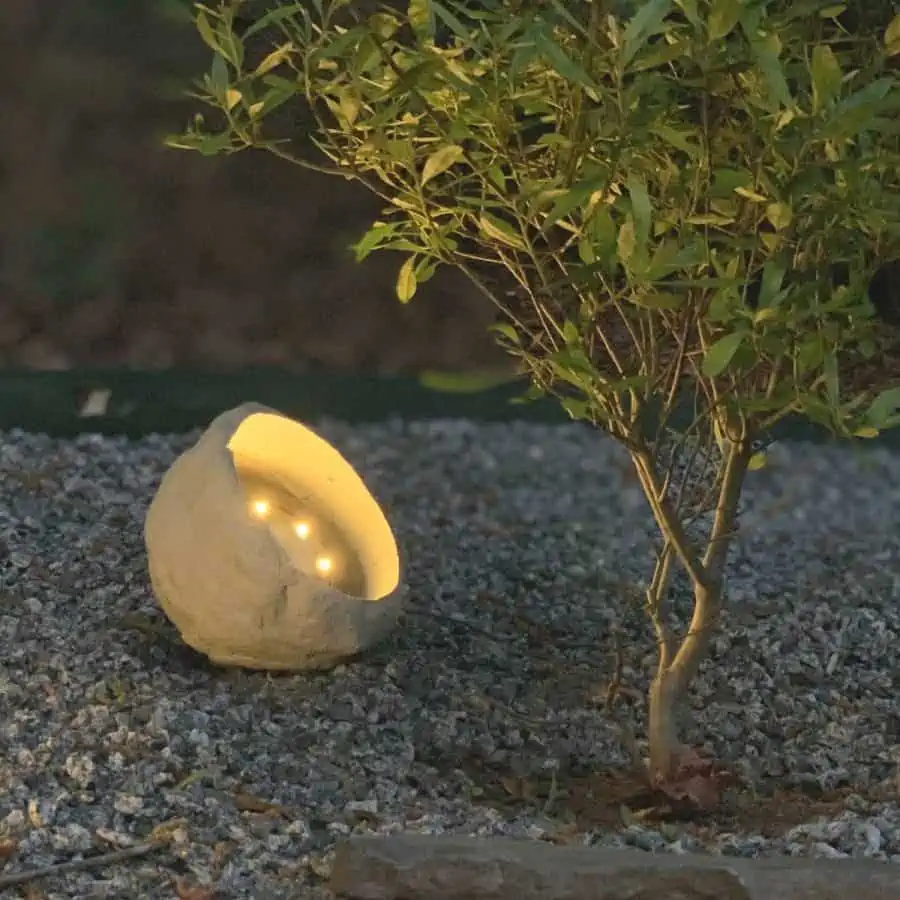
Add unique concrete rock solar garden lights to your outdoor space for an eye-appealing look. If you havenโ€™t worked with concrete yet, this is a great step-by-step tutorial.


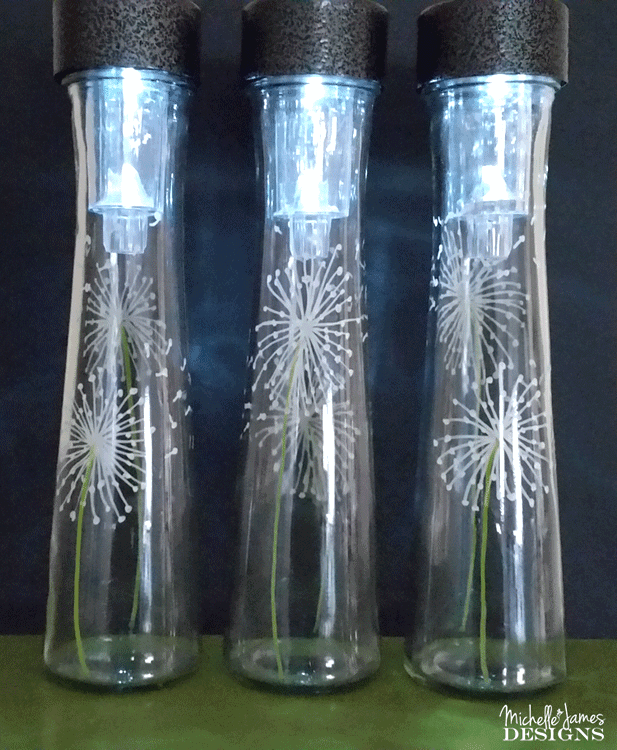
DIY projects are a great way to keep costs down indoors or out. These outdoor solar lights use dollar store vases and lights making it extremely budget-friendly. Add several on a patio table, or picnic table for a fun outdoor lighting party idea.


Add curb appeal to your home while also lighting a pathway to your front door with these clever solar landscape lighting ideas.


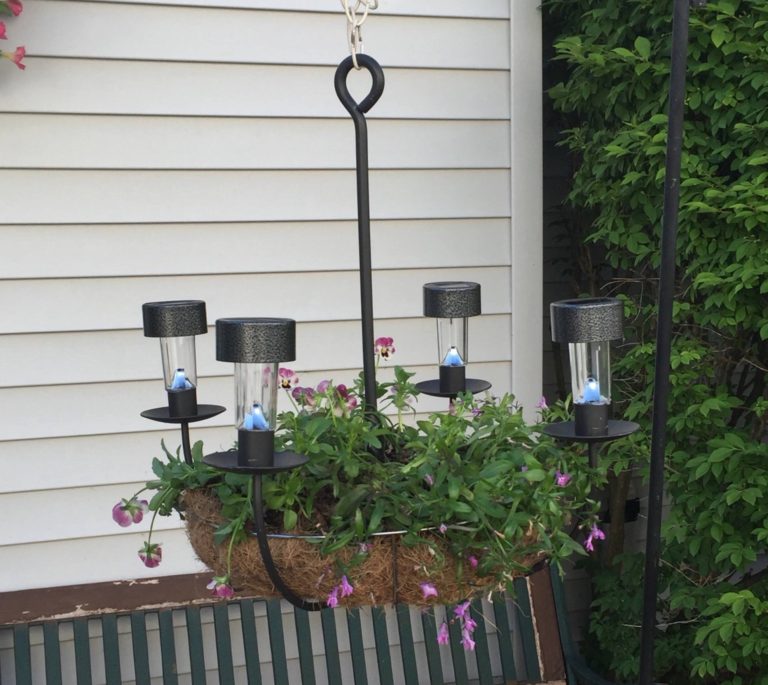
We all love a good upcycle project. Learn how to make a DIY solar light chandelierย using an old candle holder. This would look great hung in a gazebo too.


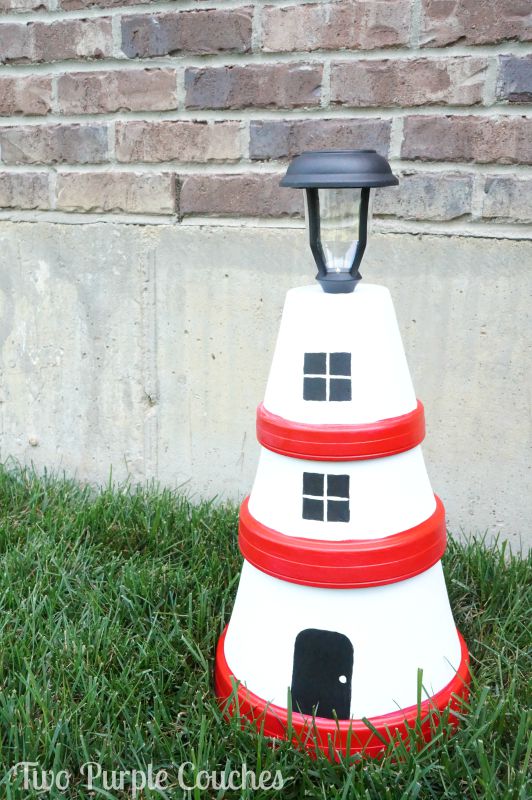
Pick up a few terracotta pots and outdoor paint to make the coolest clay pot lighthouseย  topped with a solar light bulb. Place this in a garden or outdoor patio for aย  beautiful garden accent piece.


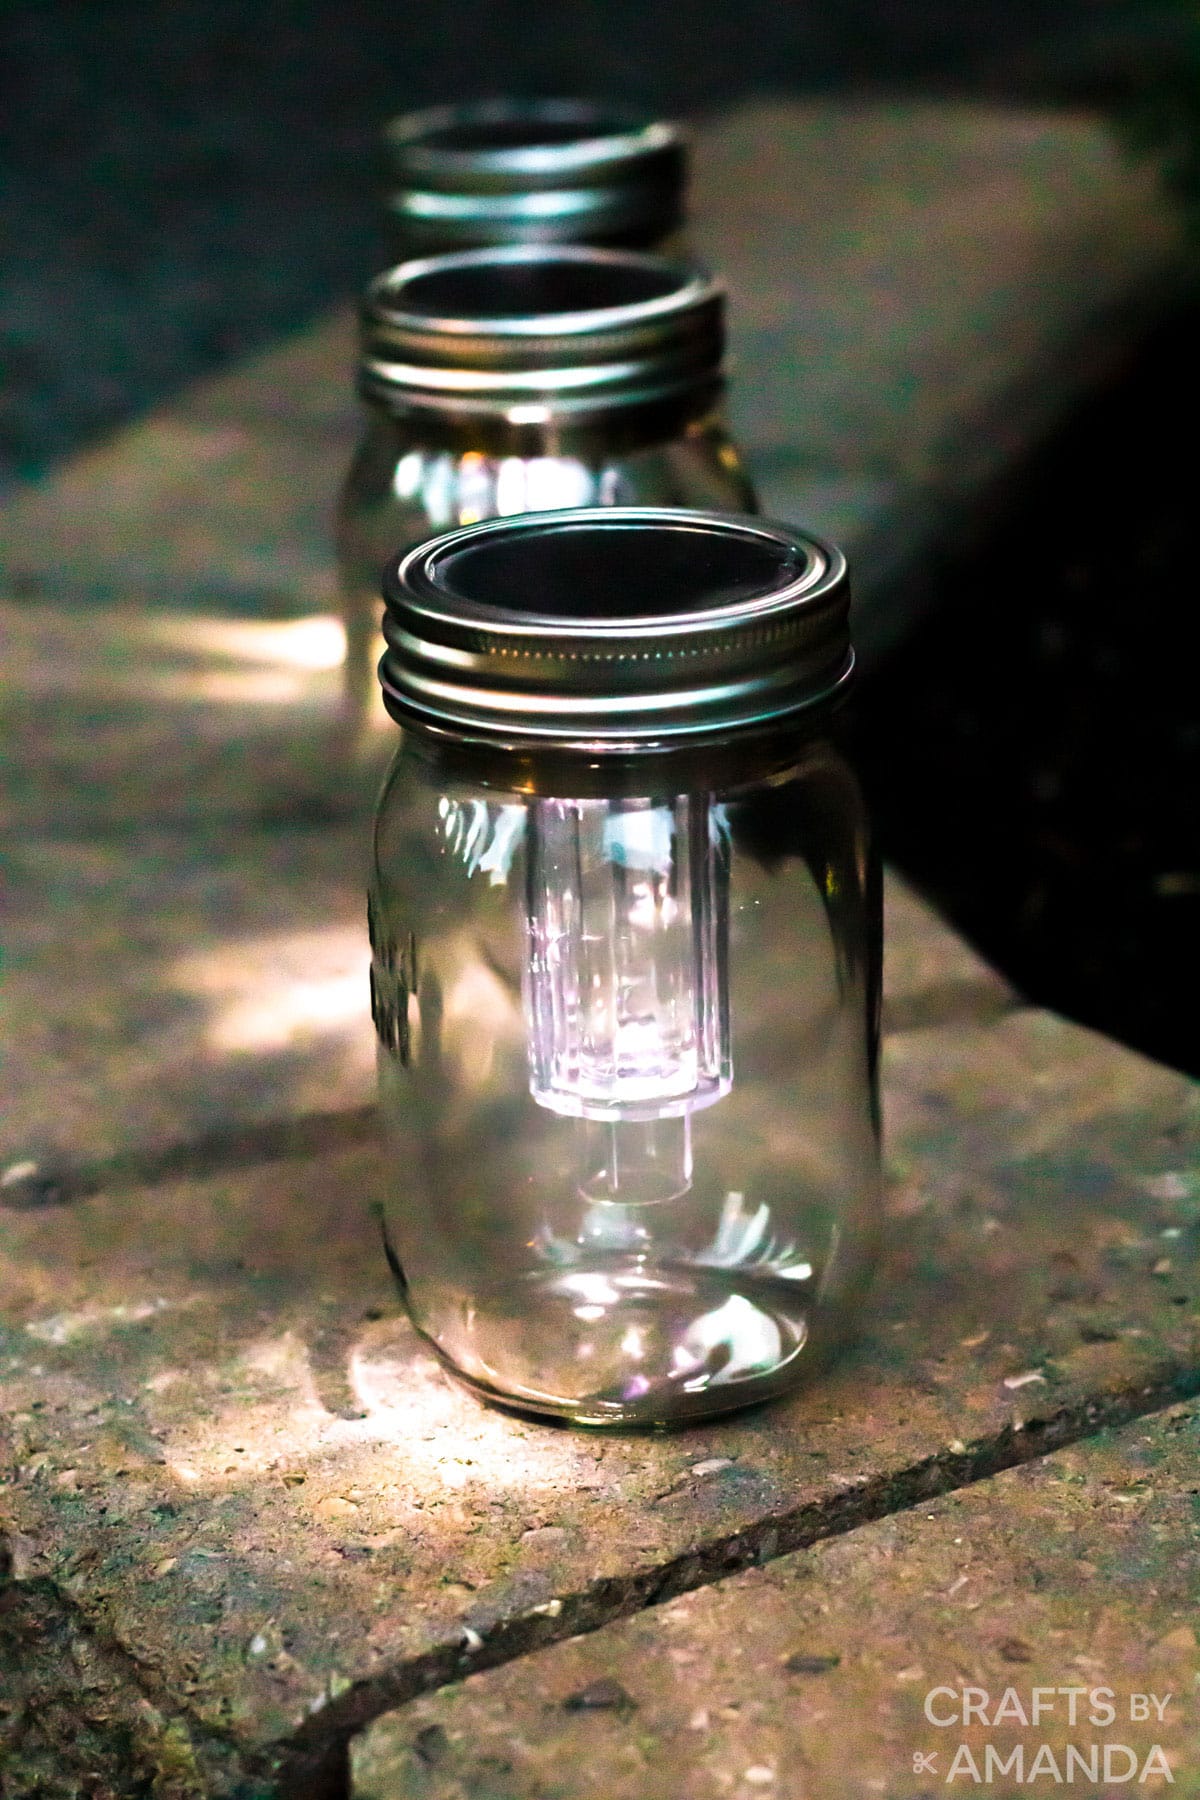
Get the easy tutorial for aย DIY Mason Jar Solar Light that can be used in so many different ways. You could attach wire and hang several from a tree, or place them along a walkway. They are also just the right size to place on an outdoor table.


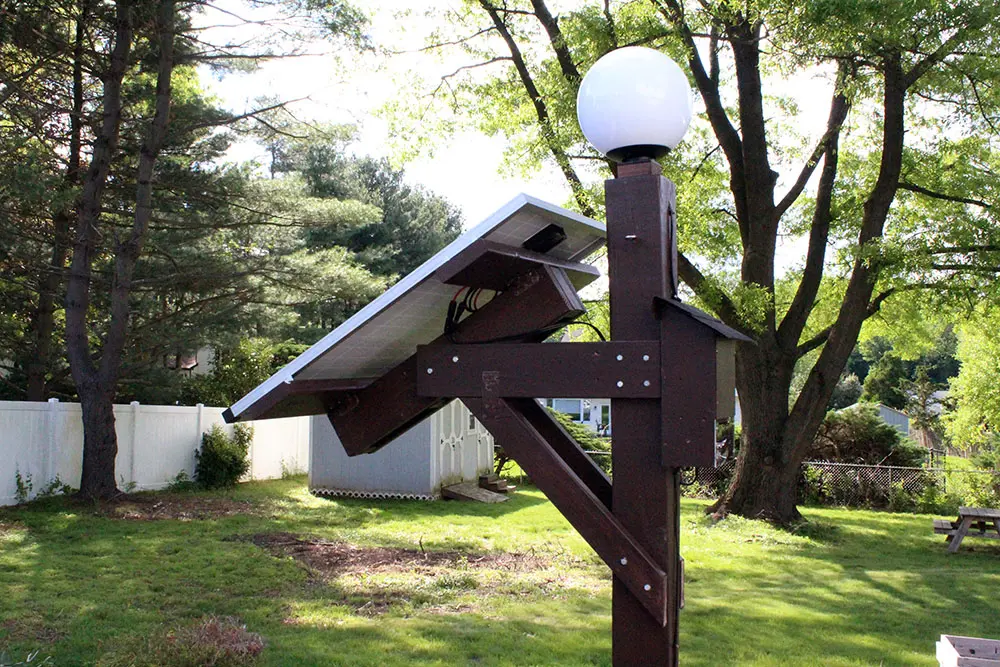
Looking to save a bit on your electric bill? Consider installing solar powered lights in your yard. They are easier than you think to install.


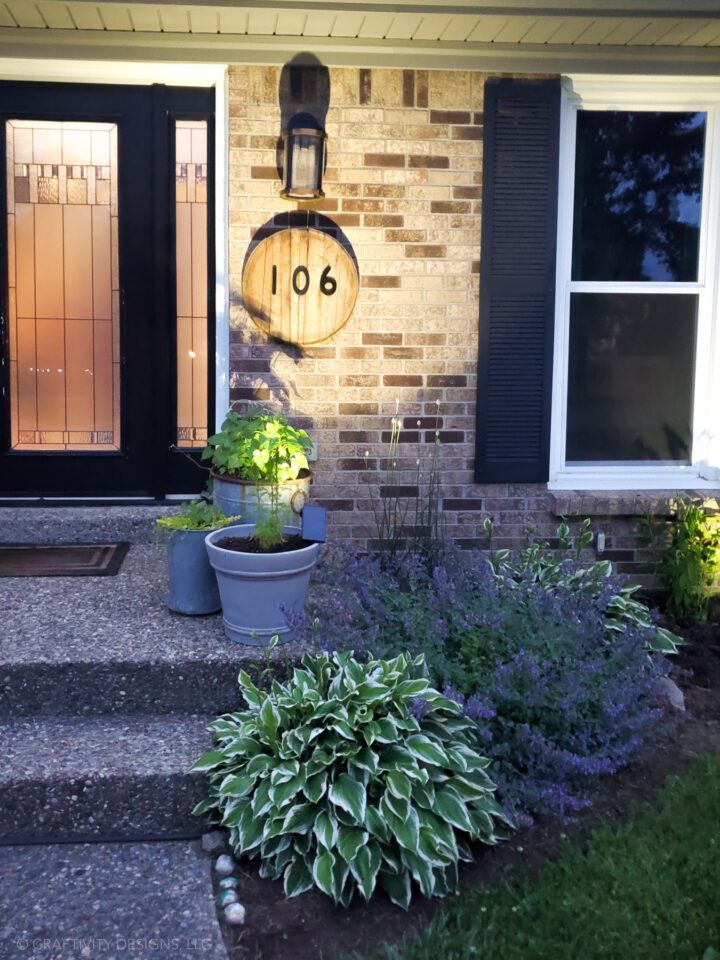
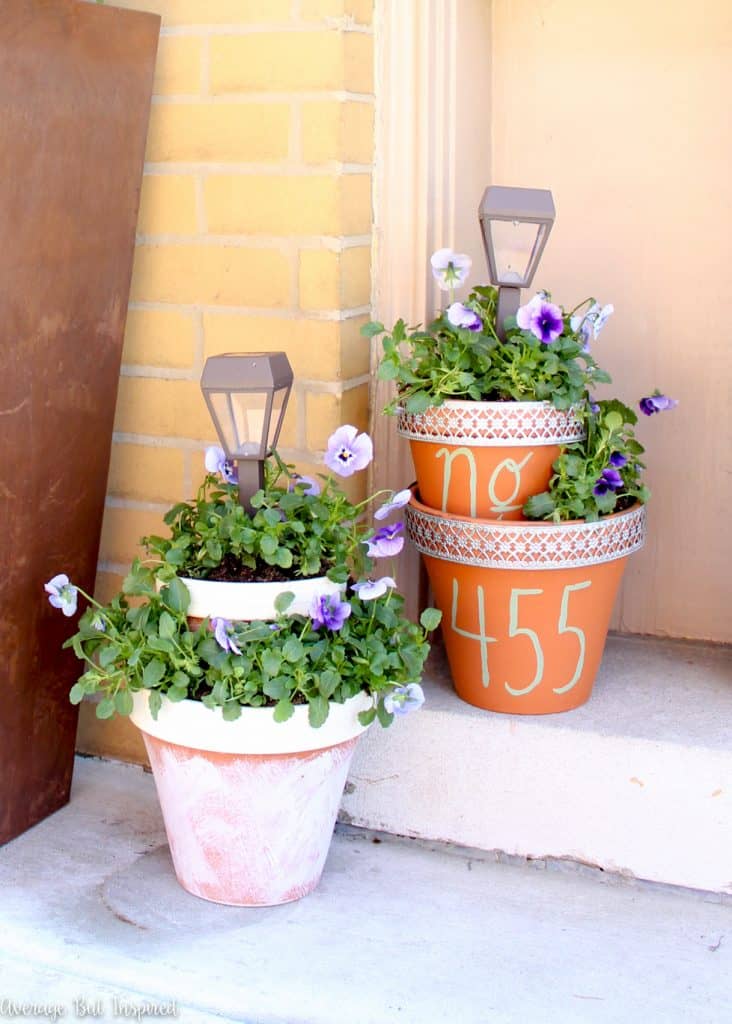
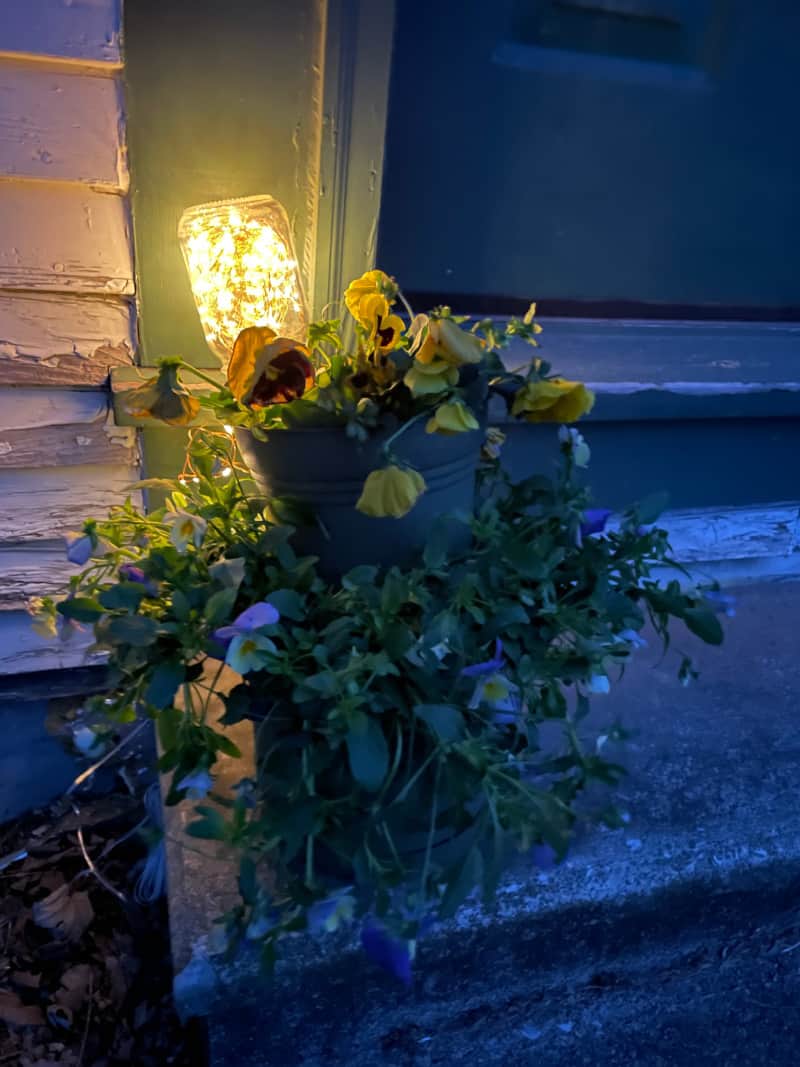
Create beautiful solar light planters for your front steps or porch. Add seasonal flowers for a pop of color. The addition of your house number is a great finishing touch.


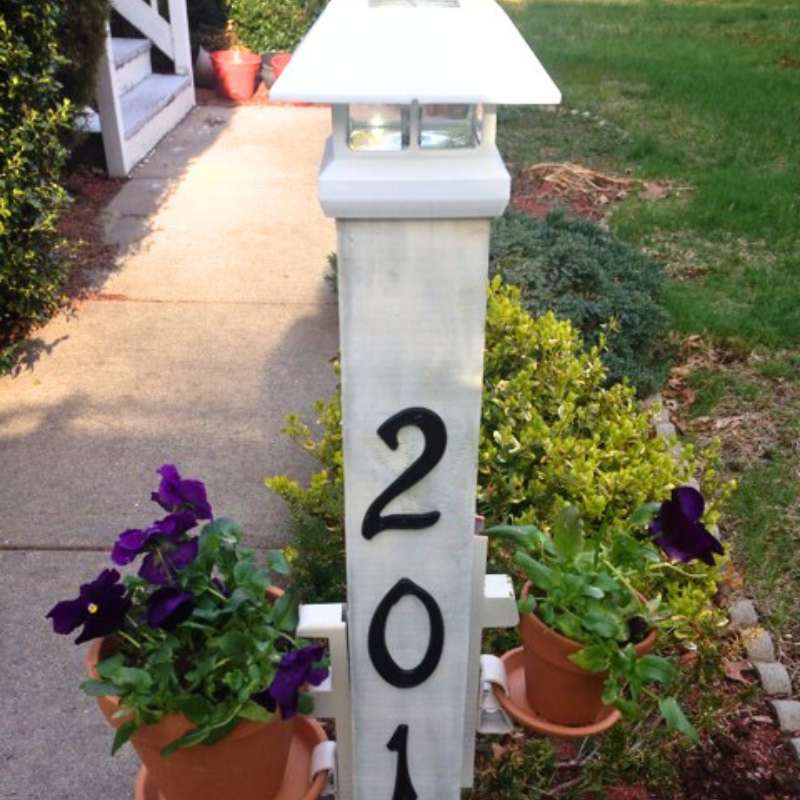
Get all the details on how to make your own solar address sign garden post using a 4×4 post. Take it to the next level by attaching planter hooks for a pop of color.


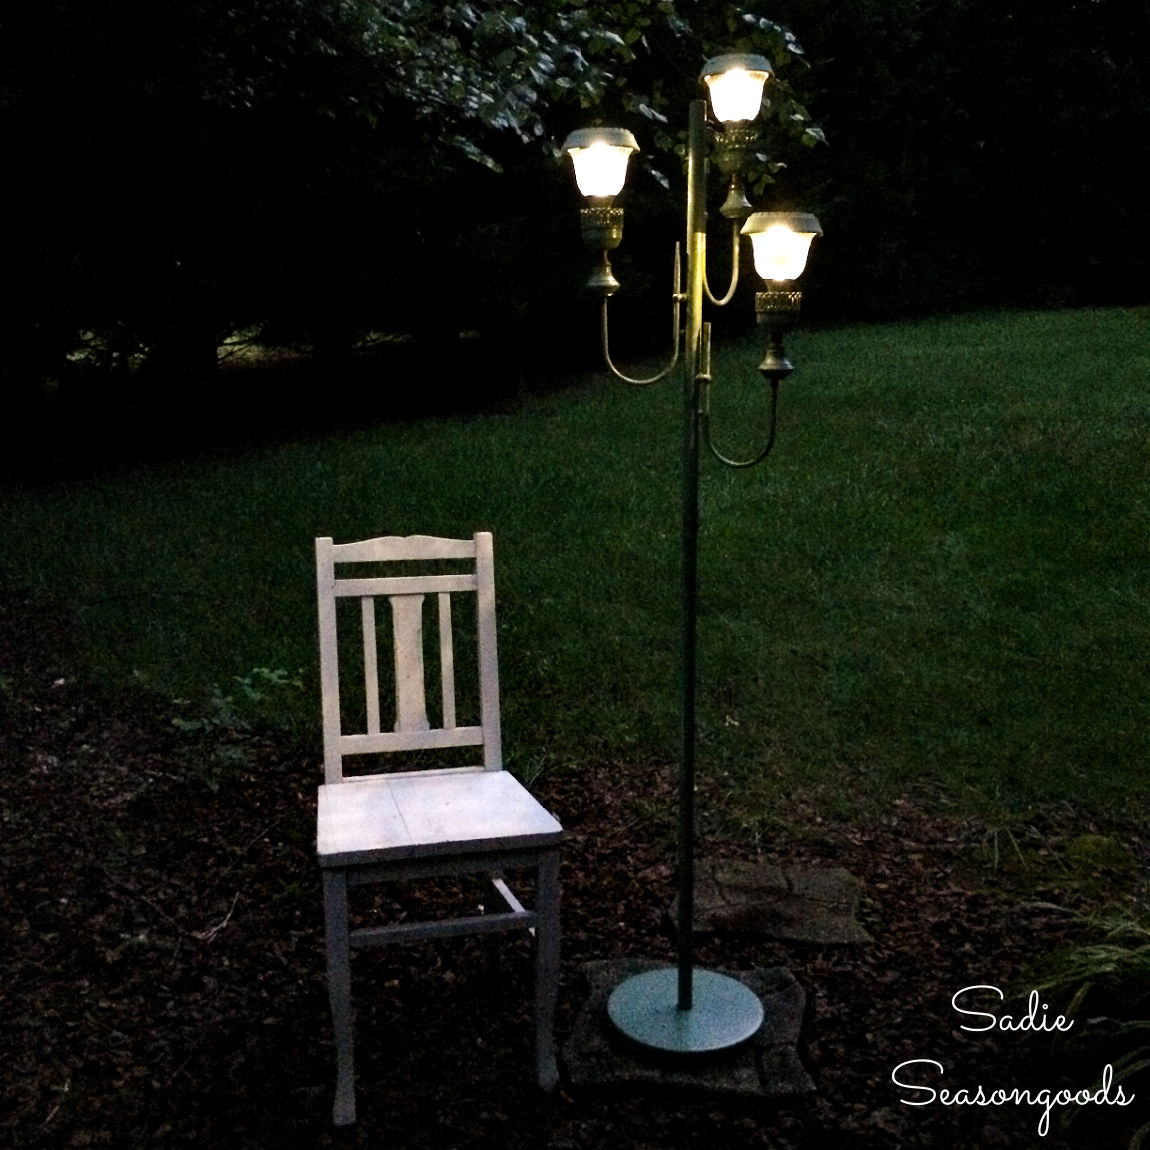
Create a one of a kind floor lamp solar light by upcycling an old lamp. This is such a creative idea and is definitely a statement piece for any outdoor entertaining area.


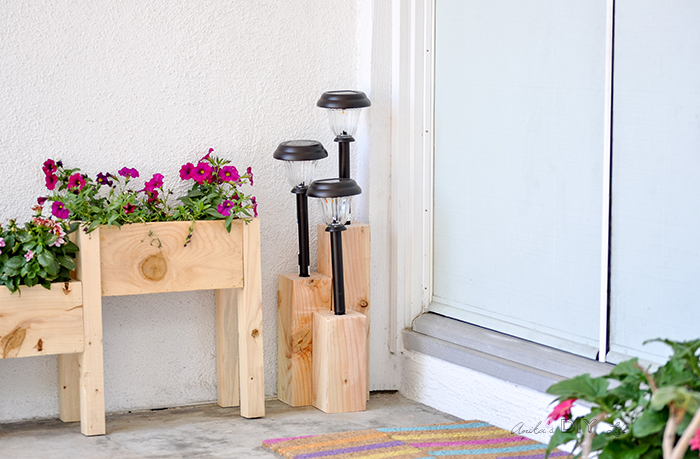
How to make an easy solar light stand


This DIY solar light stand has been extremely popular. The great thing is you can paint it, stain it or even add a color-block design.


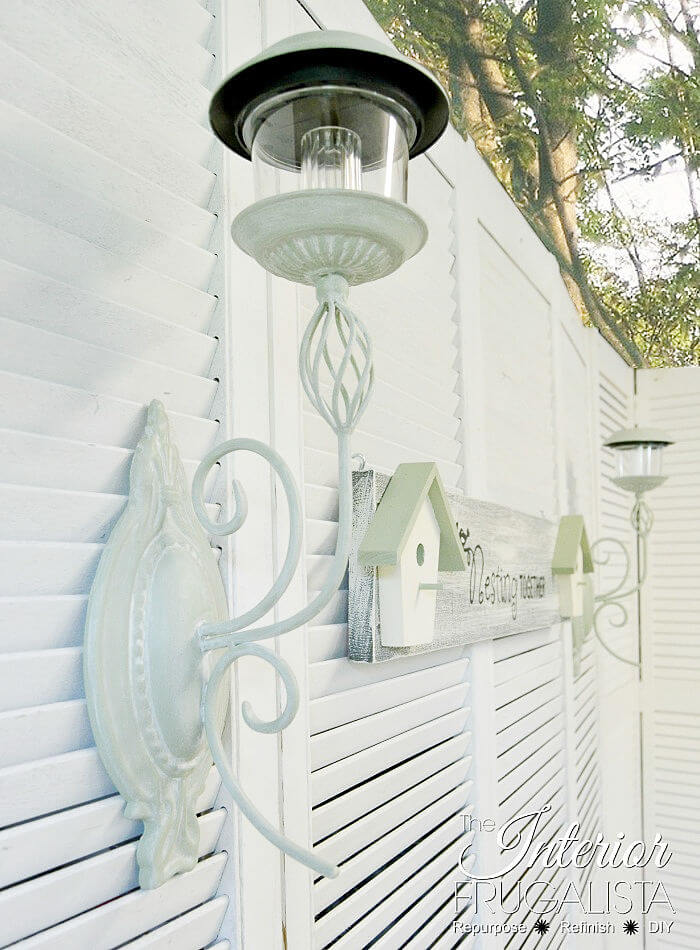
If you want to add a decorative touch to a plain fence consider these DIY solar fence lights. They are perfect for adding a bit of ambiance at night.


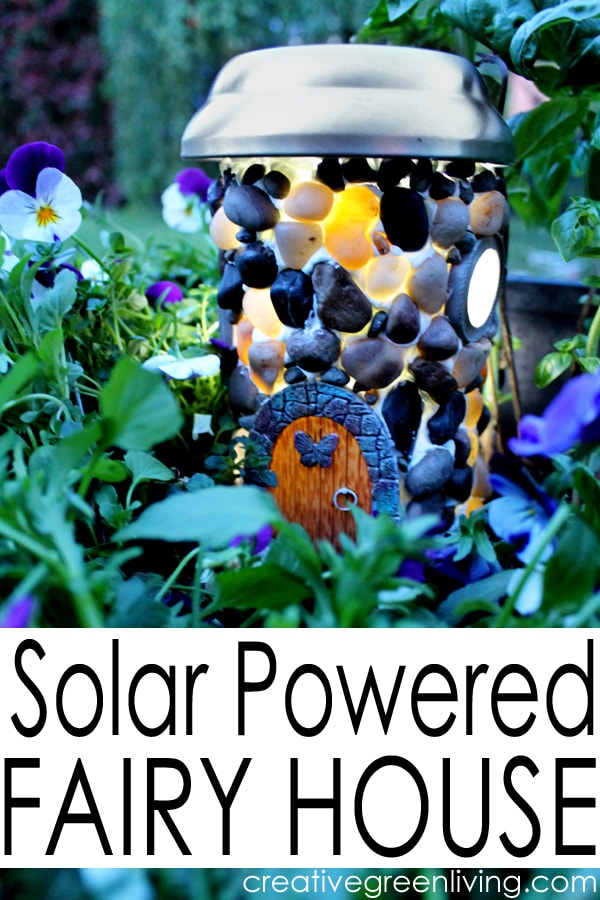
Here is a sweet idea for a solar powered fairy house made with just a few simple craft supplies. Iโ€™m sure kids would get a kick out of seeing this in the garden!


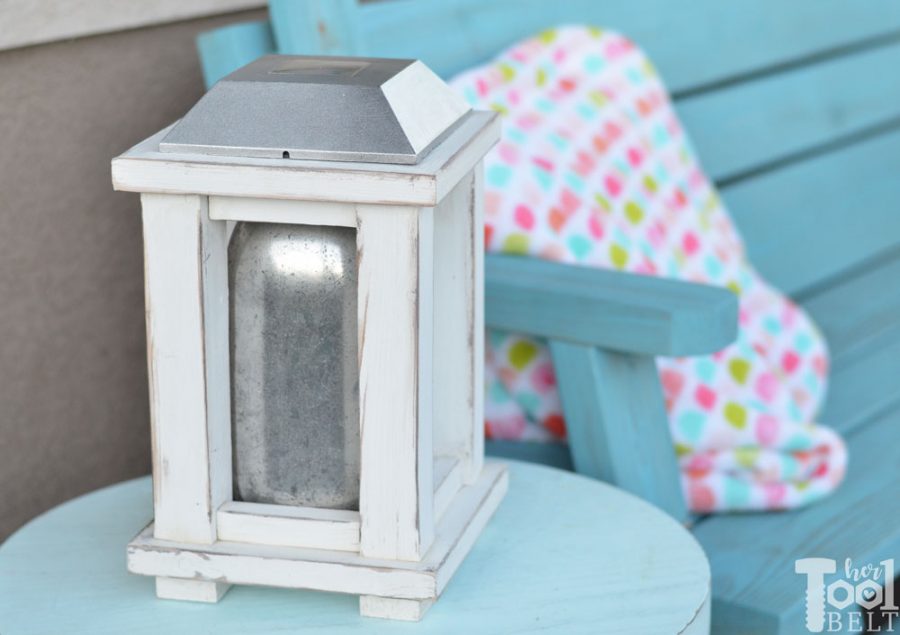
Wood and mason jar solar lanterns can be made in different sizes depending on the space. Wouldnโ€™t these be pretty at a wedding or other outdoor celebration?


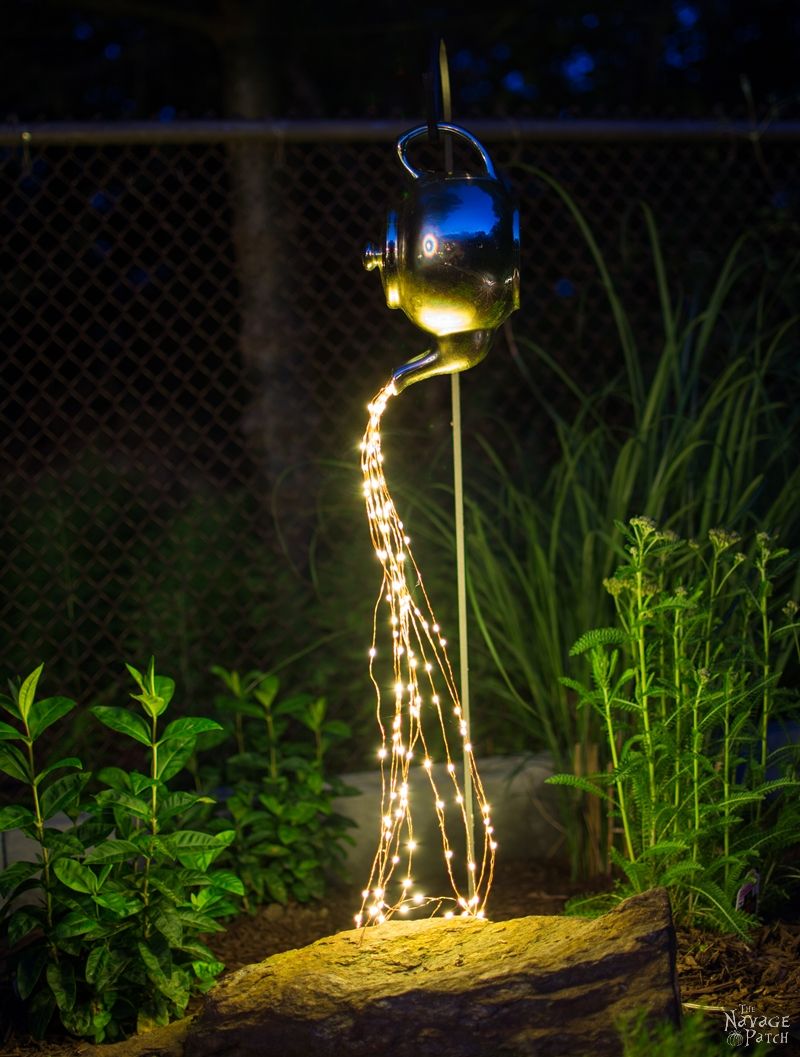
If you havenโ€™t seen these DIY spilling string lights yet, they are simply stunning! There is a detailed tutorial included in this article so you can make your own!


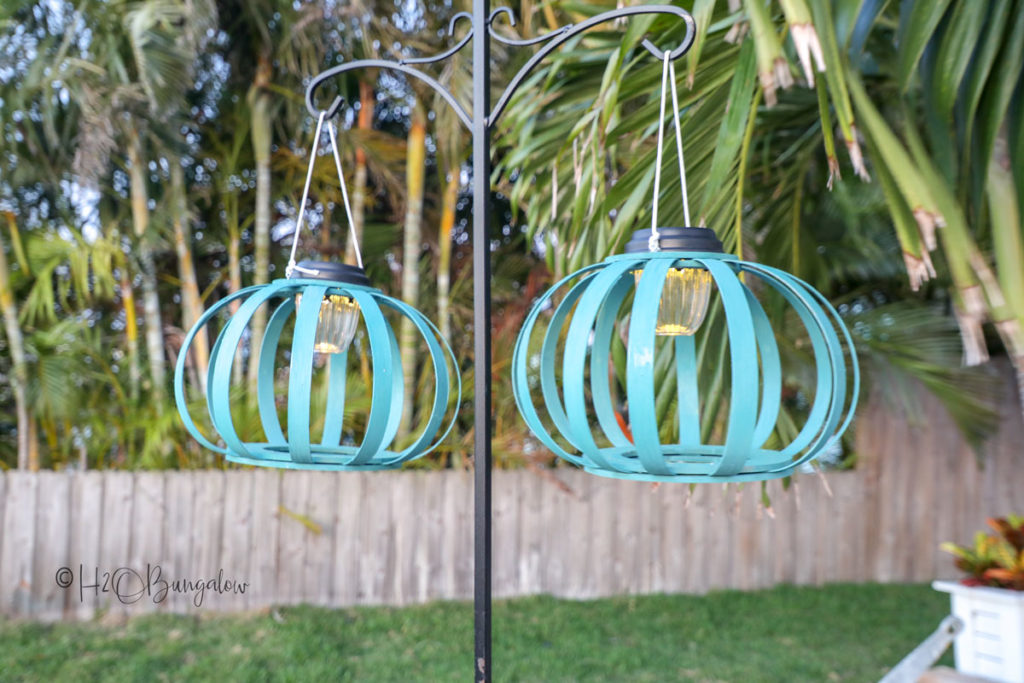
Learn how to make DIY hanging solar lights that you can use several ways in your yard. They look great hung on a shepherdโ€™s hook, or attached to an umbrella. You can even hang several from tree branches.


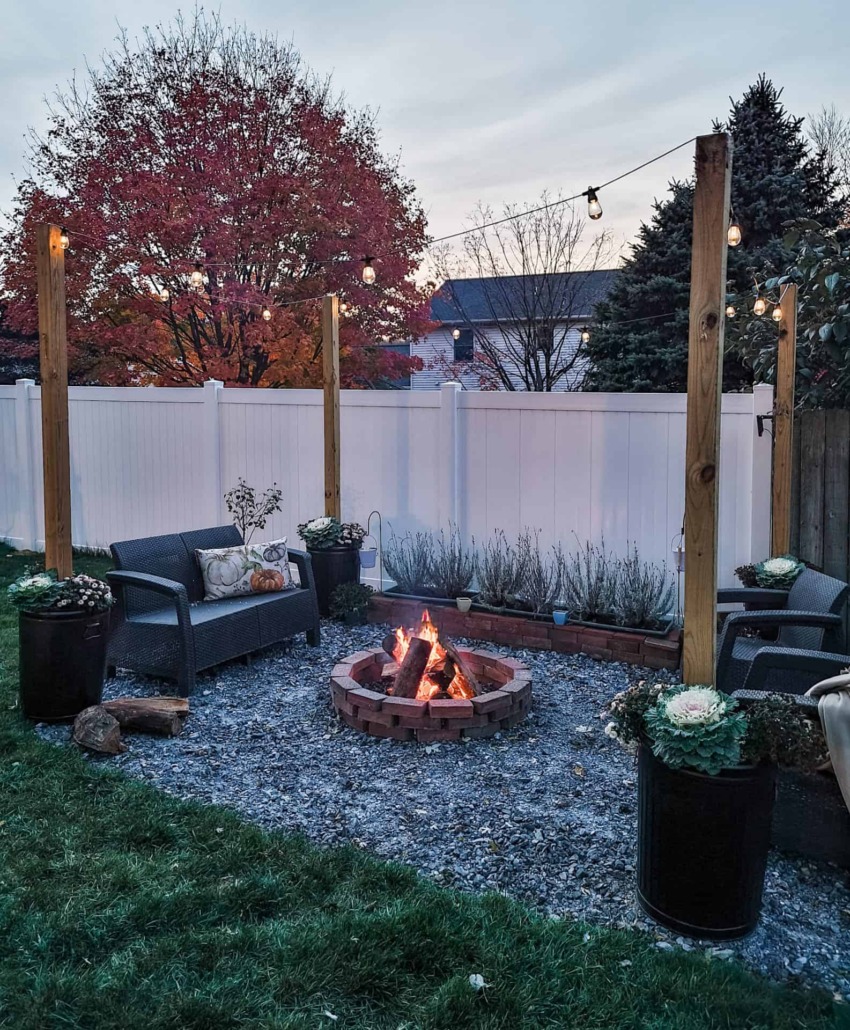
Take outdoor solar lights to the next level with this solar string light hack. What a great addition to a firepit area, or patio space.


Talk about a statement piece! This waterdrop solar light will definitely bring that wow factor to any outdoor space.


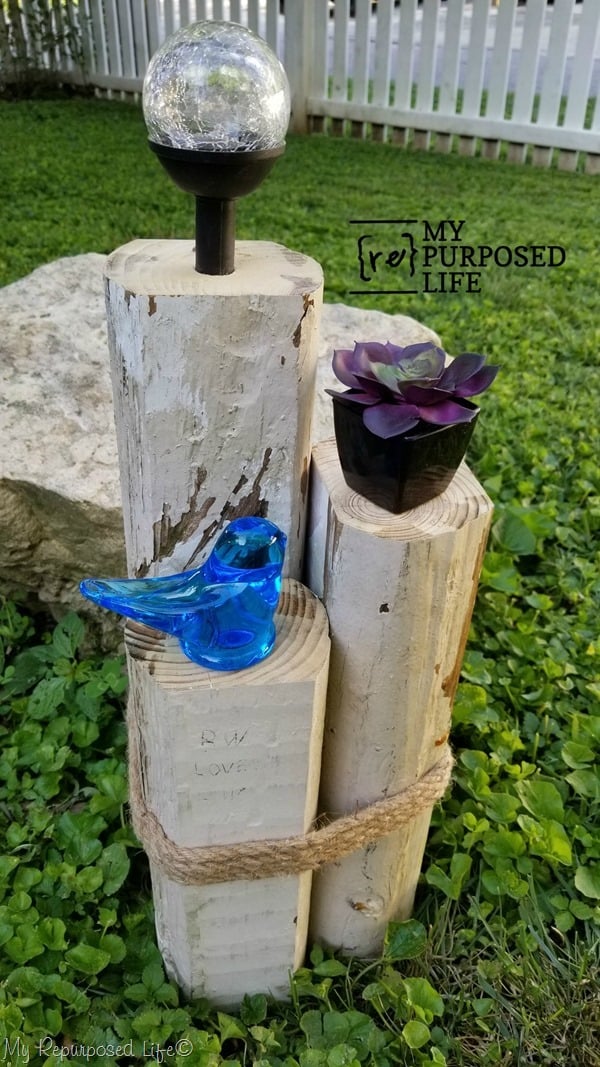
Add a landscape timber solar light to your garden for a fun beachy look. Use reclaimed wood to keep costs down.

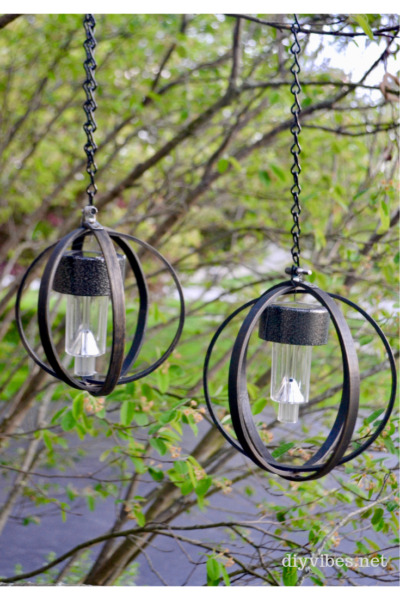
Repurpose embroidery hoops into a a cool DIY Hanging Solar Light. This is a simple DIY with great impact. Hang a grouping of several together from a tree, gazebo or arbor.


DIY mason jar crafts continue to be extremely popular for several reasons. They are inexpensive, versatile and can be used indoors or out. Check out how cool solar powered rope fairy lights look inside a simple mason jar.

I hope you found these ideas helpful for your outdoor space! Do you have any other great ideas? Feel free to share them in the comments. As always, thanks for reading!

Please remember to share on Pinterest to inspire others as well!

Here are even more landscaping and gardening ideas:

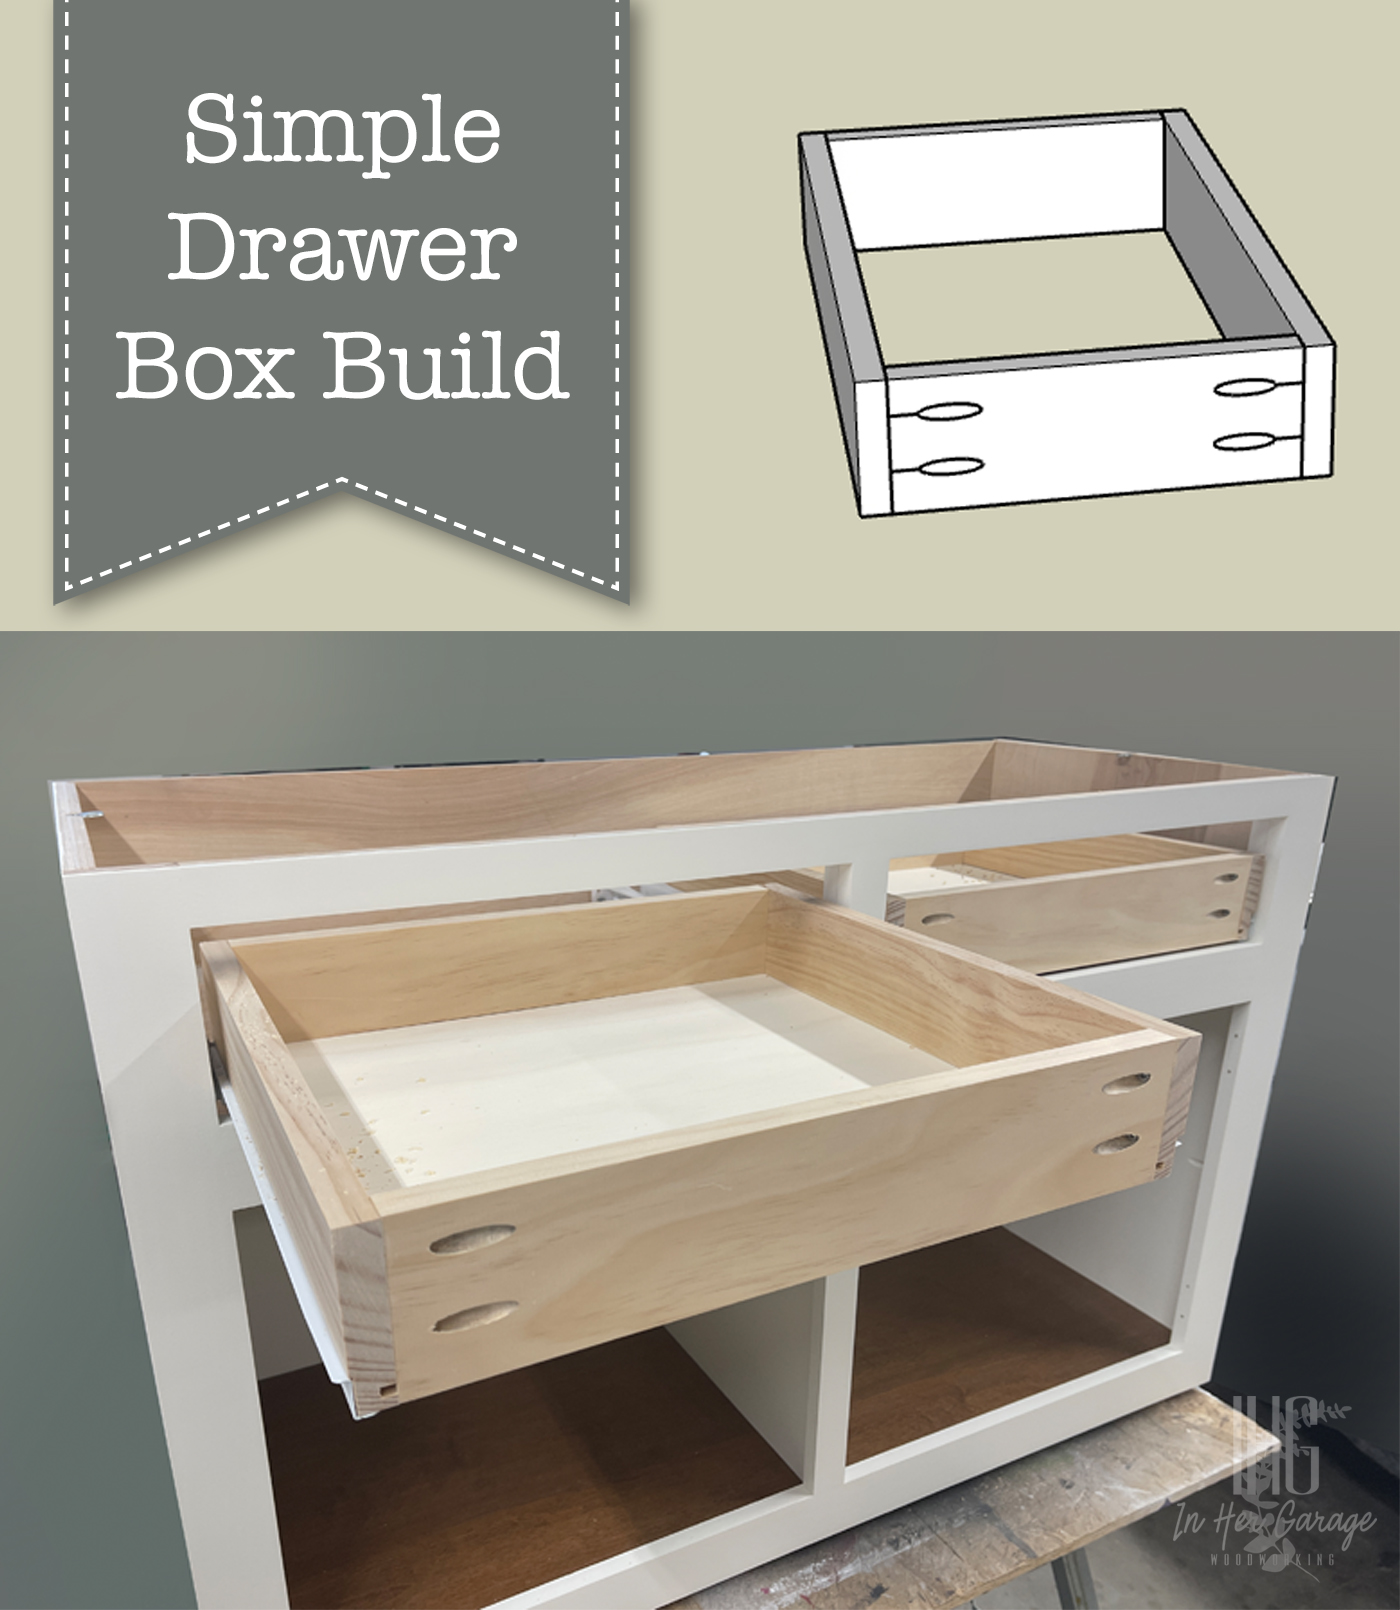
Learn the simplest and most accurate way to build drawer boxes with this easy tutorial.

Drawer Box Build

Welcome back, this is Kristen from In Her Garage Woodworking here with another build plan for you.ย ย When I first began my DIY woodworking journey over 5 years ago I was most intimidated by building drawers. I avoided them because I thought there were too many measurements and too much room for error. But, with a simple plan and a lot of practice, I now make drawers consistently and accurately.ย  These are the exact plans I use to this day to make drawer boxes for all of my commissioned furniture pieces because when youโ€™re able to make something quickly and easily that is solid and looks great, why would you ever change it?

Materials

(Iโ€™ve includedย affiliate links for your convenience. I earn a small percentage from a purchase using these links. Thereย is no additional cost to you. You canย readย more about affiliate links here.)

Tools

Instructions:

Your drawer can be any depth you wish, but before building the drawers, rip your 3/4โ€ณ material to the drawer height you desire (if you are using plywood or if your 3/4โ€ณ material is wider than your finished drawer.

Step #1: Cut drawer box sides

Using your miter or circular saw, cut two identical 3/4โ€ boards to the same length of the drawer slides youโ€™ll be using.

Step #2: Cut drawer box front and back

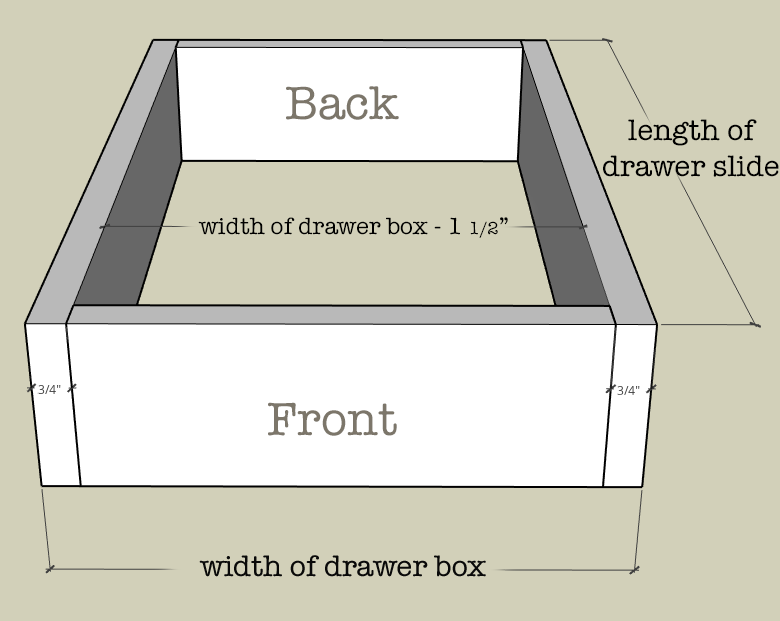
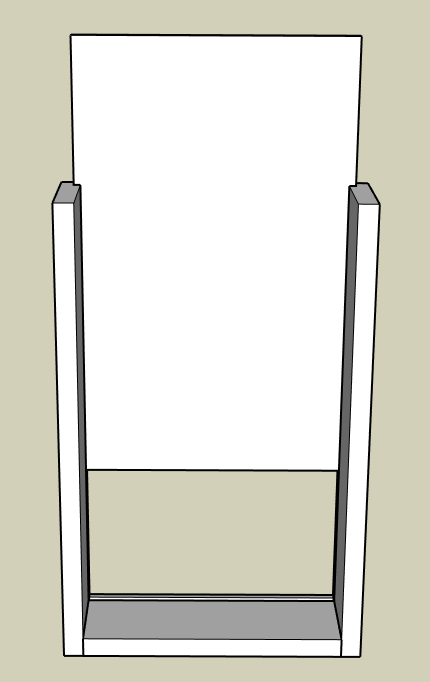
Cut two pieces of the 3/4 inch material for the front and back of the drawer box.ย  If youโ€™re using ยพโ€ material to build the drawer box then the length of the front and back can be calculated as follows (see equation and picture below):

Width of drawer box โ€“ 1ยฝโ€ = width of front and back drawer box boards

Drawer Box Diagram

Step #3: Add groove for drawer bottom (optional)

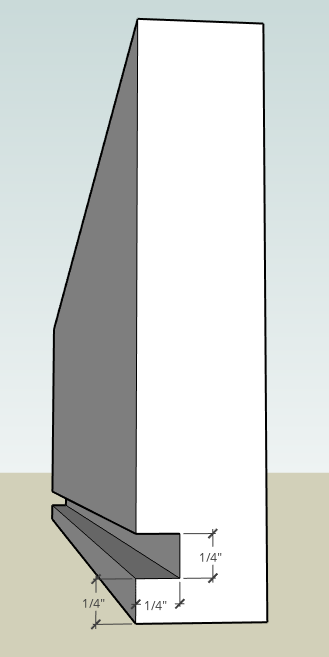
Taking all four 3/4โ€ณ boards to the table saw cut a groove 1/4โ€ from the bottom of all sides that is 1/4โ€ deep. Run the 3/4 board through one time, then adjust the fence (or your saw) to cut another groove next to the first. (A standard saw blade is 1/8โ€ wide so you will need to make two passes in each board to achieve a 1/4โ€ณ groove for the 1/4โ€ณ drawer bottom material.

Dry-fit the plywood to check for fit.


Step #4: Create pocket-holes

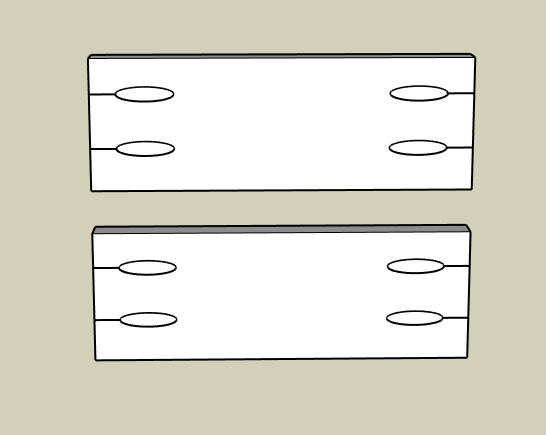
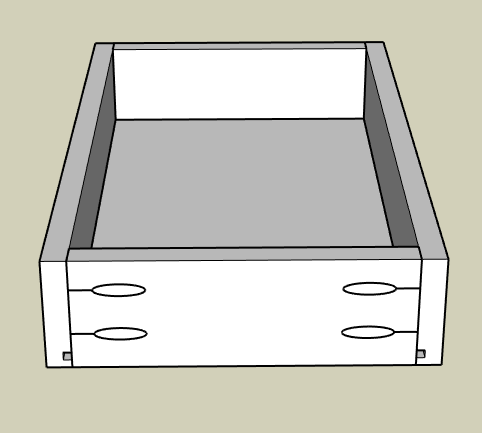
Using your Kreg jig make 2 pocket-holes at either end of the front and back boards on the opposite side as the plywood bottom groove if you chose to do this step. Be sure to avoid the groove.

Step #5: Assembly

If you DID NOT cut a groove to accept the plywood bottom, then you can assemble the drawer box using wood glue and 1 ยผโ€ pocket screws.

Then, you will cut your bottom 1/4โ€ณ panel to the length and width of the drawer box and simply glue and nail it to the bottom of the drawer box

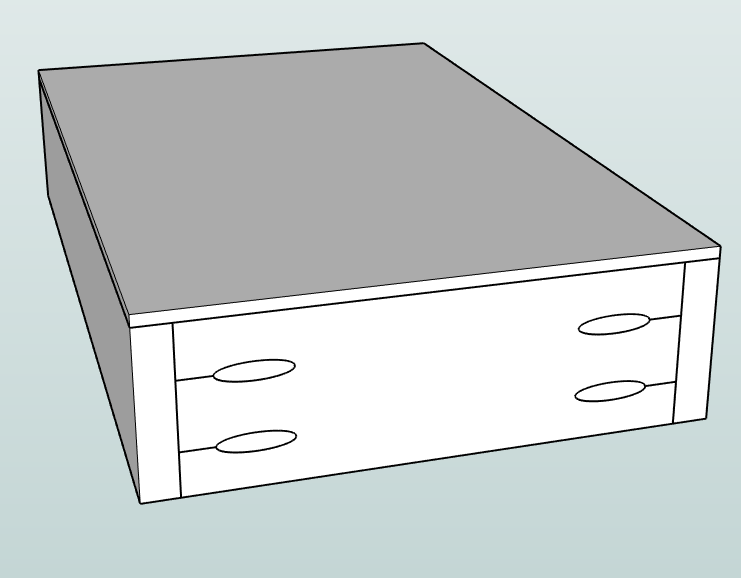
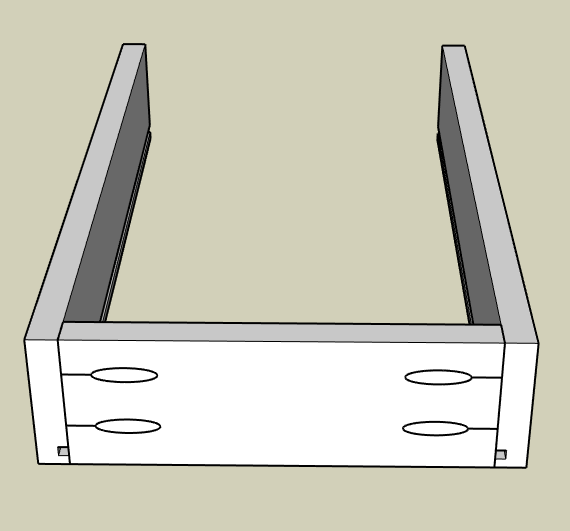
If you DID create a groove for the bottom panel assemble the front and both sides using wood glue and 1 ยผโ€ pocket screws.

Next, cut the ยผโ€ plywood to fit into the bottom of the drawer box groove dry fitting the back panel to check for fit.

Once you have the correct size for the plywood bottom then slide it into the groove and attached the back piece of the drawer box using wood glue and 1 ยผโ€ pocket screws. ย There is no need to apply glue into the panel groove.ย  The plywood bottom will โ€œfloatโ€ in place.

No need to worry about filling the pocket-holes because you will be applying a drawer face directly over them.

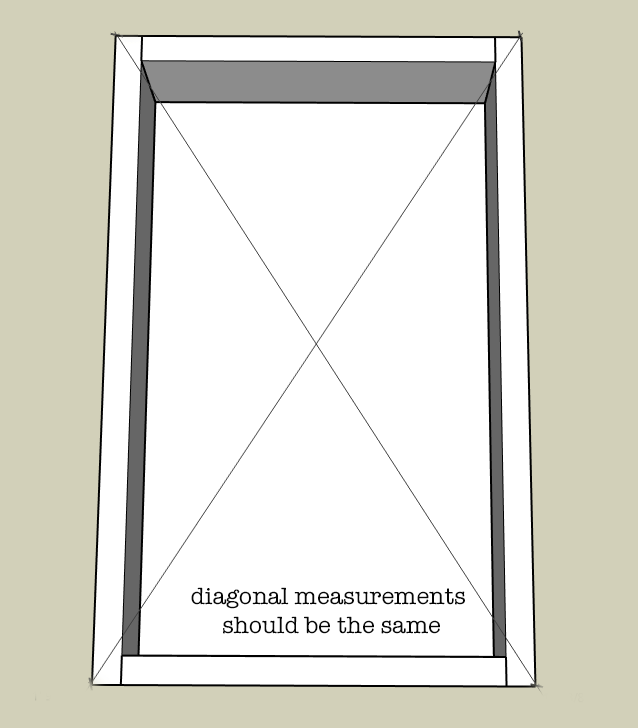
Be sure to check for square by measuring both diagonals of the drawer box.ย  If one measurement is longer simply squeeze the longer diagonal until both are the same.

Allow drawer box to dry.

That is the basic drawer box build that I use and it is strong and easy to put together. I hope this tutorial gives you the confidence to tackle that project youโ€™ve been putting off.ย  Next, I will teach you my favorite method for installing drawers and how I troubleshoot drawer boxes that just arenโ€™t quite the right fit!
Finishing Tips:

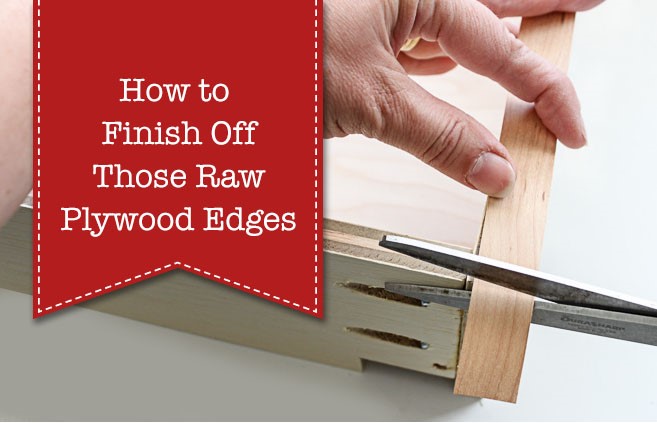
If you are making your drawer boxes out of plywood then check out Brittanyโ€™s Edge Banding Tutorialย and learn how to cover that unsightly plywood edge.

Wondering how, or if, you should apply a protective finish to the drawer box? If I am working with solid wood for the drawer sides then I will give the material a quick finish sanding and thatโ€™s it. But, for plywood, I typically do one of two things, depending upon what I have on hand at that time.

  • Option 1: Apply 1 or 2 coats of sanding sealer to raise the grain of plywood and sand smooth. Sanding sealer is clear, easy to apply, and dries quickly. If I have the time and patience I may also apply a quick spray of clear, semi-gloss, water-based topcoat to give it a little shine but it isnโ€™t necessary.
  • Option 2: Apply 2 to 3 coats of spray shellac to seal the plywood.ย  Spray shellac dries quickly and wonโ€™t leave any chemical smell behind. But be aware that it will give the plywood a slight amber tone which typically isnโ€™t big deal.ย  Remember to lightly sand between coats.

Hi! Iโ€™m Kristen, from In Her Garage,ย and I am a self-taught woodworker and DIY fanatic from Minnesota where I live with my husband and our two daughters. Between being a wife, mom and, registered nurse, I try to make as much time for DIY as possible. My love for building came after our family built our current home in 2015. After we moved in, we needed furniture and instead of spending massive amounts of money to order the pieces we wanted I decided that I would build them myself. I started with a buffet table plan from the fabulous Ana-white and quickly set out to remodel my entire home office.

Since then I have started a side business building furniture for the people in my community. I love hearing my clients talk about the pieces they wish they had whether it be aย rustic buffet table, aย one drawer side table, or aย toy box,ย and then making it a reality for them. While starting my small business it made perfect sense that I would document my building journey so I simultaneously launched theย In Her Garage blog and I love sharing my plans, tips, and tricks.

Making something beautiful with your own two hands through a little preparation and determination is an amazing feeling and I hope to bring inspiration and know-how to those looking to tackle a big or small project.

I am so glad that you found me here and please feel free to connect with me onย Pinterest,ย Instagram, and Facebook to see what I am working on right now. And check out the brand new In Her Garage Etsy shop for other plans or to have a furniture item made especially for you!

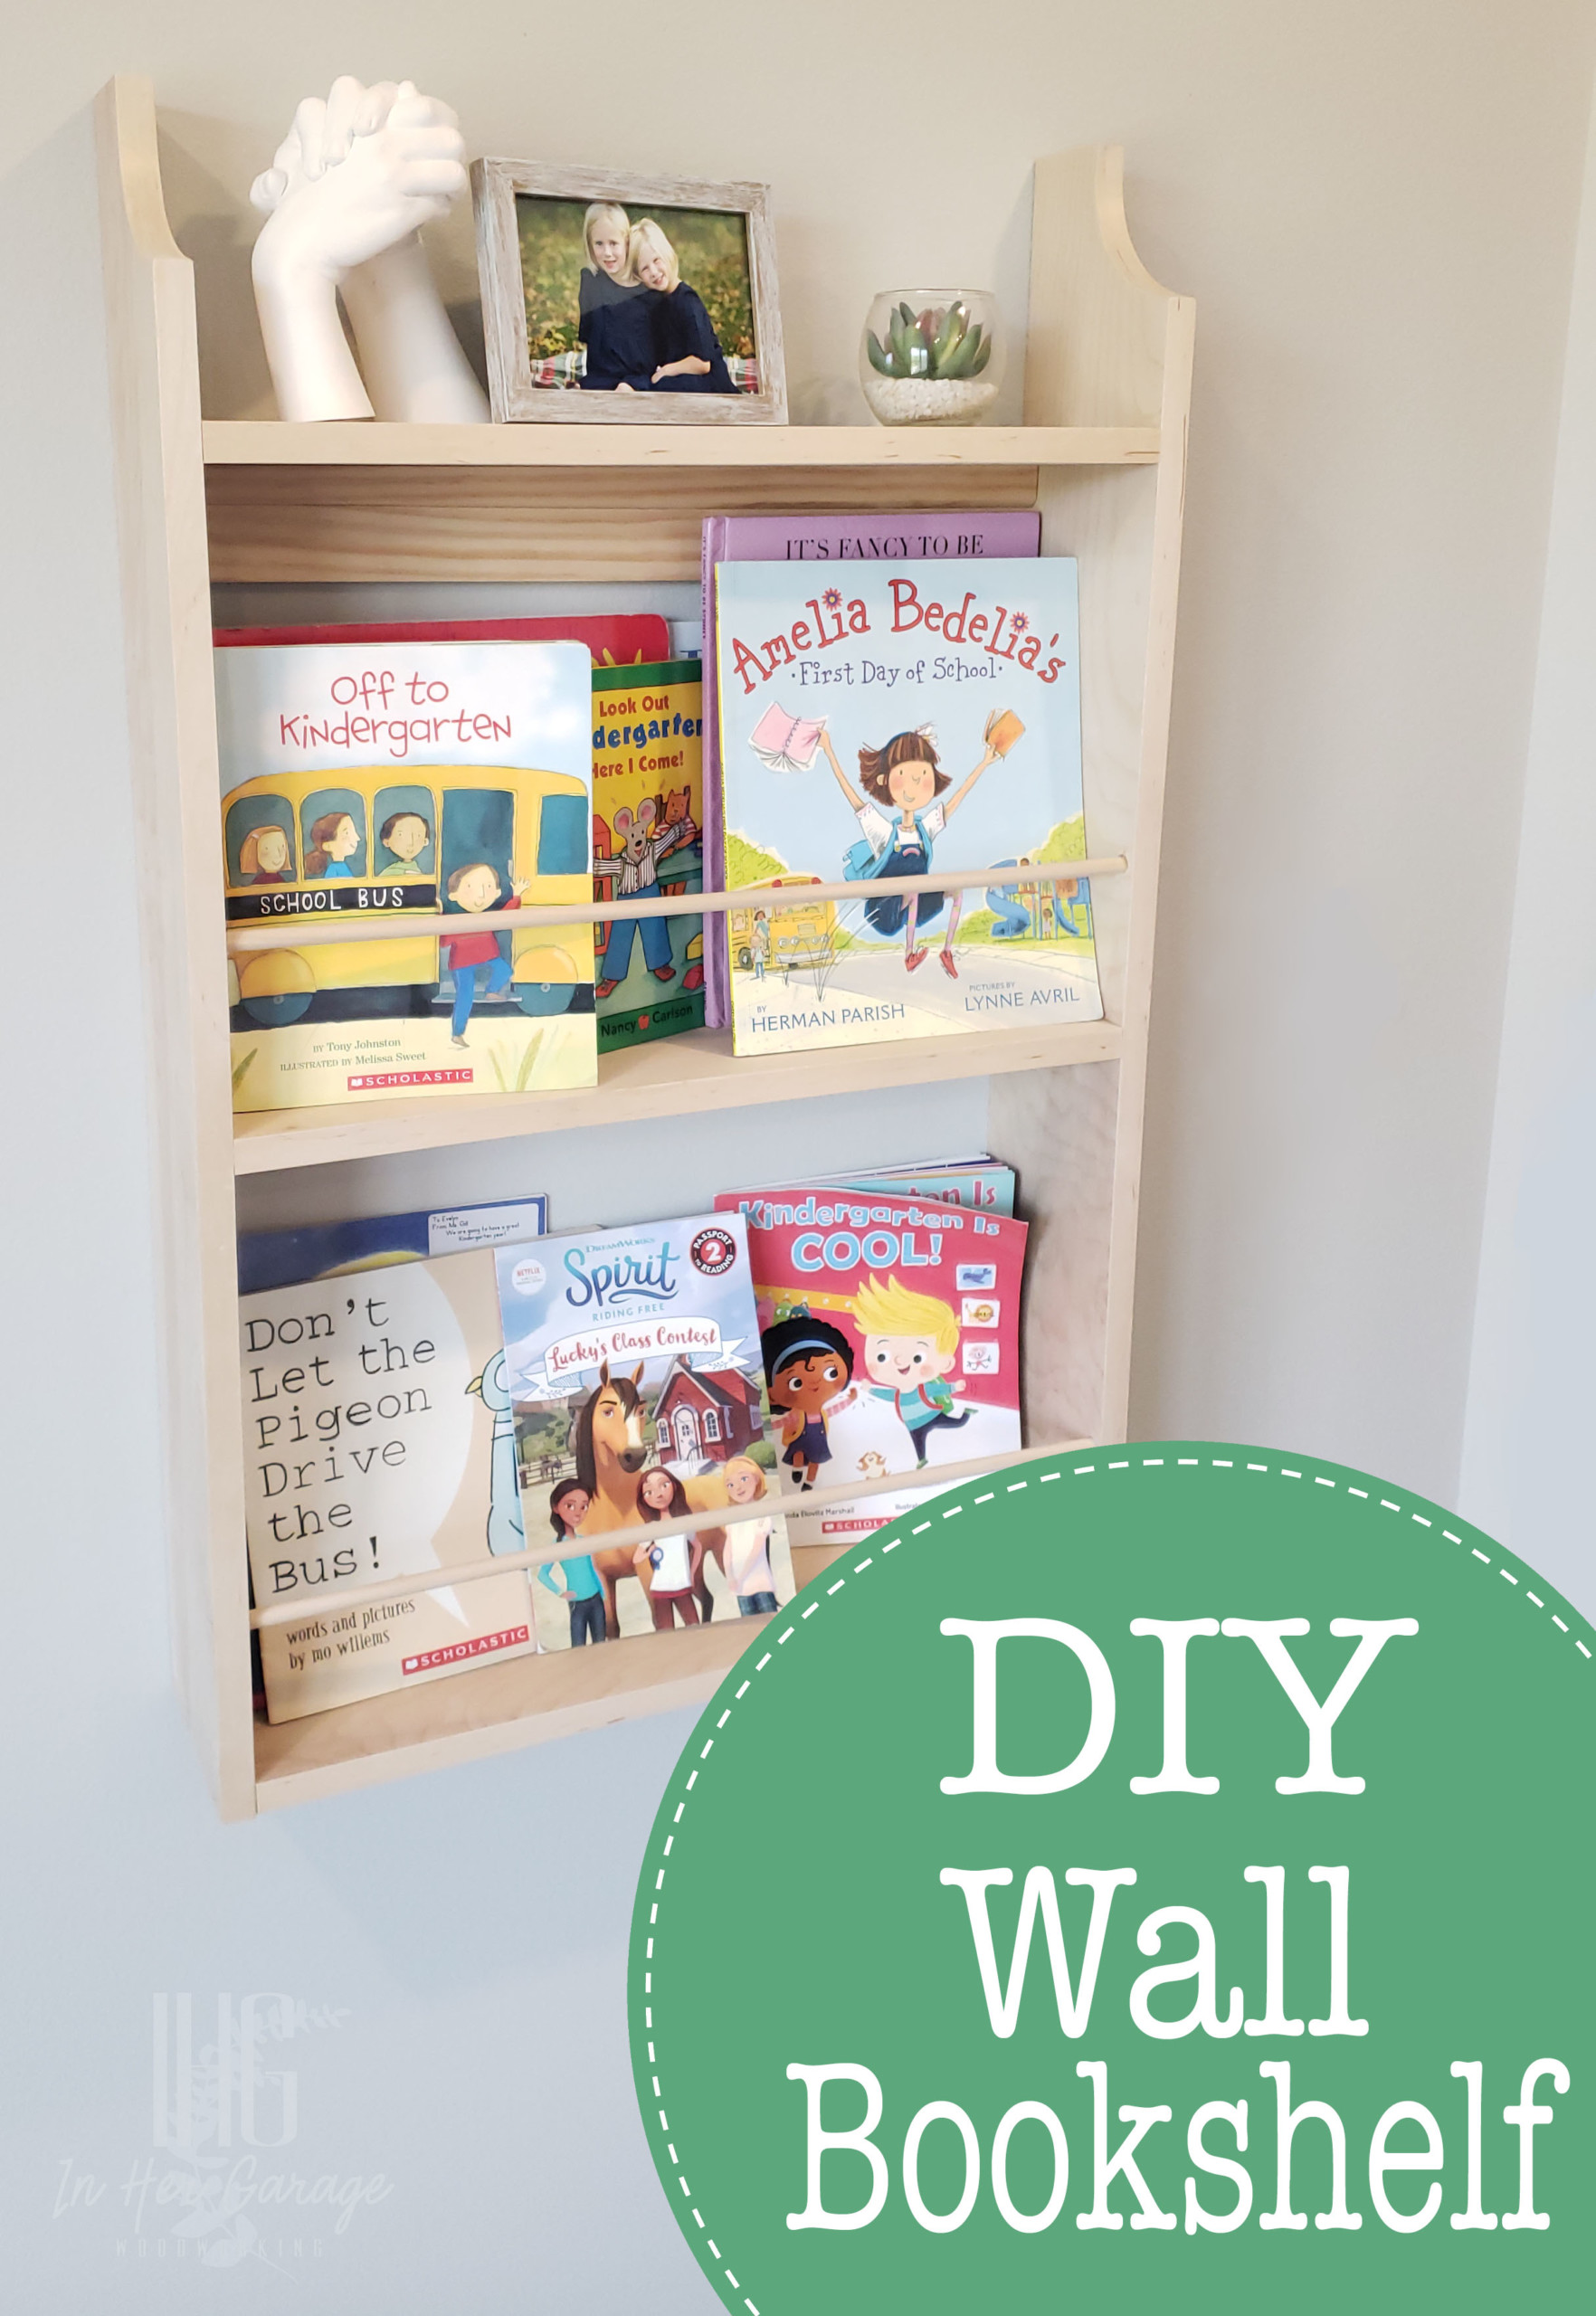
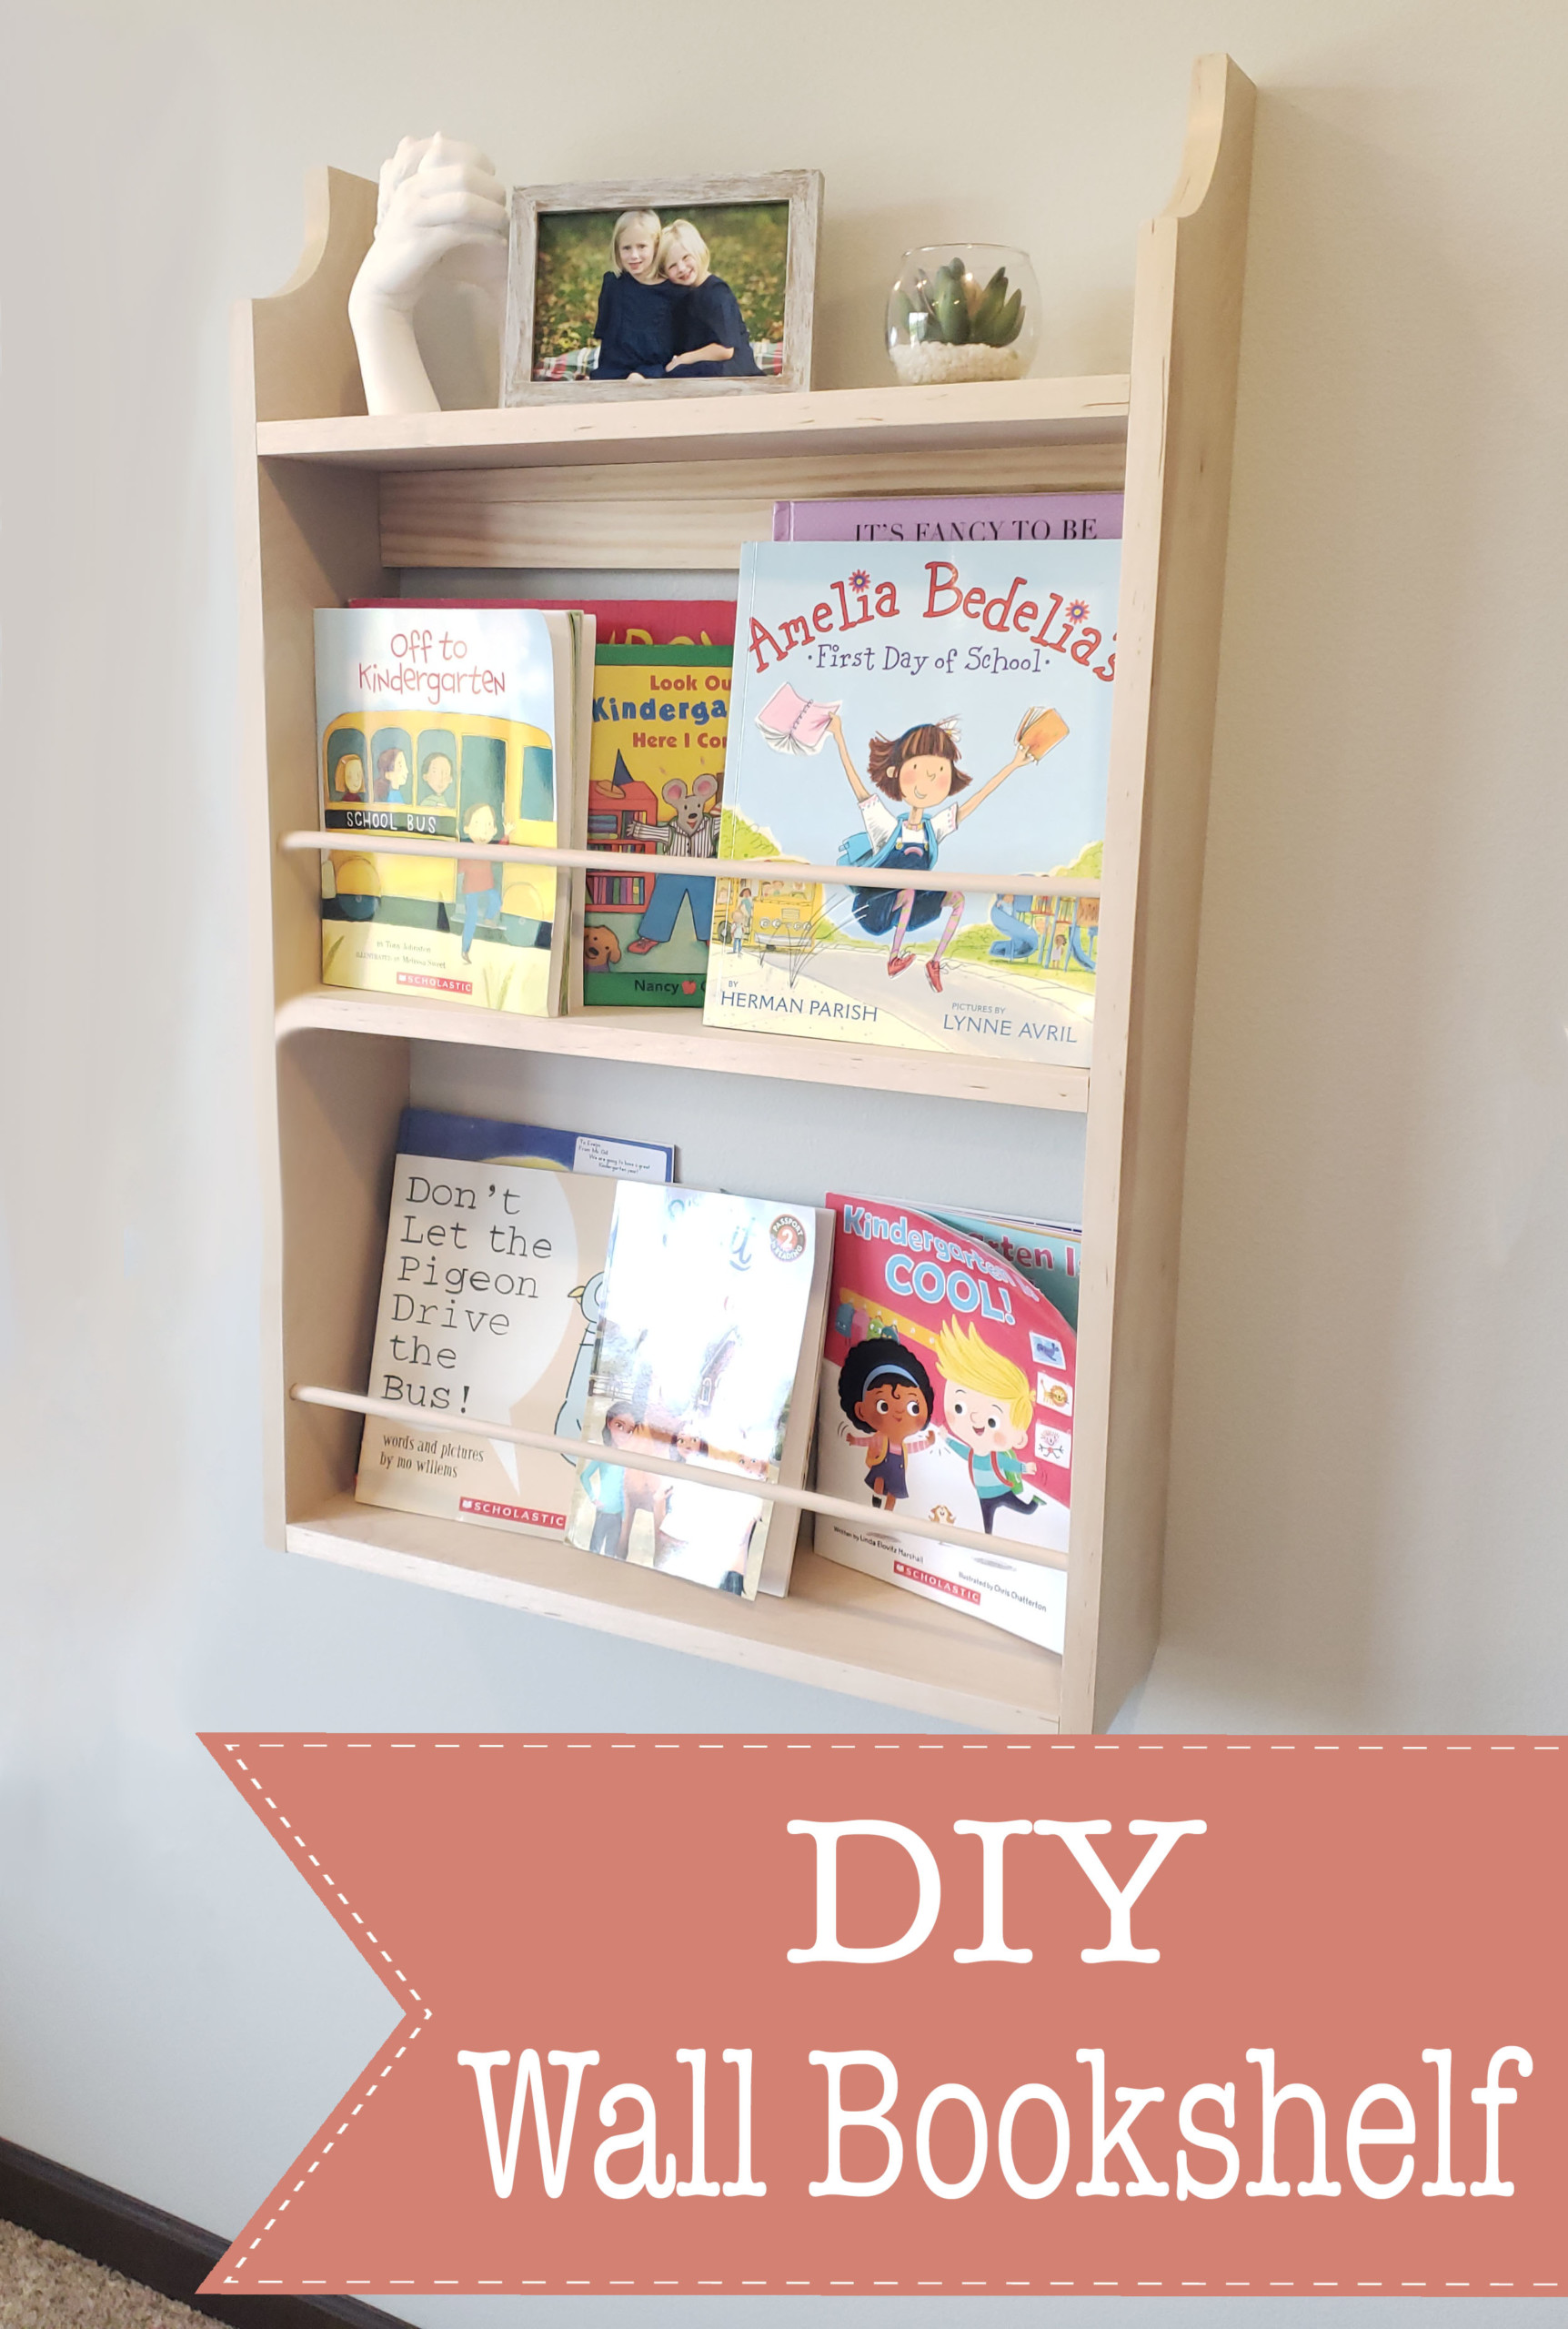
Looking for a way to organize and free up floor space in your home? Expand your DIY talents and build this adorable DIY wall bookshelf.ย  I built this as the final addition to my daughterโ€™s new room and although the joinery is slightly more advanced it still easy enough for a beginner DIYer.

DIY Wall Bookshelf

This bookshelf was the perfect last piece that brought my daughterโ€™s room together.ย  I used dowel joinery to build the bookshelf (which may sound complicated but is fun to use and quite simple when you get the hang of it).ย  To hang this shelf on the wall I used a French cleat which again sounds more advance is a convenient and secure way to install heavy objects on a wall. So stay with me and read through the instructions. I know you can do this!ย  Letโ€™s make it!

How to Make a DIY Wall-Mounted Bookshelf

Materials:

  • 2- 1โ€ณ x 6โ€ณ x 8โ€ฒ boards
  • 1- 3/8โ€ณ x 4โ€ณ round dowel
  • 1 box 3/8โ€ณ wooden dowels
  • wood glue

Tools:

(Iโ€™ve includedย affiliate links for your convenience. I earn a small percentage from a purchase using these links. Thereย is no additional cost to you. You canย readย more about affiliate links here.)

Cut List:

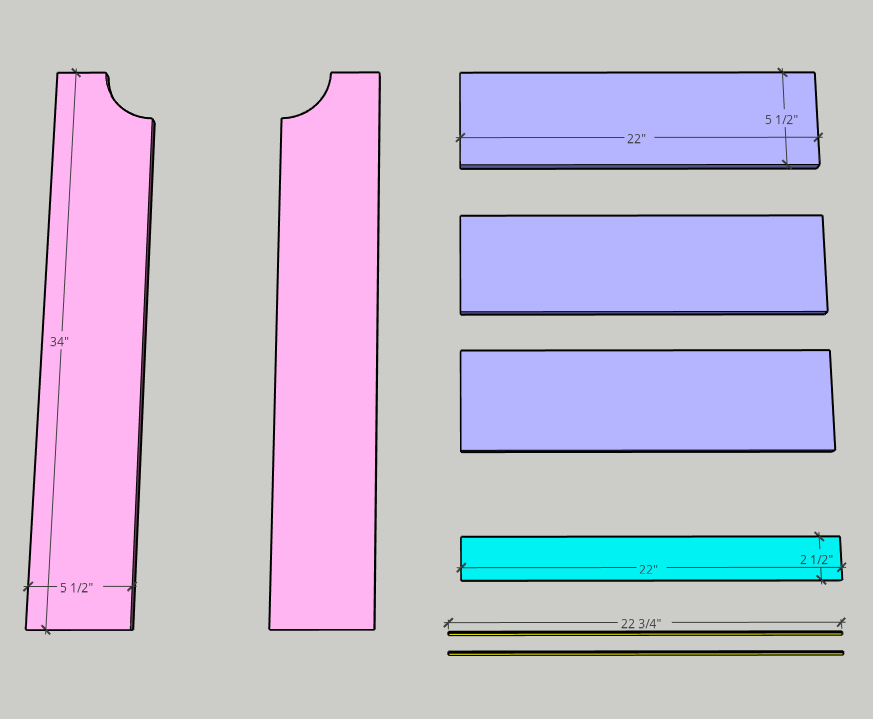
  • 2- 1โ€ณ x 6โ€ณ @ 34โ€ณ โ€“ shelf sides
  • 3- 1โ€ณ x 6โ€ณ @ 22โ€ณ โ€“ shelves
  • 1- 1โ€ณ x 6โ€ณ @ 22โ€ณ ripped to 2ยฝโ€ width โ€“ shelf cleat for hanging on the wall
  • 2- 3/8โ€ณ dowel @ 22 ยพโ€ length

Instructions:

Step 1: Cut the curve at the top of the shelf sides (optional)

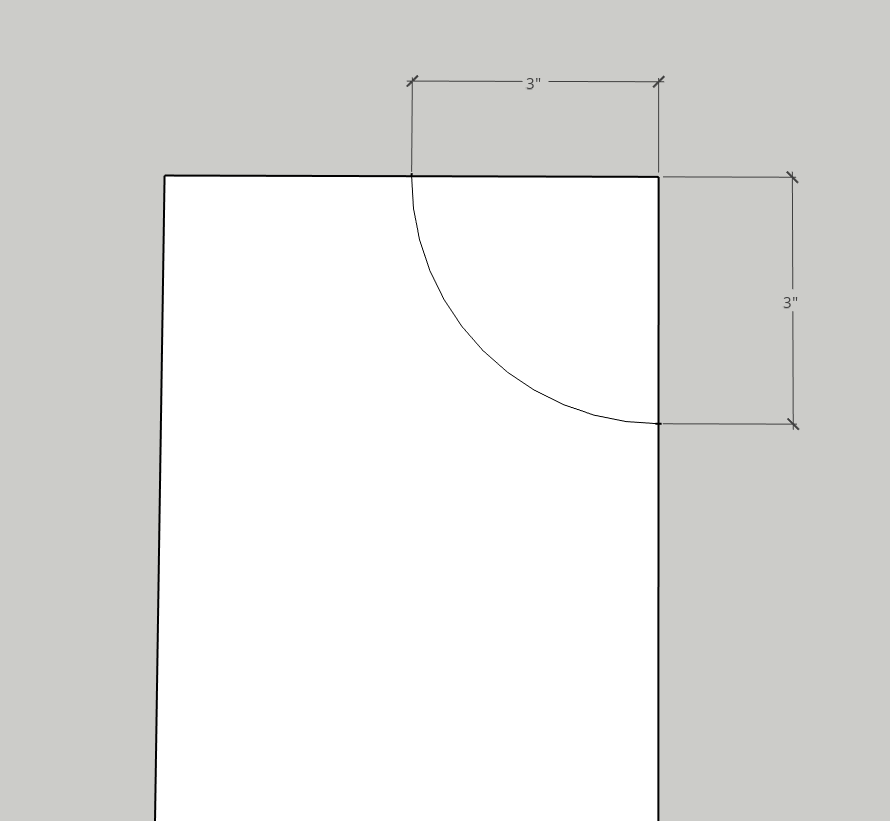
  • Measure 3โ€ณ in from the front and 3โ€ณ down from the top on both 1โ€ณ x 6โ€ณ side pieces and create a curve connecting the two marks. (I used a plastic bowl that I found in my kitchen as a stencil.)

  • Using your jigsaw, carefully cut along the curved line youโ€™ve drawn until it is cut away.
  • Repeat for both sides. Sand the curve smooth with sandpaper.

Step 2: Measure and mark dowel placement on the bookshelf sides

  • This is the step where the 6โ€ณ combination square is a lifesaver!
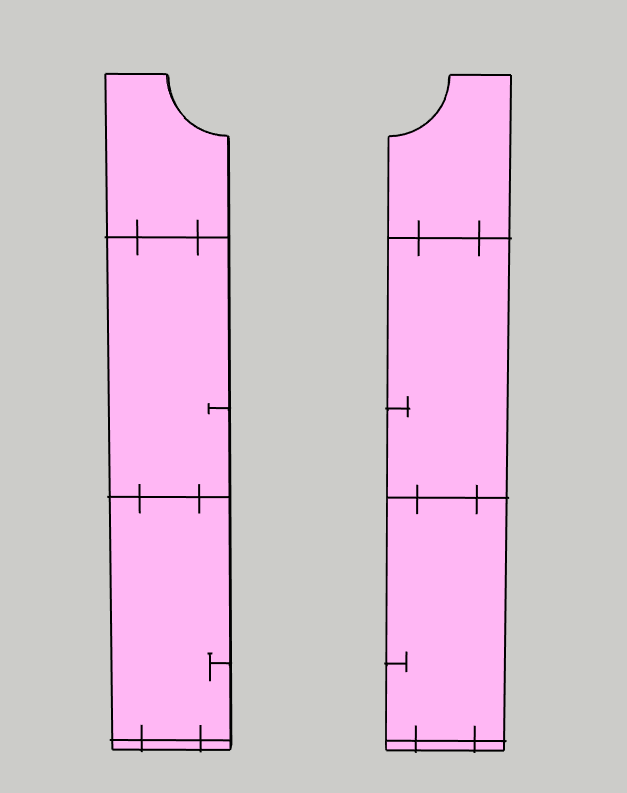
  • Lay the two side boards next to one another on your work surface so they are a mirror image of one another, insides facing up. (Like opening a book.)
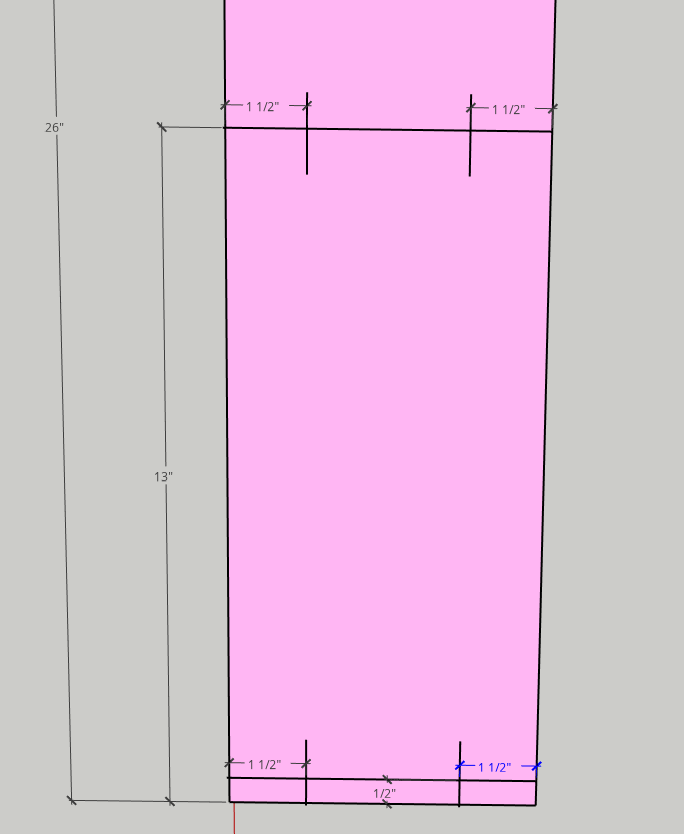
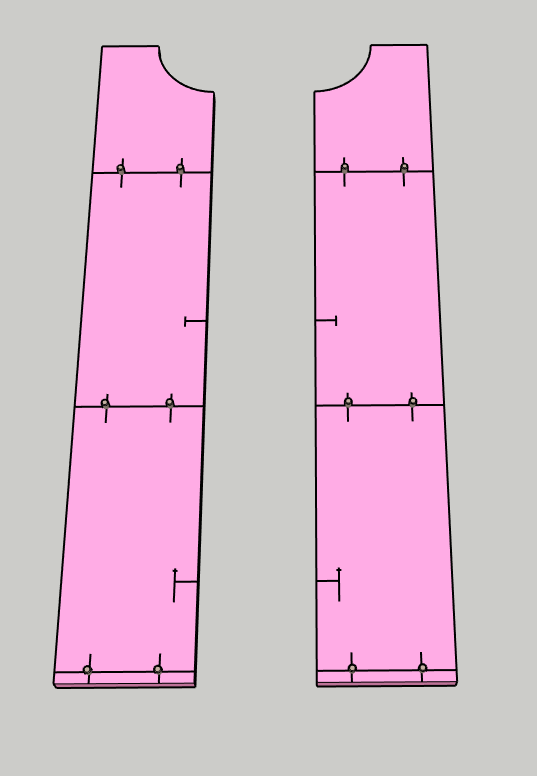
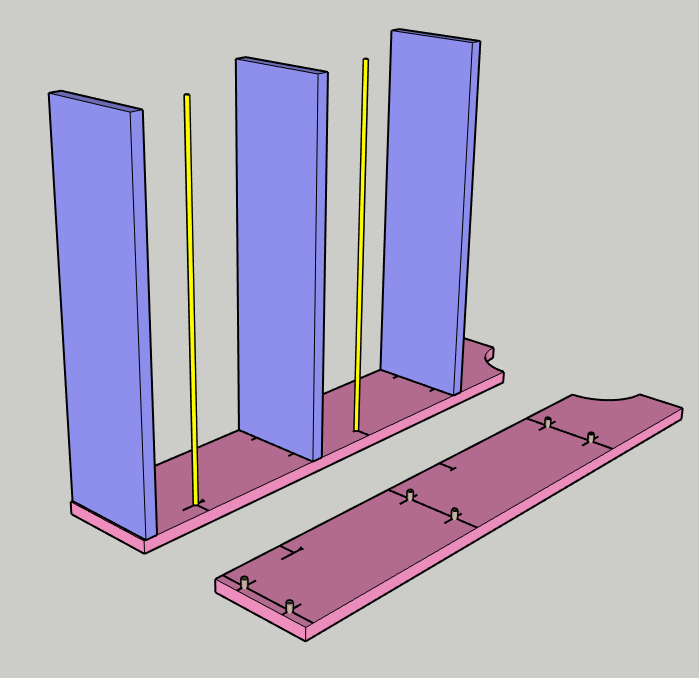
  • Use the diagram below for measuring and marking the placement of the dowels.

ย 


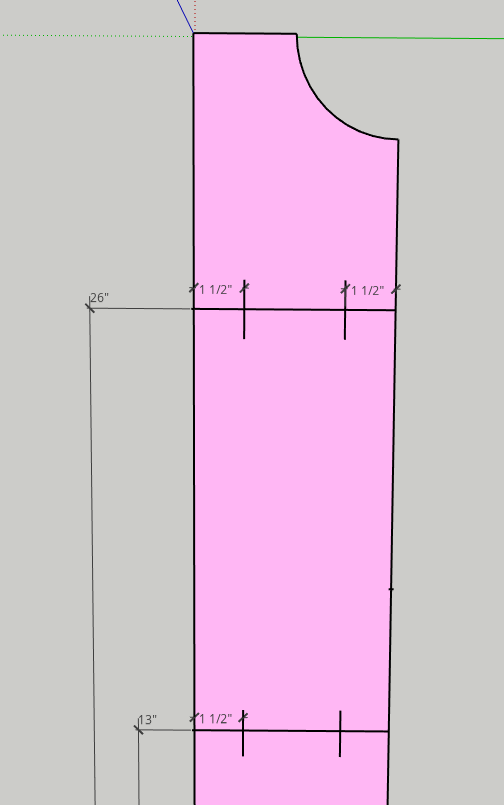
  • Each shelf dowel will be 1ยฝโ€ in from the front and back of the board and measure up 1/2โ€ณ, 13โ€ณ, and 26โ€ณ from the bottom of the board as shown.
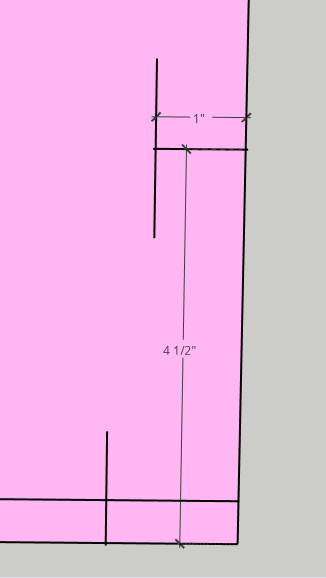
  • Both long dowels will be measured and marked 1โ€ณ in from the front of each side and 4 ยฝโ€ and 17 ยฝโ€ from the bottom of the sides as shown

  • Repeat these markings for both sides of the bookshelf.
  • You should have a total of 16 markings. 8 for each side. 6 for the shelf dowels and 2 for the long dowels.

Step 3: Drill holes for dowels

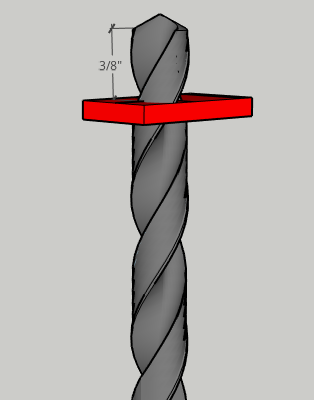
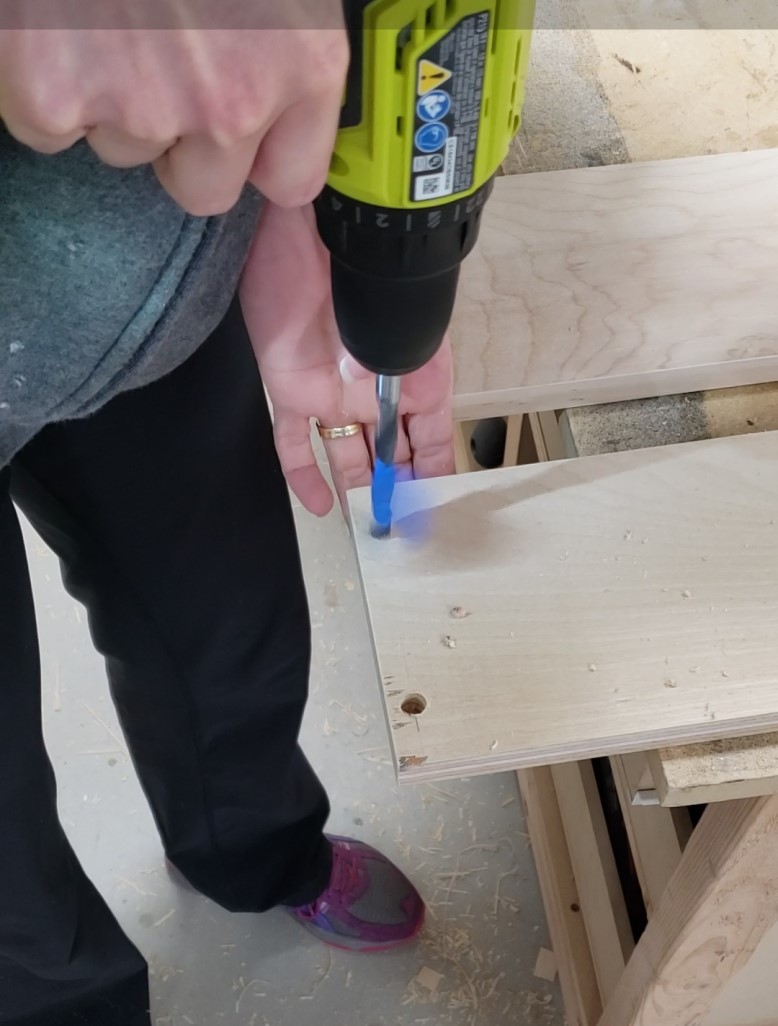
  • Using your 3/8โ€ณ drill bit place a piece of painterโ€™s tape on the drill bit to mark a depth of 3/8โ€ณ.ย  You donโ€™t want to drill through the sides of the bookshelf, just half-way.

  • With the drill bit securely in your drill (and material clamped to your work surface), drill straight down into each marking of the side board until the drill bit has reached the depth of the tape.

  • You will create 16 holes in total, 8 for each side.

Step 4: Measure and mark dowel placement in shelf boards

  • Using your combination square, mark the center of each side edge of the 3 shelf boards
  • Next measure and mark 1 ยฝโ€ in from the front and back of the 3 boards as shown. Make this same 1 ยฝโ€ mark on the face of the boards as well for reference when using your doweling jig.

Step 5: Drill dowel holes in shelf boards

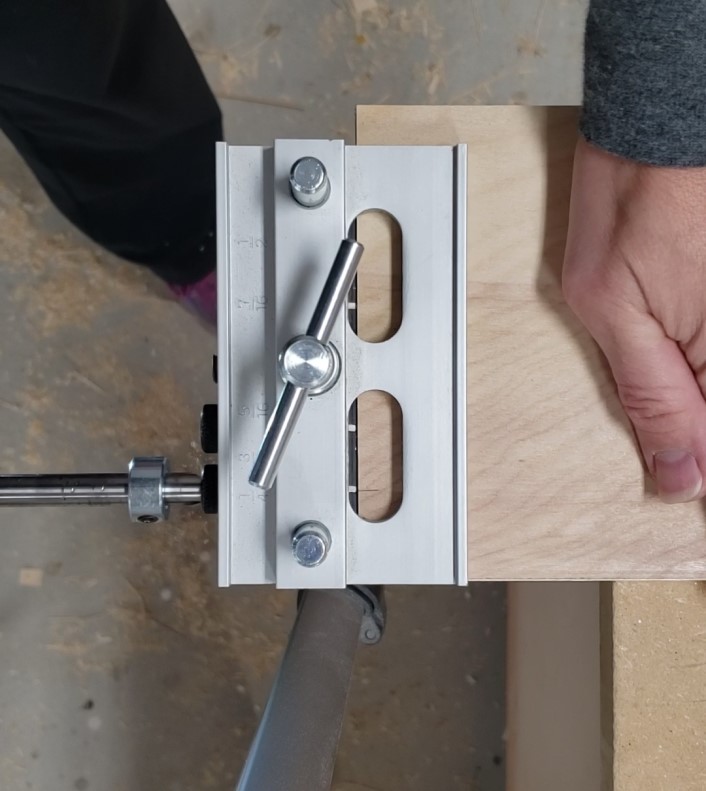
  • Iโ€™ll let you in on my secret! I use my Kreg pocket-hole bit for this step because it is 3/8โ€ณ, it makes drilling into the end grain much easier and has a collar that can be set to the depth I want!
  • The depth of your hole = length of the dowel minus 3/8โ€ณ (the depth of the hole in the side boards.)
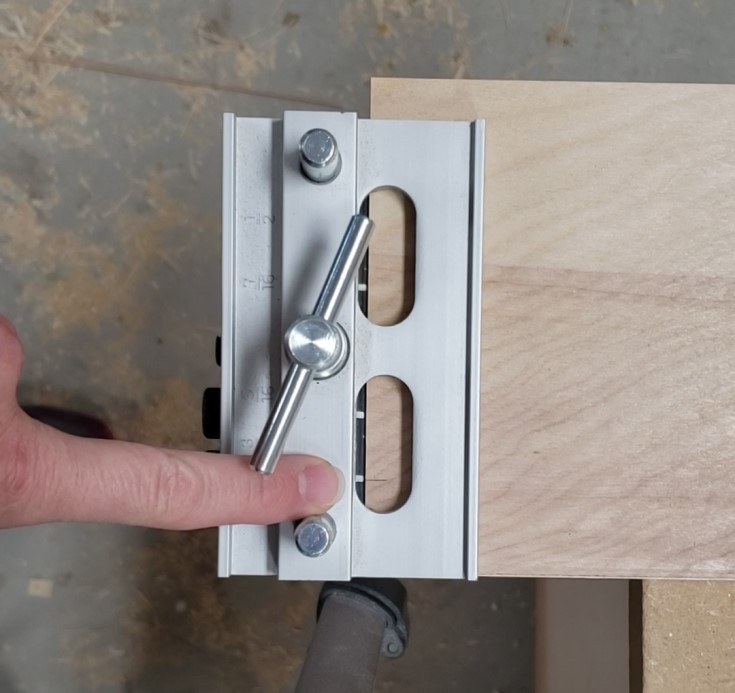
  • Now, using your doweling jig and the reference marks youโ€™ve created on the face of the board you can go ahead and drill the 12 holes to the depth determined above into the sides of the shelves.

Step 6: Dry fit!

  • It is important when using dowels for joinery that you complete a dry fit test of the project first.
  • You want to make sure the holes are large enough and deep enough for the dowel and that all pieces can securely fit together without gaps.

Assemble the Shelf!

Step 7: Install shelf dowels and shelves

  • Using wood glue install all 12 shelf dowels into the holes of both side boards.
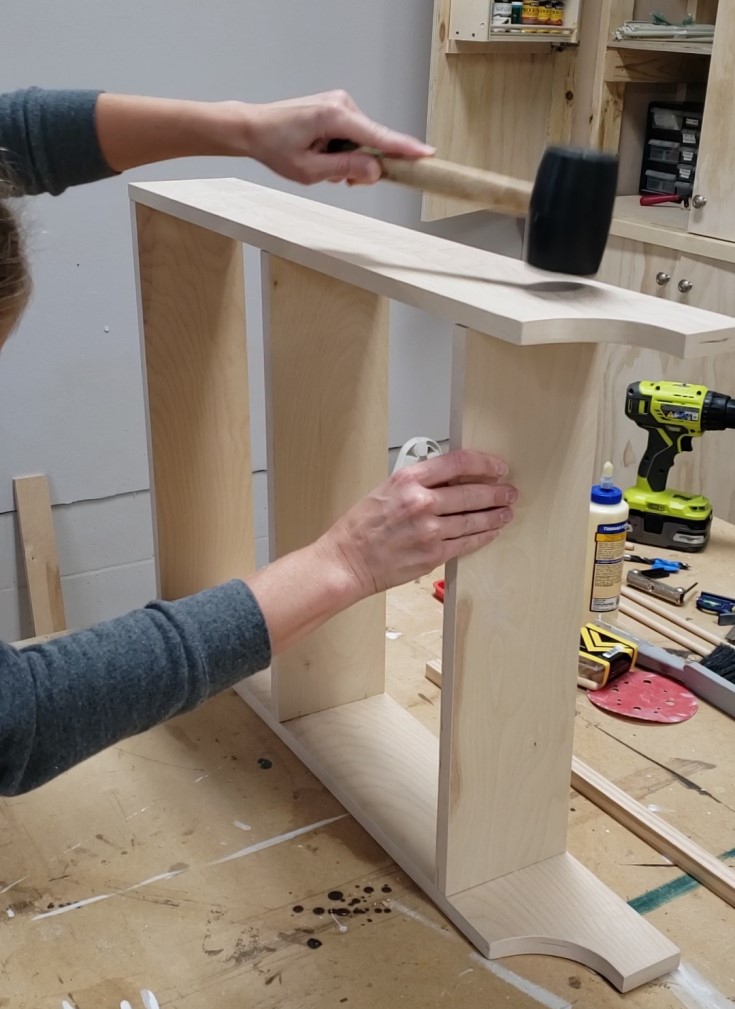
  • Next, using wood glue, install the shelves over their respective dowels and gently tap into place using a rubber mallet.

ย 

Step 8: Install long dowels

  • Place a drop of glue in both holes for the long dowels and insert dowels

Step 9: Install the remaining side board

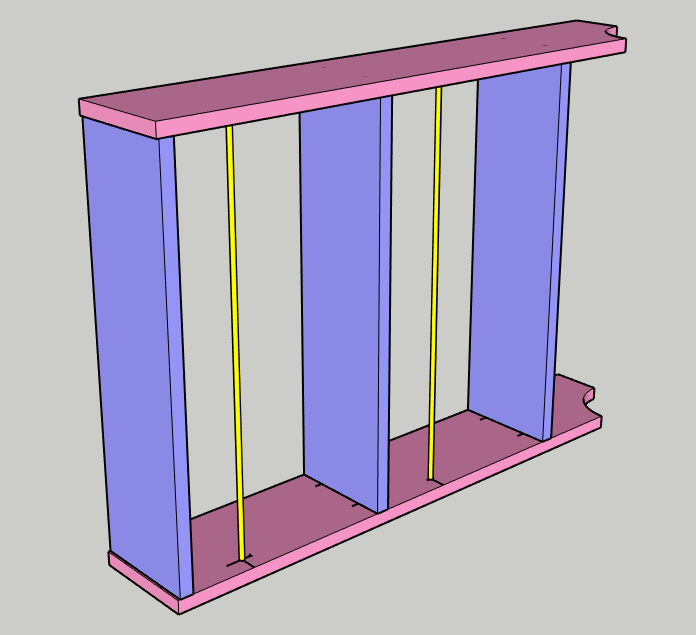
  • Carefully place the remaining side board over the shelves and long dowels have already been installed.
  • Align the dowels and long dowel holes and gently tap the side into place with a rubber mallet.

  • Check for square and clamp into place to allow the glue to dry.

Note: As you can see I forgot to insert the long dowels during assembly. I was able to add them later and I will have a scar to show for it!

Step 10: Hanging the shelf on the wall

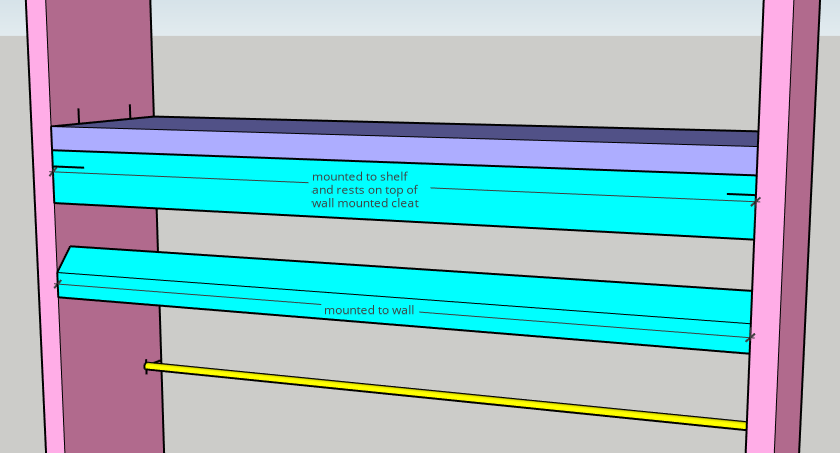
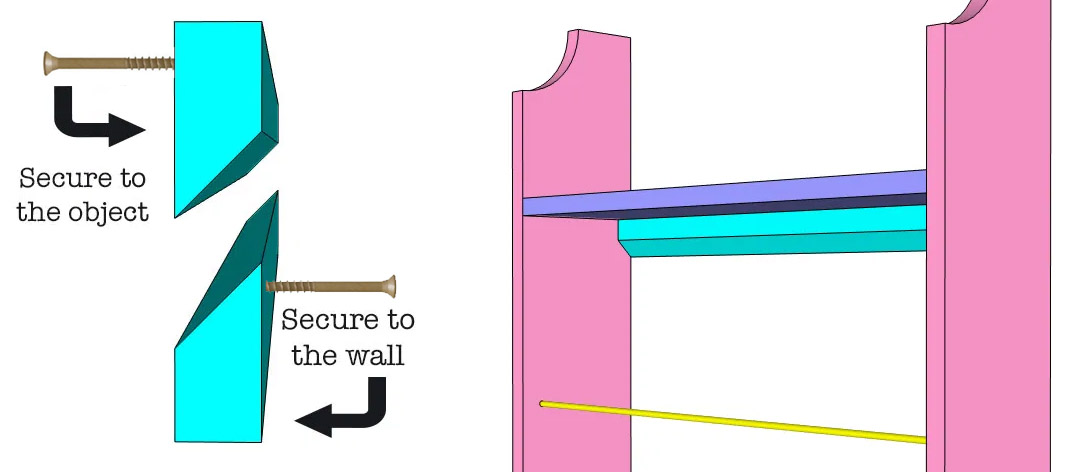
For this step, I chose to use a French cleat. I wanted the shelf to be flush to the wall and very secure which is what makes a French cleat the best choice.ย  View the basic diagram below or for step by step instruction check out How to Make and Use a French Cleat.

DIY French Cleat


I used pocket screws to secure the top portion of the French cleat to the bookshelf.

Once the French cleat is secured to the bookshelf and the wall you will be able to hang the bookshelf securely on the wall and place as many books in it as needed.ย  My daughter loves her new bookshelf and she always feels so special when Mom makes something just for her.

I hope this tutorial proves helpful in adding a little style and organization to your home.

Hi! Iโ€™m Kristen, from In Her Garage,ย and I am a self-taught woodworker and DIY fanatic from Minnesota where I live with my husband and our two daughters. Between being a wife, mom and, registered nurse, I try to make as much time for DIY as possible. My love for building came after our family built our current home in 2015. After we moved in, we needed furniture and instead of spending massive amounts of money to order the pieces we wanted I decided that I would build them myself. I started with a buffet table plan from the fabulous Ana-white and quickly set out to remodel my entire home office.

Since then I have started a side business building furniture for the people in my community. I love hearing my clients talk about the pieces they wish they had whether it be aย rustic buffet table, aย one drawer side table, or aย toy boxย and then making it a reality for them. While starting my small business it made perfect sense that I would document my building journey so I simultaneously launched theย In Her Garage blogย and I love sharing my plans, tips and tricks.

Making something beautiful with your own two hands through a little preparation and determination is an amazing feeling and I hope to bring inspiration and know-how to those looking to tackle a big or small project.
I am so glad that you found me here and please feel free to connect with me onย Pinterest,ย Instagram, Facebook, and Youtube to see what I am working on right now.


diy french cleat

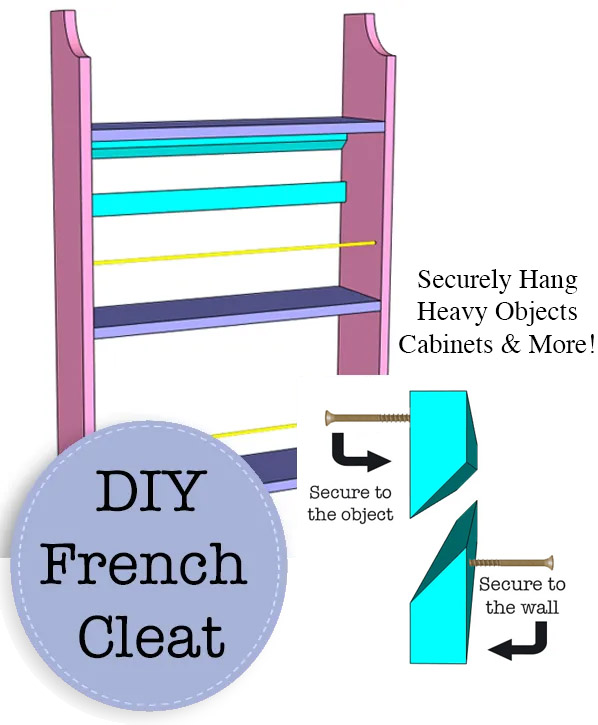
I am going to teach you how to securely hang heavy objects on the wall with a board and a few screws. Using a French Cleat has been a tried and true method for hanging heavy objects and is used by professional cabinet makers and DIYers alike. It can be incorporated into the item being built or added after the fact.

DIY French Cleat

How to Make a French Cleat

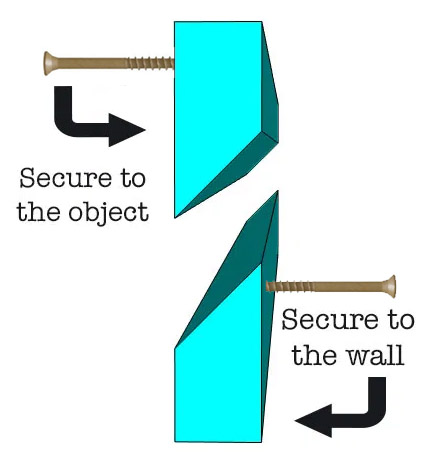
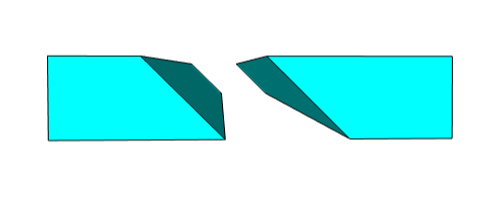
What is a French Cleat?ย  A French Cleat is a board or molding with a 30ยฐ-45ยฐ bevel cut attached to the wall along with a corresponding beveled board or molding attached to the object to be hung on the wall. That sounds a little confusing but check out the diagram below and it will all make sense. First letโ€™s grab a few supplies.

DIY French Cleat

Materials:

(Iโ€™ve includedย affiliate links for your convenience. I earn a small percentage from a purchase using these links. Thereย is no additional cost to you. You canย readย more about affiliate links here.)

  • 1โ€ณ x 3โ€ณ board or 3/4โ€ณ plywood strip (3โ€ณ minimum width)
  • 2โ€ณ screws

Tools:

Instructions:

Step 1:

Measure the length that you need your French cleat to be. Typically a french cleat is the length of the item to be hung on the wall and spans the length of at least 2 studs in the wall that the item will be secured to.

Step 2:

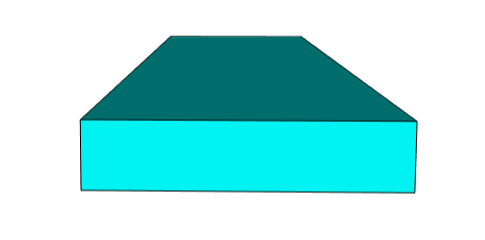
Adjust your table saw or circular saw to a 30ยฐ-45ยฐ bevel and rip your board along the center. (For tips on using a table saw safely, read this article.)

Step 3:

Secure the top piece of the cleat to the item to be hung (see diagram shown below). This can be done with pocket-holes, glued under a shelf, or with screws to the back of the item. (You may want to pre-drill your holes to avoid splitting the wood.)

DIY French Cleat

Step 4:

Choose the height at which you want to hang the item on the wall and mark where the bottom cleat will be placed. Mark the studs that the cleat will be screwed into and secure the cleat to the wall using wood screws and a level in the orientation shown above. (Again, you may want to pre-drill your holes to avoid splitting the wood.)

Step 5:

Gently place the object above the wall cleat and lower until the two pieces are securely nested together.

Often times the weight of the object and the angle of the beveled cleat is enough to keep the object securely in place. But, if youโ€™re worried about children lifting the item, you can add a screw through the hanging object into the cleat or a wall stud for peace of mind.

DIY French Cleat

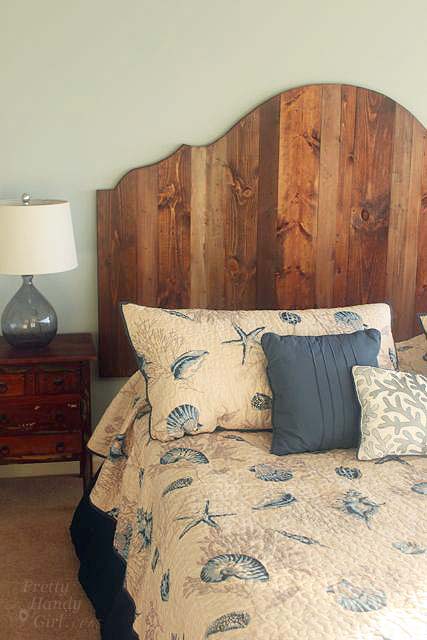
And if youโ€™re excited about using a French Cleat, you might like to make a headboard that is hung on the wall using a French Cleat!

rustic-king-headboard-side-view

This is a great tip for hanging cabinets on the wall as well. I hope you try your hand at making and using a French Cleat soon. Let me know how it goes!

Hi! Iโ€™m Kristen, from In Her Garage,ย and I am a self-taught woodworker and DIY fanatic from Minnesota where I live with my husband and our two daughters. Between being a wife, mom and, registered nurse, I try to make as much time for DIY as possible. My love for building came after our family built our current home in 2015. After we moved in, we needed furniture and instead of spending massive amounts of money to order the pieces we wanted I decided that I would build them myself. I started with a buffet table plan from the fabulous Ana-white and quickly set out to remodel my entire home office.

Since then I have started a side business building furniture for the people in my community. I love hearing my clients talk about the pieces they wish they had whether it be aย rustic buffet table, aย one drawer side table, or aย toy boxย and then making it a reality for them. While starting my small business it made perfect sense that I would document my building journey so I simultaneously launched theย In Her Garage blogย and I love sharing my plans, tips and tricks.

Making something beautiful with your own two hands through a little preparation and determination is an amazing feeling and I hope to bring inspiration and know-how to those looking to tackle a big or small project.
I am so glad that you found me here and please feel free to connect with me onย Pinterest,ย Instagram, Facebook, and Youtube to see what I am working on right now.

ย 


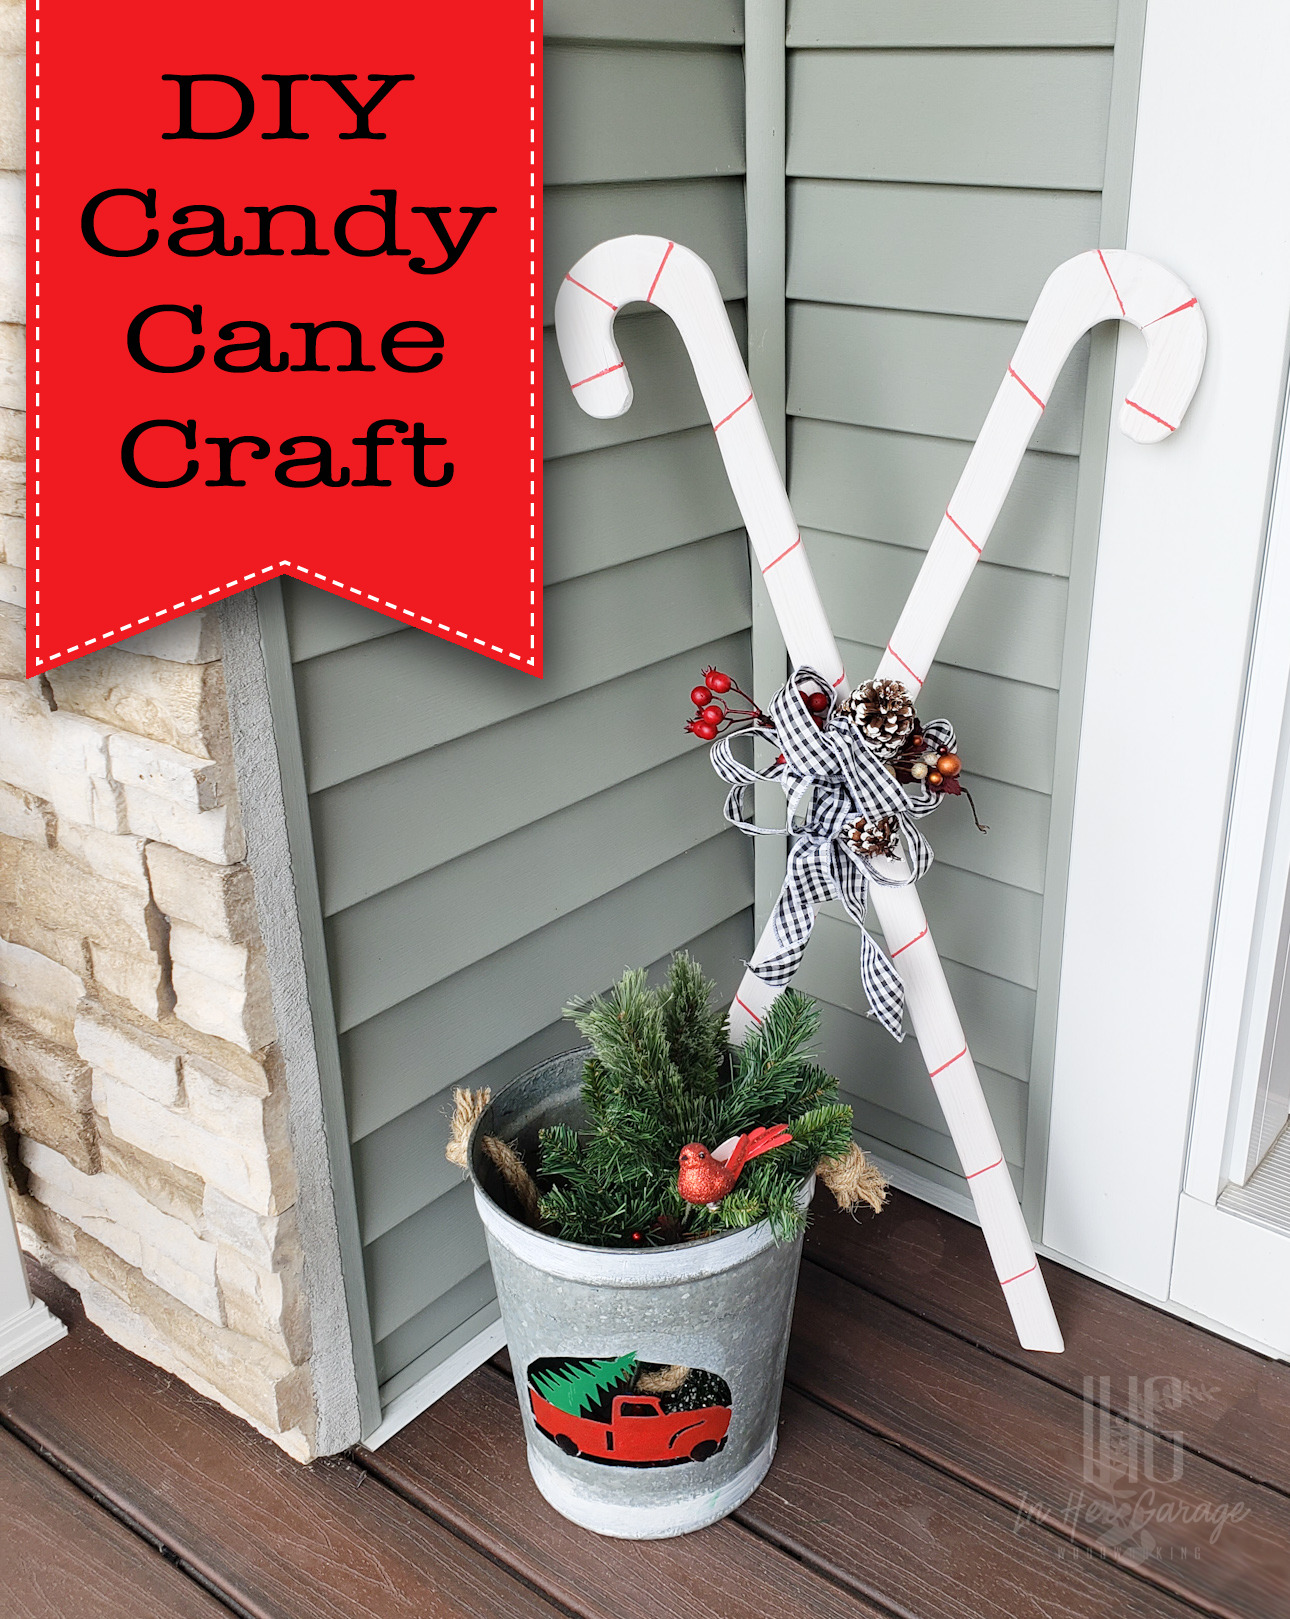
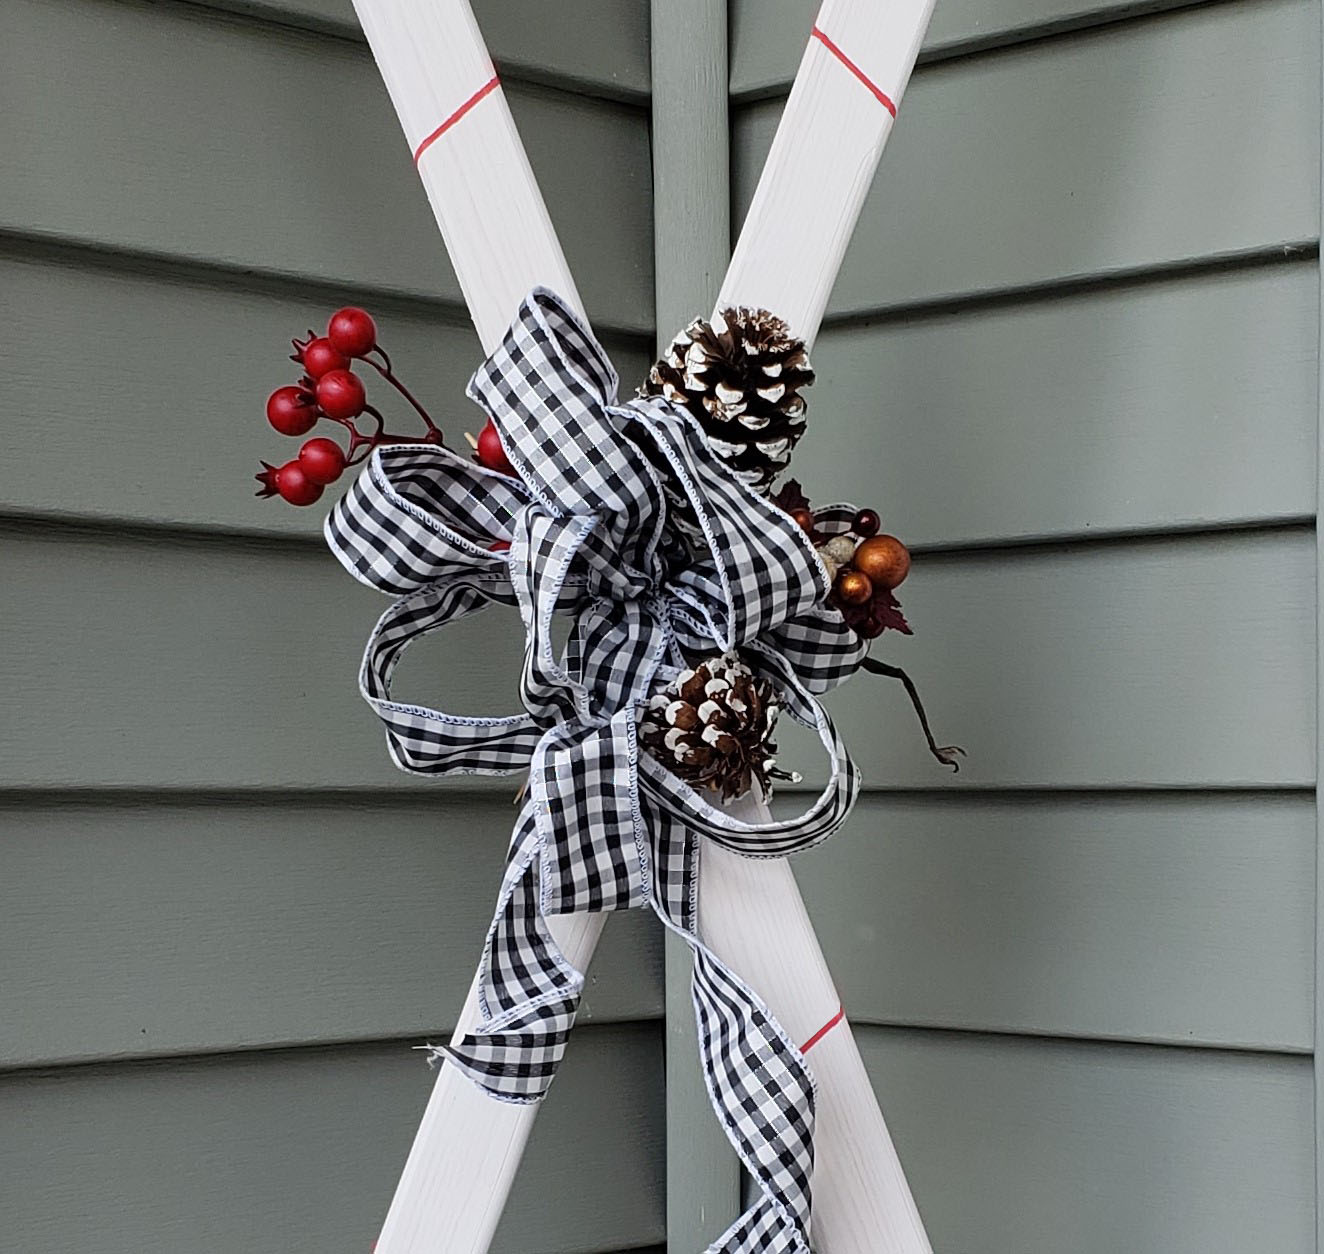
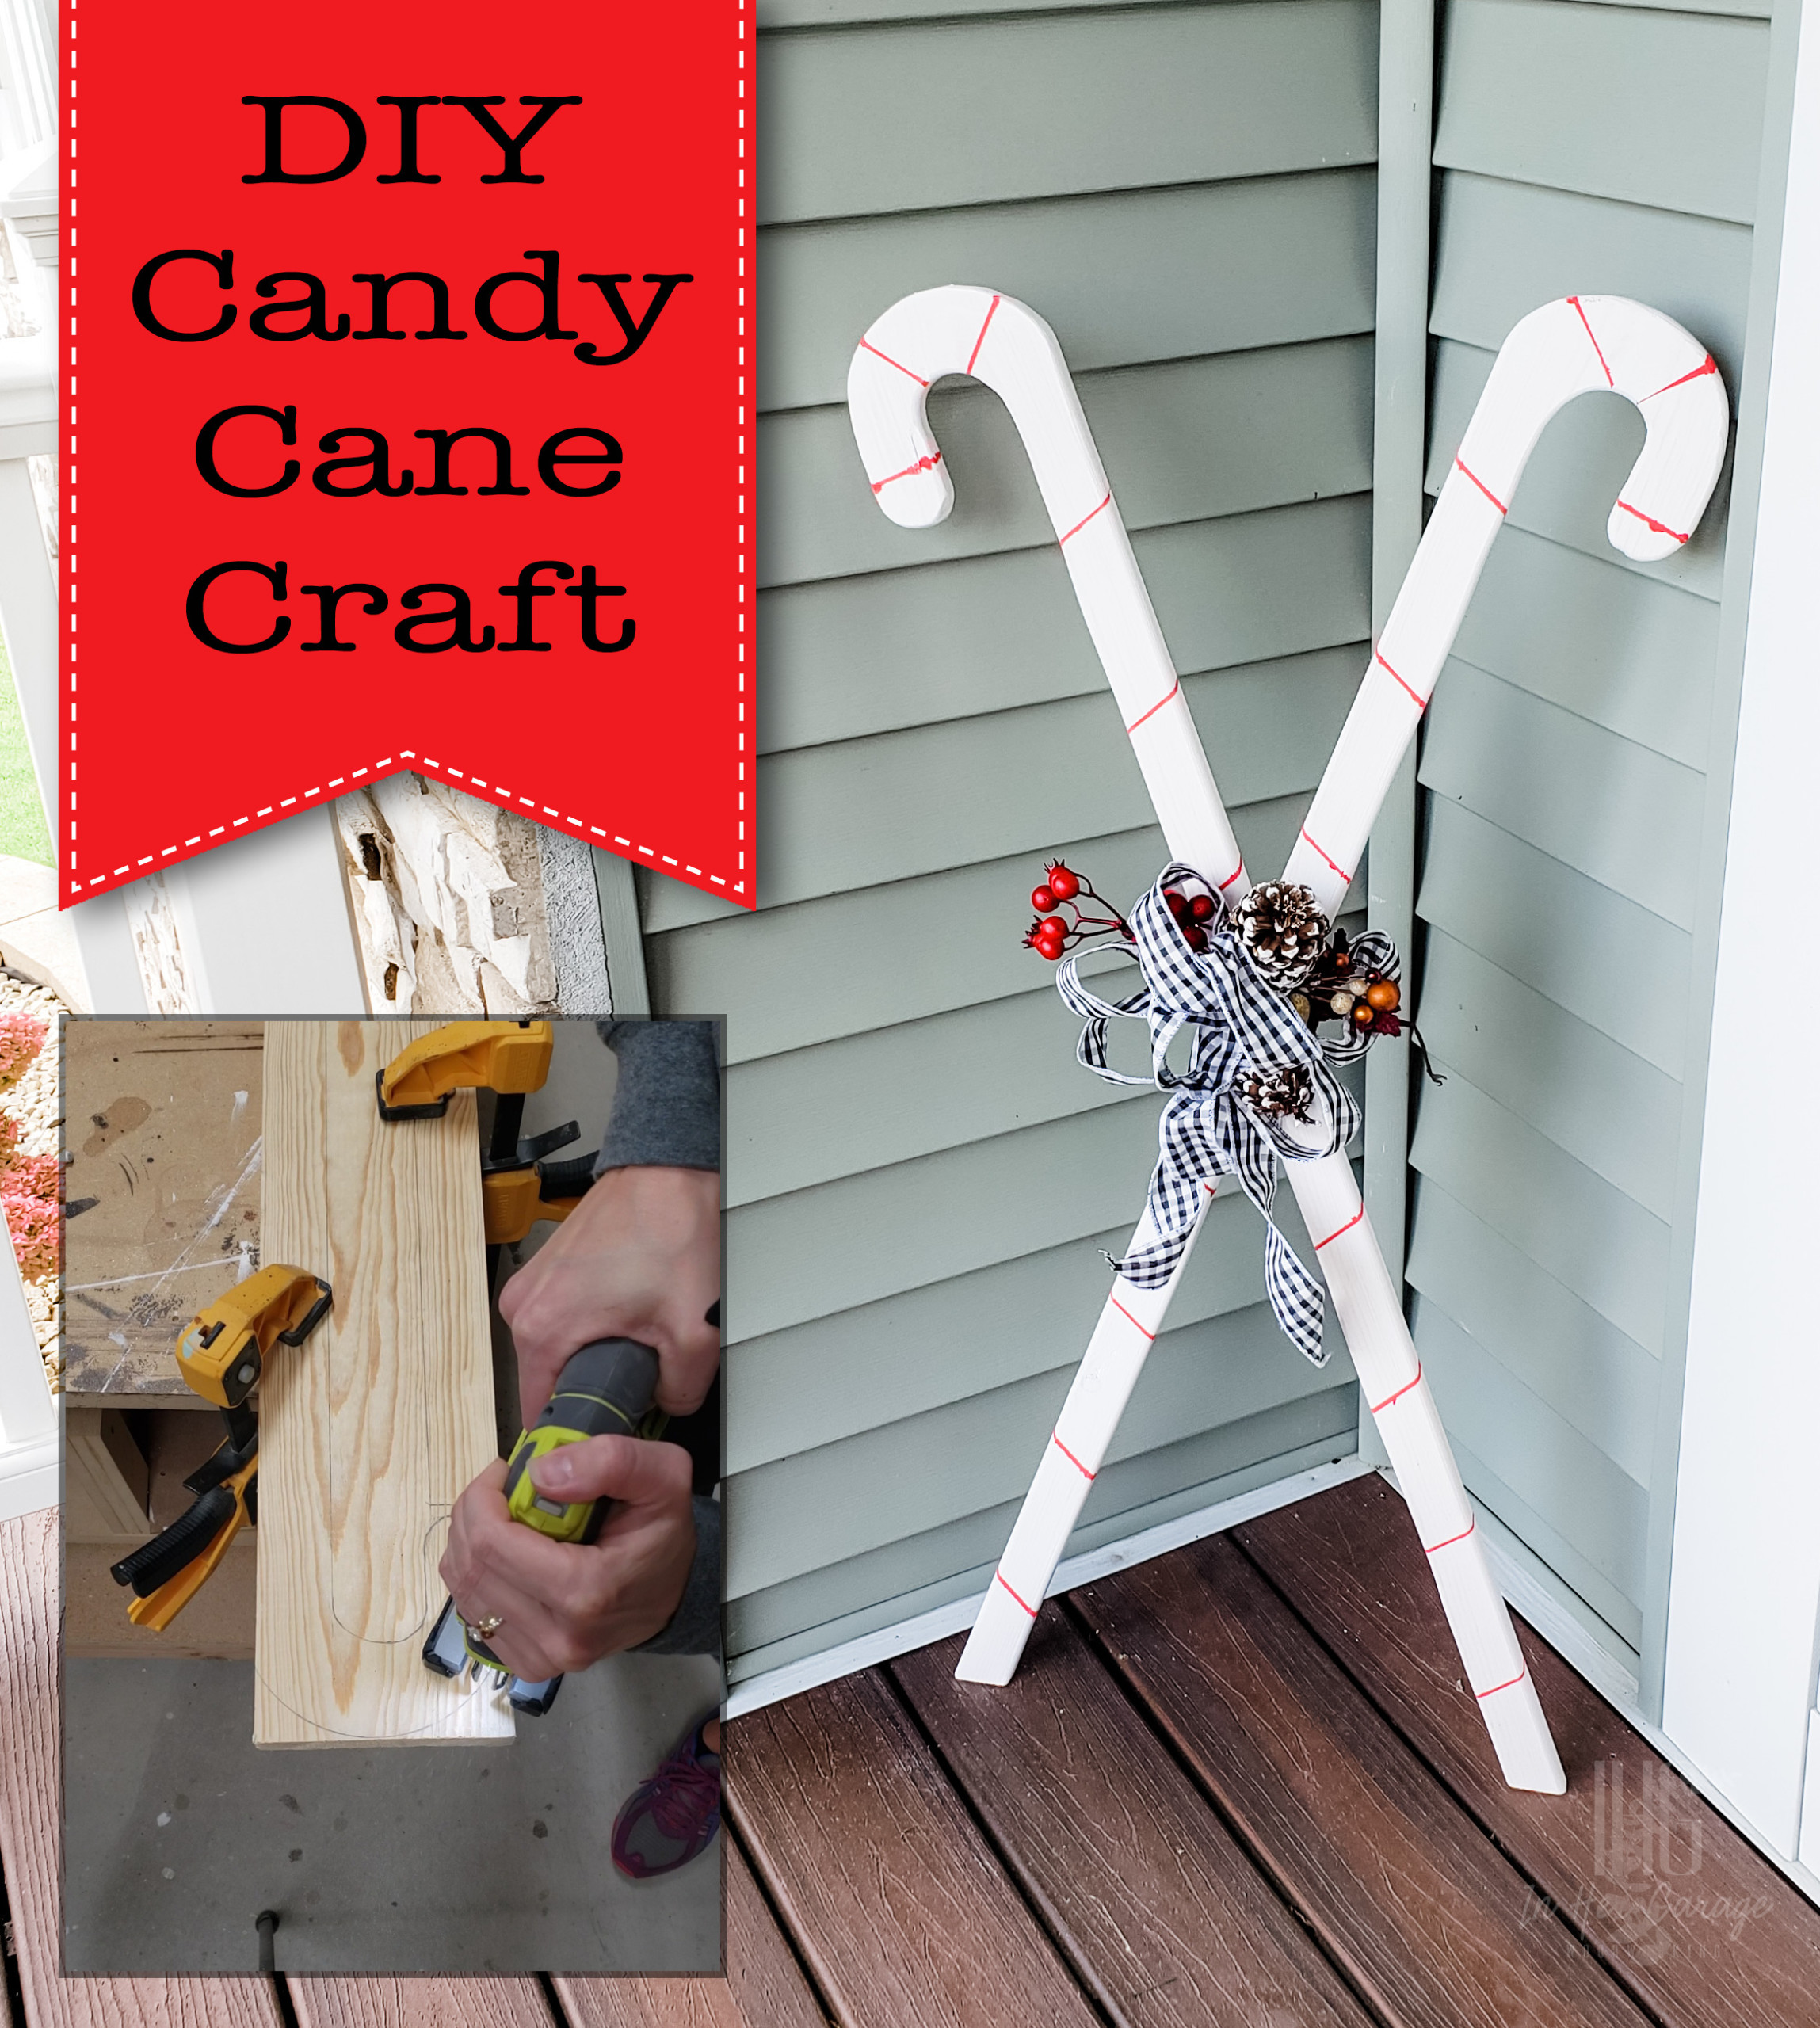
Make this adorable DIY Candy Cane craft using 1 board and 2 tools!ย  These DIY Candy Canes are the perfect complement to your holiday decorations.

DIY Candy Cane Decor

I love this craft because itโ€™s not only cheery but it also helps me add decor at a mid-height. I often find myself decorating something really tall like my Christmas tree or something short, like cute decor items near the ground. These candy canes are super simple to make and add medium height decorations to your home.

Material:

(Iโ€™ve includedย affiliate links for your convenience. I earn a small percentage from a purchase using these links. Thereย is no additional cost to you. You canย readย more about affiliate links here.)

  • 1- 1โ€ณ x 8โ€ณ x 6โ€ฒ pine board cut to 4โ€ฒ
  • Wood glue
  • Paint

Tools:

Instructions:

Step 1: Draw the candy canes

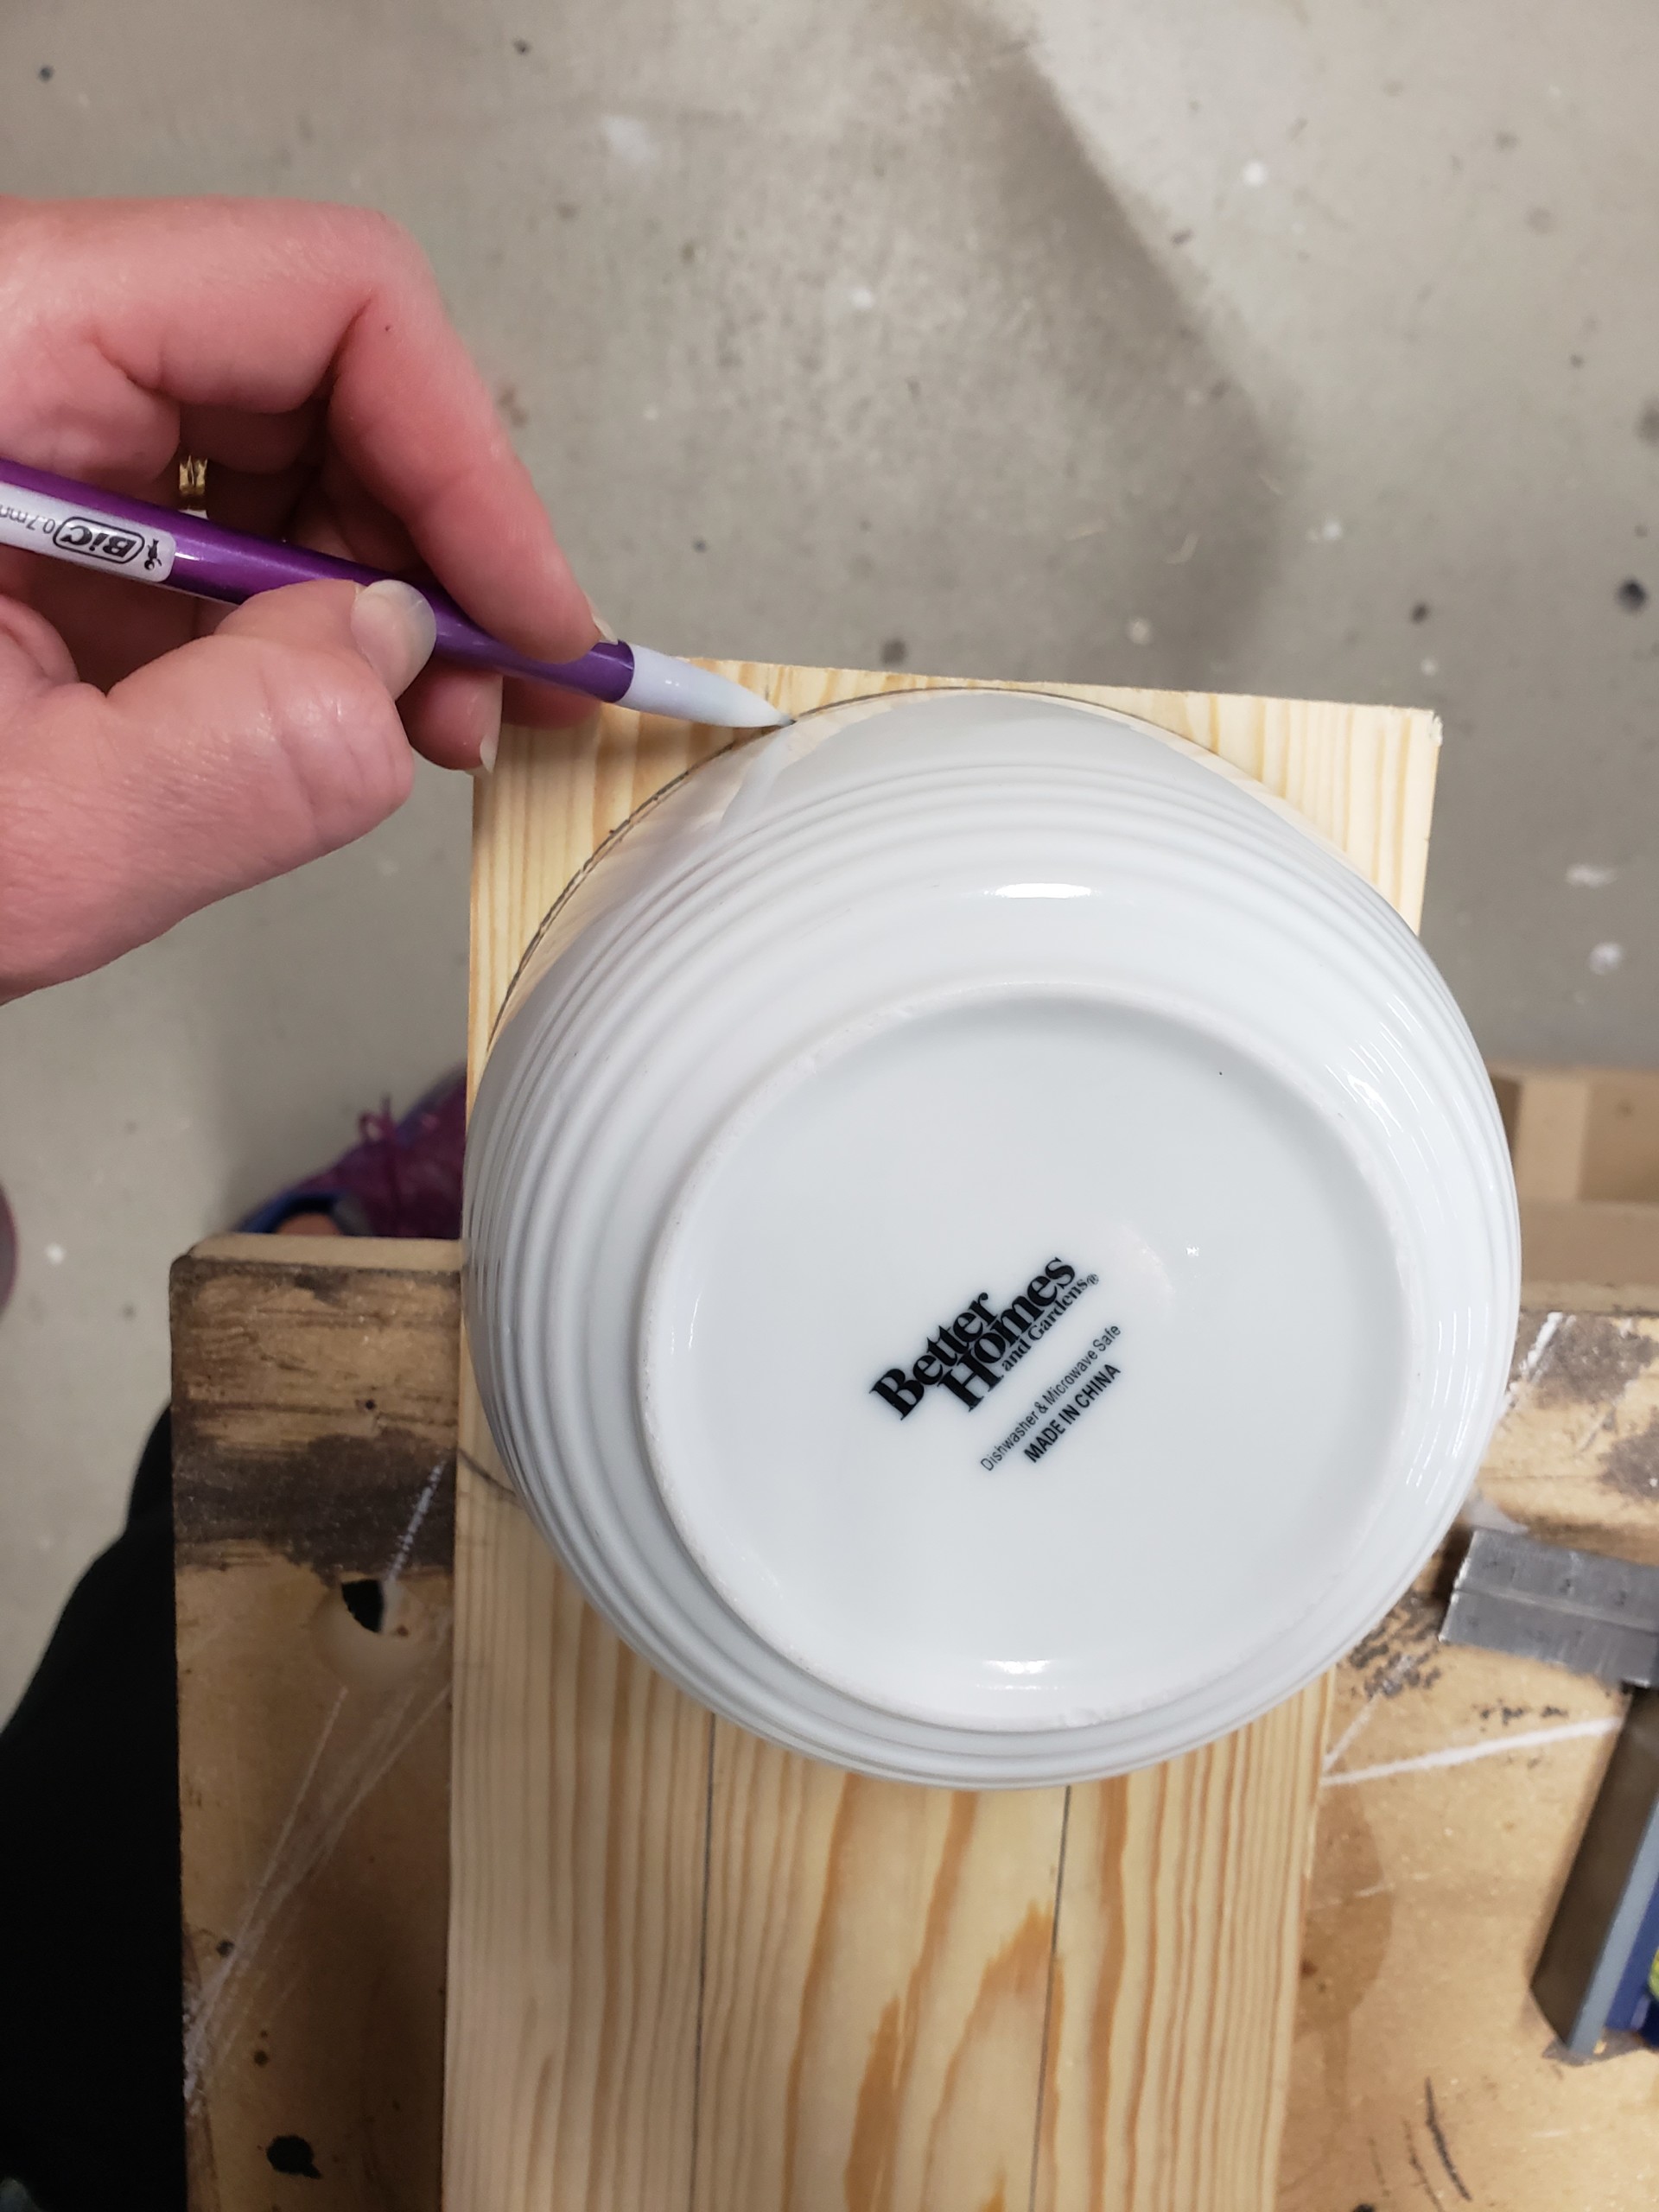
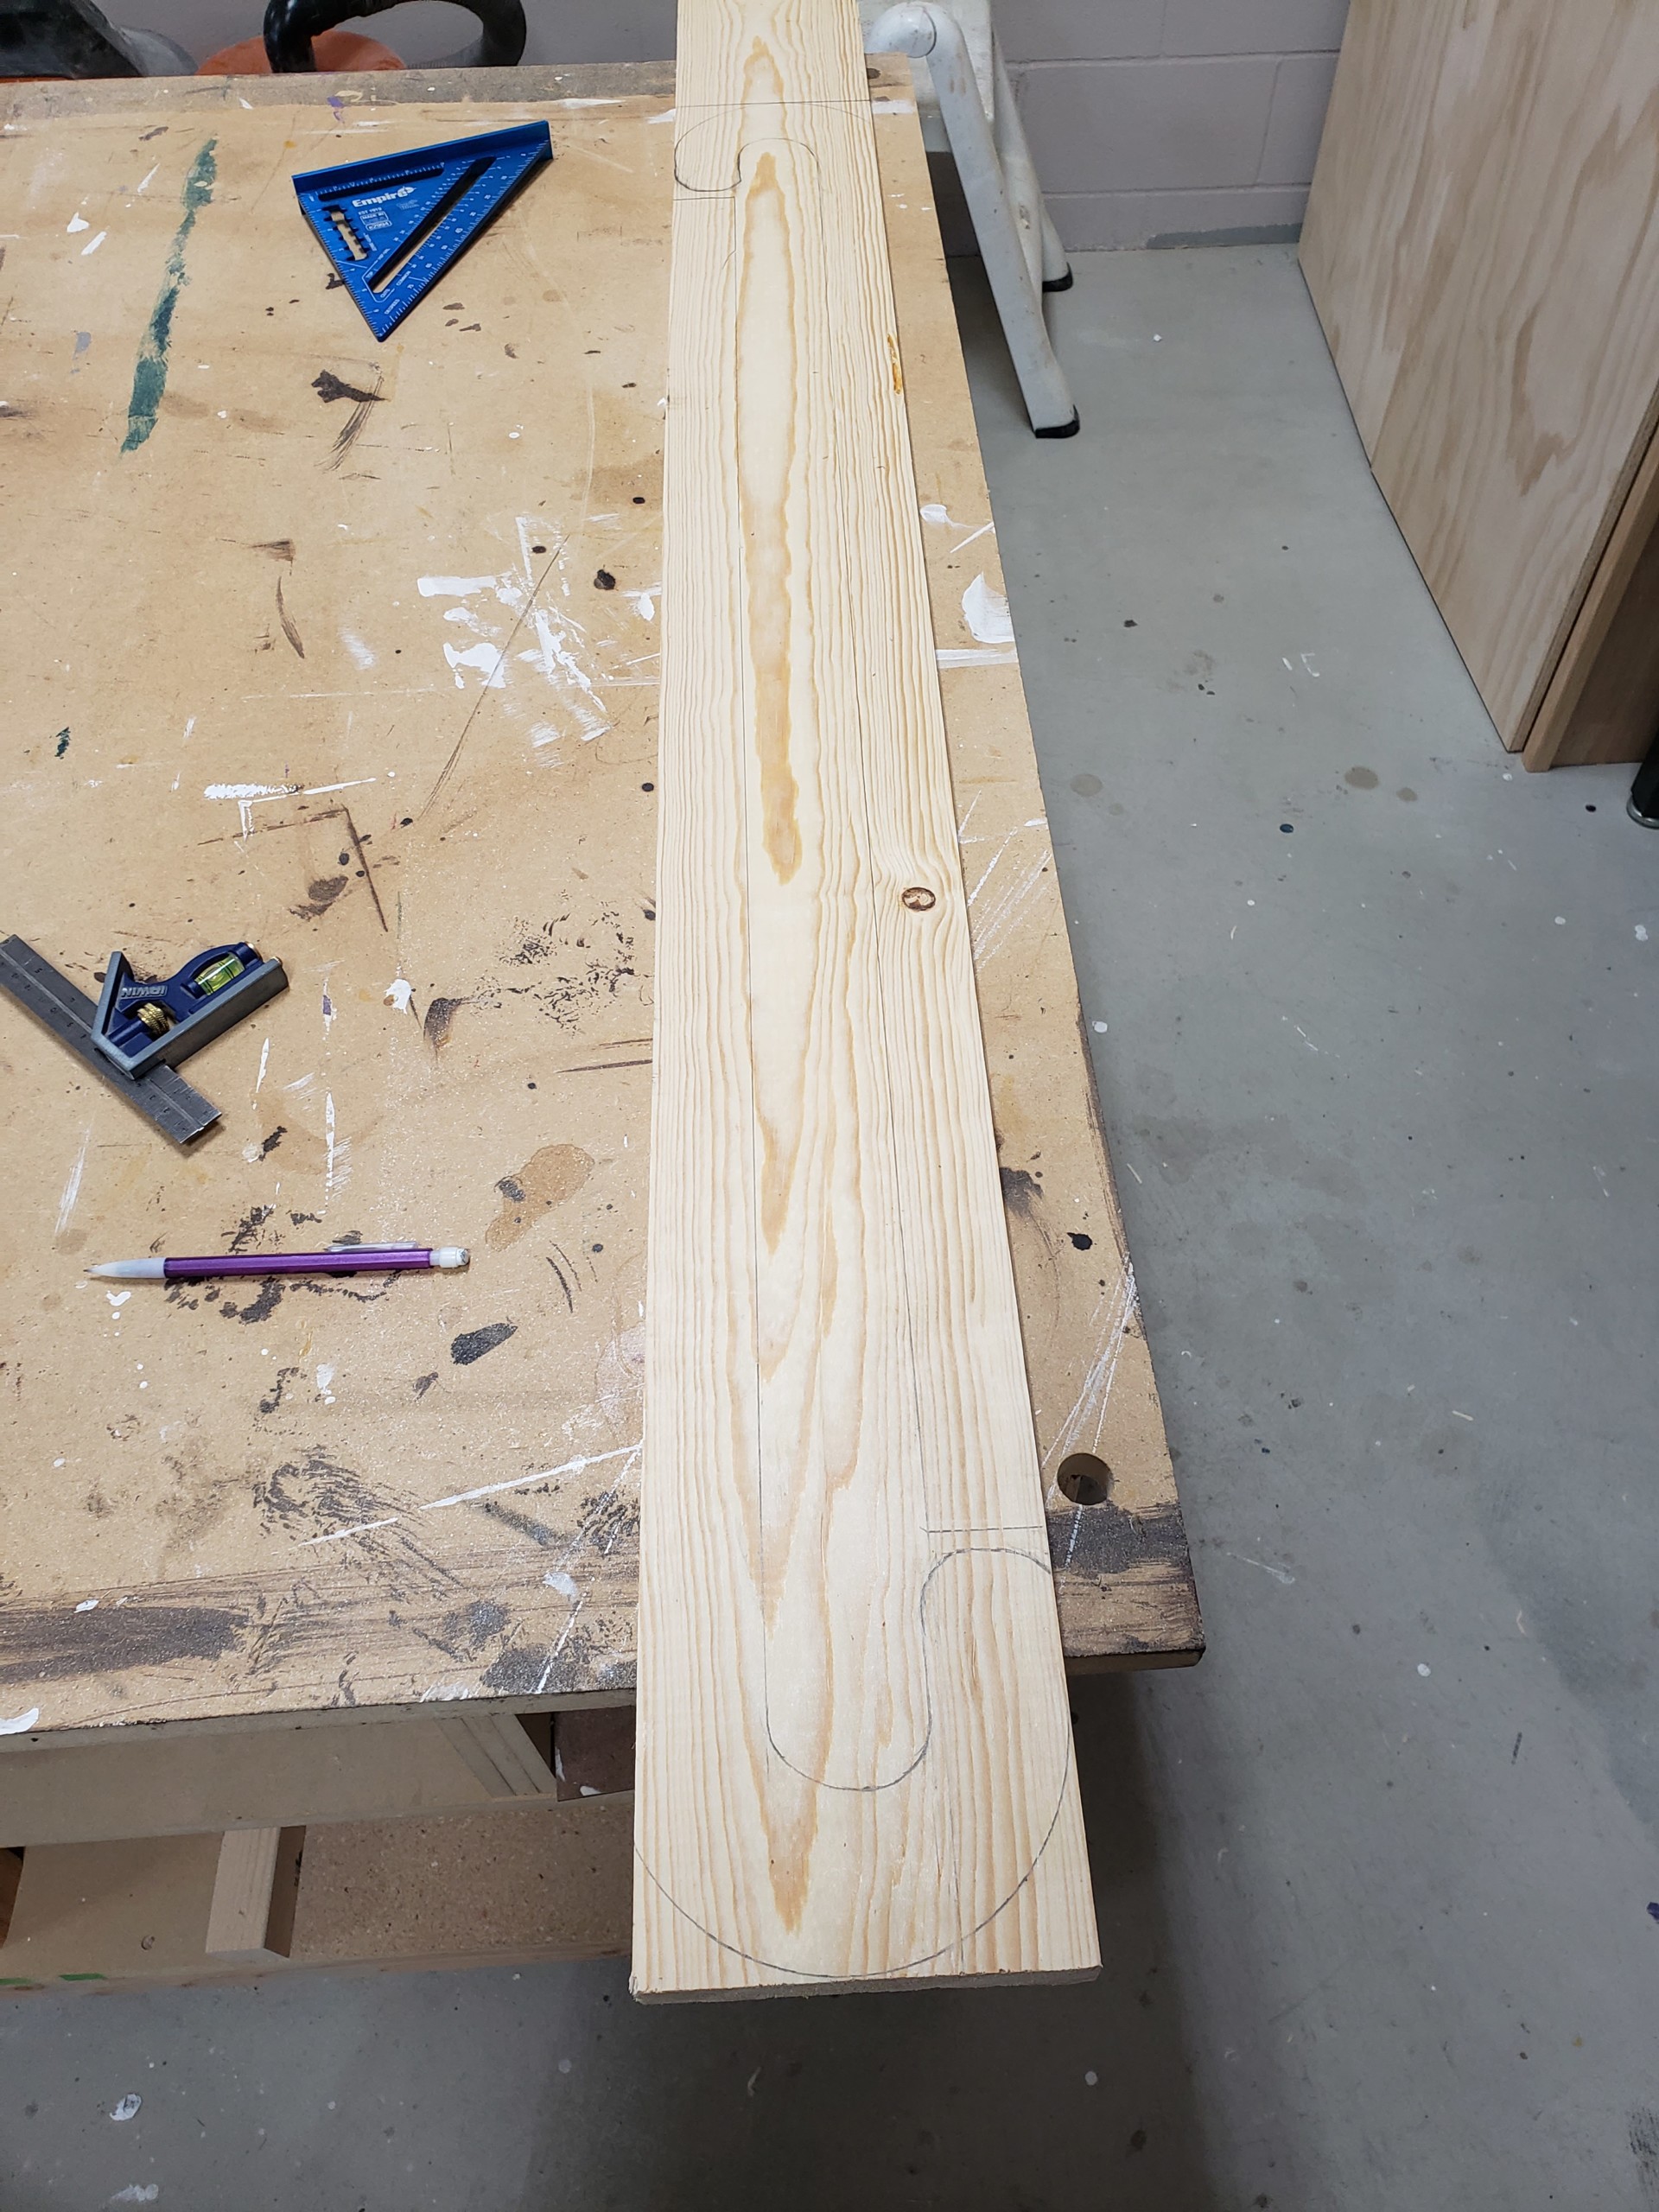
  • Find something round that is about as wide as your board. I used a cereal bowl from my kitchen.
  • Draw the top curve of the candy cane, one on each end of the board
  • Then draw the candy cane stem coming down from the curve on either side of the board.
  • By rotating the board, you should be able to fit two candy canes on one board.

Step 2: Cut out the candy canes

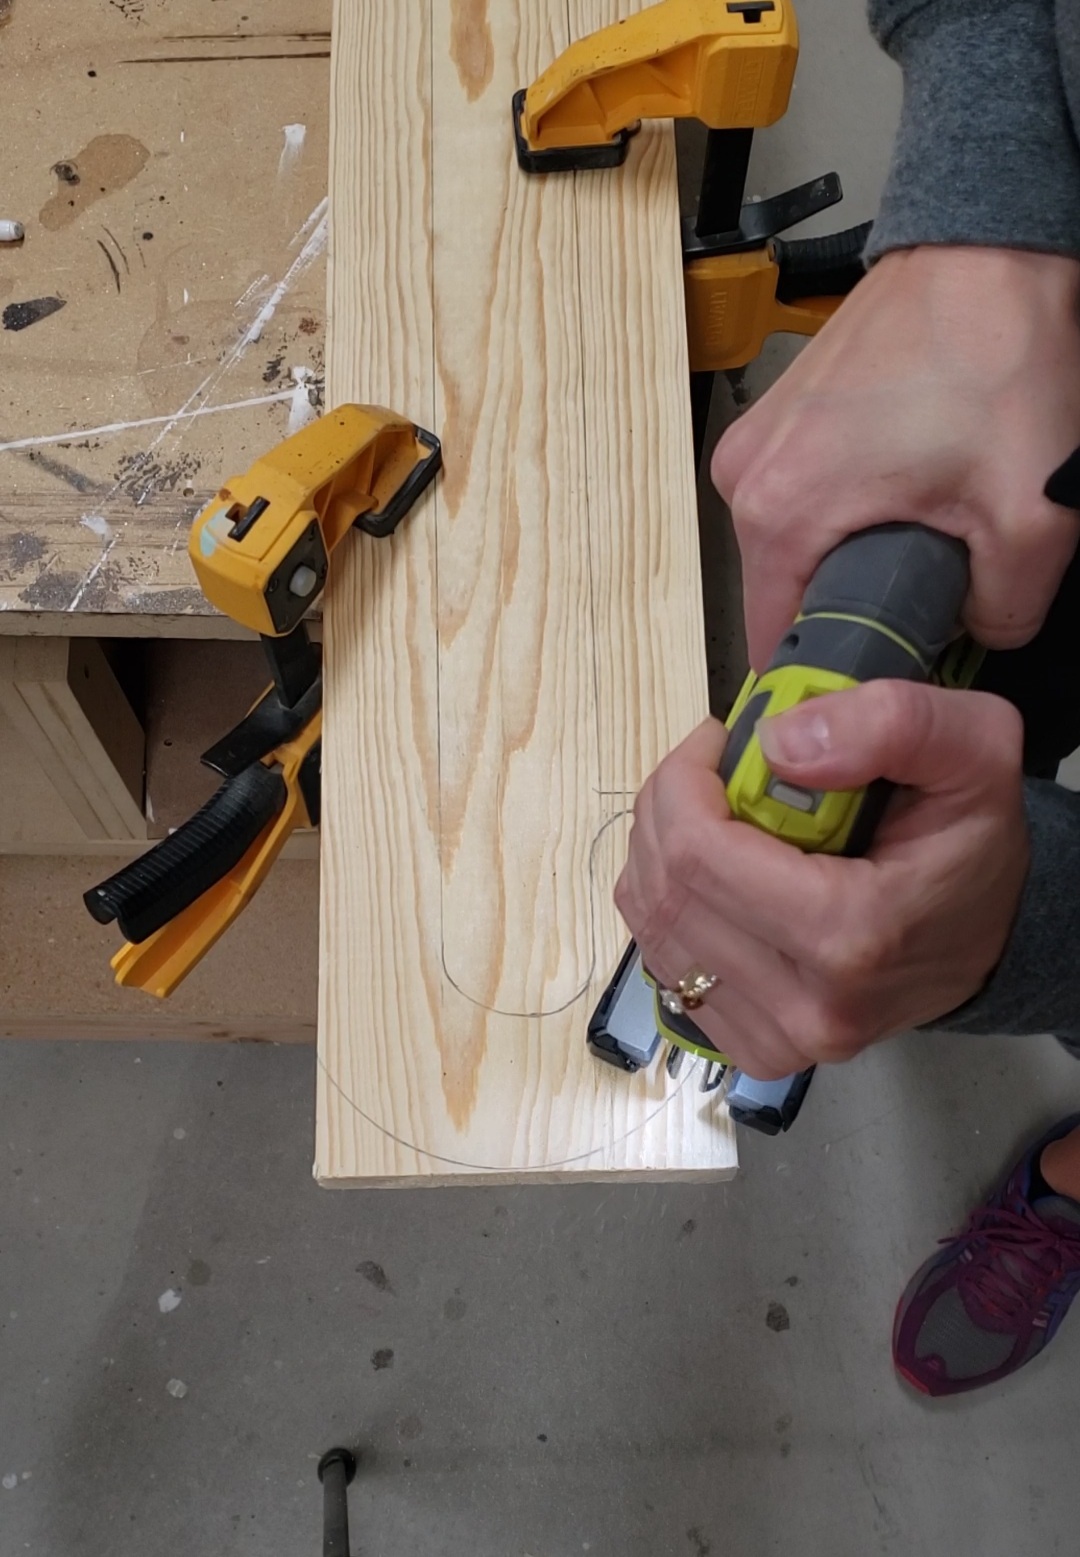
  • Clamp your board then use your jigsaw to cut out the candy cane. Mine looked pretty rough at first but no worries.

  • Sand the candy canes smooth.
  • Optional: If you have a trim router with a round-over bit, run along the edge of the candy canes to get nicely rounded edges.

Step 3: Paint

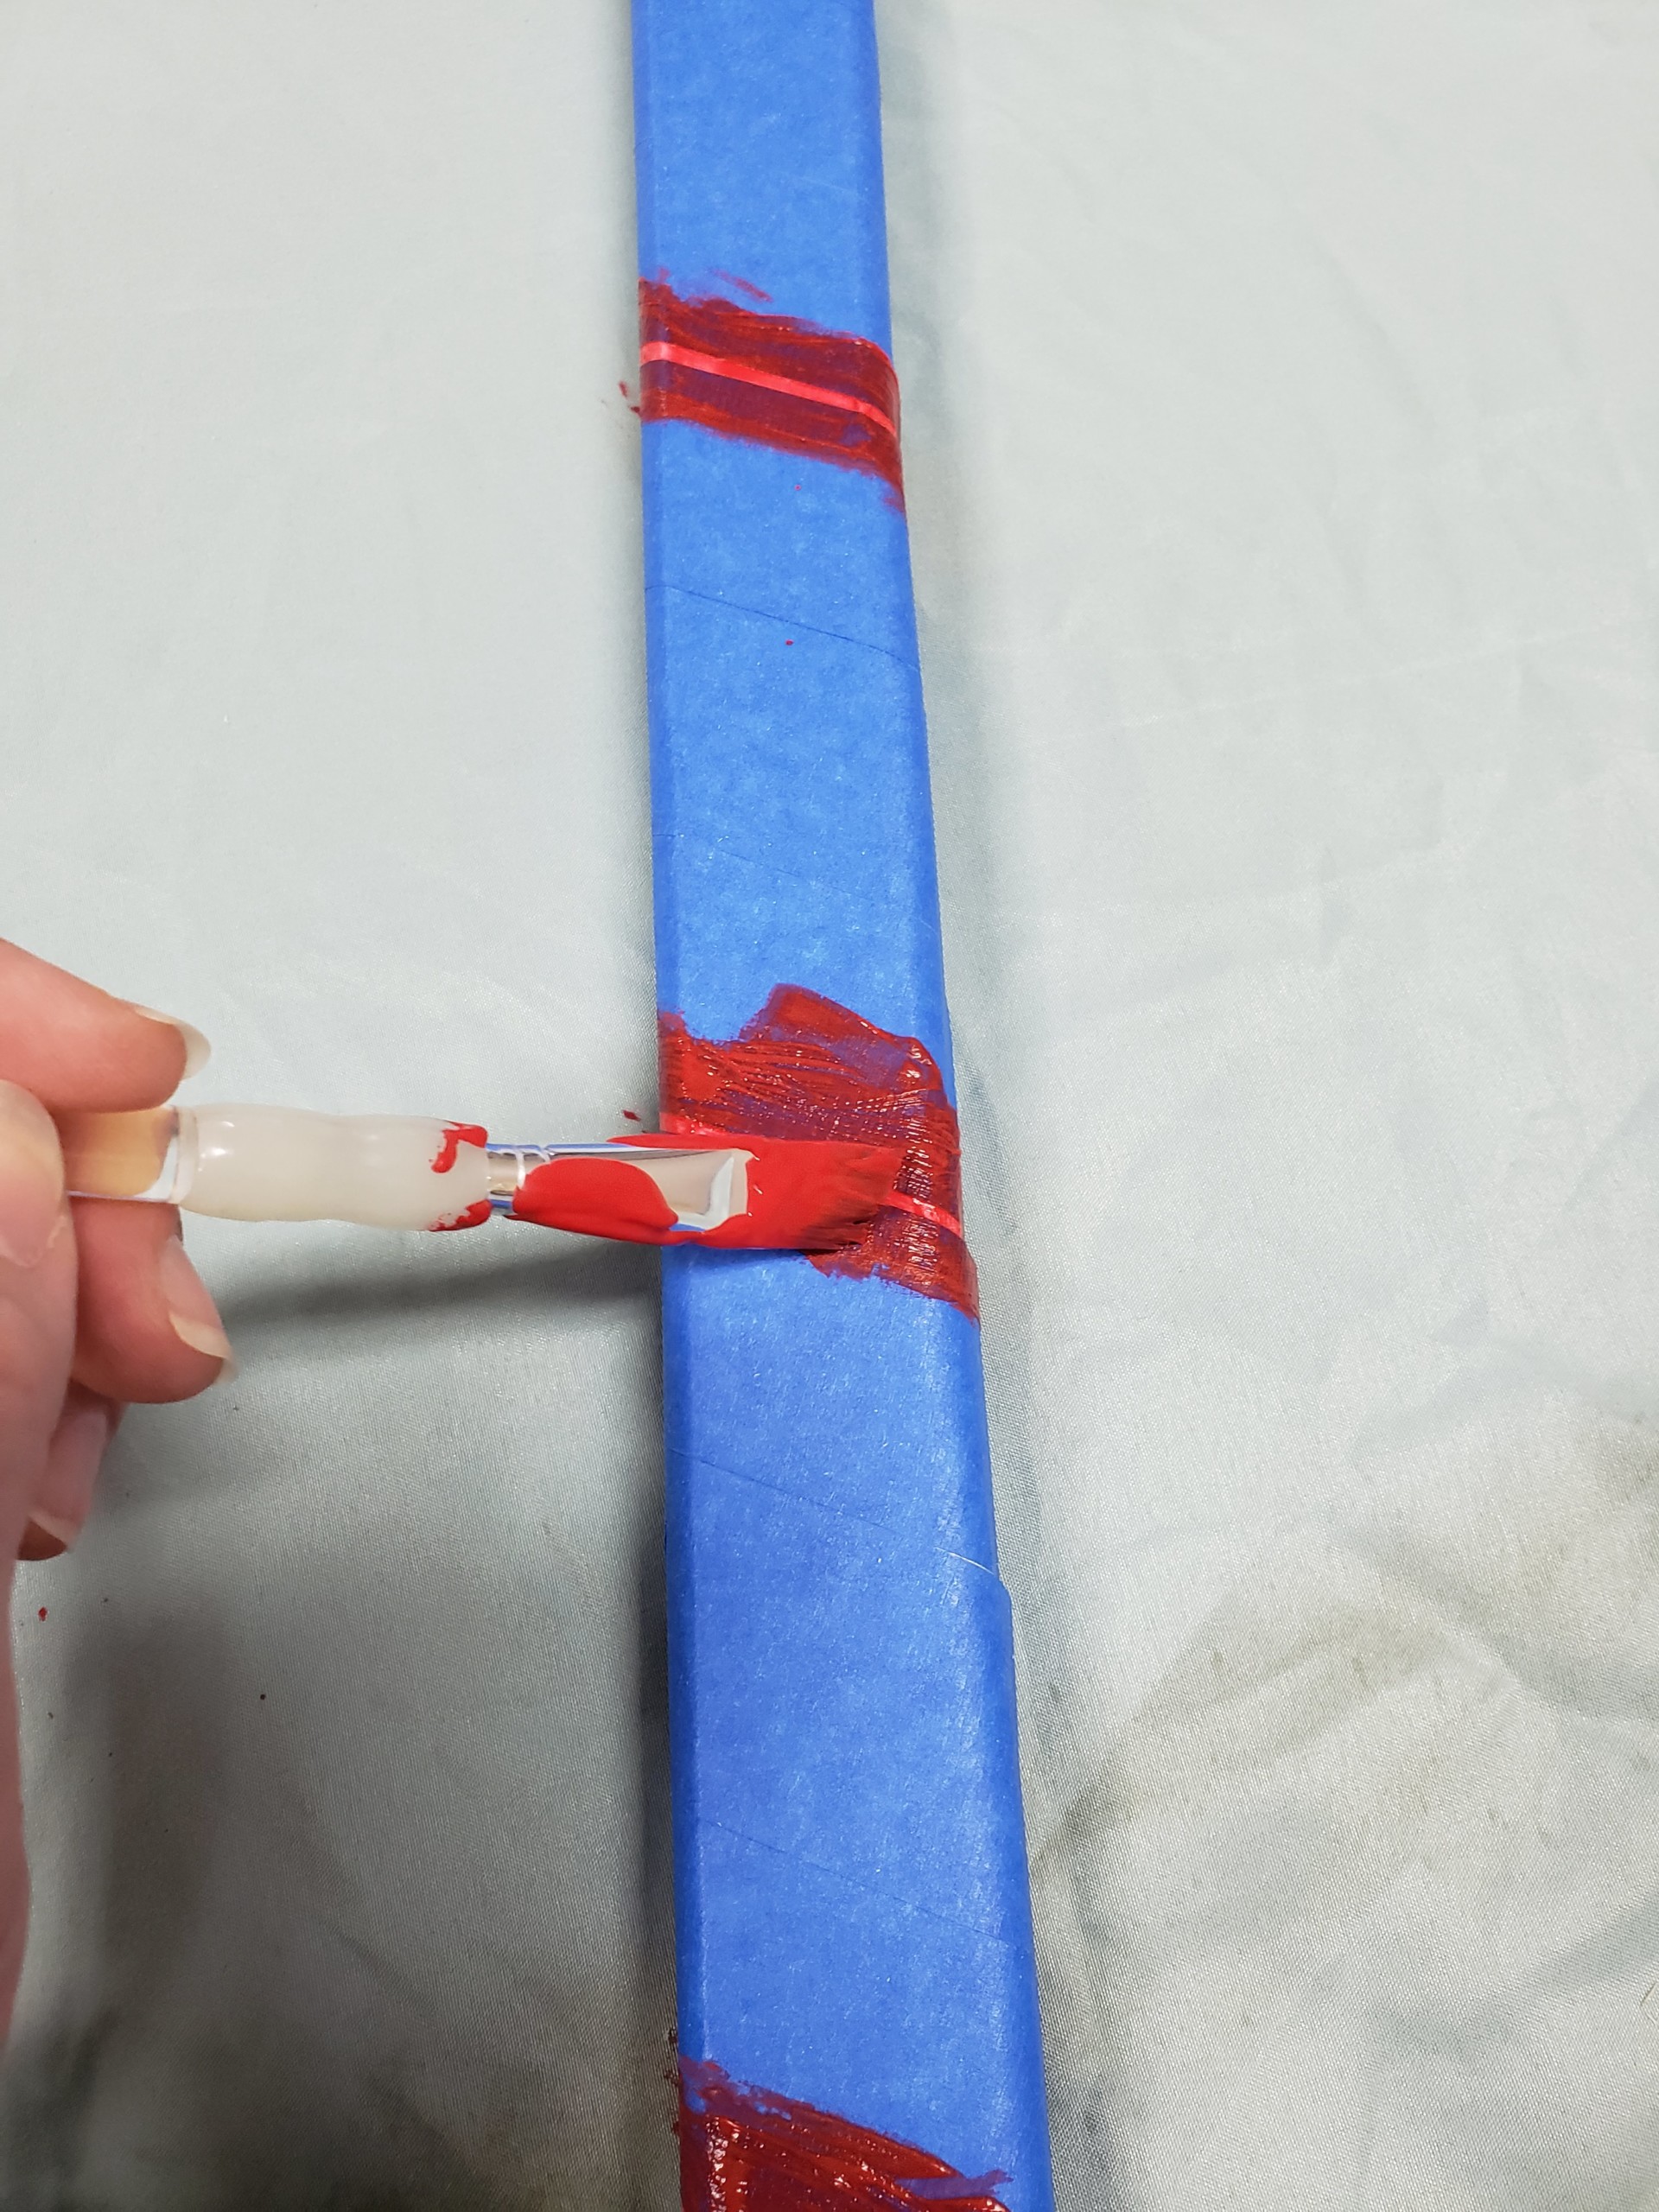
  • Paint the body of the candy canes white. (Or you can paint it red.)
  • Using painterโ€™s tape, create candy cane stripes and painted them red (or paint them white if the body is painted red).

Step 4: Cross your candy canes

  • Place your candy canes, one over the other, in the way that looks best to you and use glue and brad nails to secure them together at their intersection. (No brad nailer? You can secure with a screw through the back.)
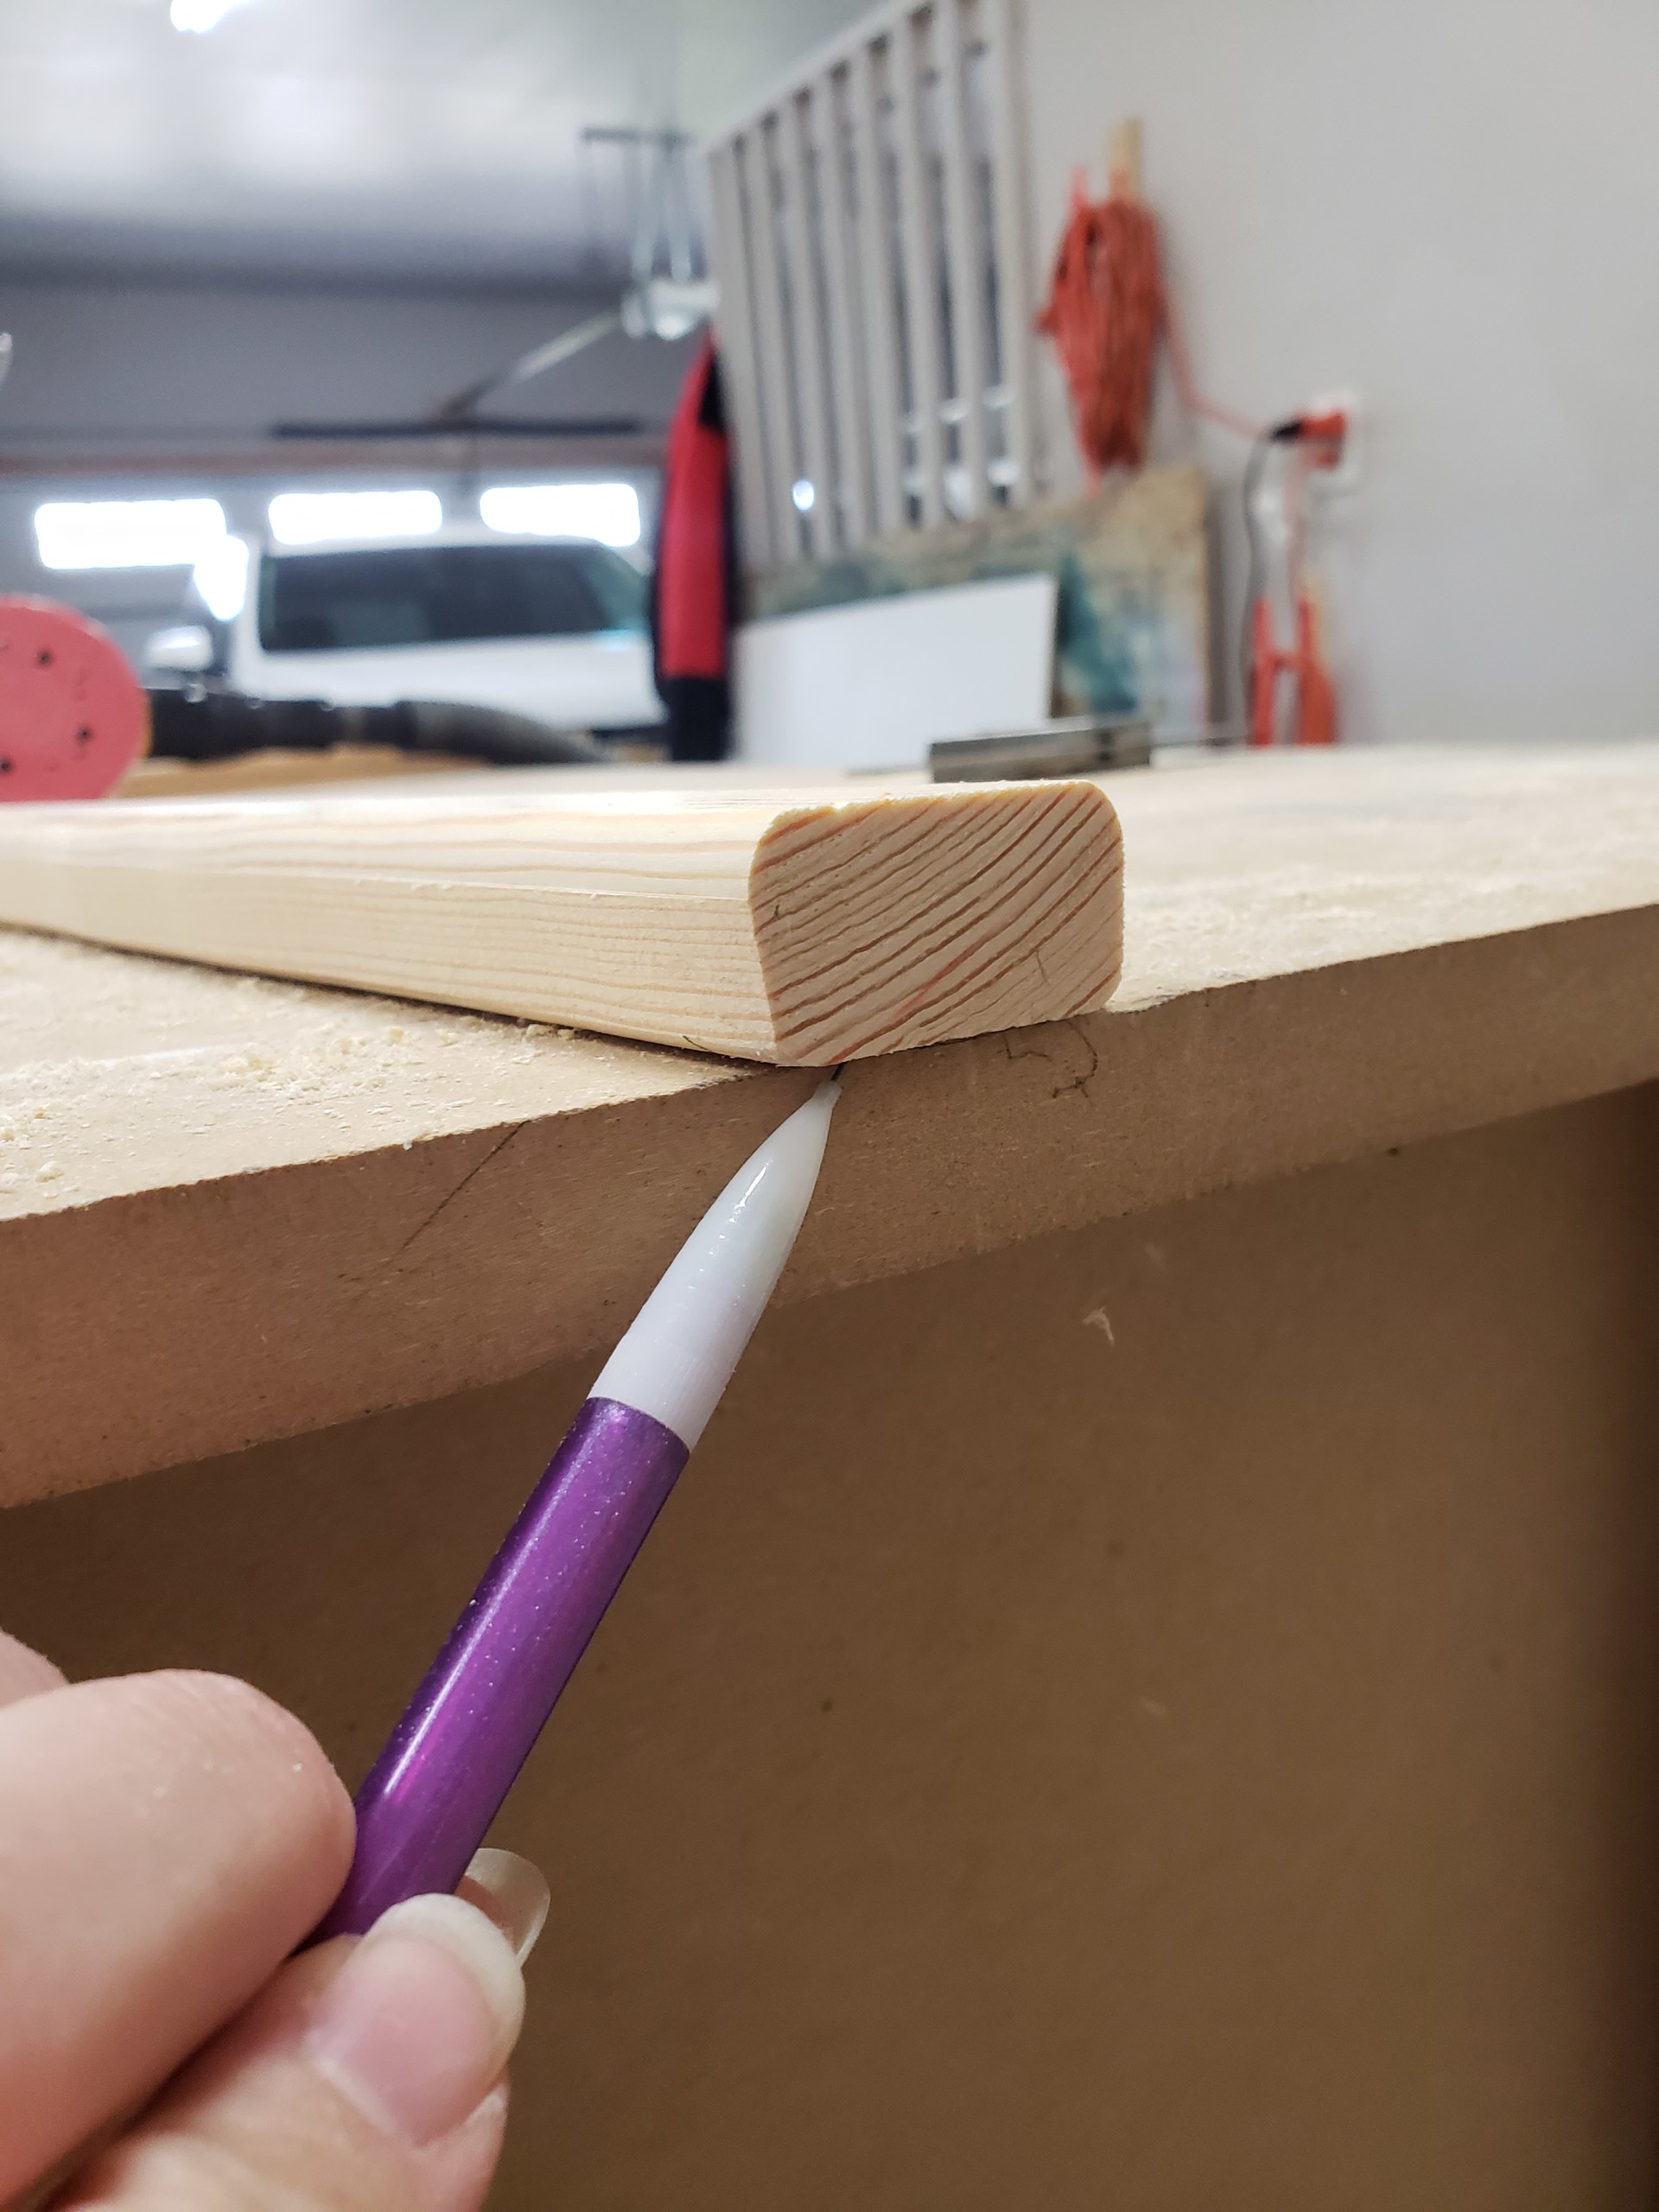
  • Cut the bottoms off at an angle so they stand up flat on the ground. (This step isnโ€™t necessary since they wonโ€™t stand on their own anyway.)

Step 5: Decorate your candy canes

  • Using ribbon, ornaments, decor sprays, or picks you have in your Christmas decor box to decorate as it suits your decor style.
  • TIP: I like to wrap a rubber band around the candy near the intersection to hold the sprays and picks. This way you can change it up yearly.

Now incorporate these candy canes into your seasonal decor. They would look cute inside or outside.

That is about as simple as it gets for a fun DIY project you can do at home. Iโ€™m sure the kids would even love to help!


Hi! Iโ€™m Kristen, from In Her Garage, and I am a self-taught woodworker and DIY fanatic from Minnesota where I live with my husband and our two daughters. ย Between being a wife, mom, and registered nurse, I try to make as much time for DIY as possible. ย ย My love for building came after our family built our current home in 2015. After we moved in, we needed furniture, and instead of spending massive amounts of money to order the pieces we wanted I decided that I would build them myself. I started with a buffet table plan from the fabulous Ana-white and quickly set out to remodel my entire home office.

Check out all of my tutorials here on the Pretty Handy Girl and head over to my site to see more tutorials for making a Toy Box, Folding Craft Table, or a Rustic Buffet Table.ย  Making something beautiful with your own two hands through a little preparation and determination is an amazing feeling and I hope to bring inspiration and know-how to those looking to tackle a big or small project.

Not interested in making these items yourself?ย  Let me make them for you!! Feel free to contact me and I would be happy to talk with you about any idea you may have for your home.

I am so glad that you found me here and please feel free to connect with me on Pinterest, Instagram, ย Facebook, and Etsy to see what I am working on right now.