Looking for a way to organize and free up floor space in your home? Expand your DIY talents and build this adorable DIY wall bookshelf.ย  I built this as the final addition to my daughterโ€™s new room and although the joinery is slightly more advanced it still easy enough for a beginner DIYer.
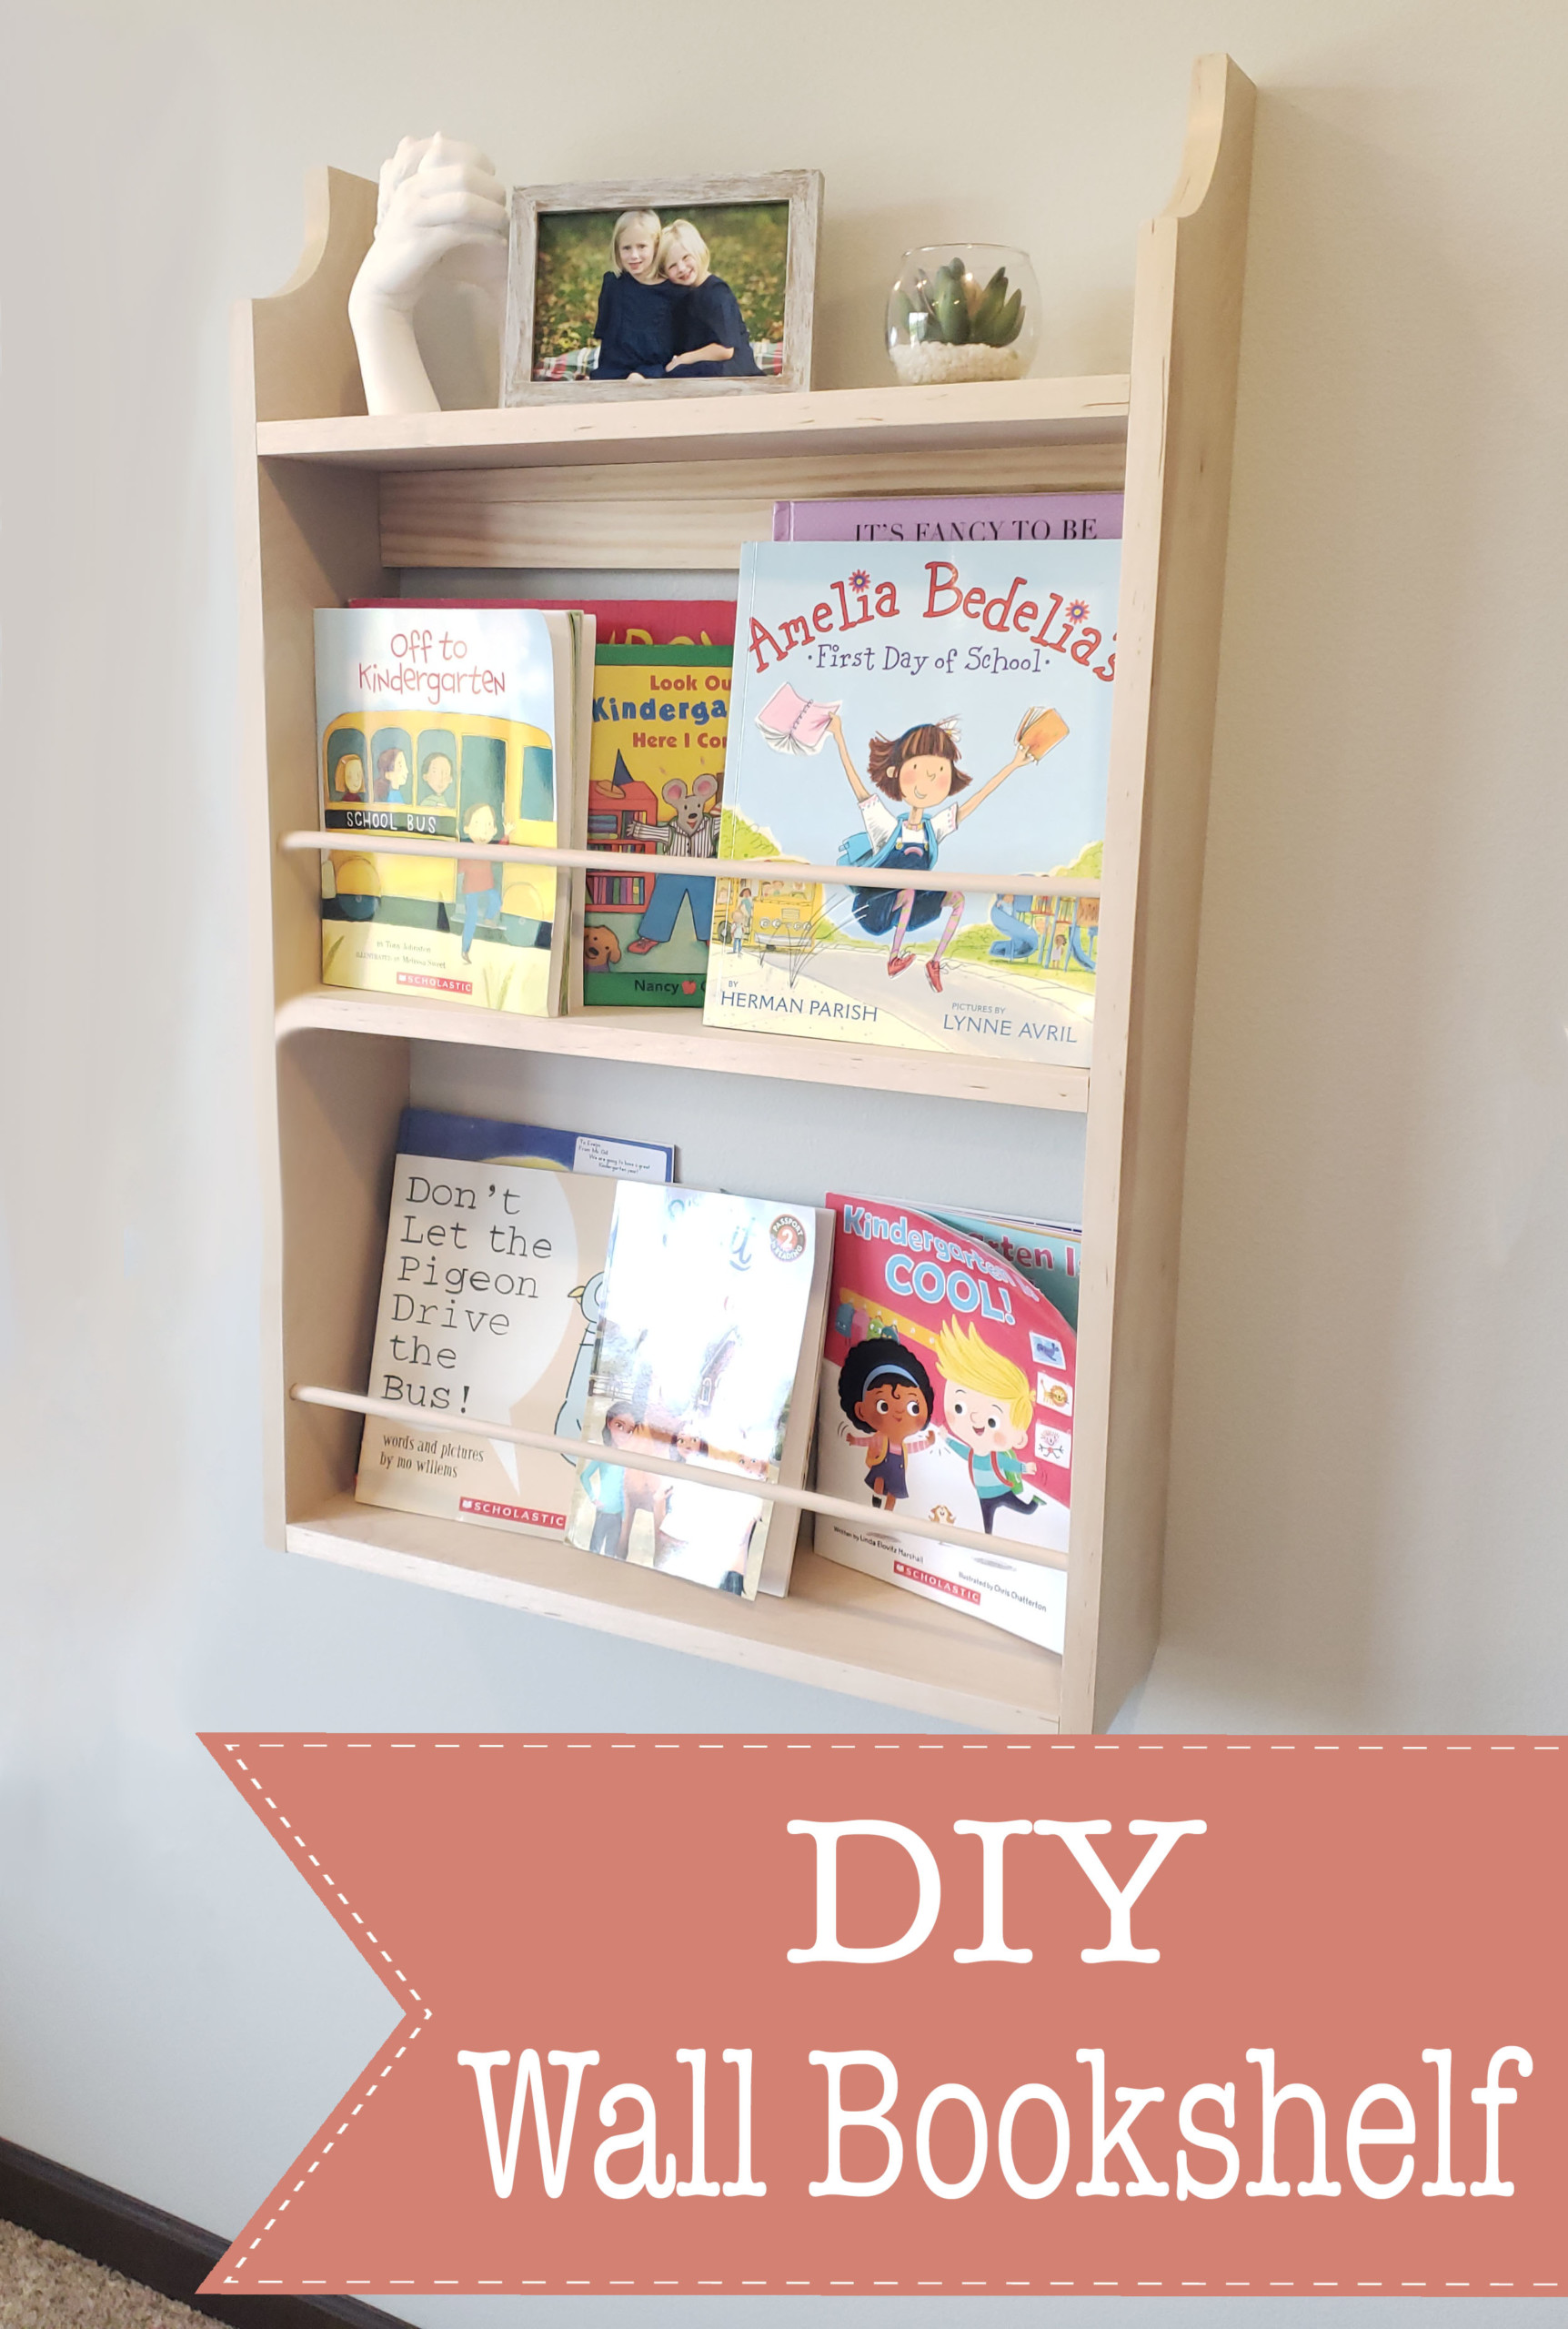
DIY Wall Bookshelf

This bookshelf was the perfect last piece that brought my daughterโ€™s room together.ย  I used dowel joinery to build the bookshelf (which may sound complicated but is fun to use and quite simple when you get the hang of it).ย  To hang this shelf on the wall I used a French cleat which again sounds more advance is a convenient and secure way to install heavy objects on a wall. So stay with me and read through the instructions. I know you can do this!ย  Letโ€™s make it!

How to Make a DIY Wall-Mounted Bookshelf

Materials:

  • 2- 1โ€ณ x 6โ€ณ x 8โ€ฒ boards
  • 1- 3/8โ€ณ x 4โ€ณ round dowel
  • 1 box 3/8โ€ณ wooden dowels
  • wood glue

Tools:

(Iโ€™ve includedย affiliate links for your convenience. I earn a small percentage from a purchase using these links. Thereย is no additional cost to you. You canย readย more about affiliate links here.)

Cut List:

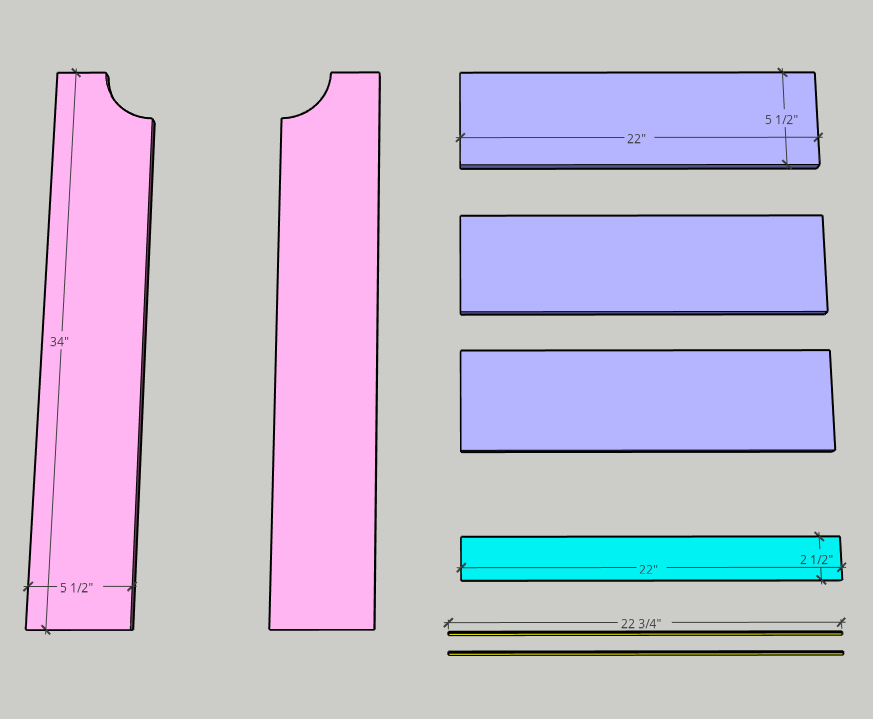
  • 2- 1โ€ณ x 6โ€ณ @ 34โ€ณ โ€“ shelf sides
  • 3- 1โ€ณ x 6โ€ณ @ 22โ€ณ โ€“ shelves
  • 1- 1โ€ณ x 6โ€ณ @ 22โ€ณ ripped to 2ยฝโ€ width โ€“ shelf cleat for hanging on the wall
  • 2- 3/8โ€ณ dowel @ 22 ยพโ€ length

Instructions:

Step 1: Cut the curve at the top of the shelf sides (optional)

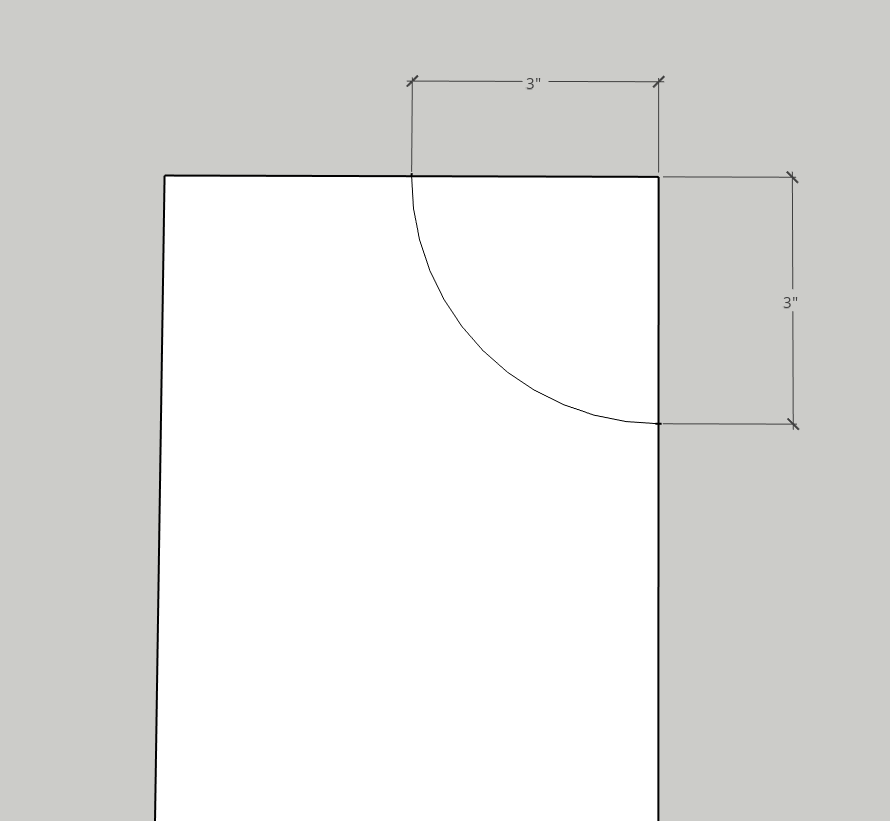
  • Measure 3โ€ณ in from the front and 3โ€ณ down from the top on both 1โ€ณ x 6โ€ณ side pieces and create a curve connecting the two marks. (I used a plastic bowl that I found in my kitchen as a stencil.)

  • Using your jigsaw, carefully cut along the curved line youโ€™ve drawn until it is cut away.
  • Repeat for both sides. Sand the curve smooth with sandpaper.

Step 2: Measure and mark dowel placement on the bookshelf sides

  • This is the step where the 6โ€ณ combination square is a lifesaver!
  • Lay the two side boards next to one another on your work surface so they are a mirror image of one another, insides facing up. (Like opening a book.)
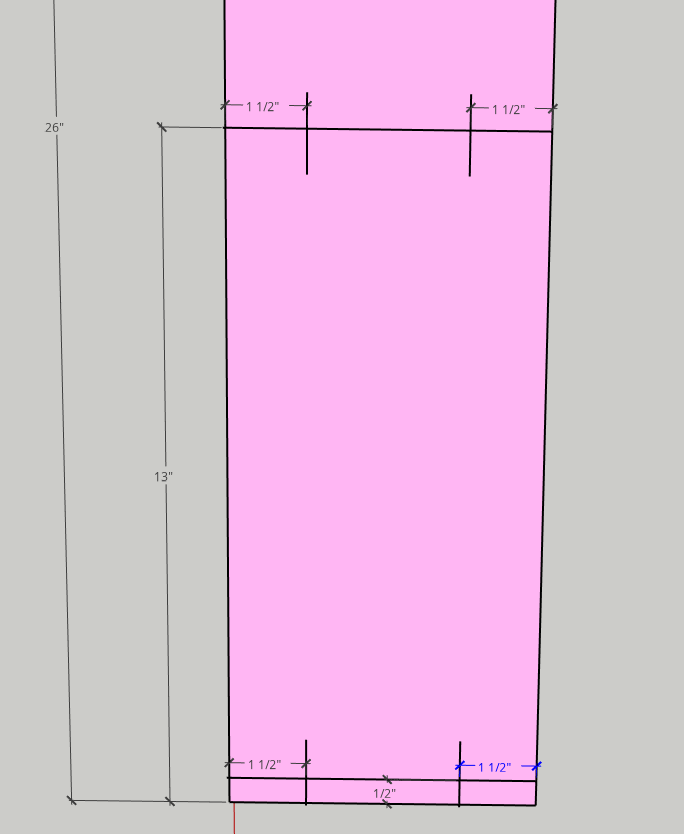
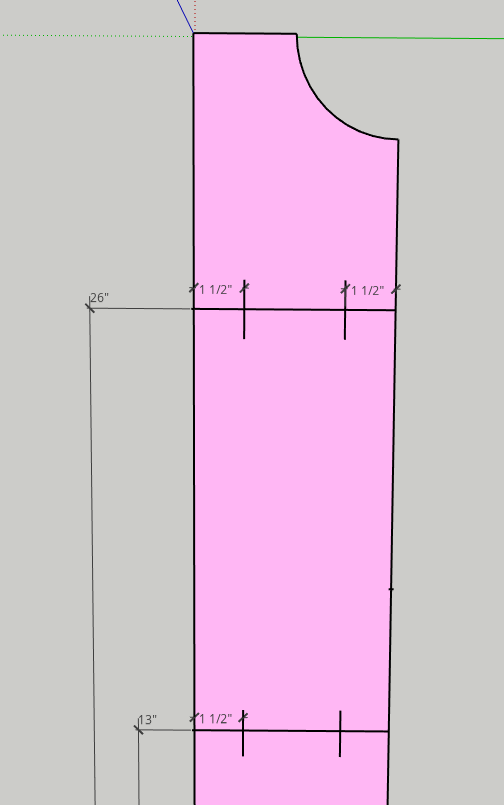
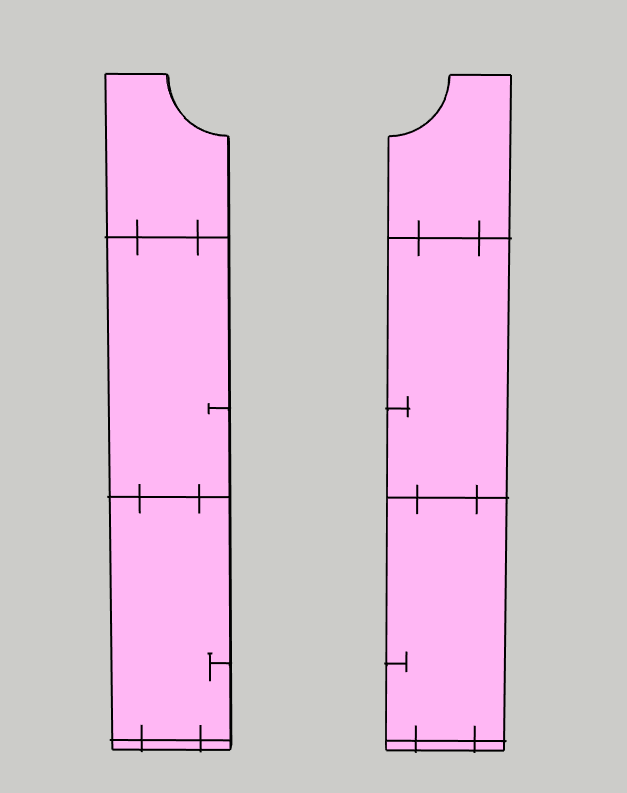
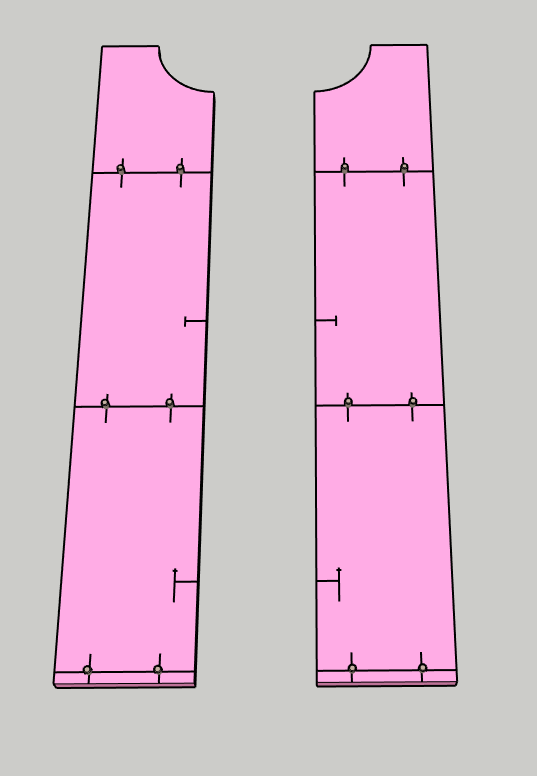
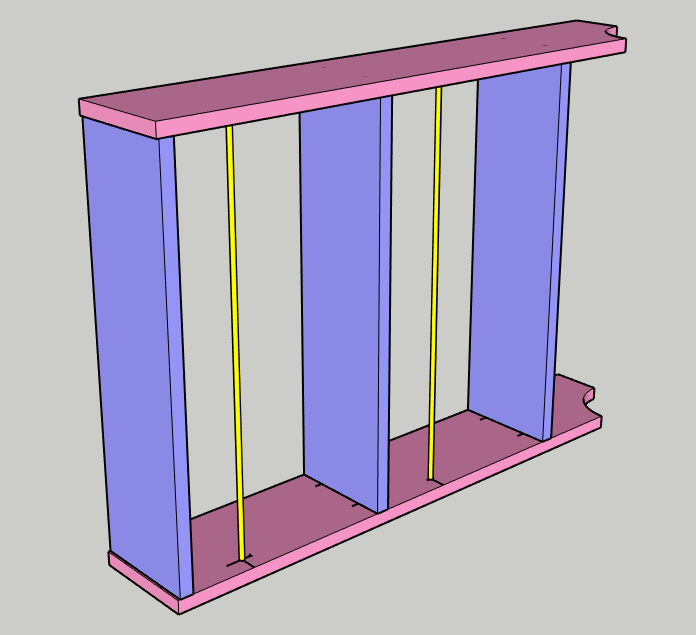
  • Use the diagram below for measuring and marking the placement of the dowels.

ย 


  • Each shelf dowel will be 1ยฝโ€ in from the front and back of the board and measure up 1/2โ€ณ, 13โ€ณ, and 26โ€ณ from the bottom of the board as shown.
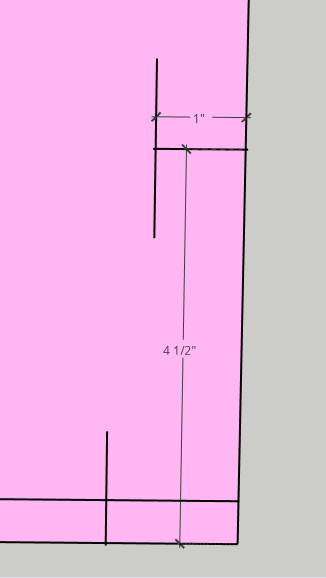
  • Both long dowels will be measured and marked 1โ€ณ in from the front of each side and 4 ยฝโ€ and 17 ยฝโ€ from the bottom of the sides as shown

  • Repeat these markings for both sides of the bookshelf.
  • You should have a total of 16 markings. 8 for each side. 6 for the shelf dowels and 2 for the long dowels.

Step 3: Drill holes for dowels

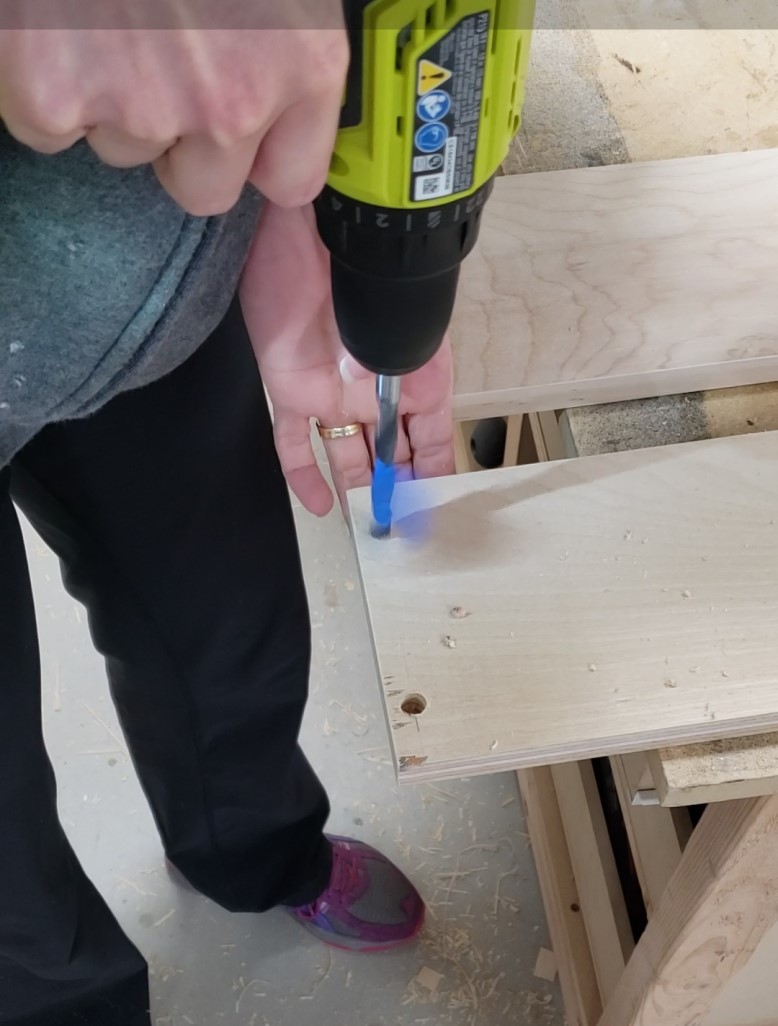
  • Using your 3/8โ€ณ drill bit place a piece of painterโ€™s tape on the drill bit to mark a depth of 3/8โ€ณ.ย  You donโ€™t want to drill through the sides of the bookshelf, just half-way.

  • With the drill bit securely in your drill (and material clamped to your work surface), drill straight down into each marking of the side board until the drill bit has reached the depth of the tape.

  • You will create 16 holes in total, 8 for each side.

Step 4: Measure and mark dowel placement in shelf boards

  • Using your combination square, mark the center of each side edge of the 3 shelf boards
  • Next measure and mark 1 ยฝโ€ in from the front and back of the 3 boards as shown. Make this same 1 ยฝโ€ mark on the face of the boards as well for reference when using your doweling jig.

Step 5: Drill dowel holes in shelf boards

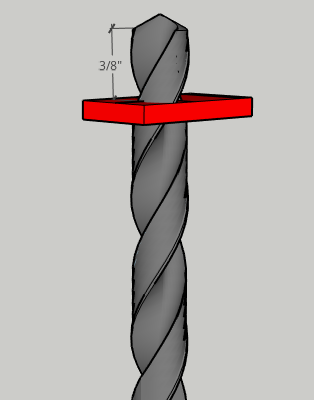
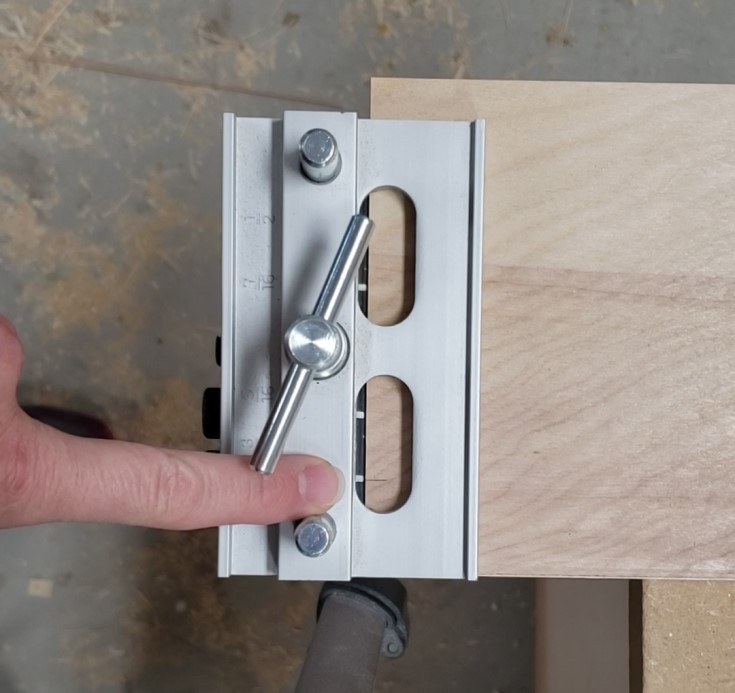
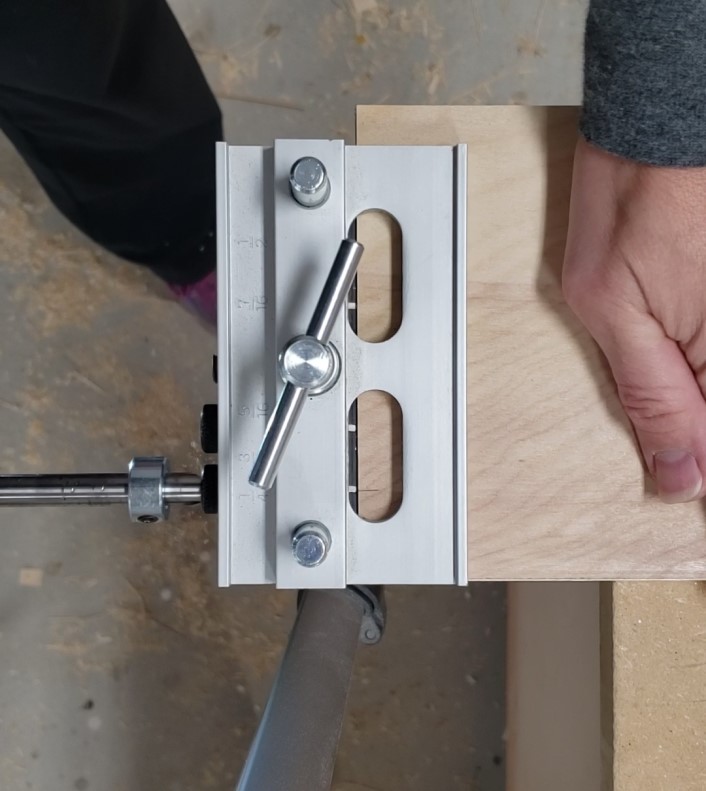
  • Iโ€™ll let you in on my secret! I use my Kreg pocket-hole bit for this step because it is 3/8โ€ณ, it makes drilling into the end grain much easier and has a collar that can be set to the depth I want!
  • The depth of your hole = length of the dowel minus 3/8โ€ณ (the depth of the hole in the side boards.)
  • Now, using your doweling jig and the reference marks youโ€™ve created on the face of the board you can go ahead and drill the 12 holes to the depth determined above into the sides of the shelves.

Step 6: Dry fit!

  • It is important when using dowels for joinery that you complete a dry fit test of the project first.
  • You want to make sure the holes are large enough and deep enough for the dowel and that all pieces can securely fit together without gaps.

Assemble the Shelf!

Step 7: Install shelf dowels and shelves

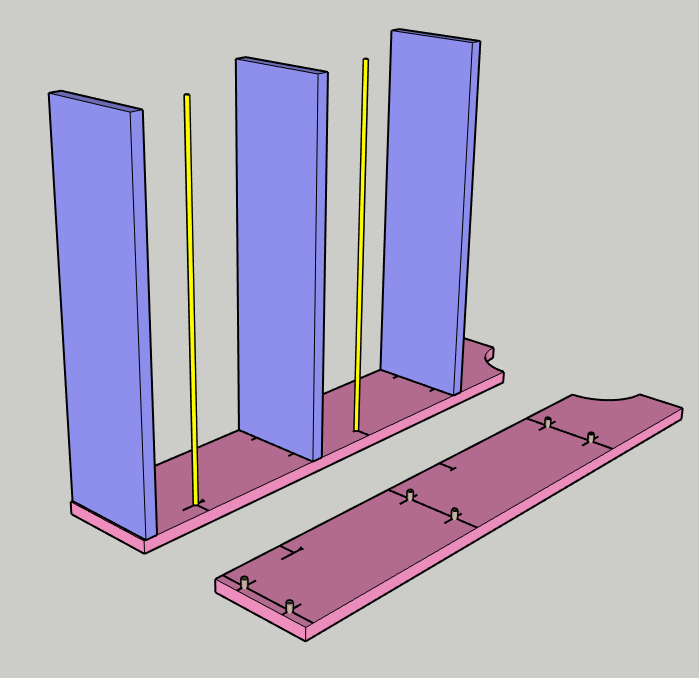
  • Using wood glue install all 12 shelf dowels into the holes of both side boards.
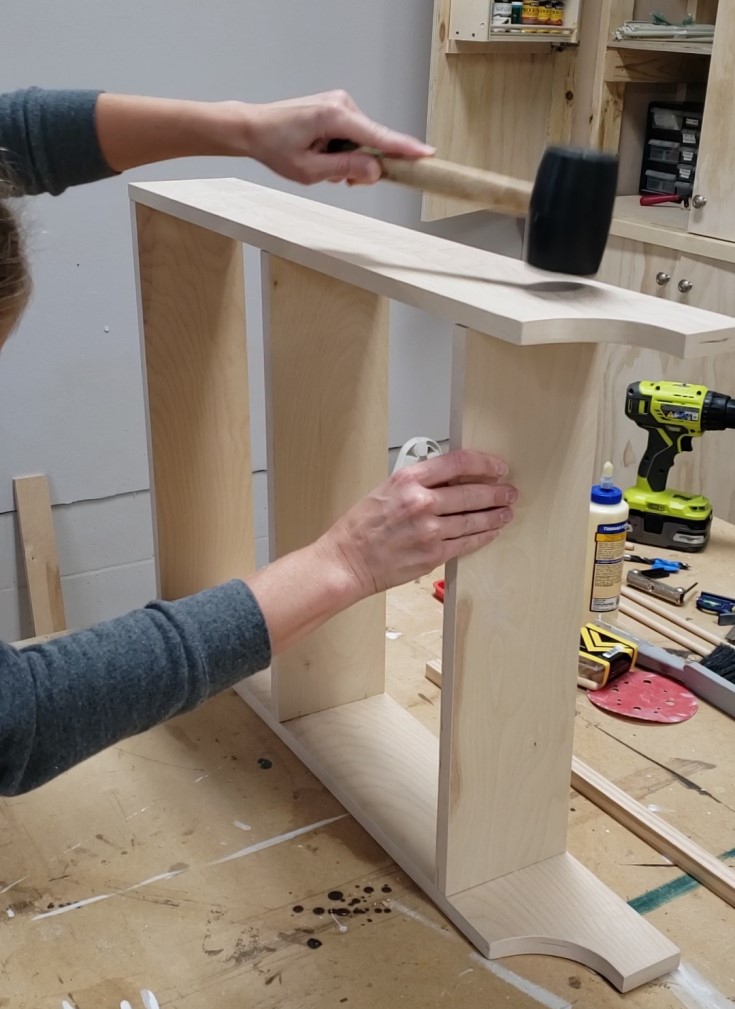
  • Next, using wood glue, install the shelves over their respective dowels and gently tap into place using a rubber mallet.

ย 

Step 8: Install long dowels

  • Place a drop of glue in both holes for the long dowels and insert dowels

Step 9: Install the remaining side board

  • Carefully place the remaining side board over the shelves and long dowels have already been installed.
  • Align the dowels and long dowel holes and gently tap the side into place with a rubber mallet.

  • Check for square and clamp into place to allow the glue to dry.

Note: As you can see I forgot to insert the long dowels during assembly. I was able to add them later and I will have a scar to show for it!

Step 10: Hanging the shelf on the wall

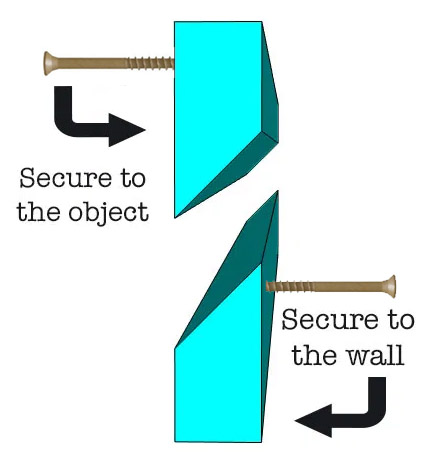
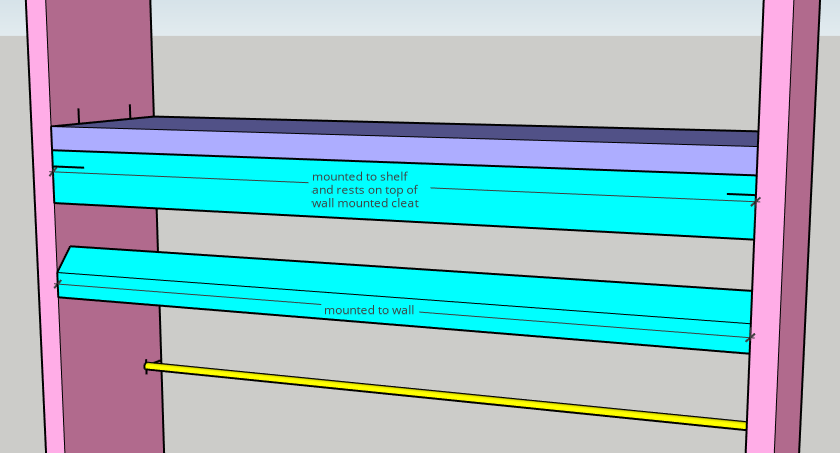
For this step, I chose to use a French cleat. I wanted the shelf to be flush to the wall and very secure which is what makes a French cleat the best choice.ย  View the basic diagram below or for step by step instruction check out How to Make and Use a French Cleat.

DIY French Cleat


I used pocket screws to secure the top portion of the French cleat to the bookshelf.

Once the French cleat is secured to the bookshelf and the wall you will be able to hang the bookshelf securely on the wall and place as many books in it as needed.ย  My daughter loves her new bookshelf and she always feels so special when Mom makes something just for her.

I hope this tutorial proves helpful in adding a little style and organization to your home.

Hi! Iโ€™m Kristen, from In Her Garage,ย and I am a self-taught woodworker and DIY fanatic from Minnesota where I live with my husband and our two daughters. Between being a wife, mom and, registered nurse, I try to make as much time for DIY as possible. My love for building came after our family built our current home in 2015. After we moved in, we needed furniture and instead of spending massive amounts of money to order the pieces we wanted I decided that I would build them myself. I started with a buffet table plan from the fabulous Ana-white and quickly set out to remodel my entire home office.

Since then I have started a side business building furniture for the people in my community. I love hearing my clients talk about the pieces they wish they had whether it be aย rustic buffet table, aย one drawer side table, or aย toy boxย and then making it a reality for them. While starting my small business it made perfect sense that I would document my building journey so I simultaneously launched theย In Her Garage blogย and I love sharing my plans, tips and tricks.

Making something beautiful with your own two hands through a little preparation and determination is an amazing feeling and I hope to bring inspiration and know-how to those looking to tackle a big or small project.
I am so glad that you found me here and please feel free to connect with me onย Pinterest,ย Instagram, Facebook, and Youtube to see what I am working on right now.


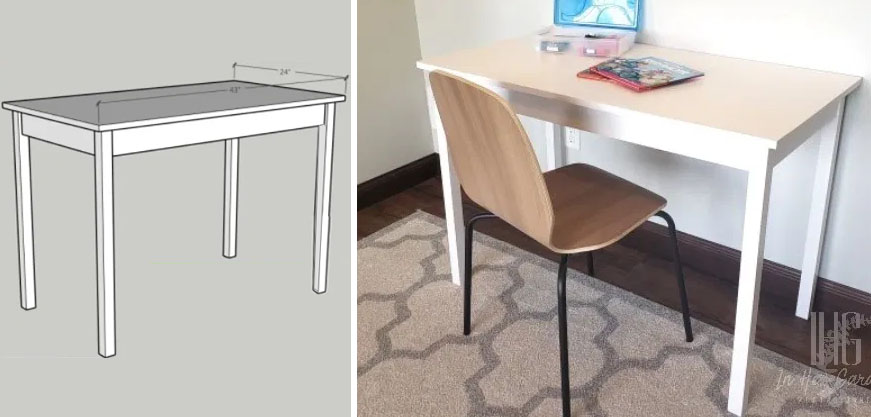
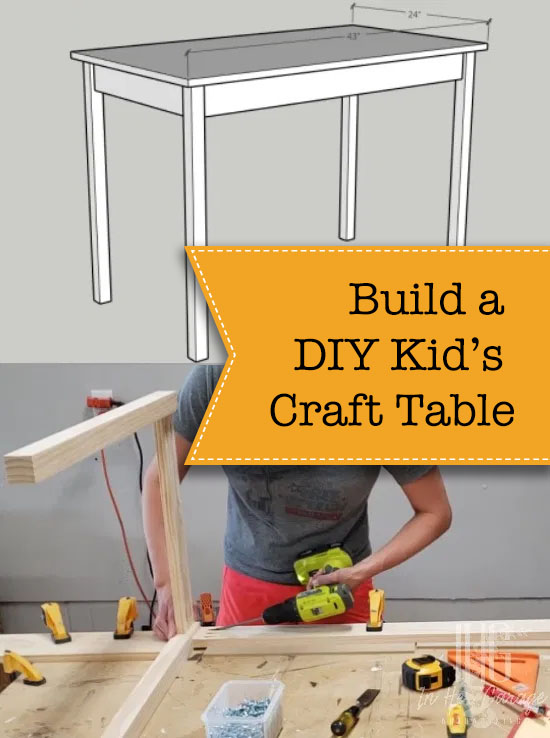
Have the kids taken over your kitchen table or island? Need somewhere to let the kids get creative? Today I am going to show you how to make a simple DIY kidโ€™s craft table (or desk). Letโ€™s get building.

Build a DIY Kid's Craft Table

DIY Kidโ€™s Desk and Craft Table

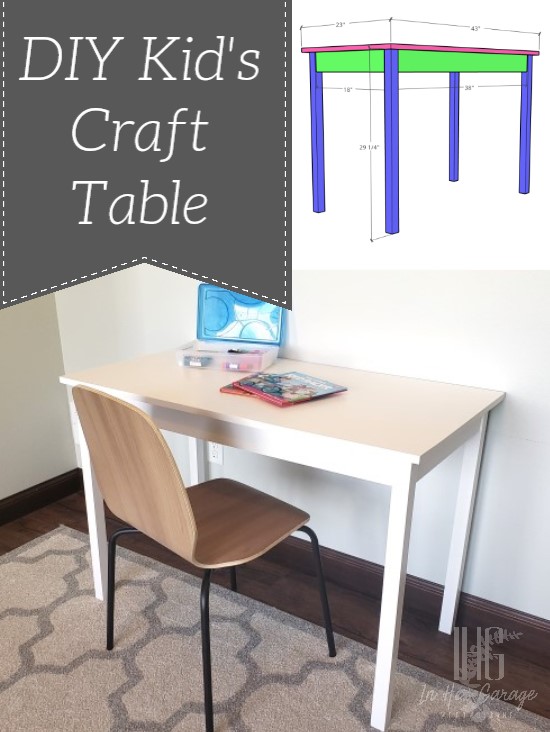
If your children are going to be home this fall for distance learning or you just want a spot they can call their own, then it is time to get a space ready for them!! This DIY Kidโ€™s Craft Table is the perfect size for whatever your child will need and it is small enough to fit in a spare corner in your home. Letโ€™s make it!

I made this particular table for a client and it measures 30โ€h x 43โ€w x 23โ€d but you can modify these measurements to fit your needs. Of course, the quality of lumber you use is your choice but I used clear pine from my local big box store because it paints better than using common pine boards. It may be more expensive but the boards tend to be straighter, it saves time on sanding, and I feel it yields a better-finished product. It doesnโ€™t matter what wood you use as long as you love it.

Materials:

(Iโ€™ve includedย affiliate links for your convenience. I earn a small percentage from a purchase using these links. Thereย is no additional cost to you. You canย readย more about affiliate links here.)

Tools:

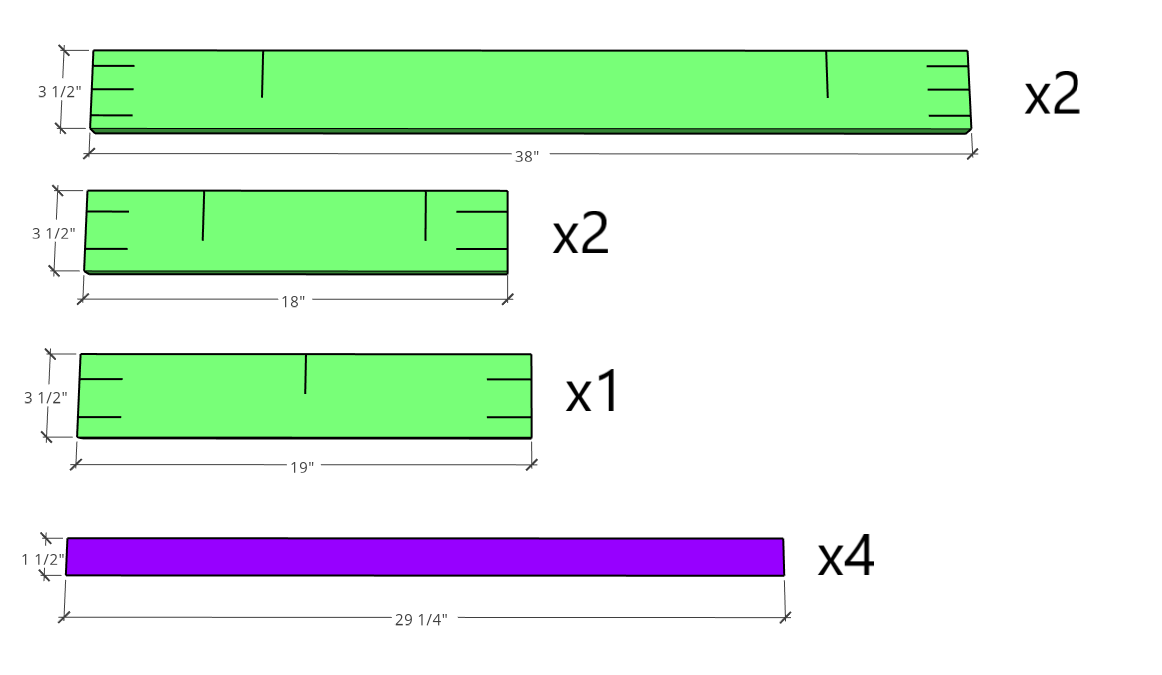
Cut list and pocket-hole placement:

  • 4- 2×2 @ 29 ยผโ€
  • 2- 1×4 @ 38โ€ (3 pocket-holes in each end)
  • 2- 1×4 @ 18โ€ (2 pocket-holes in each end)
  • 1- 1×4 @ 19โ€ (2 pocket-holes in each end)
  • 3/4โ€x 43โ€x 23โ€ birch plywood

Step 1: Sand table components

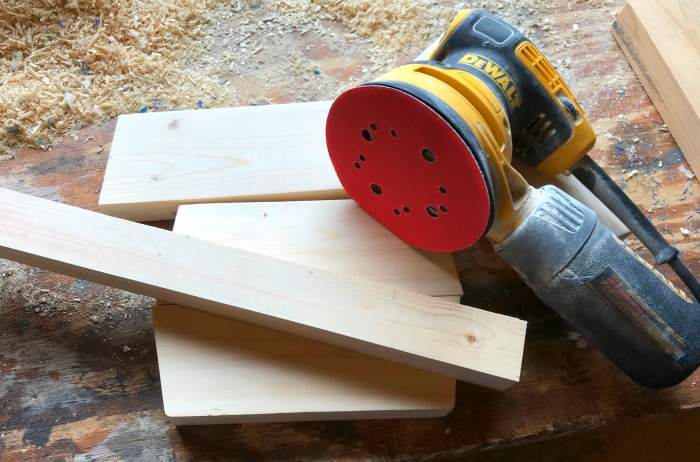
  • I know it seems odd to start with this step but trust me when I tell you it is much easier to sand these boards before they are in place. Depending on how rough your lumber is, begin using 60-80 grit sandpaper and incrementally work your way up to 220 grit sandpaper.ย  I chose to use clear pine found at my local big box store so I was able to start with 120 grit sandpaper, which cut down my sanding time. This makes the extra money spent, well worth it!

Step 2: Assemble both table sides

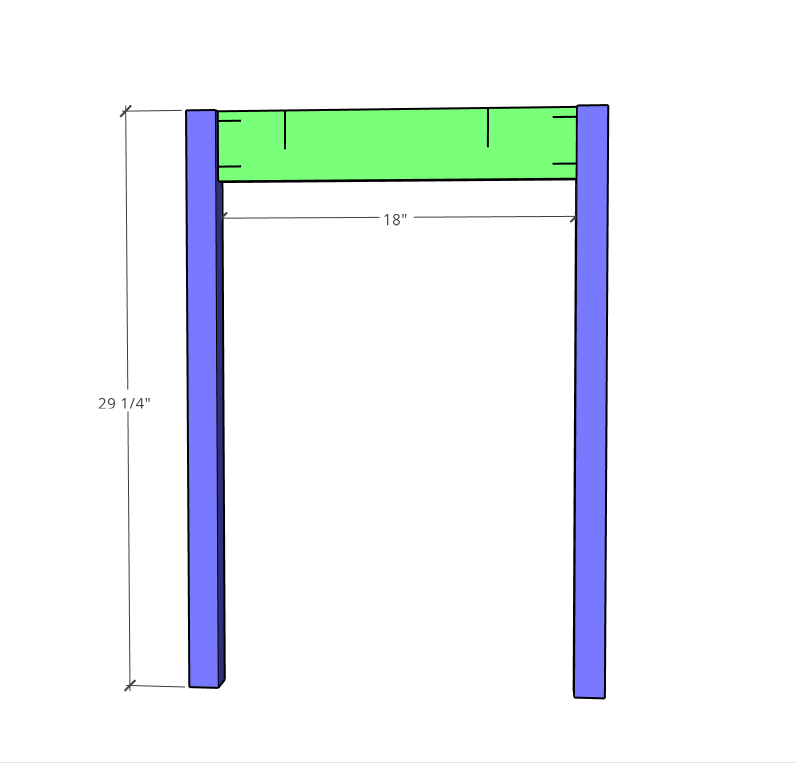
  • Sandwich one 1 x 4 x 18โ€ (apron) board between two 2 x 2 x 29 ยผโ€ (leg) boards. Pocket-holes should be facing up.
  • To add a little detail, place a ยผโ€ piece of scrap beneath the 1×4 board to inset it slightly. This will create a shallow reveal looks nice and also gives you a little grace because now the three boards donโ€™t have to be flush to the same surface perfectly.
  • Clamp the legs and apron boards together and join them using wood glue and 1 ยผโ€ pocket screws.
  • Repeat these steps for the other side of the table.

Step 3: Attach the front and back table aprons

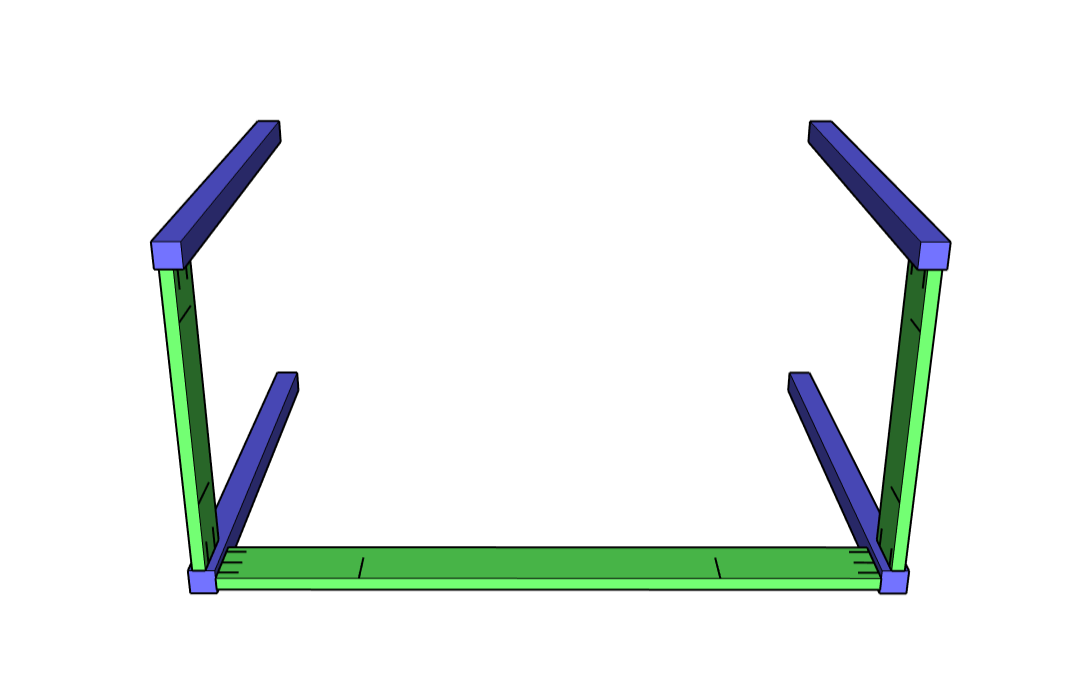
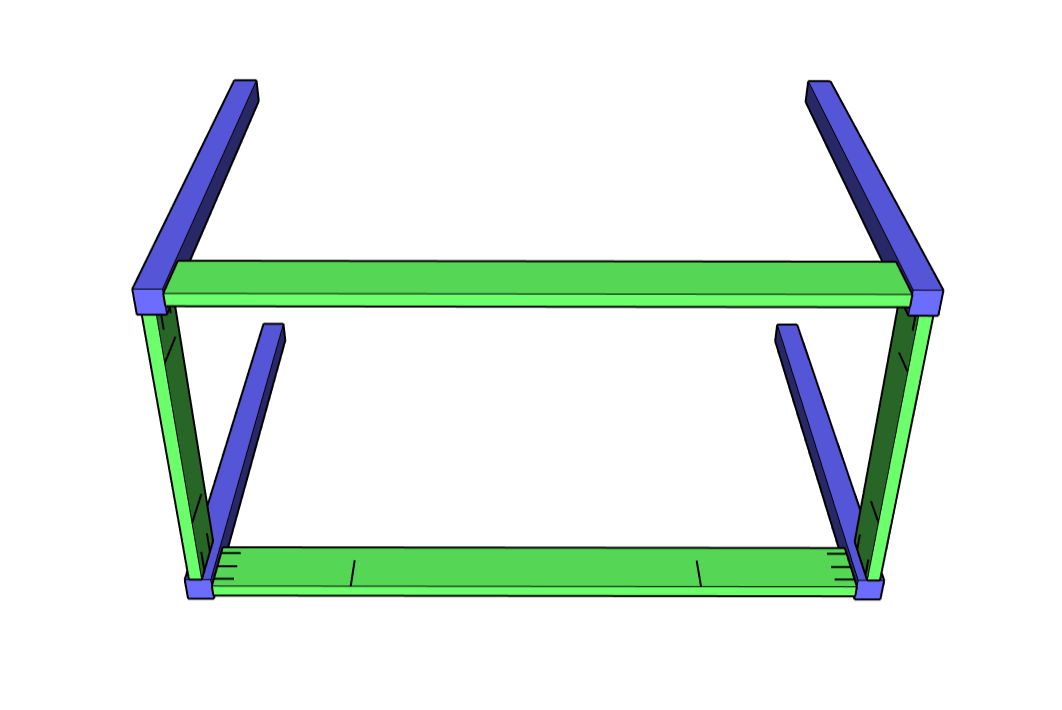
  • With both side components standing on their sides sandwich a 1 x 4 x 38โ€ (apron) board between them, again placing a ยผโ€ board beneath the apron to inset it slightly.
  • Align the top of the 1×4 with the top of the side components.
  • Clamp and attach using wood glue and 1 ยผโ€ pocket screws.
  • Carefully flip the piece over and repeat the above steps to attach the second 1 x 4 x 38โ€ apron board.

Step 4: Attach center support

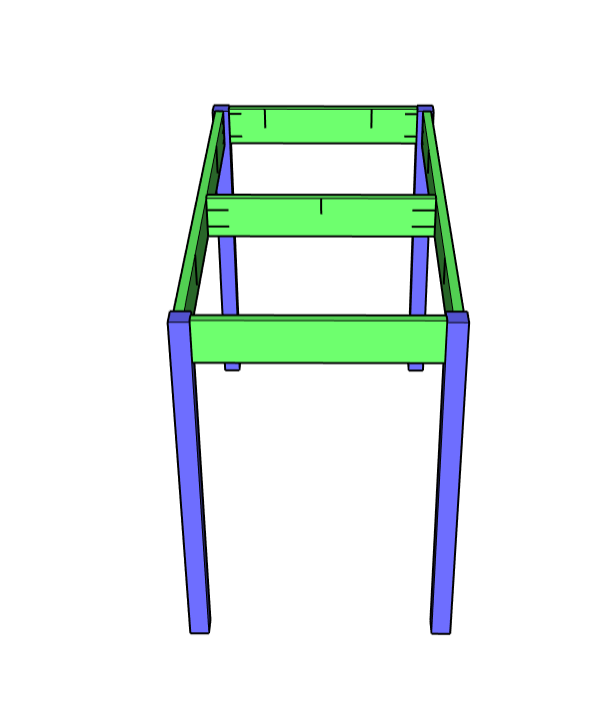
  • Attach the center support using wood glue and pocket screws between the two 1 x 4 x 38โ€ boards centered in the middle.

Step 5: Clean up

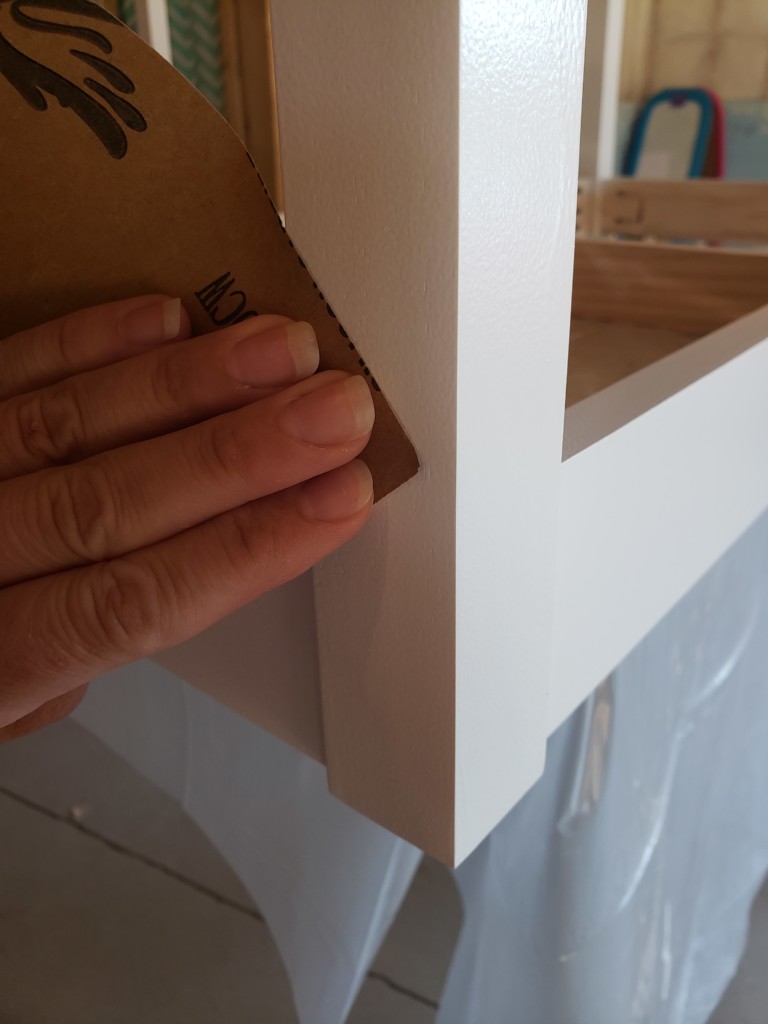
  • With a putty knife or chisel gently remove any glue squeeze out and sand smooth.

Step 6: Edge banding

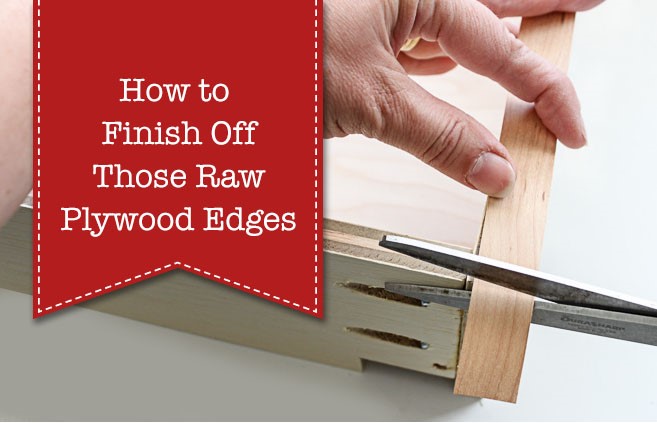
  • Once the plywood top is cut to size you will need to edge band to cover up the unsightly edges. I wonโ€™t go over all of the steps here but if you are new to edge banding please check out this tutorial on How to Finish Raw Plywood Edges.


Step 7: Finish

  • Time to paint or stain and topcoat!! My client wanted this piece painted white, so I chose a premium latex paint and used a water-based topcoat to protect the paint and prevent yellowing of the finish in the future.

Step 8: Attach the top

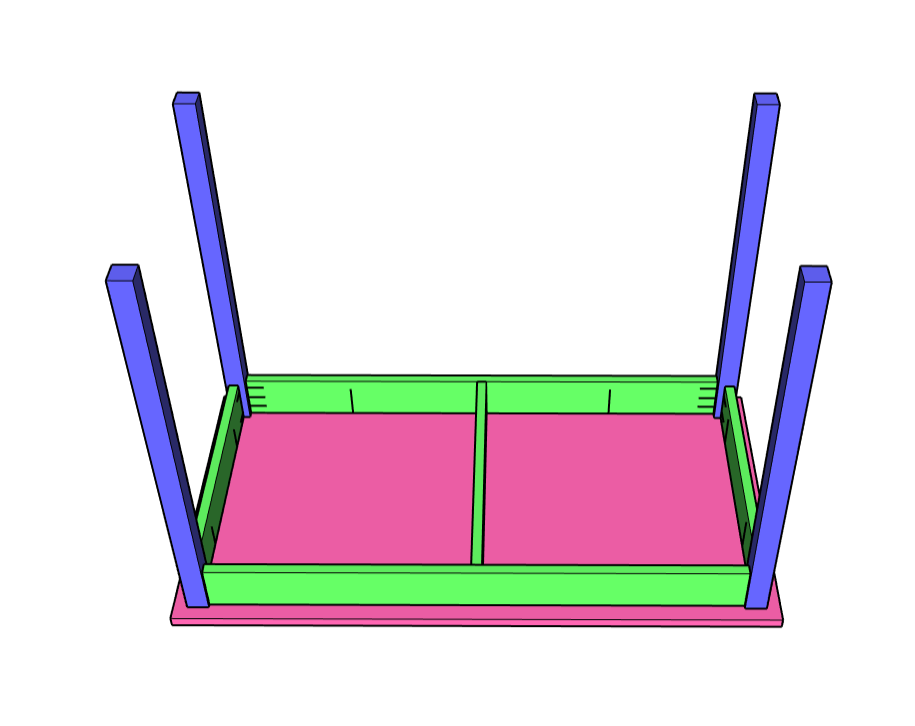
  • Place the tabletop on a flat surface (bottom side up) and center the base over the top upside down.
  • This plan allows for a 1โ€ overhang of the top on all sides of the table base.
  • Using the pocket-holes that are shown in the diagrams below, attach the top with 1 ยผโ€ pocket screws.

    • Note: Normally I would not recommend attaching a tabletop using pocket screws IF that top were made of solid wood because of woodโ€™s tendency to expand and contract. However, this top is made of plywood and the amount of expansion and contraction that will happen over time is negligible and should not affect the structure of the table base.ย  If you are uncomfortable using pocket-holes to attach the top then feel free to attach it in some other way, such as with figure-8 fasteners or Z-clips.

Flip it over and admire your handy work!! Isnโ€™t this DIY Kidโ€™s Craft Table adorable?!

Check out my latest blog post about building a DIY Folding Craft/Sewing Table! This table is large enough for any craft project but folds down when you donโ€™t need it. Perfect for anyone with a small space but large crafting ambitions!

Hi! Iโ€™m Kristen, fromย In Her Garage, and I am a self-taught woodworker and DIY fanatic from Minnesota where I live with my husband and our two daughters. Between being a wife, mom, and registered nurse, I try to make as much time for DIY as possible. My love for building came after our family built our current home in 2015. After we moved in, we needed furniture, and instead of spending massive amounts of money to order the items we wanted I decided that I would build them myself. I started with a buffet table plan from the fabulous Ana-white and quickly set out to remodel my entire home office.

Since then I have started a side business building furniture for the people in my community. I love hearing my clients talk about the pieces they wish they had whether it be aย rustic buffet table, aย one drawer side table, or aย toy boxย and then making it a reality for them. While starting my small business it made perfect sense that I would document my building journey so I simultaneously launched theย In Her Garage blog and I love sharing my plans, tips, and tricks.


I am so glad that you found me here and please feel free to connect with me onย Pinterest,ย Instagram, andย Facebookย to see what I am working on right now.
 

If you enjoyed this tutorial and are looking for other cute ideas for kidโ€™s desk or craft table check out these two fun projects. Both of these could be great projects you could do with the kids to keep the fun going.

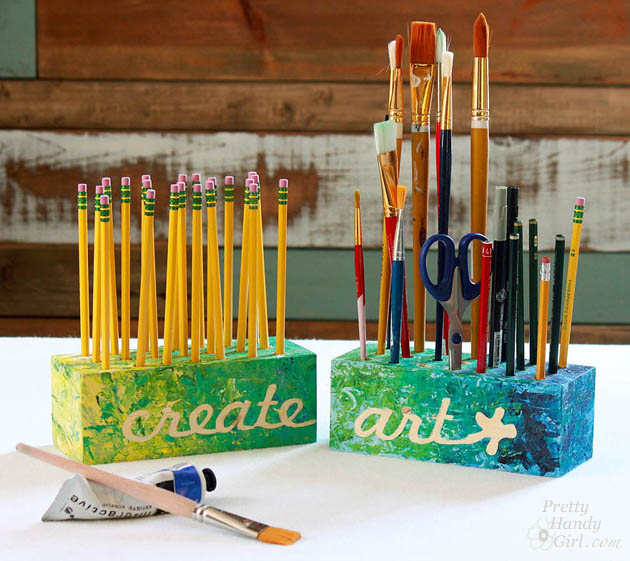
Creative Block Desk & Art Utensil Holder

create_art_block_holders_sm

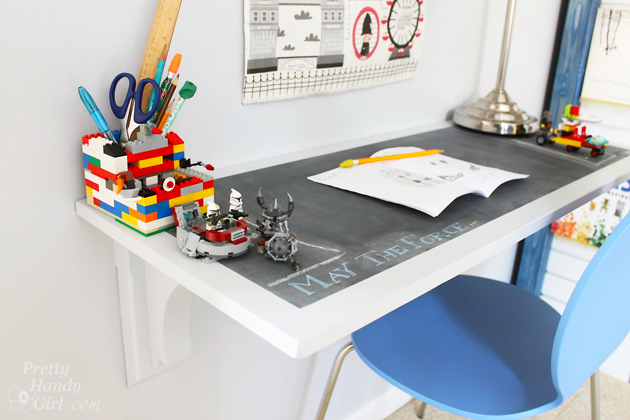
Creating a Chalkboard Desktop.

How to Make a Chalkboard Surface Desk | Pretty Handy Girl

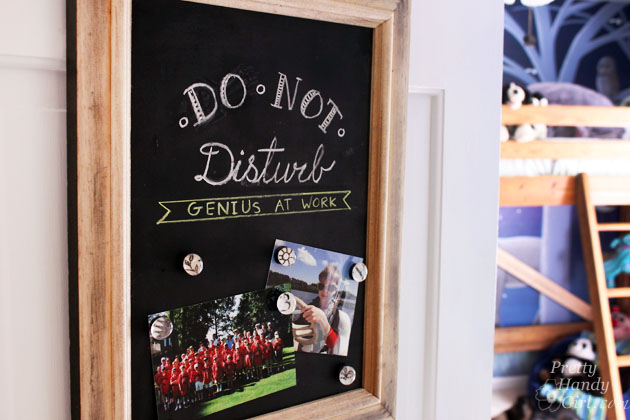
Upcycled Magnetic Chalkboard Frame | Pretty Handy Girl

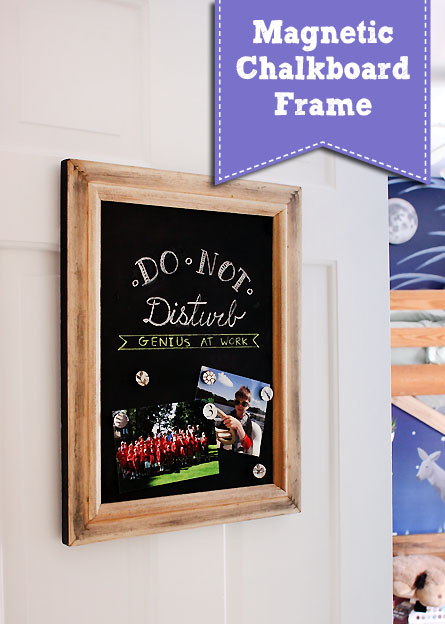
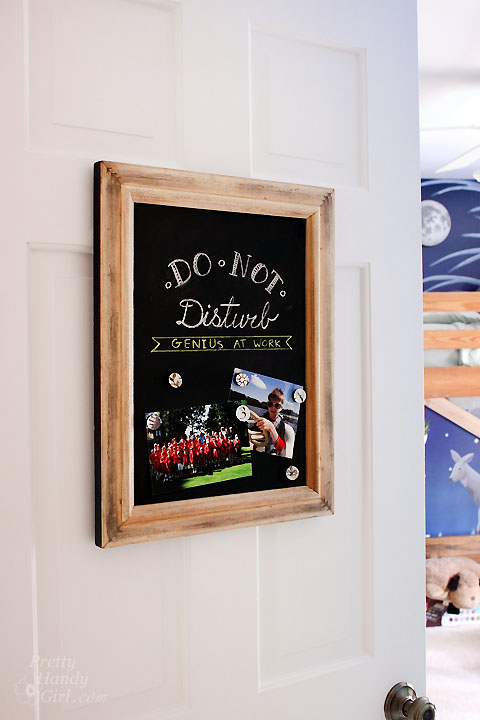
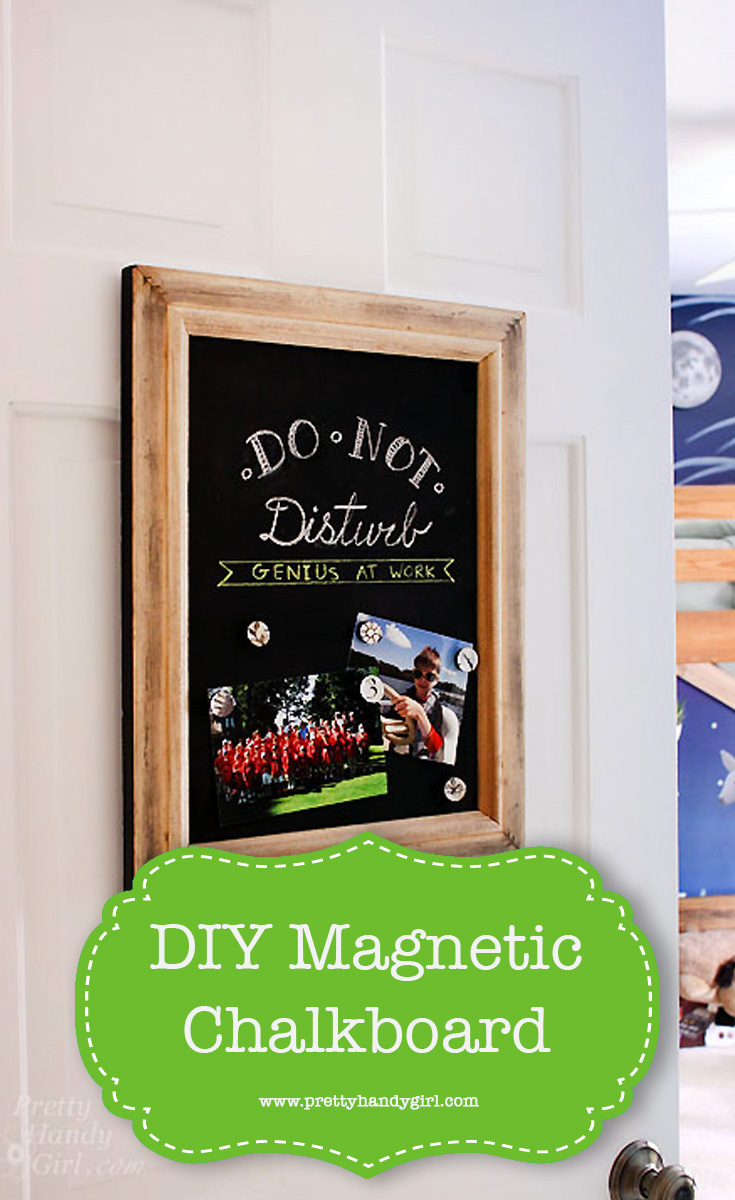
Iโ€™m a serial upcycler. When I can find relatively free materials and turn them into something worth displaying, Iโ€™m thrilled! This Magnetic Chalkboard frame is one of those upcycled projects I am proud of.

Upcycled Magnetic Chalkboard Frame | Pretty Handy Girl

Upcycled Magnetic Chalkboard Frame

Earlier in the week, I showed you the changes I made in my oldest sonโ€™s bedroom. One of the switches I made was to replace his bedroom door because the old one had cracked after one too many slammings. Ugh, cheap hollow door.

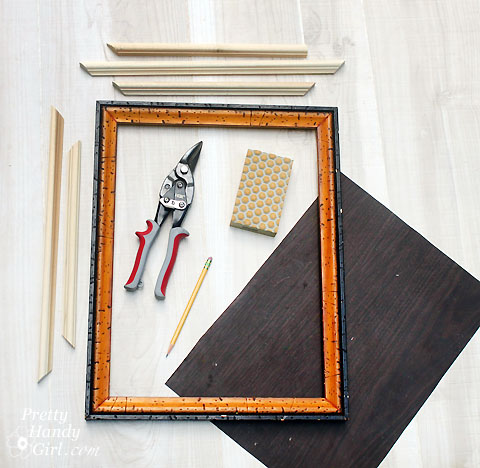
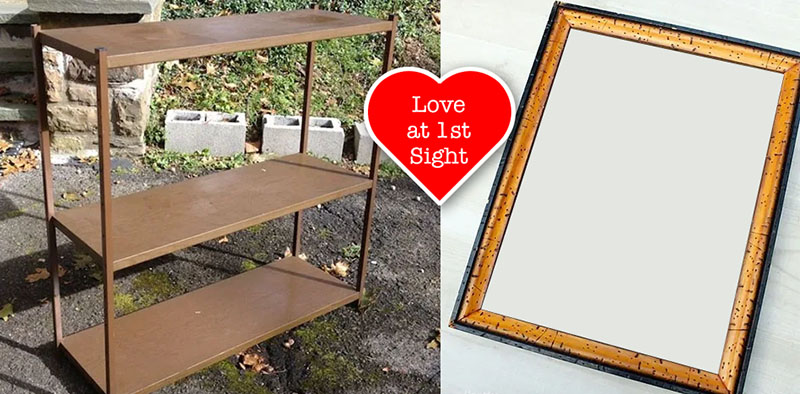
In an effort to keep my son from taping all types of signs to his new door, I found an ugly old frame and married it with some scrap metal from a junky set of shelving a neighbor was throwing away.

bookcase in love with ugly frame

Thatโ€™s not real wood, itโ€™s metalโ€ฆfake wood metal. Yuck. Wait until you see how they were transformed. You wonโ€™t believe your eyes, so watch closely how I made this Upcycled Magnetic Chalkboard Frame.

Before you leave this tutorial thinking you canโ€™t possibly make this project because youโ€™ll never be able to find cheap faux wood shelves, let me share with you some alternate materials you can use!

(Iโ€™ve includedย affiliate links for your convenience. I earn a small percentage from a purchase using these links. Thereย is no additional cost to you. You canย readย more about affiliate links here.)

Magnetic Material:

Non-Magnetic Material for Chalkboard:

Now that you have some additional material options, letโ€™s get busy making a Magnetic Framed Chalkboard (or just a framed chalkboard).

Materials:

Upcycled Magnetic Chalkboard Frame | Pretty Handy Girl

Optional: You may need some Goo Gone, a scraper, and rag to eliminate any glue on the back of the frame.

Instructions:

Begin by cutting your metal (or backing) to fit into the back of the frame.

Upcycled Magnetic Chalkboard Frame | Pretty Handy Girl

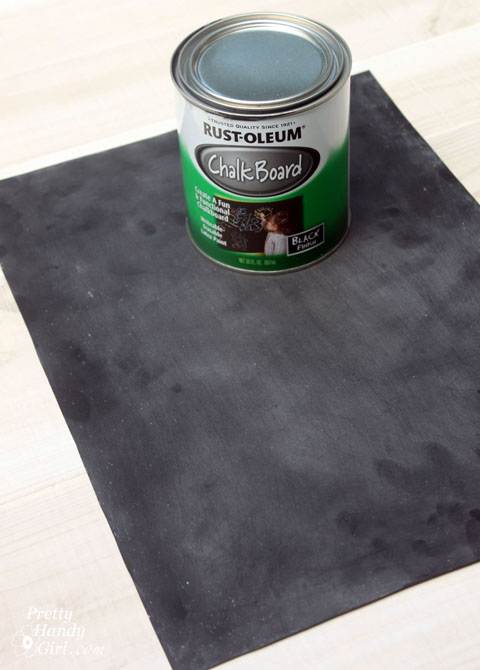
Paint one side of the metal with chalkboard paint. Let it dry. Apply a second coat of chalkboard paint. Let it dry.

Upcycled Magnetic Chalkboard Frame | Pretty Handy Girl

While the chalkboard paint is drying, time to work on the frame.

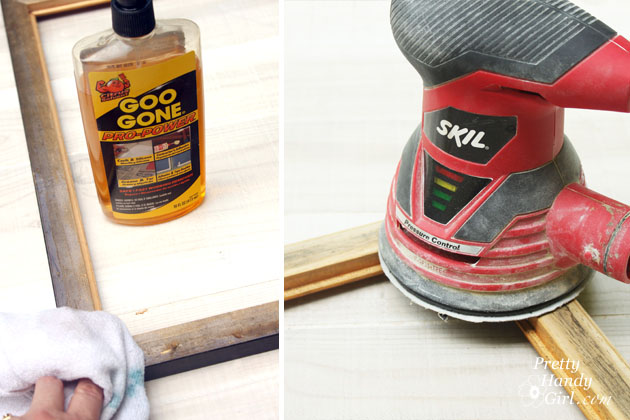
If your frame has paper on the back, peel it off and use Goo Gone, a scraper, and sander to remove any of the glue residue.

Upcycled Magnetic Chalkboard Frame | Pretty Handy Girl


When the chalkboard paint has dried, insert it into the frame, chalkboard side up from the backside of the frame (are you seeing where Iโ€™m going with this?)

Upcycled Magnetic Chalkboard Frame | Pretty Handy Girl

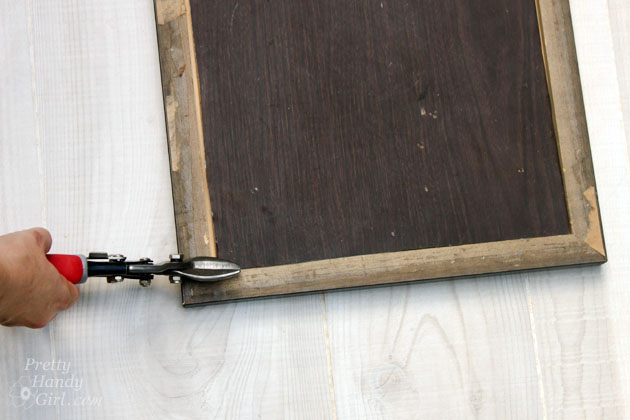
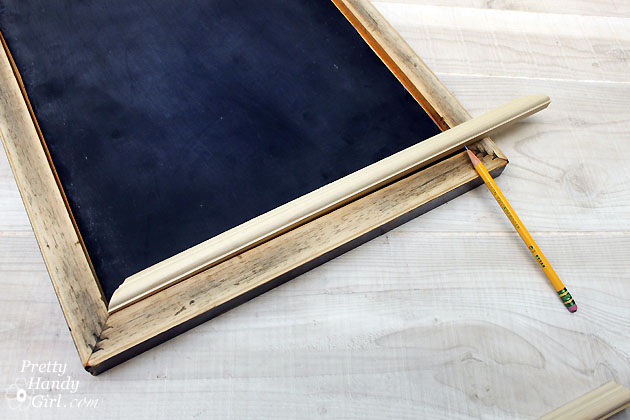
The back of the frame is much prettier than the front, but in order to hold the chalkboard in place, we need to cut some picture molding. Cut the end of your molding at a 45 degree angle. Fit it into the frame and mark where to make your second cut.

Upcycled Magnetic Chalkboard Frame | Pretty Handy Girl

Continue fitting and cutting molding around your frame.

Upcycled Magnetic Chalkboard Frame | Pretty Handy Girl

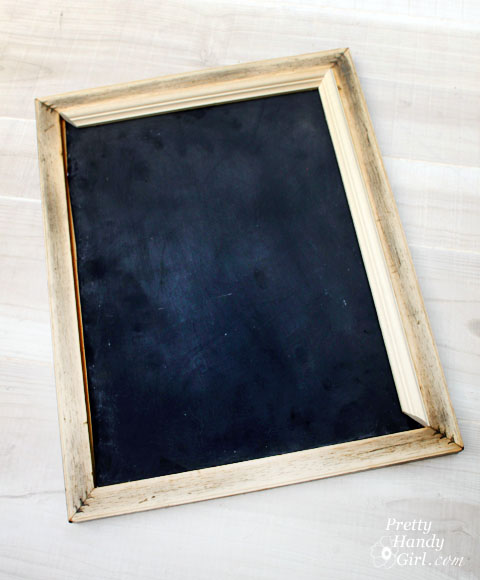
Once all four pieces of molding fit, you are ready to secure them.

Upcycled Magnetic Chalkboard Frame | Pretty Handy Girl

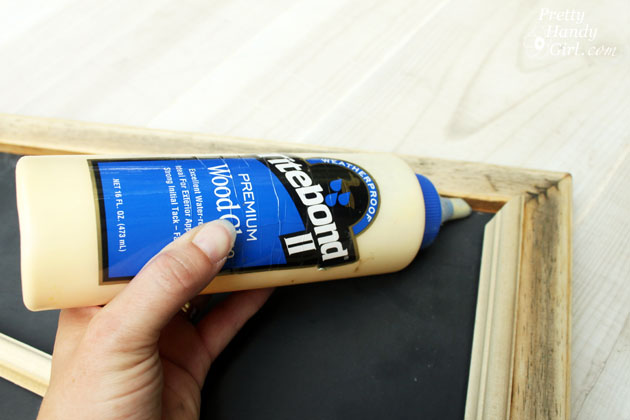
Apply a bead of wood glue along the inside edge of the back of the frame.

Upcycled Magnetic Chalkboard Frame | Pretty Handy Girl

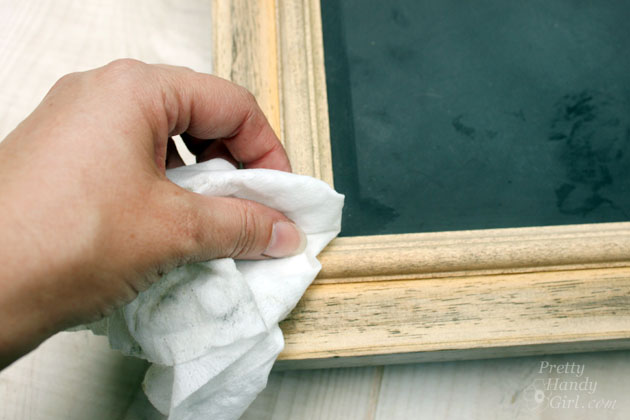
Set the molding pieces in place and wipe up any glue that squeezes out.

Upcycled Magnetic Chalkboard Frame | Pretty Handy Girl

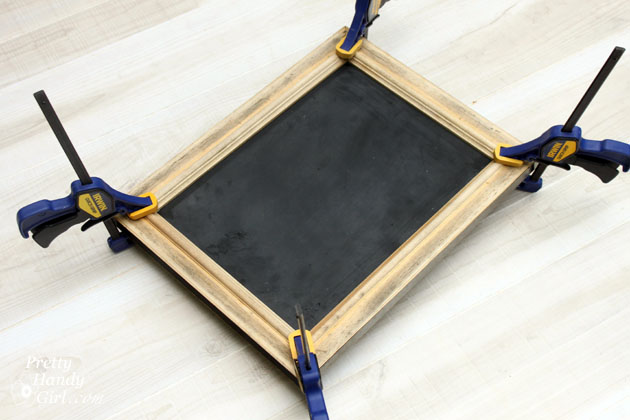
Clamp the molding pieces and the frame. Allow the glue to dry for at least an hour.

Upcycled Magnetic Chalkboard Frame | Pretty Handy Girl

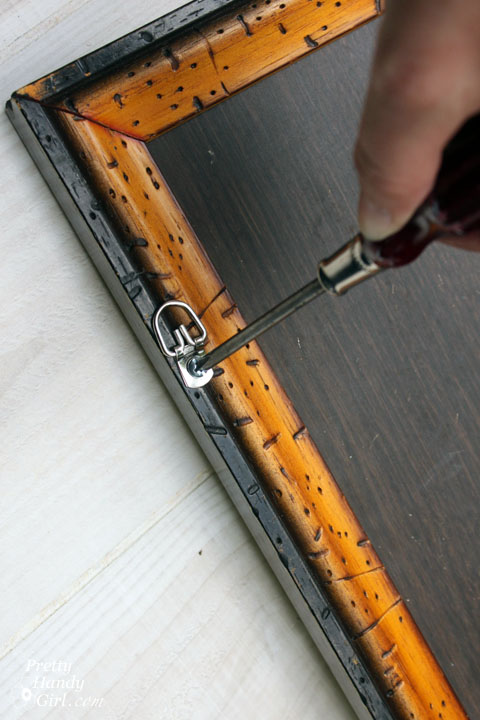
When the glue has dried. Attach two D-rings to the back of the frame.

Upcycled Magnetic Chalkboard Frame | Pretty Handy Girl

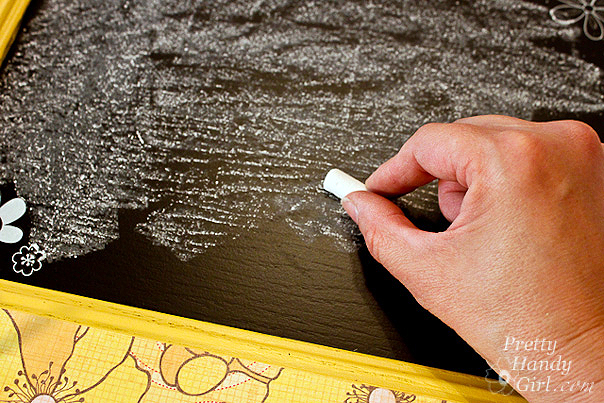
Season the chalkboard with the side of a piece of chalk. Then use a dry rag to buff it off.

Time to hang it up! (In my case, I hung it on my sonโ€™s door.

Upcycled Magnetic Chalkboard Frame | Pretty Handy Girl

To keep the frame from bouncing any time the door is opened or closed, I put a 3M Command velcro strip between the bottom of the frame and the door.

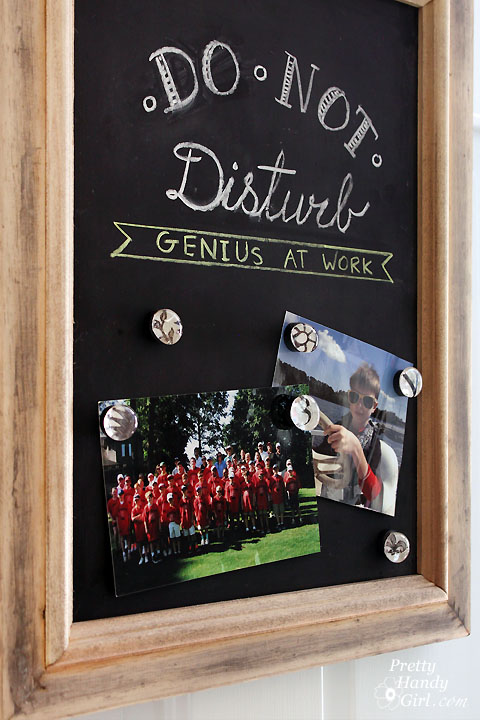
Now my son can put up pictures, messages, and more without damaging the door.

Upcycled Magnetic Chalkboard Frame | Pretty Handy Girl

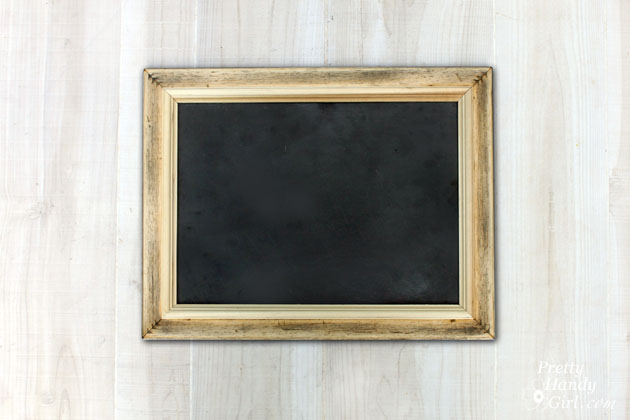
Pretty cool huh?! Would you ever guess the back of an ugly frame and metal shelves could look this beautiful?

Upcycled Magnetic Chalkboard Frame | Pretty Handy Girl

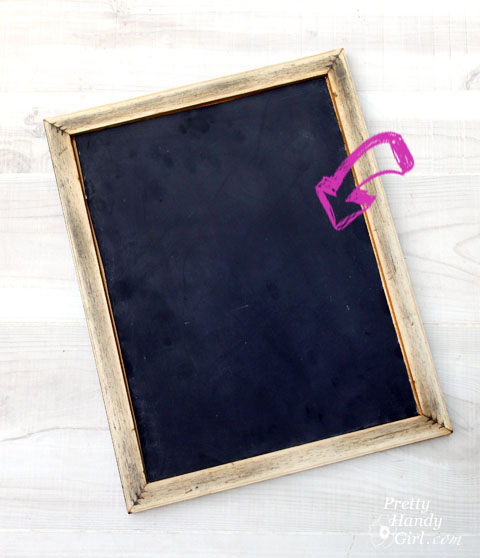
I especially like the little metal fasteners showing in the corners of the frame.

Tell me, do you have an ugly frame hanging around your house? Have you ever looked at the back and found it more beautiful than the front?

PHGFancySign


Pin for later!

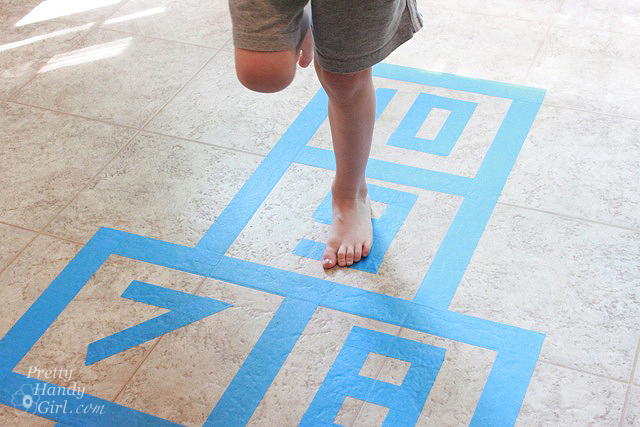
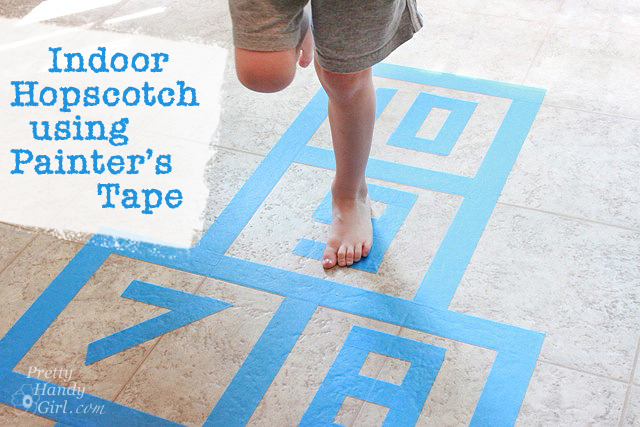
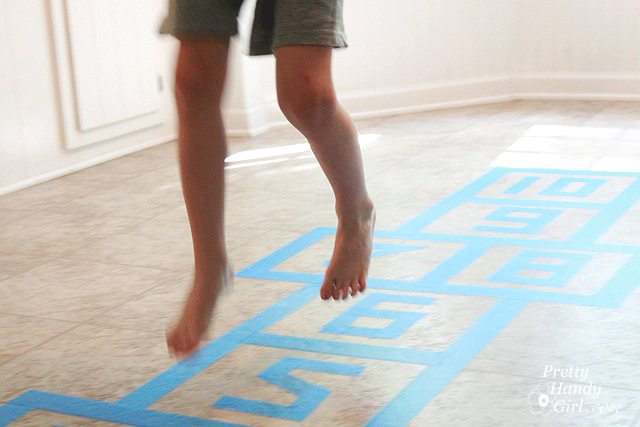
Need an activity to do indoors that will help the kids burn off a little excess energy? An Indoor Hopscotch Game with Painterโ€™s Tape is just the thing you need.

indoor_hopscotch_painters_tapeIndoor Hopscotch using Painterโ€™s Tape

When the weather outside is frightful and your kids are less than delightful, lay a roll of painterโ€™s tape on your floor and soon your kids will be having fun indoors.

(Iโ€™ve includedย affiliate links for your convenience. I earn a small percentage from a purchase using these links. Thereย is no additional cost to you. You canย readย more about affiliate links here.)

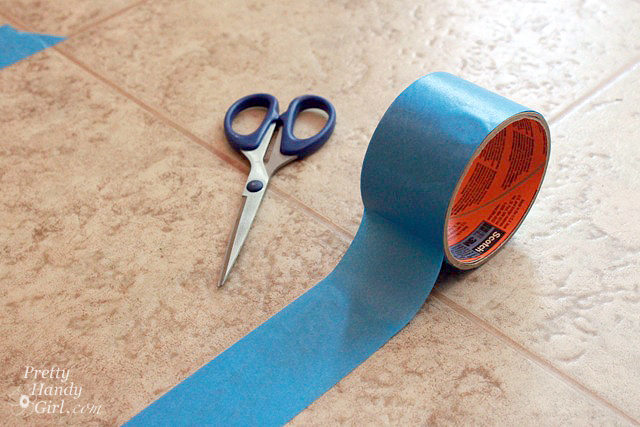
How about that for a quick little limerick? Well, this project is almost as quick. All you need is a roll of painterโ€™s tape (I used ScotchBlue for delicate surfaces, but you can use any type) and a pair of scissors.

scissors_tape

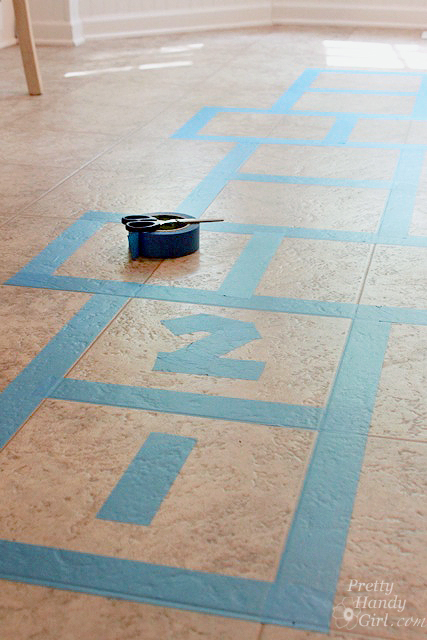
Lay out your hopscotch grid on the floor. (It was easy on our square tile floor because the tile layout acted as a guideline for our course.)

lay_out_hopscotch_on_floor

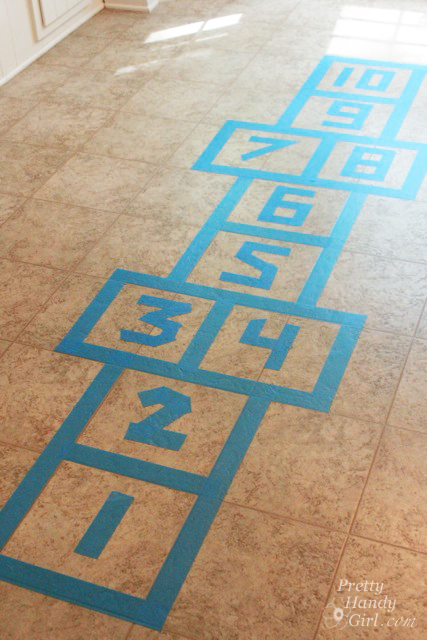
Add numbers inside the squares.

painters_tape_hopscotch

And let the kids loose. Soon theyโ€™ll be a hop skippinโ€™ and a jumpinโ€™ that energy awayโ€ฆ

boy_playing_indoor_hopscotch

โ€ฆwell, maybe not all their energy.

boy_jumping_in_air

Important note, donโ€™t leave the tape on the floor for weeks on end or you may struggle to get the adhesive up. But, in the meantime, have fun and letโ€™s pray we can all venture out safely soon!

Anyone else have any great ideas to let kids burn off energy indoors? Please, leave me a comment, I need help here.

PHGFancySign

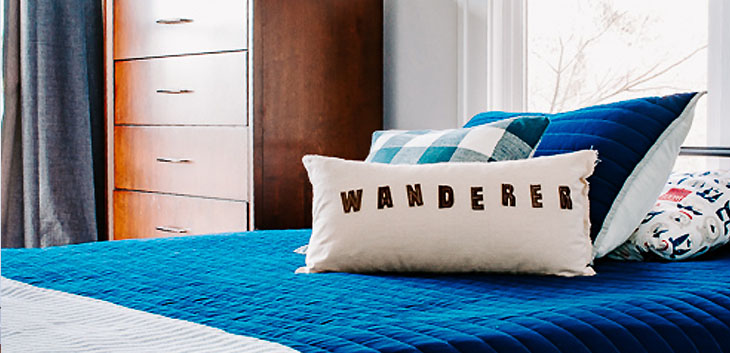
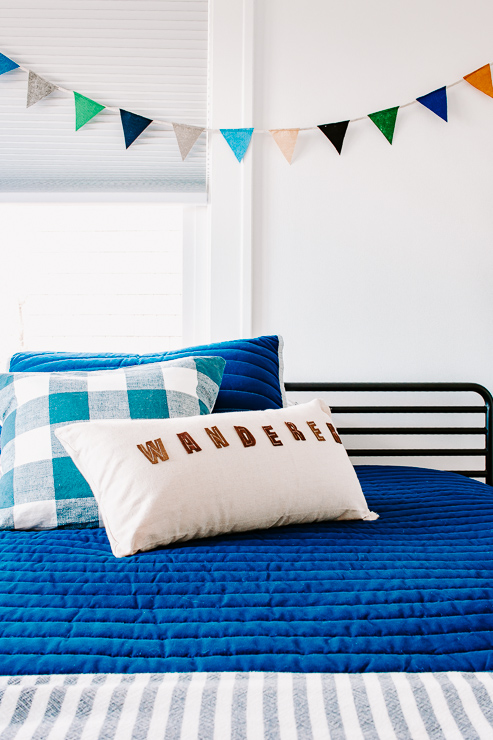
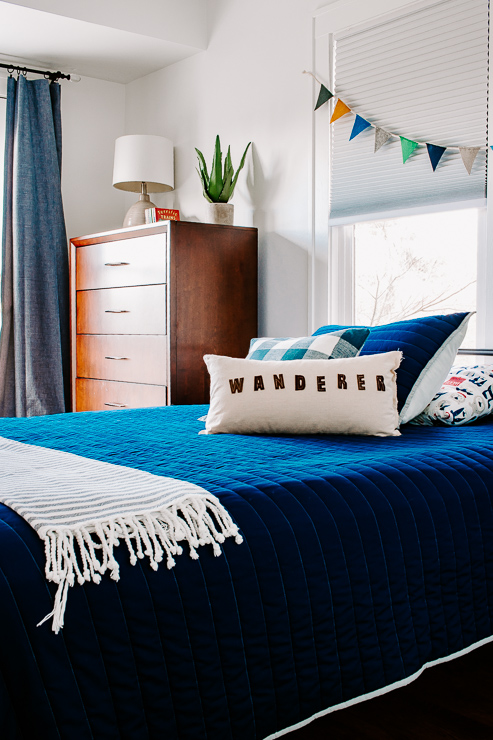
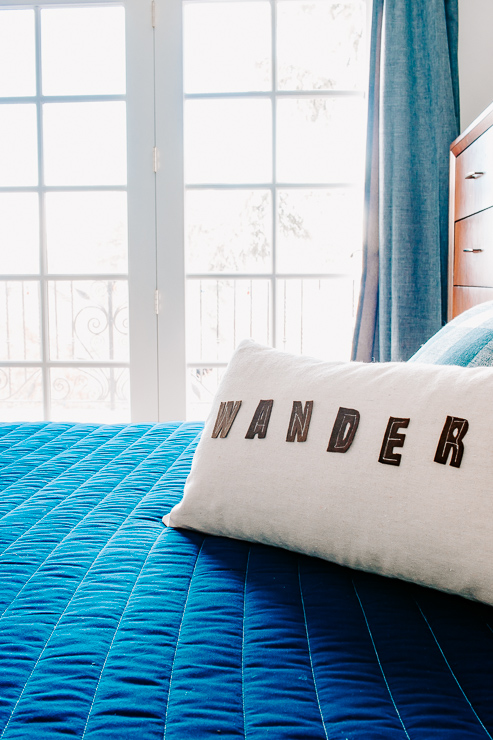
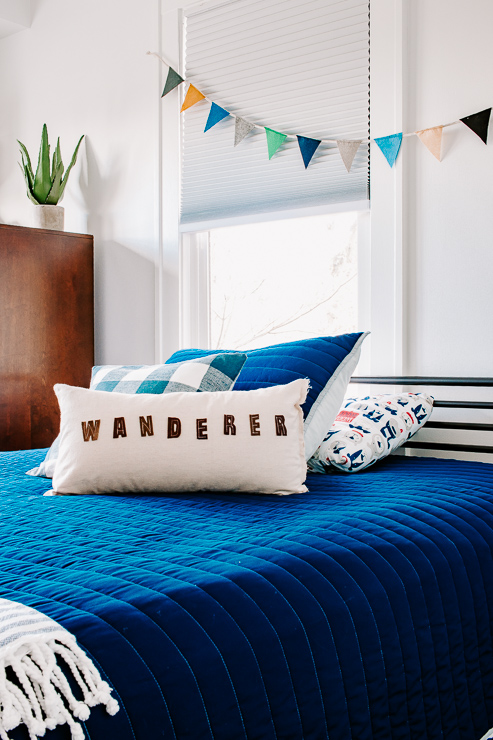
DIY Wanderer Felt Pillow

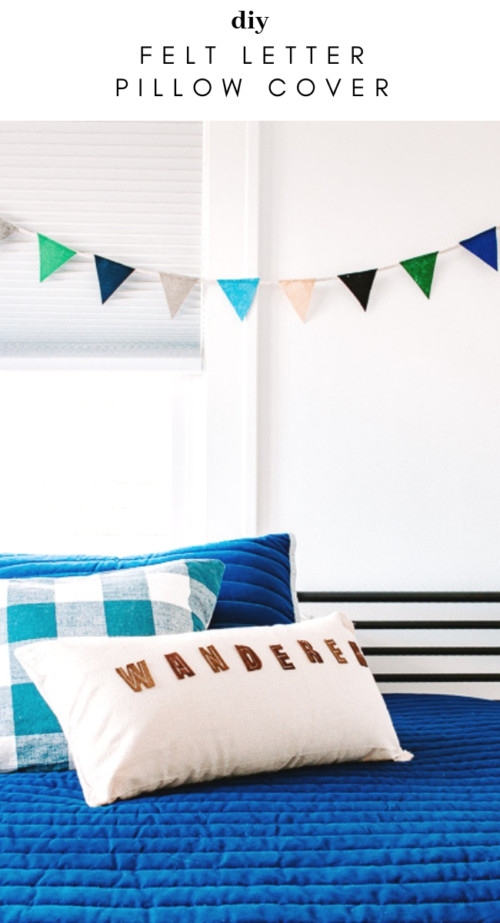
DIY Felt Letter Pillow Cover
How to Make a Felt Letter Pillow Cover

Friends! Iโ€™m so excited to be back today with a new project for you, a DIY felt letter pillow cover. One of my favorite things to do is to scour home decor stores for inspiration for my kidsโ€™ rooms. ย I love trying to recreate trendy looks for my home, but on a budget. Todayโ€™s project accomplishes this goal! Iโ€™ve seen some really cute letter pillow covers and I knew I could DIY one myself. ย Originally I made one for my sonโ€™s room. It turned out so well that my daughter requested one for her room too. Lucky for you, a sewing machine is optional โ€“ so this project is for truly for anyone who wants to make their own Felt Letter Pillow Cover.

Letโ€™s get started!

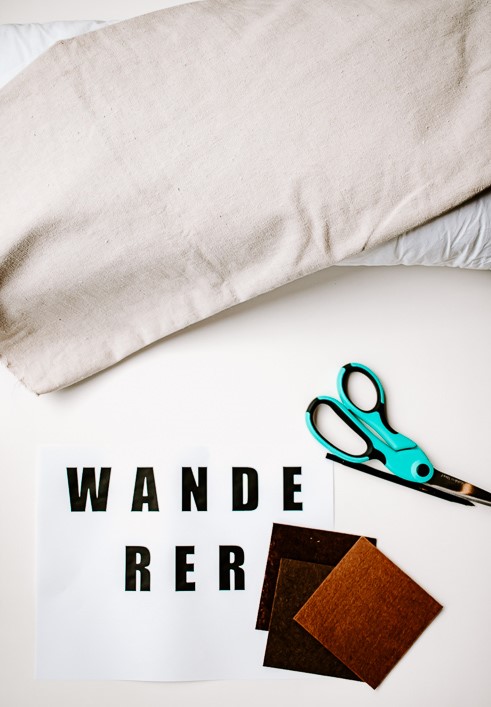
Materials:

(Iโ€™ve includedย affiliate links for your convenience. I earn a small percentage from a purchase using these links. Thereย is no additional cost to you. You canย readย more about affiliate links here .)

Materials Needed to make a DIY Felt Letter Pillow

Instructions:

Step 1:ย  Itโ€™s helpful to type up and print out a word template for this project or use letter stencils.ย  Itโ€™s not totally necessary, but when tracing your letters onto the felt it helps keep all the letters relatively uniform.

Cut out letters from paper word template

Making Your Word Template:

Open up Word or Google Docs and type out the word you want.ย  Add a space between the letters. (I used the Impact font at font size 150pt for this project.)

You can make your letters bigger or smaller. Just be aware, it gets a little tricky to cut out smaller letters. Cut your letters out of your template and letโ€™s move on to the next step.

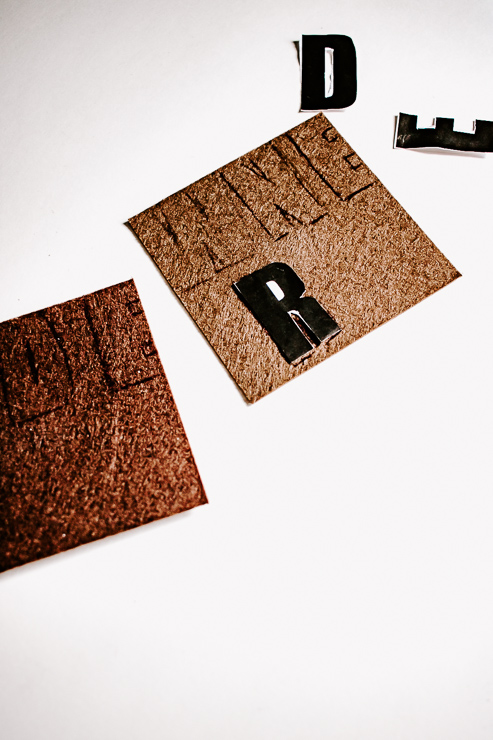
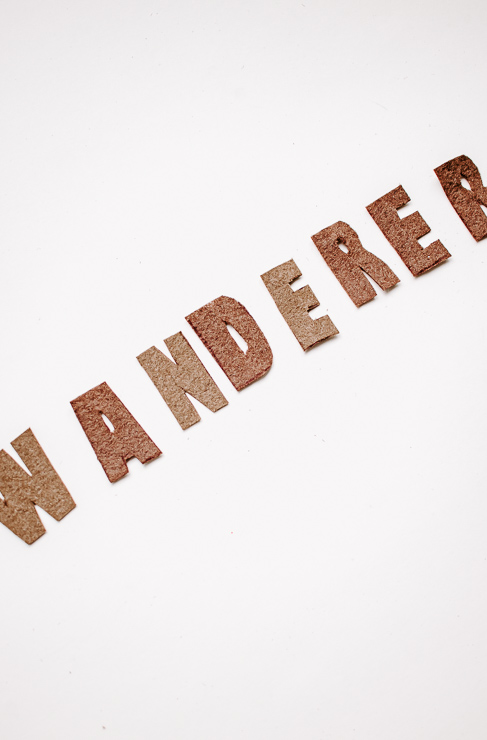
Tip:ย  If your word contains more than one of the same letter โ€“ you only need to cut that letter once. For instance โ€“ WANDERER has two Eโ€™s and two Rโ€™s, but I only needed one template for each letter because I could use the same one to trace two letters. ย This should save you a few minutes.

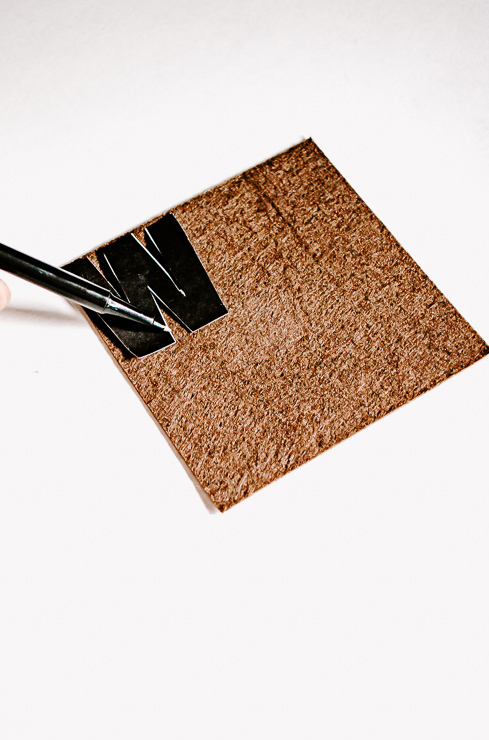
Step 2: Trace your letters onto the felt using your stencil or cut out letters (or draw them freehand if not using a template).

Trace Letter with Pen or Chalk onto felt

You can use pen, chalk, or pencil to trace. ย Just make sure you can see the lines so you can cut them out.

Trace Felt Letters with Pen or Chalk onto you Felt Piece

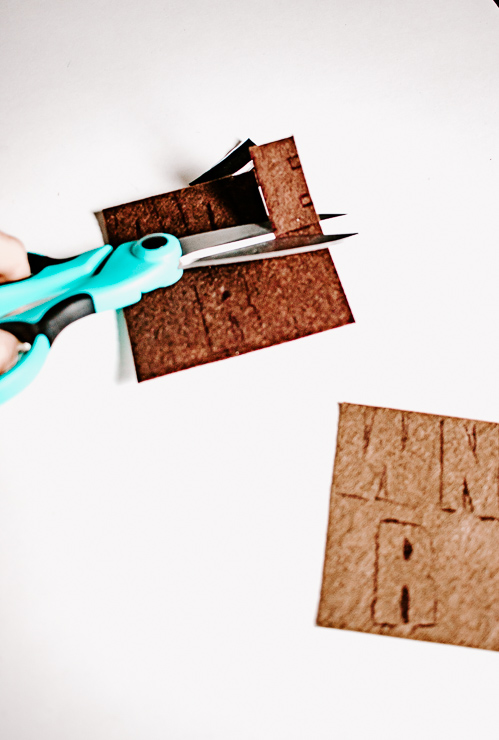
Step 3: Cut out your letters using scissors.

Cut your Letters out of Felt after tracing Continue to Cut out all Felt Letters

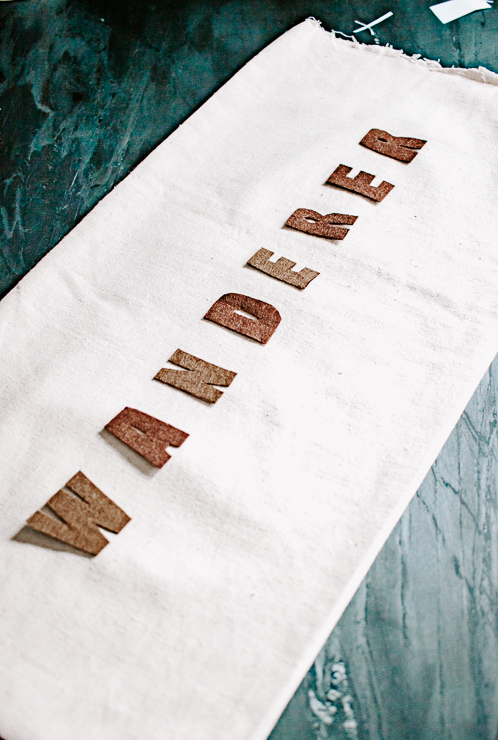
Step 4: Space your felt letters onto your pillow cover.ย  (I made a lumbar pillow cover from canvas drop cloth for this project, but you can also buy a plain cover.) Itโ€™s helpful to play with the placement and see where you want to start the word on your pillow cover.

Layout Felt Letters on your Pillow

Attaching the Letters:

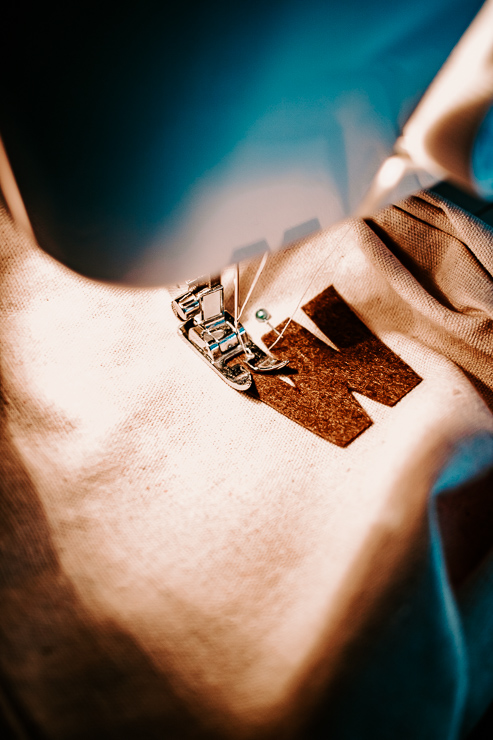
  • Sewing โ€“ Pin your first letter to the pillow cover. ย Hand sew or use your sewing machine to sew the letter onto the cover. You can use matching thread or a different color to give it more of a rustic vibe. ย My thread was white on brown felt.
  • Fabric Glue โ€“ Glue your felt letter to your pillow cover.

Sew your felt letters on your pillow cover or use fabric glue

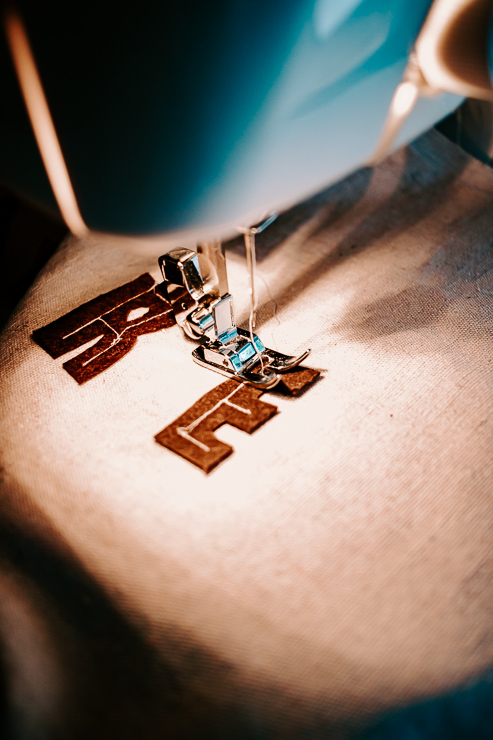
Step 5: ย Continue to sew or glue the rest of your letters onto your pillow cover.

Use fabric glue or your sewing machine to attach felt letters to your pillow

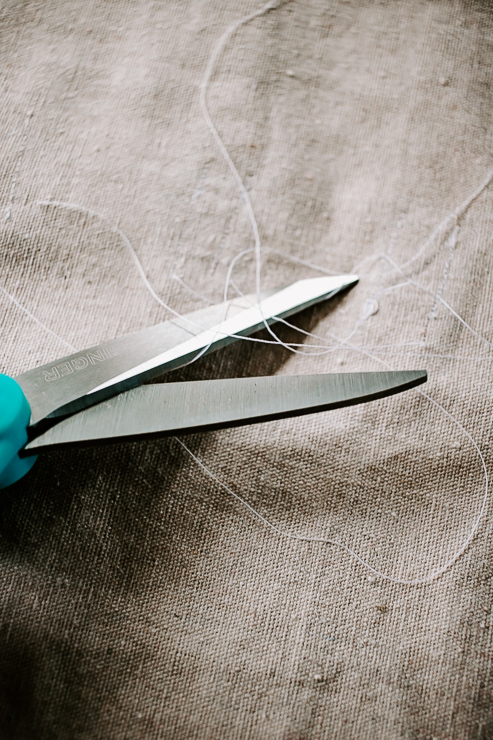
Step 6 : ย After you finish sewing on the letters, cut off any loose strings. ย If you used fabric glue, you want to let this dry for 24 hours before attempting to wash it. ย (Please refer to the instructions on your specific fabric glue. )

Cut loose strings from your protect after sewing felt letters

Step 7 : ย Insert your pillow form into your new cover.

Insert your pillow form into your new felt letter pillow cover!

All done! This looks fantastic, donโ€™t you agree?!

I have seen these letter pillow covers in stores for over $25!ย  Yet, I was able to make this knock off for less than $5 with a simple DIY canvas pillow cover and some inexpensive felt.

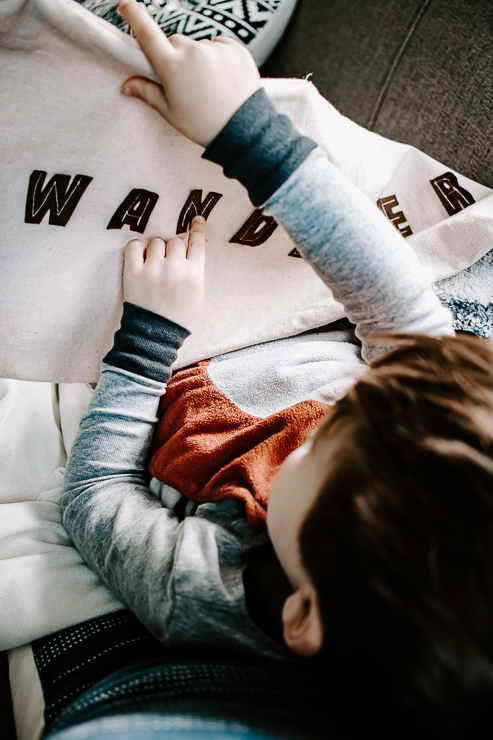
Kids Love these DIY Felt Letter Pillow Covers

I love the way this pillow turned out. As I mentioned, my daughter requested one for her room. (Although sheโ€™s having a little trouble choosing which word she wants!)ย  So far sheโ€™s come up with: Cupcake, Ice Cream, Unicorns โ€“ she canโ€™t decide.

DIY Felt Letter Pillow Cover Tutorial

This project would also be cute as a personalized pillow cover. Or make it as a gift for someone who has young children. ย Itโ€™s the perfect touch for a nursery or kids room.

DIY Felt Letter Pillow Cover perfect for Kids Rooms

Another idea would be to create one for each holiday: Halloween, Thanksgiving and Christmas are great occasions to display a felt letter pillow.
DIY Felt Letter Pillow Cover

I hope you guys enjoyed this tutorial for a DIY felt letter pillow cover.ย  You might also like to learn how to sew a rope basket at Decor Hint (where I blog regularly).
Iโ€™ll be back next month with another fun project for you! In the meantime, be sure to check out some other sewing tutorials on Pretty Handy Girl.

Thanks for reading!

karen signature

~ See More of Karenโ€™s Tutorials ~


karen from decor hintHello!ย  Iโ€™m Karen, the creator of the Home Decor and DIY Blog:ย Decor Hint .ย Iโ€™m a Native of the East Coast, but I currently live in beautiful Seattle with my hubby, our two wonderful children and our spunky wheaten terrier.

You can usually find me with some sort of craft in one hand and a coffee in the other. And Iโ€™m always rearranging furniture or moving lamps from room to room. I have a passion (read: obsession) for decorating, DIY, and gardening. In short, I love making my house into a home.

Like many, Iโ€™m inspired by what I see in home decor magazines, but Iโ€™m not so inspired by the price tags.ย  Consequently, I love finding and creating beautiful budget-friendly home decor items. In a head to head competition, I bet youโ€™d never know the difference between the designer items and my DIY creations!ย  Many of my DIY projects focus on sewing, crafting, upcycling and organizing. Some of my favorite projects have been making pretty wreaths , sewing my own tassel hand towels, and crafting these trendy wood bead garlands . I canโ€™t wait to inspire you and spark your creativity through my DIY projects.

You can always connect with me on Pinterest , Twitter or Instagram.