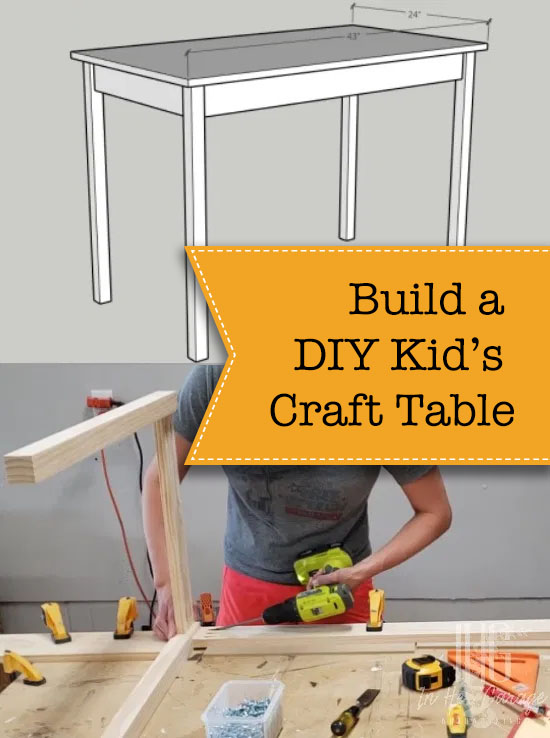
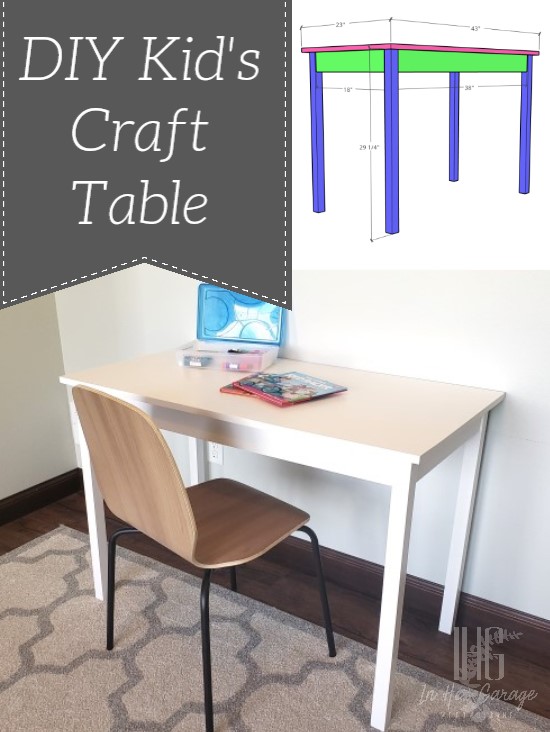
Have the kids taken over your kitchen table or island? Need somewhere to let the kids get creative? Today I am going to show you how to make a simple DIY kidโ€™s craft table (or desk). Letโ€™s get building.

Build a DIY Kid's Craft Table

DIY Kidโ€™s Desk and Craft Table

If your children are going to be home this fall for distance learning or you just want a spot they can call their own, then it is time to get a space ready for them!! This DIY Kidโ€™s Craft Table is the perfect size for whatever your child will need and it is small enough to fit in a spare corner in your home. Letโ€™s make it!

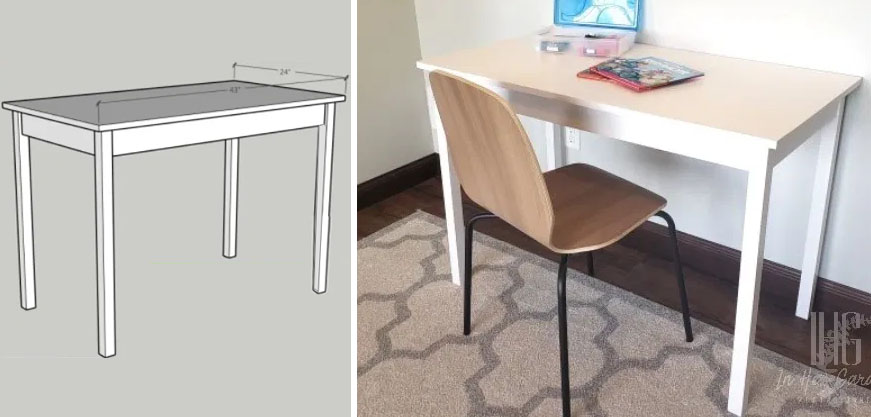
I made this particular table for a client and it measures 30โ€h x 43โ€w x 23โ€d but you can modify these measurements to fit your needs. Of course, the quality of lumber you use is your choice but I used clear pine from my local big box store because it paints better than using common pine boards. It may be more expensive but the boards tend to be straighter, it saves time on sanding, and I feel it yields a better-finished product. It doesnโ€™t matter what wood you use as long as you love it.

Materials:

(Iโ€™ve includedย affiliate links for your convenience. I earn a small percentage from a purchase using these links. Thereย is no additional cost to you. You canย readย more about affiliate links here.)

Tools:

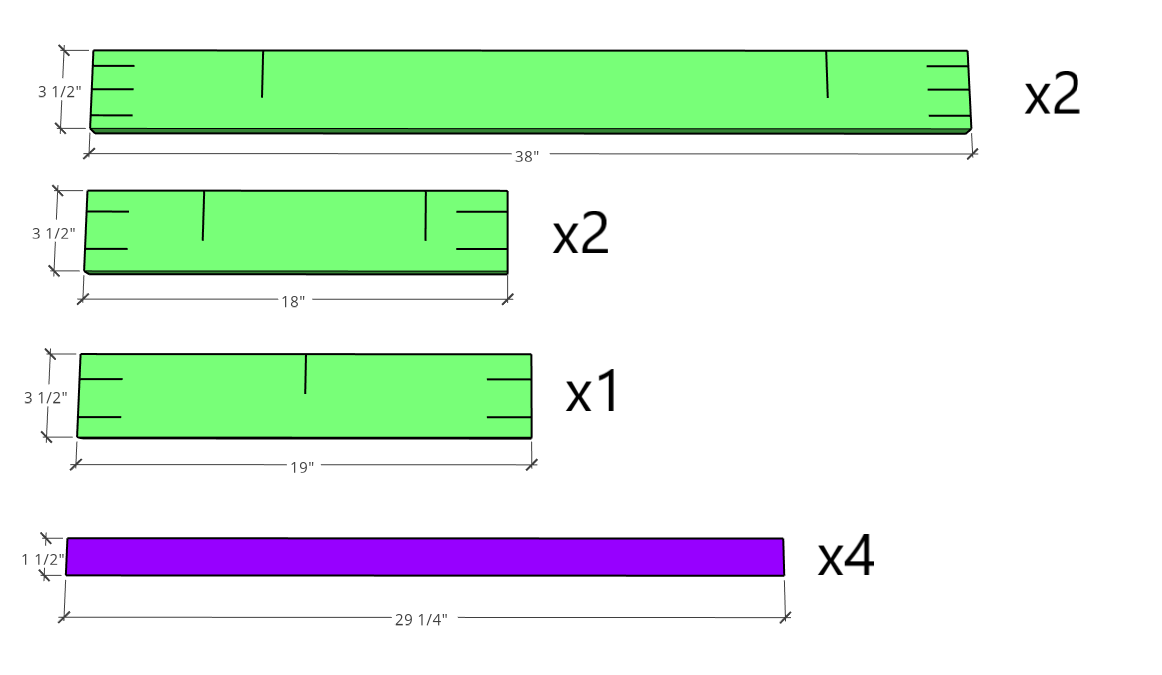
Cut list and pocket-hole placement:

  • 4- 2×2 @ 29 ยผโ€
  • 2- 1×4 @ 38โ€ (3 pocket-holes in each end)
  • 2- 1×4 @ 18โ€ (2 pocket-holes in each end)
  • 1- 1×4 @ 19โ€ (2 pocket-holes in each end)
  • 3/4โ€x 43โ€x 23โ€ birch plywood

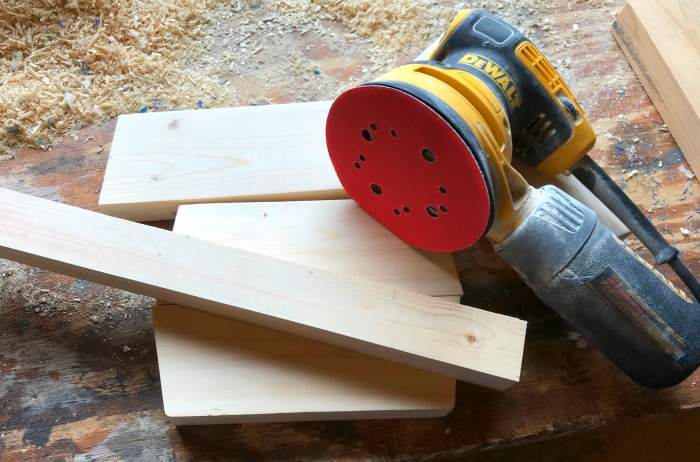
Step 1: Sand table components

  • I know it seems odd to start with this step but trust me when I tell you it is much easier to sand these boards before they are in place. Depending on how rough your lumber is, begin using 60-80 grit sandpaper and incrementally work your way up to 220 grit sandpaper.ย  I chose to use clear pine found at my local big box store so I was able to start with 120 grit sandpaper, which cut down my sanding time. This makes the extra money spent, well worth it!

Step 2: Assemble both table sides

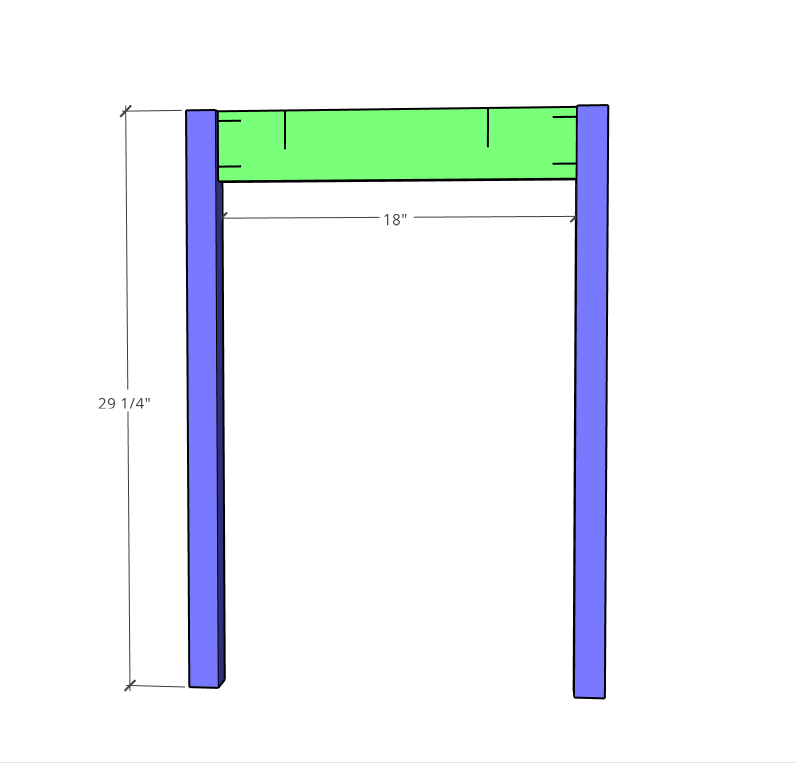
  • Sandwich one 1 x 4 x 18โ€ (apron) board between two 2 x 2 x 29 ยผโ€ (leg) boards. Pocket-holes should be facing up.
  • To add a little detail, place a ยผโ€ piece of scrap beneath the 1×4 board to inset it slightly. This will create a shallow reveal looks nice and also gives you a little grace because now the three boards donโ€™t have to be flush to the same surface perfectly.
  • Clamp the legs and apron boards together and join them using wood glue and 1 ยผโ€ pocket screws.
  • Repeat these steps for the other side of the table.

Step 3: Attach the front and back table aprons

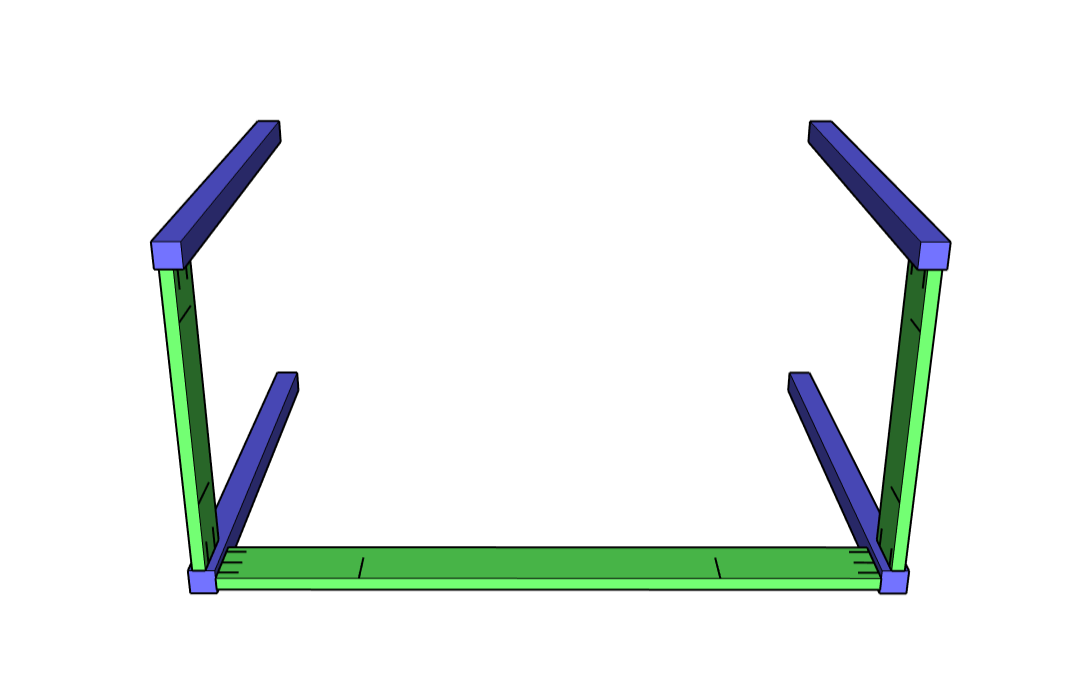
  • With both side components standing on their sides sandwich a 1 x 4 x 38โ€ (apron) board between them, again placing a ยผโ€ board beneath the apron to inset it slightly.
  • Align the top of the 1×4 with the top of the side components.
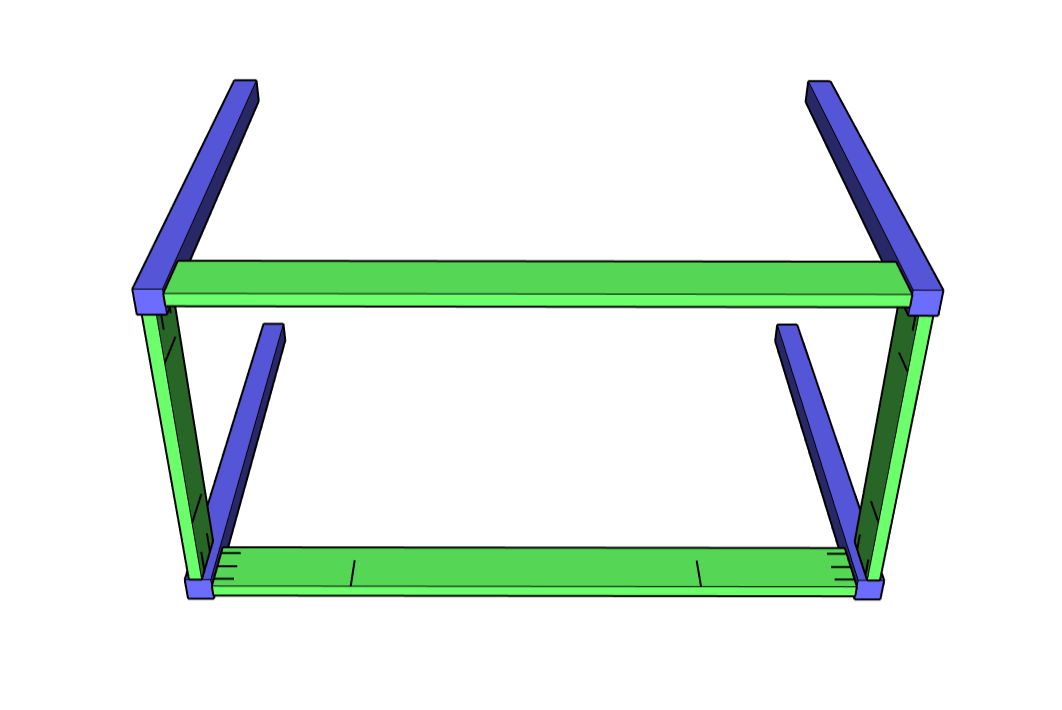
  • Clamp and attach using wood glue and 1 ยผโ€ pocket screws.
  • Carefully flip the piece over and repeat the above steps to attach the second 1 x 4 x 38โ€ apron board.

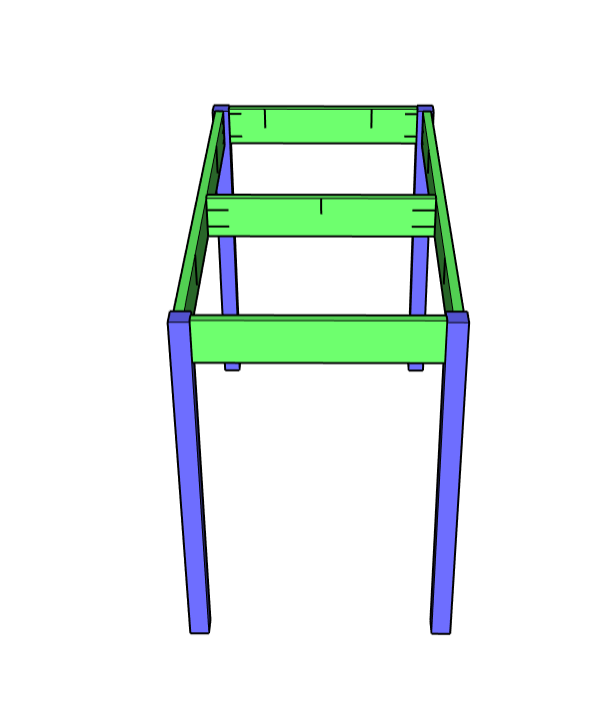
Step 4: Attach center support

  • Attach the center support using wood glue and pocket screws between the two 1 x 4 x 38โ€ boards centered in the middle.

Step 5: Clean up

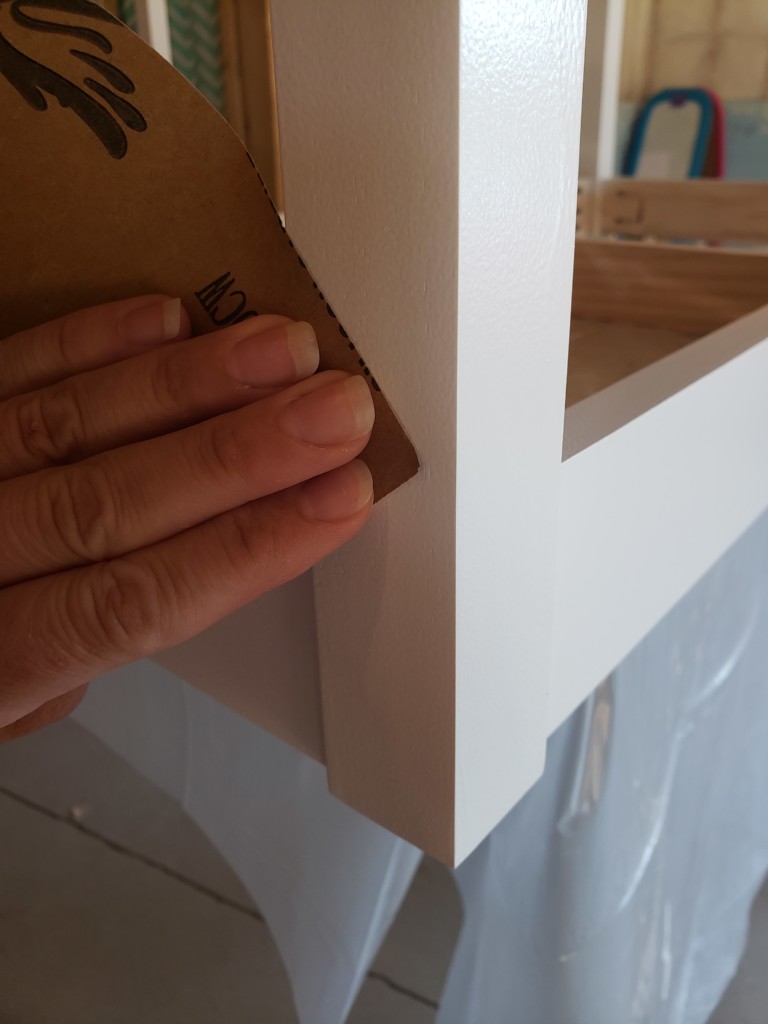
  • With a putty knife or chisel gently remove any glue squeeze out and sand smooth.

Step 6: Edge banding

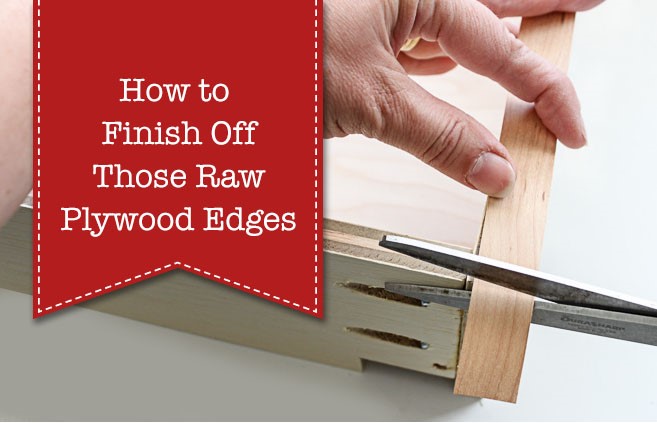
  • Once the plywood top is cut to size you will need to edge band to cover up the unsightly edges. I wonโ€™t go over all of the steps here but if you are new to edge banding please check out this tutorial on How to Finish Raw Plywood Edges.


Step 7: Finish

  • Time to paint or stain and topcoat!! My client wanted this piece painted white, so I chose a premium latex paint and used a water-based topcoat to protect the paint and prevent yellowing of the finish in the future.

Step 8: Attach the top

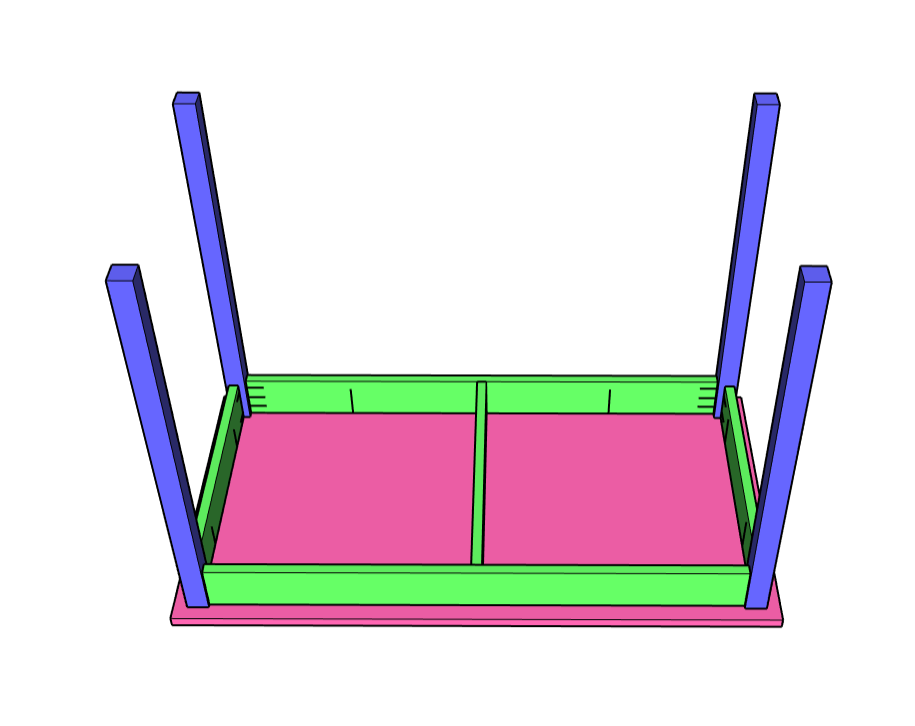
  • Place the tabletop on a flat surface (bottom side up) and center the base over the top upside down.
  • This plan allows for a 1โ€ overhang of the top on all sides of the table base.
  • Using the pocket-holes that are shown in the diagrams below, attach the top with 1 ยผโ€ pocket screws.

    • Note: Normally I would not recommend attaching a tabletop using pocket screws IF that top were made of solid wood because of woodโ€™s tendency to expand and contract. However, this top is made of plywood and the amount of expansion and contraction that will happen over time is negligible and should not affect the structure of the table base.ย  If you are uncomfortable using pocket-holes to attach the top then feel free to attach it in some other way, such as with figure-8 fasteners or Z-clips.

Flip it over and admire your handy work!! Isnโ€™t this DIY Kidโ€™s Craft Table adorable?!

Check out my latest blog post about building a DIY Folding Craft/Sewing Table! This table is large enough for any craft project but folds down when you donโ€™t need it. Perfect for anyone with a small space but large crafting ambitions!

Hi! Iโ€™m Kristen, fromย In Her Garage, and I am a self-taught woodworker and DIY fanatic from Minnesota where I live with my husband and our two daughters. Between being a wife, mom, and registered nurse, I try to make as much time for DIY as possible. My love for building came after our family built our current home in 2015. After we moved in, we needed furniture, and instead of spending massive amounts of money to order the items we wanted I decided that I would build them myself. I started with a buffet table plan from the fabulous Ana-white and quickly set out to remodel my entire home office.

Since then I have started a side business building furniture for the people in my community. I love hearing my clients talk about the pieces they wish they had whether it be aย rustic buffet table, aย one drawer side table, or aย toy boxย and then making it a reality for them. While starting my small business it made perfect sense that I would document my building journey so I simultaneously launched theย In Her Garage blog and I love sharing my plans, tips, and tricks.


I am so glad that you found me here and please feel free to connect with me onย Pinterest,ย Instagram, andย Facebookย to see what I am working on right now.


If you enjoyed this tutorial and are looking for other cute ideas for kidโ€™s desk or craft table check out these two fun projects. Both of these could be great projects you could do with the kids to keep the fun going.

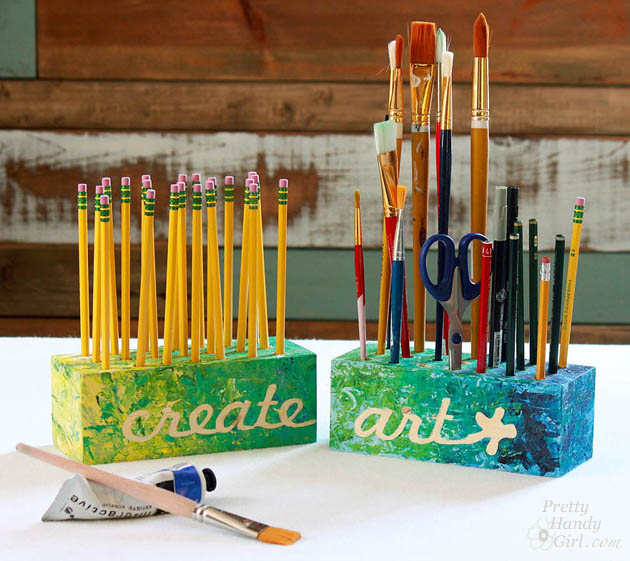
Creative Block Desk & Art Utensil Holder

create_art_block_holders_sm

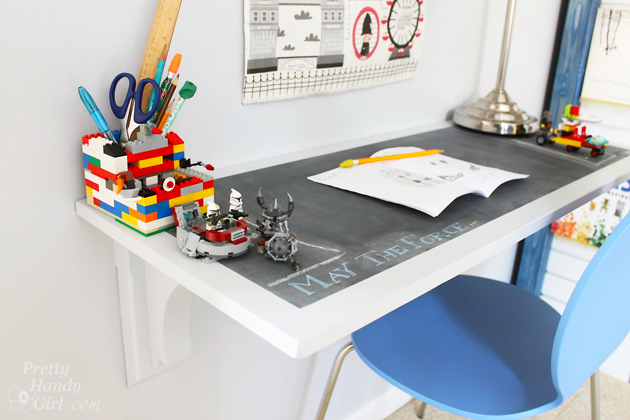
Creating a Chalkboard Desktop.

How to Make a Chalkboard Surface Desk | Pretty Handy Girl

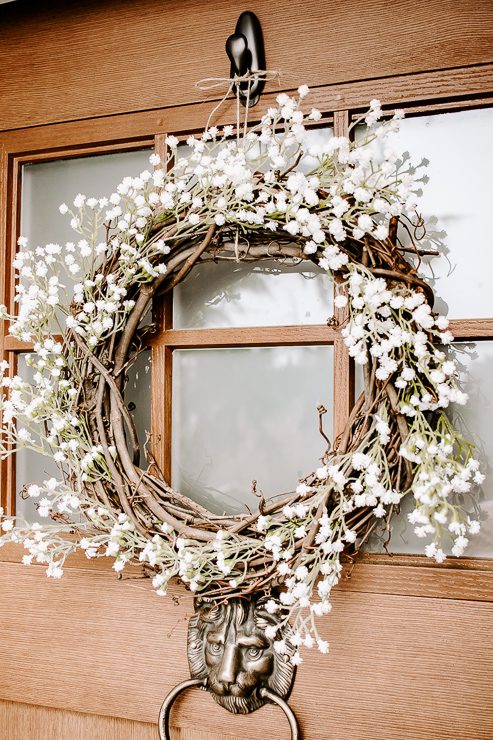
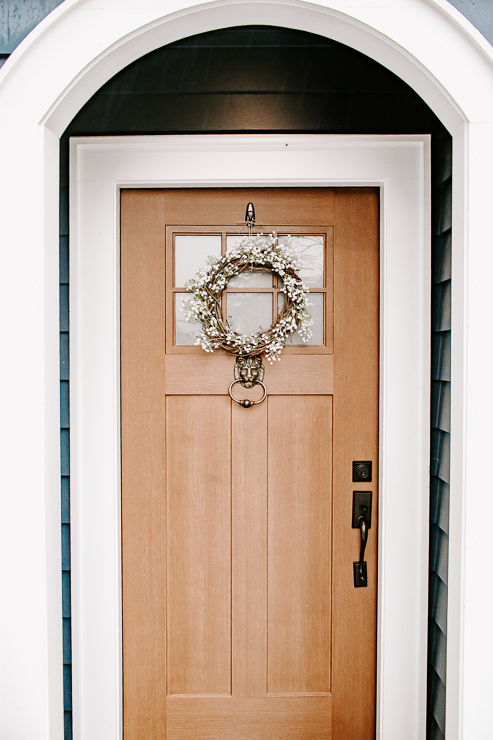
Spring Wreath hanging on front door

DIY Spring Wreath

Hello, Pretty Handy Girl Readers!

Iโ€™m back today with a fun project for your front doors! This beautiful baby breathโ€™s wreath โ€“ perfect for Spring. I love making my own wreaths because I can customize them exactly the way I want. And I can save a bunch of money by making them myself, too.

The first thing I do before making any wreath is to collect some inspiration. I look at a bunch of shops, like Pottery Barn and Etsy to get an idea of what kind of wreath I want to make. Iโ€™ve learned the hard way that it can be extremely overwhelming (and easier to overspend) when you donโ€™t have a plan in place first.

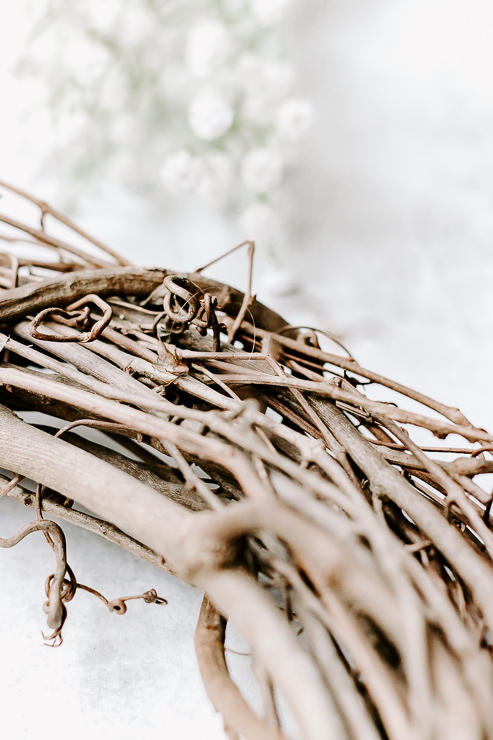
Close up of a grapevine wreath

To make a wreath like this one all you need is a simple, inexpensive grapevine wreath and some faux flowers of your choice. In this case, I used all baby breath stems to keep a uniform look. Michaelโ€™s and Afloral.com seem to be the best places to get these materials at the best price. In fact, Michaelโ€™s is almost always running a sale on their floral department and you can usually find an additional 40% off coupon online. However, Michaelโ€™s can be overwhelming as I said before. They have so many options! Itโ€™s important to know what kind of wreath you want to make first so you can easily gather the flowers you need. Otherwise, you might be there all day! ๐Ÿ™‚

Close up of Faux Baby's Breath Floral

Hereโ€™s another tip for you. While I really enjoy making wreaths, I donโ€™t have the room to store a lot of them. So, I tend to make each wreath somewhat temporary. Meaning, I donโ€™t permanently attach the florals. I like to have the option to change up the look using the same Grapevine Wreath. Another way to save a little bit more money!

So letโ€™s get started.

Materials:

(Iโ€™ve includedย affiliate links for your convenience. I earn a small percentage from a purchase using these links. Thereย is no additional cost to you. You canย readย more about affiliate links here.)

Materials needed to make a Spring Wreath

Grapevine Wreath (I used brass gift toppers from Target, Amazon and craft stores sell bells too.)
Scissors or Wire Cutters
Faux Florals of your Choice
Floral Wire โ€“ (optional, you may not need this)
Ribbon for Hanging

Instructions

Follow these steps to make this lovely Spring Wreath.

Step 1: Prepare your Floral Pieces

Cut floral stems

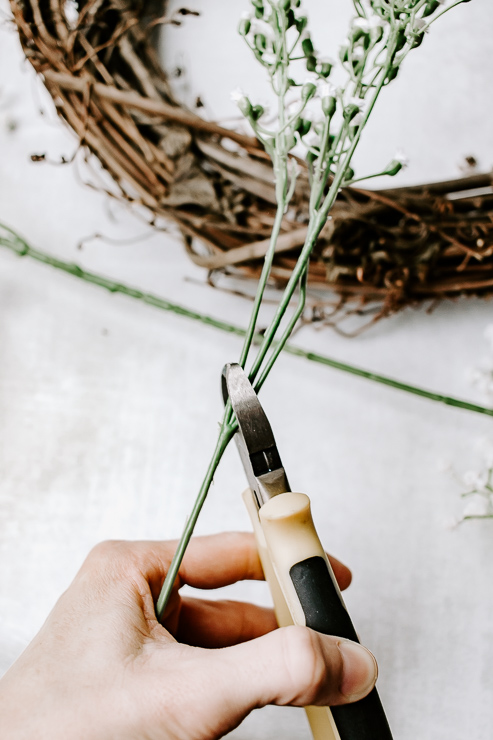
When you buy faux flowers, most of the time they come in bunches or with a very long stem attached. We need shorter stems and mainly individual flowers when making a wreath. Using your wire cutters, cut your floral bunches into individual flowers and cut any long stems a bit shorter.

Donโ€™t cut stems too short! You do want some stem to be able to insert them snugly into your grapevine wreath.

Step 2: Start Attaching your Florals to your Wreath

Insert Faux Florals into Grapevine Wreath

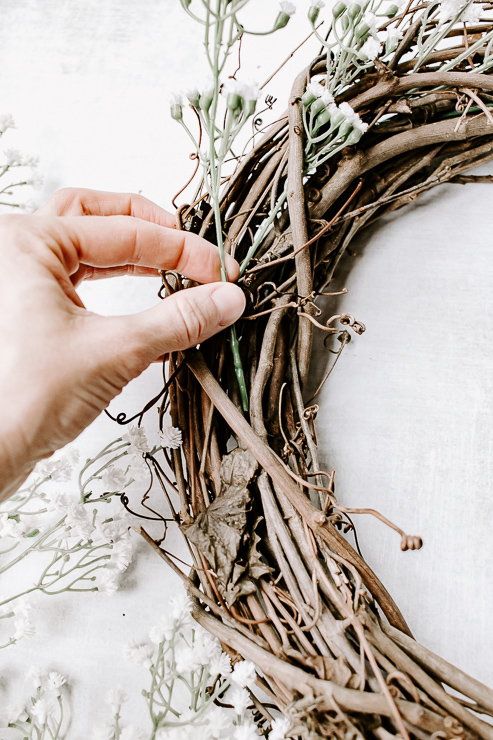
Now, you can attach your florals fairly securely just by pushing the stems snugly into the intertwined branches of the grapevine wreath. That is why you may not need any floral wire at all! I only ended up needing a little bit of wire to secure a few pieces. Use your wire cutters to snip off a piece of wire. With the wire holding your stem to the wreath, twist the back to secure it. You can carefully use your wire cutters to help twist the wire in the back. Be careful, the floral wire can be sharp!

insert florals into grapevine wreath

Periodically pick up your wreath to make sure that your floral pieces are secure and not falling off.

Use floral wire to secure florals to wreath

Thatโ€™s pretty much all you need to do to make this pretty wreath!

Step 3: Hang up your new Spring wreath

Close up of jute ribbon used for hanging wreath

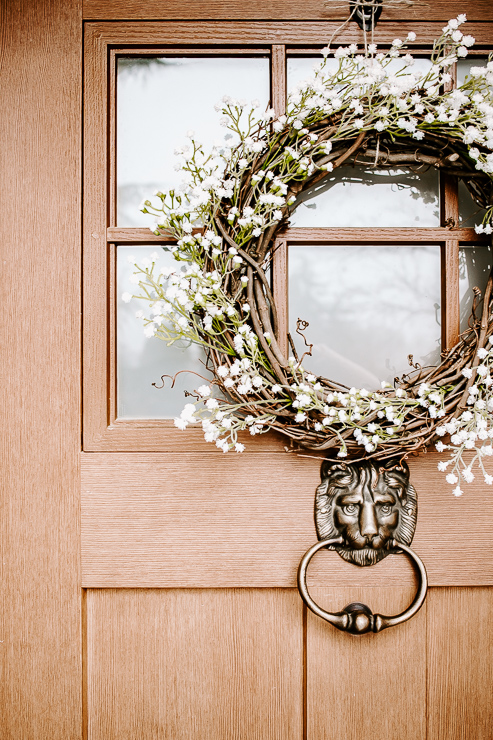
Itโ€™s time to hang it up! I use a command hook made especially for hanging wreaths.

Spring Wreath hanging on front door

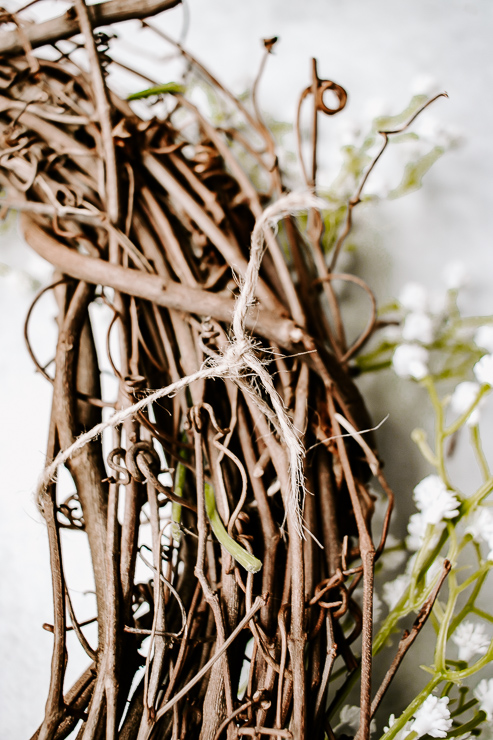
I just attach a little loop of ribbon or string to the back of the wreath. Then, I just hang the loop directly on the hook.

Spring Wreath hanging on Front Door

It works really well and has never fallen off (even with young kids slamming the door one too many times!)

Spring wreath hanging on front door

I really hope you enjoyed this project and it brings some Spring joy to your homes. If you love making wreaths, check out my other DIY Spring hoop wreath project here on Pretty Handy Girl.

Thanks so much for reading and being here today.ย  Iโ€™ll meet you back here next month!

karen signature

~ See More of Karenโ€™s Tutorials ~


karen from decor hintHello!ย  Iโ€™m Karen, the creator of the Home Decor and DIY Blog:ย Decor Hint.ย Iโ€™m a Native of the East Coast, but I currently live in beautiful Seattle with my hubby, our two wonderful children, and our spunky wheaten terrier.

You can usually find me with some sort of craft in one hand and a coffee in the other. And Iโ€™m always rearranging furniture or moving lamps from room to room. I have a passion (read: obsession) for decorating, DIY, and gardening. In short, I love making my house into a home.

Like many, Iโ€™m inspired by what I see in home decor magazines, but Iโ€™m not so inspired by the price tags.ย  Consequently, I love finding and creating beautiful budget-friendly home decor items. In a head to head competition, I bet youโ€™d never know the difference between the designer items and my DIY creations!ย  Many of my DIY projects focus on sewing, crafting, upcycling and organizing. Some of my favorite projects have been making pretty wreaths,ย sewing my own tassel hand towels, and crafting these trendy wood bead garlands.ย I canโ€™t wait to inspire you and spark your creativity through my DIY projects.

You can always connect with me on Pinterest,ย Twitter or Instagram.

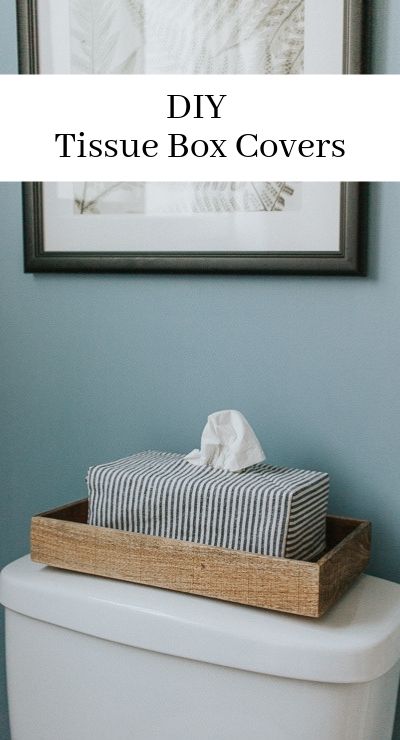
Make these easy DIY tissue box covers. Use any fabric and cover up those ugly tissue boxes!

Hey Guys, happy Summer! Iโ€™m back today with another easy home project for you โ€“ a simple stylish DIY Fabric Tissue Box Cover.

I donโ€™t know about you, but I think most tissue boxes are tacky. They stick out like a sore thumb in our house! Unfortunately, itโ€™s not the type of thing I can just put away in a closet (believe me, Iโ€™ve tried!) Our family has allergies and young kidsโ€”needless to sayโ€”the tissues must remain out.

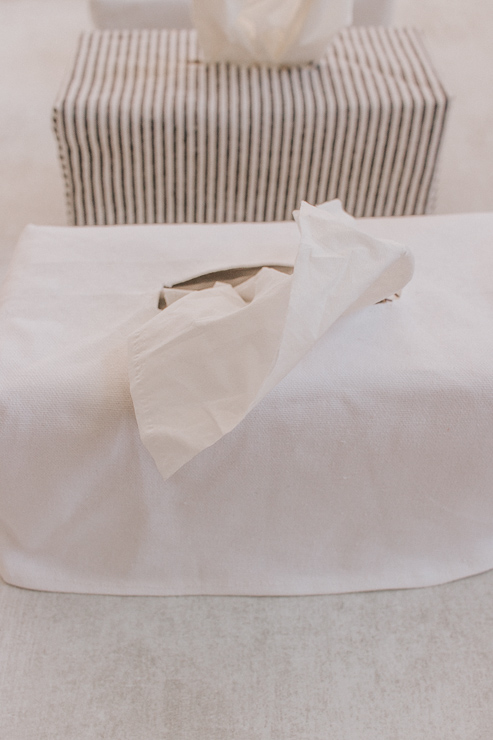
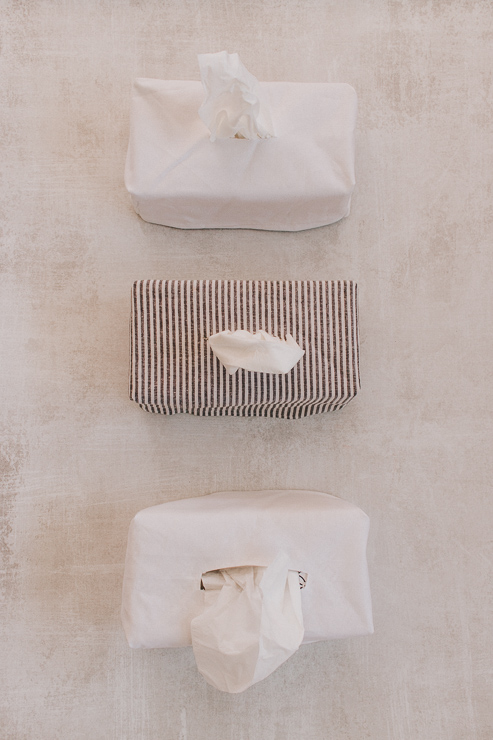
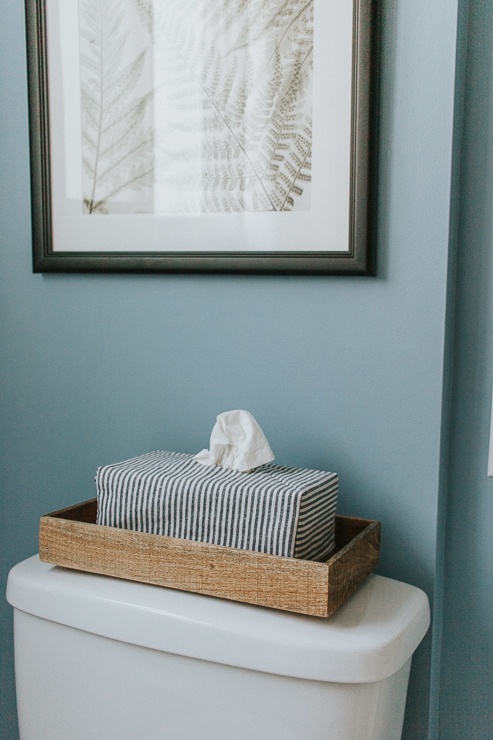
Tissue Box Covers - White and Striped Fabric

Until the tissue manufacturers come out with some better patterns, Iโ€™ll be covering mine up! These fabric tissue covers do just the trick. You donโ€™t need too much fabric to make them. They blend in nicely with your decor, and you can wash them if needed!

Of course you could buy tissue box covers. But, these are customizable and you can make them with a $2 piece of fabric (or less.) So, go ahead and save some money by doing this yourself. Iโ€™ve seen some tissue box covers selling for almost $40! Yikes.

I wanted to make the process as simple as possible for you. Youโ€™ll be happy to know, I did this project over and over and over again until I found the perfect method for making them. Yes โ€“ I have over 5 tissue box covers now. Ha!

Tissue Box Covers - White Canvas and Striped Fabric

Ok, letโ€™s get started.

Materials:

(Iโ€™ve includedย affiliate links for your convenience. I earn a small percentage from a purchase using these links. Thereย is no additional cost to you. You canย readย more about affiliate links here.)

Instructions:

Follow these steps to make your stylish tissue box covers.

Step 1: Cut out your Rectangle.

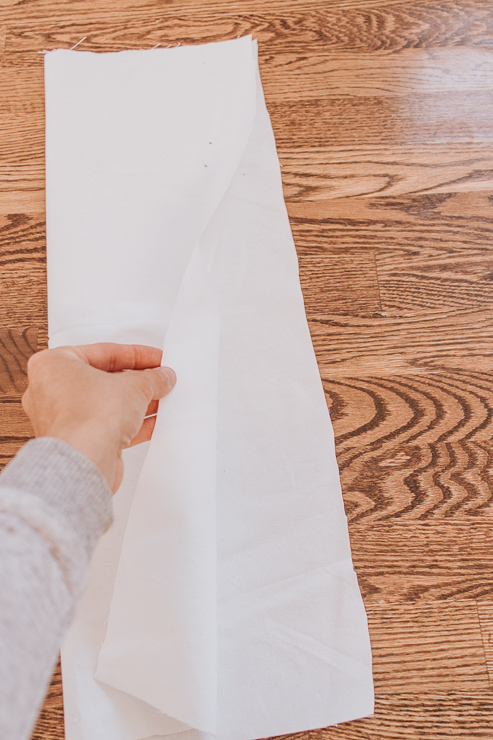
Iโ€™m assuming most tissue boxes are generally the same dimensions. But, measure your box to double check. For a standard rectangular tissue box, I started with a rectangle of fabric sized 16 inches by 24 inches.

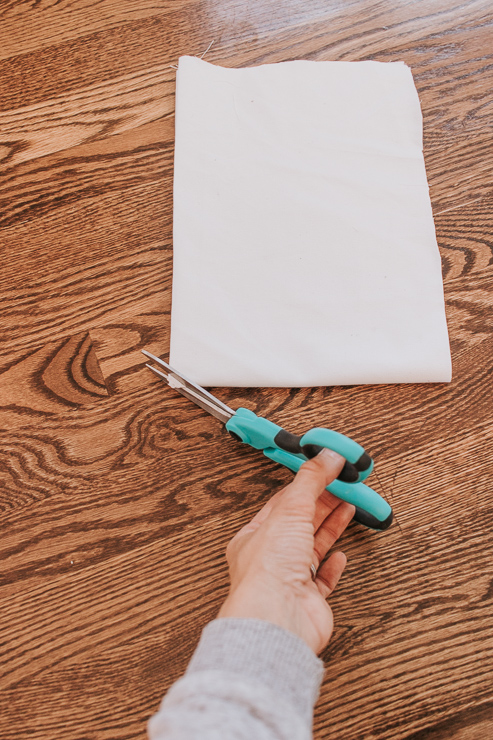
Now cut your fabric to size.

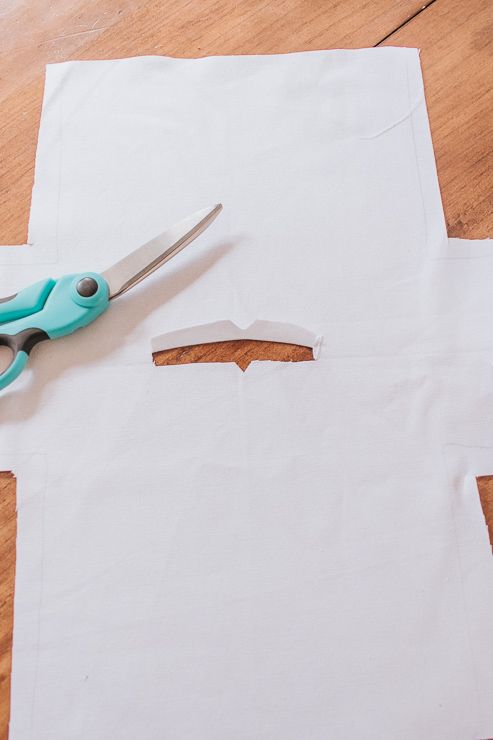
Step 2: Cut a Center Hole.

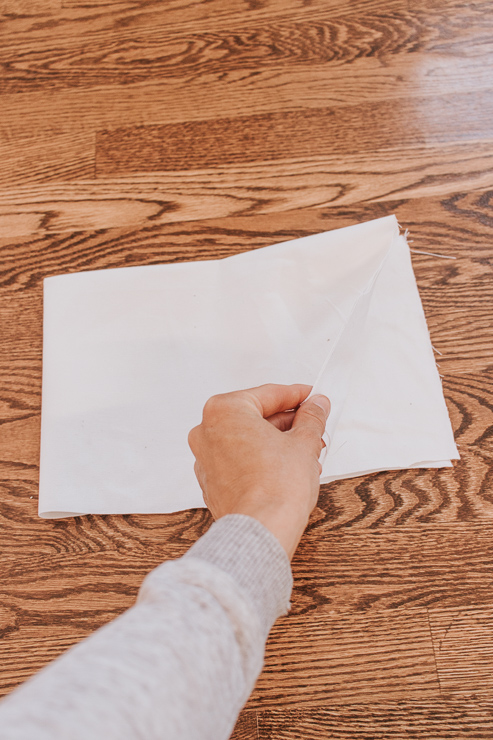
Make a hole where the tissues will be dispensed. Hereโ€™s an easy way to do this. Take your rectangle of fabric and fold it in half lengthwise, then fold it in half again. Snip a little piece of the corner section โ€“ this will create a small hole perfectly centered in your fabric.

Snip corner to create a hole in the center of your fabric


Step 3: Measure and Mark your Corners.

Measure Squares to Make Mitered Corners


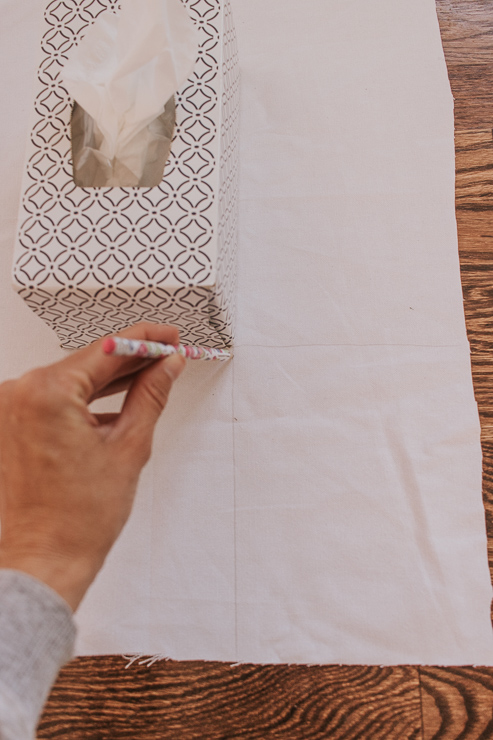
Place your tissue box in the center of your fabric. Hold the tissue box in place with one hand. With your other hand, use your pencil to mark a square at the corner of the tissue box. Repeat for all four corners.

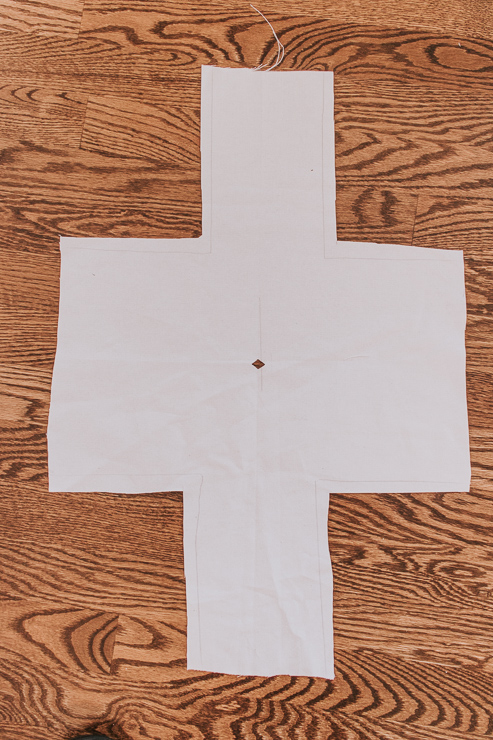
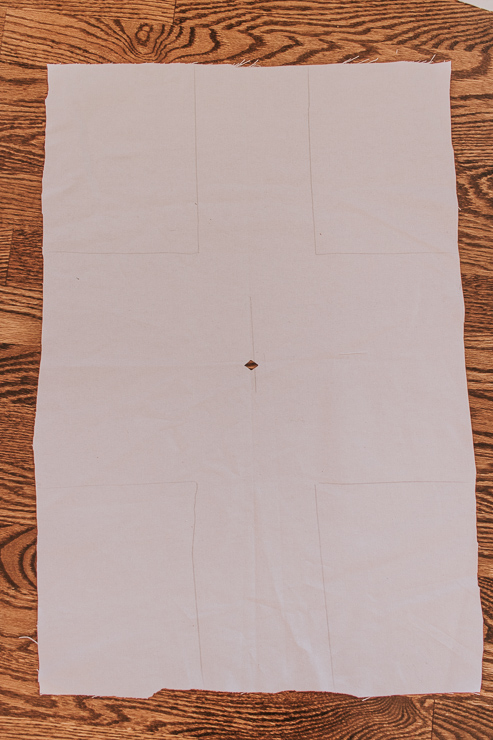
It should look like this โ€ฆ

Create a hole in the center of the fabric

Step 4: Cut Out the Corners.

Cut your Squares out of Fabric

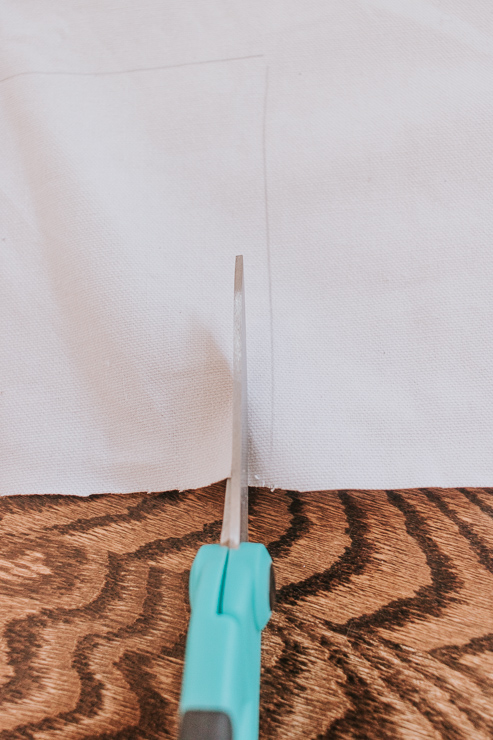
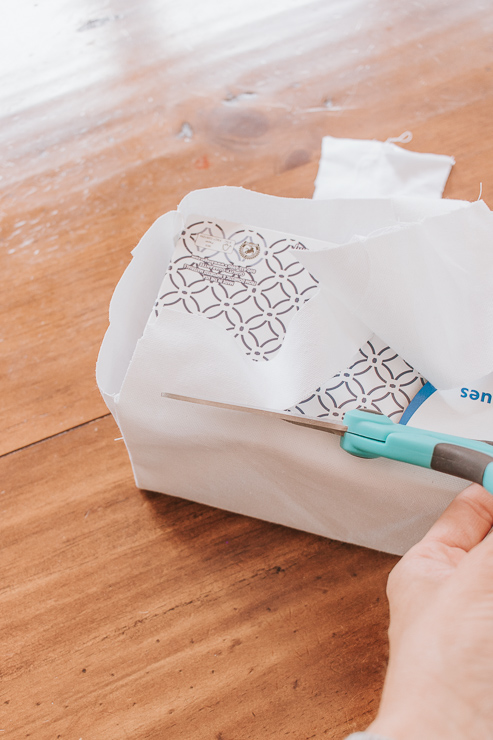
To make nice mitered corners, cut out the squares marked above. But, to allow for your seam, subtract about 1/4 โ€“ 1/2โ€ณ from the marked lines. Essentially, youโ€™re cutting slightly outside where you made the pencil lines as shown below.

Tissue Box Cover before it's sewn together

Step 5: Sew Your Tissue Box Hole.

Remember the little hole we cut out of the center earlier? Now you can cut it slightly bigger to accommodate your tissues. Cut, a skinny rectangle and fold flaps toward the inside of the fabric tissue cover. Iron them to keep them from folding back. It doesnโ€™t have to be super neat. The tissues will help cover it up!

Create a Center Hole for Tissues

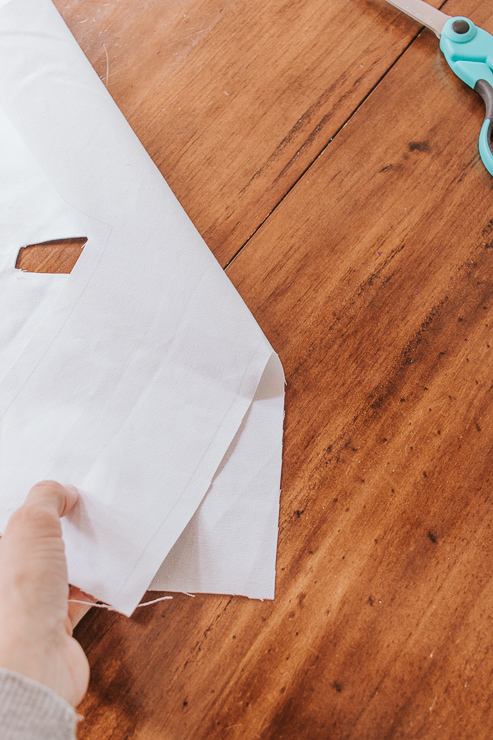
Step 6: Sew your Corners.

Take your piece of fabric and fold it so the corner pieces line up as shown below. You want to make sure you sew the pencil mark side on the underside so they donโ€™t show. When you fold the fabric, the pencil marks should be facing out. Stitch along the pencil line.

Repeat and sew all four corners the same way.

Step 7: Trim the Bottom.

Woot! Your little tissue box cover is taking shape now. Turn your cover right side out and place it over your tissue box.

Tissue box cover with excess fabric at bottom

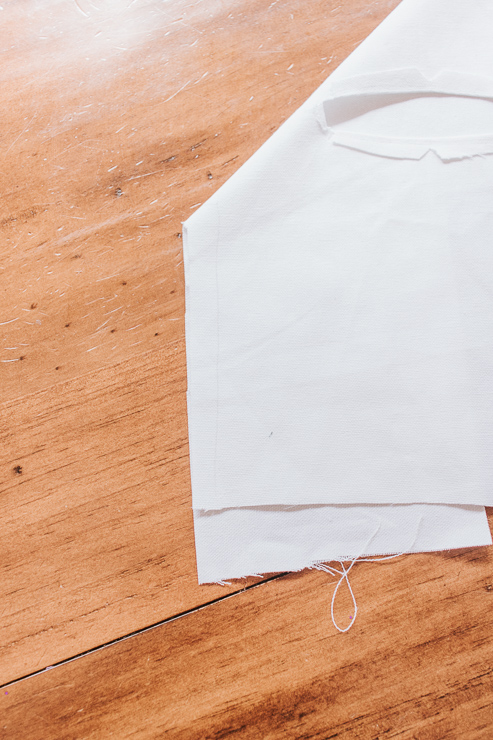
The ends are long, huh? Well, we can easily just cut those down and sew a clean seam all the way around! You may be wondering why I started with a larger piece of fabric only to have excess at the end.

Trim excess fabric from tissue box cover

Trust me โ€“ I did this five times over! Having excess fabric ensures all your ends meet nicely and cover the tissue box entirely.

Letโ€™s finish up by cutting away all the excess fabric minus 1/2โ€ณ to create a nice seam.

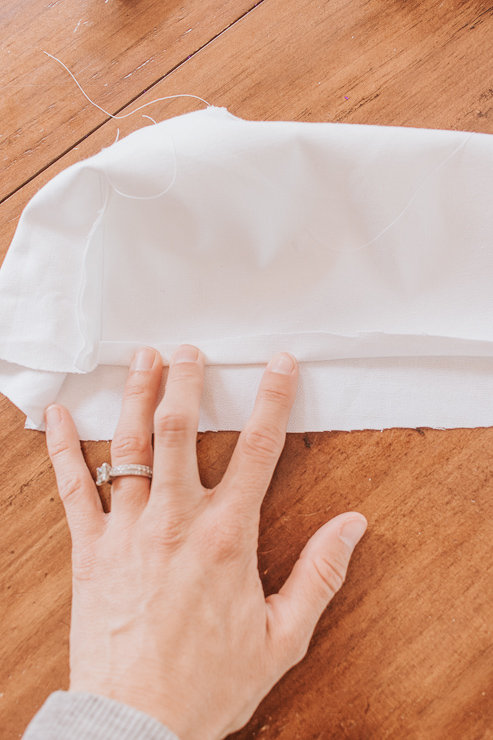
Iron Down a Small Seam on the bottom

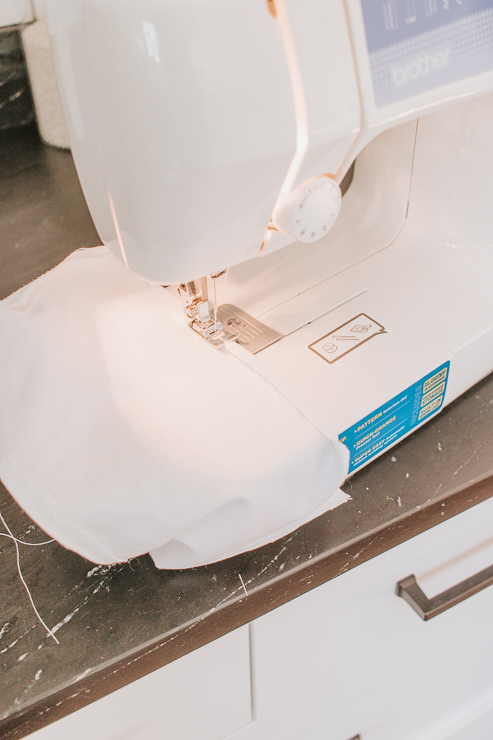
Fold over the excess. Iron the seams. Now stitch along the edge of the folded seam.

Sewing Tissue Box Cover

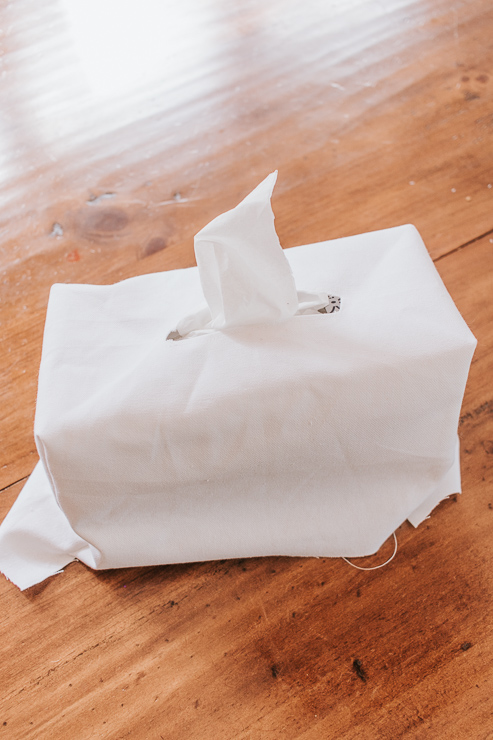
Step 8: Flip your Tissue Box cover Right Side Out.

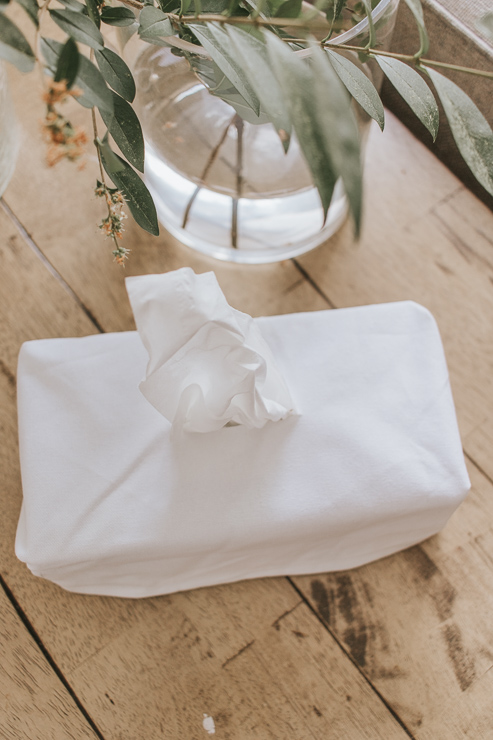
White Tissue Box Cover on Table

You are all done! Flip your tissue box right sides out and place it over your tissue box.

Soooooooo much better. Right?

These fabric tissue box covers look great everywhere and you can customize them with fabric of your choice. Place one in your bathroom, in your bedroom, and in your living room. Anywhere you want!

DIY Tissue Box Covers - Easy and Simple Tutorial for covering up those ugly tissue boxes!

No more ugly tissues boxes.ย  And my husband doesnโ€™t have to ask โ€“ โ€œwhere are the tissues, now?โ€ LOL.

DIY Tissue Box Covers - Easy and Simple Tutorial for covering up those ugly tissue boxes!

Even though I prefer a sturdier canvas or heavy cotton fabric for this project, you can make these tissue box covers with any fabric.ย  Add some embroidery for a personalized touch!ย  Or get out some fabric markers and create a Scandi design on plain canvas.ย  This is a fun project allowing you to get creative with different looks.

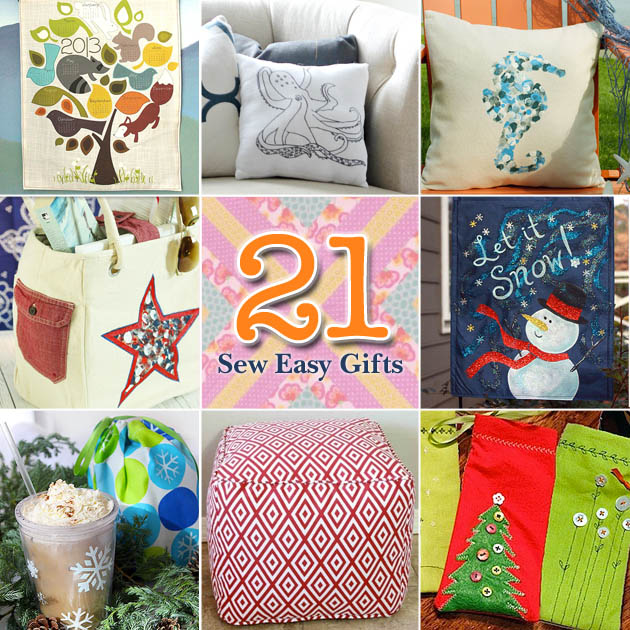
I hope you enjoyed this tutorial for a DIY fabric tissue box cover.ย  ย For more fun sewing projects for your home, check out these sewing posts from Pretty Handy Girl. Or these 21 Sew Easy Gift Ideas:

21 Sew Easy Gift Ideas You Can Make Yourself | PrettyHandyGirl

Or learn how to make some of my popular projects from Decor Hint:

Iโ€™ll see you right back here next month! Enjoy the start of Summer!

karen signature

~ See More of Karenโ€™s Tutorials ~


karen from decor hintHello!ย  Iโ€™m Karen, the creator of the Home Decor and DIY Blog:ย Decor Hint .ย Iโ€™m a Native of the East Coast, but I currently live in beautiful Seattle with my hubby, our two wonderful children and our spunky wheaten terrier.

You can usually find me with some sort of craft in one hand and a coffee in the other. And Iโ€™m always rearranging furniture or moving lamps from room to room. I have a passion (read: obsession) for decorating, DIY, and gardening. In short, I love making my house into a home.

Like many, Iโ€™m inspired by what I see in home decor magazines, but Iโ€™m not so inspired by the price tags.ย  Consequently, I love finding and creating beautiful budget-friendly home decor items. In a head to head competition, I bet youโ€™d never know the difference between the designer items and my DIY creations!ย  Many of my DIY projects focus on sewing, crafting, upcycling and organizing. Some of my favorite projects have been making pretty wreaths , sewing my own tassel hand towels, and crafting these trendy wood bead garlands . I canโ€™t wait to inspire you and spark your creativity through my DIY projects.

You can always connect with me on Pinterest , Twitter or Instagram.

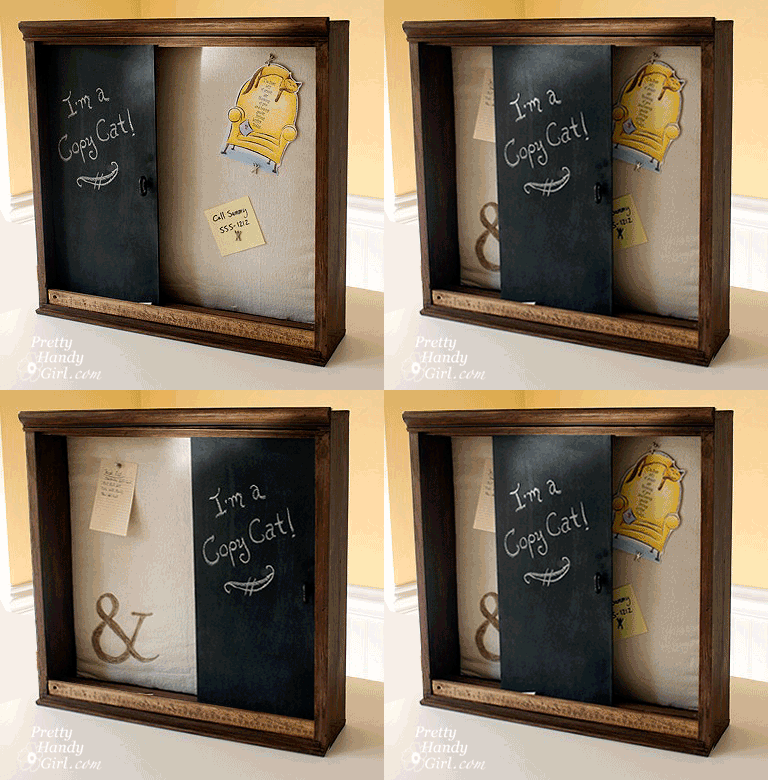
Pottery_barn_like_organizational_box

I love a challenge. If you hold an object up to me and ask me how it can be transformed, I can usually name a few different things. So, when the Elmerโ€™s #Look4Less Challenge was introduced, I jumped at the opportunity!

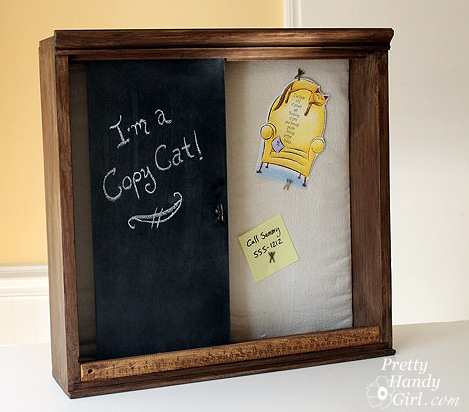
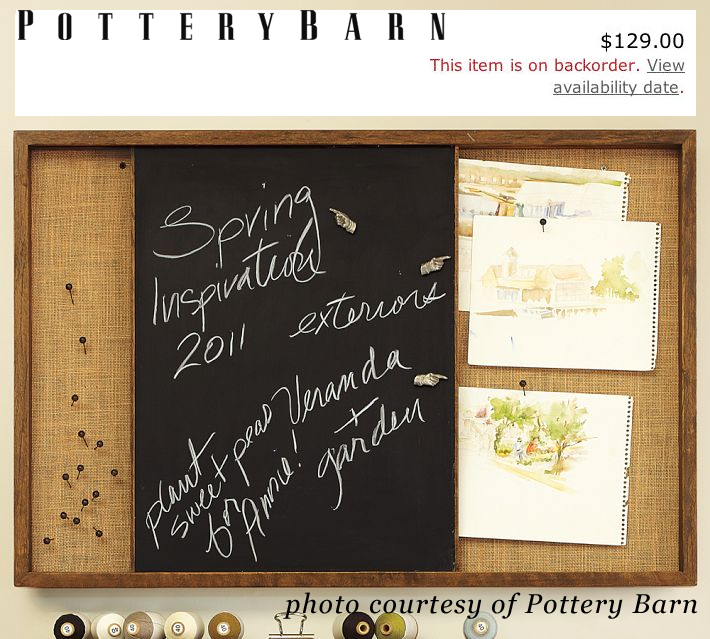
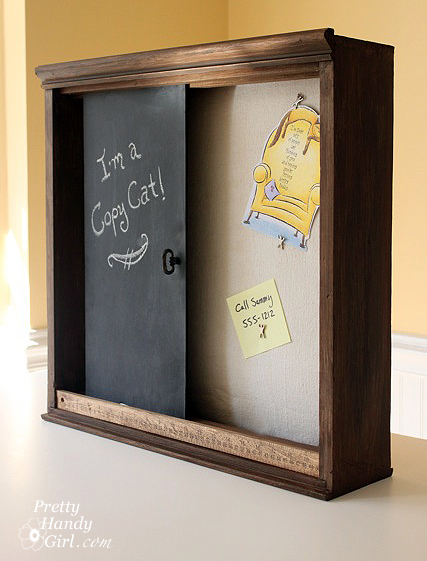
For this challenge I chose to recreate Pottery Barnโ€™s Sliding Chalkboard Wall Organizer. I loved the idea of a sliding board and a bulletin board in the back. But, I especially loved the rustic wood look.

However, I wasnโ€™t crazy about the price. (Obviously that didnโ€™t stop the item from selling out!) So, if you want one for yourself, Iโ€™ll save you $100 and show you how to make your own!

My version cost approximately $30 (cost estimate based on materials used. If I used a 1/2 can of spray paint I calculated half the cost.) Personally, I spent about $10 out of pocket on this project because I had a lot of the supplies already. Plus, Elmerโ€™s was kind enough to sent me some of the materials to make the project (shown as links below.)

Be sure to read the end of this post to learn how you can win your own Elmerโ€™s materials!

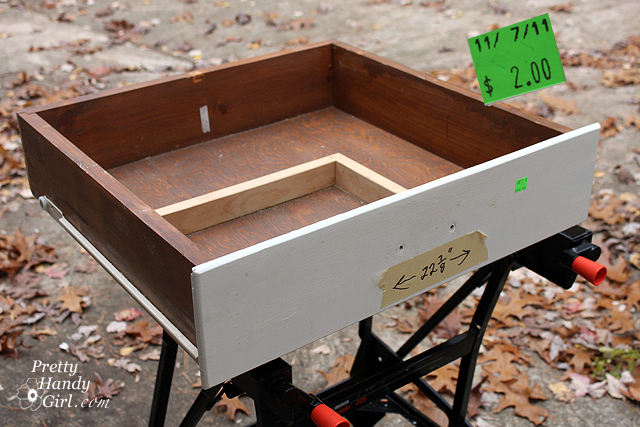
In addition to the new art supplies, I bought an old drawer to use for the structure of my organization unit. I paid โ€” are you ready for this โ€” two dollars at our local Habitat ReStore! Seriously, only $2 for the main component of my wall organizer unit.

Here is a list of the rest of the supplies I used:


  • Krylon chalkboard spray paint
  • Drawer
  • Damp rag
  • Painterโ€™s drop cloth
  • Batting
  • Wooden ruler
  • 1 Knob
  • Washers
  • Rustoleum brown spray primer
  • Behr glazing liquid
  • Valspar mocha glaze
  • Acrylic or latex paint (dark brown tester sample)
  • Acrylic or latex paint (light tan tester sample)
  • Wood putty
  • Saw
  • Hammer
  • Drill and drill bits
  • Handsaw
  • Brad nails
  • Finish Nail
  • Construction glue
  • Clamps
  • Pencil
  • Trim molding
  • 1โ€ณ x 1โ€ณ wood strips (or square dowels)
  • Duct tape

Prepping the drawer:

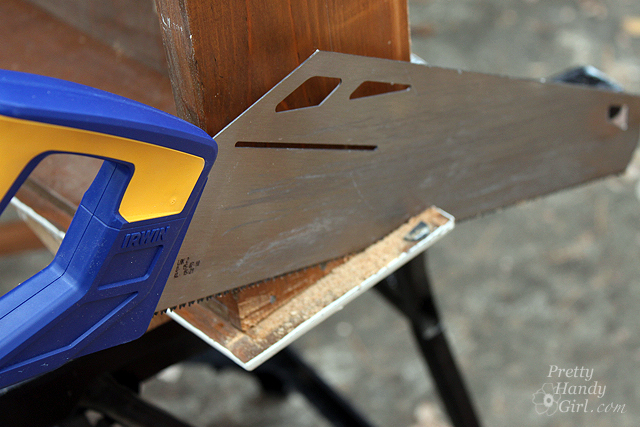
Remove any hardware from the drawer.ย Use a handsaw to trim off the sides of the face of the drawer. You want the sides to be flush with the sides of the drawer. The top and bottom of the face can extend beyond the drawer.

Orient the drawer so the face is now the bottom of the wall organizational unit. The rear panel of the drawer is now the top of the unit.

Add decorative trim molding to the top as shown:

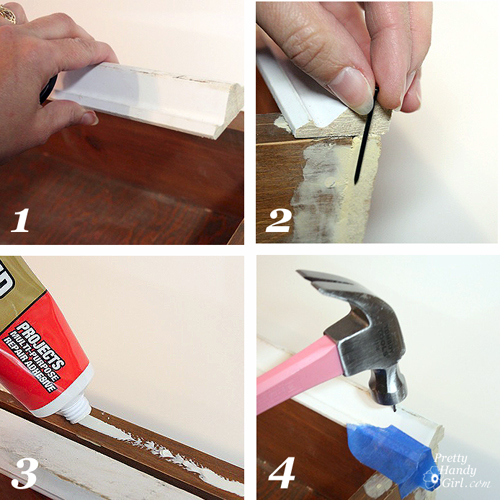
  1. Cut decorative trim molding to the width of the top of the unit/drawer.ย (Check with your local Habitat Restore for inexpensive trim.)
  2. Choose a finish nail that is long enough to go through the molding and into the drawer. Drill a few pilot holes into the molding (to avoid splitting the wood when you hammer a nail into it.)
  3. Run a bead of construction glue on the top of the drawer. Lay the molding on top of the glue.
  4. Use finish nails to hammer through the pilot holes and attach the molding to the drawer.

Wipe off the drawer/unit with a wet rag.


Faux painting the unit:

If you are dealing with a mixture of wood finishes (some paint, some stain), you will want to prime and paint your unit. I decided to give mine a faux rustic wood treatment (because I love that rustic wood look!) Here are the basic steps:

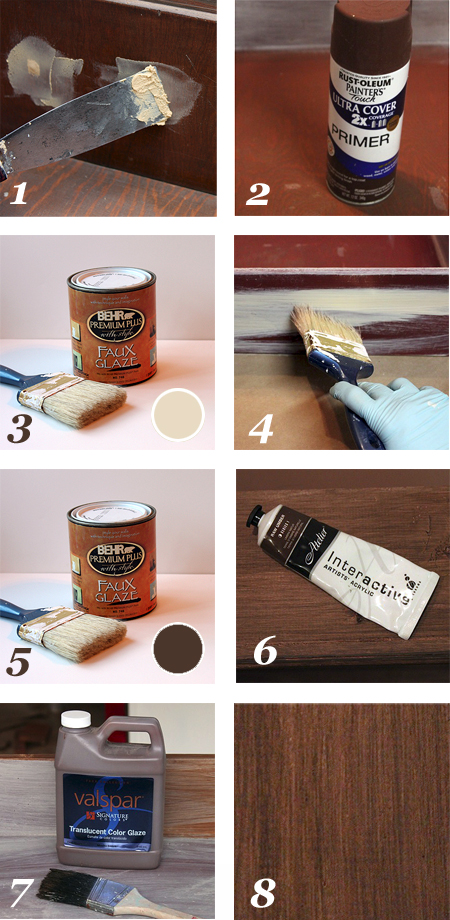
  1. Use wood putty to fill any holes or cracks. After the putty has dried, sand it smooth. Wipe off any dust from the wood using a damp rag.
  2. Prime the entire box (minus the back) with Rustoleum brown primer.
  3. Mix 1 part glaze to 2 parts light tan paint.
  4. Brush the mixture onto the unit using a tattered paint brush. Keep the strokes in long lines to mimic wood grain.
  5. Let that layer dry.ย Mix 1 part glaze to 2 parts dark brown paint.
  6. Brush it on the unit using the same technique as step 4.
  7. Finish up by brushing a coat of Vaspar Mocha glaze over the entire unit.


Creating the bulletin board:

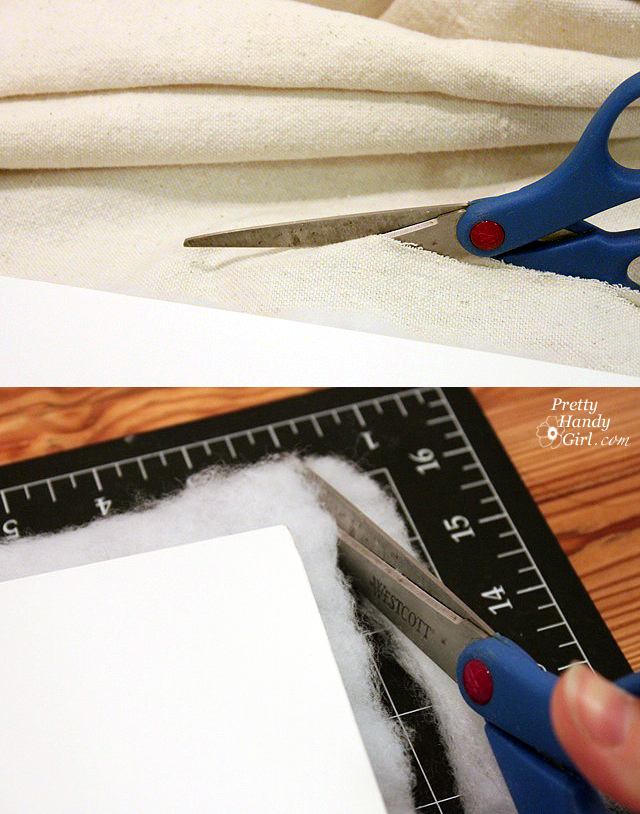
After the glaze has dried, cut a piece of Elmerโ€™s White Foam Board the dimensions of the inside of the drawer/unit.

Cut a piece of batting the same size as the foam board.

Cut a piece of paintersโ€™ drop cloth 2-3โ€ณ wider (on all sides) than the foam board.
Layer the drop cloth, then the batting and top it with the foam board.
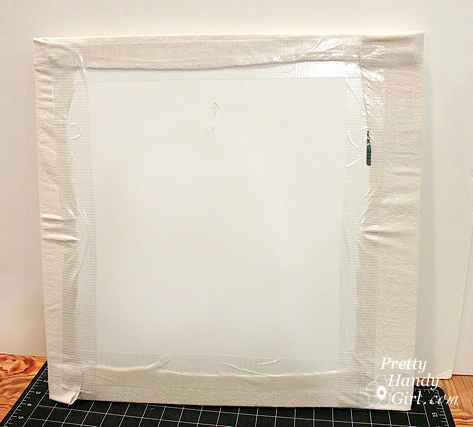
Wrap the edges of the drop cloth around the foam board and secure it with duct tape.

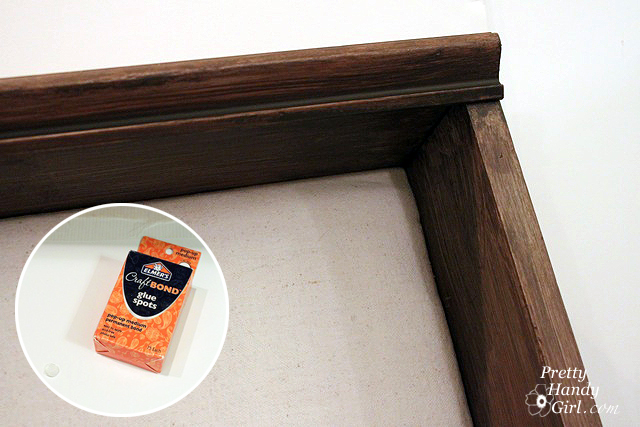
Add a few Elmerโ€™s CraftBond Glue Spots Pop-up Medium to the back side of the foam board and press the board into the back of the unit. Instant bulletin board!


Adding a graphic letter to the bulletin board:
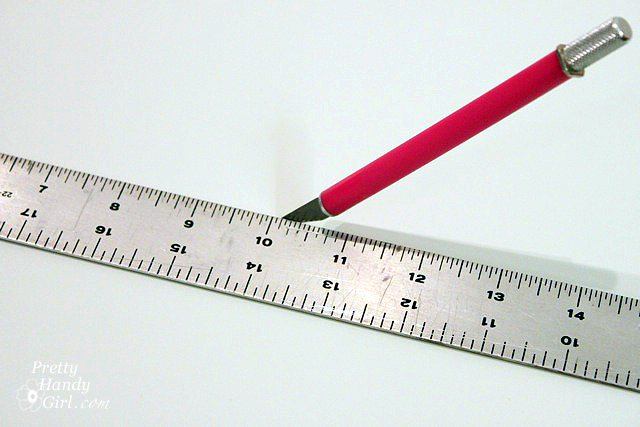
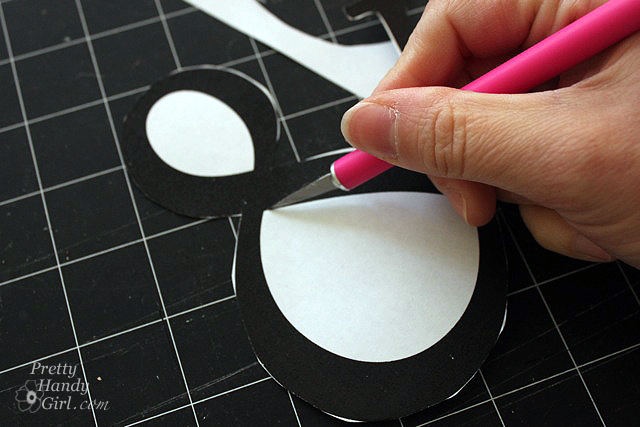
Print out a large letter, number or symbol. Cut out around the shape using an x-acto knife.

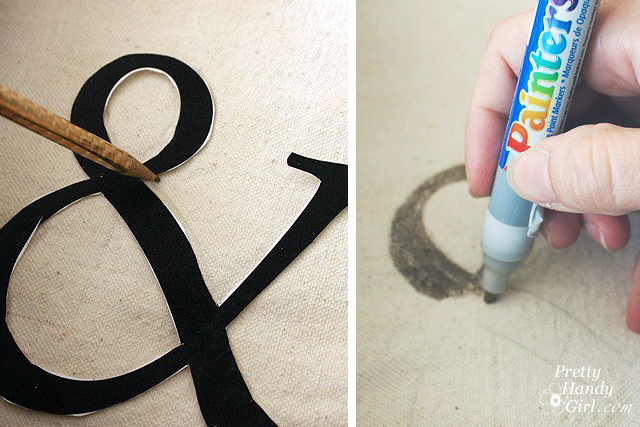
Position the cut out onto the bulletin board and trace around the edges lightly with pencil.Use an Elmerโ€™s Painters gold paint marker to color inside the pencil tracing.


Creating the sliding chalkboard:

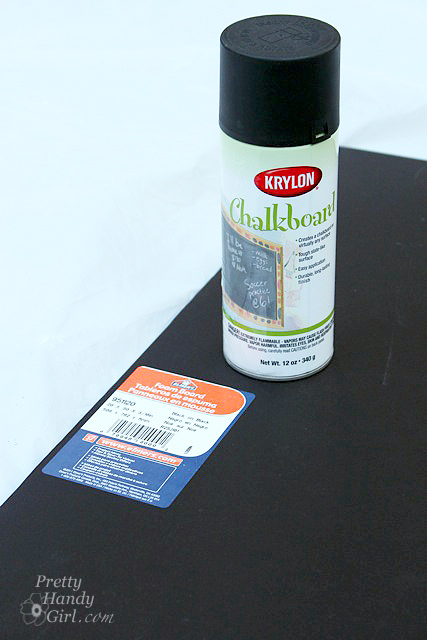
Cut theย Elmerโ€™s Black Foam Board the height of the interior of the drawer/unit and about 1/3 the width.

Spray the black foam board with the chalk paint. Add 1-2 more light coats per the directions on the can.

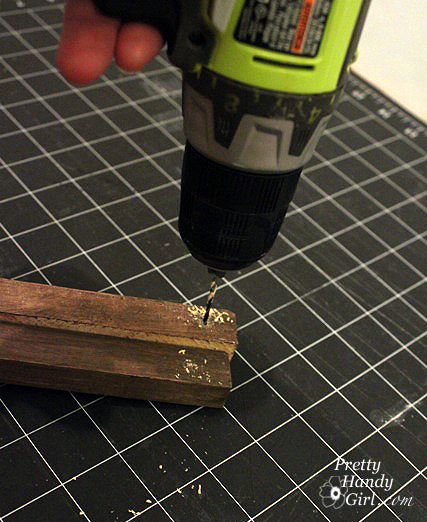
Measure the interior width at the top and bottom of the organizational unit. Cut two 1โ€ณ x 1โ€ณ strips of wood (or square dowels) for the top and 2 strips for the bottom. Drill a hole in each end of the strips.

Measure out 1โ€ณ from the bulletin board, on the bottom of the unit. Mark this location. Repeat for the top . Run a bead of construction glue onto the bottom of the wood strip and then adhere it to the bottom of the unit at the 1โ€ณ measurement mark.

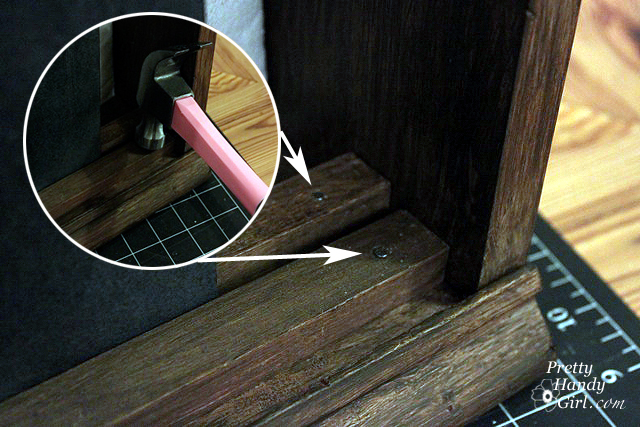
Hammer brad nails into the predrilled holes. Repeat for the top of the cubby. (Two 1โ€ณ square strips are shown, but only install the back ones at this time.)

If the chalkboard paint has dried, rub a piece of chalk all over the board to season it. Wipe it clean with a dry cloth.

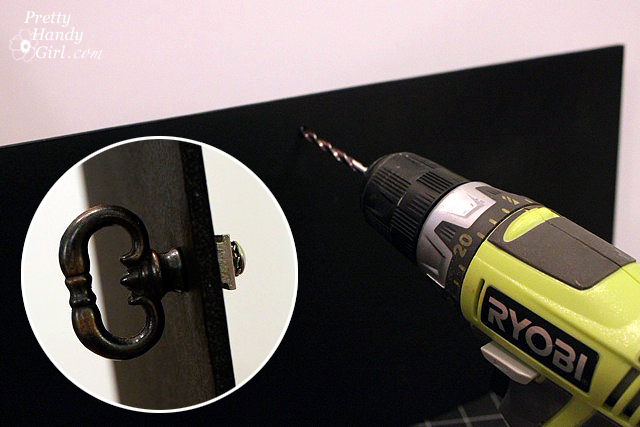
Drill a hole into the chalkboard where you want the handle. Feed the handle through. Add washers to the backside of the chalkboard if you need to take up some of the slack on the screw.

Insert the chalkboard into the wall unit and rest it against the first strip. Add the second strip in front of the chalkboard and attach it the same way you did above.

Be sure that the wood strips are not too snug against the chalkboard. The board should have enough freedom to slide back and forth freely.


Finishing touches:

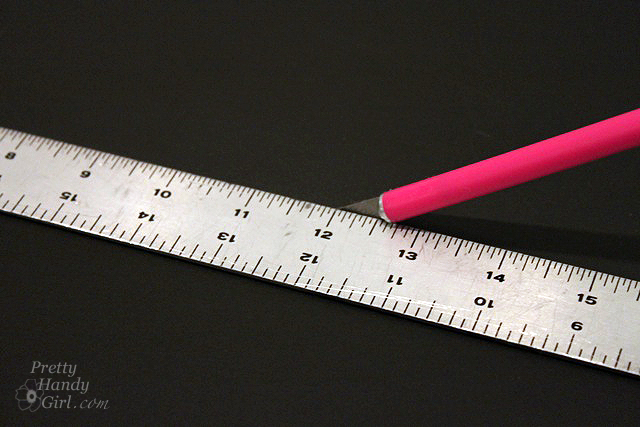
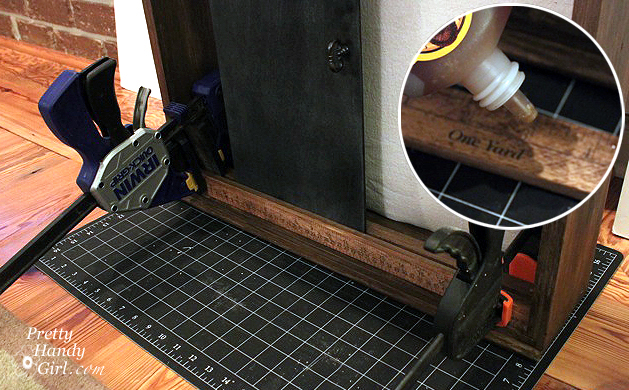
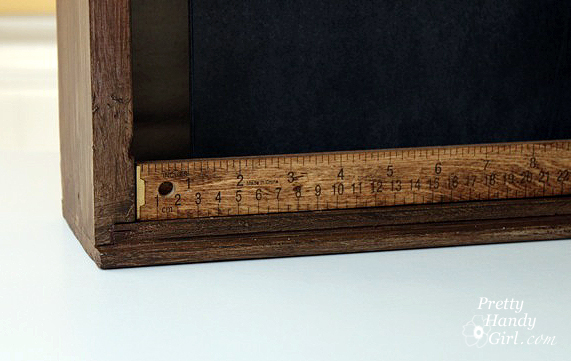
If you want to give your ruler some age, rub a walnut stain onto the wood. Let it dry. Glue theย wooden ruler to the front of the wood strip on the bottom using construction glue.

Clamp the ruler in place and let it dry overnight.

Add your pushpins and a message to the chalkboard and enjoy your efforts! You just saved yourself $100!!! Woot!

If you want instructions for hanging the unit, check out this post onย hanging objects on the wall (the right way) the first time.

Iโ€™m pretty pleased with my Pottery Barn copy cat. Not to be mean or anything, but I like mine better because of the ruler,

the decorative crown molding,

and most of all for the price!!!


Do you like my Pottery Barn knock off? Or does it still look like an old discarded drawer to you?


Disclaimer: This project has been compensated as part of a social shopper insights study for Elmerโ€™s #gluenglitter #collectivebias #CBias. I was paid a small fee and sent some Elmerโ€™s products. However, the ideas and opinions expressed in this post are solely mine.

Sharing with Sawdust and Paper Scraps โ€“ Build{hers} Link Party

Did you like this post? Want to be notified when there are more fantastic tutorials by Pretty Handy Girl? Sign up to receive emails in your inbox:

Enter your email address:

Delivered byย FeedBurner

Or follow me onย Twitter orย Facebook so you can be the first to know!

ย 


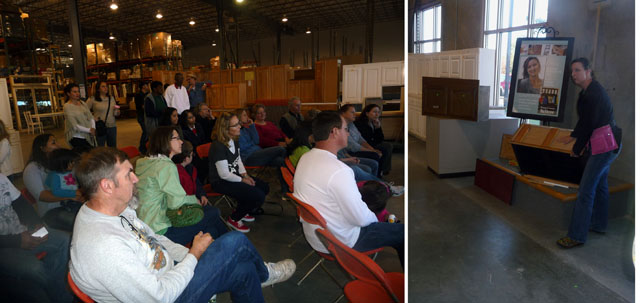
We had a great turnout at the Habitat ReStore demonstration on Saturday! Thank you to everyone who showed up. It was nice meeting some new friends. There will be another talk at 1 pm on Saturday, December 10th at the Cary, NC Habitat ReStore! I hope you can make it, because Iโ€™ll be showing how to turn some common ReStore items into holiday gifts and dรฉcor.

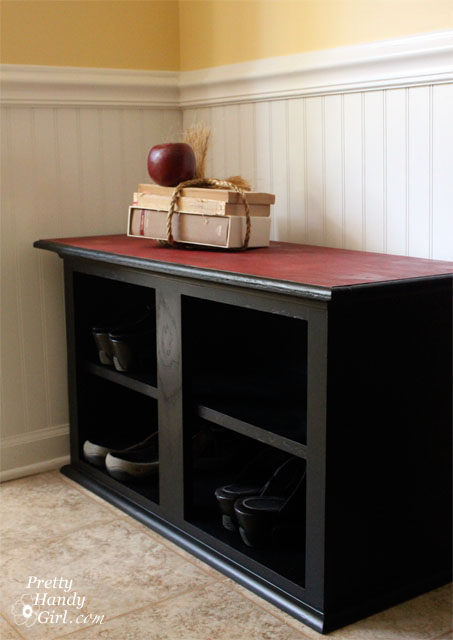
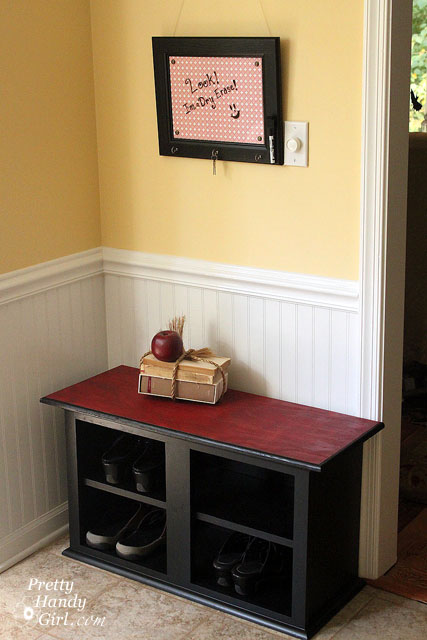
And now for the tutorial that you really wanted to see โ€” but couldnโ€™t make it to see โ€” making a shoe storage bench out of an kitchen wall cabinet!

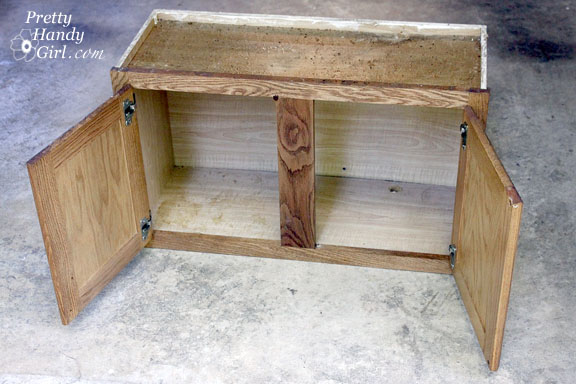
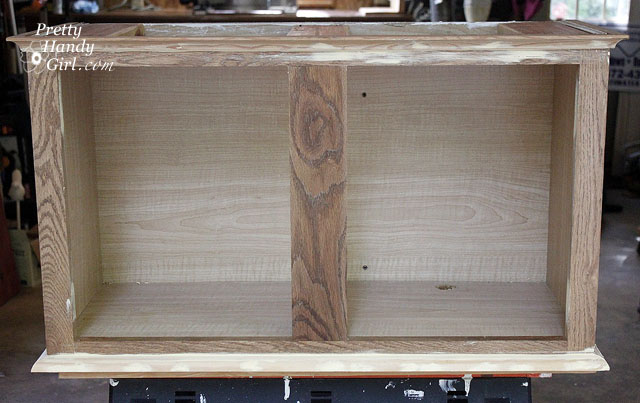
Wall cabinets that fit over your fridge or stove work really well for this shoe storage bench project. Ideally the cabinet will be 18โ€ณ in height (standard seat height). If it is shorter, you can build a base for your bench to raise it up a little.

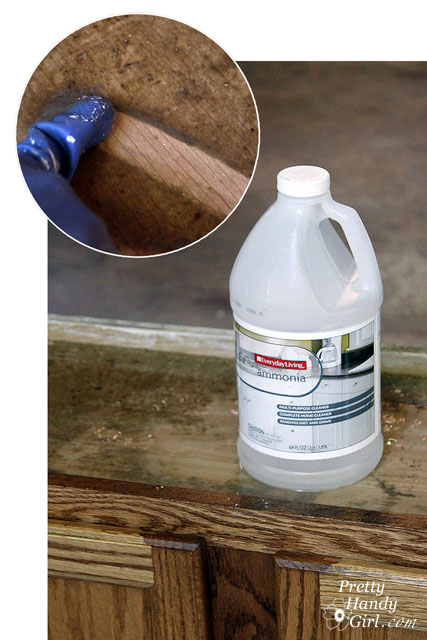
It is more than likely that these cabinets will be coated with about 5 lbs. of grease. But, have not fear, I found THE BEST cleaner for removing grease. Hot water and ammonia! You must work in a well ventilated area when working with ammonia. Sponge on the ammonia and hot water concoction and wait about 10 minutes. Wipe off the cabinet and repeat until clean.

Materials:

  • Ammonia, hot water and a sponge or rag (to clean off grease)
  • Screwdriver
  • Hammer
  • Nail set
  • Miter saw
  • Pencil
  • Level
  • Tape measure
  • Wood putty
  • Sandpaper
  • Construction or thick wood glue
  • Primer
  • Paint
  • Paint brush
  • 2โ€ณ finish nails
  • 1 and 1/4โ€ณ finish nails
  • Quarter round moulding for base of cabinet
  • Cove moulding for top of cabinet
  • 1โ€ณ thick board (cut to fit inside cabinet dimensions)
  • 1×4โ€ณ pine firring strips
  • Plywood or pine board cut to fit 3โ€ณ wider and 1.5โ€ณ deer than finished dimensions of the cabinet (after moulding is added.)
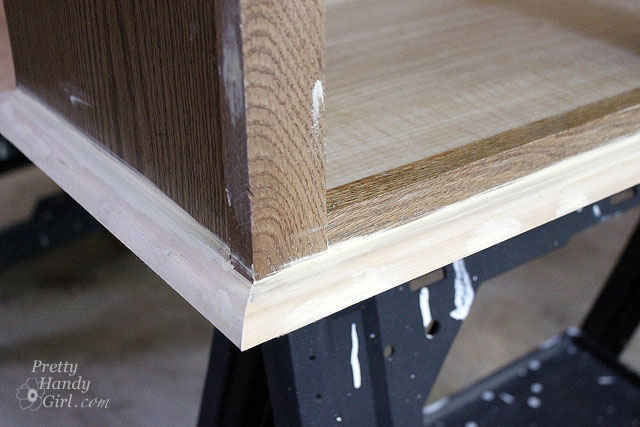
  • Optional: Thin plywood to use as a filler strip


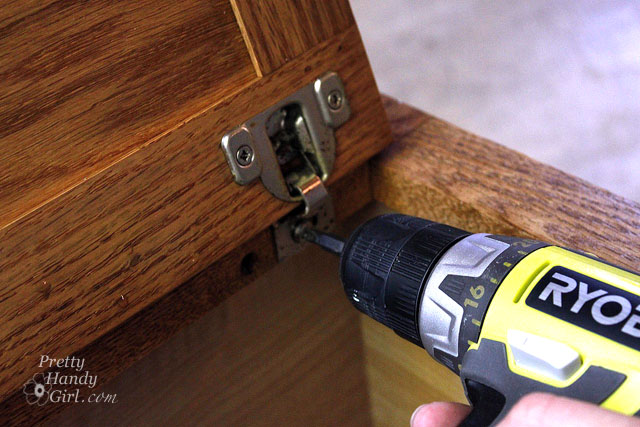
Remove all the hardware and the doors. Remove any nails that are poking out or hammer them flush with the wood.

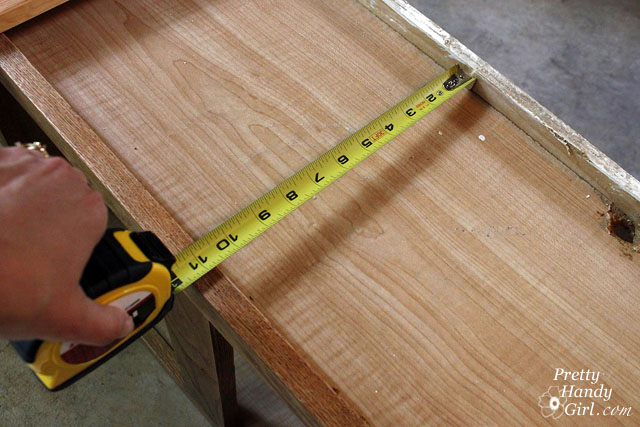
Measure the inside depth of the top of your cabinet.

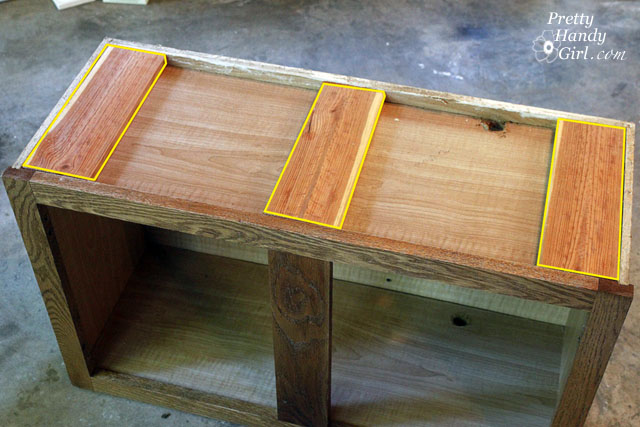
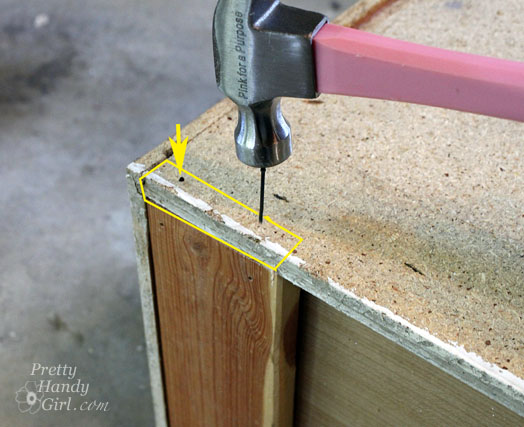
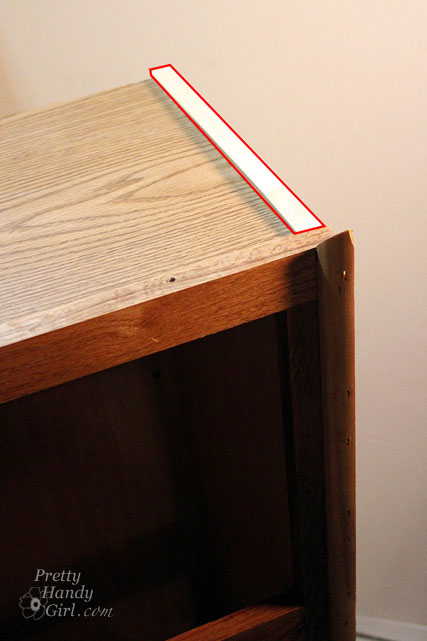
Cut three 1×4โ€ณ boards to sit on top of the cabinet and use for the bench support and to give your nails something to grip when attaching the bench top. (Without these supports it would be very difficult to nail or screw into the particle board cabinet without it flaking and chipping.)

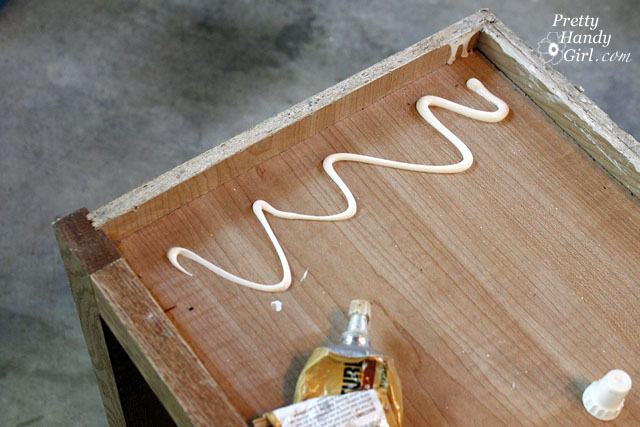
Use thick construction glue to attach the boards. (Glues that have a toothpaste consistency.)

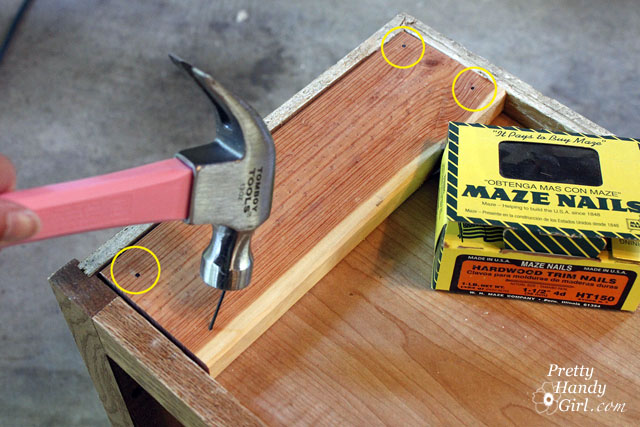
Nail finish nails into the boards at an angle to secure them.

For good measure, nail two more finish nails through the back of the cabinet and into the ends of the support boards.

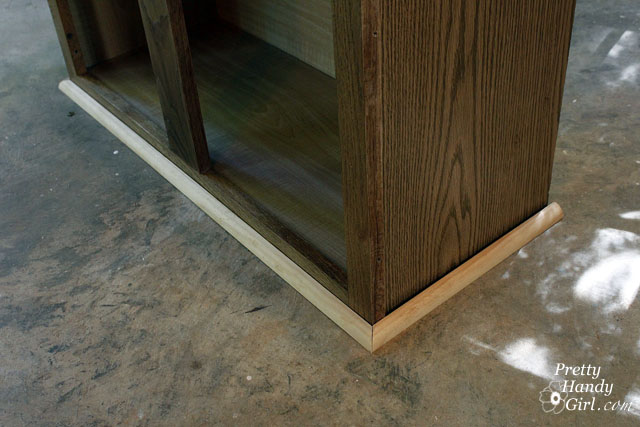
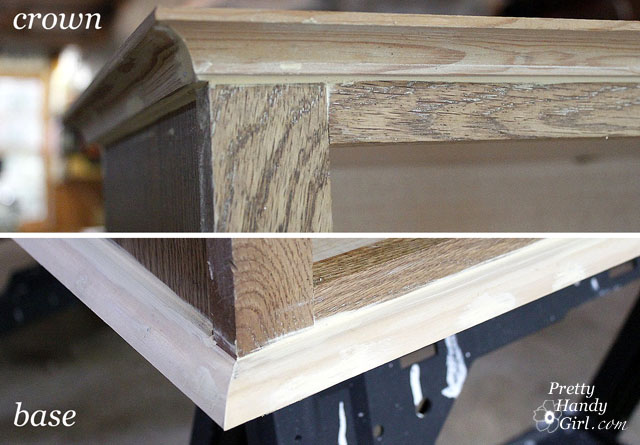
Measure your cabinet sides and front. Cut quarter round (convex shape) for the base of your cabinet and cove moulding (concave shape) for the top of your cabinet.

Here is a close up of the moulding I used for the base and crown of the cabinet.

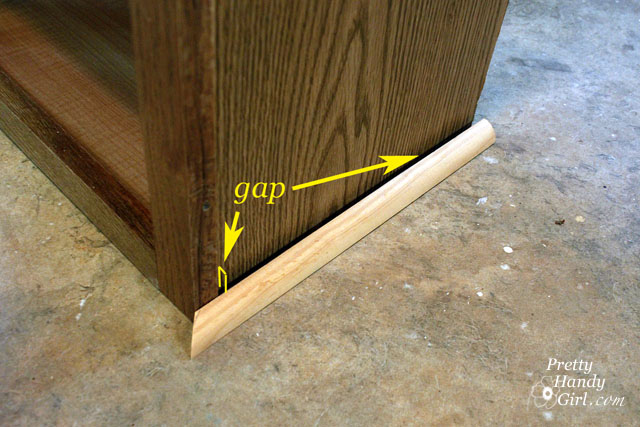
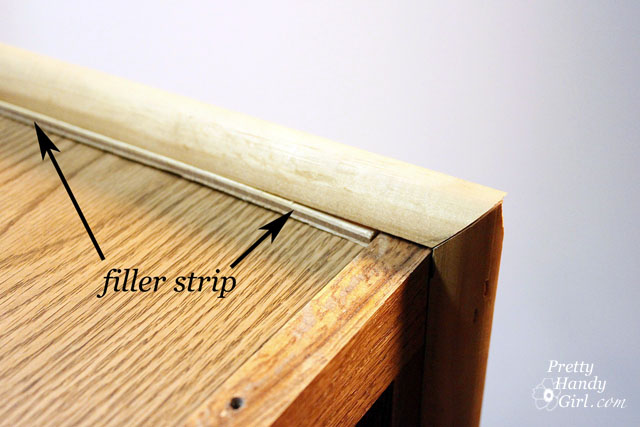
If the face frame of your cabinet juts out past the side, youโ€™ll have a gap (see below). No worries, we can fix that!

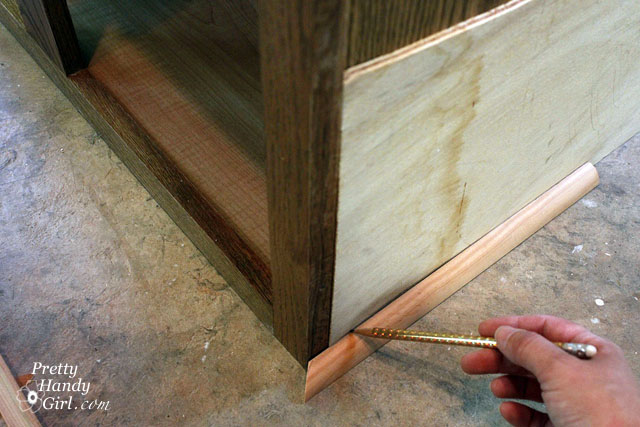
Slip a piece of thin plywood to fit behind the quarter round (and cove moulding). Draw a line at the top of your quarter round (and bottom of the cove moulding). Cut the plywood piece with a jig saw.

Glue the thin plywood strip onto the cabinet.

Rest your moulding on top of the filler strip.

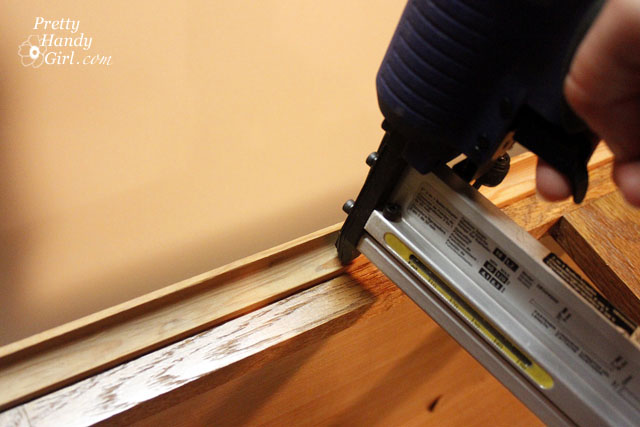
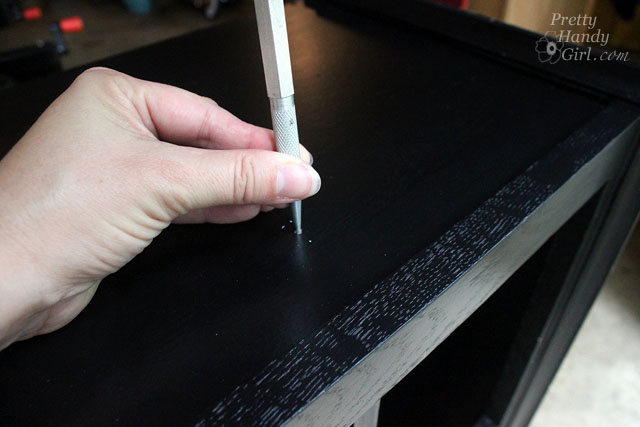
Predrill holes in your trim moulding, then hammer finish nails to secure the trim. If you are using a finish nailer to secure the moulding pieces, you wonโ€™t need to pre-drill.

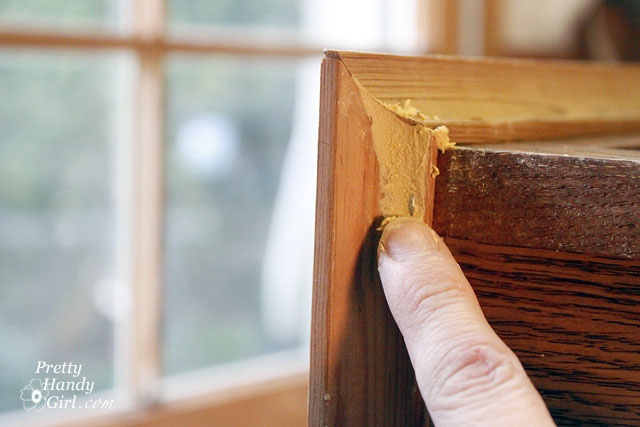
Fill any nail holes or cracks with wood putty.

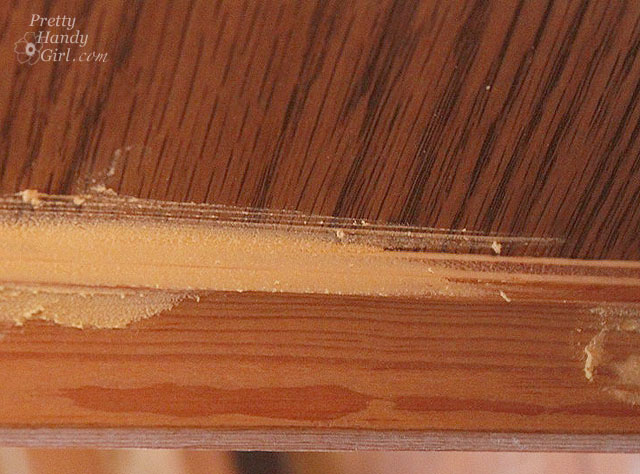
Fill the seams of the filler strips with wood putty too.

Allow the wood putty to dry and then sand it smooth.

Your cabinet should look something like this:

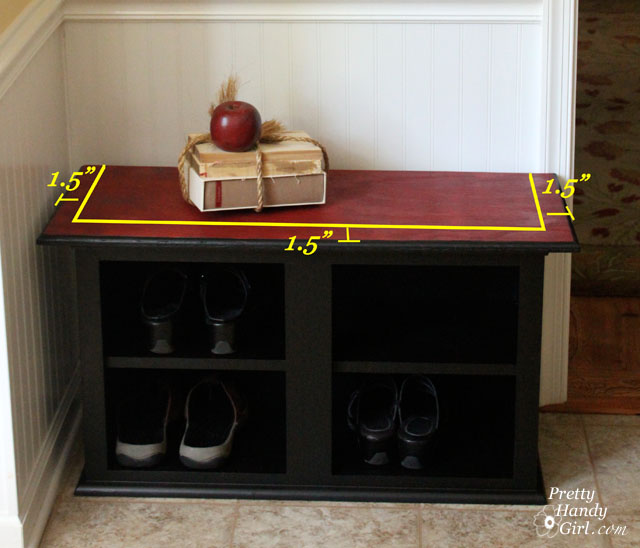
For the top of your bench, cut a piece of wood that is 3โ€ณ wider and 1.5โ€ณ deeper than the top dimensions of the cabinet (be sure to measure to the edge of the crown moulding.) Sand it smooth. Stain or paint the bench top.


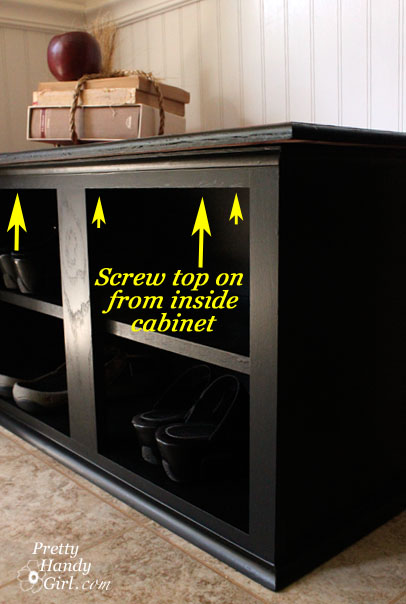
At this point, you can attach your bench top by screwing a few screws from inside the cabinet up through the support pieces and into the bench top.

*For demonstration purposes, the video will show how I attached the bench top with glue and finish nails from the top:ย Add some construction glue to the wood supports. Then, nail the top into the three support boards on top of the cabinet. Fill the holes left by the nails. And touch up the spots with stain or paint. Either way will work, but the screws from below will save you the work of adding wood putty and/or touching up the nail holes.

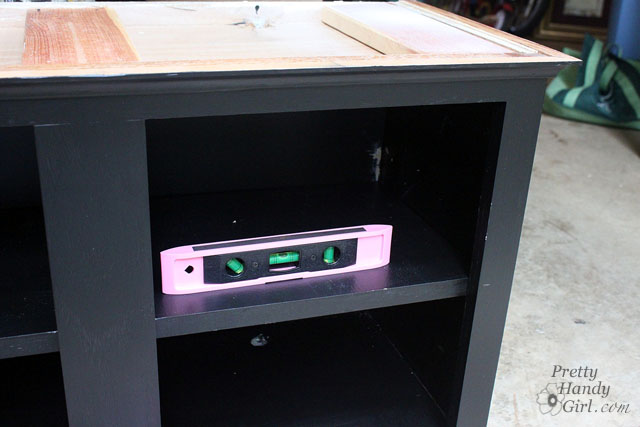
To install the shelf, level the board you cut to fit inside the cabinet (or shall I call it a bench since we are almost done!)


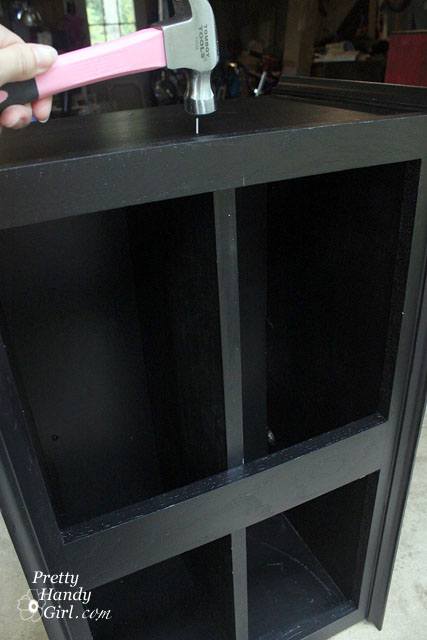
Use either โ€œLโ€ brackets inside the cabinet to hold the shelf or hammer nails from the side and into the ends of the shelf to secure it. Luckily shoes arenโ€™t super heavy, so you can get away with using finish nails to hold the shelf in place.


Use a nail set to sink the nail below the wood surface.


Add a small amount of wood putty to the nail hole.


Gently sand the cabinet and shelf to scuff up the surface and give it a โ€œtoothโ€ for the primer to adhere to. Prime the cabinet and bench.


Paint the cabinet, shelf and bench.


Protect your bench with a few coats of polyurethane and you are done!


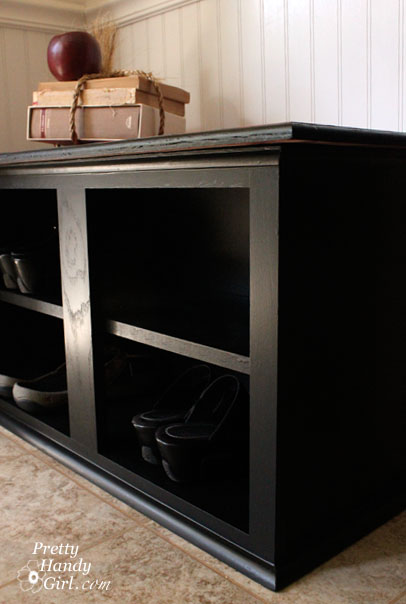
Room for about 8 pairs of shoes! If you wanted a larger bench or more storage, you could attach two cabinets side by side.


Here is the video from my Habitat ReStore talk. (I apologize about some of the background noise.)

By the way, thanks to my sponsors Bogs Footwear (boots) and Tomboy Tools (tool belt.) I need to lower that belt a little ;-). I was rushing in and just buckled it on me without adjusting it.


Sharing this tutorial with Home Stories A2Z Tutorials and Tips Link Party and The Shabby Creek Cottageโ€™s Transformation Thursday