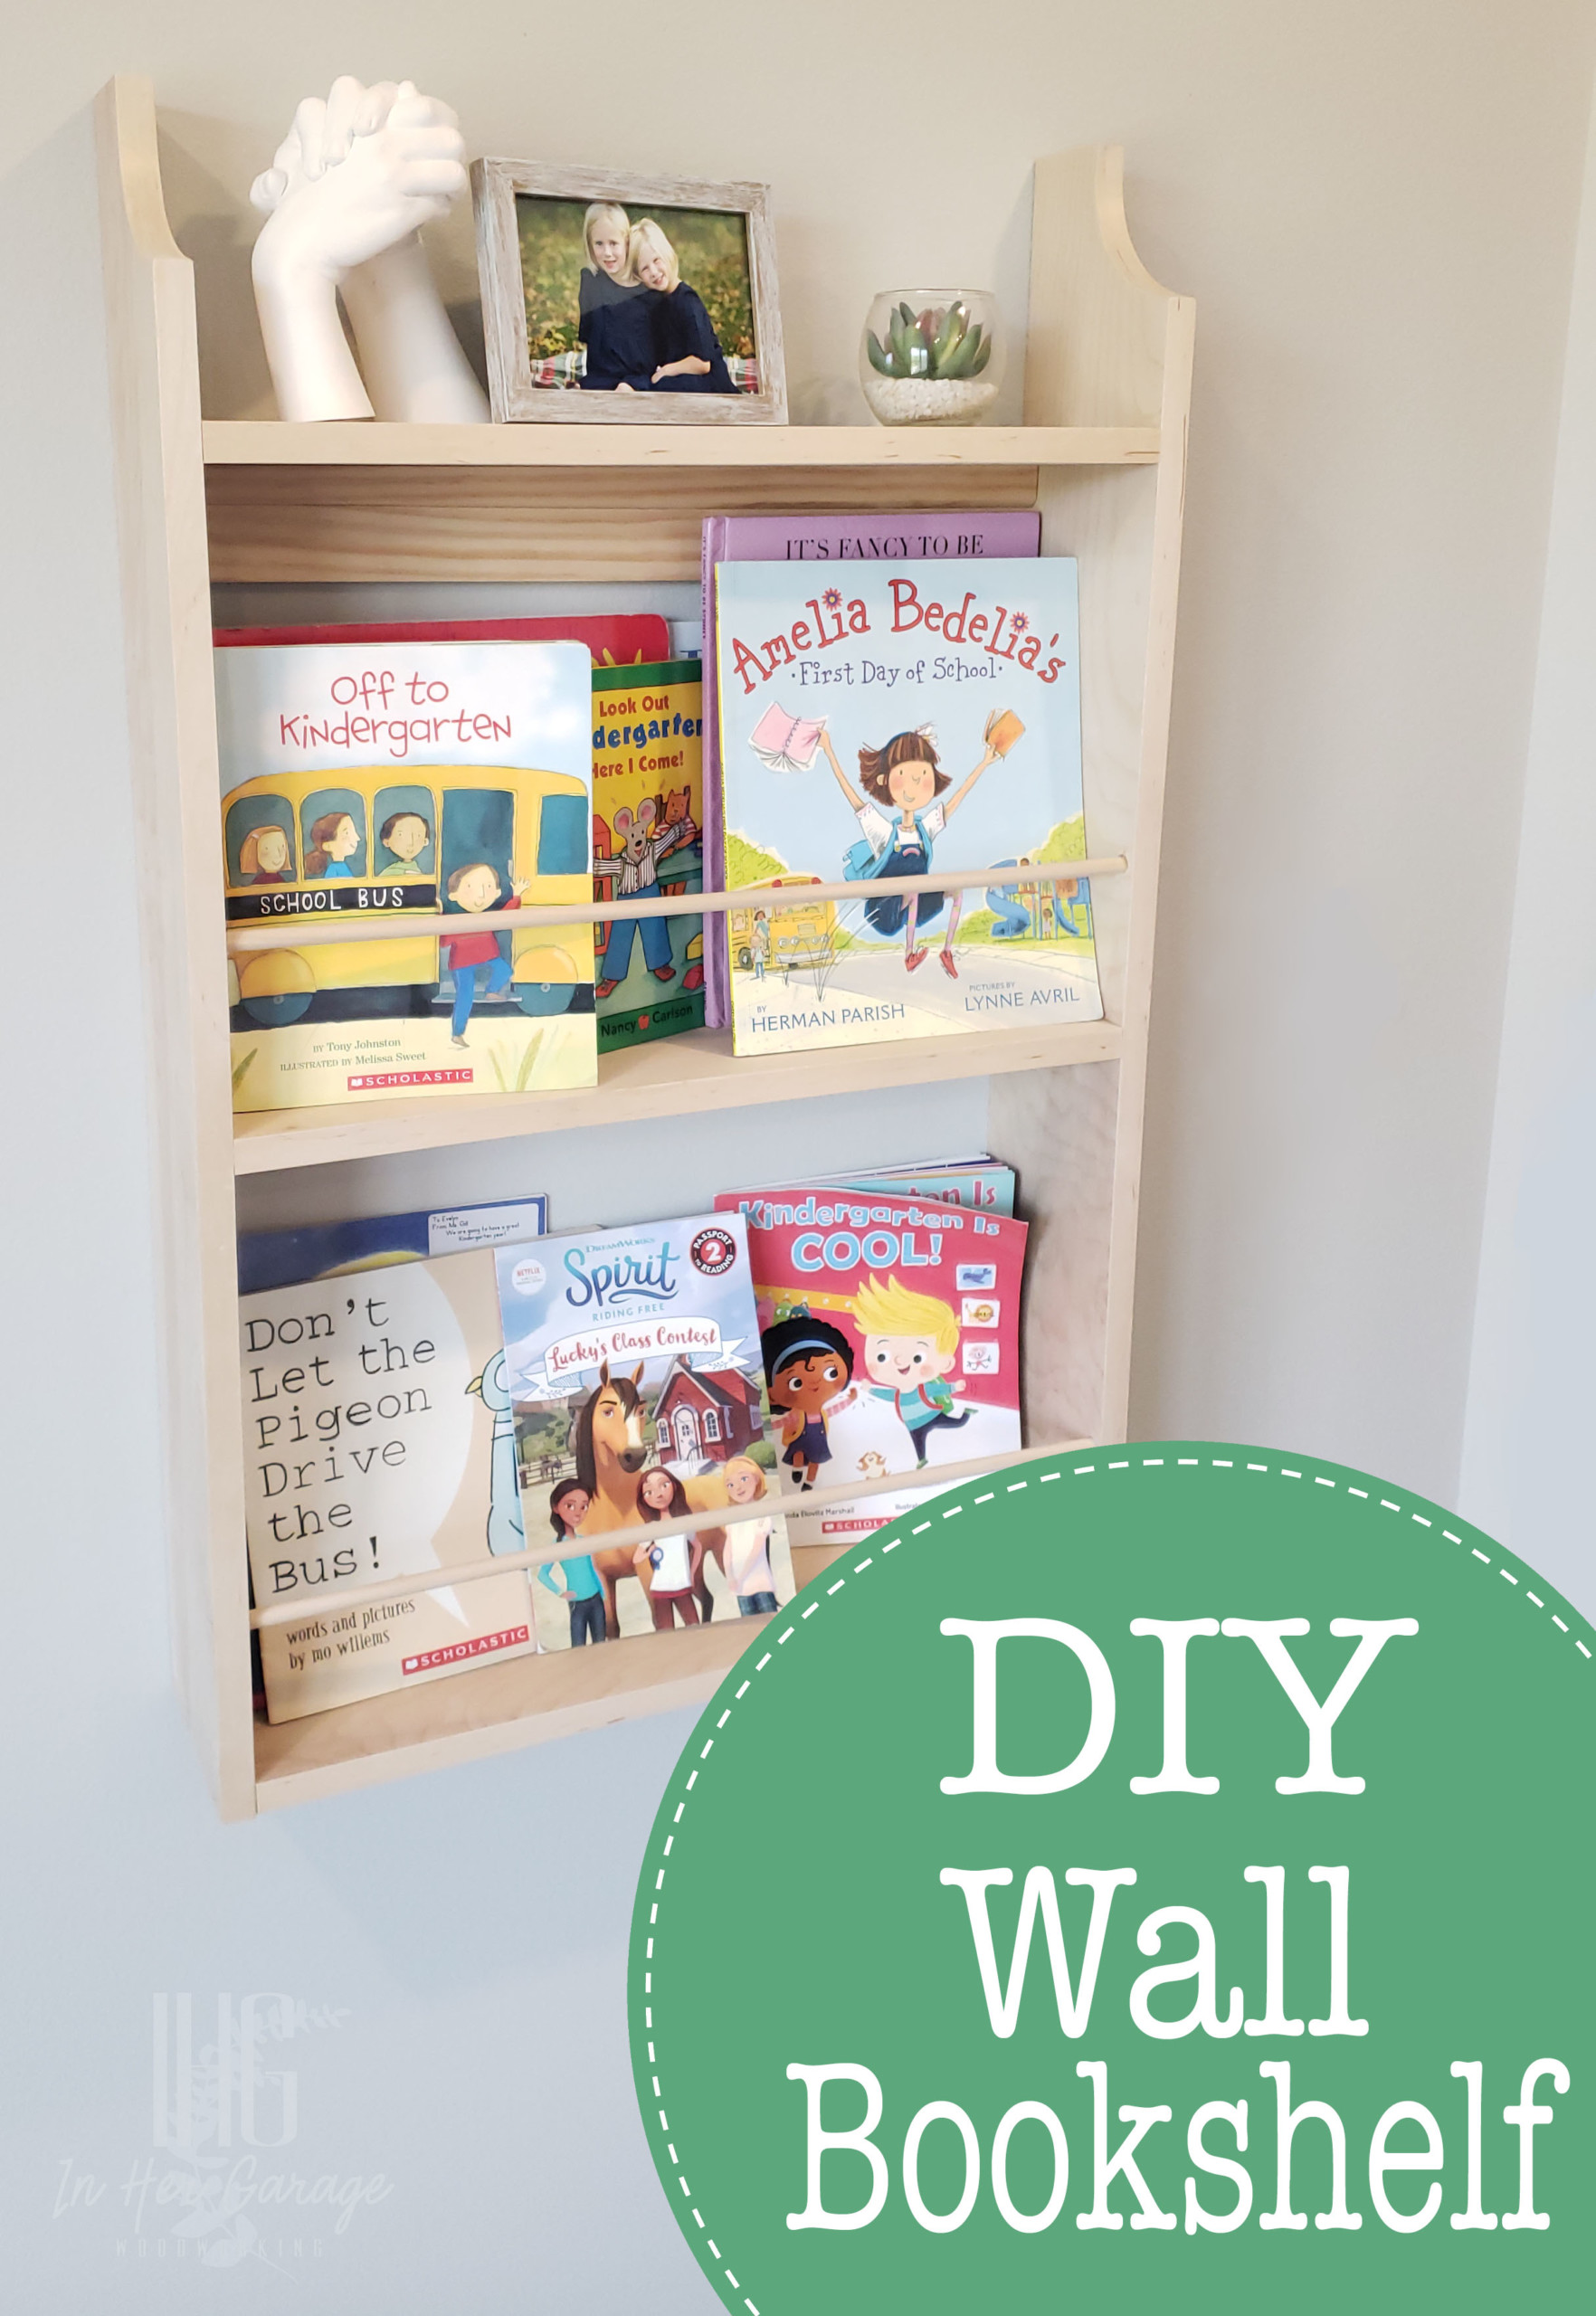
Looking for a way to organize and free up floor space in your home? Expand your DIY talents and build this adorable DIY wall bookshelf.ย  I built this as the final addition to my daughterโ€™s new room and although the joinery is slightly more advanced it still easy enough for a beginner DIYer.
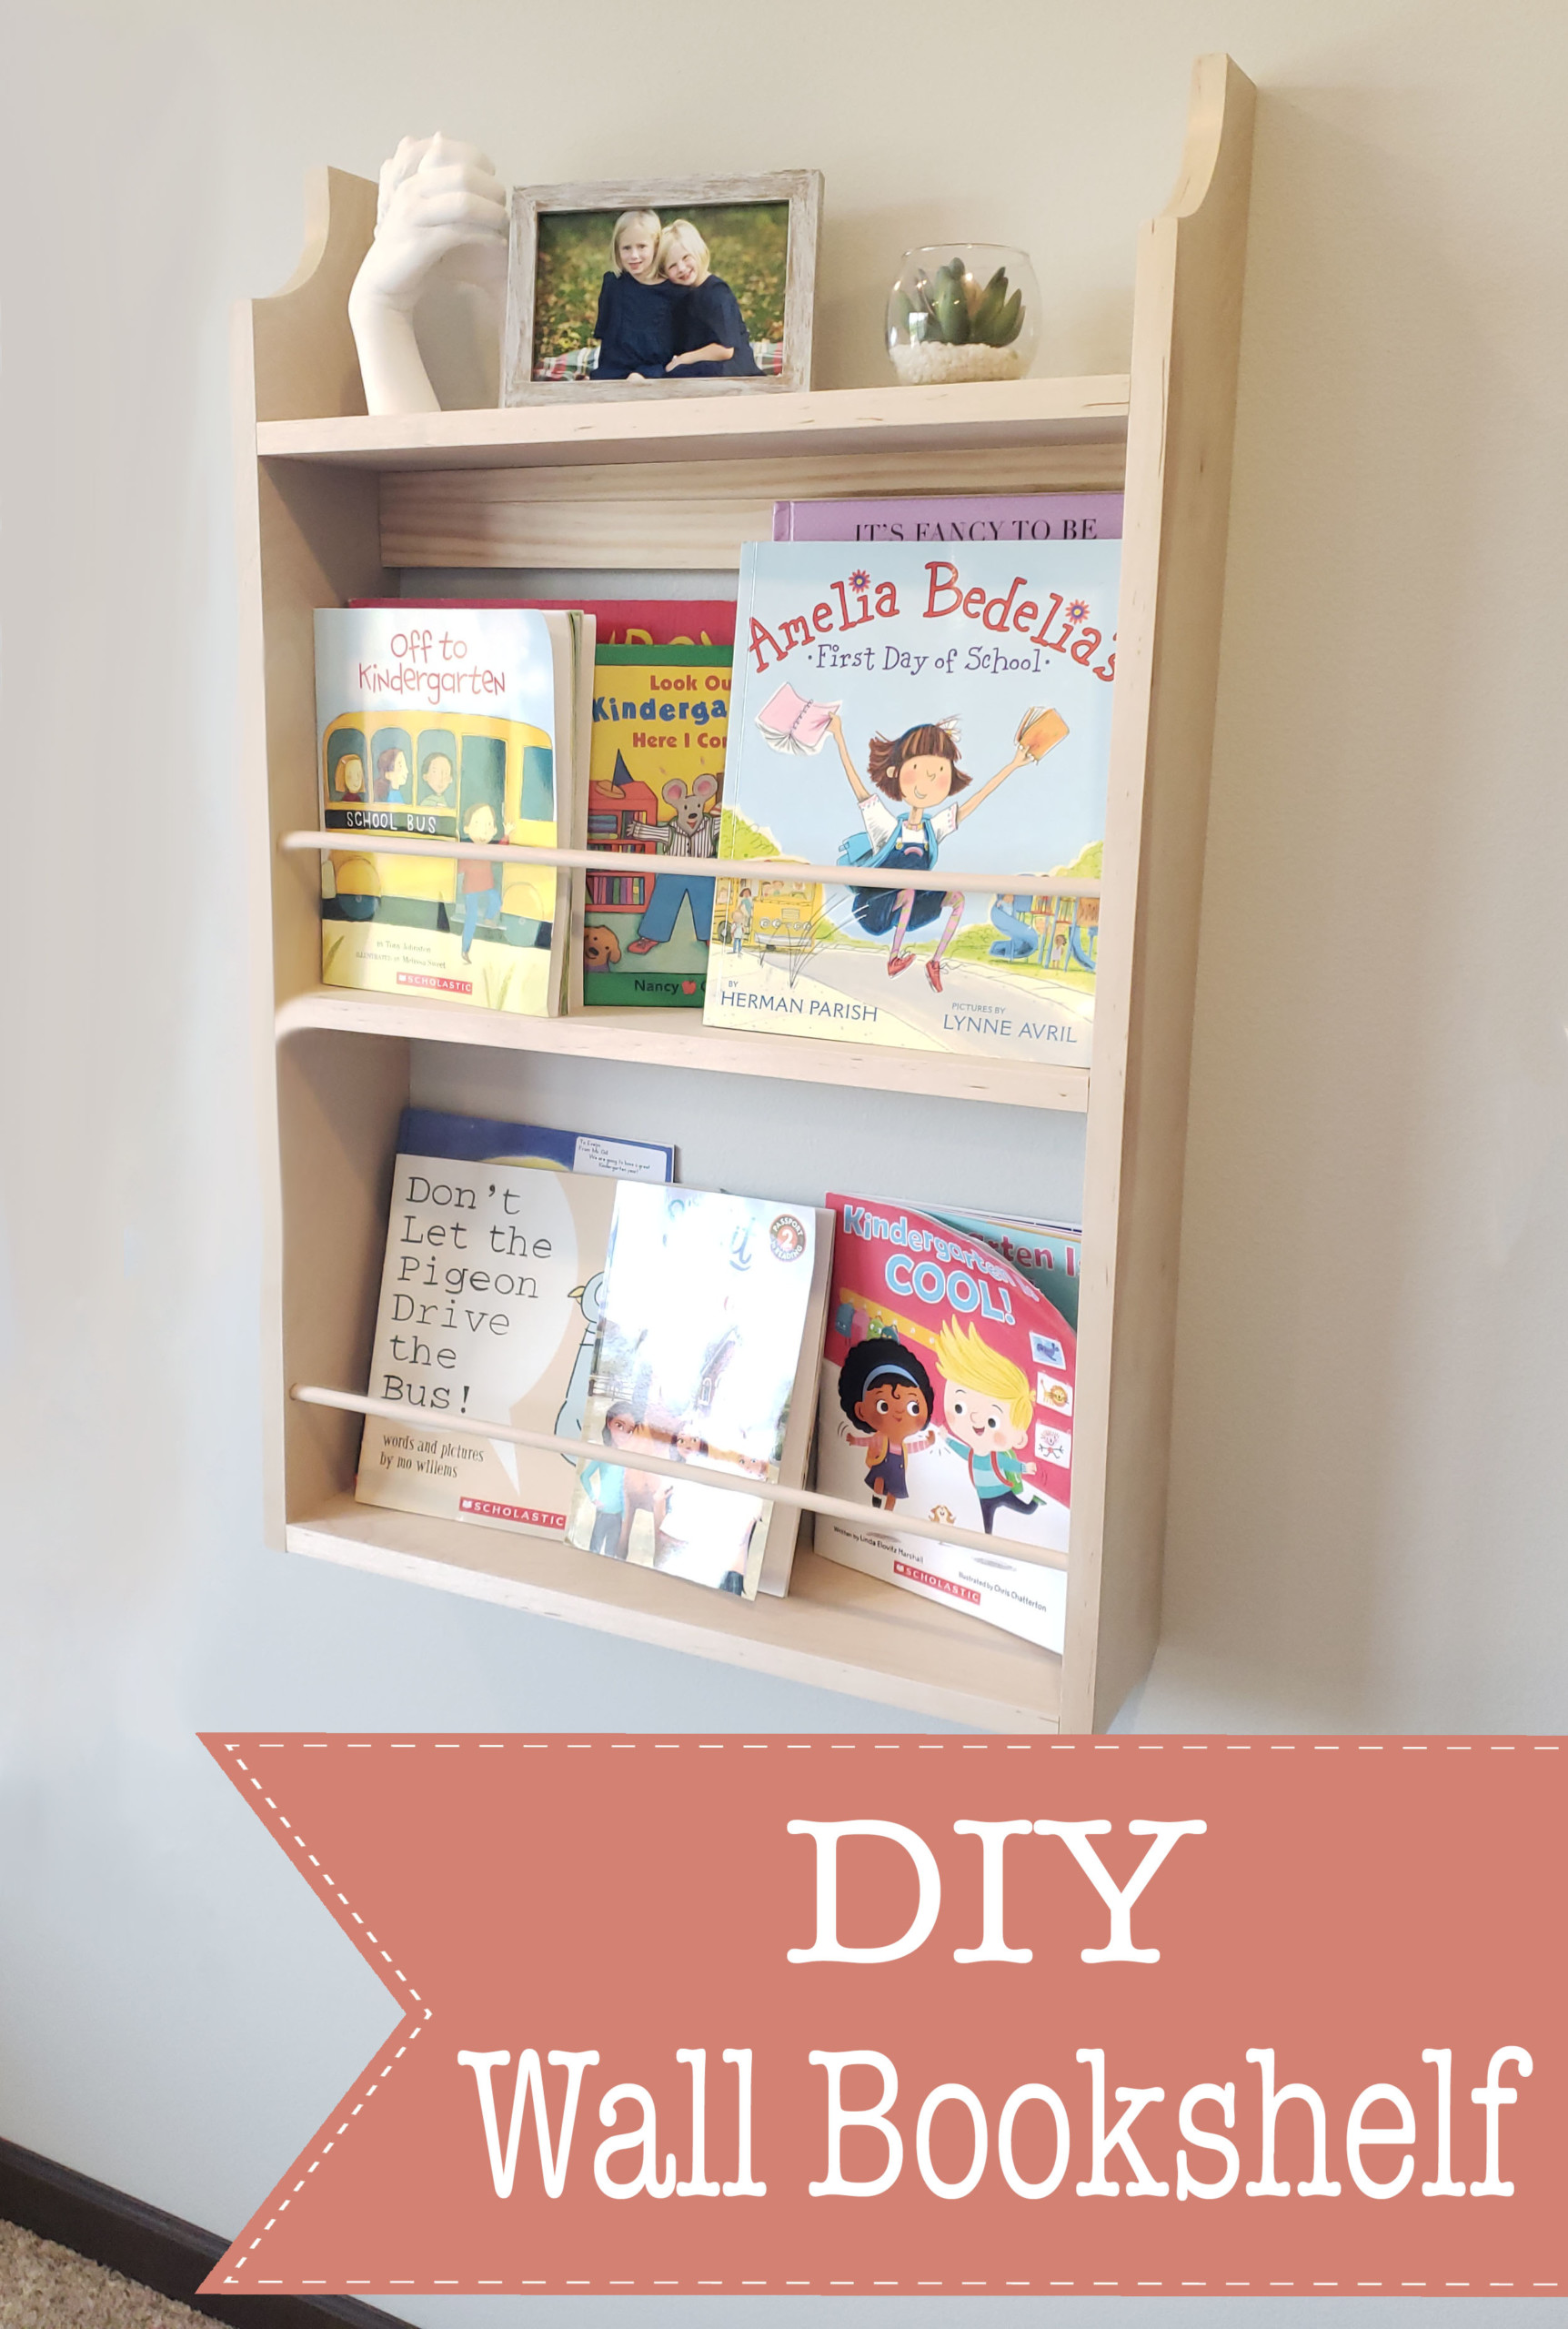
DIY Wall Bookshelf

This bookshelf was the perfect last piece that brought my daughterโ€™s room together.ย  I used dowel joinery to build the bookshelf (which may sound complicated but is fun to use and quite simple when you get the hang of it).ย  To hang this shelf on the wall I used a French cleat which again sounds more advance is a convenient and secure way to install heavy objects on a wall. So stay with me and read through the instructions. I know you can do this!ย  Letโ€™s make it!

How to Make a DIY Wall-Mounted Bookshelf

Materials:

  • 2- 1โ€ณ x 6โ€ณ x 8โ€ฒ boards
  • 1- 3/8โ€ณ x 4โ€ณ round dowel
  • 1 box 3/8โ€ณ wooden dowels
  • wood glue

Tools:

(Iโ€™ve includedย affiliate links for your convenience. I earn a small percentage from a purchase using these links. Thereย is no additional cost to you. You canย readย more about affiliate links here.)

Cut List:

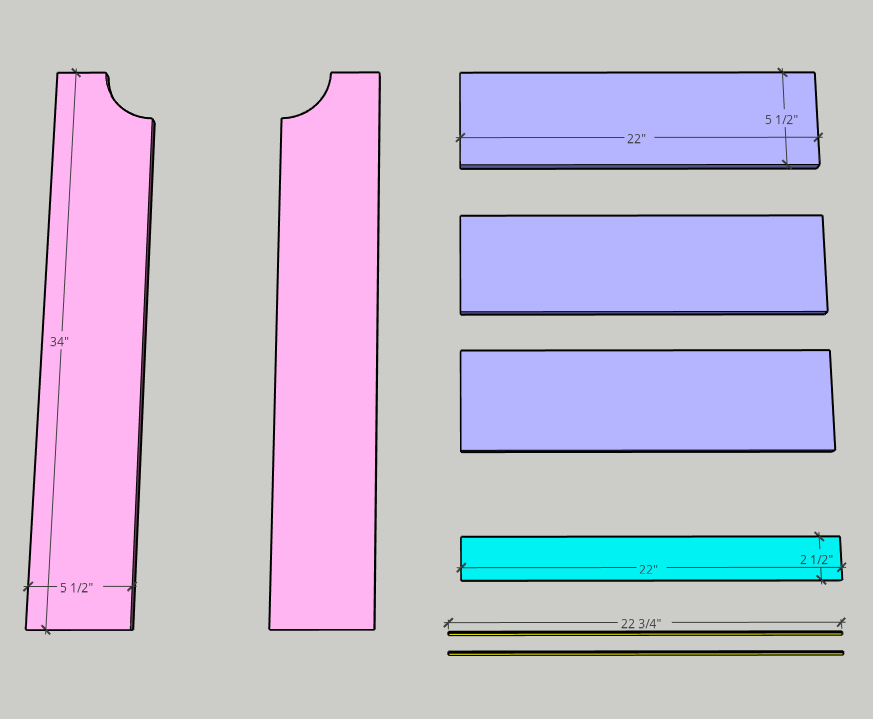
  • 2- 1โ€ณ x 6โ€ณ @ 34โ€ณ โ€“ shelf sides
  • 3- 1โ€ณ x 6โ€ณ @ 22โ€ณ โ€“ shelves
  • 1- 1โ€ณ x 6โ€ณ @ 22โ€ณ ripped to 2ยฝโ€ width โ€“ shelf cleat for hanging on the wall
  • 2- 3/8โ€ณ dowel @ 22 ยพโ€ length

Instructions:

Step 1: Cut the curve at the top of the shelf sides (optional)

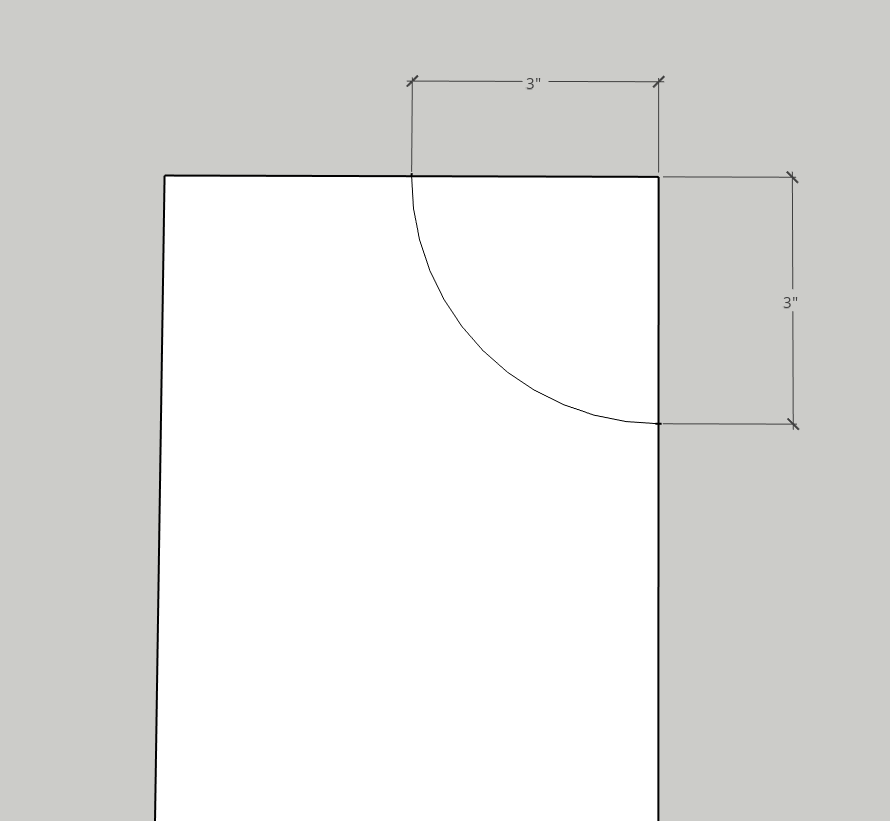
  • Measure 3โ€ณ in from the front and 3โ€ณ down from the top on both 1โ€ณ x 6โ€ณ side pieces and create a curve connecting the two marks. (I used a plastic bowl that I found in my kitchen as a stencil.)

  • Using your jigsaw, carefully cut along the curved line youโ€™ve drawn until it is cut away.
  • Repeat for both sides. Sand the curve smooth with sandpaper.

Step 2: Measure and mark dowel placement on the bookshelf sides

  • This is the step where the 6โ€ณ combination square is a lifesaver!
  • Lay the two side boards next to one another on your work surface so they are a mirror image of one another, insides facing up. (Like opening a book.)
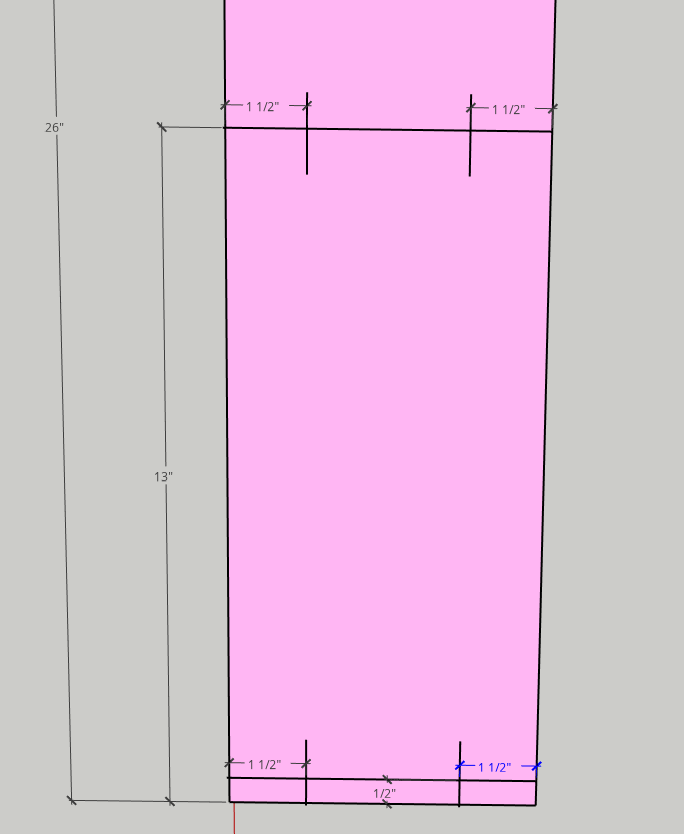
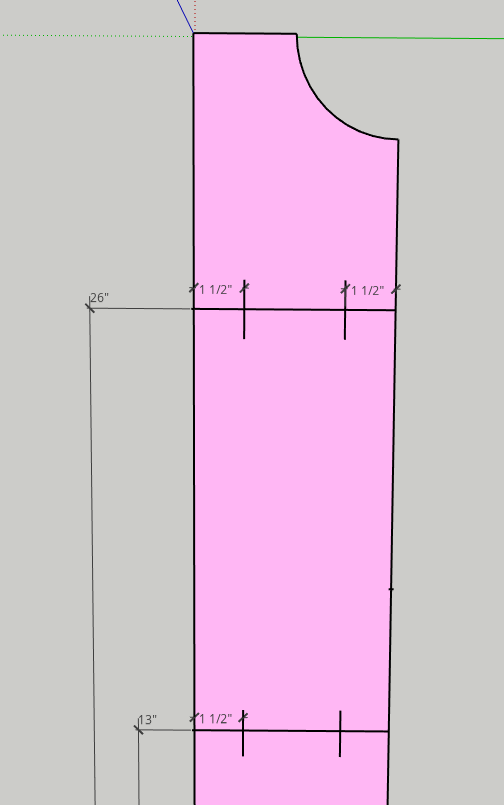
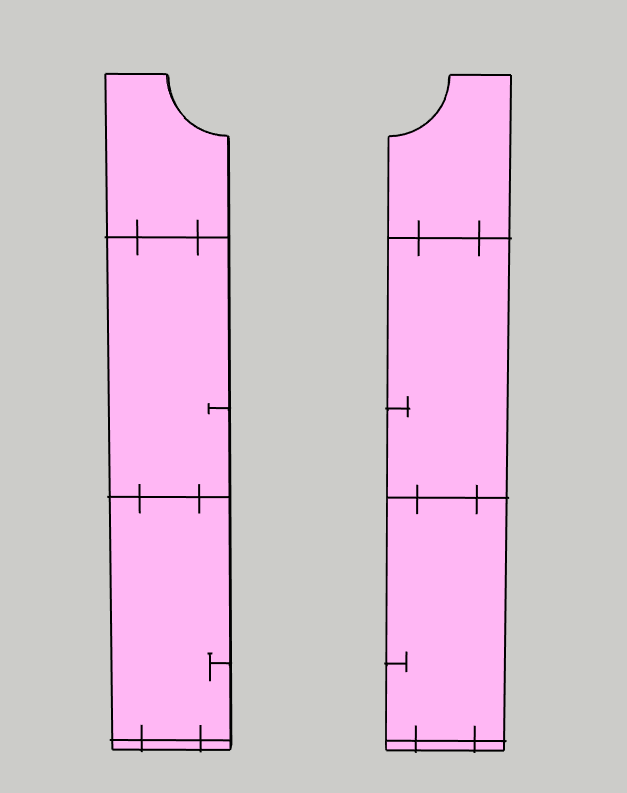
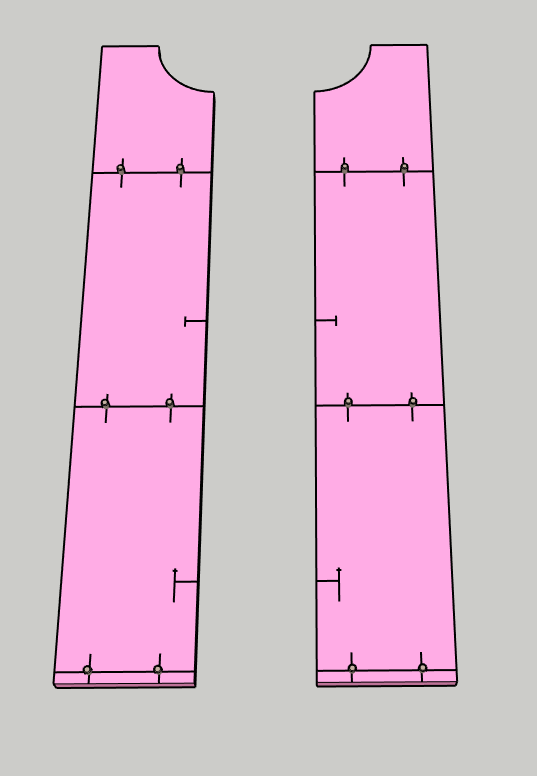
  • Use the diagram below for measuring and marking the placement of the dowels.

ย 


  • Each shelf dowel will be 1ยฝโ€ in from the front and back of the board and measure up 1/2โ€ณ, 13โ€ณ, and 26โ€ณ from the bottom of the board as shown.
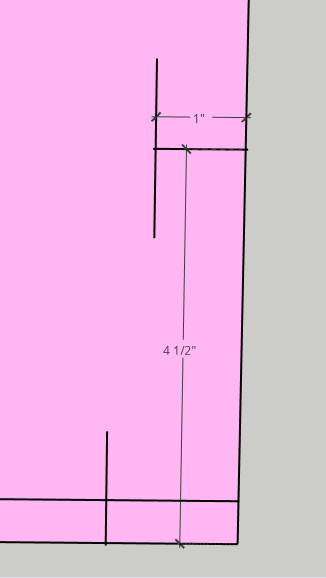
  • Both long dowels will be measured and marked 1โ€ณ in from the front of each side and 4 ยฝโ€ and 17 ยฝโ€ from the bottom of the sides as shown

  • Repeat these markings for both sides of the bookshelf.
  • You should have a total of 16 markings. 8 for each side. 6 for the shelf dowels and 2 for the long dowels.

Step 3: Drill holes for dowels

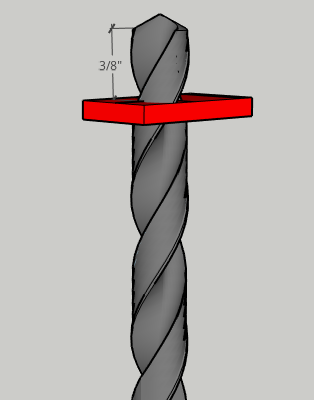
  • Using your 3/8โ€ณ drill bit place a piece of painterโ€™s tape on the drill bit to mark a depth of 3/8โ€ณ.ย  You donโ€™t want to drill through the sides of the bookshelf, just half-way.

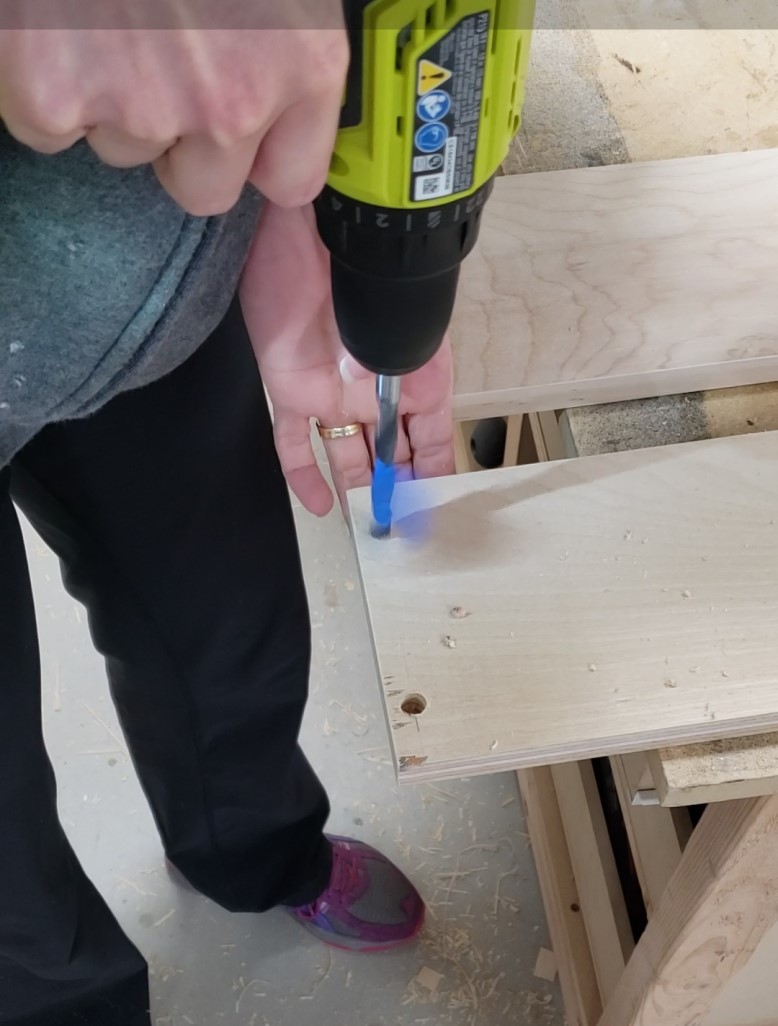
  • With the drill bit securely in your drill (and material clamped to your work surface), drill straight down into each marking of the side board until the drill bit has reached the depth of the tape.

  • You will create 16 holes in total, 8 for each side.

Step 4: Measure and mark dowel placement in shelf boards

  • Using your combination square, mark the center of each side edge of the 3 shelf boards
  • Next measure and mark 1 ยฝโ€ in from the front and back of the 3 boards as shown. Make this same 1 ยฝโ€ mark on the face of the boards as well for reference when using your doweling jig.

Step 5: Drill dowel holes in shelf boards

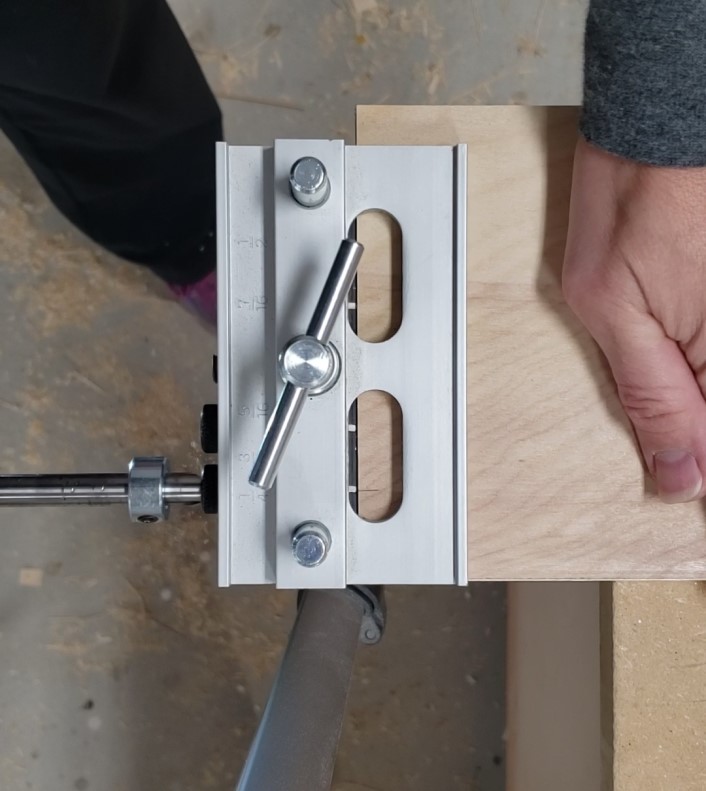
  • Iโ€™ll let you in on my secret! I use my Kreg pocket-hole bit for this step because it is 3/8โ€ณ, it makes drilling into the end grain much easier and has a collar that can be set to the depth I want!
  • The depth of your hole = length of the dowel minus 3/8โ€ณ (the depth of the hole in the side boards.)
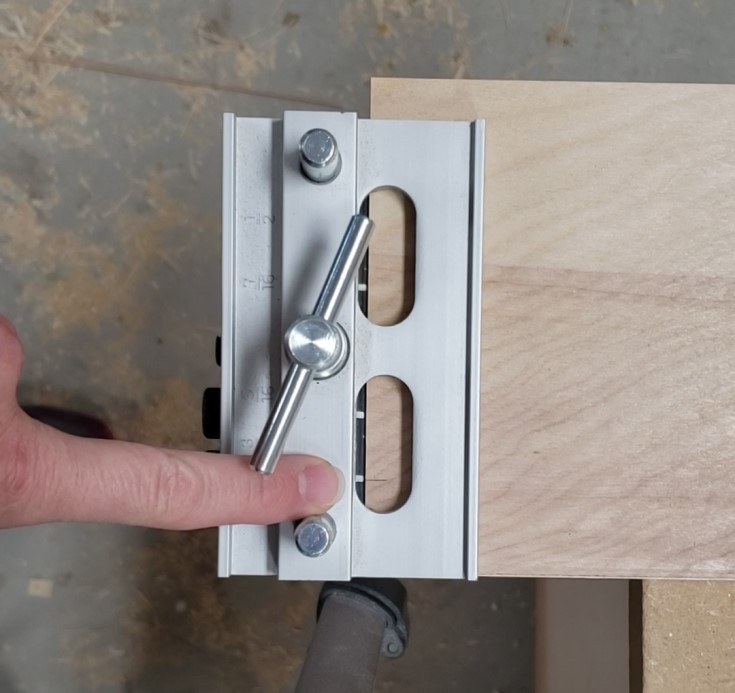
  • Now, using your doweling jig and the reference marks youโ€™ve created on the face of the board you can go ahead and drill the 12 holes to the depth determined above into the sides of the shelves.

Step 6: Dry fit!

  • It is important when using dowels for joinery that you complete a dry fit test of the project first.
  • You want to make sure the holes are large enough and deep enough for the dowel and that all pieces can securely fit together without gaps.

Assemble the Shelf!

Step 7: Install shelf dowels and shelves

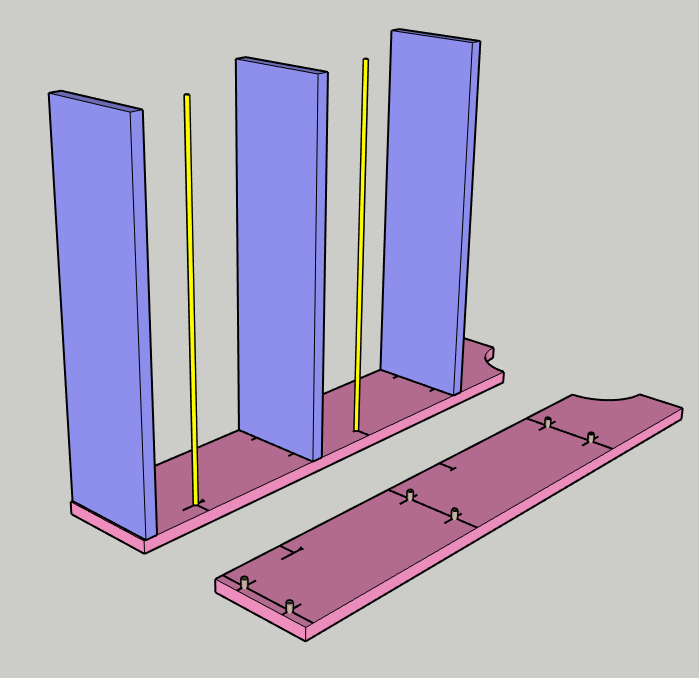
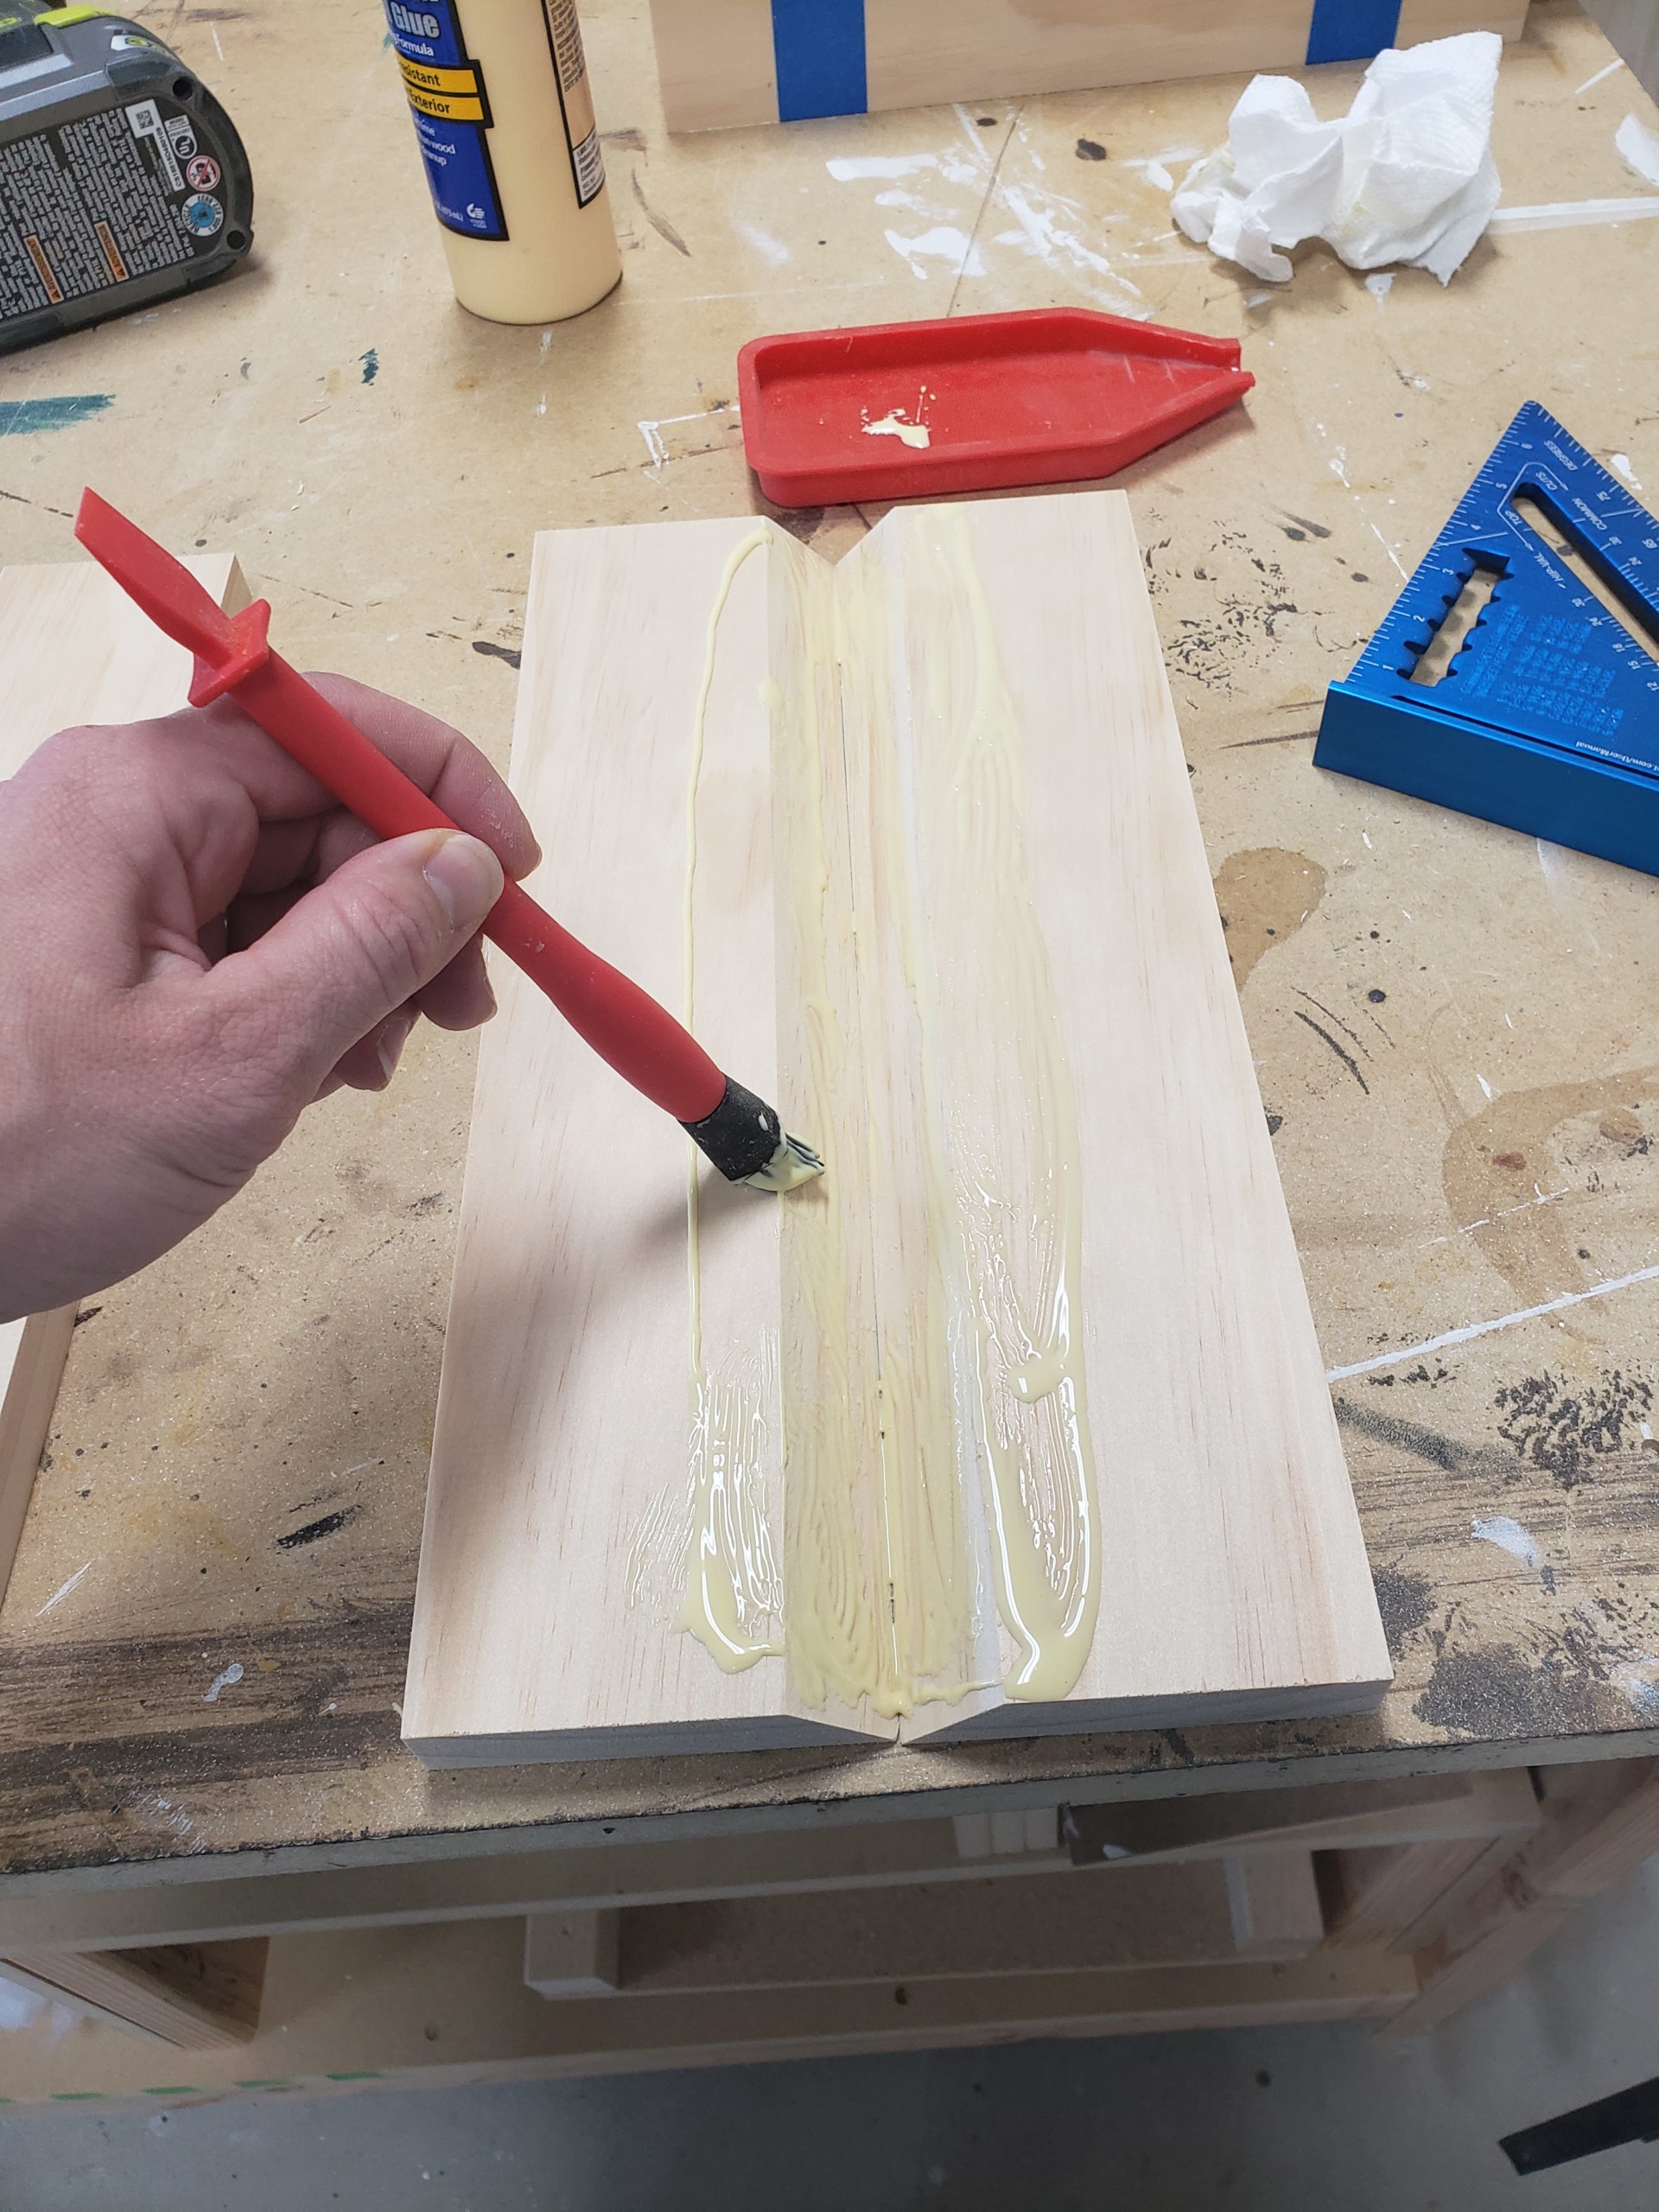
  • Using wood glue install all 12 shelf dowels into the holes of both side boards.
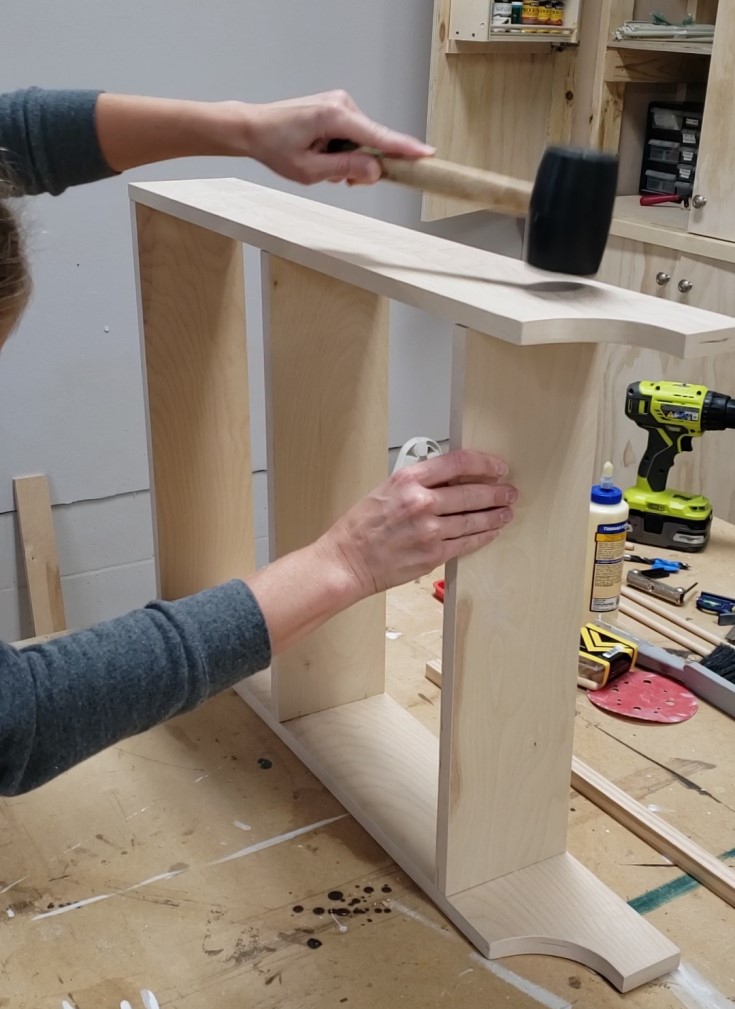
  • Next, using wood glue, install the shelves over their respective dowels and gently tap into place using a rubber mallet.

ย 

Step 8: Install long dowels

  • Place a drop of glue in both holes for the long dowels and insert dowels

Step 9: Install the remaining side board

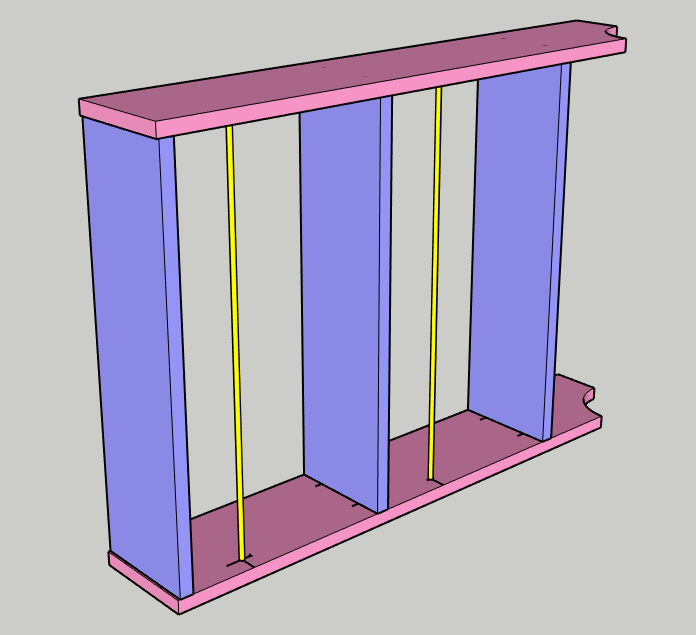
  • Carefully place the remaining side board over the shelves and long dowels have already been installed.
  • Align the dowels and long dowel holes and gently tap the side into place with a rubber mallet.

  • Check for square and clamp into place to allow the glue to dry.

Note: As you can see I forgot to insert the long dowels during assembly. I was able to add them later and I will have a scar to show for it!

Step 10: Hanging the shelf on the wall

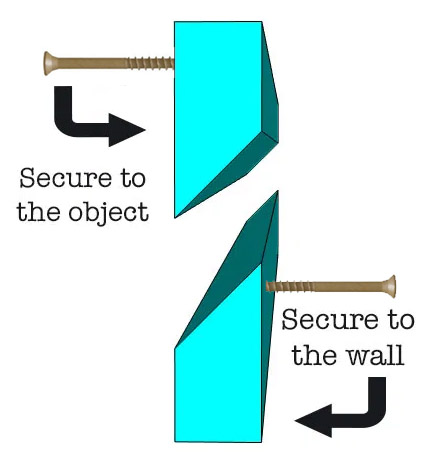
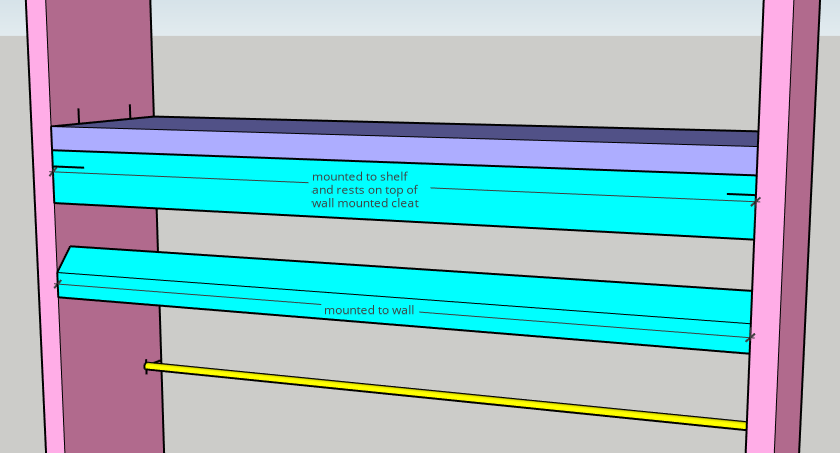
For this step, I chose to use a French cleat. I wanted the shelf to be flush to the wall and very secure which is what makes a French cleat the best choice.ย  View the basic diagram below or for step by step instruction check out How to Make and Use a French Cleat.

DIY French Cleat


I used pocket screws to secure the top portion of the French cleat to the bookshelf.

Once the French cleat is secured to the bookshelf and the wall you will be able to hang the bookshelf securely on the wall and place as many books in it as needed.ย  My daughter loves her new bookshelf and she always feels so special when Mom makes something just for her.

I hope this tutorial proves helpful in adding a little style and organization to your home.

Hi! Iโ€™m Kristen, from In Her Garage,ย and I am a self-taught woodworker and DIY fanatic from Minnesota where I live with my husband and our two daughters. Between being a wife, mom and, registered nurse, I try to make as much time for DIY as possible. My love for building came after our family built our current home in 2015. After we moved in, we needed furniture and instead of spending massive amounts of money to order the pieces we wanted I decided that I would build them myself. I started with a buffet table plan from the fabulous Ana-white and quickly set out to remodel my entire home office.

Since then I have started a side business building furniture for the people in my community. I love hearing my clients talk about the pieces they wish they had whether it be aย rustic buffet table, aย one drawer side table, or aย toy boxย and then making it a reality for them. While starting my small business it made perfect sense that I would document my building journey so I simultaneously launched theย In Her Garage blogย and I love sharing my plans, tips and tricks.

Making something beautiful with your own two hands through a little preparation and determination is an amazing feeling and I hope to bring inspiration and know-how to those looking to tackle a big or small project.
I am so glad that you found me here and please feel free to connect with me onย Pinterest,ย Instagram, Facebook, and Youtube to see what I am working on right now.


modern boho side table

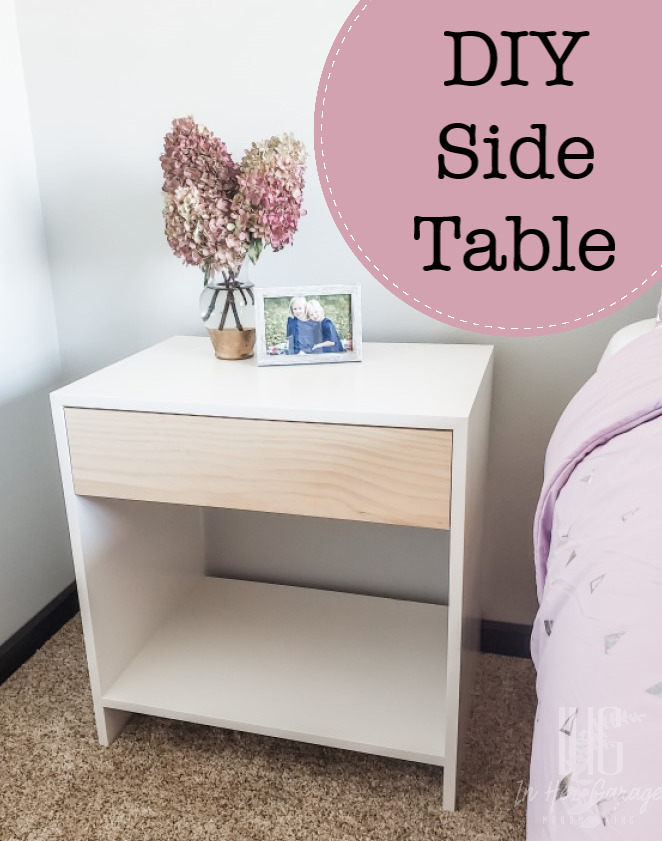
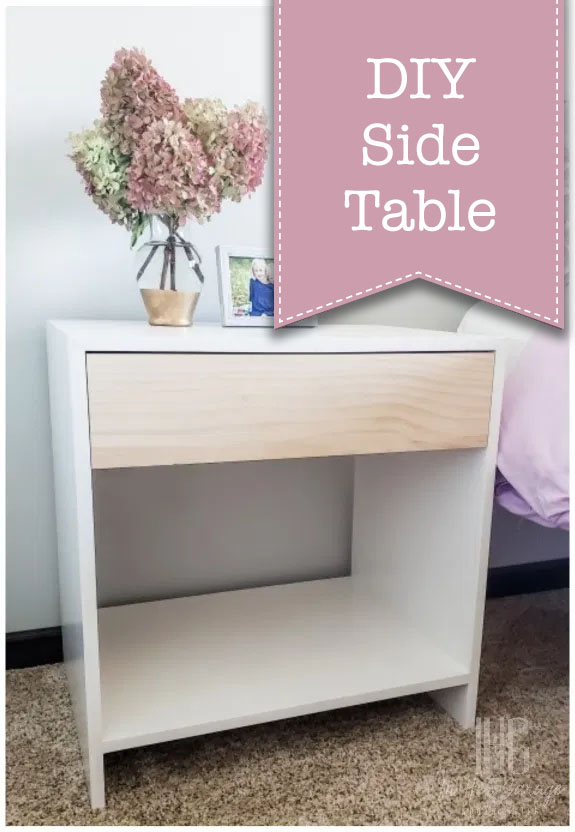
I built this side table as part of the bedroom furniture set for my daughterโ€™s new room. It may look a little complicated, but can be built with a circular saw or a table saw.ย  Letโ€™s make this DIY Modern Boho Side Table!

diy side table

DIY Modern Boho Side Table

Hello again! This is Kristen from In Her Garage and I am going to show you how I built this simple DIY side table (or nightstand). I built this as part of the bedroom furniture set for my daughterโ€™s new room. We decided that we liked the Boho furniture trend and think it complements the bedding she picked out.

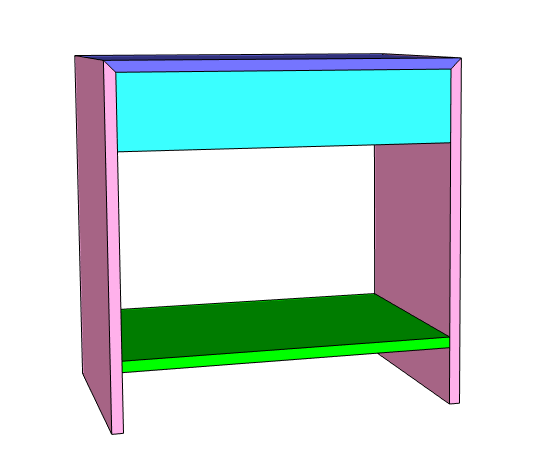
This side table is small but can be customized to your desires. It measures 24โ€ณw x 24โ€ณh x 17โ€ณd and is made from birch plywood. The side table incorporates beveled edges (which I think gives it a crisp and clean look).ย  It may look a little complicated, but these corners can be achieved using a circular saw or a table saw.ย  Letโ€™s get making!

How to Build a Side Table

Materials:

(Iโ€™ve includedย affiliate links for your convenience. I earn a small percentage from a purchase using these links. Thereย is no additional cost to you. You canย readย more about affiliate links here.)

Tools:

Cut list:

  • 2- 3/4โ€ณ x 24โ€ณ x 17โ€ณ โ€“ with a 45ยฐ bevel along one short edge (sides)
  • 1- 3/4โ€ณ x 24โ€ณ x 17โ€ณ โ€“ with two 45ยฐ bevels along both short edges (top)
  • 1- 3/4โ€ณ x 22 ยฝโ€ x 17โ€ณ (bottom shelf)
  • 1- 3/4โ€ณ x 22 ยผ โ€ x 5โ€ณ (drawer face)

Instructions:

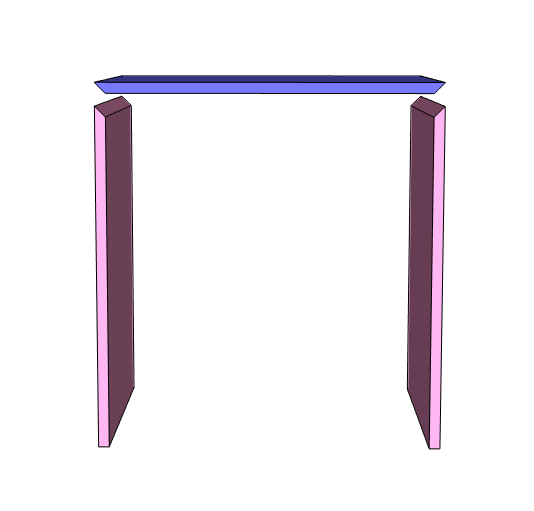
Step 1: Cut the bevel into the top and side panels of the side table.

  • Using either your table saw or your circular saw, adjust the blade to cut at a 45ยฐ bevel.ย  To get this measurement exact I use a Wixey Digital Angle Finder which is helpful but if you donโ€™t have this tool then feel free to use a speed square or protractor.
  • Each side panel should have one bevel cut along the top edge
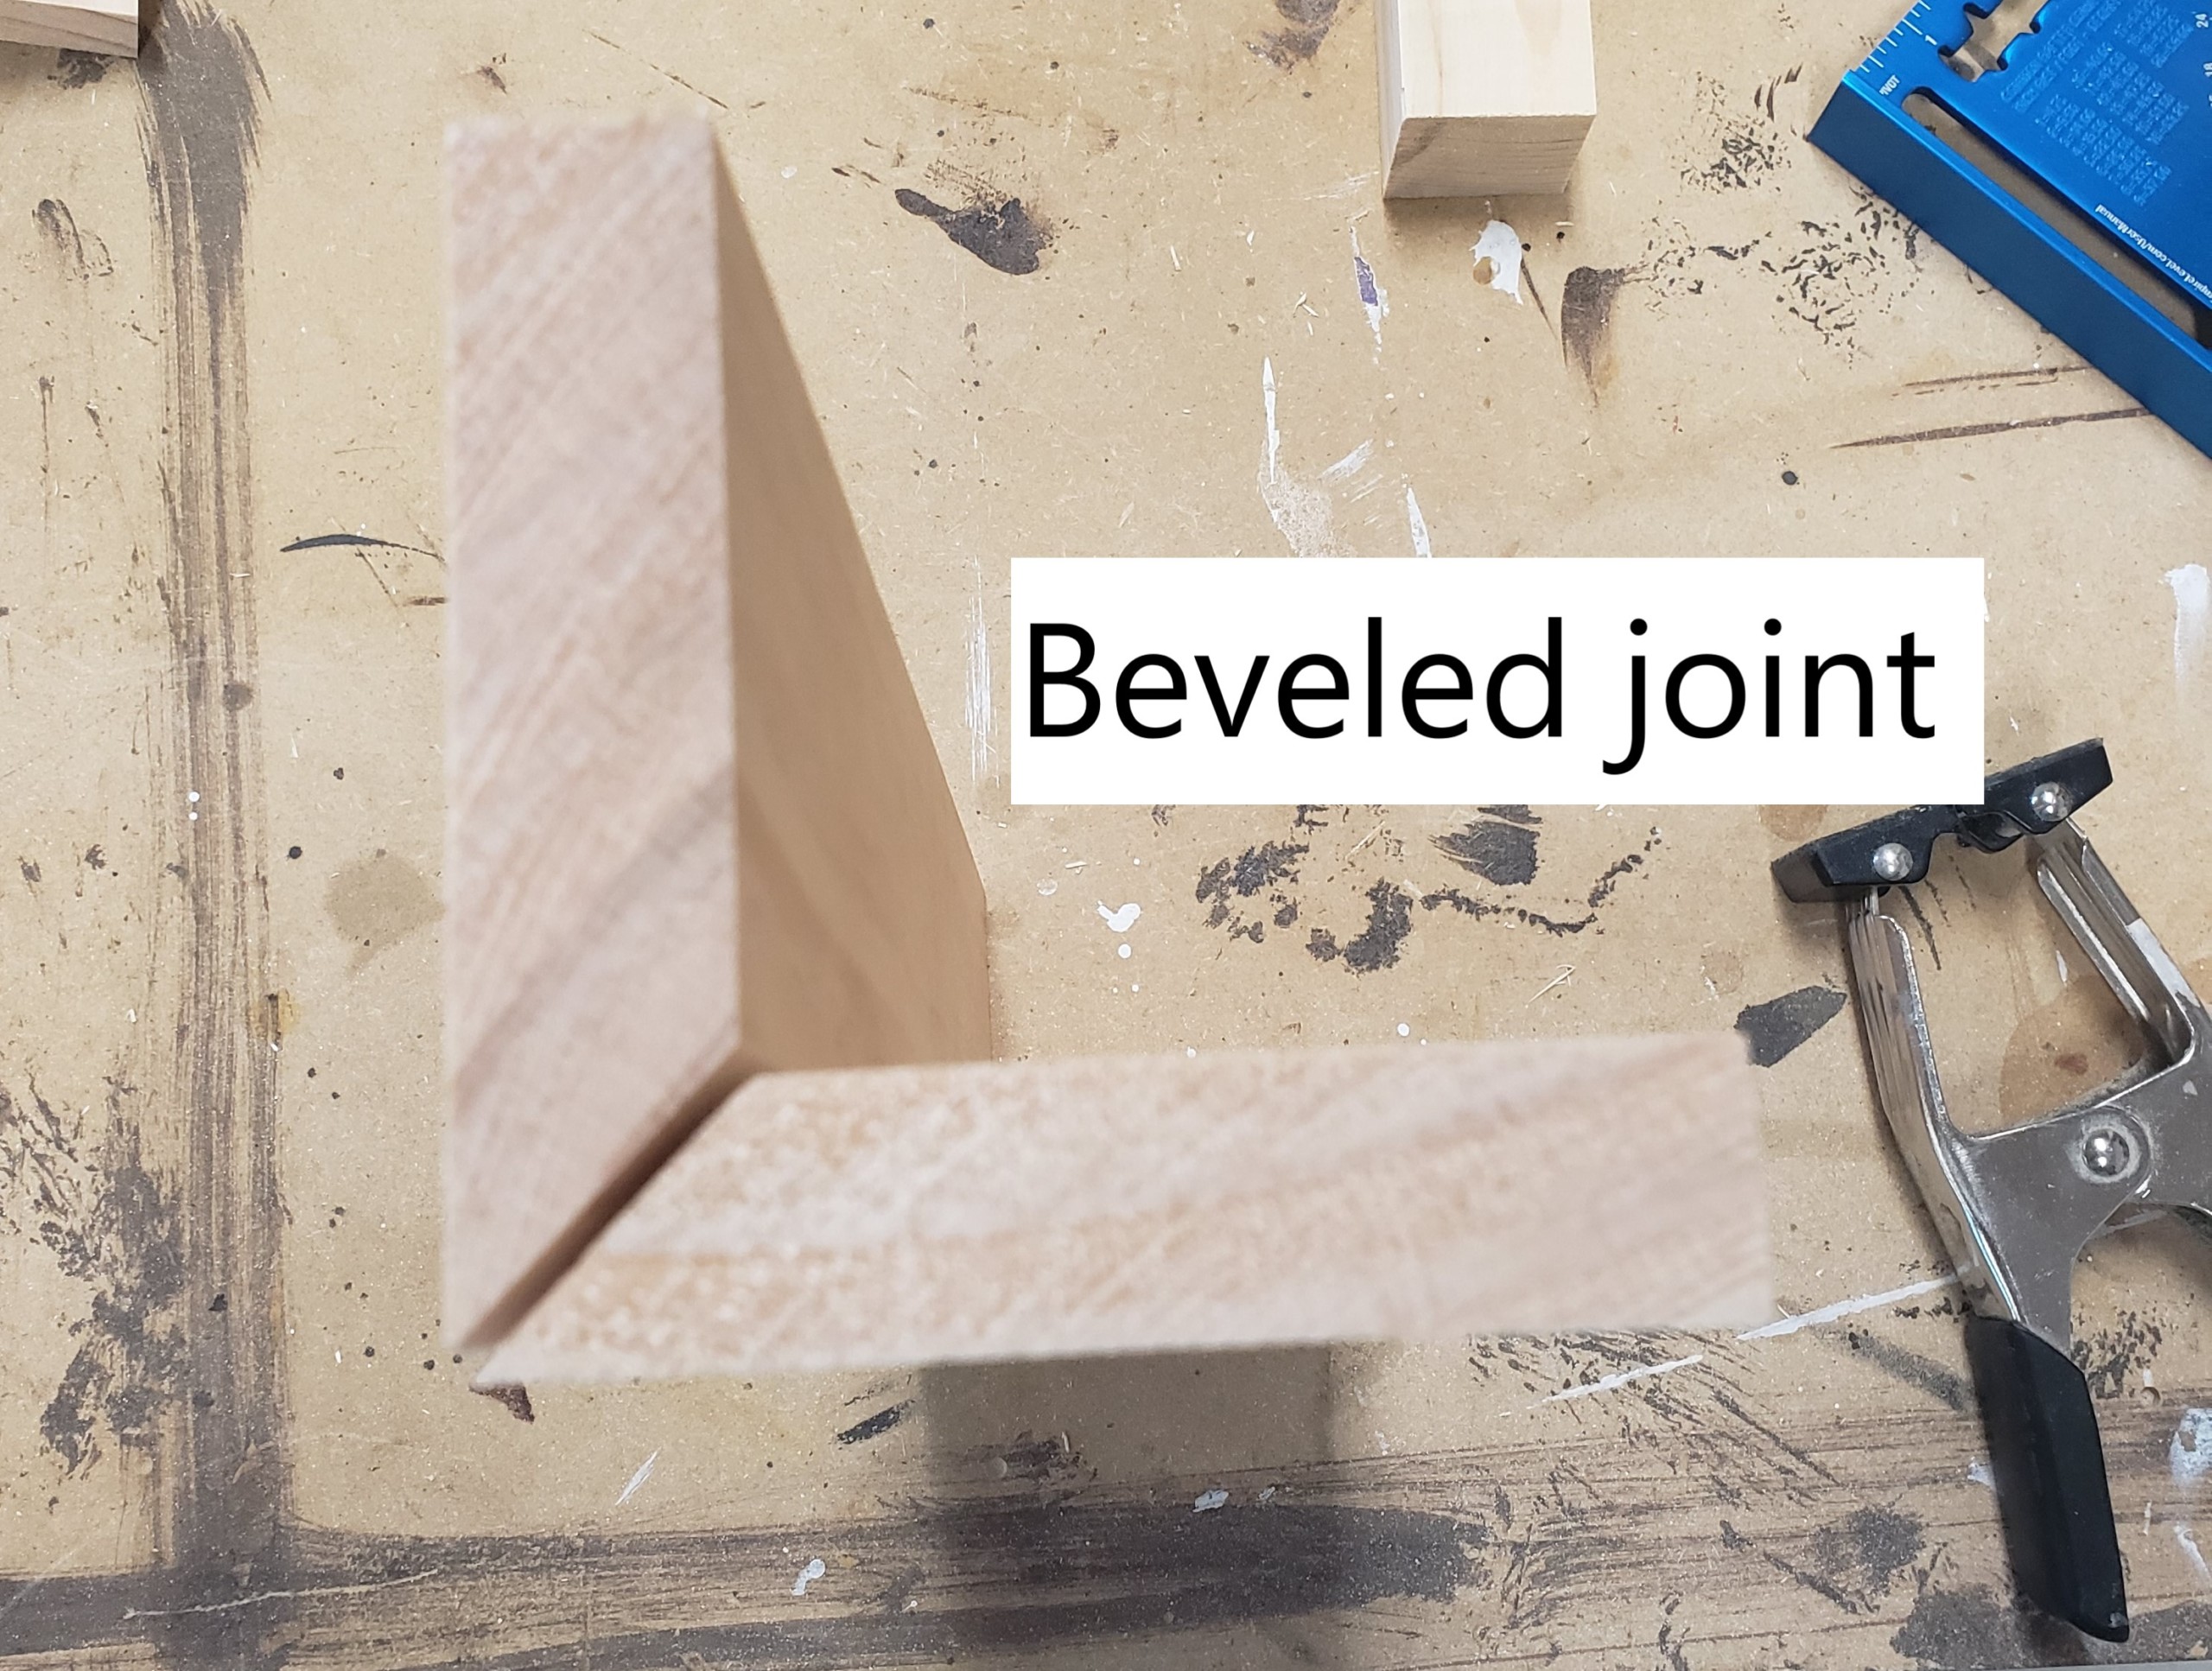
  • The top panel should have a bevel cut along each side as pictured below

Step 2: Add pocket holes to the shelf panel

  • Using your Kreg Jig, set to 3/4โ€ณ depth, drill three pocket holes into each side on the bottom of the shelf panel.ย  This is how your shelf will attach to the sides of the side table.

Step 3: Edge banding

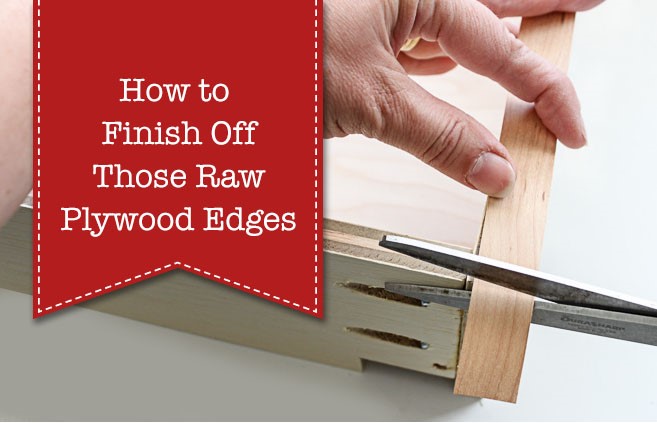
I wonโ€™t go over all of the steps for applying iron-on edge banding in this tutorial because the Pretty Handy Girl has already done this for me! If you are new to edge banding check out Brittanyโ€™s Edge Banding Tutorial.

  • You will need to edge band the front edge of each panel (side panels, top panel, and shelf panel). This will finish the visible sides.
  • You can also edge band all edges of the drawer face if you wish.ย  This piece will be inset into the side table, so the edges wonโ€™t be visible when the drawer is closed but youโ€™ll see them when open.
  • Another option would be to use a solid piece of 1×6 for the drawer face to avoid needing to band the edges all together. (I used a scrap piece of 1×6 so it didnโ€™t need edge banding.)

Step 4: Install drawer slides to table carcass

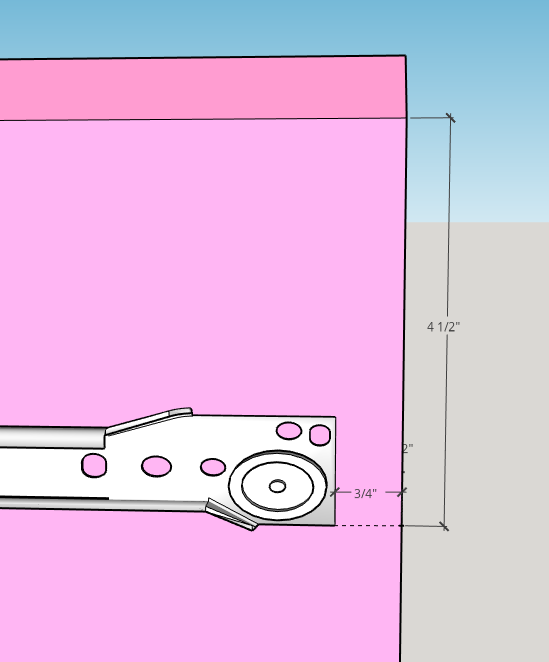
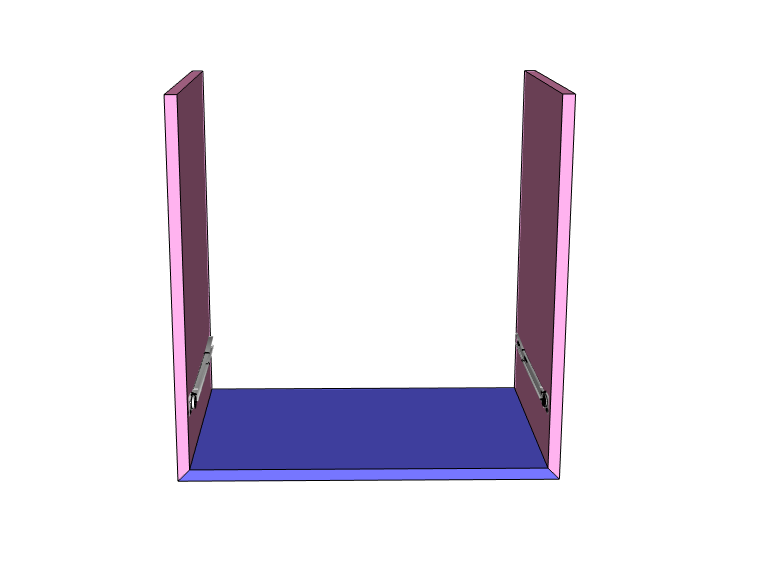
  • Install the drawer slides (meant to attach to the cabinet) on the inside of each side panel measuring down 4 ยฝโ€ from the top of the bevel and 3/4โ€ณ in from the front edge as shown.ย  This is the step where the self-centering drill bit is really helpful to have!


Step 5: Assemble the sides and top panels. The table will be upside down during assembly

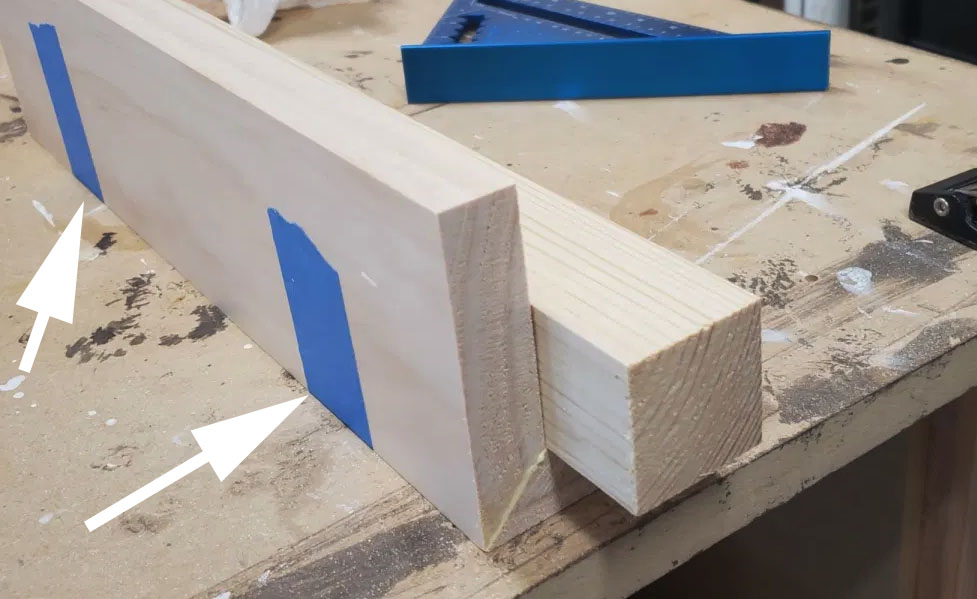
  • Add two pieces of painterโ€™s tape to each of the two outside edges of the top panel, perpendicular to both beveled edges.
  • Set the top panel down on your work surface upside down, sticky side of the tape facing up, and place the two side panels with the beveled edges touching the top panelโ€™s beveled edge, also being sure to align the front and back of the panels. Press down firmly so the tape sticks to all three panels.

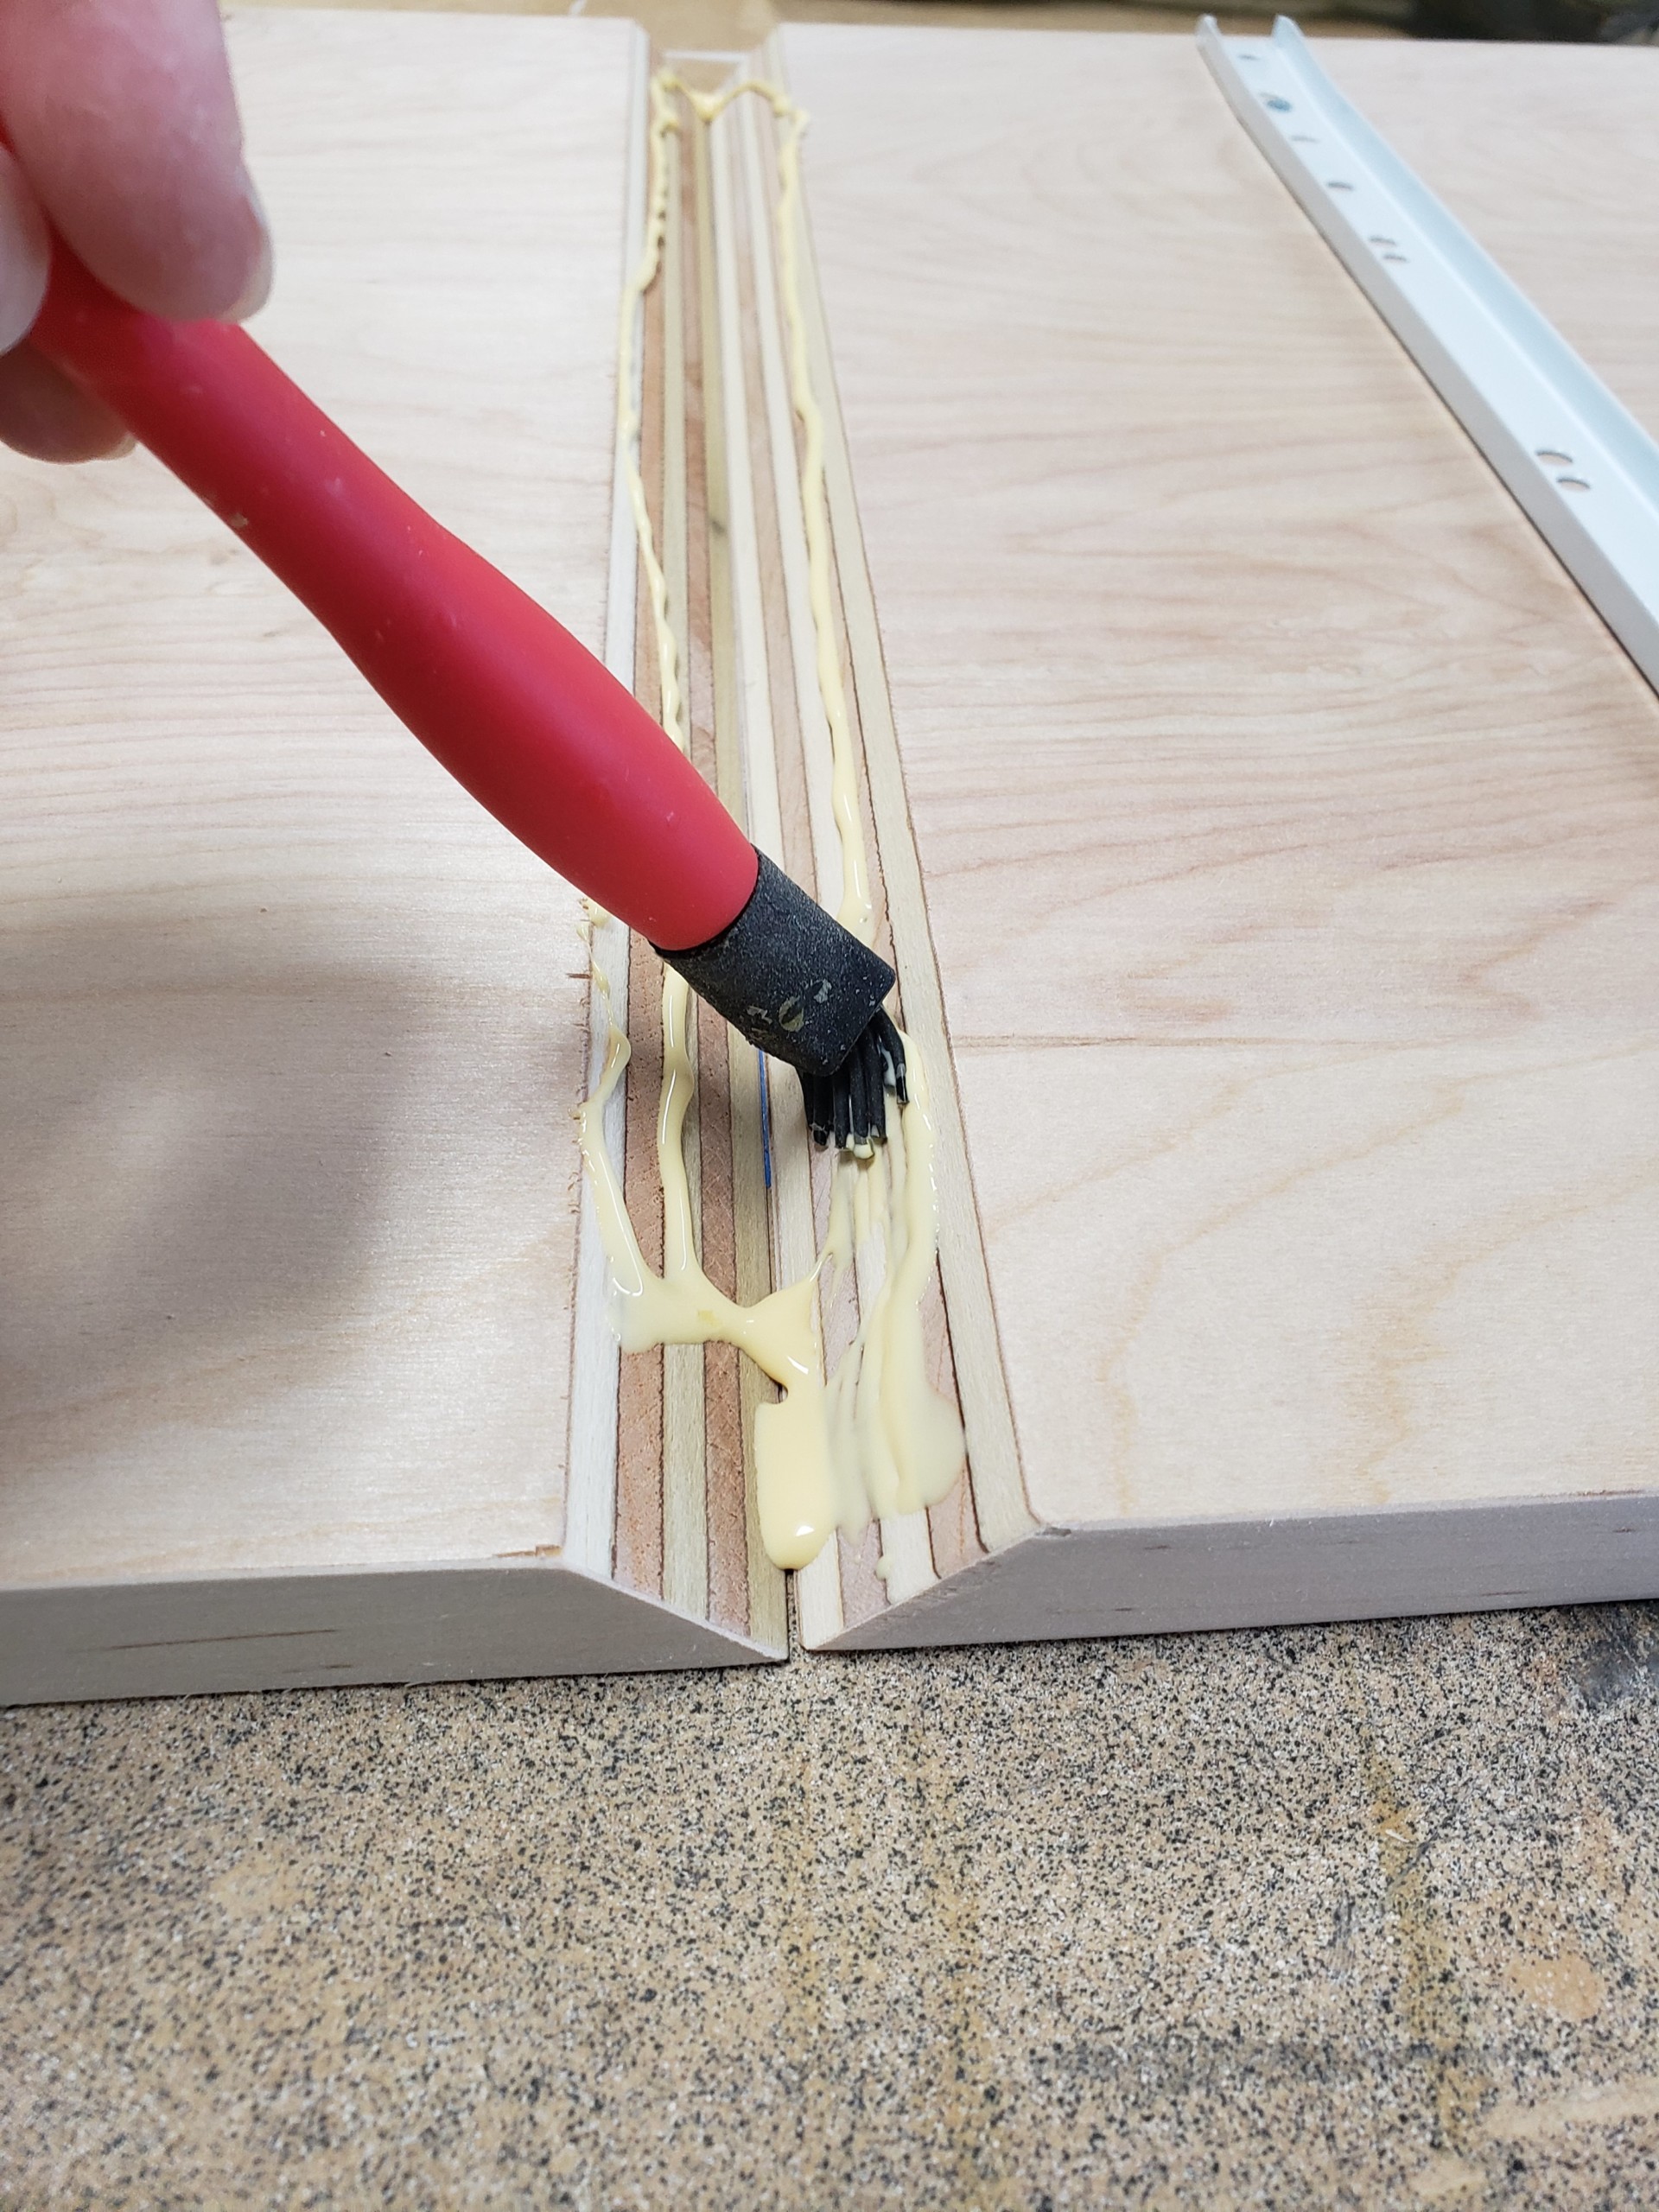
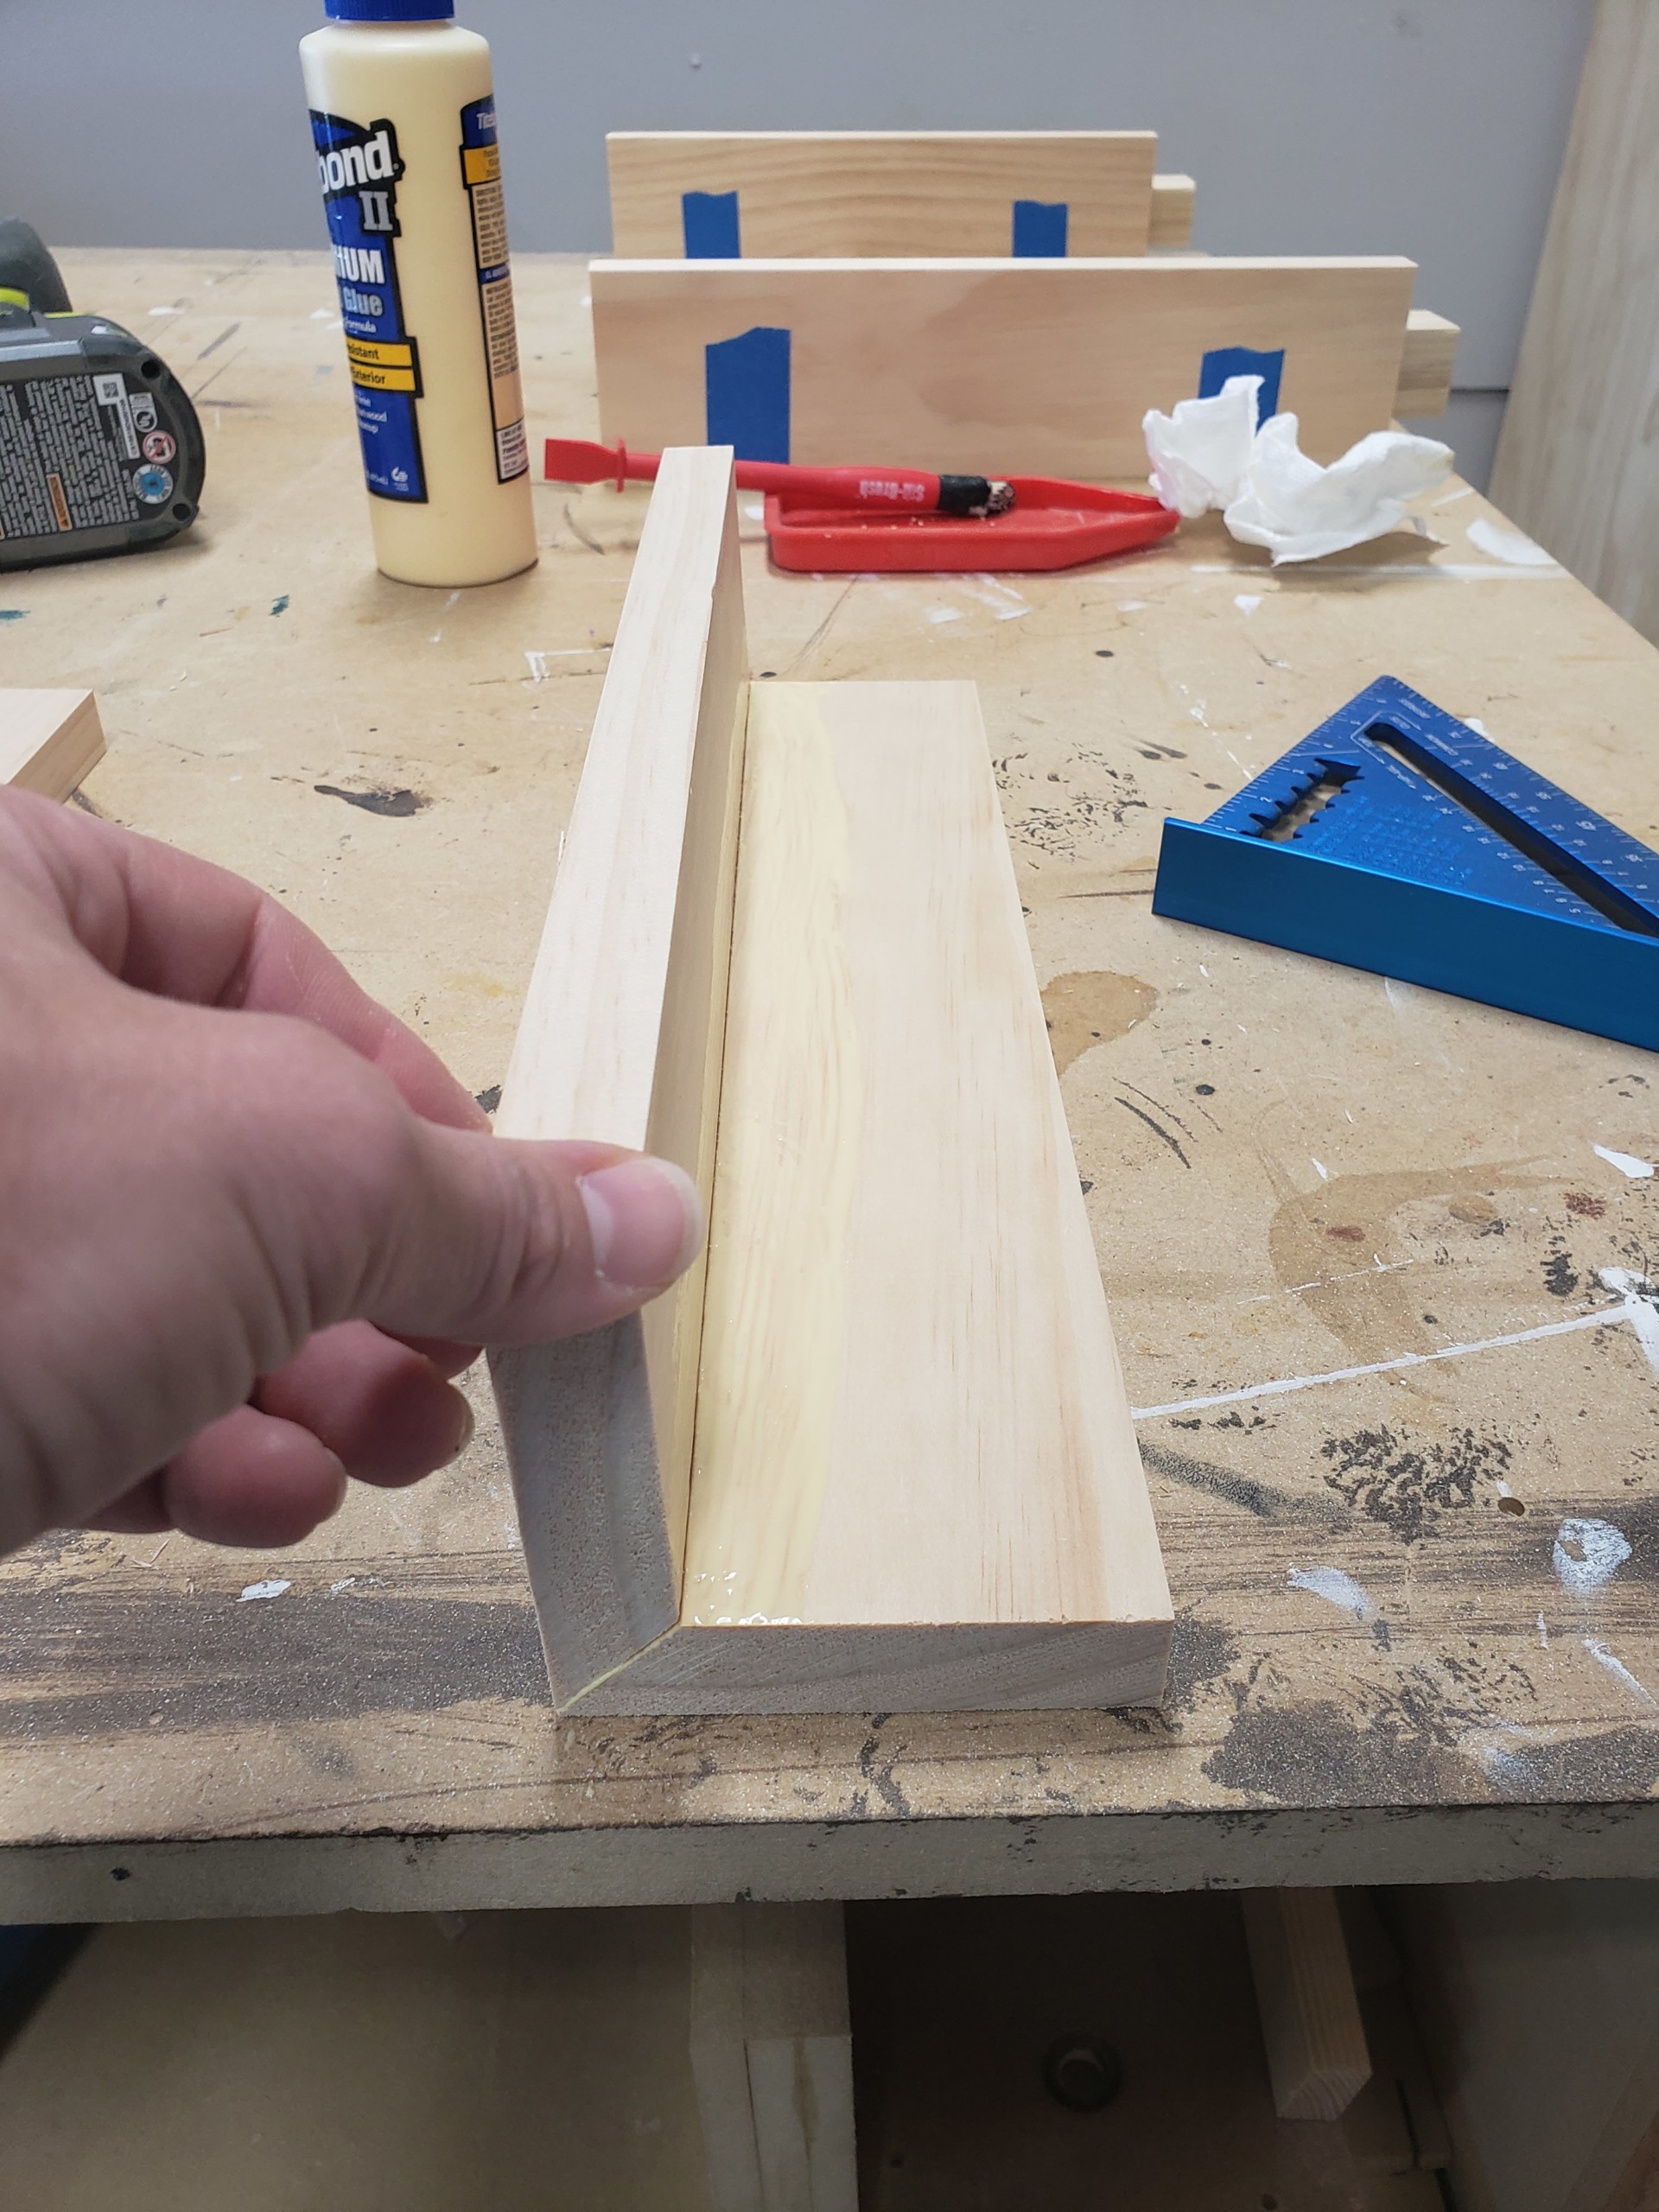
  • Add an even bead of glue to both beveled surfaces and then lift one side panel as if closing a book. The two beveled edges will meet, and the tape will hold it in place (see photos below). Repeat this step for the other side panel.

The photo below is from another project, but shows how to use painterโ€™s tape for holding the bevel joint in place.

tape back for bevel joints

  • You can add a few 1 ยผโ€ brad nails to the joint to help hold it in place. Use wood putty to fill in the brad holes and sand smooth.

Step 6: Install shelf panel

  • Install the shelf 4โ€ณ from the bottom of each side panel using wood glue and 1 ยผโ€ pocket holes.
  • This step is easier to accomplish with wood clamps or by carefully laying the table on one side.

Step 7: Build the drawer

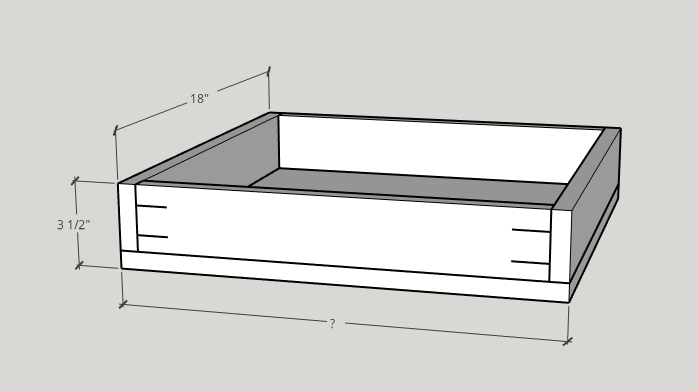
  • There are several different ways to build drawer boxes. The dimensions for this drawer are 3 ยฝโ€ tall and 18โ€ณ deep. The width of your drawer depends on the specific drawer slides that youโ€™ve chosen to use. I have provided a diagram for a simple method of building drawer boxes. (Or you can follow this tutorial for building drawers.)


Step 8: Paint or Stain and Finish

  • Once the side table carcass is assembled and the drawer face has been edge-banded (if that is what you chose to do) then you can paint or stain your DIY side table.ย  I chose to paint the carcass and apply a gloss top coat to give it a pretty shine. I left the drawer face a natural wood color because this is what looked best in my daughterโ€™s room.

Step 9: Install the drawer face

  • Once the carcass and drawer face are finished to your liking then you can slide the drawer box into place.
  • Attach the drawer face using super glue and simply eye-balling the top and side gaps. Hold the drawer face firmly against the drawer box until they adhere together.ย  Then gently pull the drawer out and drive two 1 ยผโ€ wood screws from inside the drawer into the back of the drawer face.

  • Feel free to add a pretty drawer pull or knob if you want. My daughter liked it without, so we decided to leave it as is.

Check out the entire furniture collection that I created for my youngest daughterโ€™s bedroom.

DIY Platform Bed and DIY Quote Sign

Stay tuned for the DIY Hanging Bookshelf that I will be teaching you how to make next month!

Hi! Iโ€™m Kristen, from In Her Garage,ย and I am a self-taught woodworker and DIY fanatic from Minnesota where I live with my husband and our two daughters. Between being a wife, mom and, registered nurse, I try to make as much time for DIY as possible. My love for building came after our family built our current home in 2015. After we moved in, we needed furniture and instead of spending massive amounts of money to order the pieces we wanted I decided that I would build them myself. I started with a buffet table plan from the fabulous Ana-white and quickly set out to remodel my entire home office.

Since then I have started a side business building furniture for the people in my community. I love hearing my clients talk about the pieces they wish they had whether it be aย rustic buffet table, aย one drawer side table, or aย toy boxย and then making it a reality for them. While starting my small business it made perfect sense that I would document my building journey so I simultaneously launched theย In Her Garage blogย and I love sharing my plans, tips and tricks.

Making something beautiful with your own two hands through a little preparation and determination is an amazing feeling and I hope to bring inspiration and know-how to those looking to tackle a big or small project.
I am so glad that you found me here and please feel free to connect with me onย Pinterest,ย Instagram, Facebook, and Youtube to see what I am working on right now.
 

DIY Platform Bed

Build this simple DIY platform bed for your home!! This platform bed is a minimalistโ€™s dream and it fits in perfectly with the new and trending BoHo decor style.

DIY Platform Bed

DIY Platform Bed

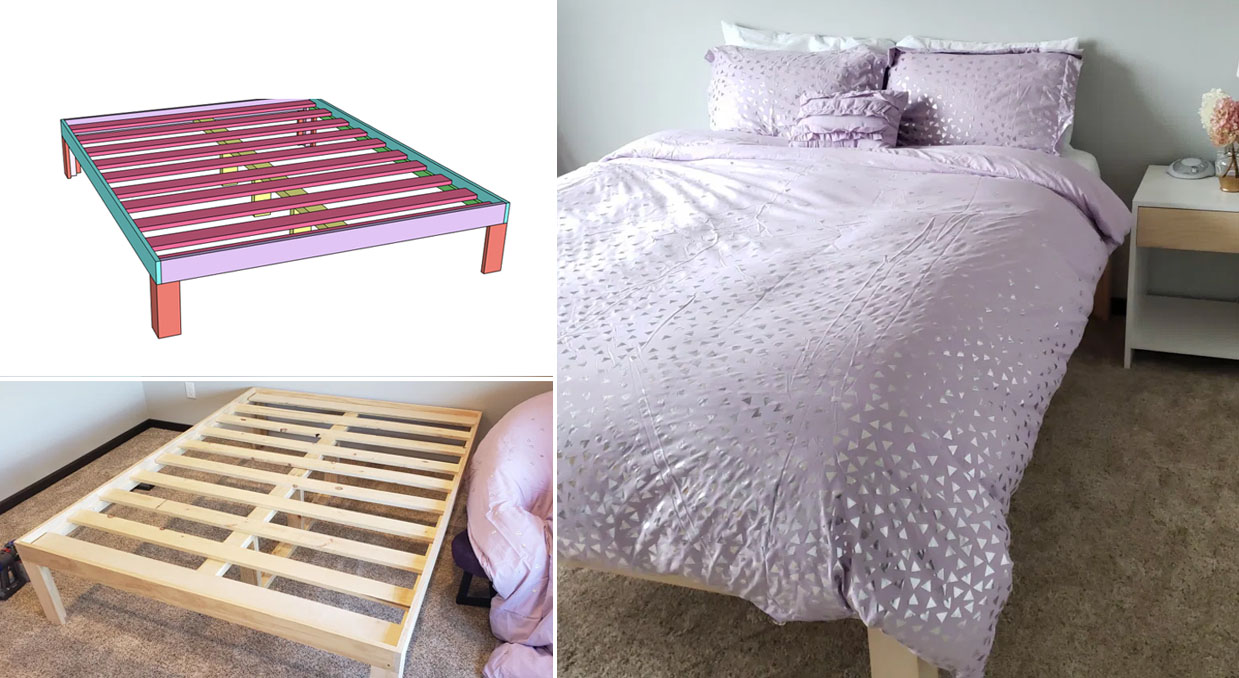
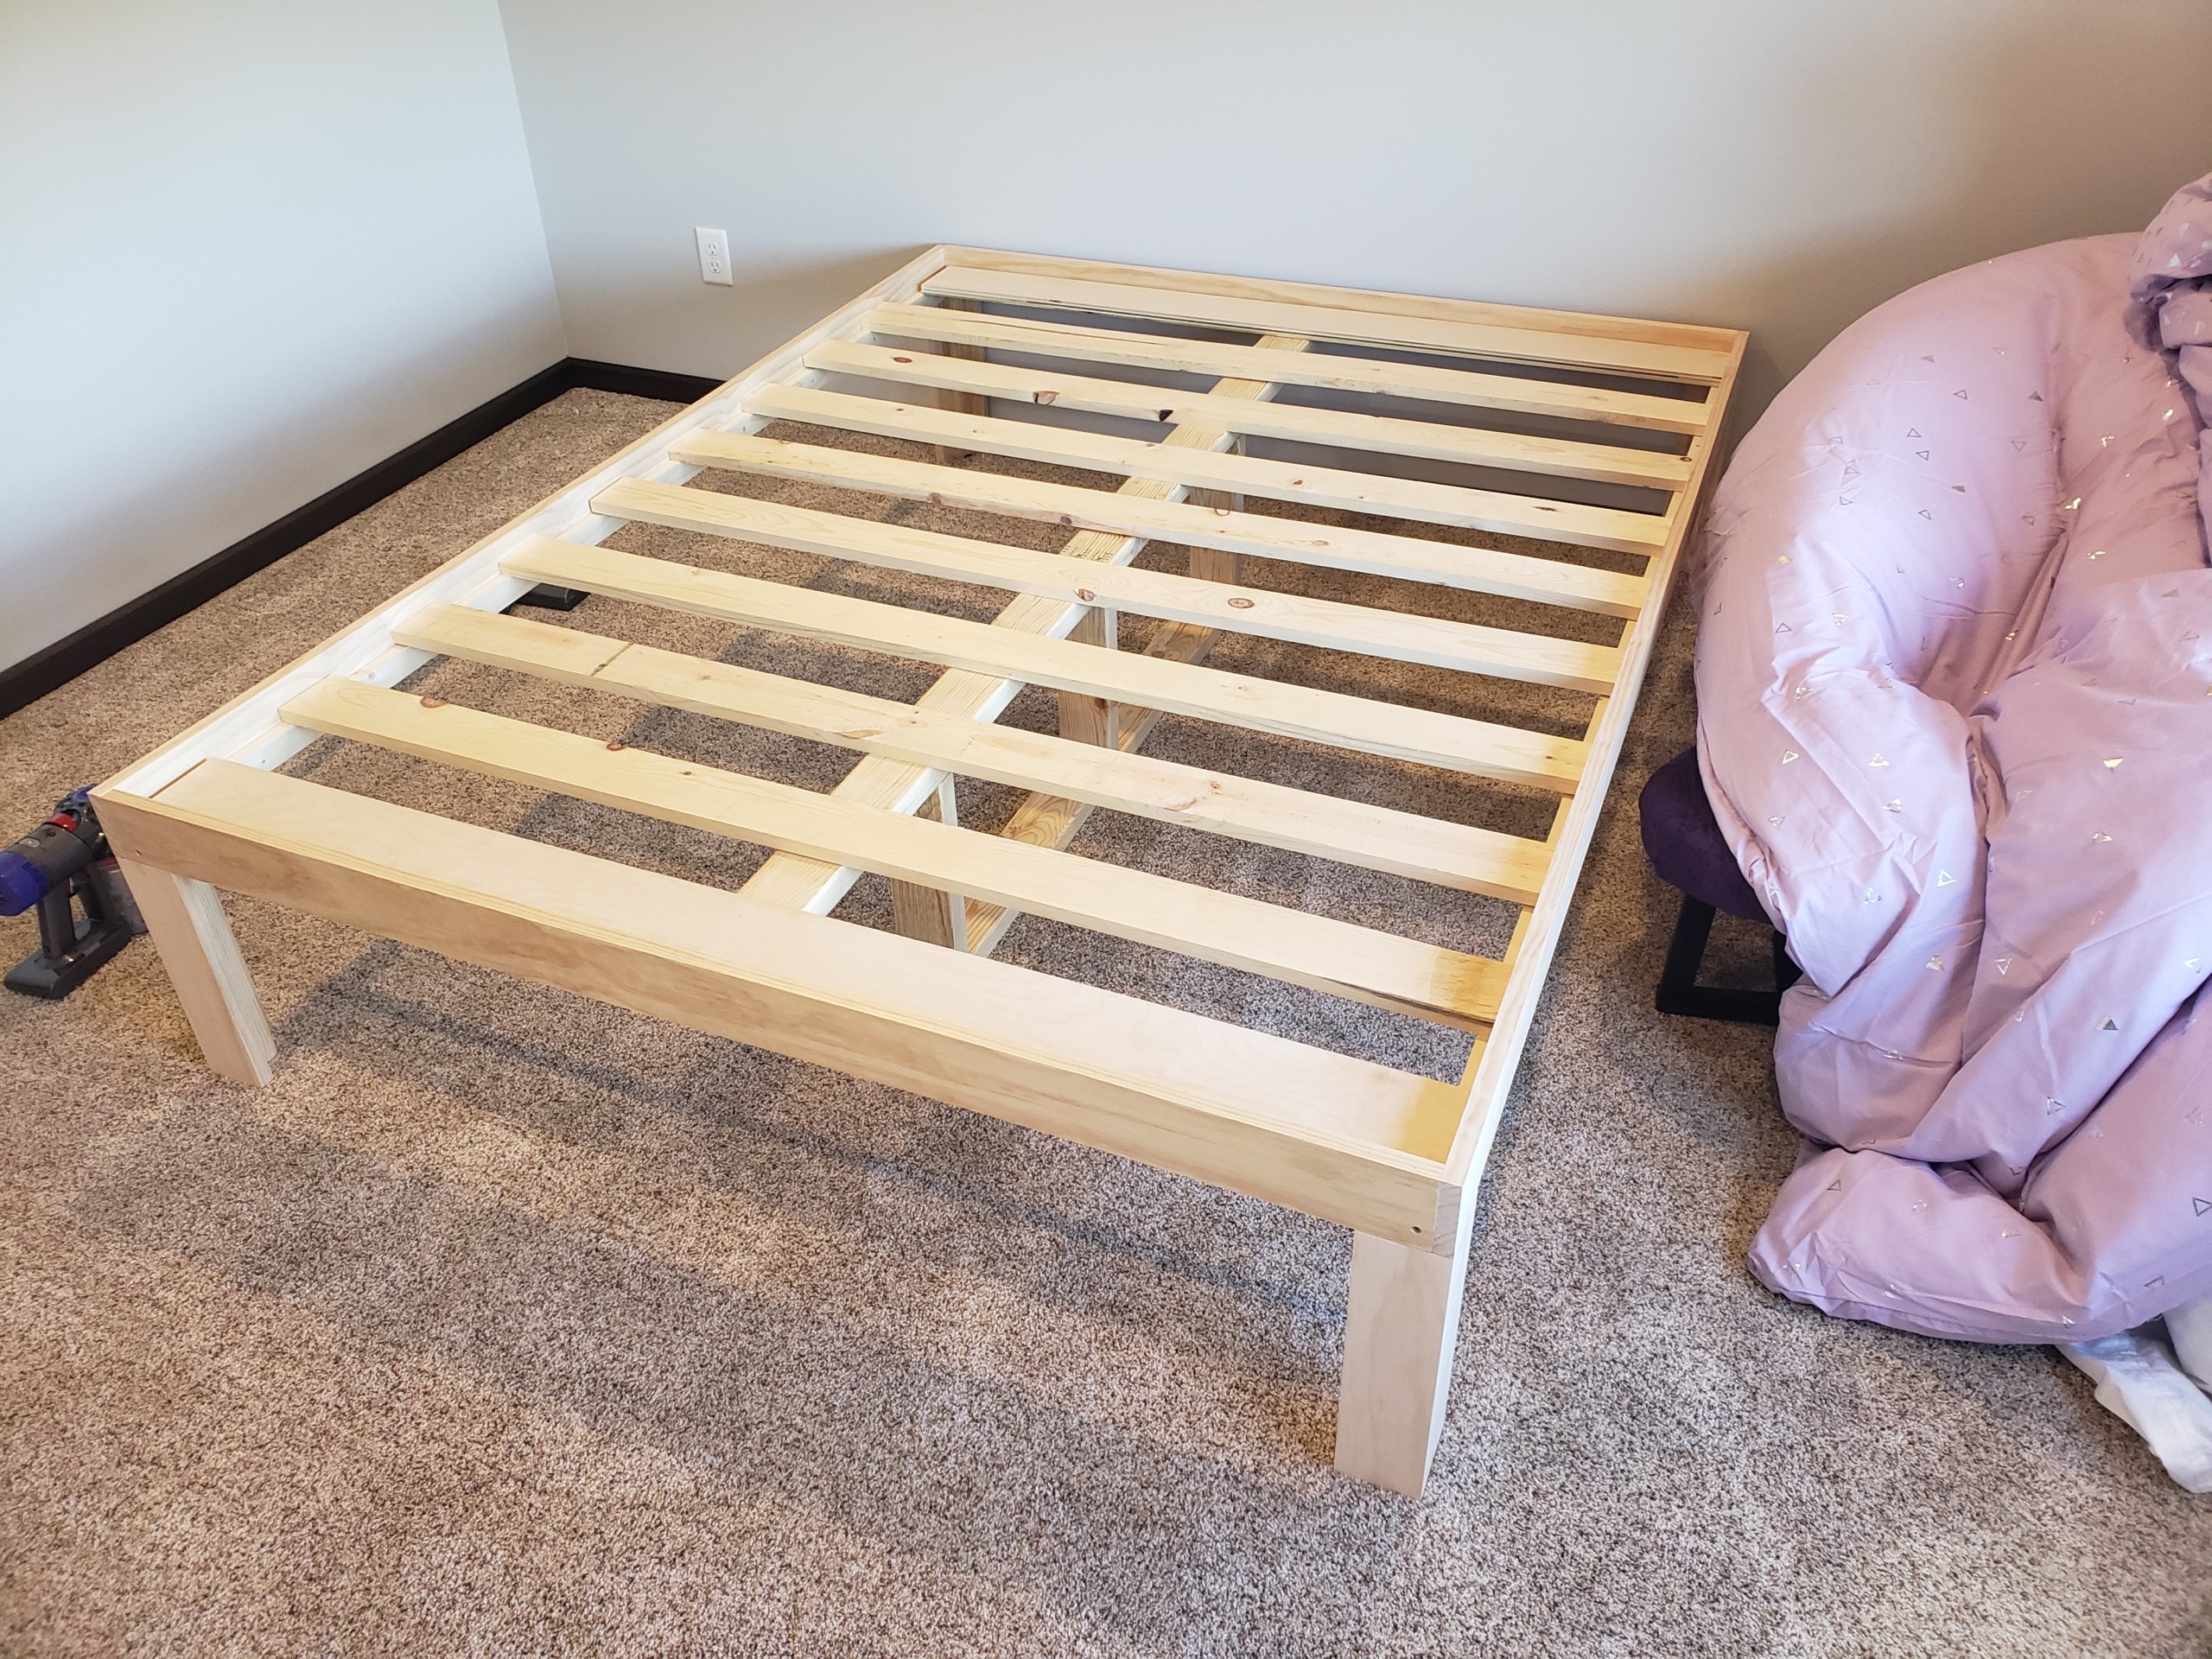
Hey everyone, this is Kristen from In Her Garage and I am going to show you how to build an adorable platform bed. This is the bed I built for my daughter in about an hour and a half.ย  In my home, we are once again changing my girlsโ€™ bedrooms (because why wouldnโ€™t I take down the uber-cute loft beds I just built them back in March?! )My kiddos are lucky Iโ€™m a sucker for building furniture. Be sure to follow me on Instagram if you want to keep up with all my furniture building adventures!

Since my girls are moving into separate bedrooms we decided each would have a queen size mattress. We purchased a queen mattress without the box spring in the interest of saving money.ย  But, all the platform bed frames I found were either too expensive or too short. I still wanted her bed to be at a standard height so I decided to throw together this really simple platform bed.

The simplicity and natural look of the popular BoHo style pairs really nicely with the bedding for my daughterโ€™s room. I used the more expensive pine boards from the local big box store (less knot holes and higher quality) to construct the bed legs and frame.ย  These boards are so pretty and I love the color so I chose not to paint, stain, or topcoat them.ย  This is why you wonโ€™t find a โ€œFinishโ€ step in this tutorial.ย  But, feel free to finish your bed however you like! Letโ€™s make it!

How to Build a DIY Platform Bed

Materials:

(Iโ€™ve includedย affiliate links for your convenience. I earn a small percentage from a purchase using these links. Thereย is no additional cost to you. You canย readย more about affiliate links here.)

Tools:

Cut list:

Bed legs:

  • 8 โ€“ 1โ€ณ x 4โ€ณ @ 12โ€ณ
  • 4 โ€“ 2โ€ณ x 2โ€ณ @ 13 ยผโ€

Bed Frame:

  • 2 โ€“ 1โ€ณ x 4โ€ณ @ 60โ€ณ
  • 2 โ€“ 1โ€ณ x 4โ€ณ @ 80โ€ณ
  • 2 โ€“ 1โ€ณ x 2โ€ณ @ 75 ยผโ€

Slats and center support:

  • 10 โ€“ 1โ€ณx 4โ€ณ @59 7/8โ€ณ
  • 1 โ€“ 2โ€ณ x 4โ€ณ @ 78 ยฝโ€
  • 3 โ€“ 2โ€ณ x 4โ€ณ @12โ€ณ

Instructions:

Step 1 โ€“ Build the Platform Legs

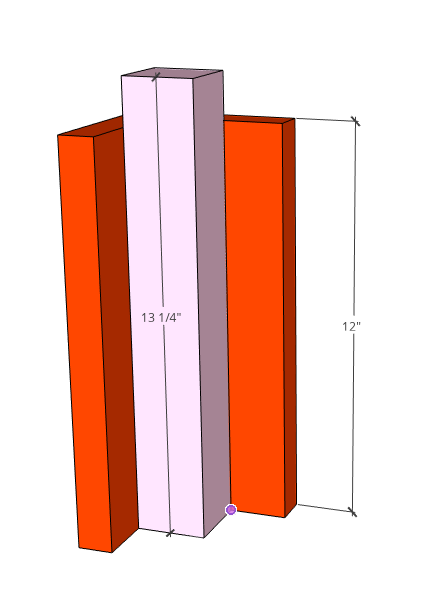
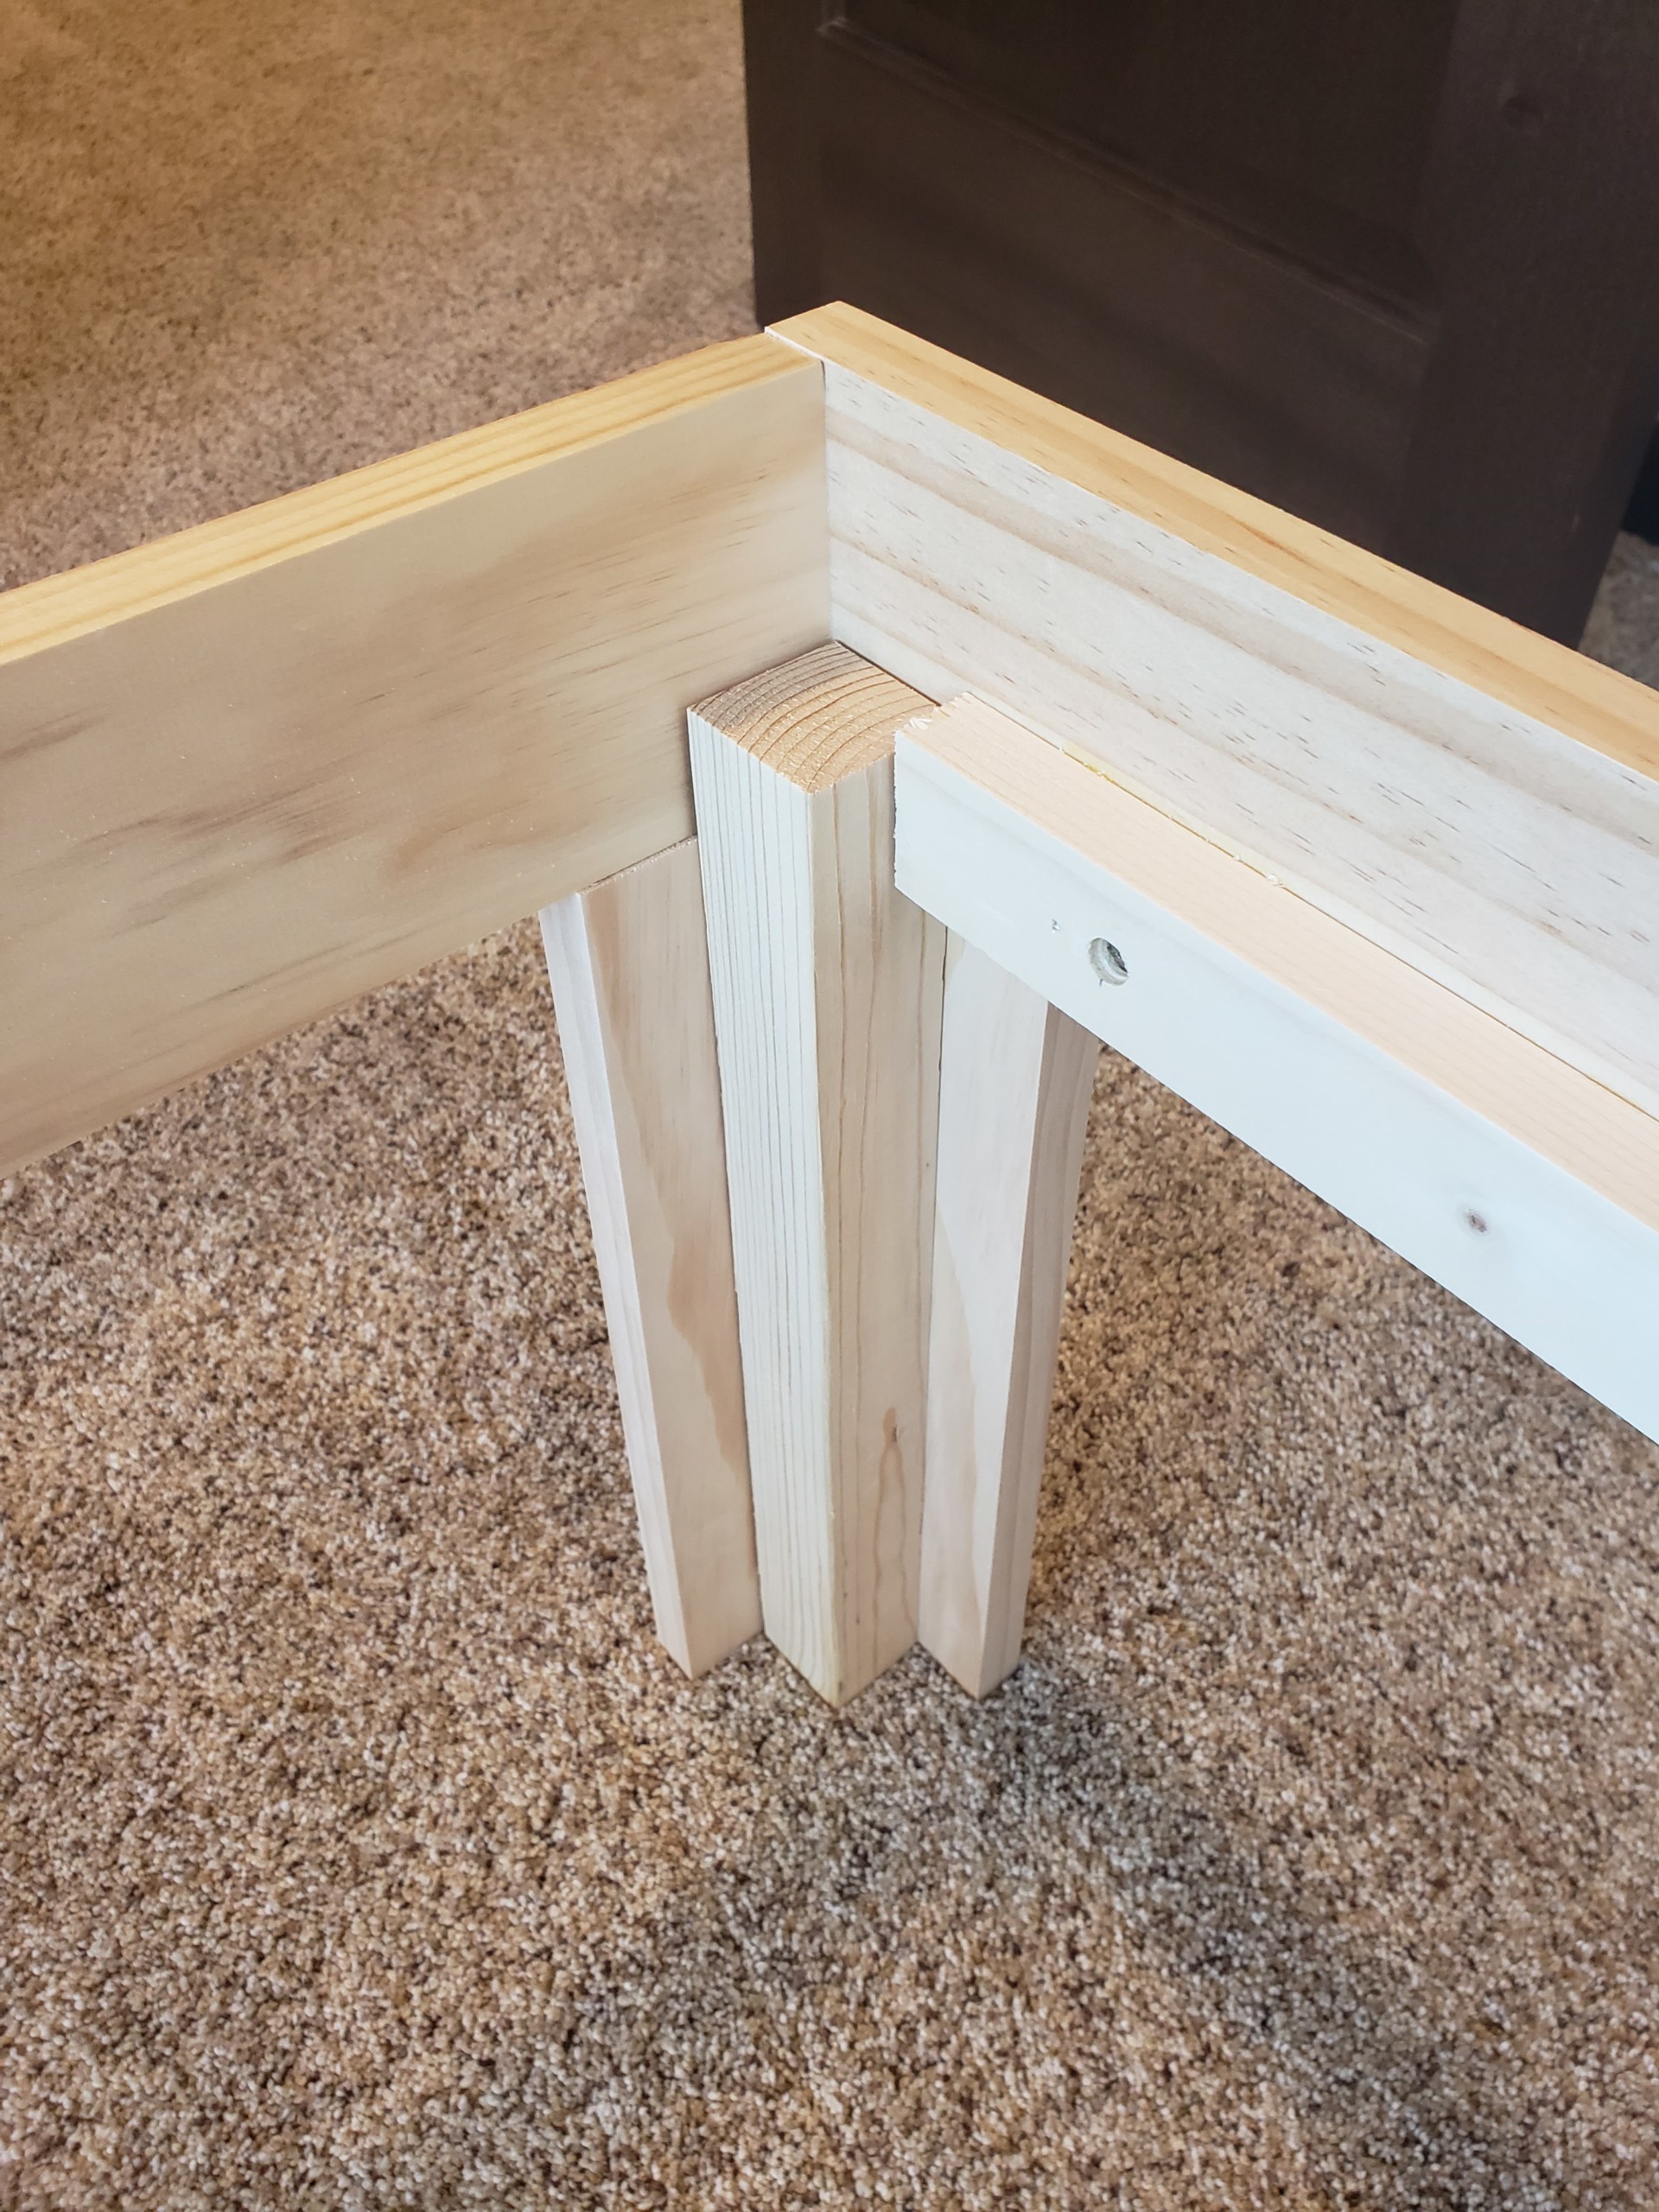
The legs for this bed are meant to provide a base for the bed frame to rest on and attach to. Attach twoย  1โ€ณ x 4โ€ณ x 12โ€ณ boards at a 90 degree angle to each other with a 2โ€ณ x 2โ€ณ x 13 ยผโ€ board glued into the center for added support as shown below.

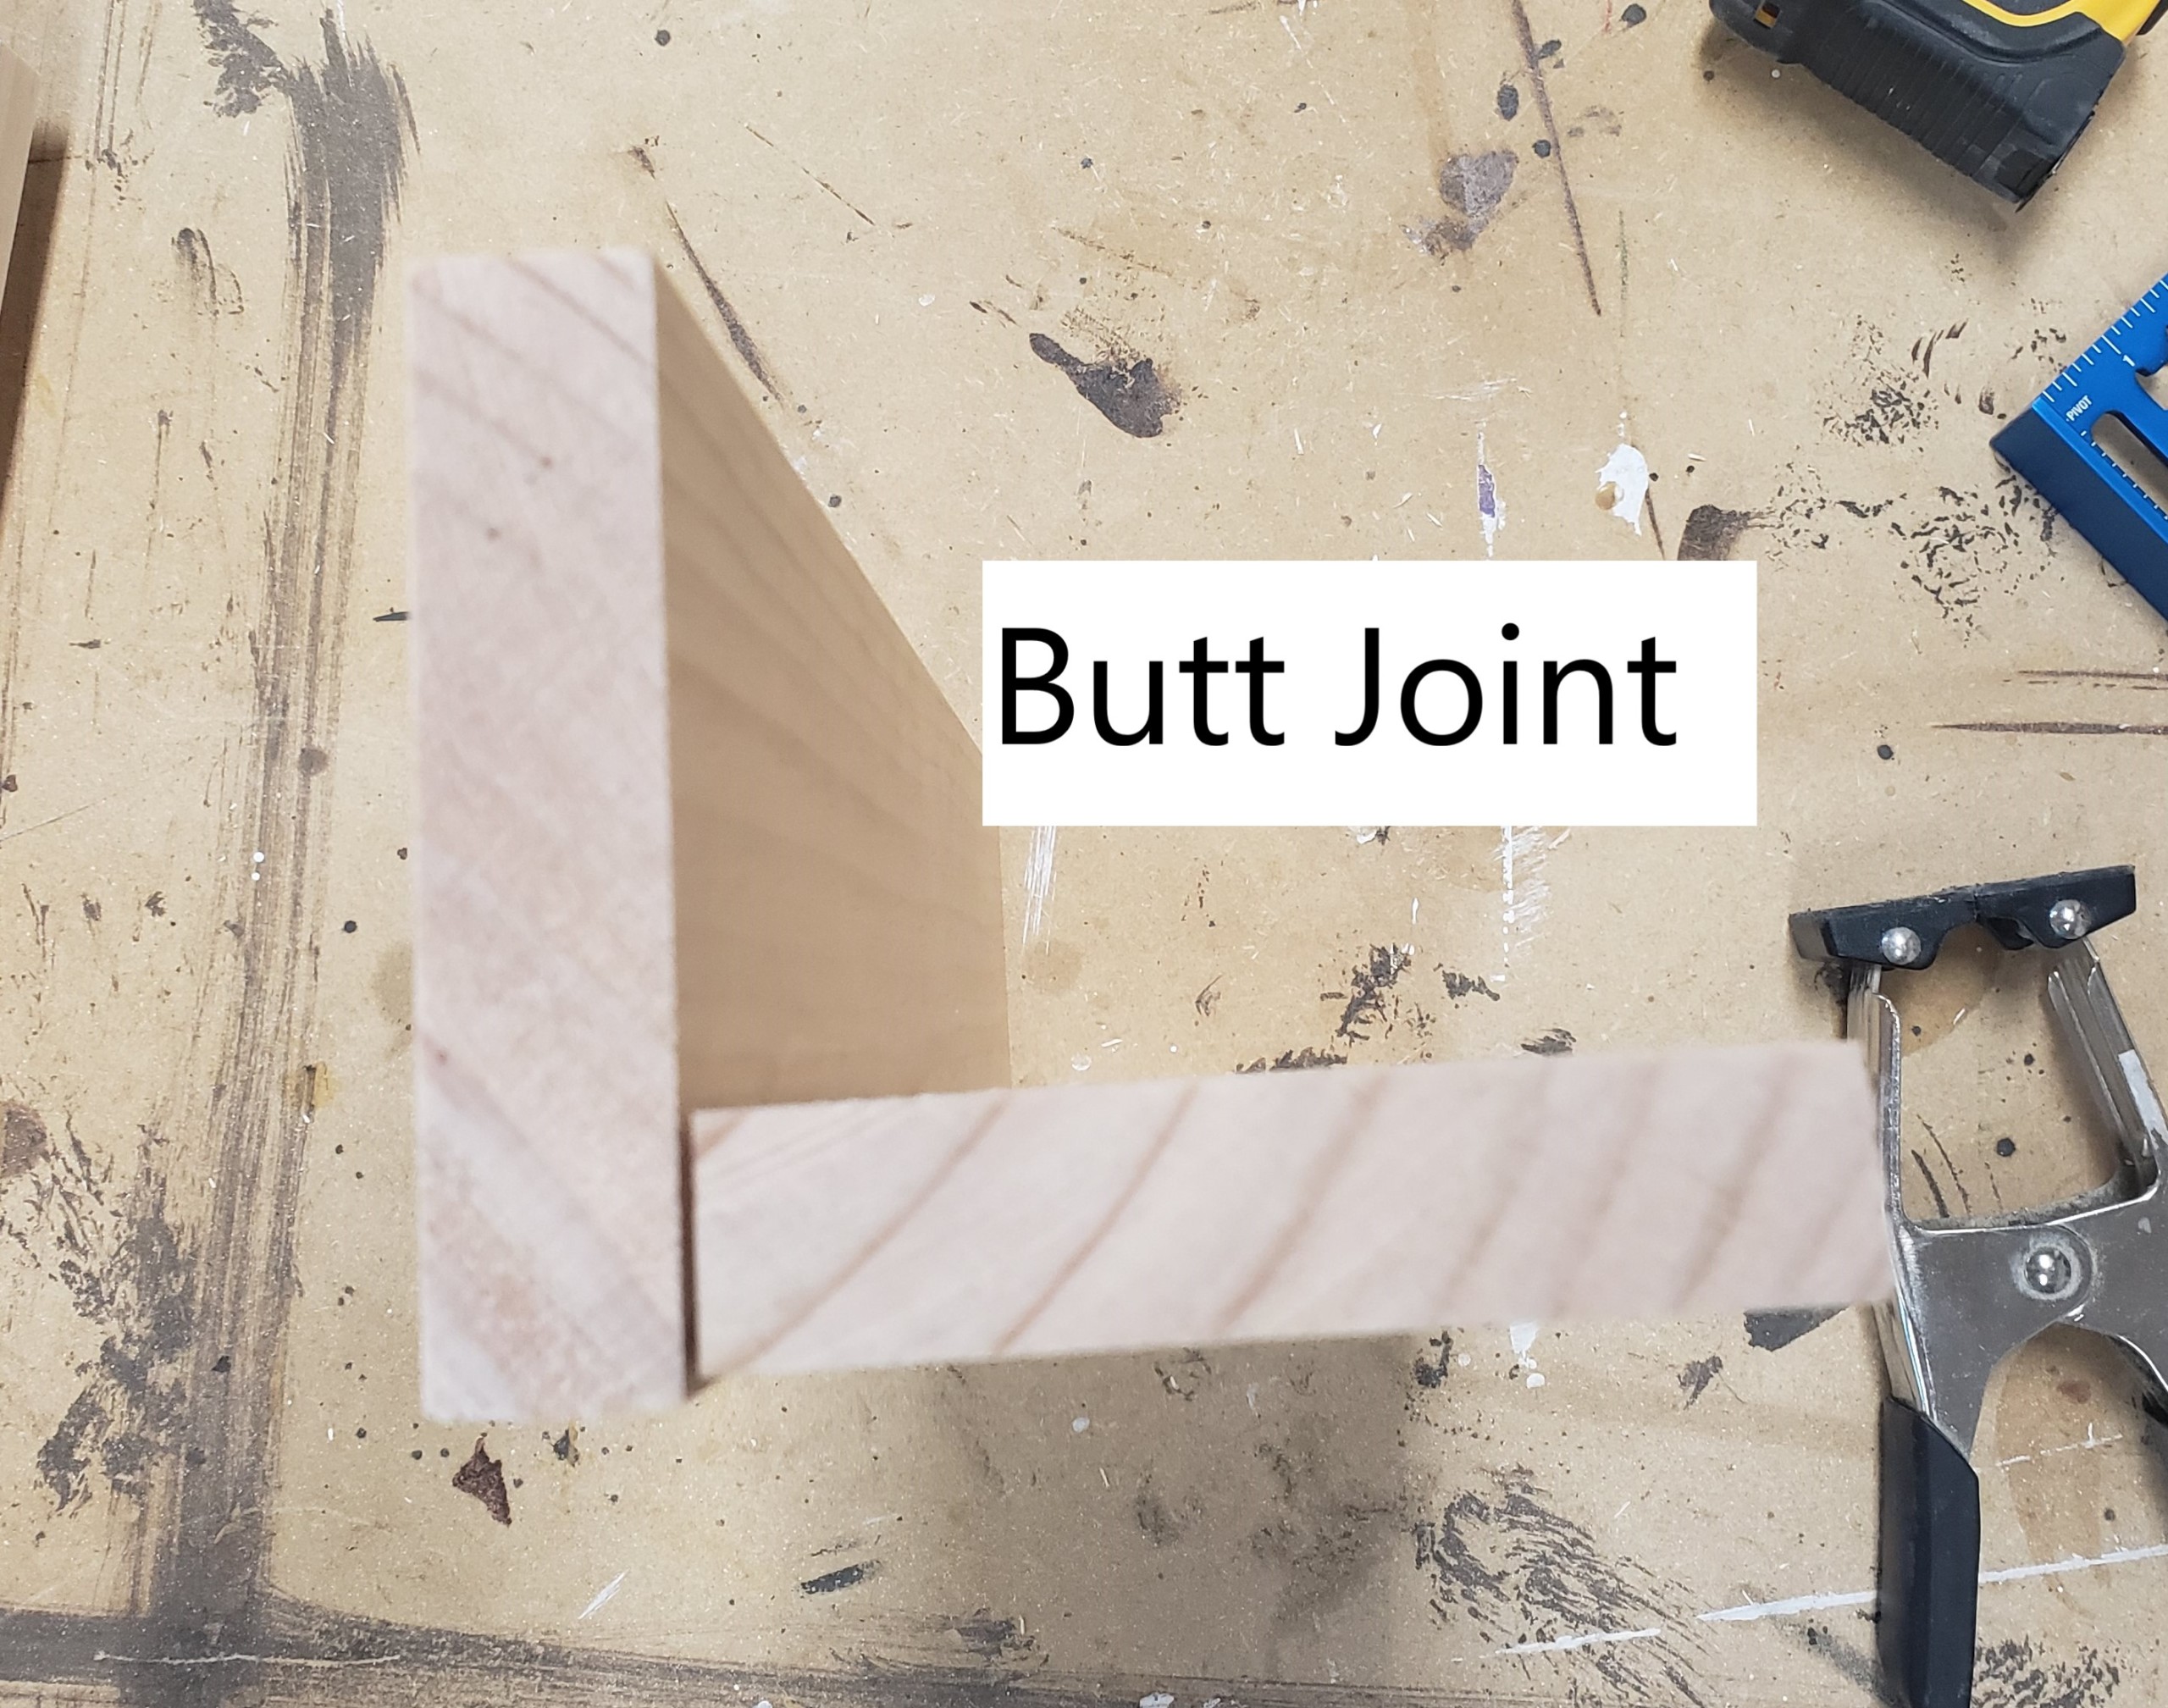
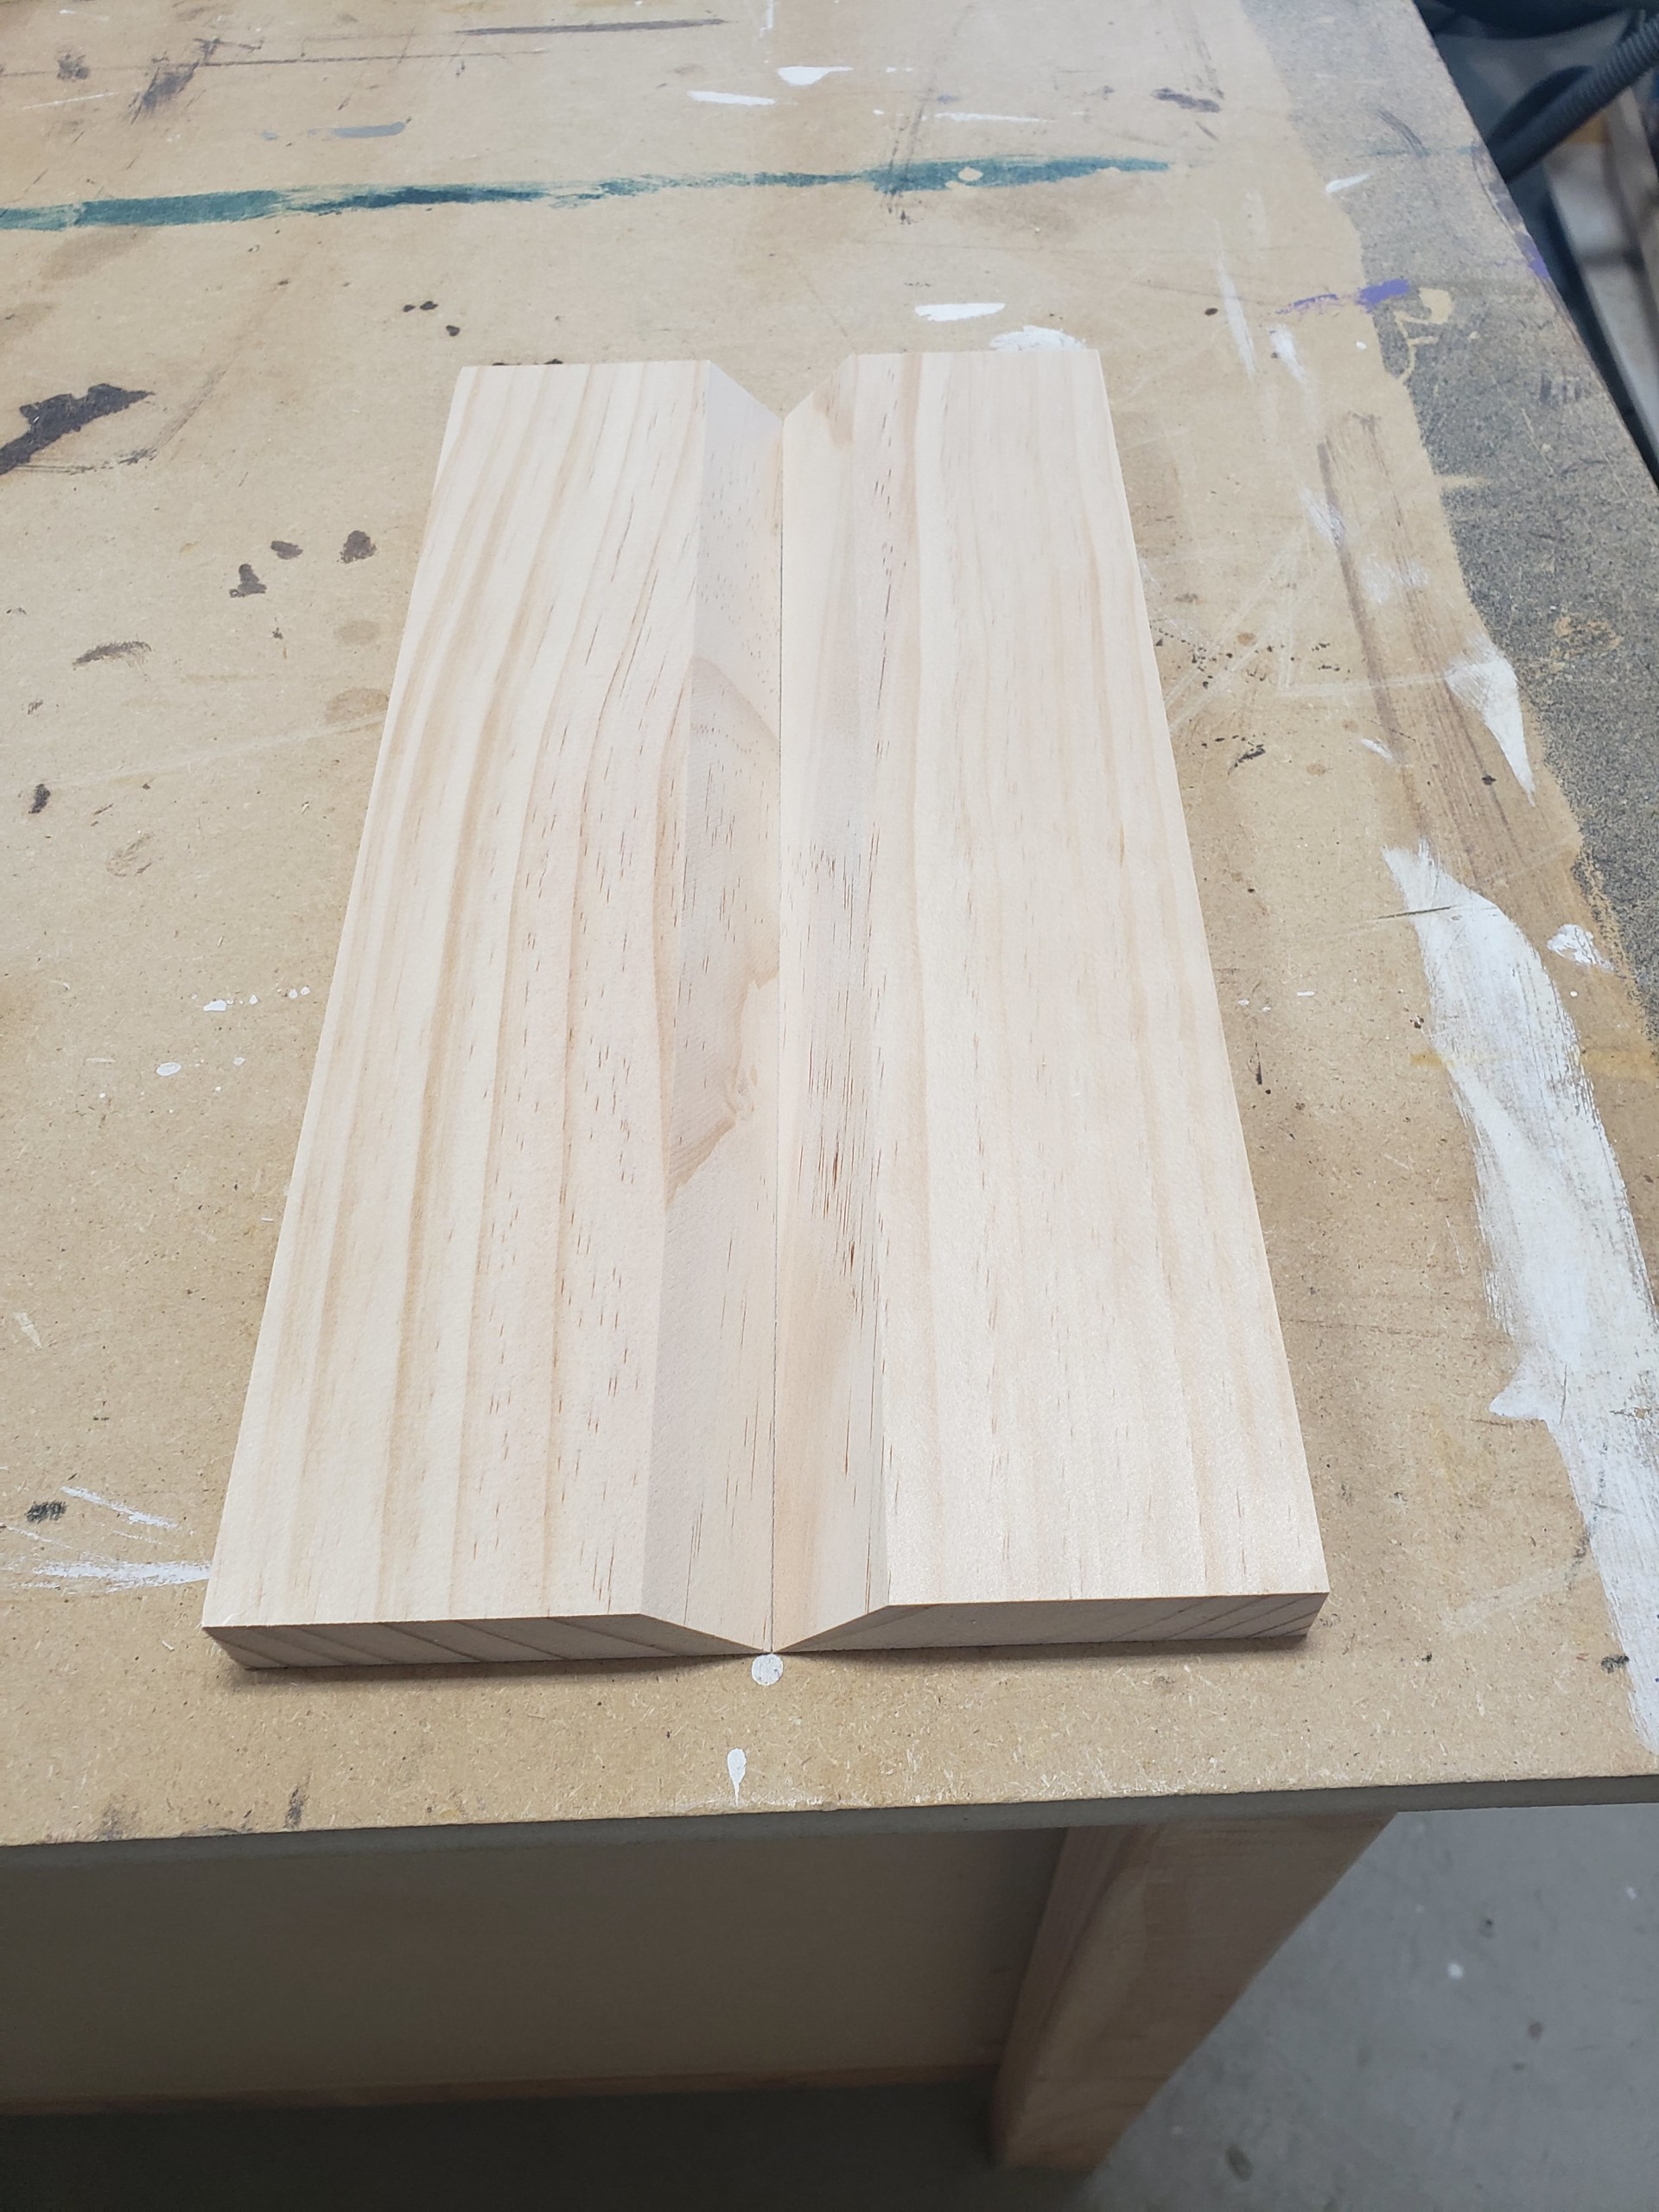
I chose to use my table saw and cut the 1โ€ณ x 4โ€ณ x12โ€ณ boards at 45 degrees along one long edge to create a miter joint between the two boards. This creates a cleaner look but you are more than welcome to use a butt joint instead. Look at the pictures below to see the difference.

If you are also choosing to bevel the corners of the bed legs then continue reading to see how I put this joint together with ease. If not, go ahead and assemble the legs using the butt joint, wood glue, and brad nails.

Mitered Joint Leg Assembly:

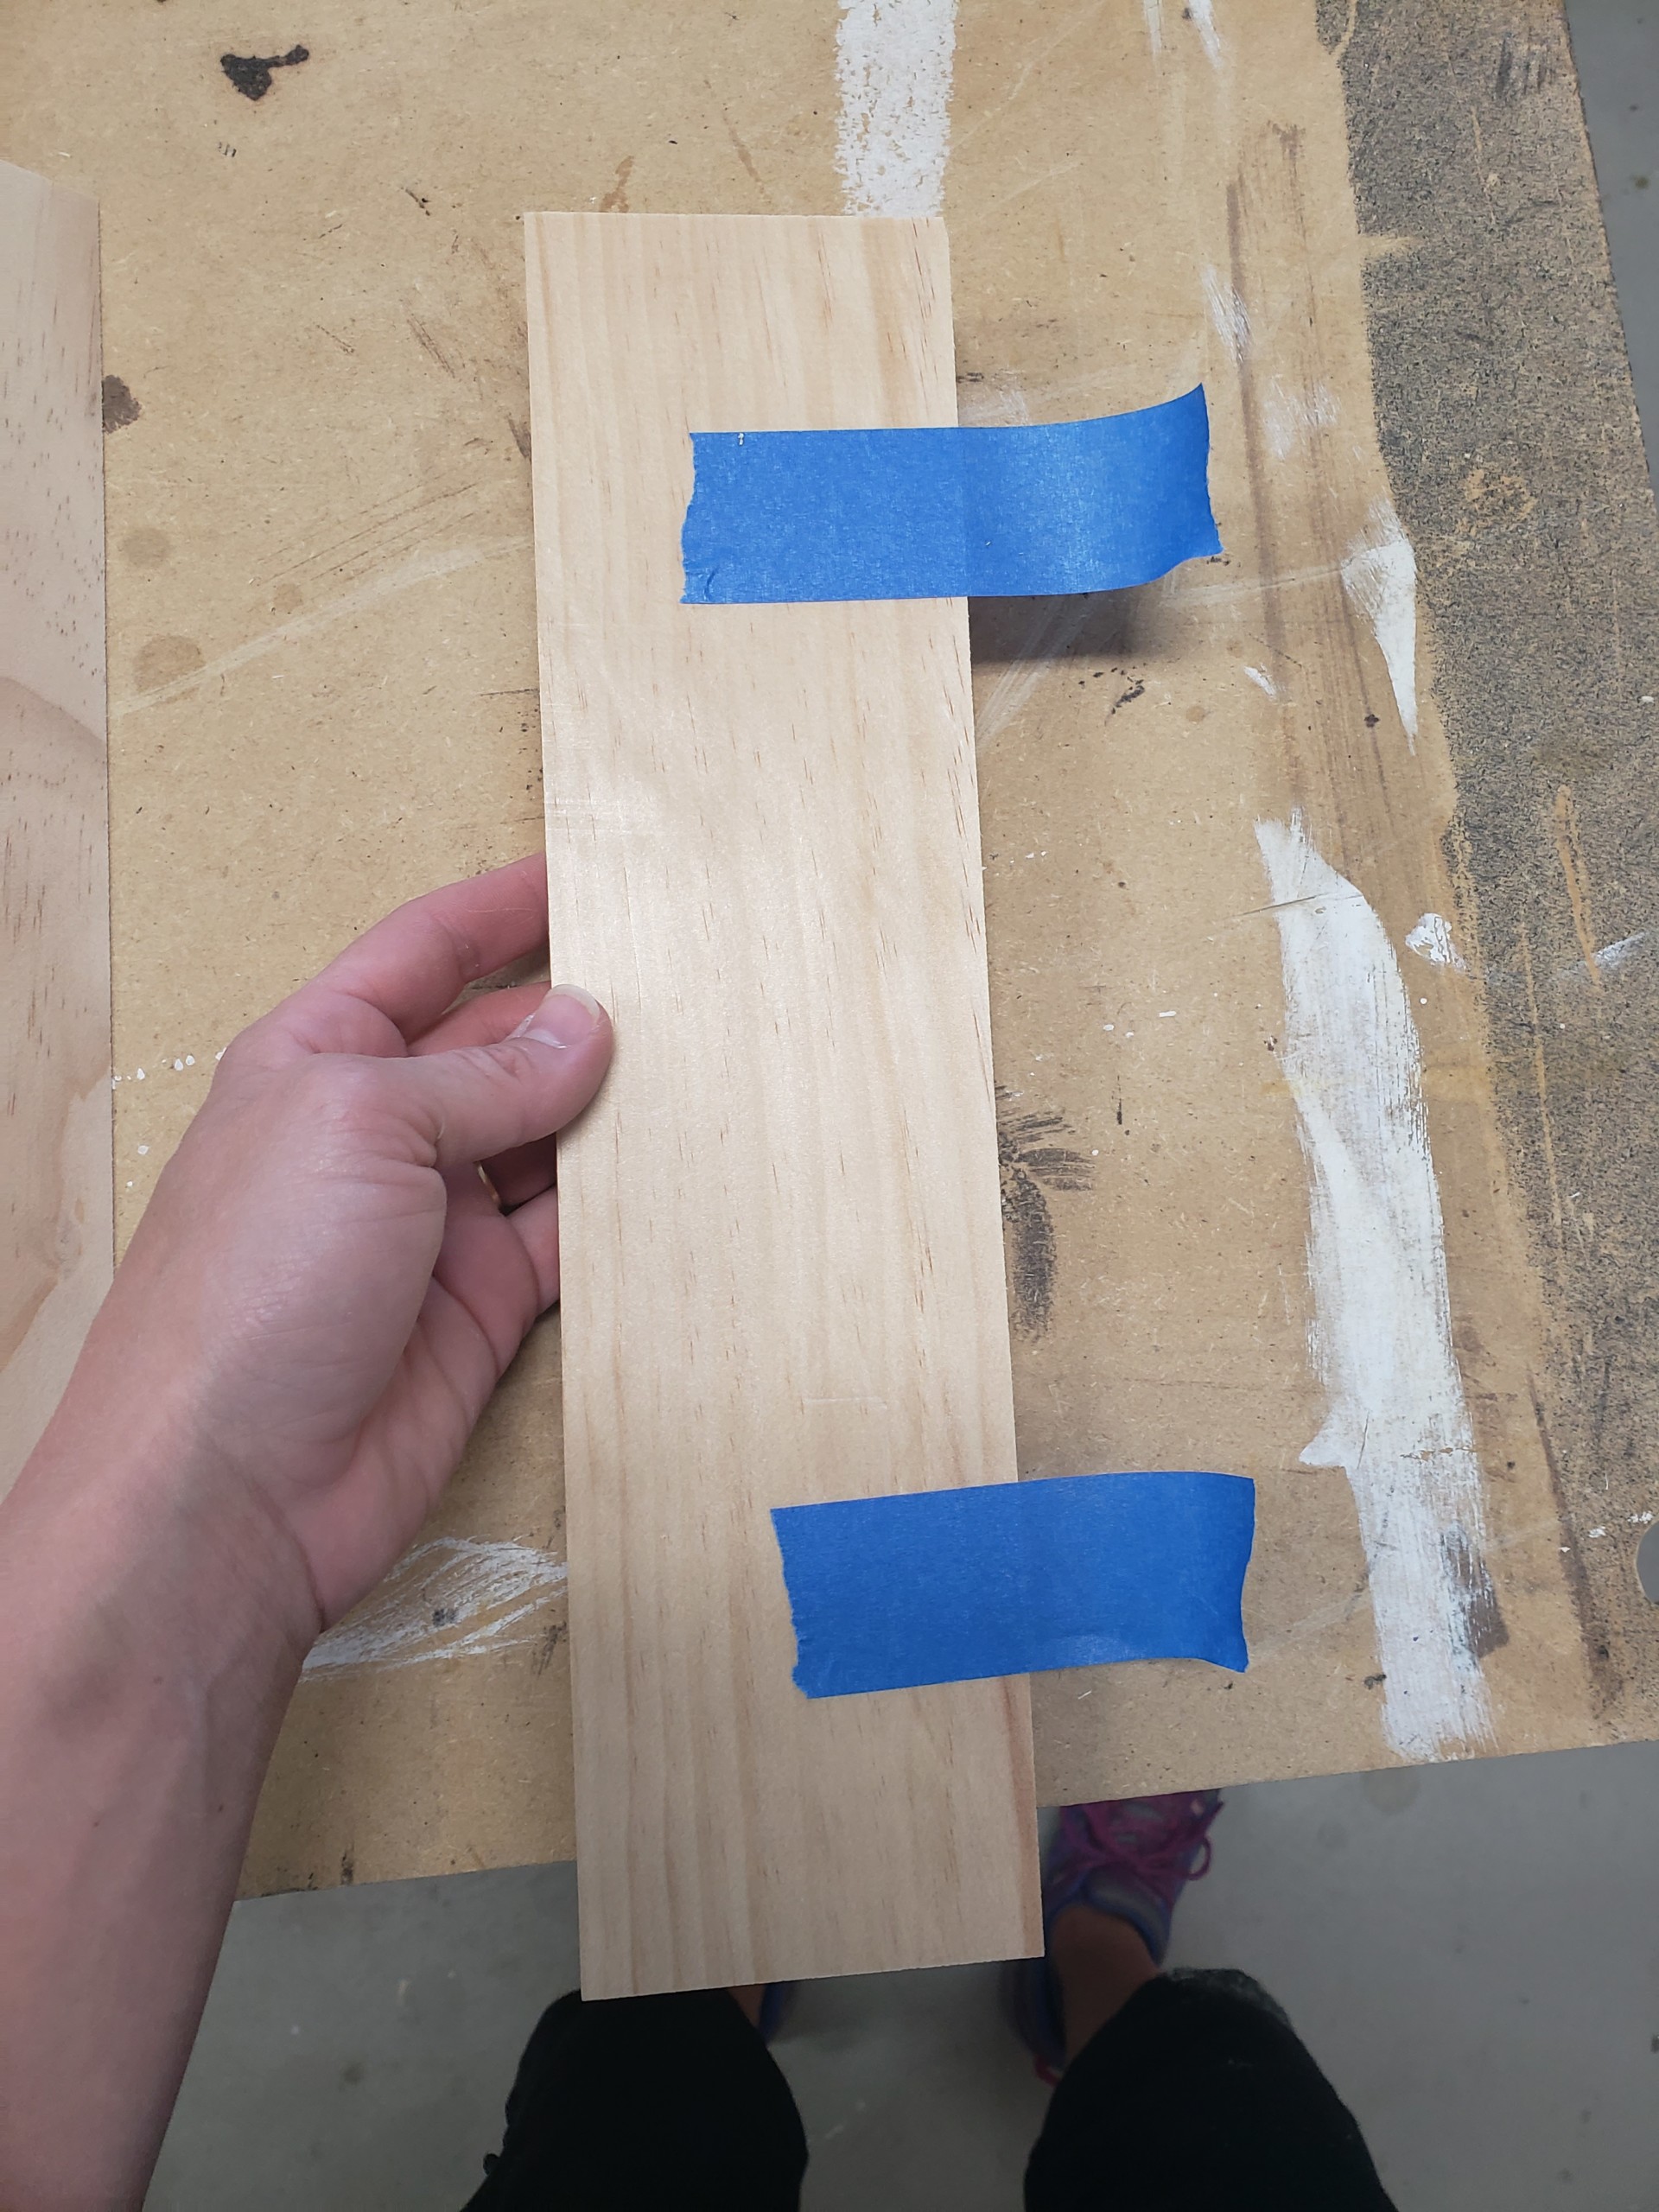
After cutting all eight 1โ€ณ x 4โ€ณ x 12โ€ณ leg boards to 45 degrees, add two pieces of painters tape to the back of the board running perpendicular to the beveled edge.

Set the board down on your work surface, sticky side of the tape facing up, and place another leg board with the beveled edge touching the first boardโ€™s beveled edge, also being sure to align the top and bottom of the boards. Press down firmly so the tape sticks to both boards.

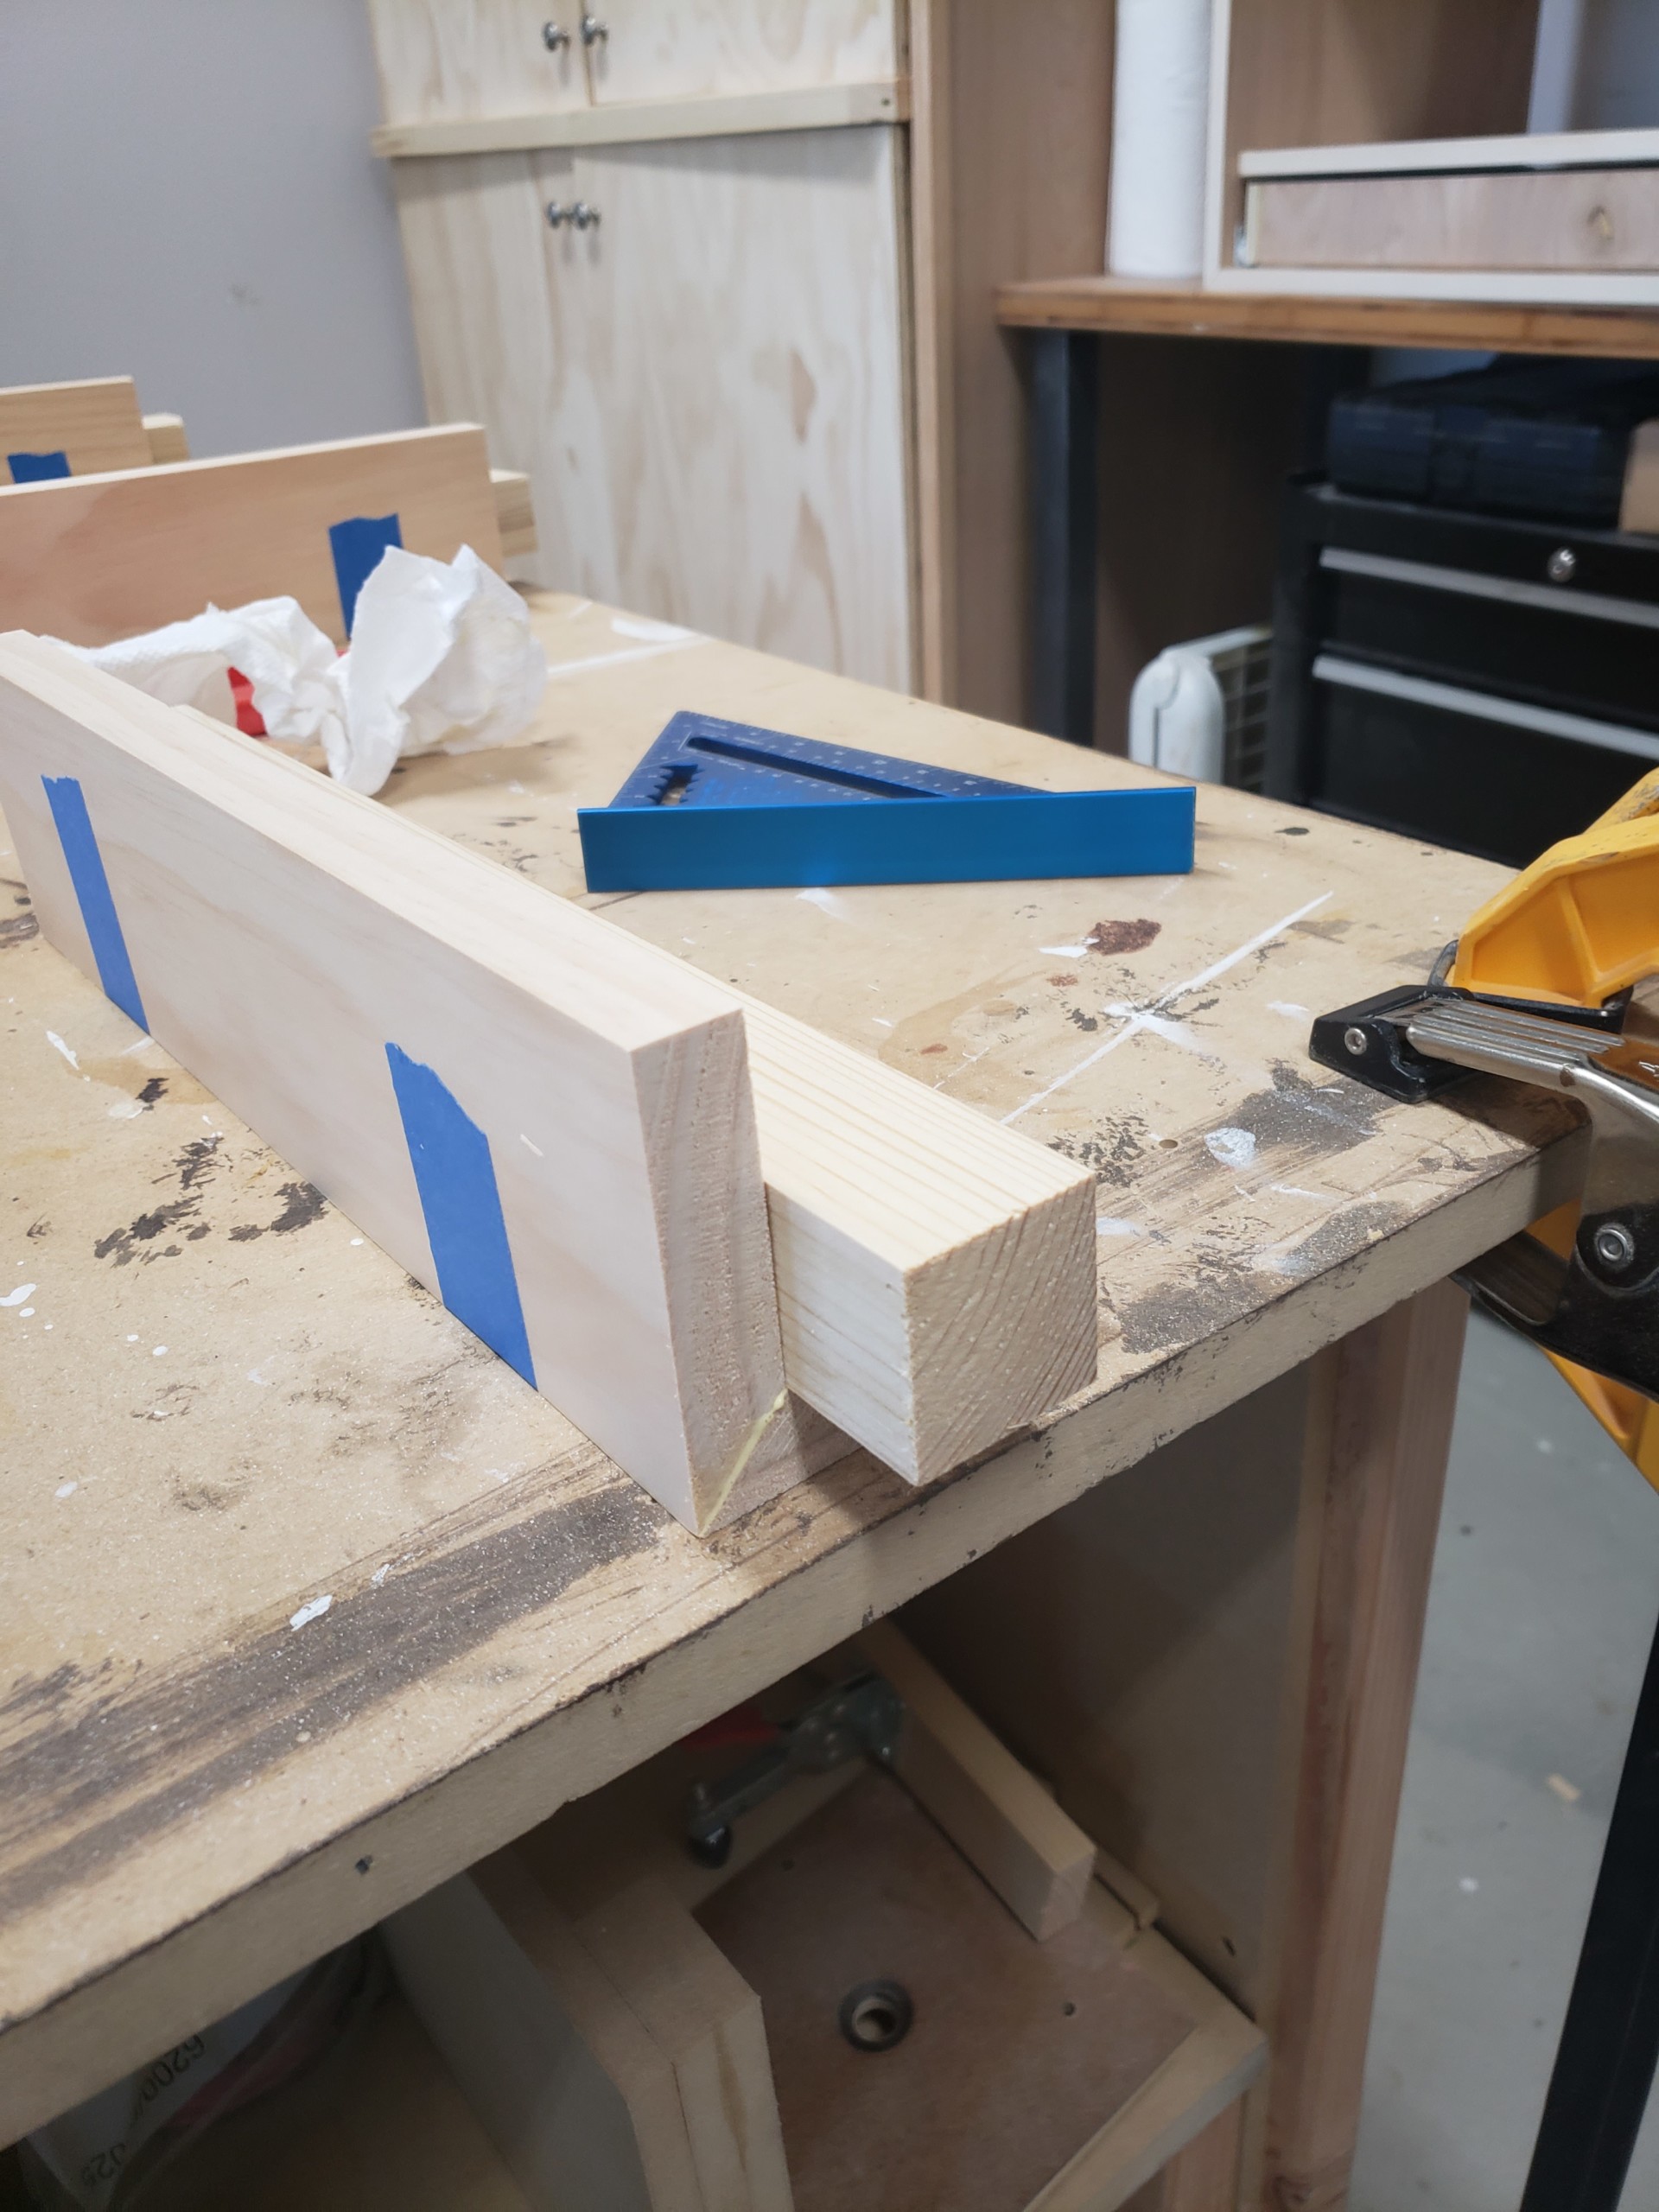
Add an even bead of glue to both beveled surfaces and then lift one board as if closing a book. The two beveled edges will meet and the tape will hold it in place.

Now place your 2โ€ณ x 2โ€ณ x 13 ยผโ€ board in the corner of this joint using wood glue. Shoot the brad nails through the 1โ€ณ x 4โ€ณ into the 2โ€ณ x 2โ€ณ to secure in place. No need to use screws here as there is plenty of surface area for the wood glue to create a strong joint (once cured).ย  Congratulations, you completed one leg for the platform bed frame to rest on!

Repeat these steps for the other 3 legs. After the legs are built, use wood putty to fill in the brad holes and sand smooth.

Step 2- Building the Bed Frame Components

Letโ€™s build the side rail supports for the bed slats to rest upon. Start by marking the center of the 1โ€ณ x 4โ€ณ x 80โ€ณ board and the center of the 1โ€ณ x 2โ€ณ x 75 ยผโ€ board.

Lay the 75 1/4โ€ณ board along the bottom of the 80โ€ณ board and align the two center marks. Using wood glue and 1 ยผโ€ wood screws fasten the 1โ€ณ x 2โ€ณ x 75 ยผโ€ board to the 1โ€ณ x 4โ€ณ x 80โ€ณ. Repeat for the other side rail support.

Step 3: Building the center support

The center support will run parallel to the side rails (and perpendicular to the bed slats) in the center of the bed. Therefore, it will run between the headboard and footboard of the bed frame.

Pull out your 2โ€ณ x 4โ€ณ x 78 1/2โ€ณ board (this is your center support). Now pull out the 2โ€ณ x 4โ€ณ x 12โ€ณ pieces and evenly space them under the 2 x 4 center support.ย  Use 2 ยฝโ€ wood screws to secure the 2โ€ณ x 4โ€ณ x 12โ€ณ legs under the center support).

Note: You might notice in later pictures that my center support looks a little different than what is shown below. I accidentally cut my legs too short and had to add another 2 x 4 to the bottom of the legs to raise it to the correct height.ย  Oops!

Step 4: Assembly Time

Pre-drill 2 holes into each end of the 1โ€ณ x 4โ€ณ x 80โ€ณ side rails where you will attach the headboard and footboard. (If you donโ€™t have much room to work, you can do this step shortly after building the side rails. This will make assembly easier when youโ€™re up in a small bedroom.)

Carefully bring all of the components up to the bedroom. Donโ€™t forget to grab your drill, 1 ยผโ€ wood screws, and brad nailer.

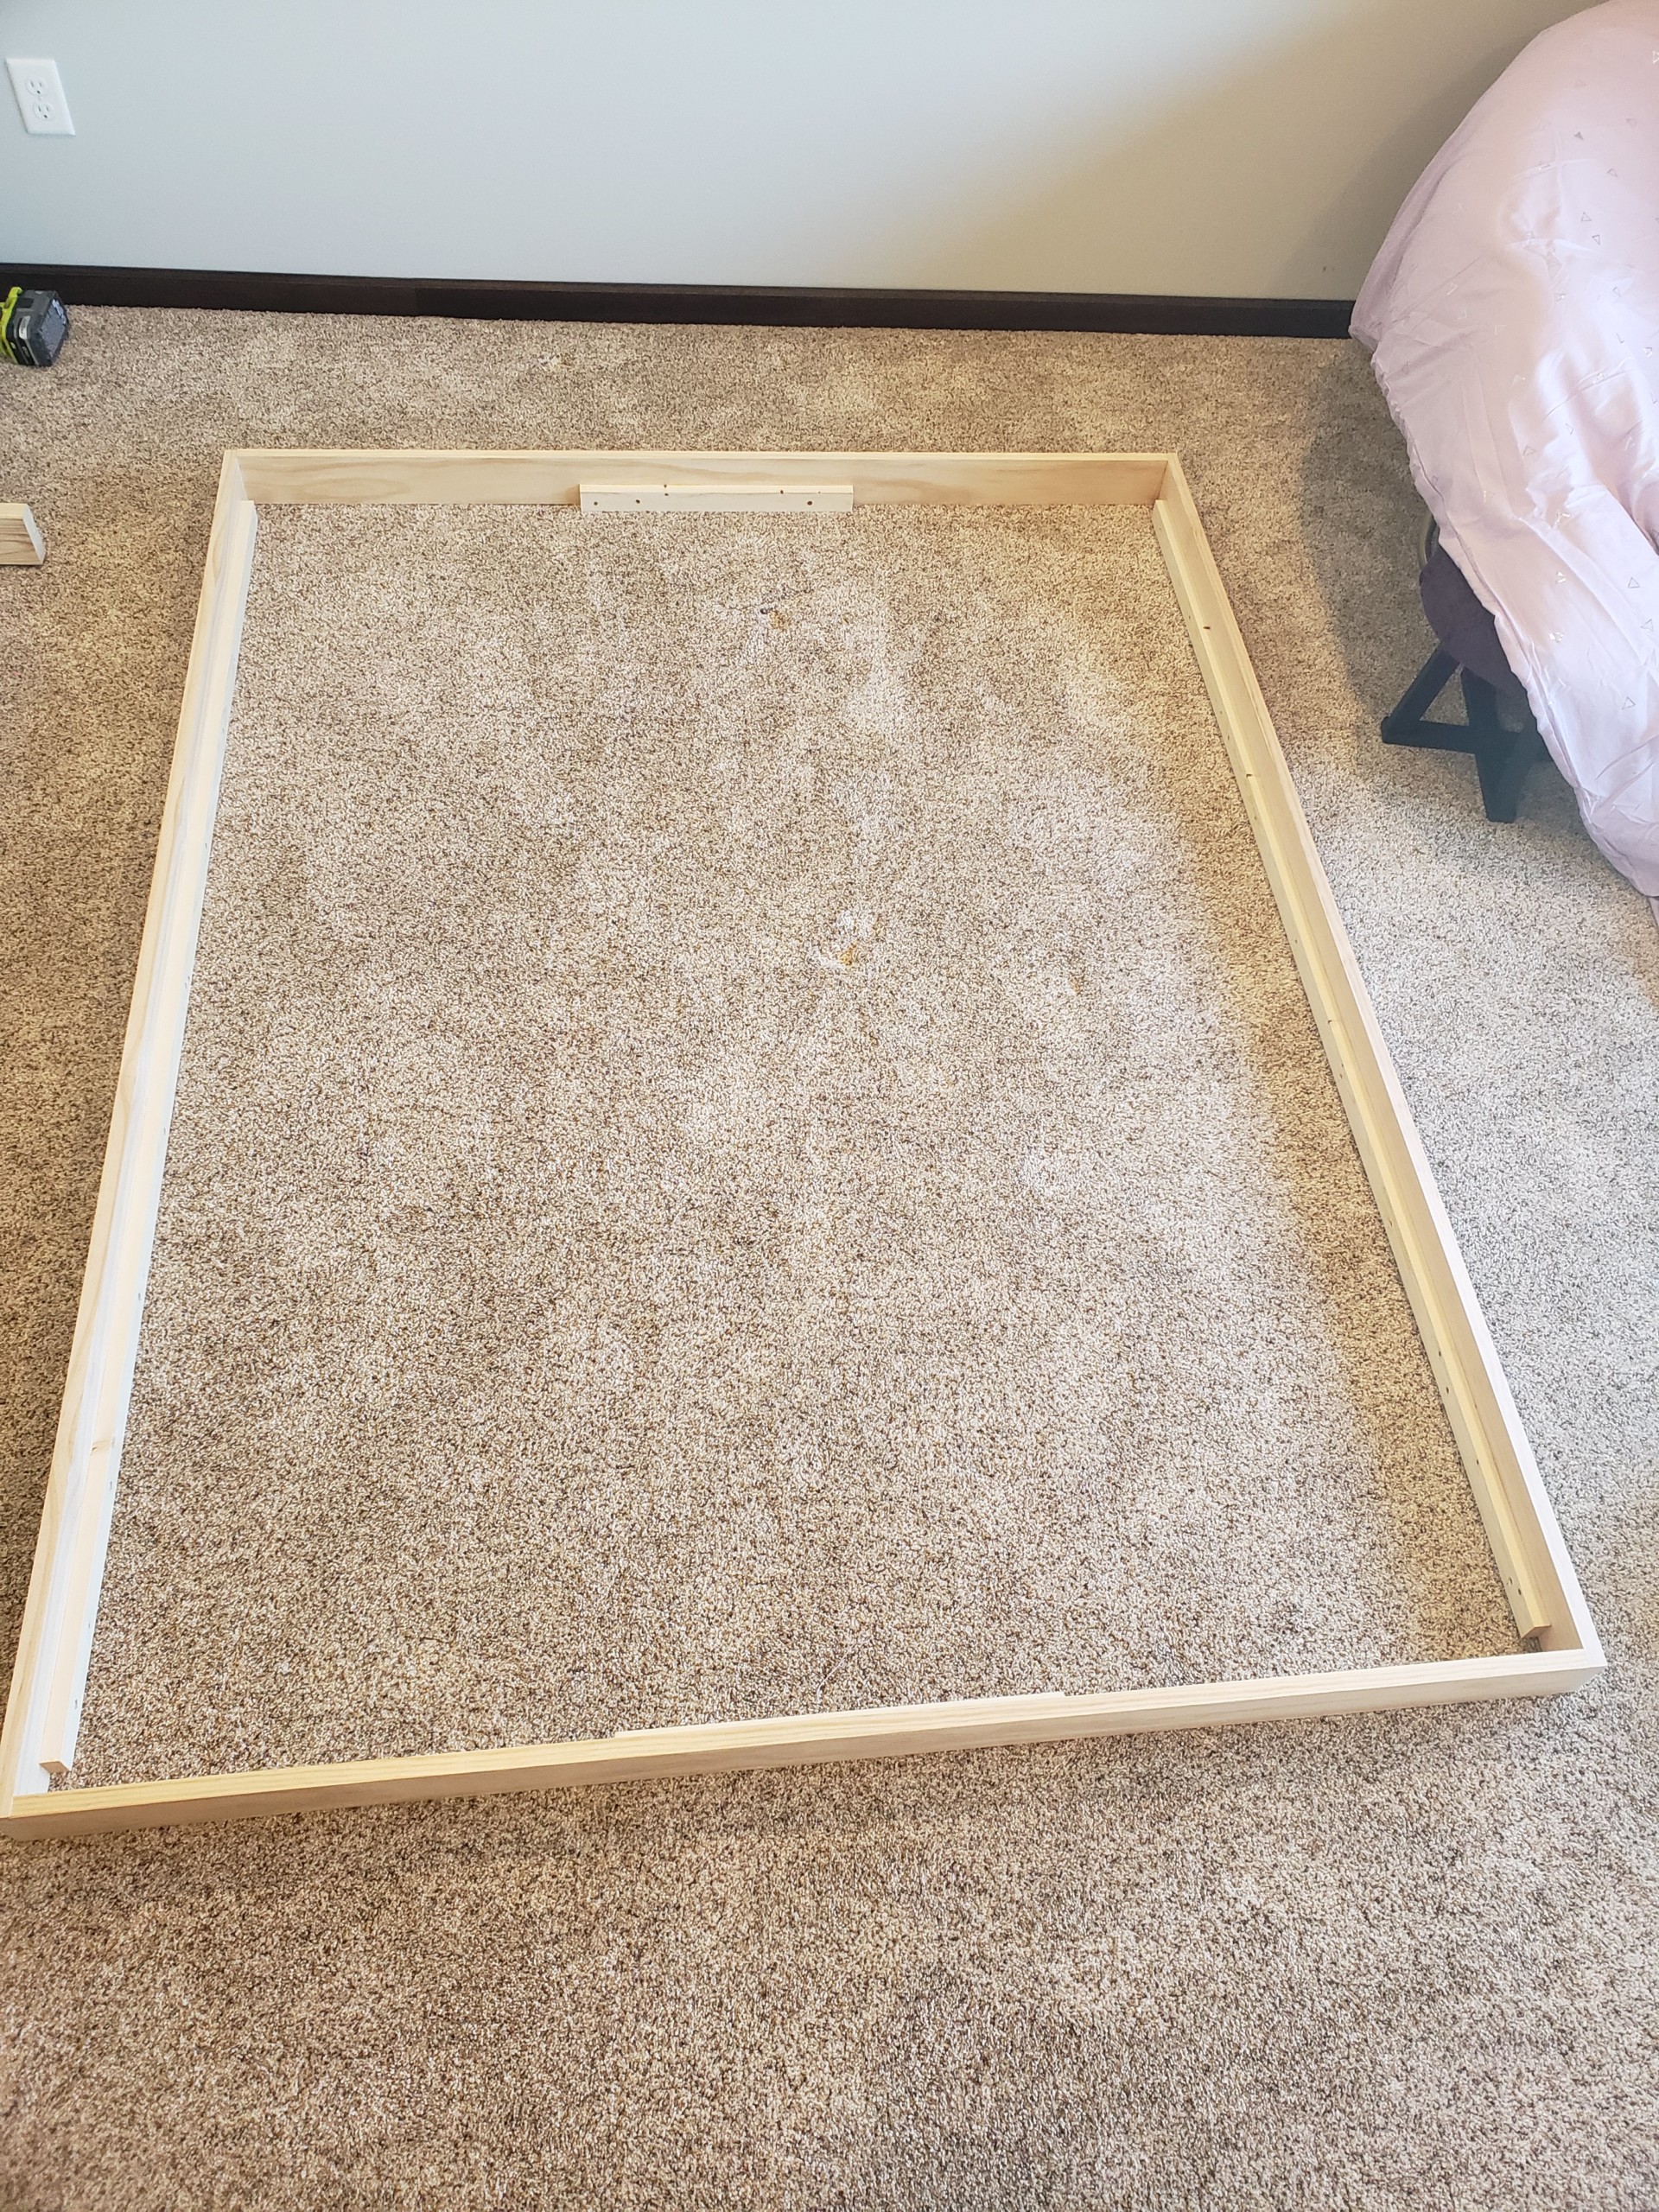
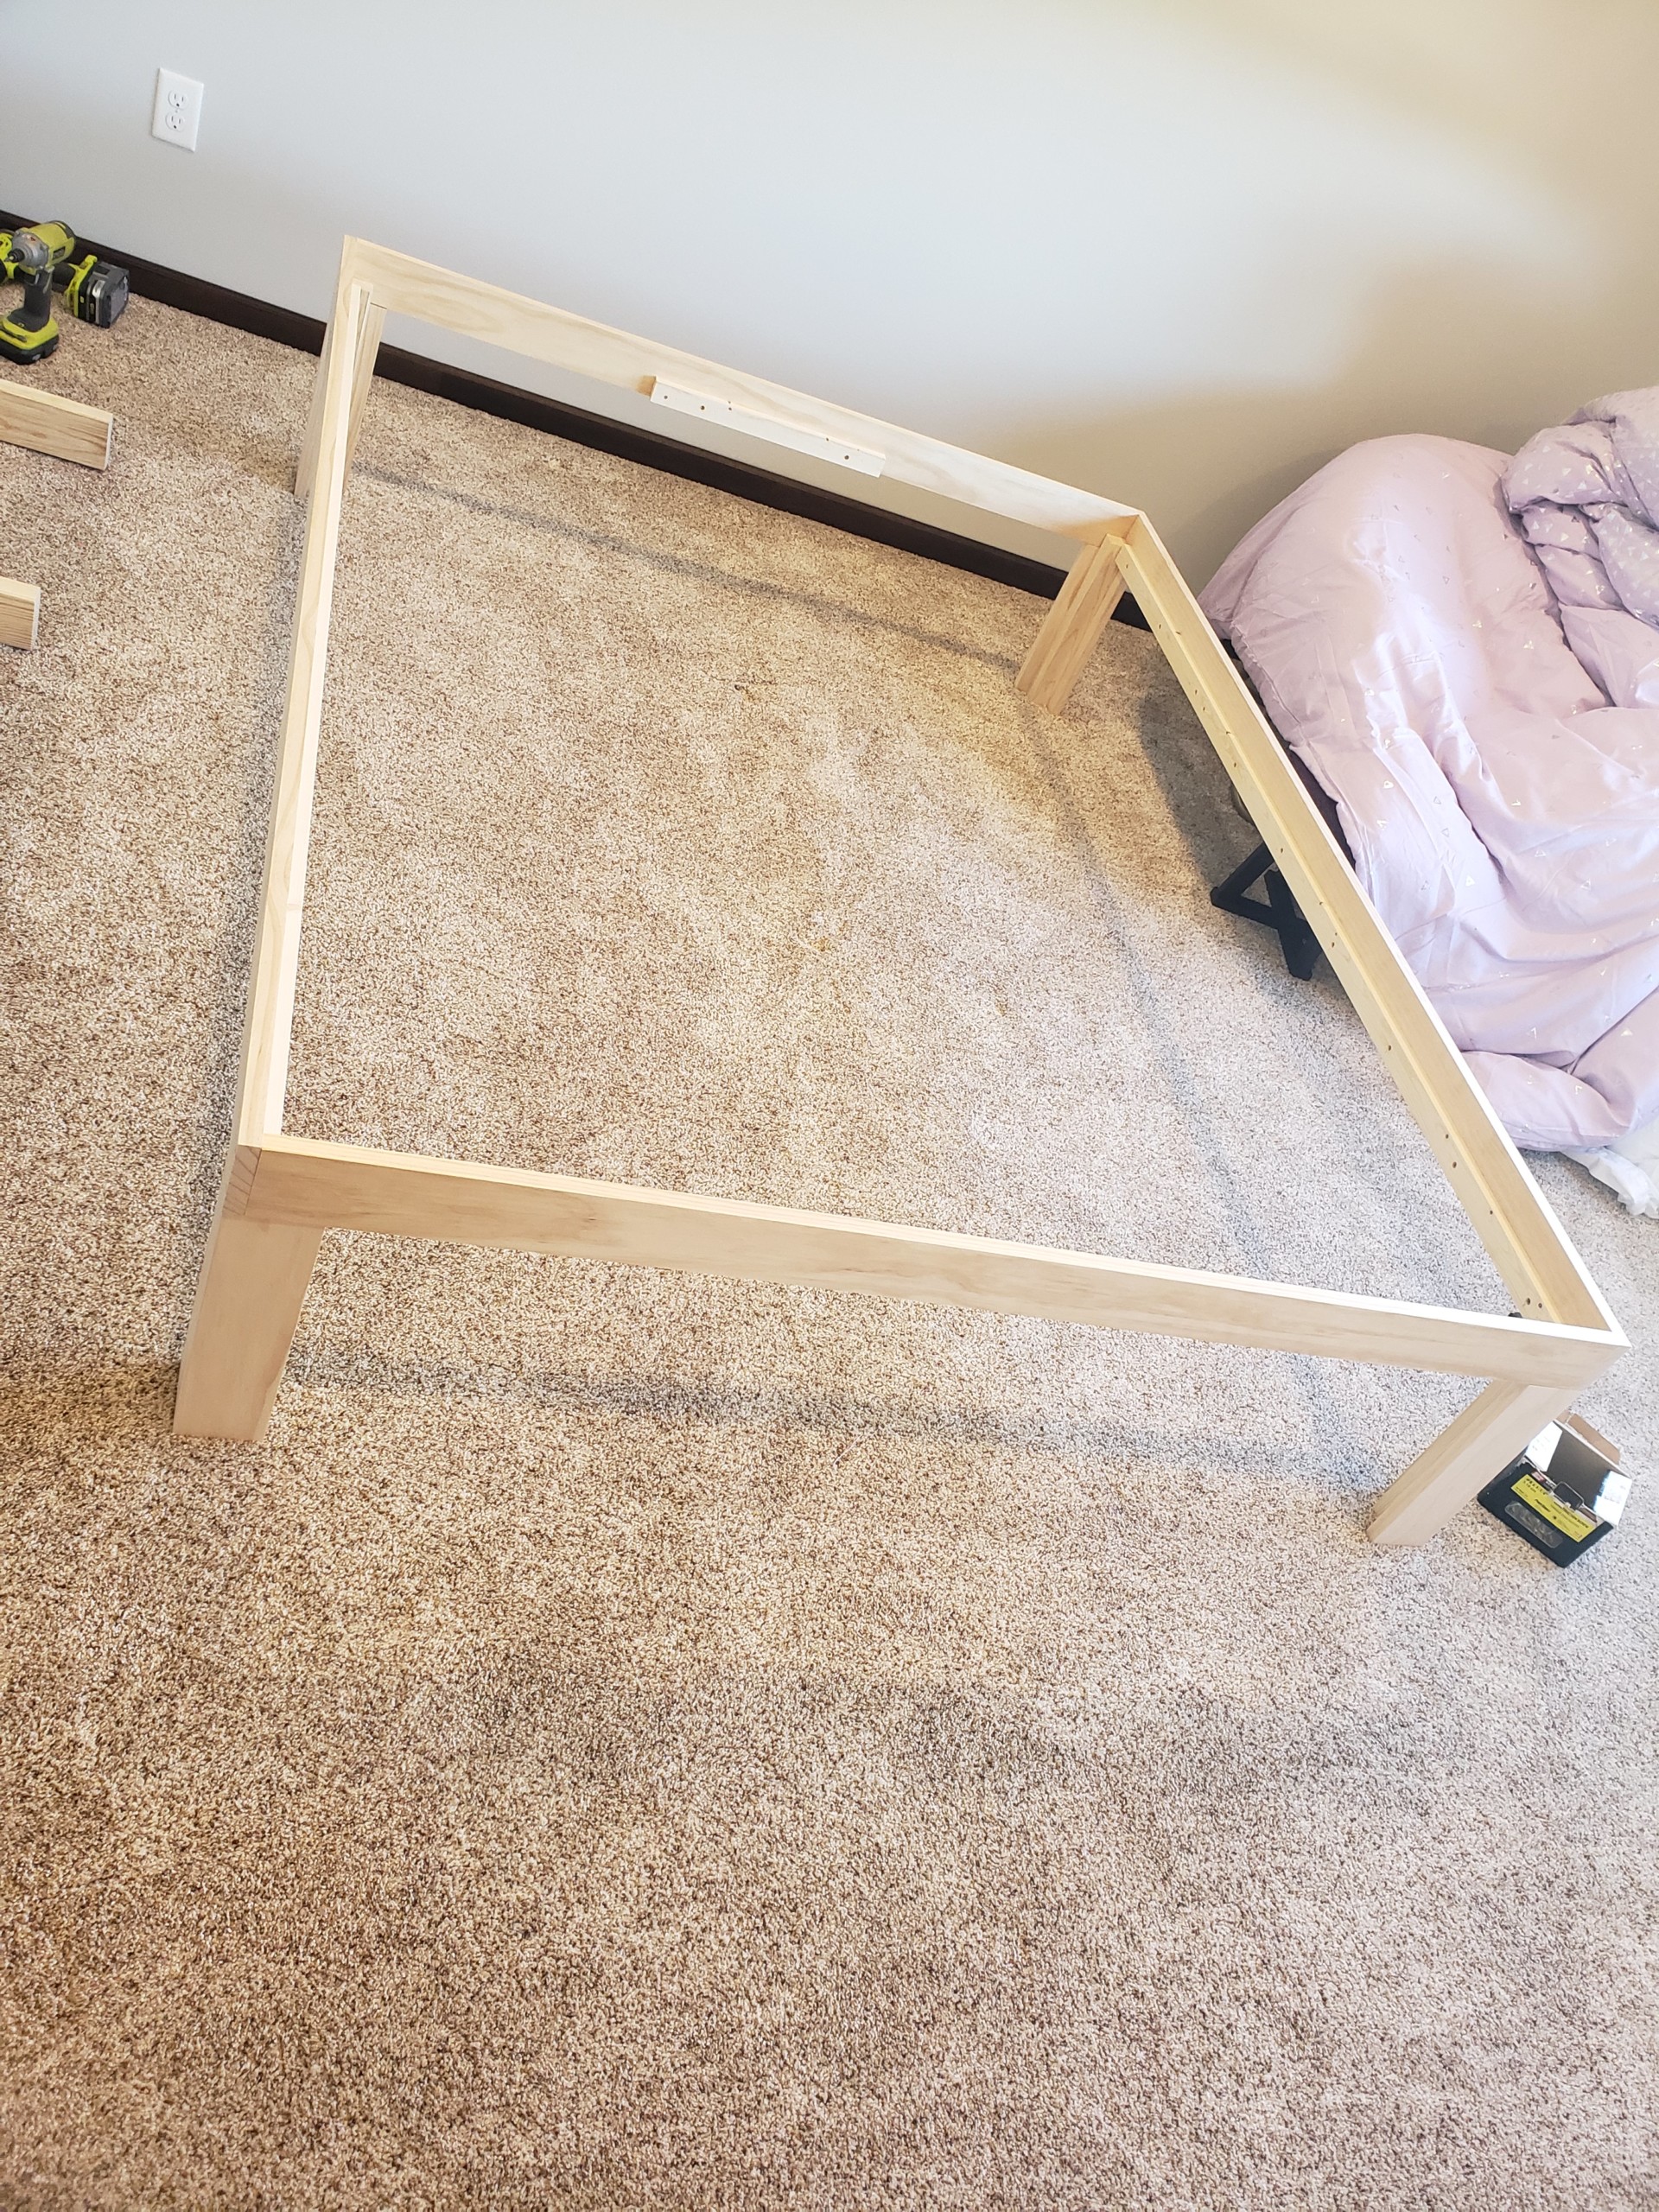
Assemble the bed frame by attaching the side rails to the headboard and footboard pieces. Drive the 1 ยผโ€ wood screws through the pre-drilled holes you made.

(Note: You may have noticed the scrap 1โ€ณ x 2โ€ณ boards attached to my headboard and footboard below. I did this extra step for my bed because I like using up all my scrap pieces as much as possible, but structurally it doesnโ€™t really make a difference. If you do this added step be sure to allow for this additional thickness when building the center support.)

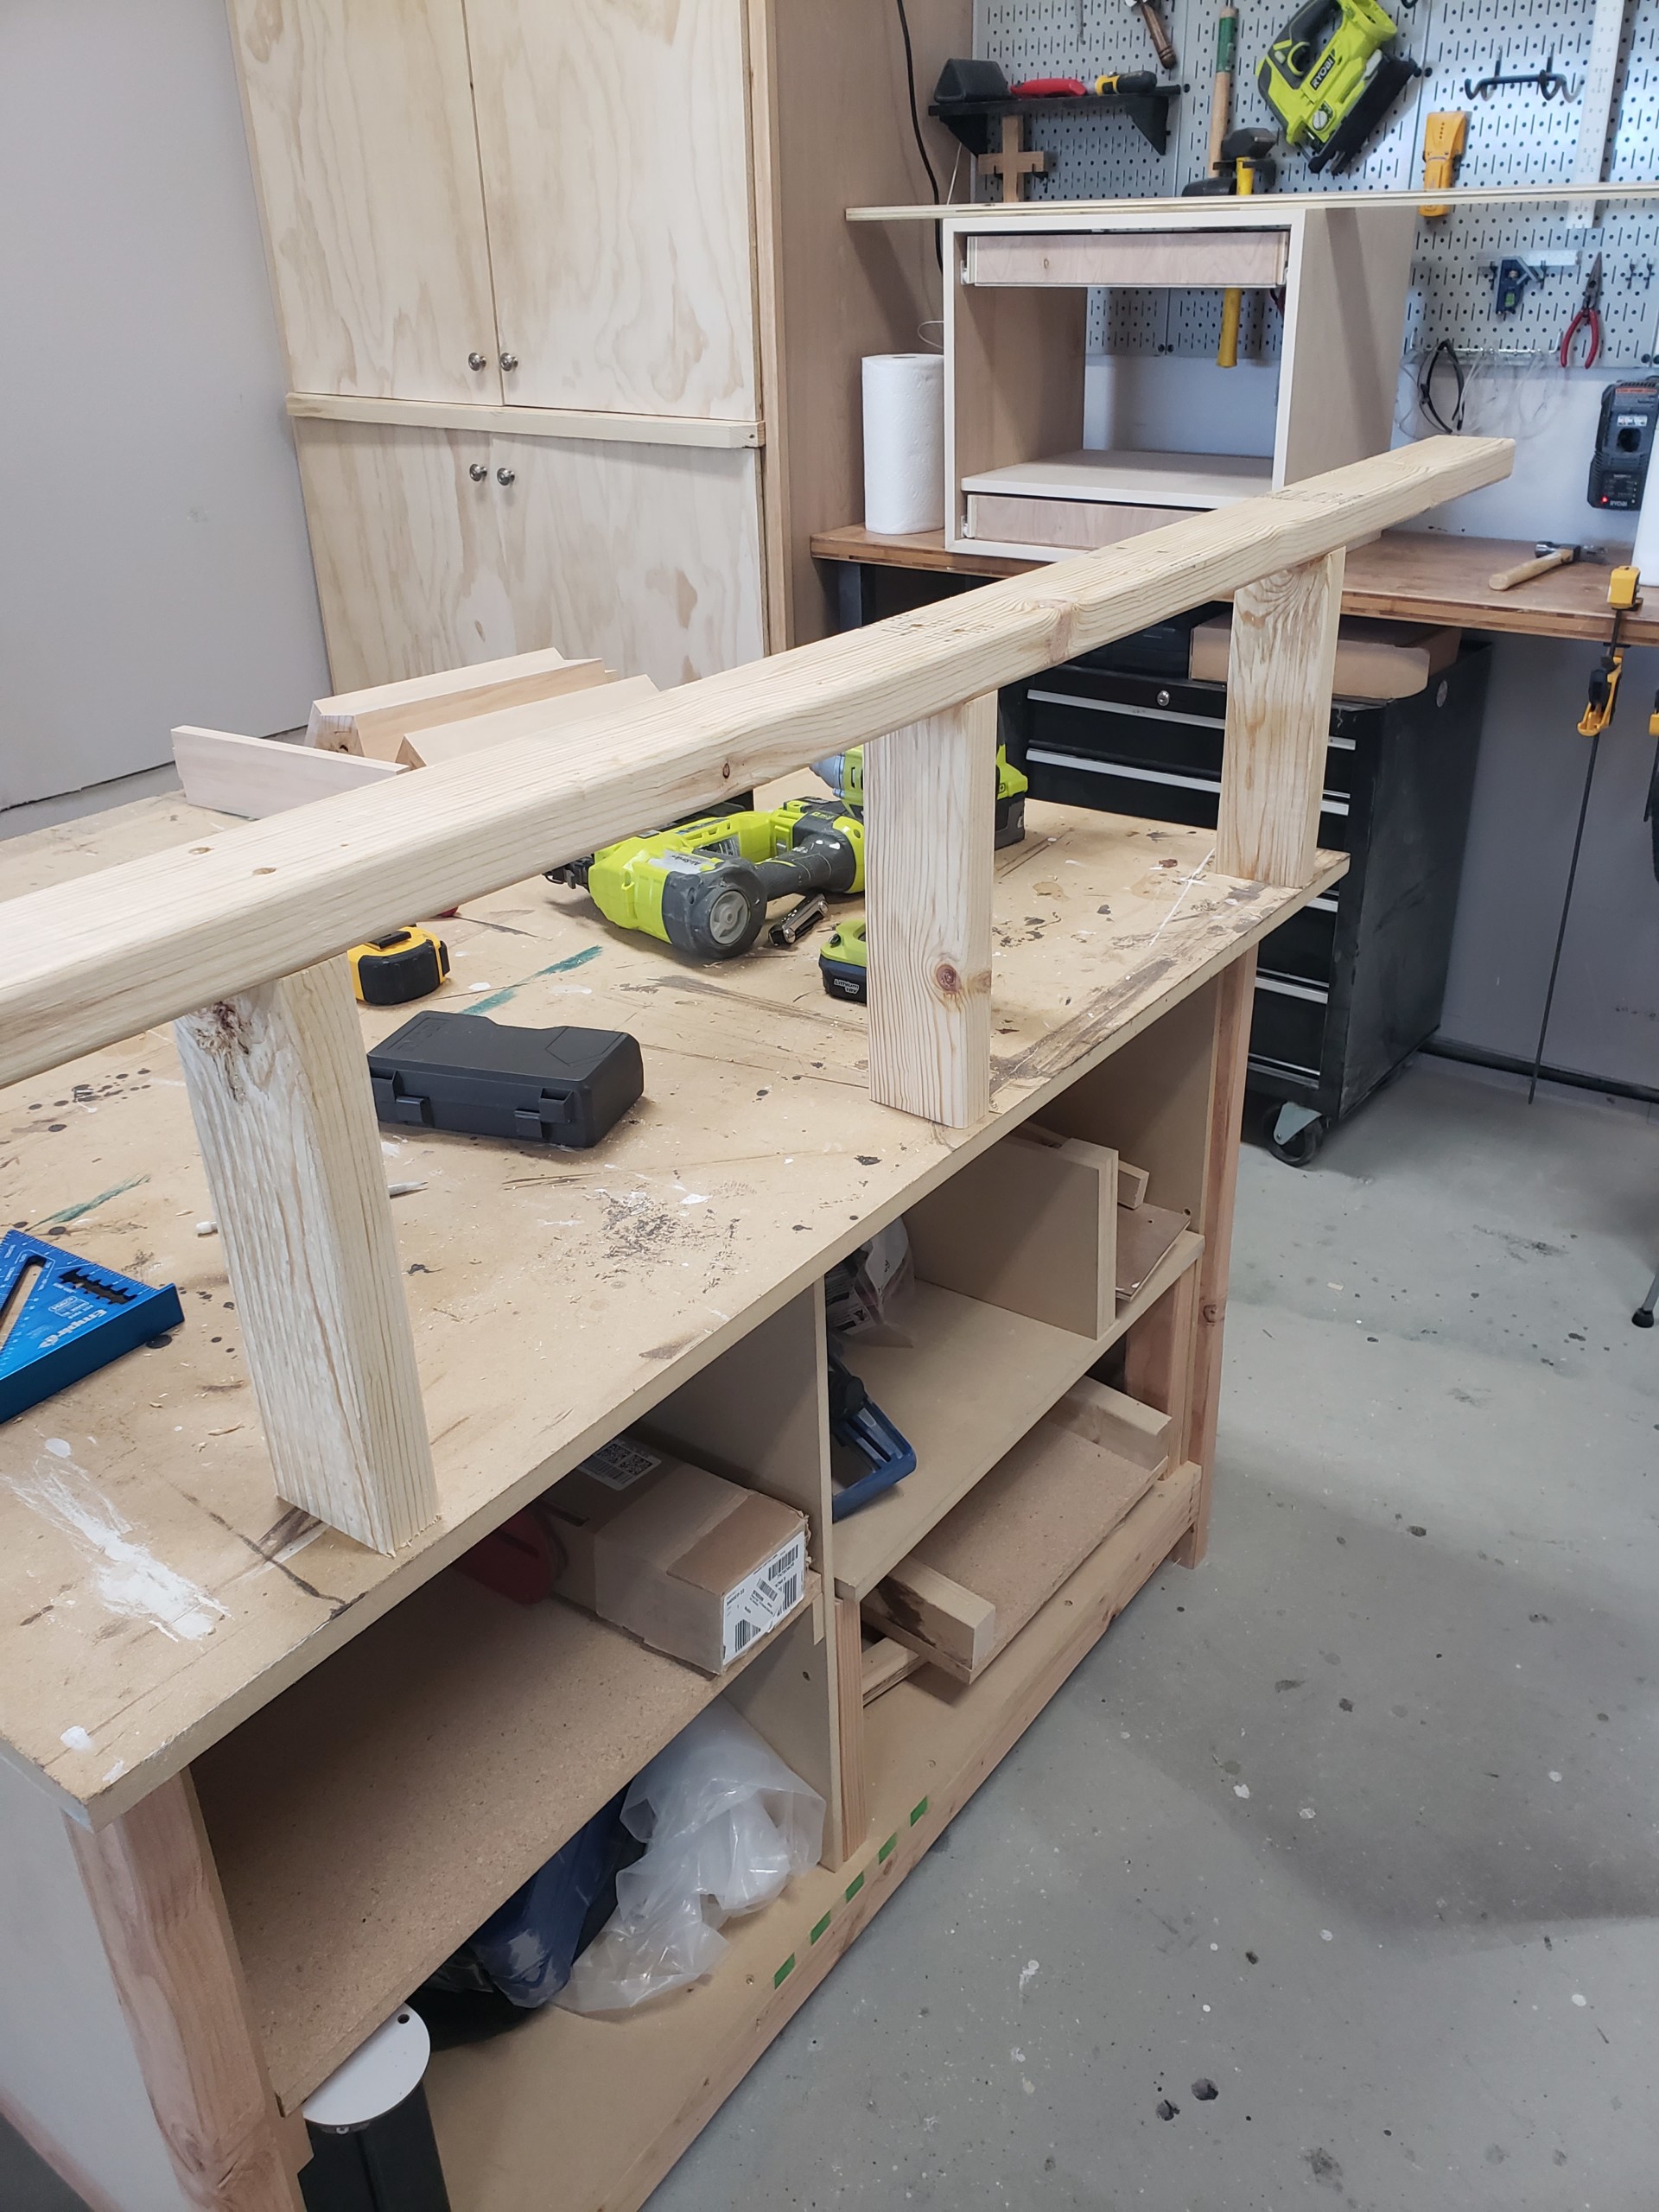
Lift the frame and place a leg into each of the four corners of the bed frame. Attach the frame to the legs using 1 ยผโ€ wood screws. You should use 2 screws per leg (one on each side of the corner). This will secure the legs in place firmly and prevent any rotating.

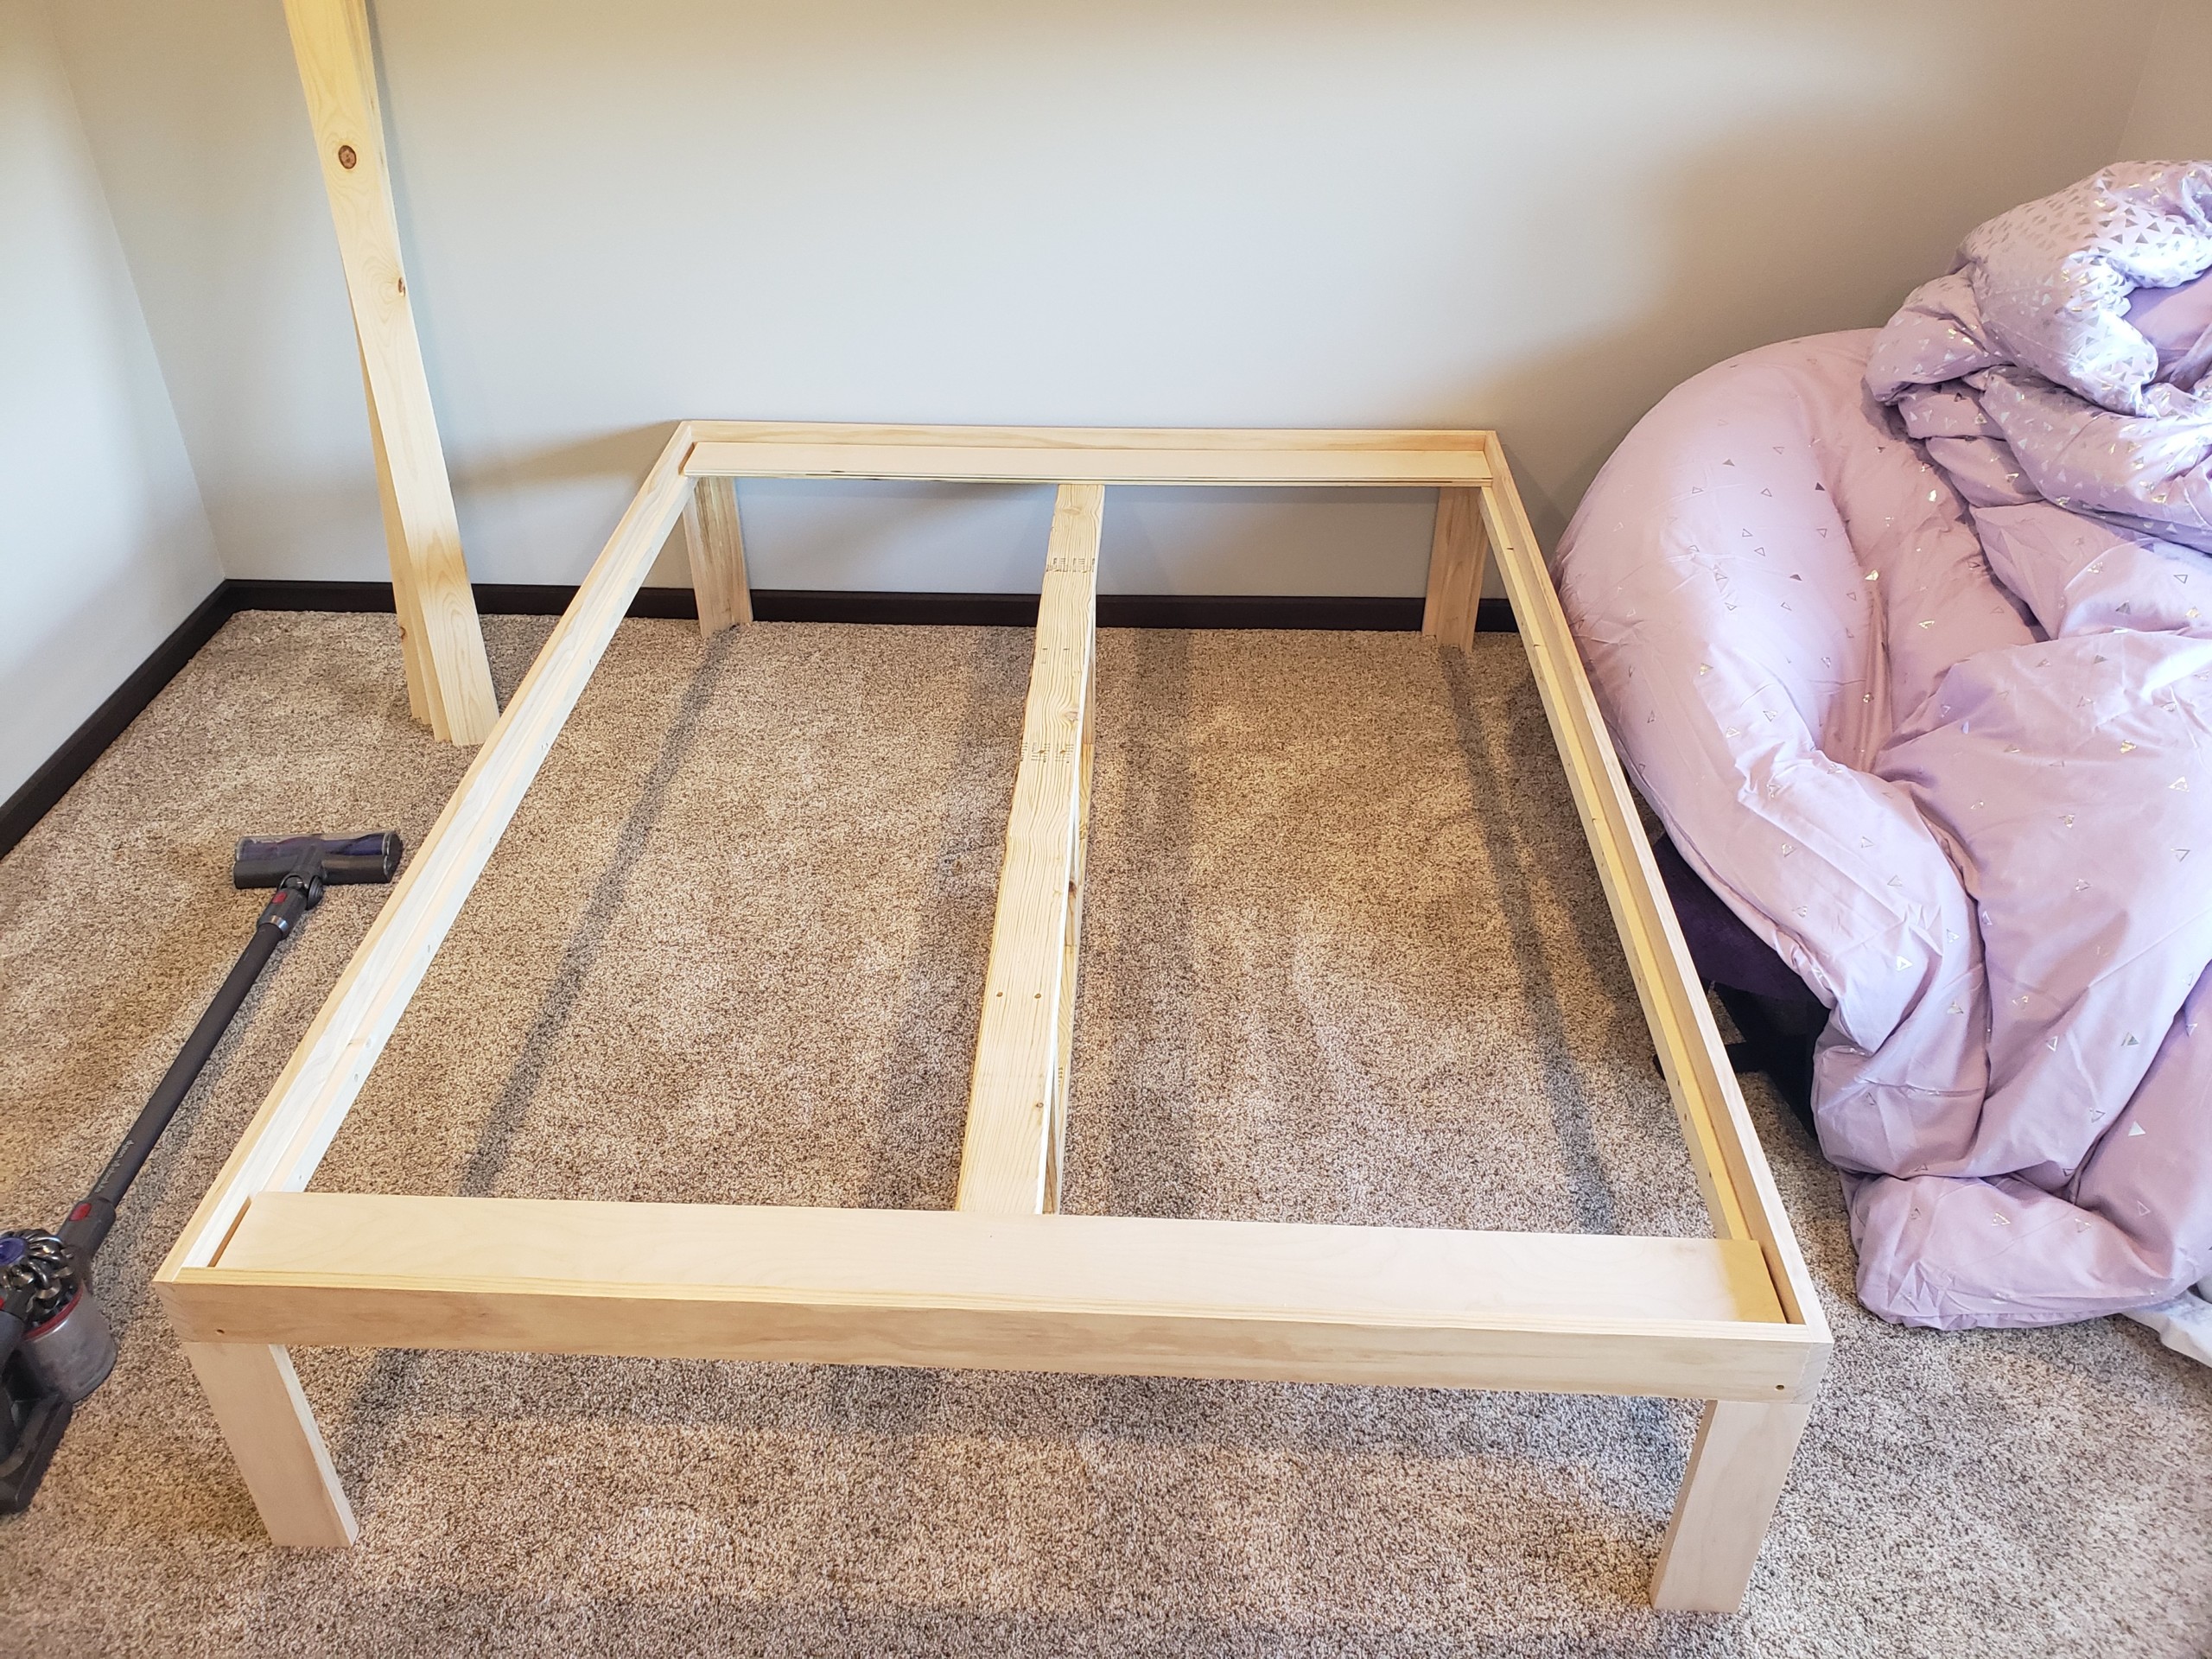
Set the center support in the middle of the bed frame.

Lay your 1โ€ณ x 4โ€ณ bed slats on top of the side rail and center support. Evenly space the slats across the bed frame. Attached the slats to the center support using 2 brad nails for each. (Or to be able to disassemble the bed easier in the future, pre-drill holes through the end of each slat and into the side rail support board. Then drive a screw in to hold it in place.)

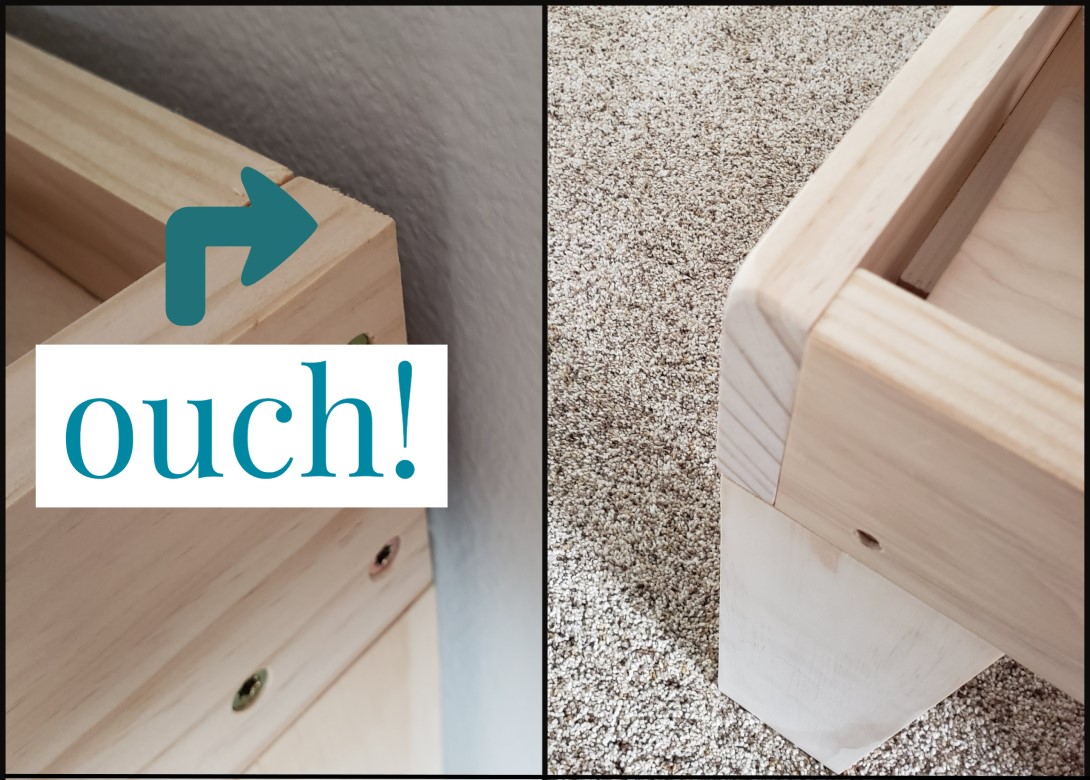
Step 5: Sanding the corners

Hand sand the bottom two corners of the frame to avoid any injuries to shins, legs, and bedding.

Step 6: Make the Bed

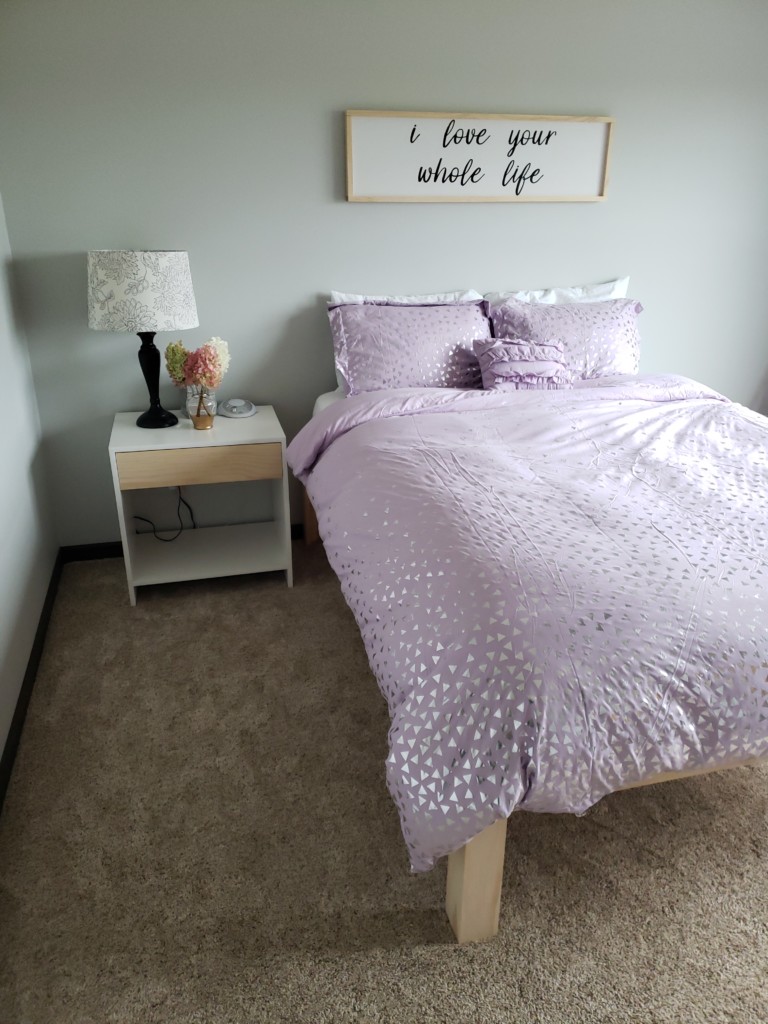
Lay the mattress onto the bed frame. Then make the bed and get ready to watch the new owner get a good nightโ€™s sleep.

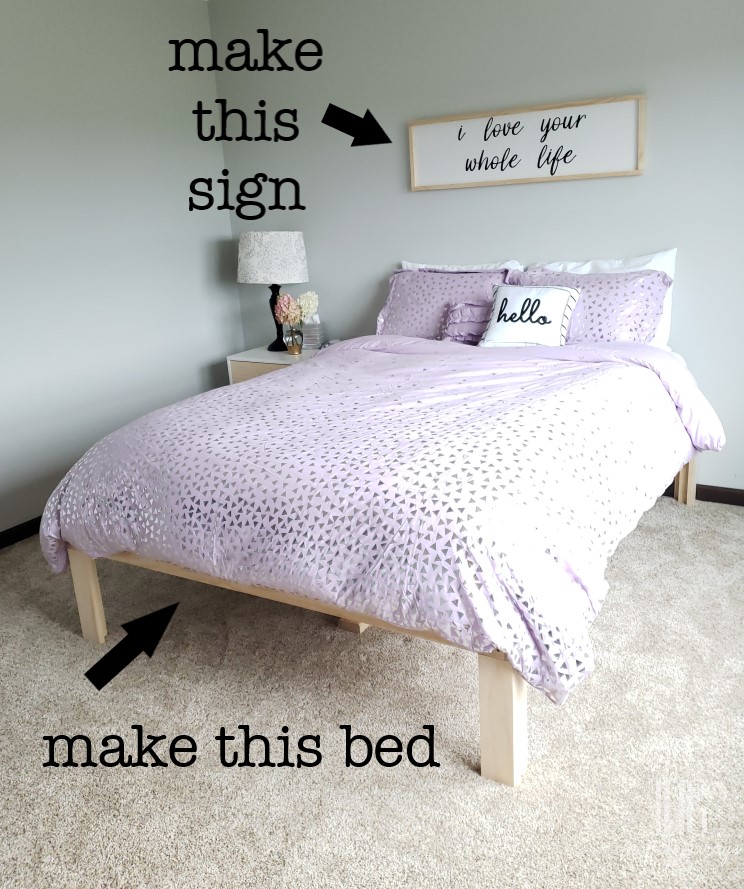
See the โ€œI love your whole lifeโ€ sign on the wall? You can learn how I make my own signs! Click over to view my tutorial for making a DIY Quote Sign. I even have a trick for adding faux-shiplap detail.

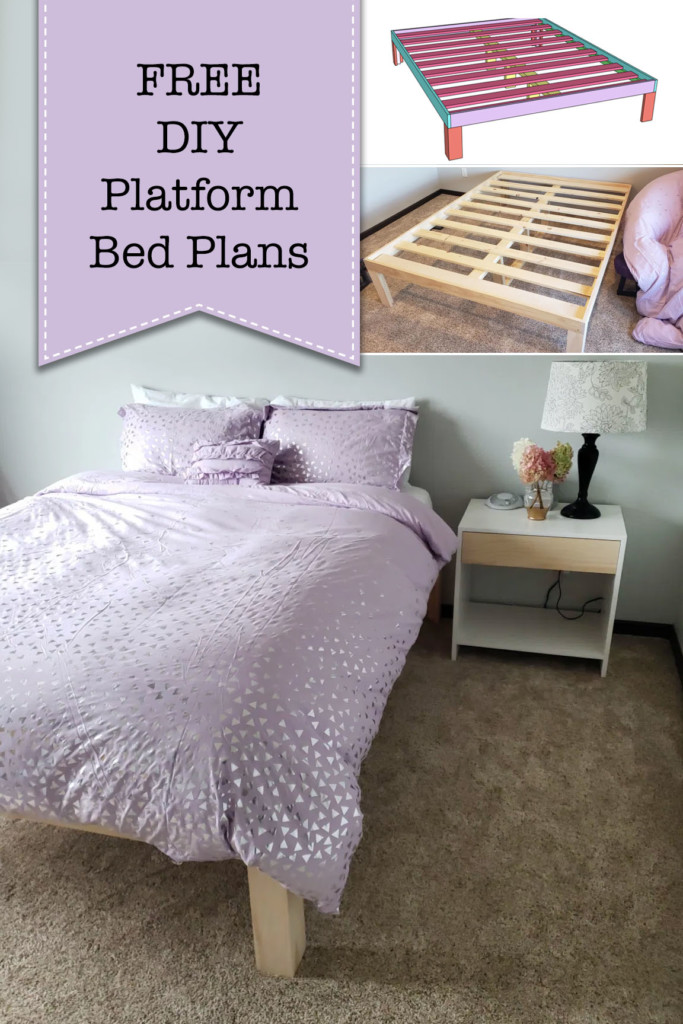
If youโ€™re not ready to make the bed right now, pin this image for later!

DIY Platform Bed

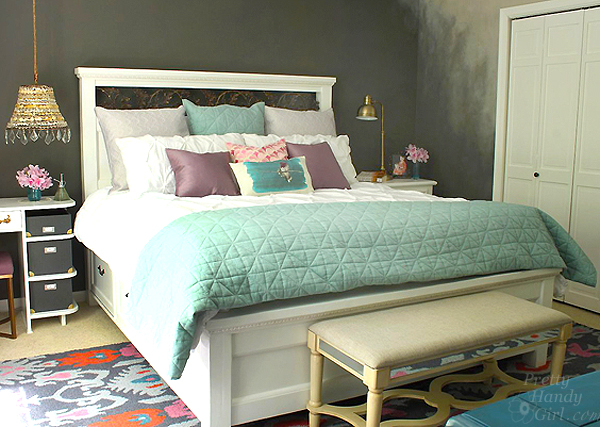
If you liked this build, youโ€™ll also like Brittanyโ€™s Farmhouse Style King Bed with Storage drawers:

Modified King Size Farmhouse Bed with Storage Drawers | Pretty Handy Girl

Stay tuned as I bring you more tutorials for the furniture that I am creating for my girlsโ€™ bedrooms! The adorable side table pictured alongside the platform bed is coming next month.ย  Thanks for building with me.

Hi! Iโ€™m Kristen, from In Her Garage,ย and I am a self-taught woodworker and DIY fanatic from Minnesota where I live with my husband and our two daughters. Between being a wife, mom and, registered nurse, I try to make as much time for DIY as possible. My love for building came after our family built our current home in 2015. After we moved in, we needed furniture and instead of spending massive amounts of money to order the pieces we wanted I decided that I would build them myself. I started with a buffet table plan from the fabulous Ana-white and quickly set out to remodel my entire home office.

Since then I have started a side business building furniture for the people in my community. I love hearing my clients talk about the pieces they wish they had whether it be aย rustic buffet table, aย one drawer side table, or aย toy boxย and then making it a reality for them. While starting my small business it made perfect sense that I would document my building journey so I simultaneously launched theย In Her Garage blogย and I love sharing my plans, tips and tricks.

Making something beautiful with your own two hands through a little preparation and determination is an amazing feeling and I hope to bring inspiration and know-how to those looking to tackle a big or small project.
I am so glad that you found me here and please feel free to connect with me onย Pinterest,ย Instagram, Facebook, and Youtube to see what I am working on right now.
Painted Lampshade & a Quick Guest Room Makeover | Pretty Handy Girl

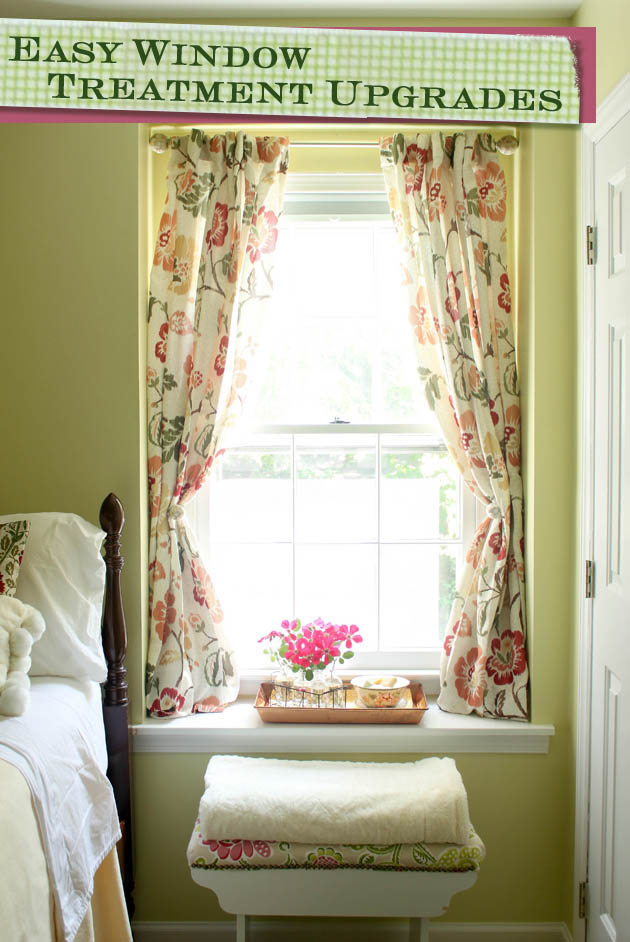
Easy Window Treatment Upgrades | Pretty Handy Girl

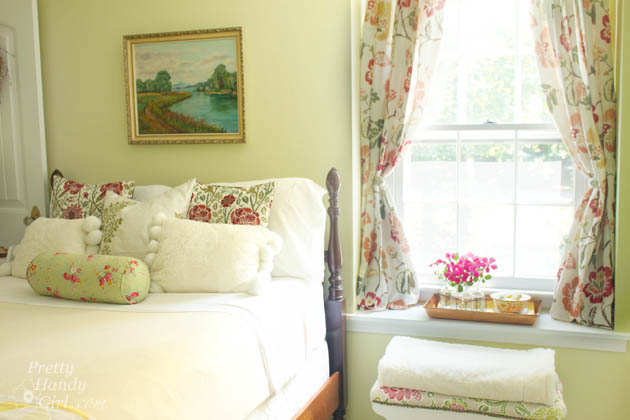
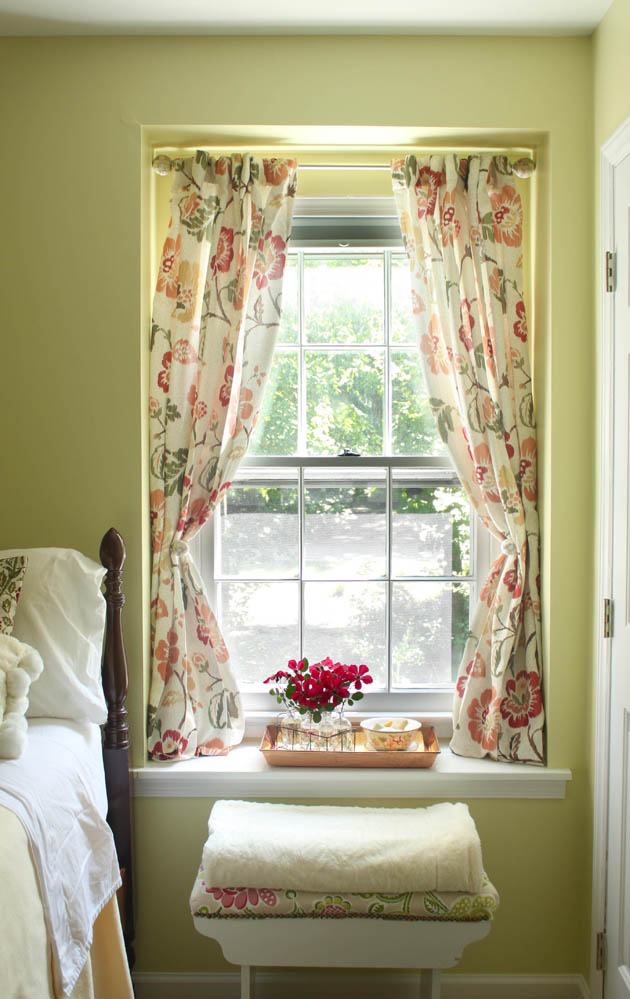
Whoa. What happened to summer? Labor Day is here and that means the holidays are just around the corner. Iโ€™ve started to think about sprucing up our guest room in anticipation of having guests. The number one complaint our guests have (not that many of them complain) is that there is too much light that comes in the window in the morning. Whenย Loweโ€™s asked us to focus on window treatments in September, I realized the time had come to address this blinding light situation.ย Little did I know, that installing new blinds and curtains would take less than an hour!
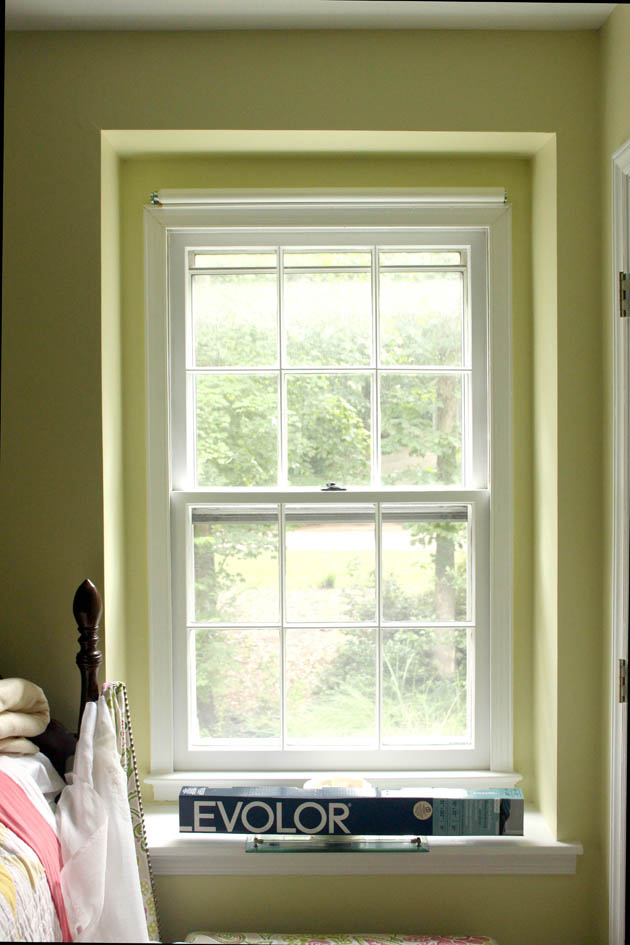
Here is the basic window that I started with. (Yes, thereโ€™s a roller shade there, but it was hidden under a valance and frankly itโ€™s a pain to use.)

How to Install Window Blinds and Curtains | Pretty Handy Girl

After taking a few measurements, I headed to Loweโ€™s to look at the options for window blinds and curtains. It was a tough decision because I really liked some of the roman shades. But, I wanted a blind that wouldnโ€™t block much light when it was raised. I settled on theย Levolor cordless room darkening cellullar shade. Not only does it have a low profile when installed, but raising it and lowering is as easy as pressing a button. Plus, no strangulation hazards because there are no external cords! Iโ€™m kicking myself for not doing this sooner.

How to Install Window Blinds and Curtains | Pretty Handy Girl

How to Install Blinds and Curtains from Loweโ€™s in less than an hour: Read more

Hey yโ€™all! Iโ€™m super stoked because Iโ€™m on my way to Blissdom in Nashville, TN for a few days.

I canโ€™t wait to learn some new blogging tricks; network with a few blogging buddies; and listen to some inspiring speakers. Donโ€™t you worry, Iโ€™ll be sharing everything I learned when I get back.

While Iโ€™m away, I will be leaving you in very capable hands. My good friend, Holly, is going to give you a tutorial for repainting and distressing a sad 1980โ€™s chest of drawers. But, before she begins I have some newsโ€ฆ

โ€ฆI am really stoked to be partnering with Tomboy Tools, Inc. Together weโ€™re going to bring you some serious DIY empowerment!This is such a wonderful venture for me because I love their tools; I love that their goal is to empower women; and I love that they are a company that gives back to women through the Avon Foundation.

Tomboy Tools and I are going to get YOU inspired to create more in 2012!

You may remember Holly from the Charm & Character Tour of her home. Many readers commented that they wanted to know how she distresses furniture. Holly was kind enough to create this tutorial for you:

Welcome Holly!

Iโ€™m so excited to be doing a guest post at Pretty Handy Girl! Brittany has been such a wealth of information to me as I have been working on growing my business and creating a web presence for Storywood Designs. There is truly nothing that Pretty Handy Girl canโ€™t do and her willingness to share her knowledge and skill with the rest of us is so appreciated!

Several months back, I had a client approach me about painting an old chest of drawers she had. It had been given to her in her college years and had been painted to embrace the trends of the times. ๐Ÿ˜‰ The chest itself wasnโ€™t an antique or looked like it had been built by hand. However, it has a lot of sentimental value for my client. She wanted to pass it on to her toddler-aged daughterโ€ฆ and envisioned something that wasnโ€™t too โ€œbabyโ€ and not pink in color, and wanted to create a piece that might stay with her daughter as she grows.

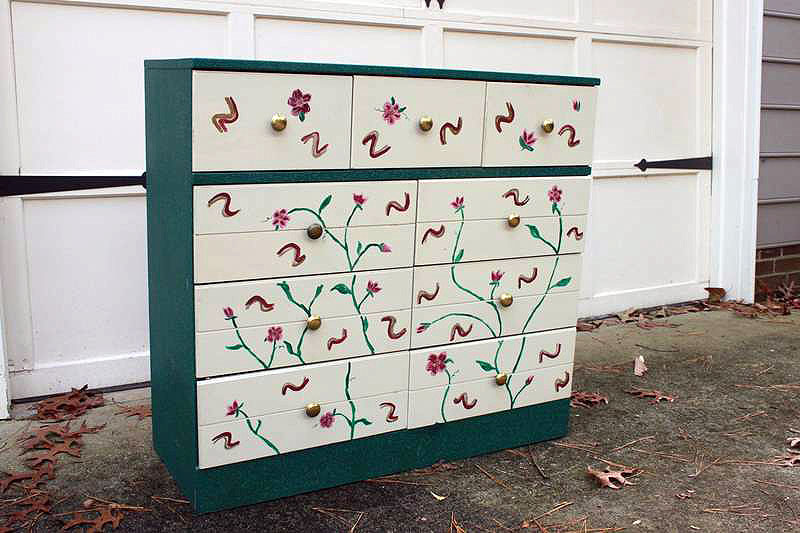
Check out the chest of drawers in all her 1990โ€™s glory! The chest itself was painted with a textured hunter green paint and the drawers were cream with hand-painted burgundy, gold and hunter green flowers. She was in dire need of a makeover! My client envisioned a more feminine color scheme and wanted the piece to look distressed. She was also itching to get rid of the brassy hardware.

I knew there was no hope of stripping the piece to the bare wood, staining it and distressing it. The piece had always been painted and I had no clue (and neither did she!) as to what was under all that textured paint. I also knew it would be cost prohibitive to her to try to get to bare wood in order to stain. I suggested painting the piece an base color that I could use in the distressing process and to create the overall look she was going for. With a plan in place it was time to get started!

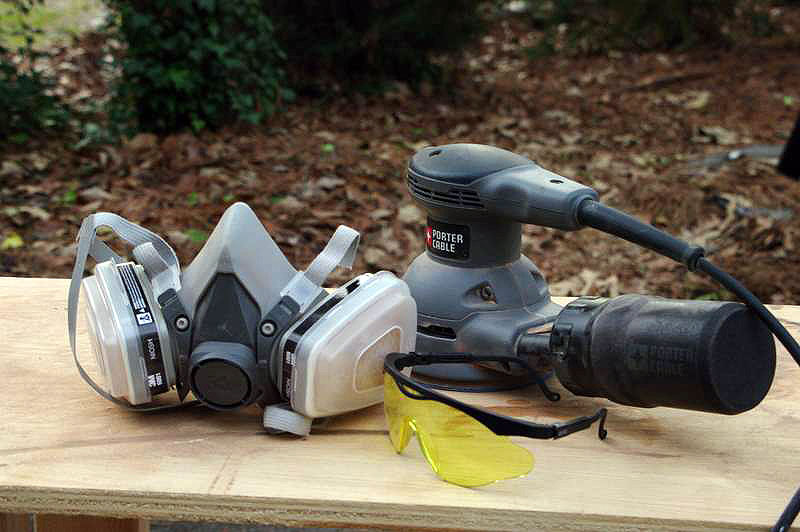
The first order of business in any refinishing project is to prep the piece for refinishing. In almost all cases, this means sanding. Painted pieces require less sanding than pieces that are being stainedโ€ฆ and in this particular case, I knew I had to sand enough to smooth out that textured paint surface. Forunately, my orbital sander made quick work of the texture and using 150-grit sandpaper, I was able to completely remove the texture without much fuss. A mask and safety goggles are important anytime you sand โ€“ you never want to breathe in the nasty particles sanding stirs up; nor do you want to get it in your eyes. But in this case, the eye and mouth protection were super important! That textured paint flew all over the place as it was sanded off. I lightly sanded the drawer fronts as well so that the hand-painted floral design would no longer show when painted. We have a scary, apocalypse-looking mask only because we use it often and for some pretty yucky stuff, but any disposable mask will work just fine!

Once sanding was completed, I wiped the chest of drawers down well using mineral spirits. I then checked for loose pieces of the chest; keeping a close eye on drawer bottoms, corner and bottom moldings, and around the top edge of the dresser. I made repairs using wood glue and clamps to hold the pieces tightly together until dry. If needed, I added a finishing nail or 2 to the repair. Before painting, I also eyeballed the dresser looking for chips in the wood that needed to be repaired with wood putty. This dresser had a large chip in the base molding, so I filled it in with wood putty, let it dry and sanded it smooth with the orbital sander. Once the repairs were made, it was time to paint!

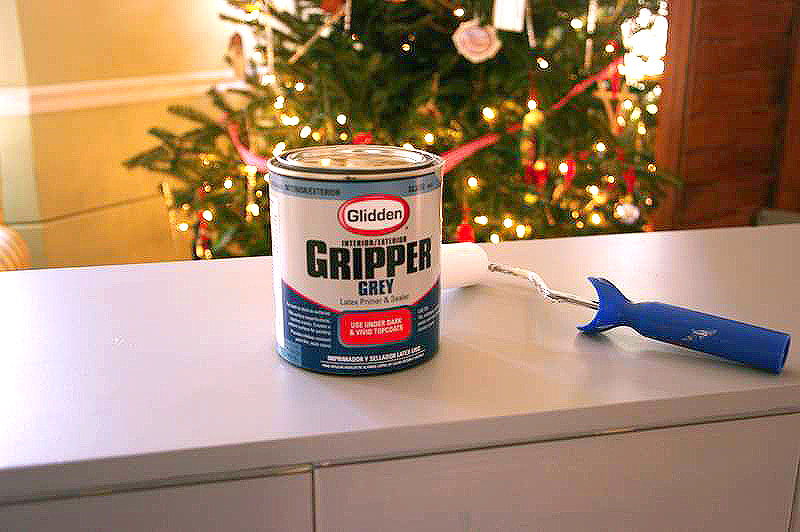
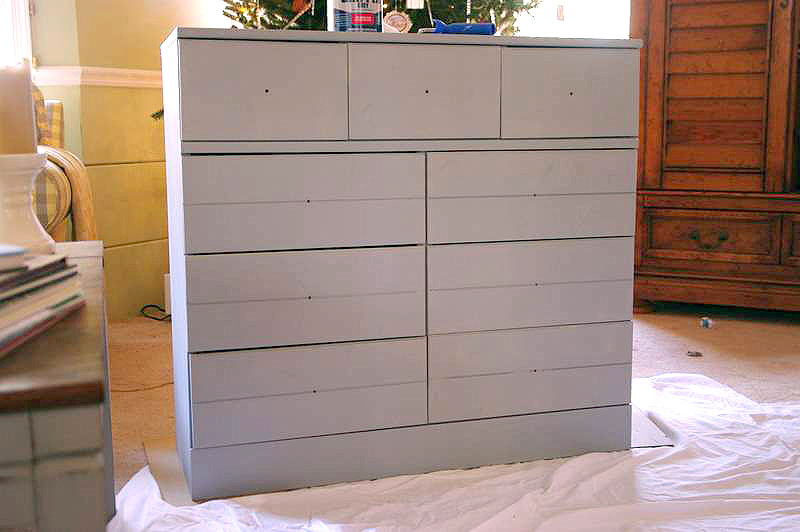
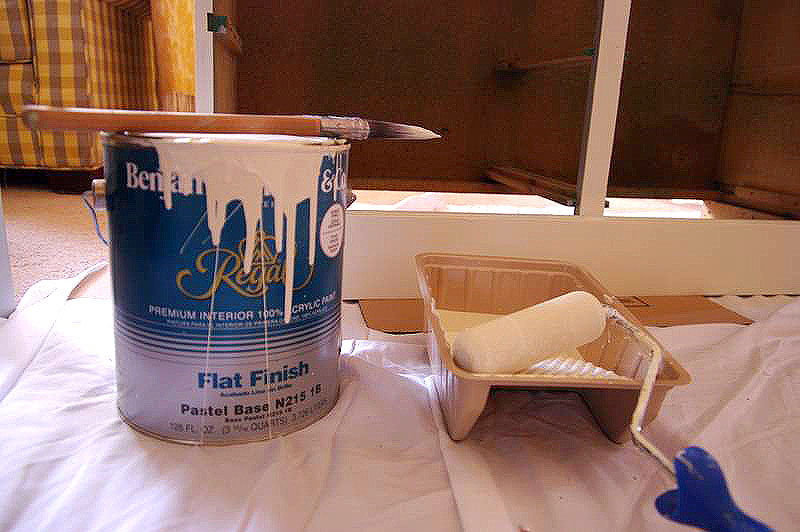
This dresser was a little different than ones I had completed in the past because my client wanted a distressed look, but we wouldnโ€™t be distressing down to the original wood finish. I knew that the royal blue paint we were painting over needed a strong primer to cover it, so I went with Gliddenโ€™s Gripper Primer in Gray. Itโ€™s super thick, hides well and Iโ€™ve found it to have excellent coverage.

Since I didnโ€™t have to worry about sanding through it in the distressing process, I knew it was the paint for the job. The simple lines of the dresser and its drawers made it easy to roll most of the paint on. I did run my brush through the grooves in each drawer, but was able to paint the rest of it with a roller, which really sped the process along.

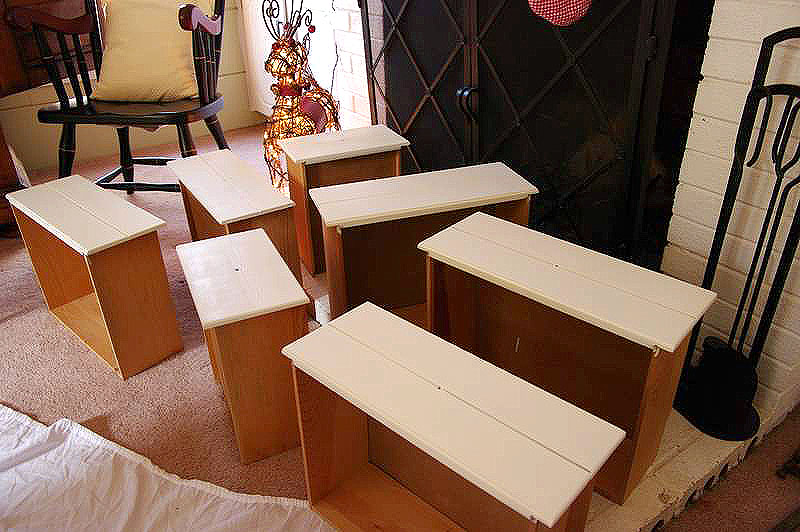
Once the primer coat was on the dresser and had thoroughly dried, I went to work on the base color. This is the color we would be distressing back to instead of the original wood finish. We wanted the dresser to look like it had originally been painted an antique white colorโ€ฆ this would be the color that peeked through the final coat when the process was complete. I went with Benjamin Mooreโ€™s Navajo White.

Navajo White is great because itโ€™s one of those paint colors that is not too yellow and not too beige. It is a true neutral and has served me on many, many painting projects. I was able to apply the Navajo White in the same manner I did the primerโ€ฆ rolled it on with my foam roller and touched up the drawersโ€™ grooves and various places with my brush. Since the Navajo White was only the base coat and had a strong primer underneath, one coat sufficed.

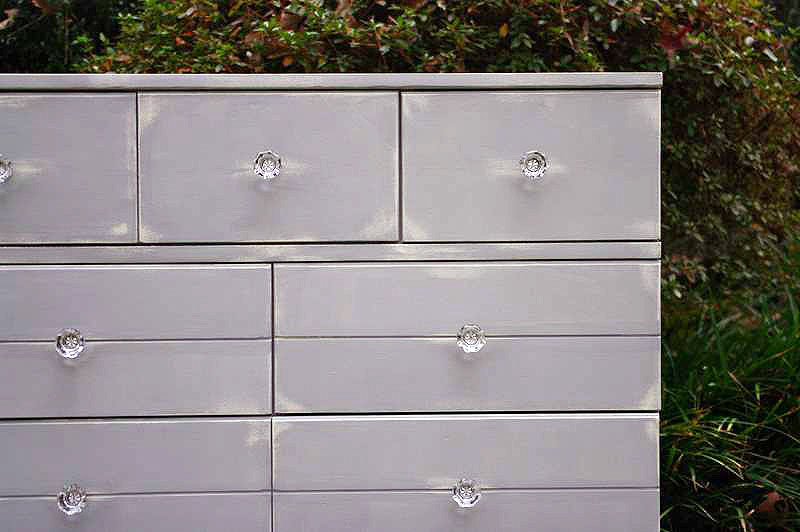
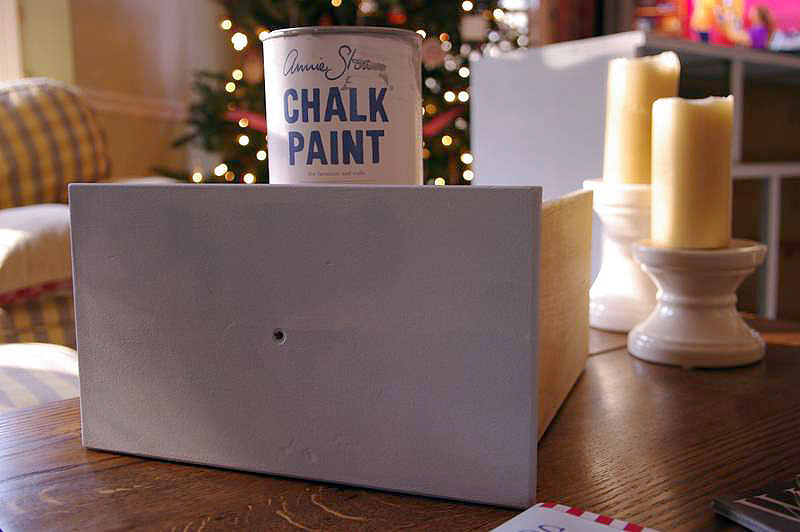
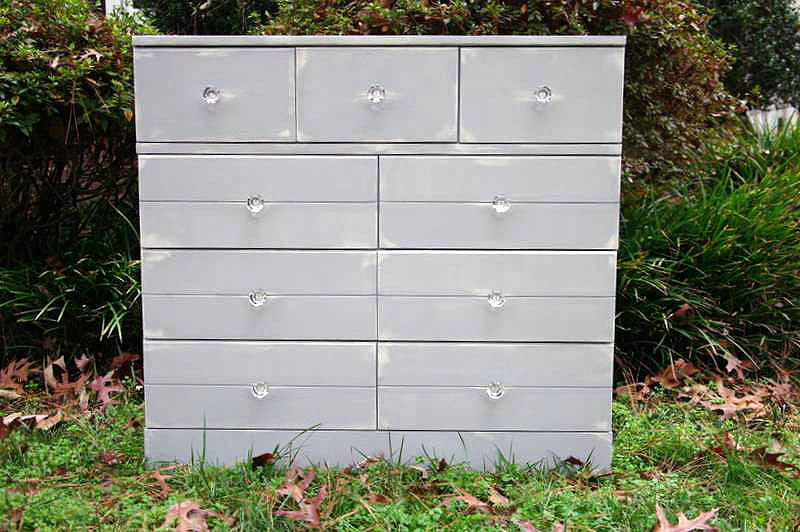
The final coat of the dresser was to be a beautiful grey color. I decided to use Annie Sloan Chalk Paint in Paris Grey for several reasons. First, Annie Sloanโ€™s paints have great coverage and I knew that only 1 coat would be required. Secondly, and perhaps most importantly, Annie Sloan Chalk Paint gives you a lot of control in the distressing process. That control was very important to me on this project because I only wanted to distress back to my base coat, not to the primer or original royal blue color. Finally, Annie Sloan Chalk Paint waxes beautifully and easily and that was important to me as paste wax would be the final coat on the dresser. I painted most of the Paris Grey on by hand with my brush. Annie Sloan Chalk Paint is expensive and I try to use it sparingly!!

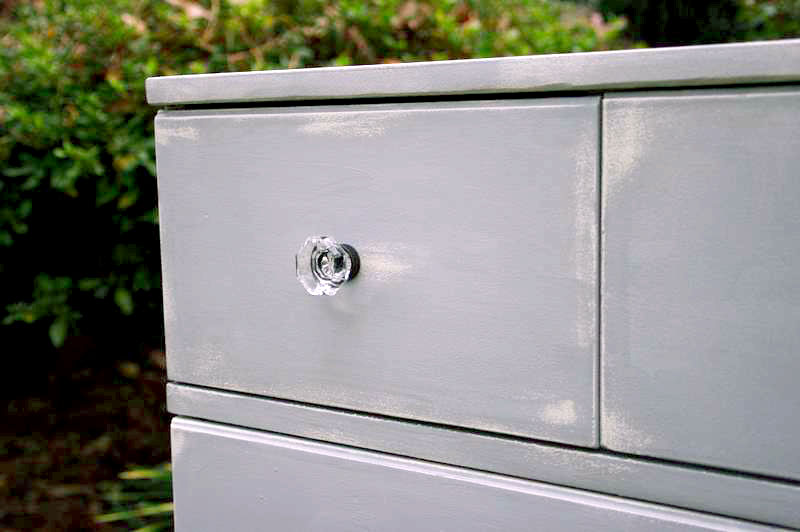
Once the chalk paint had time to dry, it was time to distress. In my opinion, this is where Annie Sloan Chalk Paint really sets itself apart from other paints. Chalk paint allows you a lot of control in the distressing process. In fact, there is no sandpaper required to distress Annie Sloan Chalk Paint! All the distressing on this dresser was done using a wet rag. I simply dampened the rag and started rubbing in the places I wanted to distress. The more I rubbed, the more distressing I got. I didnโ€™t have to worry about sanding through my base coat and with a wet rag, I was able to get to places that would be difficult to get to with sandpaper. As an added bonus, I was able to distress the dresser in the house without a fine powdered substance all over everything!

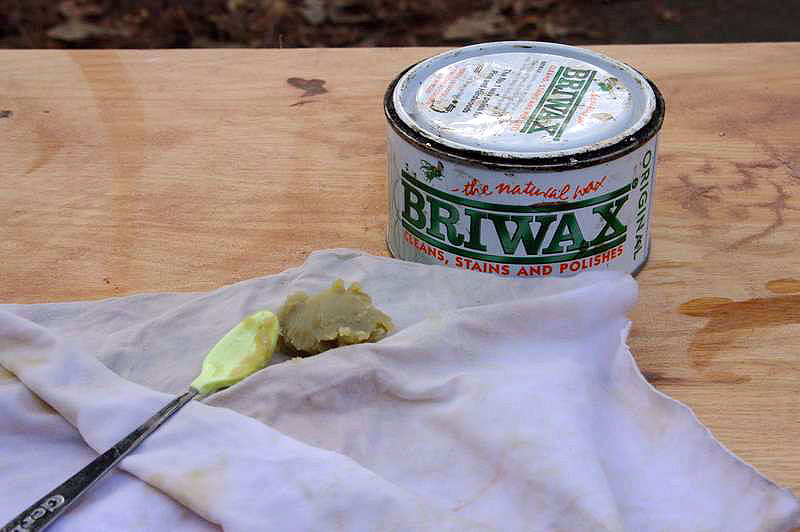
The last steps to complete the dresser were to wax the entire piece and add the new hardware. With any piece I wax, I always start with a coat of clear wax. Iโ€™ve tried several brands, from Johnsonโ€™s Paste Wax to Briwax to Fiddes and Sons. I have yet to try Annie Sloanโ€™s wax, only because the others are readily accessible to me in local stores. In my opinion, I have not noticed a big difference in application and finish between Johnsonโ€™s Furniture Paste Wax (which is found at Home Depot) and Briwax or Fiddes (which I can only find at a local wood working store). But there is a big difference in price. I think that it comes down to personal preferenceโ€ฆ there are definitely people that prefer one brand over the otherโ€ฆ I just have not noticed a big difference in them! I did not apply a darker wax to this dresserโ€ฆ we wanted to keep it light and happy for a little girls room and I didnโ€™t want to add the color changes that a dark wax brings to a piece of furniture.

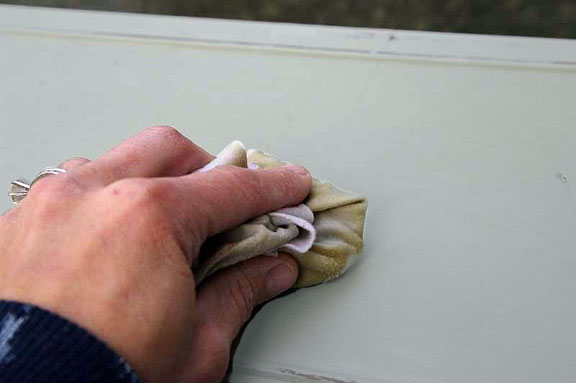
With waxing, the key is get thin, even layers of wax with each coat you put on a piece of furniture. I find the easiest way to apply the wax is to cut a clean rag, place a small amount of wax in the center and fold the rag around it. The wax will seep through the rag as you rub down your piece of furniture, keeping your coat nice and even. Once the wax coat is completely dry, you take another clean cloth and buff the piece. The result is a soft sheen and a smooth finish!

For new hardware for the dresser, we selected these beautiful glass knobs from Restoration Hardware.

They added a bit of bling to the dresser, gave it a definite feminine touch, but werenโ€™t too fussy or ornate. They fit into the existing holes with no issues, and with that, the dresserโ€™s transformation was complete!

A lot of prepping and priming, several quarts of paint and a lot of elbow grease later, this dresser was transformed and updated and ready for its new life in a little girlโ€™s room!

Thank you Holly! Oh my goodness, can you believe that transformation? From hunter green hand-painted toโ€ฆ

โ€ฆshabby chic in Paris grey! Ahhh, thatโ€™s much better!

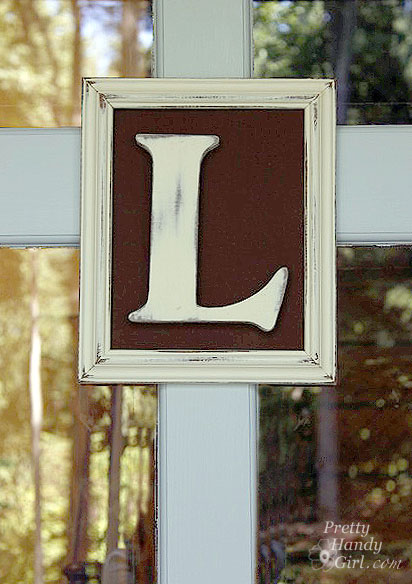
Be sure to check out Hollyโ€™s Storywood Designs Etsy shop where you can purchase a framed monogram like this one!

Holly also recently started a blog, Storywood Designs, showcasing the furniture that she refinishes. You really need to check it out!

Storywood Designs

Would you like to be a guest on Pretty Handy Girl? Well, here is your invitation: View this page for all the specifics on being my guest.