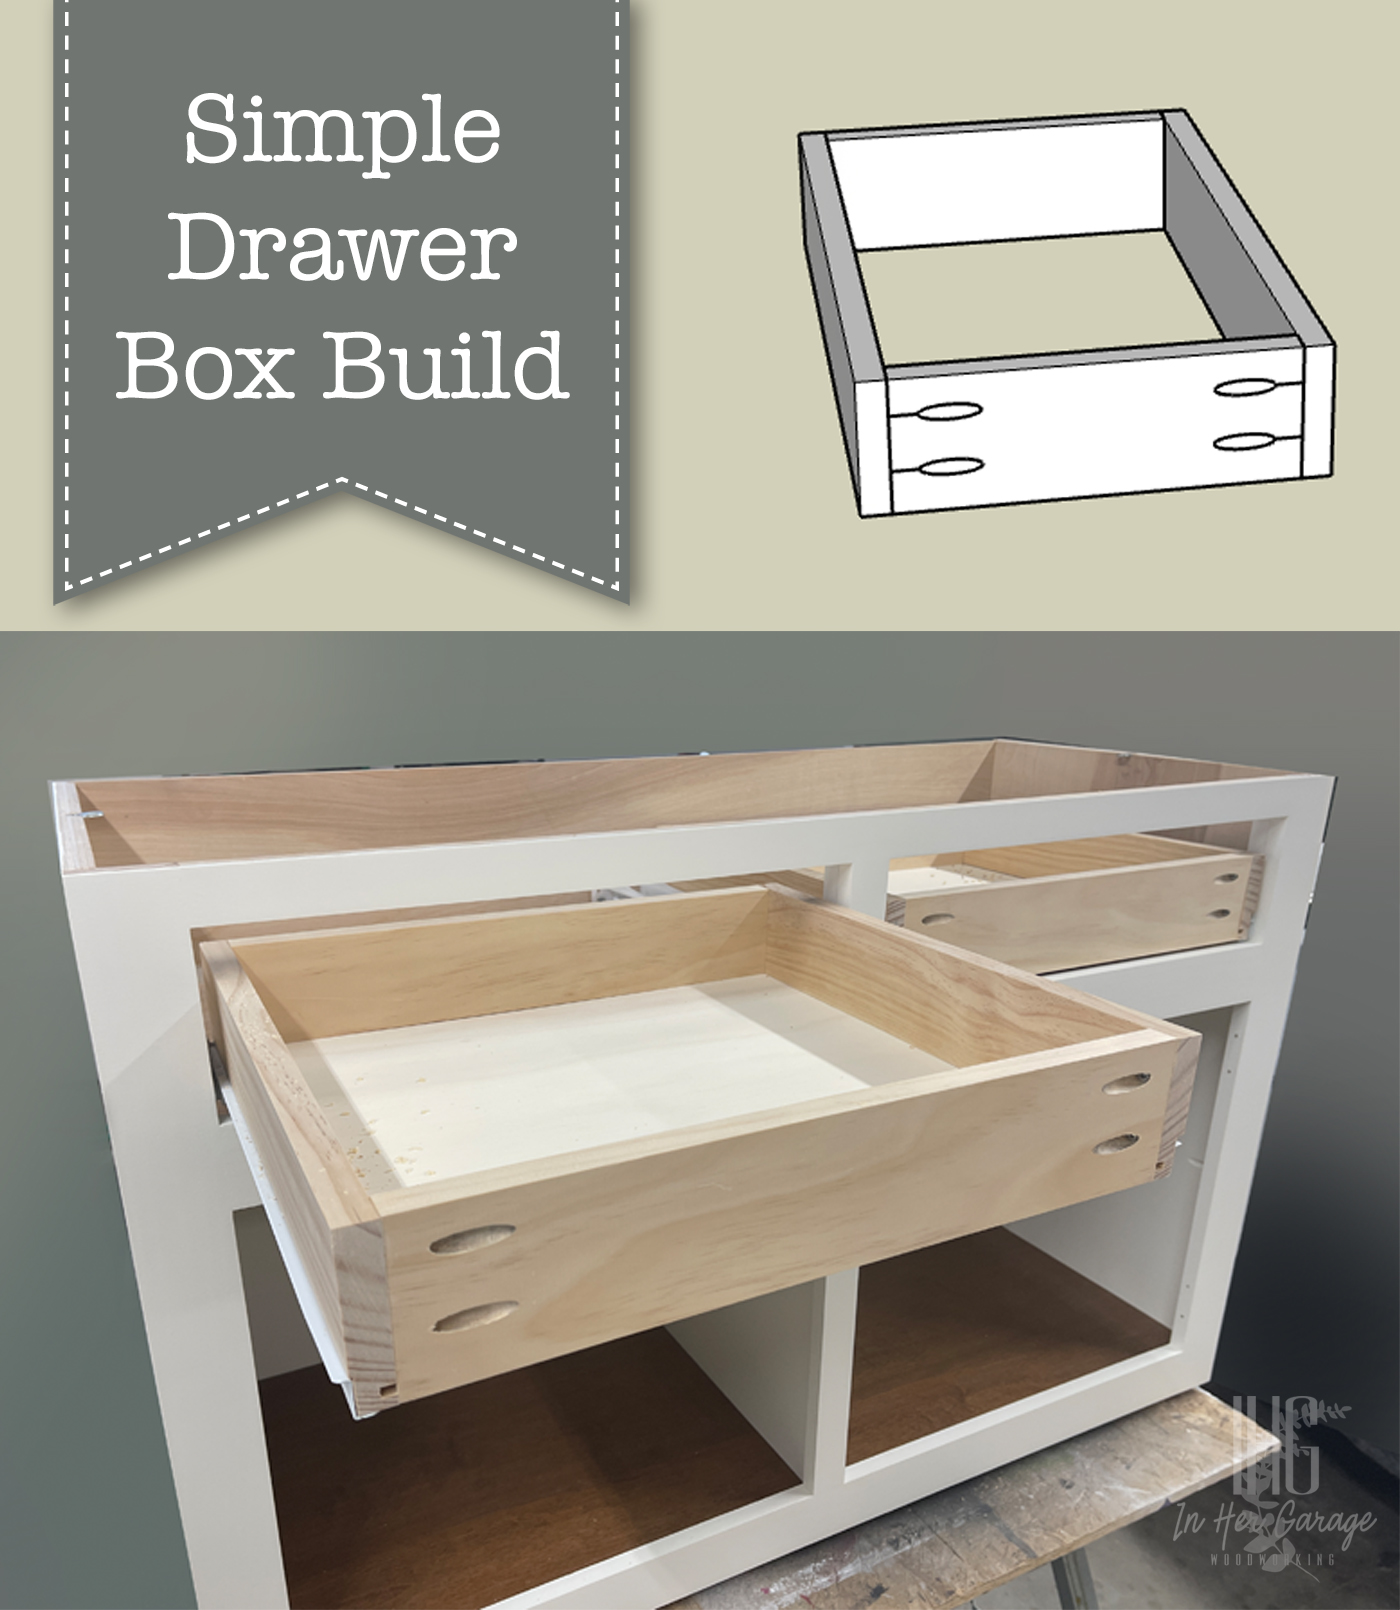
Learn the simplest and most accurate way to build drawer boxes with this easy tutorial.

Drawer Box Build

Welcome back, this is Kristen from In Her Garage Woodworking here with another build plan for you.ย ย When I first began my DIY woodworking journey over 5 years ago I was most intimidated by building drawers. I avoided them because I thought there were too many measurements and too much room for error. But, with a simple plan and a lot of practice, I now make drawers consistently and accurately.ย  These are the exact plans I use to this day to make drawer boxes for all of my commissioned furniture pieces because when youโ€™re able to make something quickly and easily that is solid and looks great, why would you ever change it?

Materials

(Iโ€™ve includedย affiliate links for your convenience. I earn a small percentage from a purchase using these links. Thereย is no additional cost to you. You canย readย more about affiliate links here.)

Tools

Instructions:

Your drawer can be any depth you wish, but before building the drawers, rip your 3/4โ€ณ material to the drawer height you desire (if you are using plywood or if your 3/4โ€ณ material is wider than your finished drawer.

Step #1: Cut drawer box sides

Using your miter or circular saw, cut two identical 3/4โ€ boards to the same length of the drawer slides youโ€™ll be using.

Step #2: Cut drawer box front and back

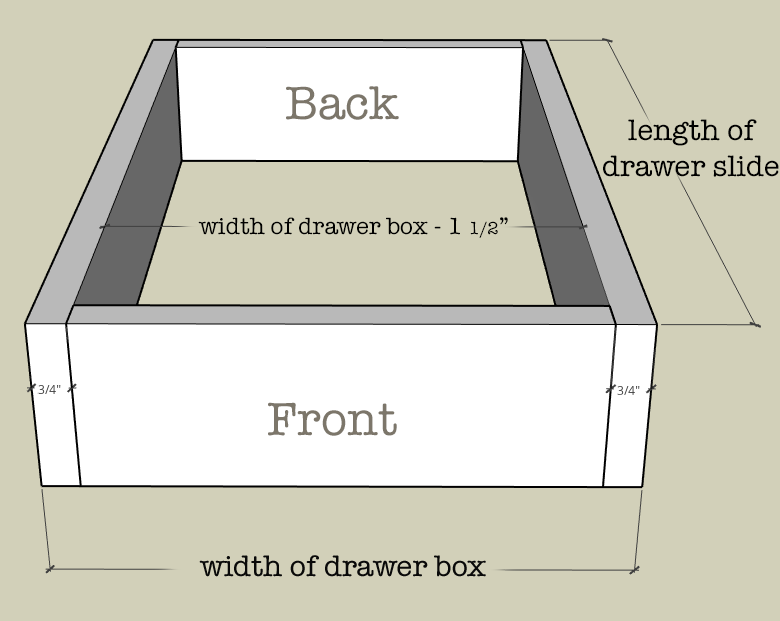
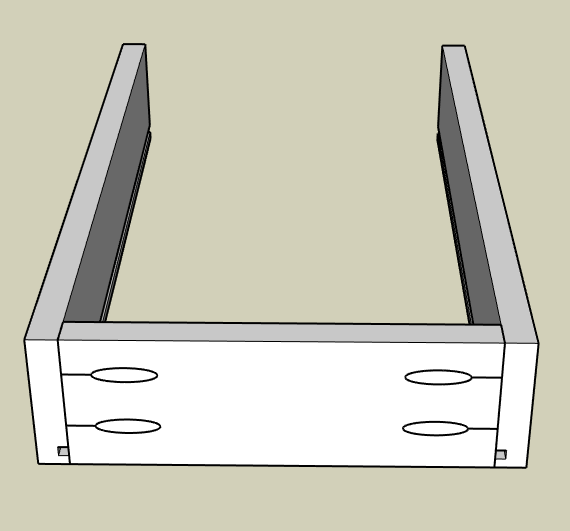
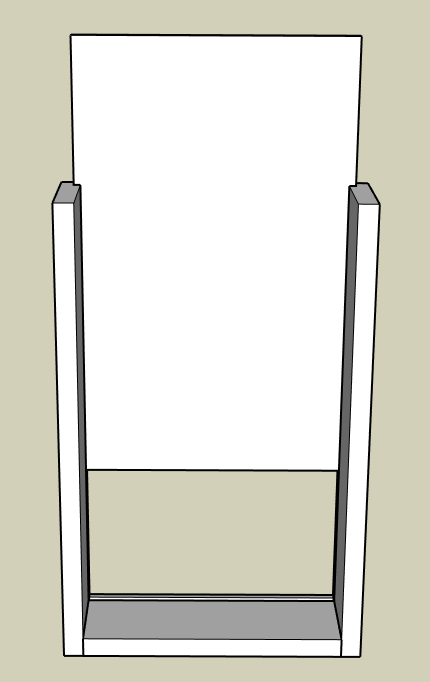
Cut two pieces of the 3/4 inch material for the front and back of the drawer box.ย  If youโ€™re using ยพโ€ material to build the drawer box then the length of the front and back can be calculated as follows (see equation and picture below):

Width of drawer box โ€“ 1ยฝโ€ = width of front and back drawer box boards

Drawer Box Diagram

Step #3: Add groove for drawer bottom (optional)

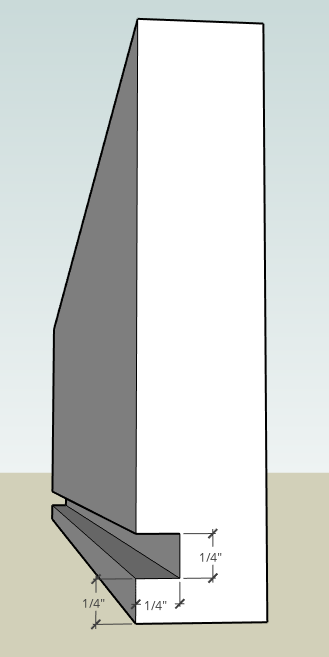
Taking all four 3/4โ€ณ boards to the table saw cut a groove 1/4โ€ from the bottom of all sides that is 1/4โ€ deep. Run the 3/4 board through one time, then adjust the fence (or your saw) to cut another groove next to the first. (A standard saw blade is 1/8โ€ wide so you will need to make two passes in each board to achieve a 1/4โ€ณ groove for the 1/4โ€ณ drawer bottom material.

Dry-fit the plywood to check for fit.


Step #4: Create pocket-holes

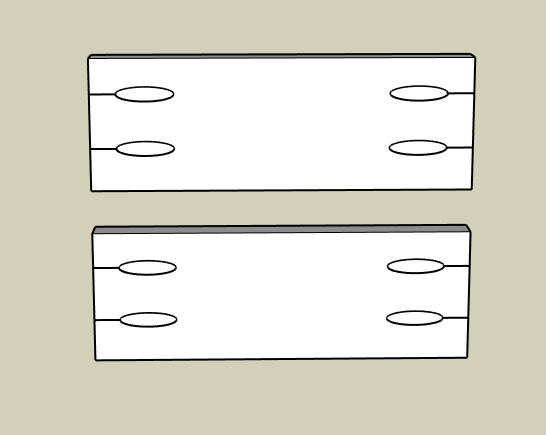
Using your Kreg jig make 2 pocket-holes at either end of the front and back boards on the opposite side as the plywood bottom groove if you chose to do this step. Be sure to avoid the groove.

Step #5: Assembly

If you DID NOT cut a groove to accept the plywood bottom, then you can assemble the drawer box using wood glue and 1 ยผโ€ pocket screws.

Then, you will cut your bottom 1/4โ€ณ panel to the length and width of the drawer box and simply glue and nail it to the bottom of the drawer box

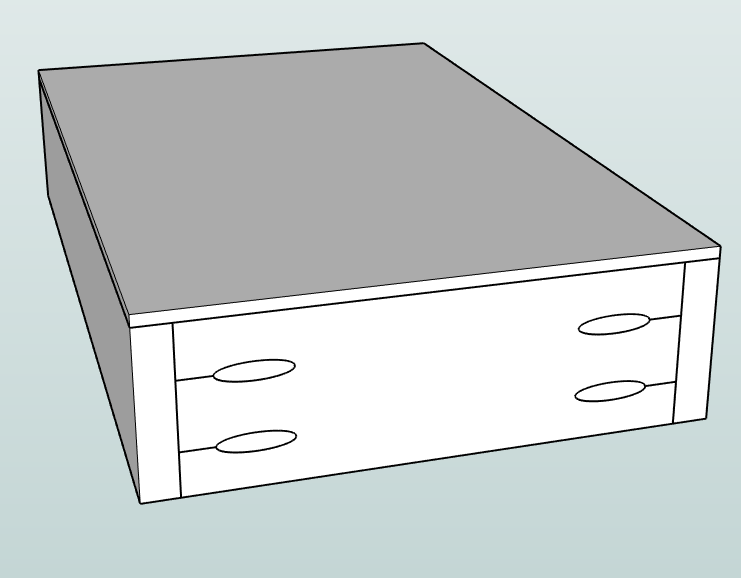
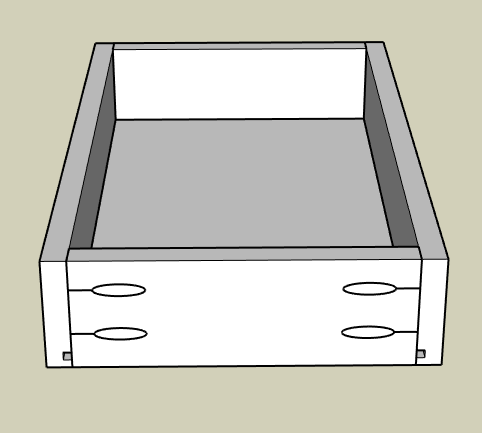
If you DID create a groove for the bottom panel assemble the front and both sides using wood glue and 1 ยผโ€ pocket screws.

Next, cut the ยผโ€ plywood to fit into the bottom of the drawer box groove dry fitting the back panel to check for fit.

Once you have the correct size for the plywood bottom then slide it into the groove and attached the back piece of the drawer box using wood glue and 1 ยผโ€ pocket screws. ย There is no need to apply glue into the panel groove.ย  The plywood bottom will โ€œfloatโ€ in place.

No need to worry about filling the pocket-holes because you will be applying a drawer face directly over them.

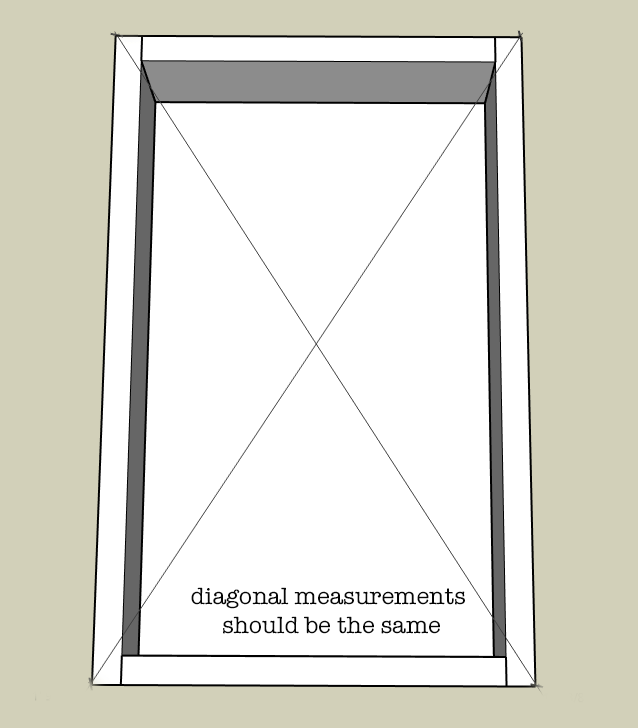
Be sure to check for square by measuring both diagonals of the drawer box.ย  If one measurement is longer simply squeeze the longer diagonal until both are the same.

Allow drawer box to dry.

That is the basic drawer box build that I use and it is strong and easy to put together. I hope this tutorial gives you the confidence to tackle that project youโ€™ve been putting off.ย  Next, I will teach you my favorite method for installing drawers and how I troubleshoot drawer boxes that just arenโ€™t quite the right fit!

Finishing Tips:

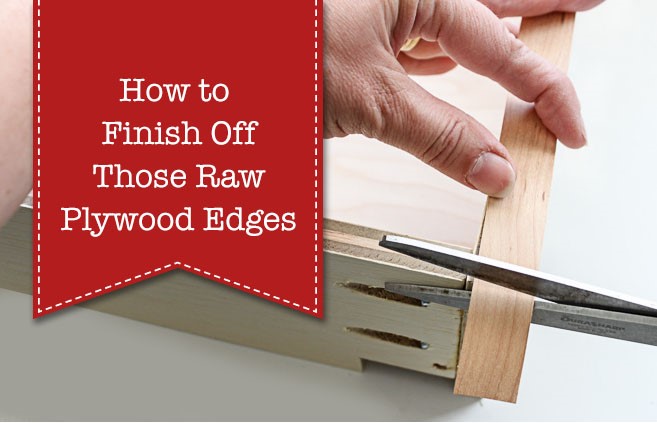
If you are making your drawer boxes out of plywood then check out Brittanyโ€™s Edge Banding Tutorialย and learn how to cover that unsightly plywood edge.

Wondering how, or if, you should apply a protective finish to the drawer box? If I am working with solid wood for the drawer sides then I will give the material a quick finish sanding and thatโ€™s it. But, for plywood, I typically do one of two things, depending upon what I have on hand at that time.

  • Option 1: Apply 1 or 2 coats of sanding sealer to raise the grain of plywood and sand smooth. Sanding sealer is clear, easy to apply, and dries quickly. If I have the time and patience I may also apply a quick spray of clear, semi-gloss, water-based topcoat to give it a little shine but it isnโ€™t necessary.
  • Option 2: Apply 2 to 3 coats of spray shellac to seal the plywood.ย  Spray shellac dries quickly and wonโ€™t leave any chemical smell behind. But be aware that it will give the plywood a slight amber tone which typically isnโ€™t big deal.ย  Remember to lightly sand between coats.

Hi! Iโ€™m Kristen, from In Her Garage,ย and I am a self-taught woodworker and DIY fanatic from Minnesota where I live with my husband and our two daughters. Between being a wife, mom and, registered nurse, I try to make as much time for DIY as possible. My love for building came after our family built our current home in 2015. After we moved in, we needed furniture and instead of spending massive amounts of money to order the pieces we wanted I decided that I would build them myself. I started with a buffet table plan from the fabulous Ana-white and quickly set out to remodel my entire home office.

Since then I have started a side business building furniture for the people in my community. I love hearing my clients talk about the pieces they wish they had whether it be aย rustic buffet table, aย one drawer side table, or aย toy box,ย and then making it a reality for them. While starting my small business it made perfect sense that I would document my building journey so I simultaneously launched theย In Her Garage blog and I love sharing my plans, tips, and tricks.

Making something beautiful with your own two hands through a little preparation and determination is an amazing feeling and I hope to bring inspiration and know-how to those looking to tackle a big or small project.

I am so glad that you found me here and please feel free to connect with me onย Pinterest,ย Instagram, and Facebook to see what I am working on right now. And check out the brand new In Her Garage Etsy shop for other plans or to have a furniture item made especially for you!

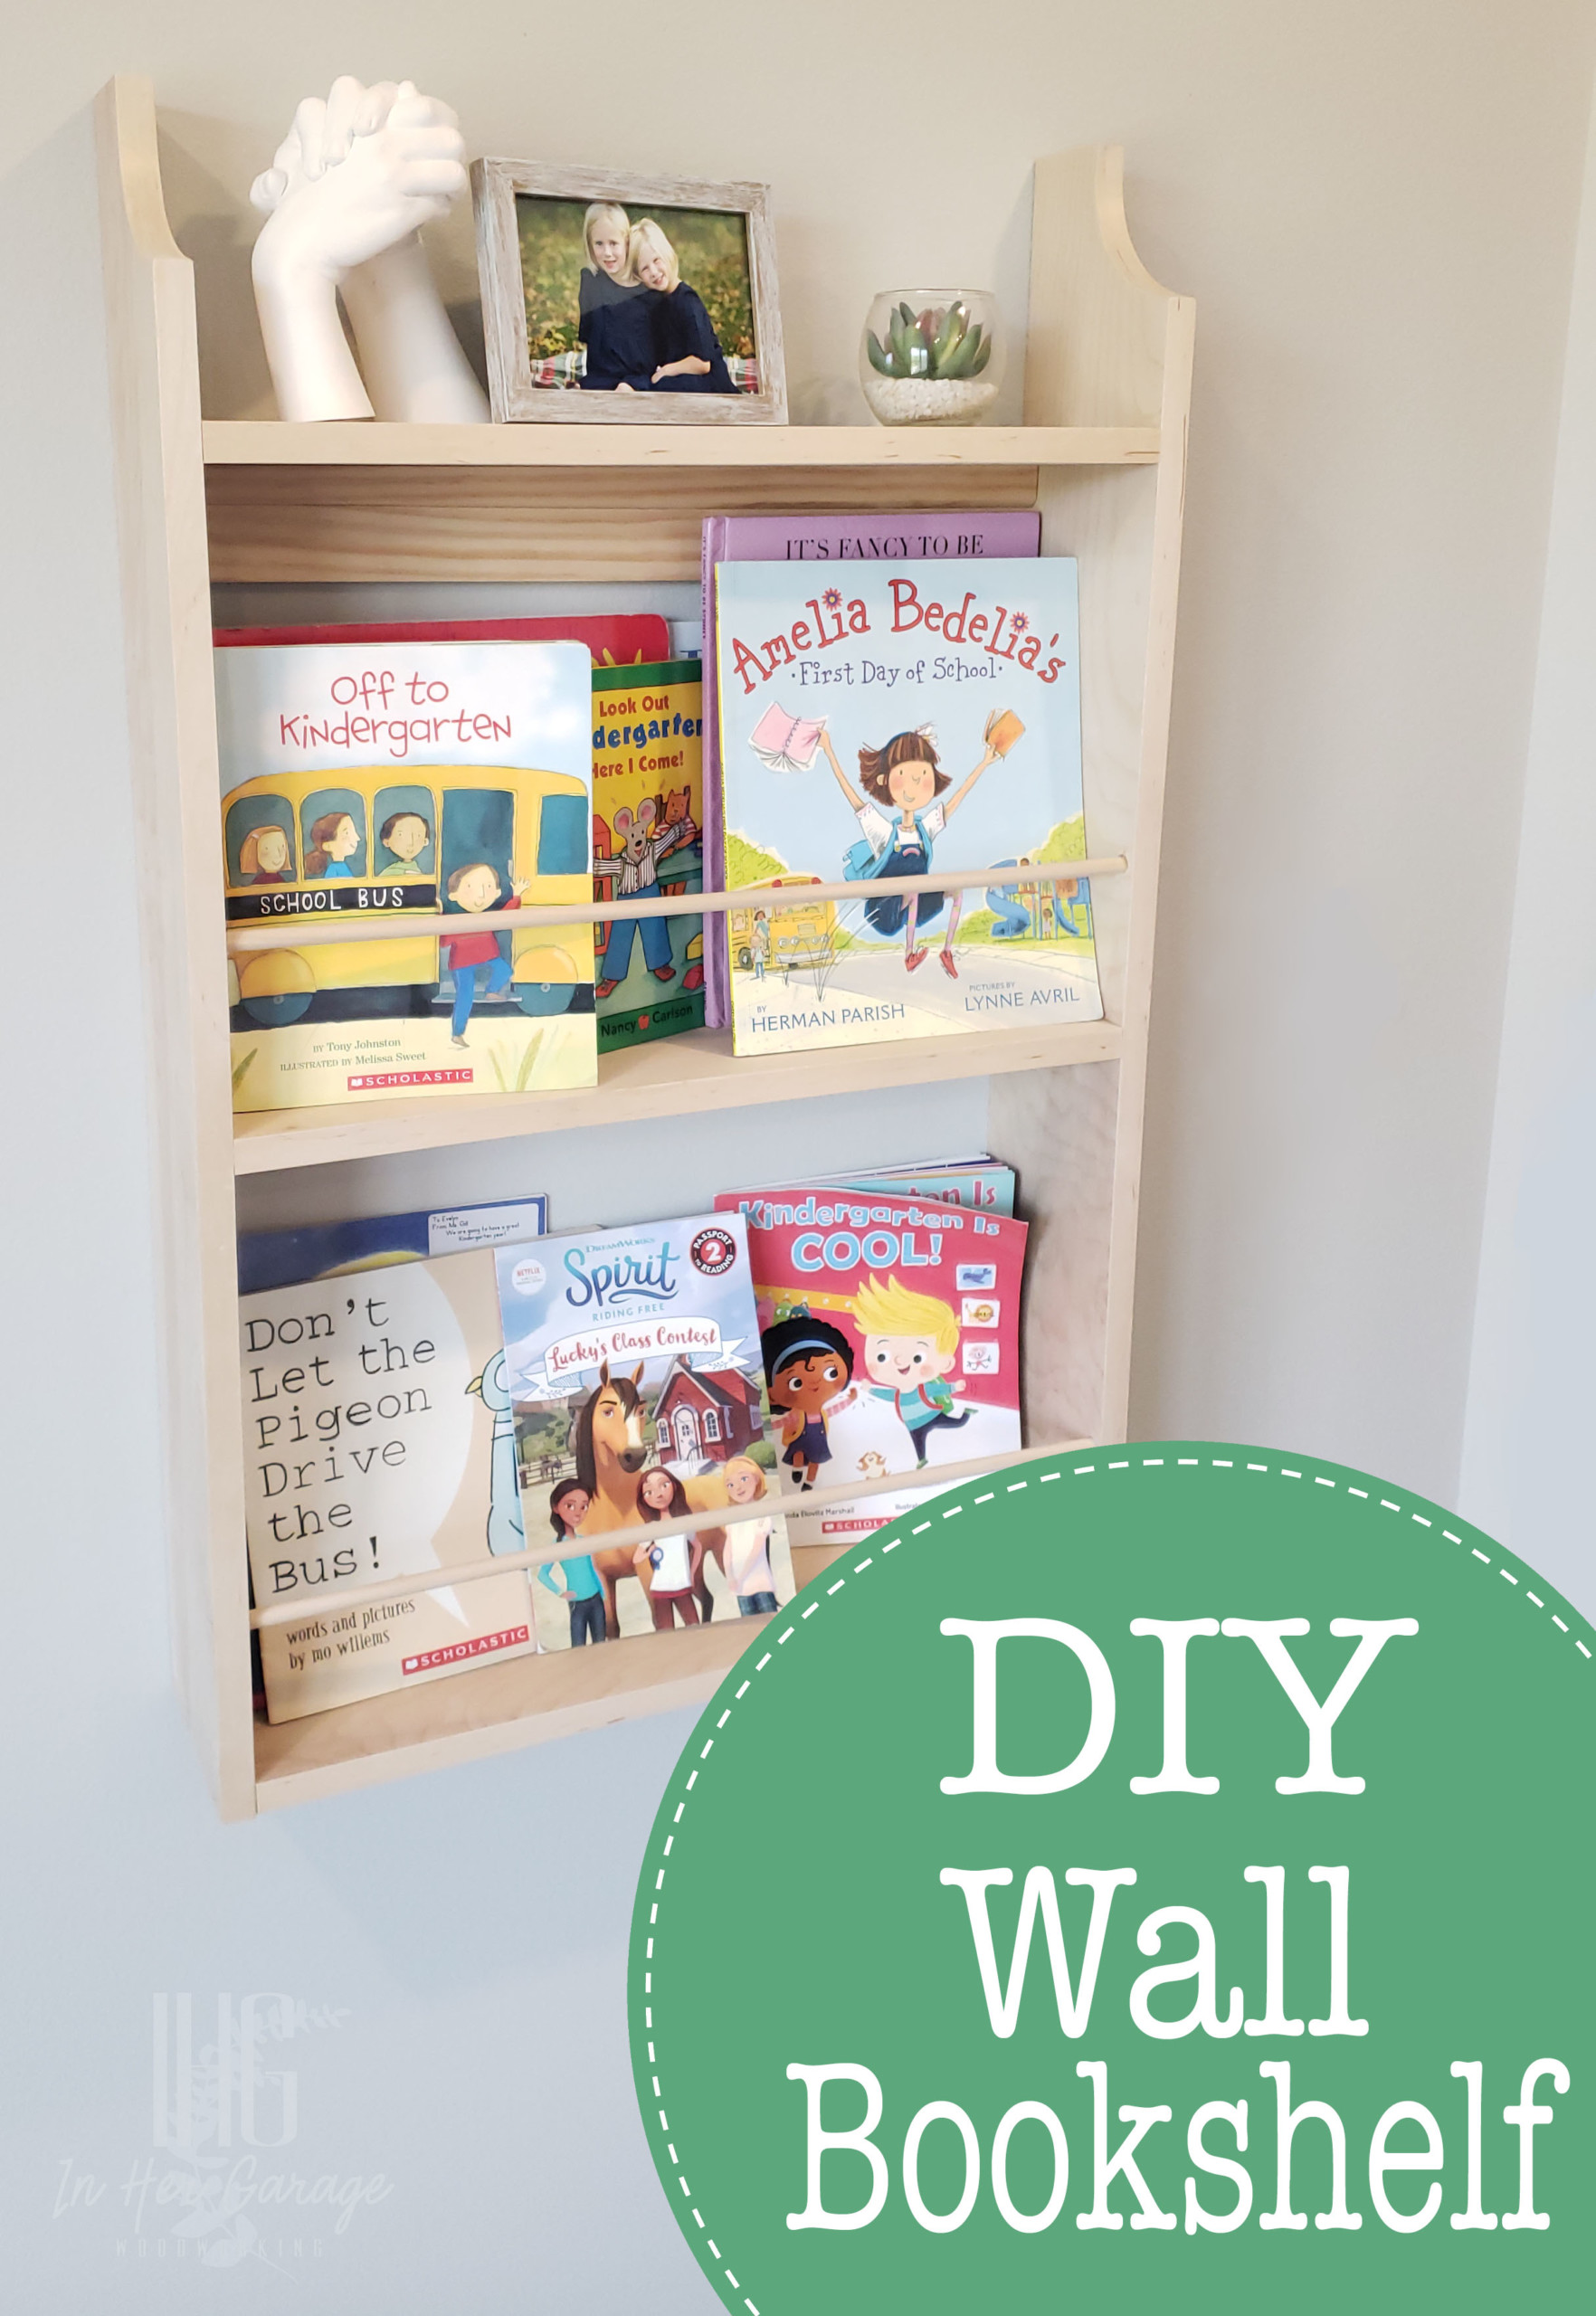
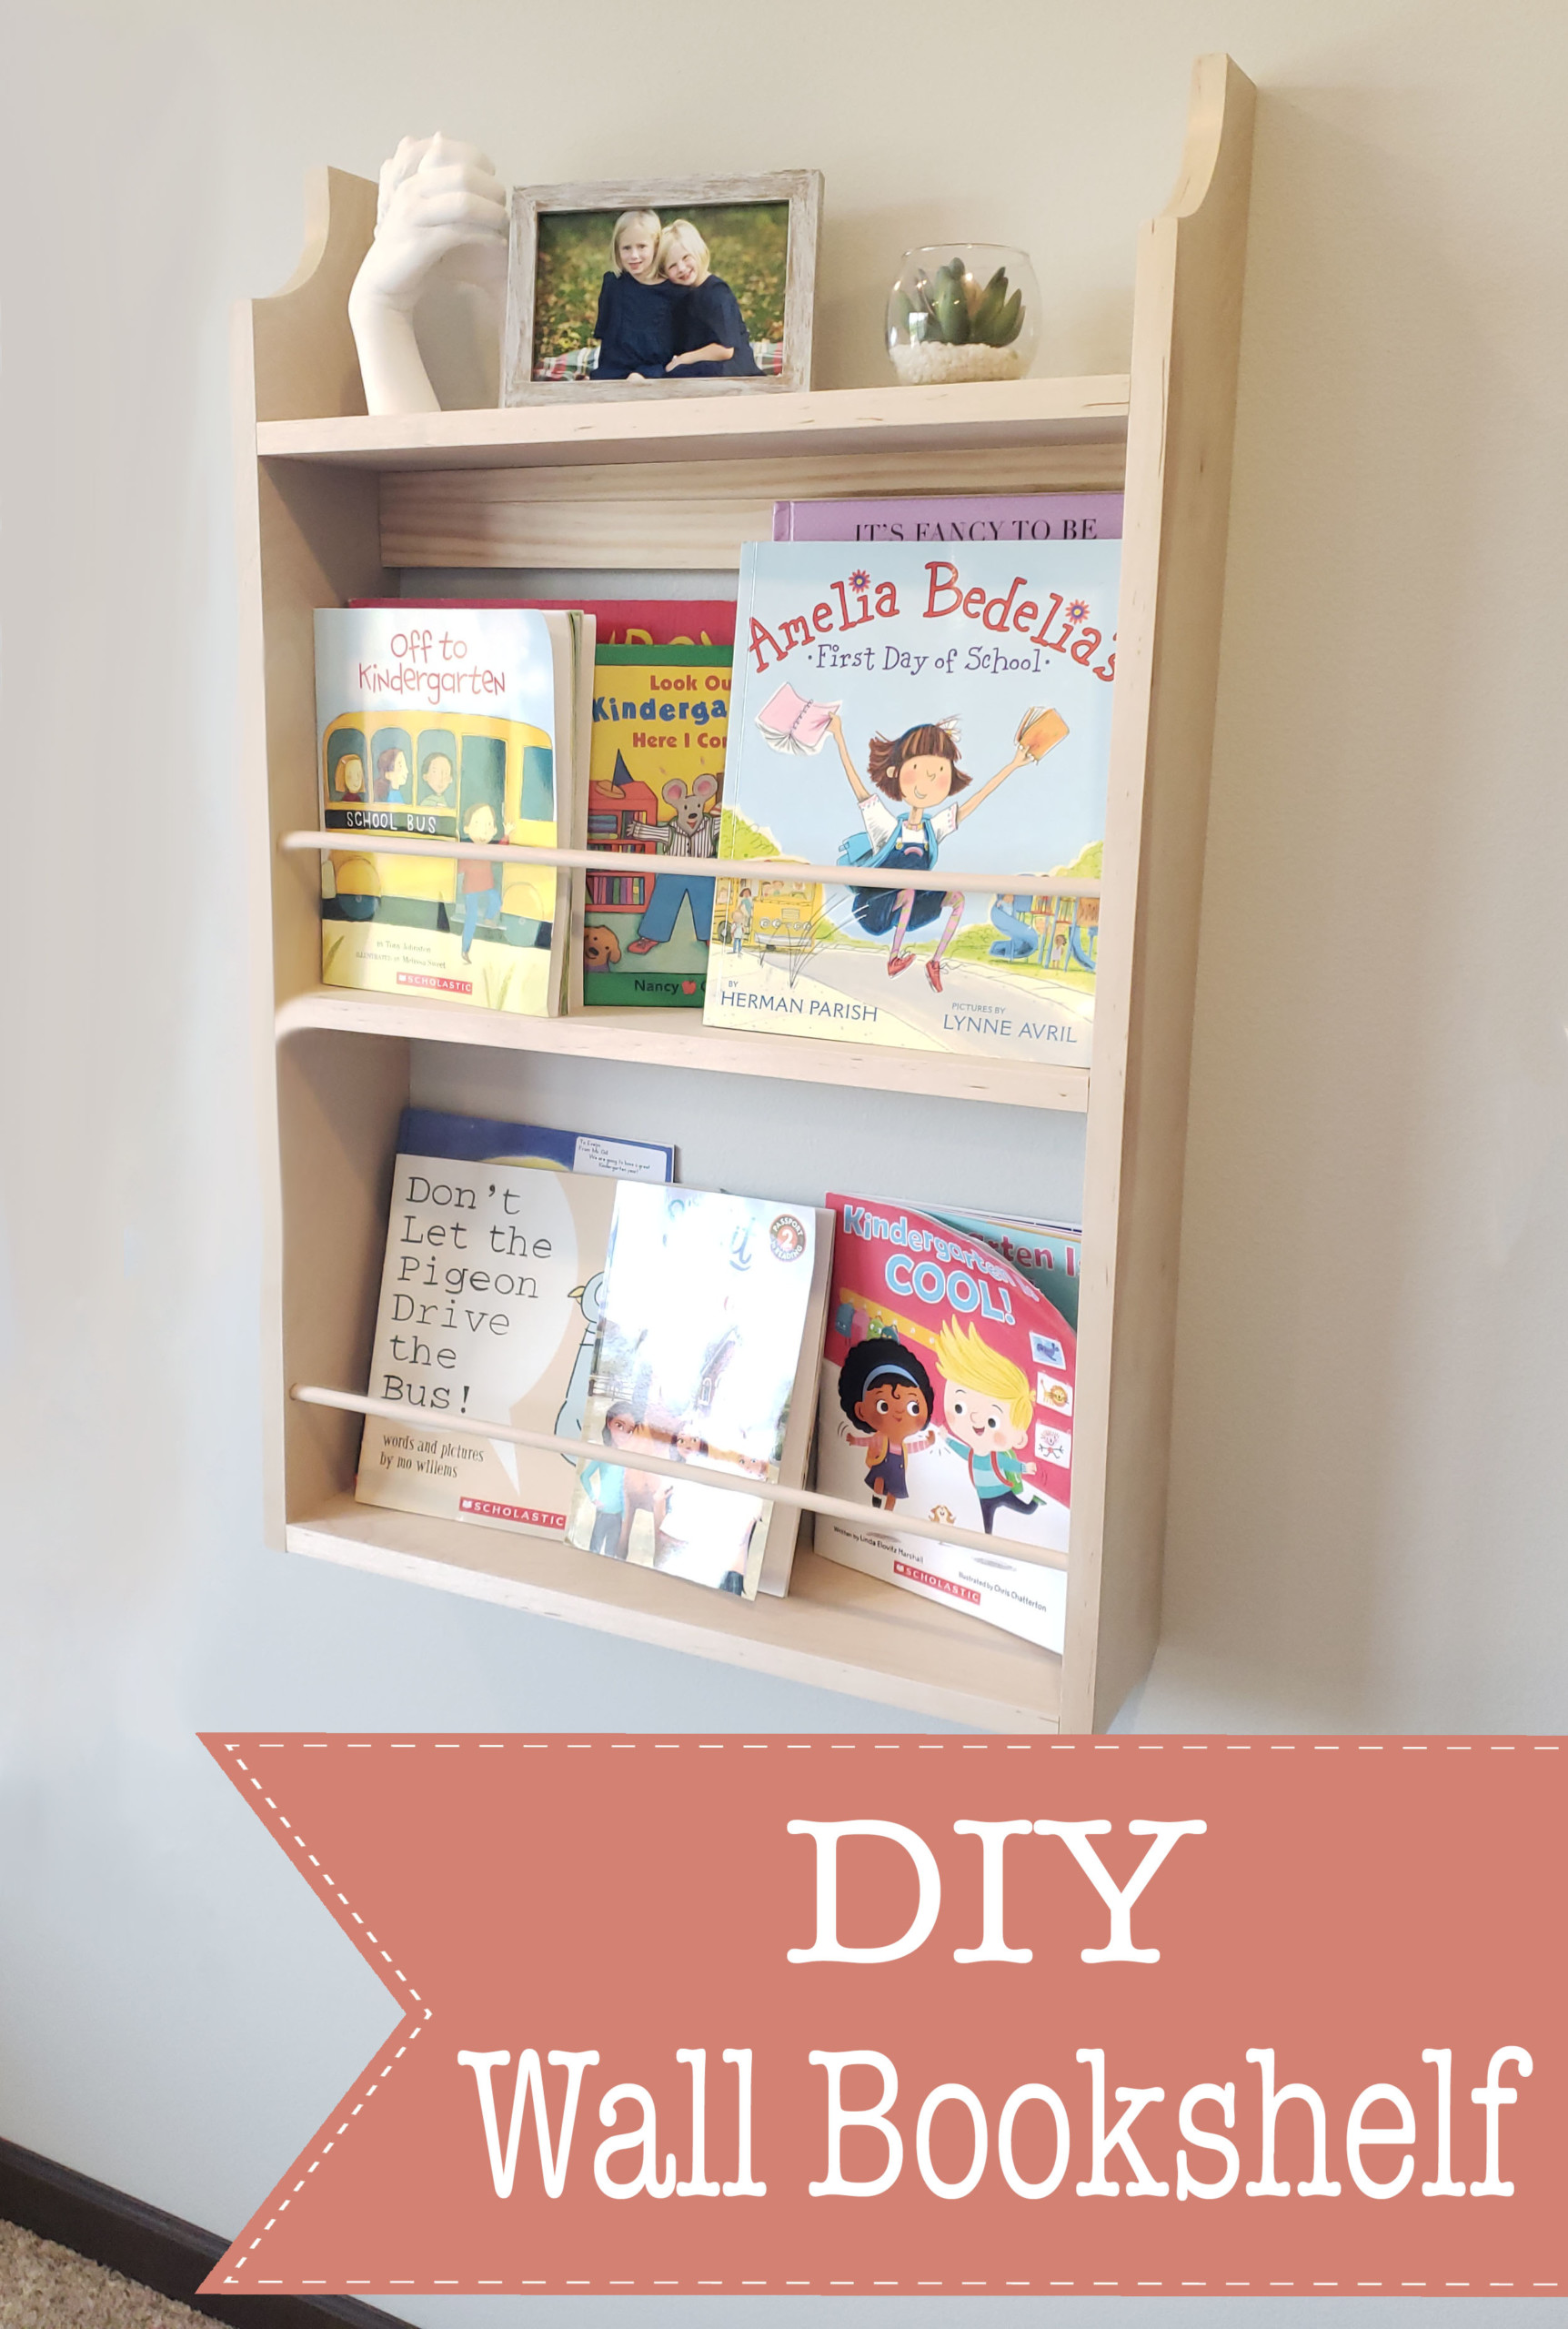
Looking for a way to organize and free up floor space in your home? Expand your DIY talents and build this adorable DIY wall bookshelf.ย  I built this as the final addition to my daughterโ€™s new room and although the joinery is slightly more advanced it still easy enough for a beginner DIYer.

DIY Wall Bookshelf

This bookshelf was the perfect last piece that brought my daughterโ€™s room together.ย  I used dowel joinery to build the bookshelf (which may sound complicated but is fun to use and quite simple when you get the hang of it).ย  To hang this shelf on the wall I used a French cleat which again sounds more advance is a convenient and secure way to install heavy objects on a wall. So stay with me and read through the instructions. I know you can do this!ย  Letโ€™s make it!

How to Make a DIY Wall-Mounted Bookshelf

Materials:

  • 2- 1โ€ณ x 6โ€ณ x 8โ€ฒ boards
  • 1- 3/8โ€ณ x 4โ€ณ round dowel
  • 1 box 3/8โ€ณ wooden dowels
  • wood glue

Tools:

(Iโ€™ve includedย affiliate links for your convenience. I earn a small percentage from a purchase using these links. Thereย is no additional cost to you. You canย readย more about affiliate links here.)

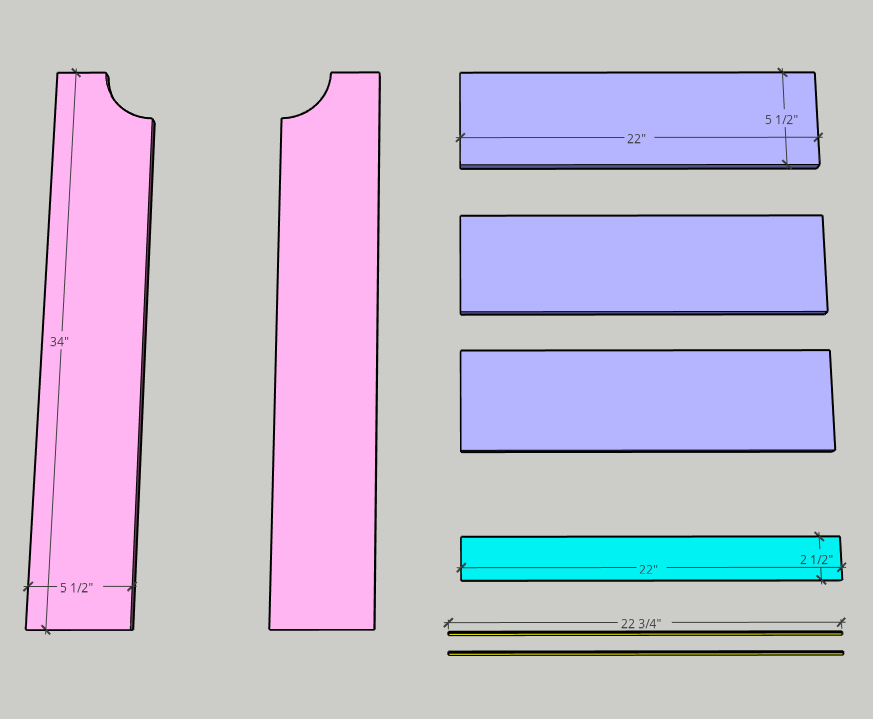
Cut List:

  • 2- 1โ€ณ x 6โ€ณ @ 34โ€ณ โ€“ shelf sides
  • 3- 1โ€ณ x 6โ€ณ @ 22โ€ณ โ€“ shelves
  • 1- 1โ€ณ x 6โ€ณ @ 22โ€ณ ripped to 2ยฝโ€ width โ€“ shelf cleat for hanging on the wall
  • 2- 3/8โ€ณ dowel @ 22 ยพโ€ length

Instructions:

Step 1: Cut the curve at the top of the shelf sides (optional)

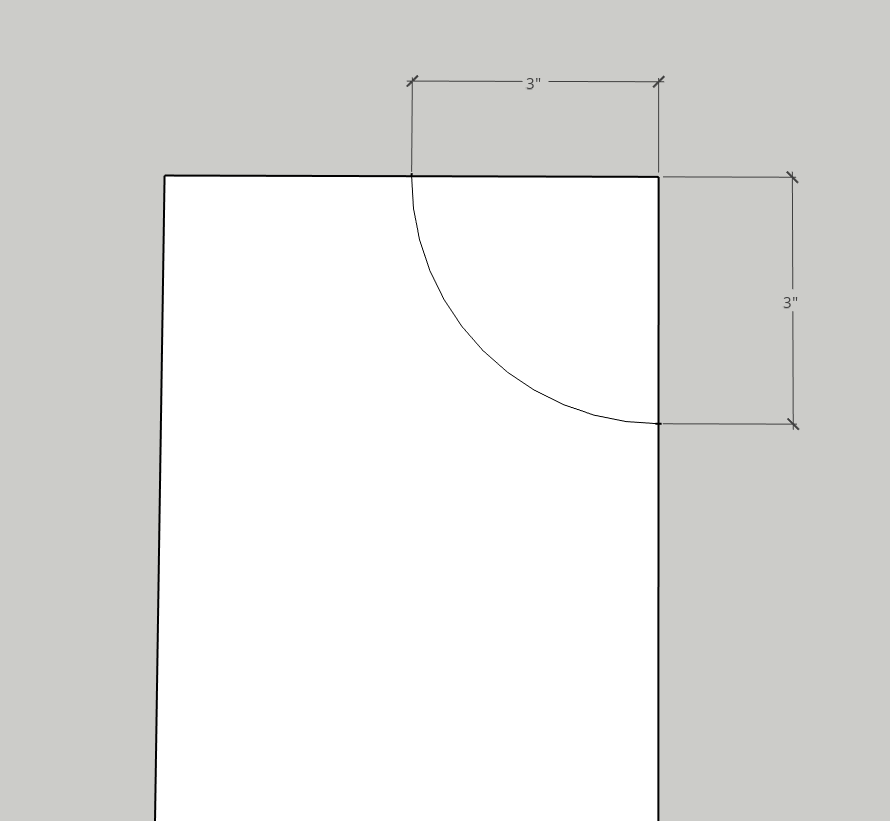
  • Measure 3โ€ณ in from the front and 3โ€ณ down from the top on both 1โ€ณ x 6โ€ณ side pieces and create a curve connecting the two marks. (I used a plastic bowl that I found in my kitchen as a stencil.)

  • Using your jigsaw, carefully cut along the curved line youโ€™ve drawn until it is cut away.
  • Repeat for both sides. Sand the curve smooth with sandpaper.

Step 2: Measure and mark dowel placement on the bookshelf sides

  • This is the step where the 6โ€ณ combination square is a lifesaver!
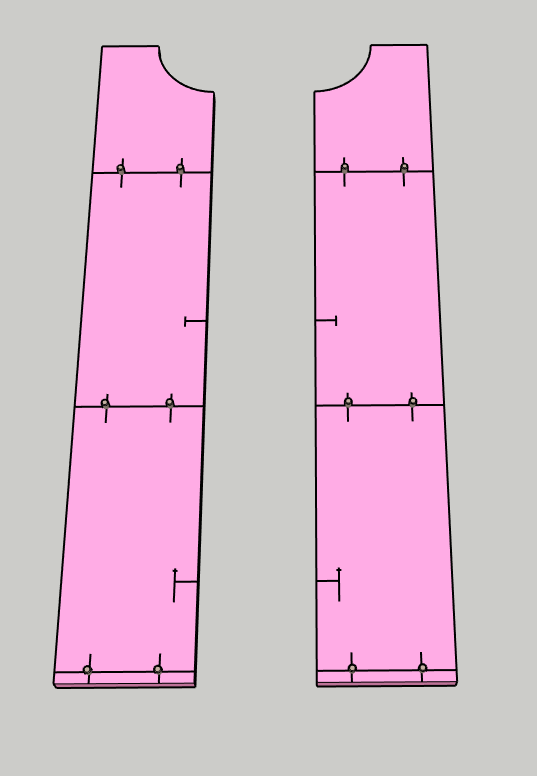
  • Lay the two side boards next to one another on your work surface so they are a mirror image of one another, insides facing up. (Like opening a book.)
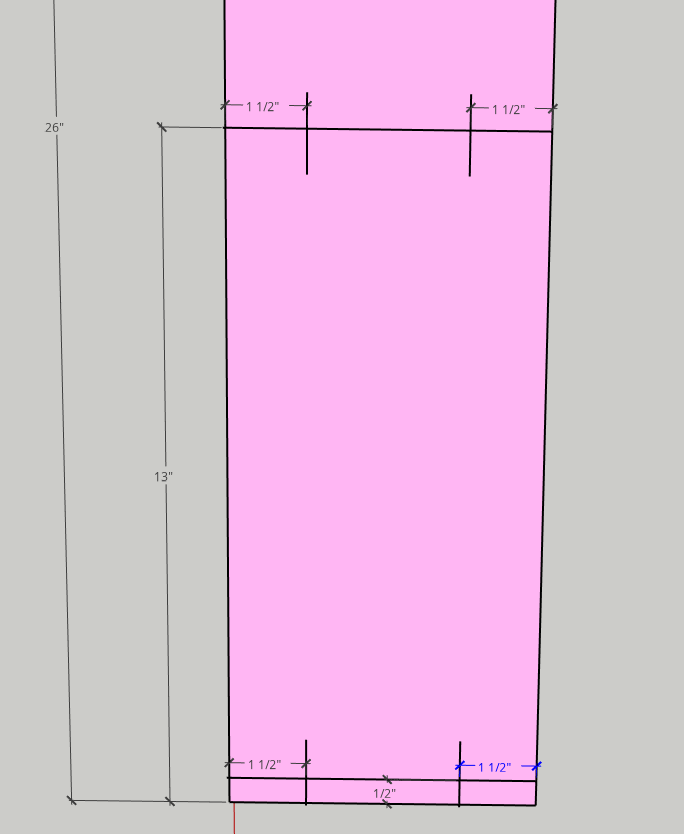
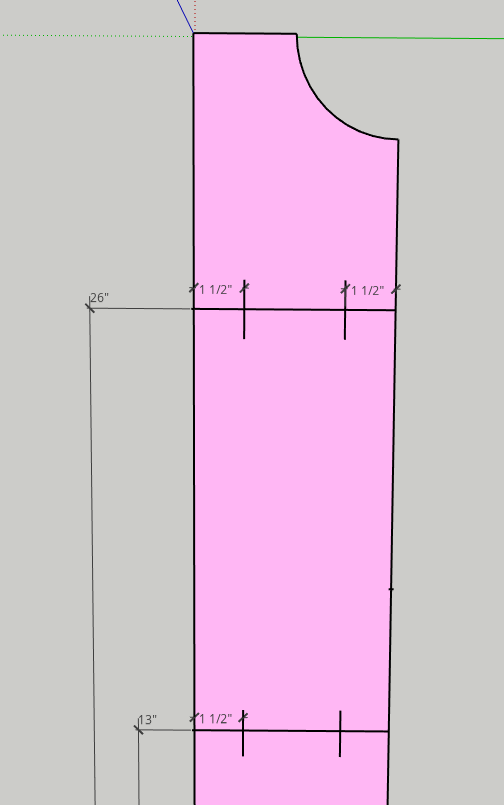
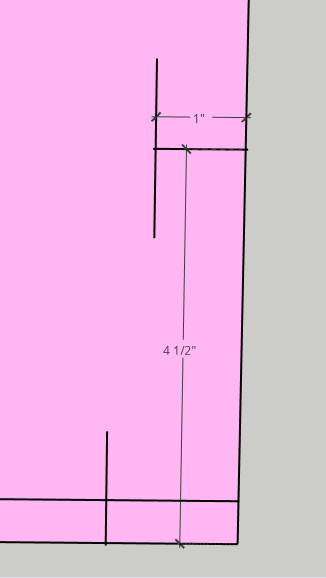
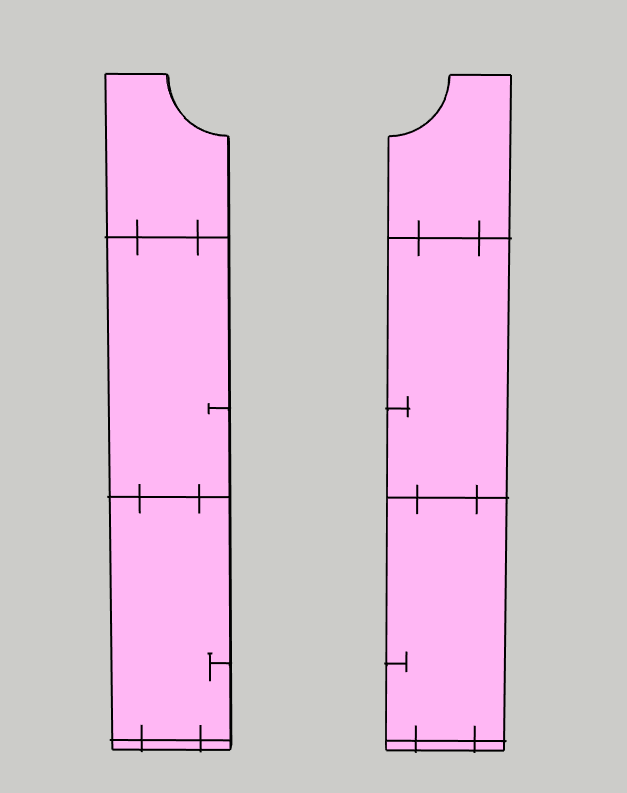
  • Use the diagram below for measuring and marking the placement of the dowels.

ย 


  • Each shelf dowel will be 1ยฝโ€ in from the front and back of the board and measure up 1/2โ€ณ, 13โ€ณ, and 26โ€ณ from the bottom of the board as shown.
  • Both long dowels will be measured and marked 1โ€ณ in from the front of each side and 4 ยฝโ€ and 17 ยฝโ€ from the bottom of the sides as shown

  • Repeat these markings for both sides of the bookshelf.
  • You should have a total of 16 markings. 8 for each side. 6 for the shelf dowels and 2 for the long dowels.

Step 3: Drill holes for dowels

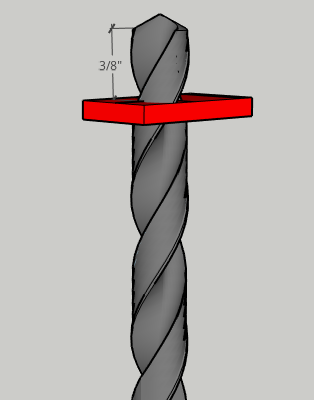
  • Using your 3/8โ€ณ drill bit place a piece of painterโ€™s tape on the drill bit to mark a depth of 3/8โ€ณ.ย  You donโ€™t want to drill through the sides of the bookshelf, just half-way.

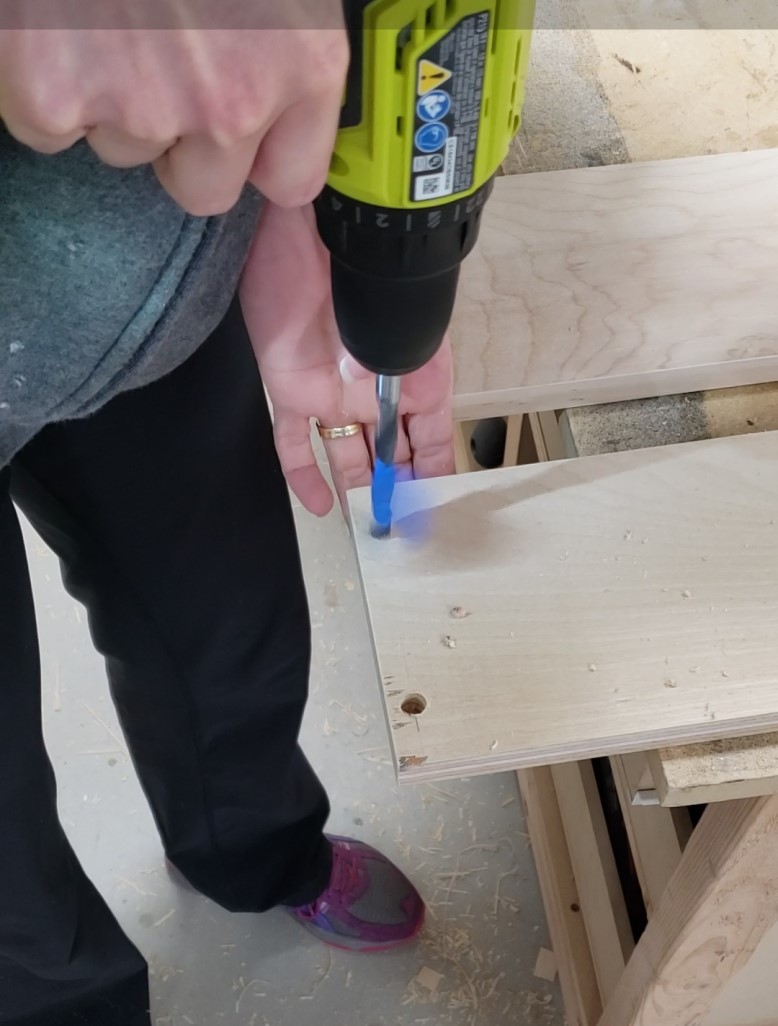
  • With the drill bit securely in your drill (and material clamped to your work surface), drill straight down into each marking of the side board until the drill bit has reached the depth of the tape.

  • You will create 16 holes in total, 8 for each side.

Step 4: Measure and mark dowel placement in shelf boards

  • Using your combination square, mark the center of each side edge of the 3 shelf boards
  • Next measure and mark 1 ยฝโ€ in from the front and back of the 3 boards as shown. Make this same 1 ยฝโ€ mark on the face of the boards as well for reference when using your doweling jig.

Step 5: Drill dowel holes in shelf boards

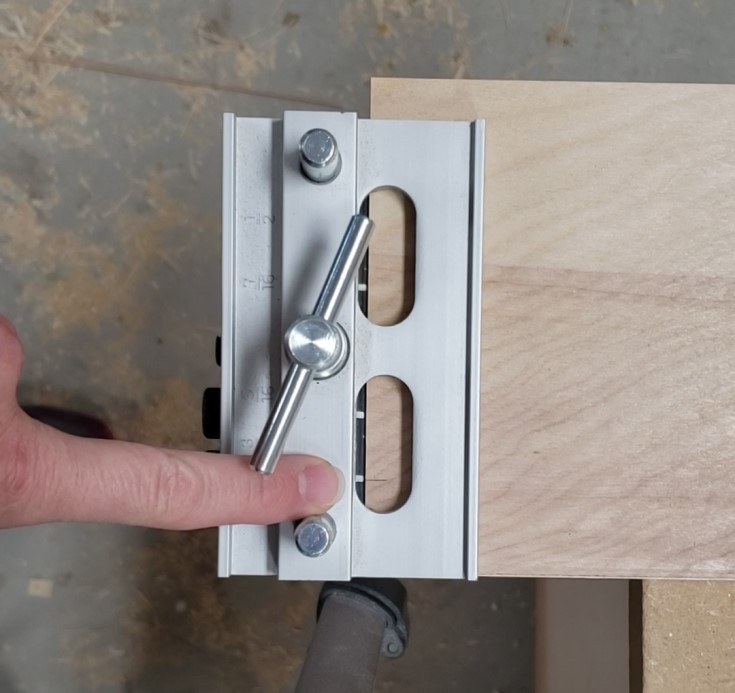
  • Iโ€™ll let you in on my secret! I use my Kreg pocket-hole bit for this step because it is 3/8โ€ณ, it makes drilling into the end grain much easier and has a collar that can be set to the depth I want!
  • The depth of your hole = length of the dowel minus 3/8โ€ณ (the depth of the hole in the side boards.)
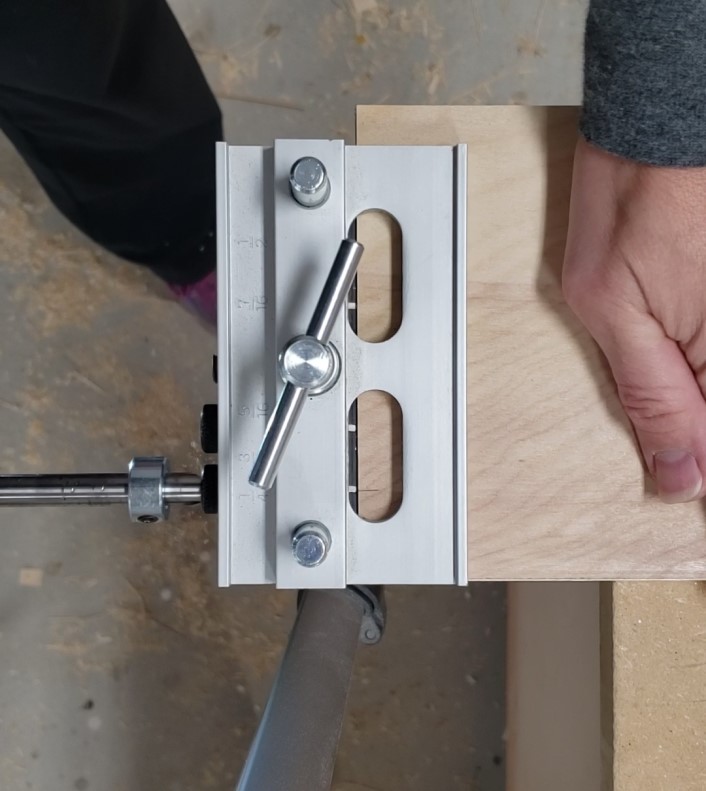
  • Now, using your doweling jig and the reference marks youโ€™ve created on the face of the board you can go ahead and drill the 12 holes to the depth determined above into the sides of the shelves.

Step 6: Dry fit!

  • It is important when using dowels for joinery that you complete a dry fit test of the project first.
  • You want to make sure the holes are large enough and deep enough for the dowel and that all pieces can securely fit together without gaps.

Assemble the Shelf!

Step 7: Install shelf dowels and shelves

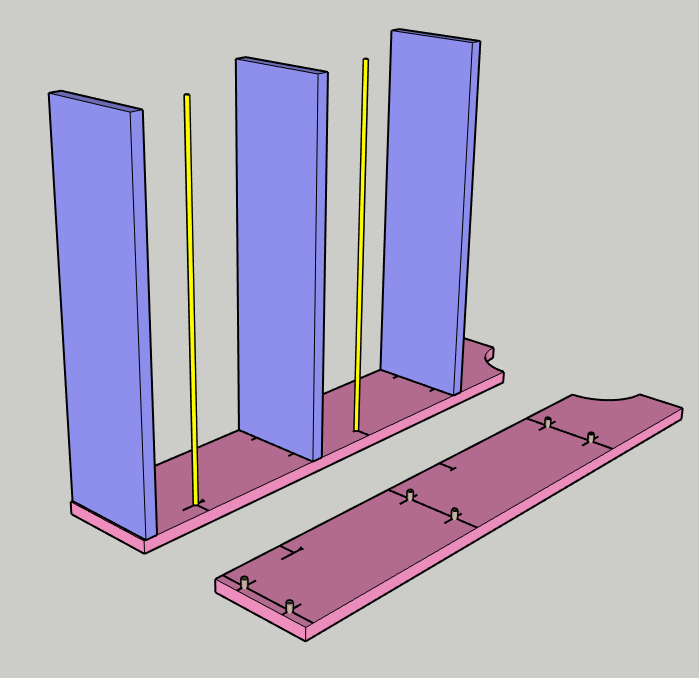
  • Using wood glue install all 12 shelf dowels into the holes of both side boards.
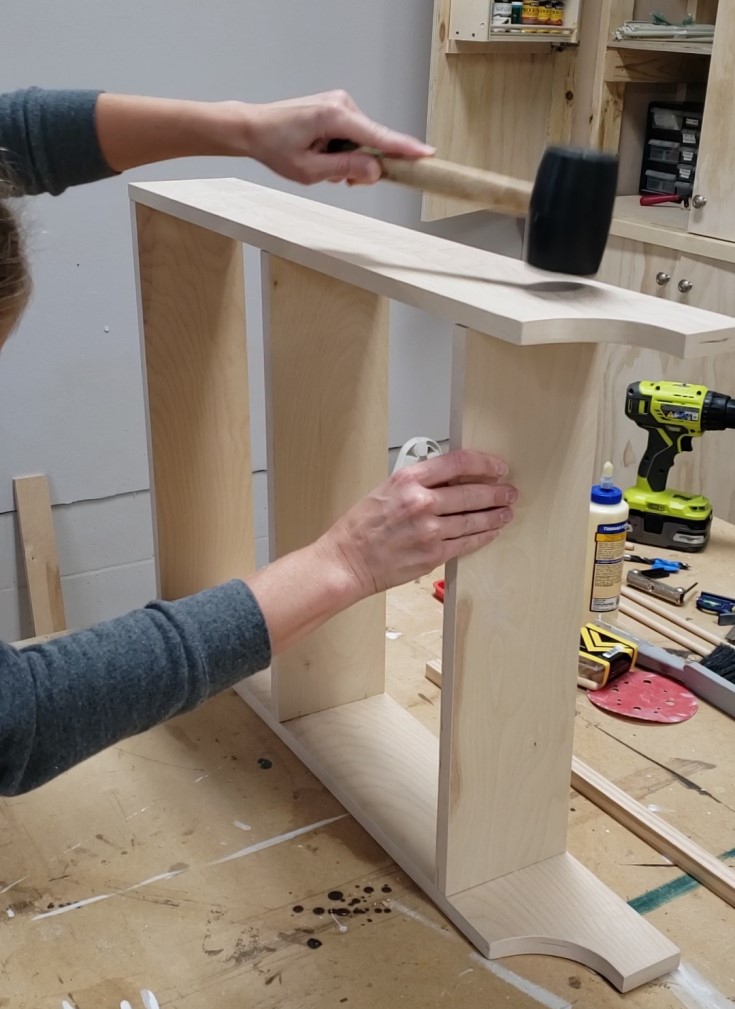
  • Next, using wood glue, install the shelves over their respective dowels and gently tap into place using a rubber mallet.

ย 

Step 8: Install long dowels

  • Place a drop of glue in both holes for the long dowels and insert dowels

Step 9: Install the remaining side board

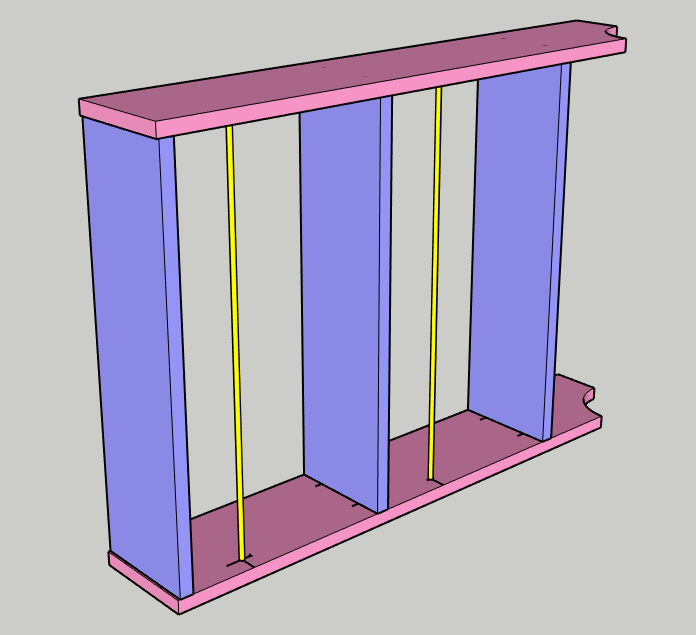
  • Carefully place the remaining side board over the shelves and long dowels have already been installed.
  • Align the dowels and long dowel holes and gently tap the side into place with a rubber mallet.

  • Check for square and clamp into place to allow the glue to dry.

Note: As you can see I forgot to insert the long dowels during assembly. I was able to add them later and I will have a scar to show for it!

Step 10: Hanging the shelf on the wall

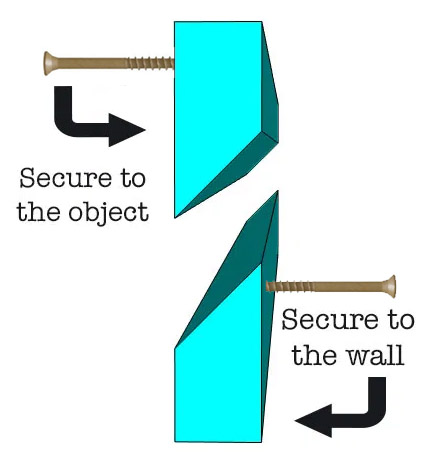
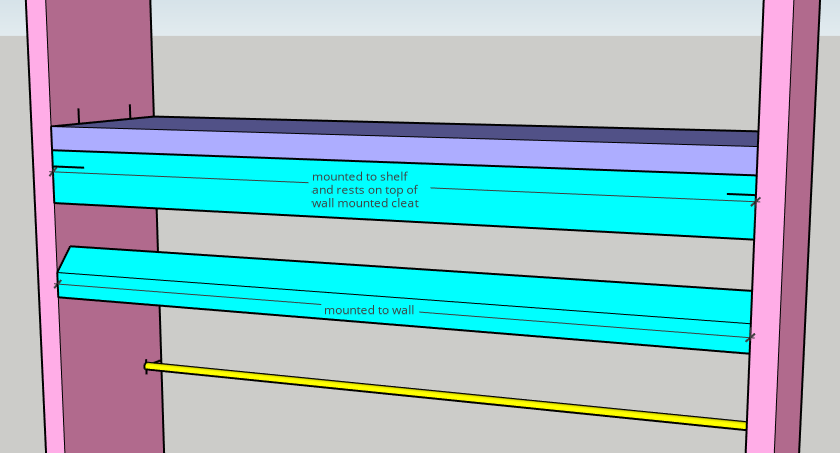
For this step, I chose to use a French cleat. I wanted the shelf to be flush to the wall and very secure which is what makes a French cleat the best choice.ย  View the basic diagram below or for step by step instruction check out How to Make and Use a French Cleat.

DIY French Cleat


I used pocket screws to secure the top portion of the French cleat to the bookshelf.

Once the French cleat is secured to the bookshelf and the wall you will be able to hang the bookshelf securely on the wall and place as many books in it as needed.ย  My daughter loves her new bookshelf and she always feels so special when Mom makes something just for her.

I hope this tutorial proves helpful in adding a little style and organization to your home.

Hi! Iโ€™m Kristen, from In Her Garage,ย and I am a self-taught woodworker and DIY fanatic from Minnesota where I live with my husband and our two daughters. Between being a wife, mom and, registered nurse, I try to make as much time for DIY as possible. My love for building came after our family built our current home in 2015. After we moved in, we needed furniture and instead of spending massive amounts of money to order the pieces we wanted I decided that I would build them myself. I started with a buffet table plan from the fabulous Ana-white and quickly set out to remodel my entire home office.

Since then I have started a side business building furniture for the people in my community. I love hearing my clients talk about the pieces they wish they had whether it be aย rustic buffet table, aย one drawer side table, or aย toy boxย and then making it a reality for them. While starting my small business it made perfect sense that I would document my building journey so I simultaneously launched theย In Her Garage blogย and I love sharing my plans, tips and tricks.

Making something beautiful with your own two hands through a little preparation and determination is an amazing feeling and I hope to bring inspiration and know-how to those looking to tackle a big or small project.
I am so glad that you found me here and please feel free to connect with me onย Pinterest,ย Instagram, Facebook, and Youtube to see what I am working on right now.


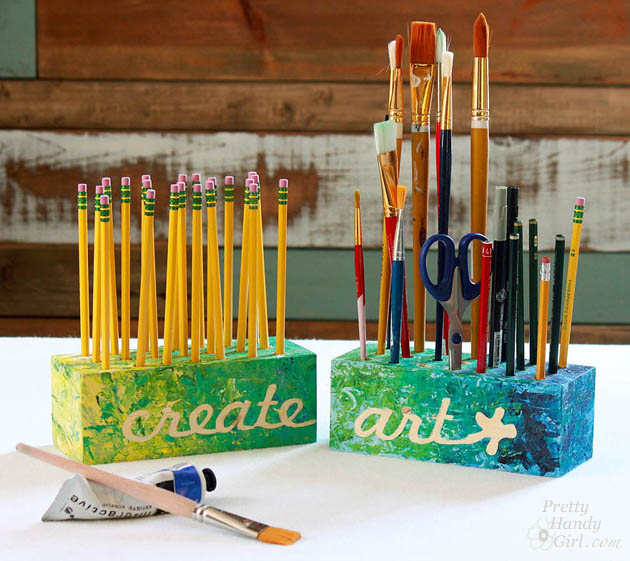
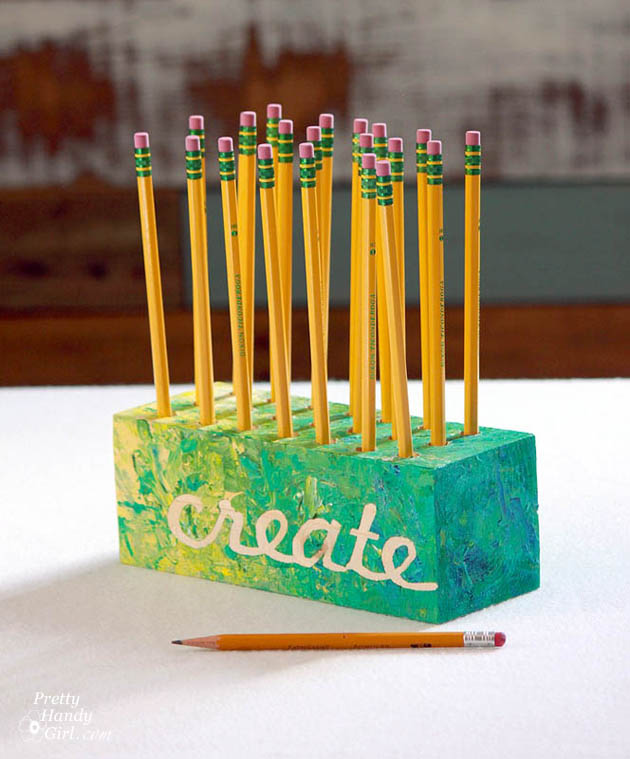
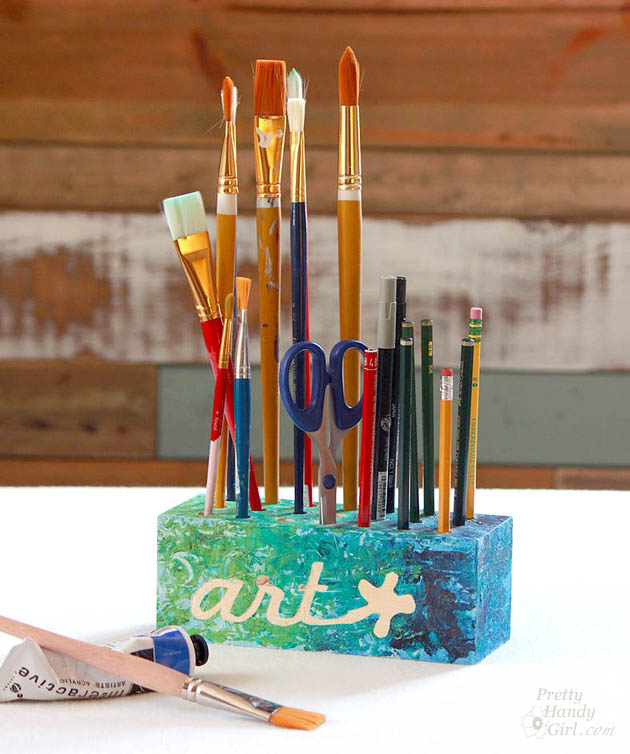
Need a quick gift using scrap wood? A Creative Block Desk & Art Utensil Holder is an easy and fun gift to make and certainly a project that you can customize to meet your needs. Best of all, the kids can help with the painting step!

create_art_block_holders_sm

Creative Block Desk & Art Utensil Holder

Motherโ€™s Day is this coming weekend! Have you decided how to show her your appreciation and love?! I did! My mother is a professional artist. She creates amazing paintings that inspire others and brightens their homes. For Motherโ€™s Day I wanted to brighten her studio with these art utensil holders. I call them โ€œCreative Blocks.โ€

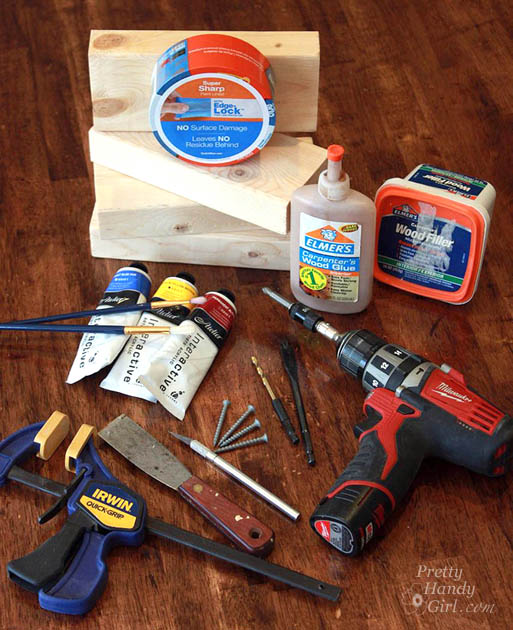
Go ahead and raid your scrap pile and join us as we make these colorful and fun Creative Block Desk & Art Utensil Holders.

Materials:

(Iโ€™ve includedย affiliate links for your convenience. I earn a small percentage from a purchase using these links. Thereย is no additional cost to you. You canย readย more about affiliate links here.)

materials_wood_blocks_sm

Instructions:

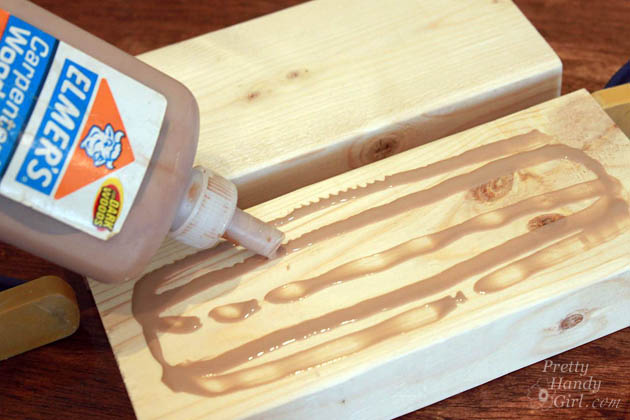
1. Block assembly: Select two 2×4โ€ณ scraps cut to the same length. Spread glue on one board and sandwich them together.

glue_blocks_together_sm

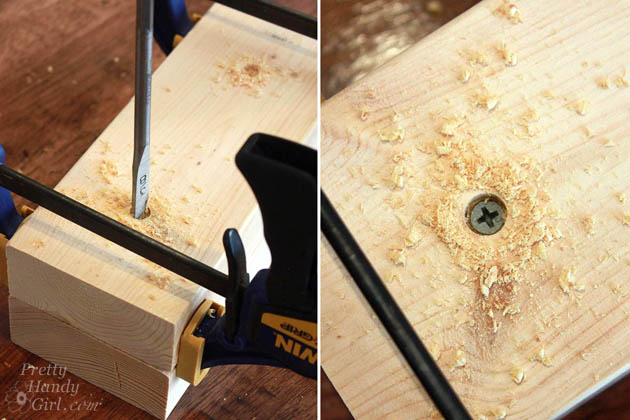
Clamp the wood together and drill two small holes to countersink the heads of the screws. Drive two screws into the bottom of the wood to hold the pieces together.

drill_blocks_together_sm

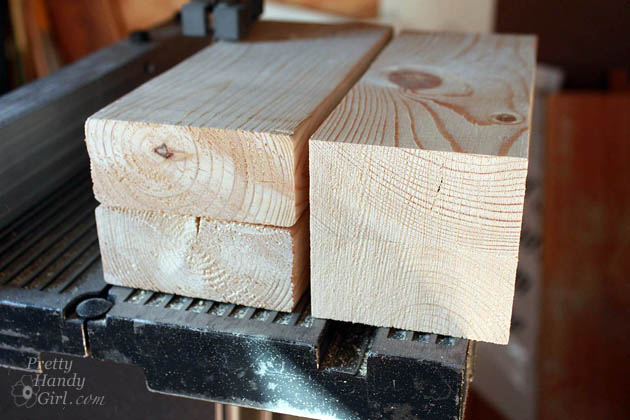
Use a band saw, jigsaw, or table saw to trim off the rounded edges of the wood so you have a square block of wood with straight corners.

square_off_2x4s_bandsaw_sm

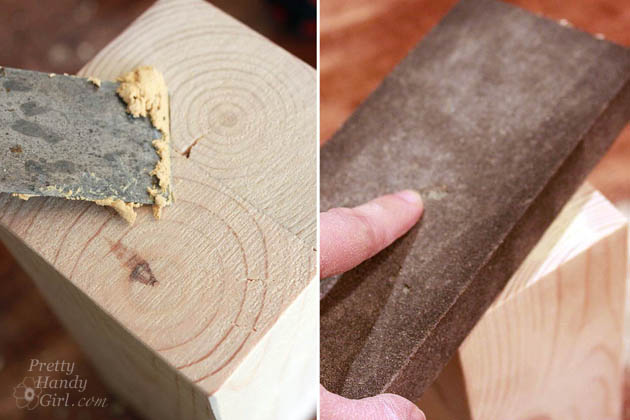
Putty any cracks or holes. Sand until smooth.

putty_and_sand_blocks_sm

2. Creating the mask:

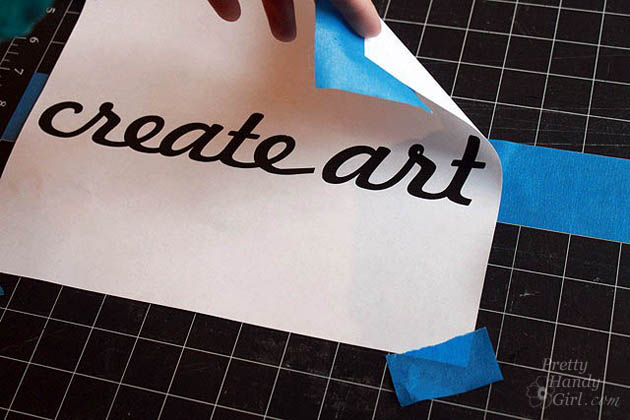
If you have a craft cutter (Silhouette or Cricut) you can create a mask in vinyl easily. But, if you donโ€™t you can use the computer to print out your words. Lay the print out on top of a strip of Painterโ€™s Tape. Use a few pieces of tape to secure the corners.

create_art_printout

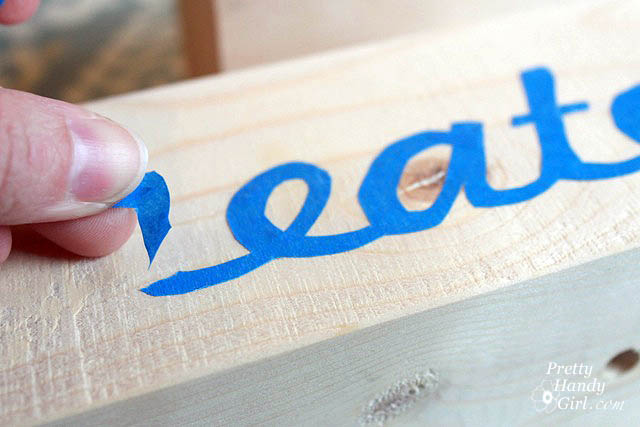
Trace around the words with the X-acto knife (be sure to have a few fresh blades on hand.) Transfer the resulting cut-out tape onto the block of wood. Press the edges of the tape mask to secure the tape.

add_scotch_blue_tape_letters

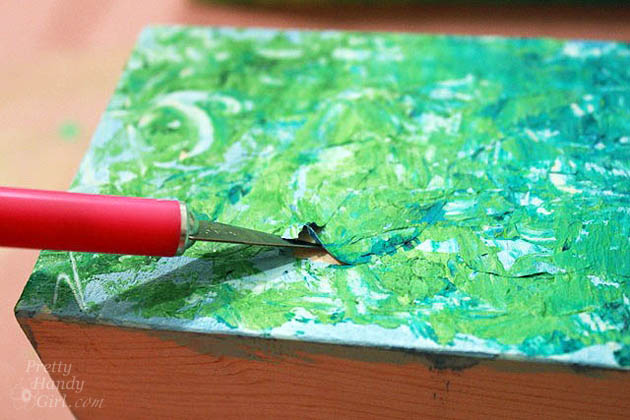
3. Painting the block: Paint a base color onto the block. Then use a brush and/or palette knife to dab thick paint over the block (minus the base.) Use the X-acto knife to gently peel off the tape mask. Let the paint dry thoroughly overnight.

lift_tape_up

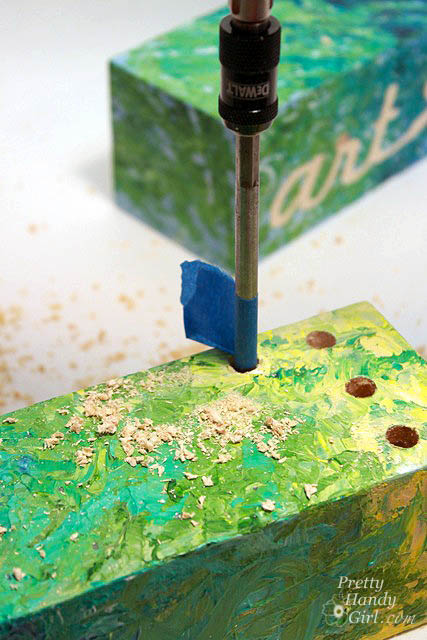
4. Drilling Holes: ย After the paint has dried completely, mark the location of the utensil holes with a pencil. Put a piece of painterโ€™s tape on the drill bit to mark the depth of your holes. Clamp the block and drill holes at each pencil mark.

drill_holes

Dump sawdust out of the holes.

Wrap up the blocks in gift wrap and enjoy the look of joy as your Mom opens her Creative Block Motherโ€™s Day gift!

create_pencil_holder_sm

art_brush_holder

You know, as an artist myself, I almost loved these too much to give them away. But, my Mom is worth it. (And I can make another set if I want ;-).)

create_art_block_holders_sm

For more last-minute Motherโ€™s Day gift ideas and many other creative projects, check out the Gift Ideas section here on the blog.

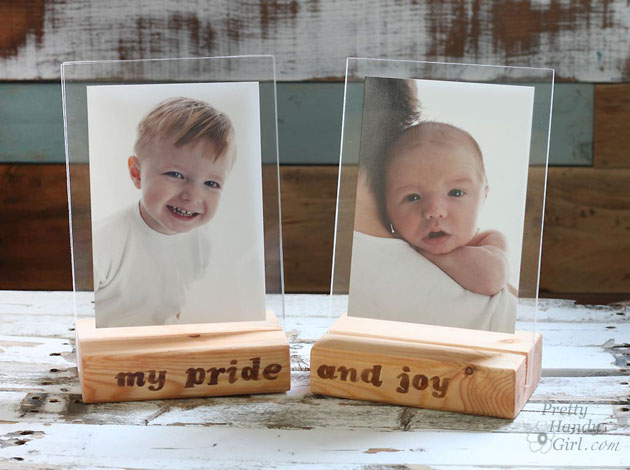
PHGFancySignIf you liked this project, youโ€™ll love these floating picture frames using more 2×4 scrap wood.

wood-block-picture-frames

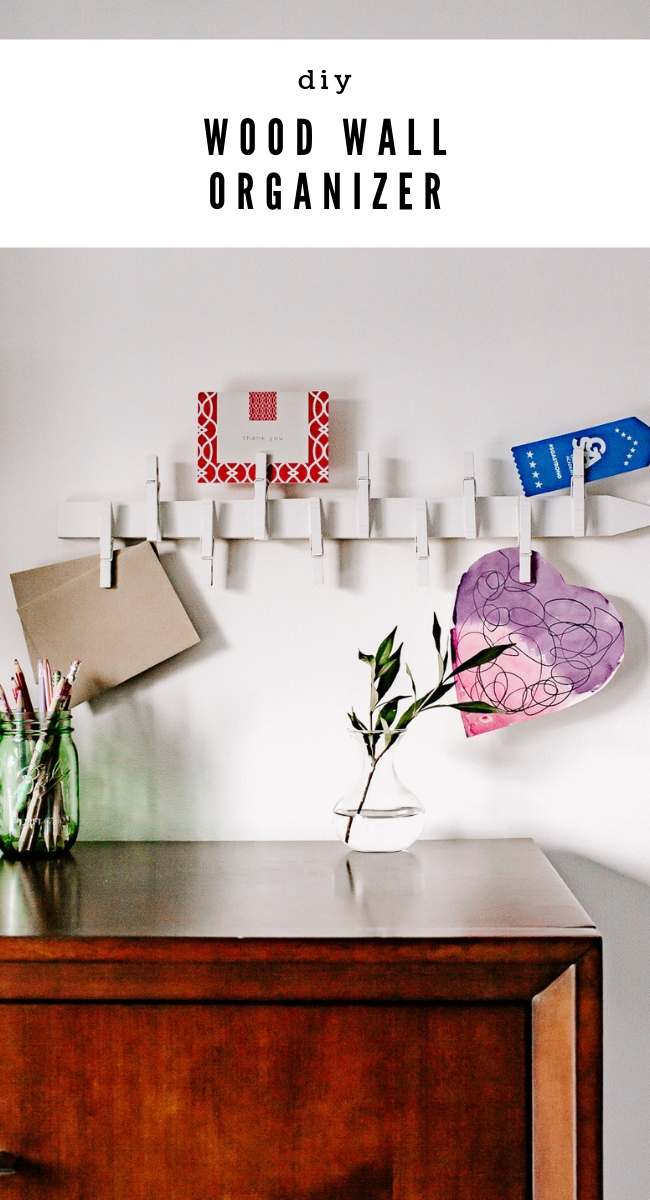
diy wood wall organizer

How to Make a DIY Wood Wall Organizer

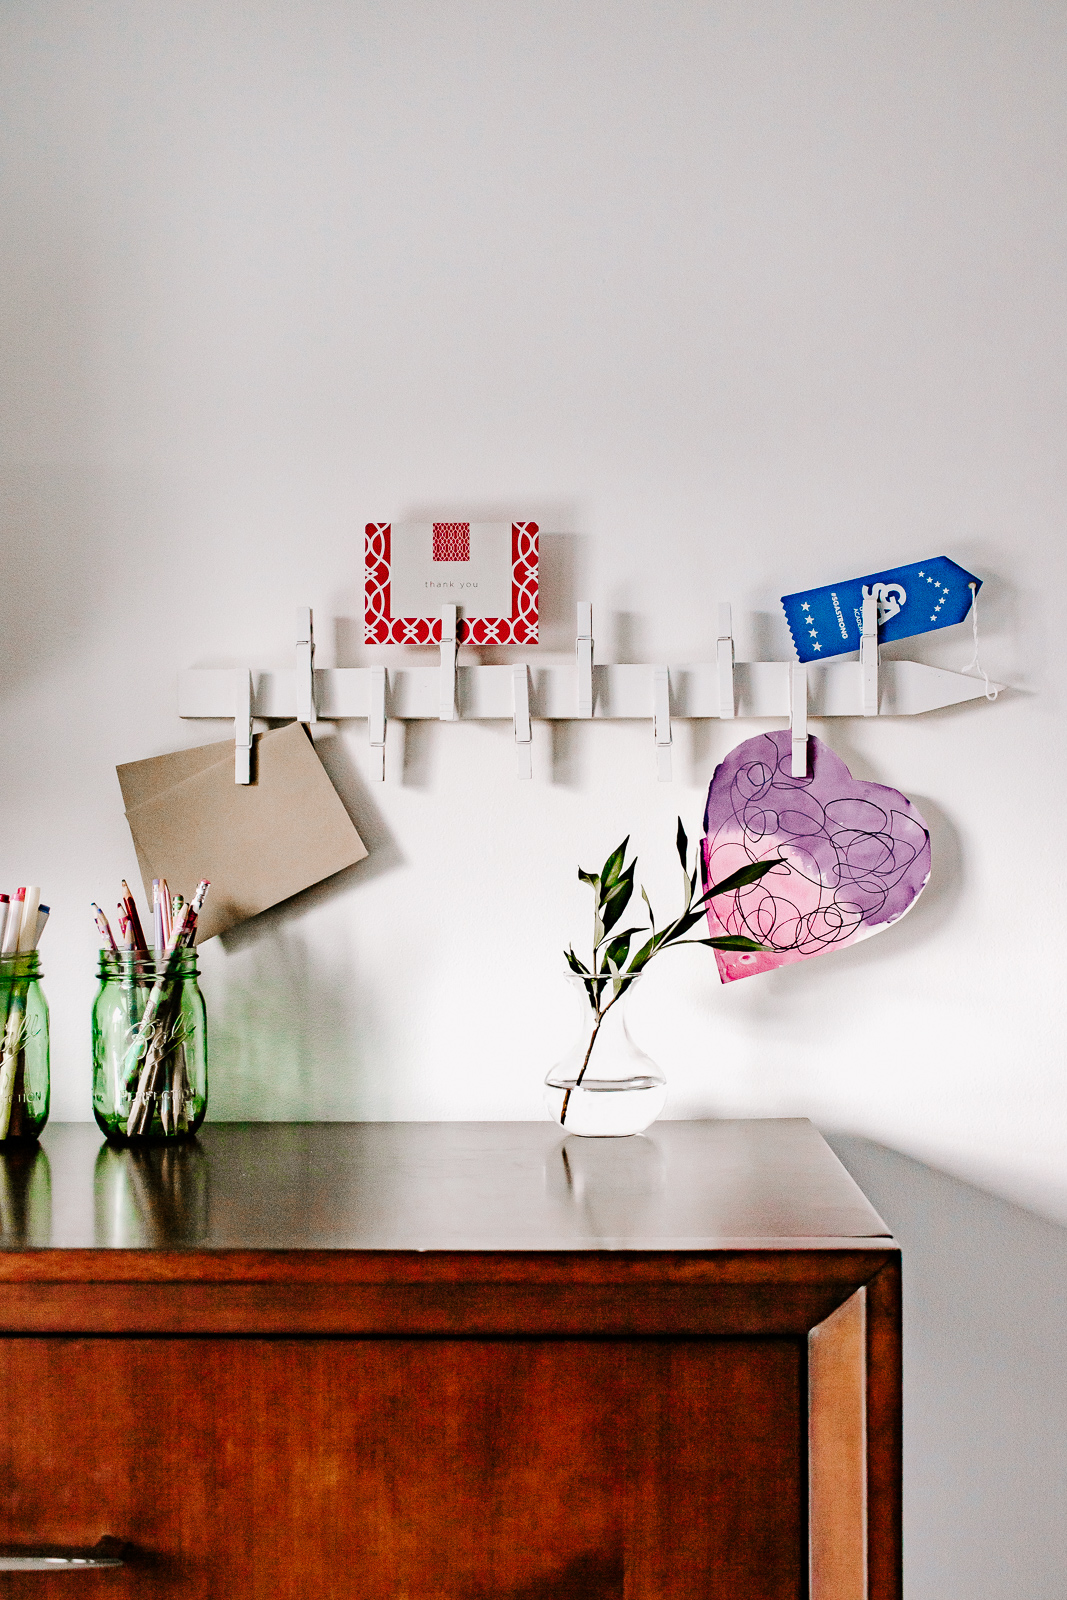
Hello, Pretty Handy Girl Readers! ย Iโ€™m Karen and Iโ€™m the blogger behind Decor Hint and a new member of the Pretty Handy Girl contributor team.ย  Iโ€™m so excited to be here today. ย Today, Iโ€™m going to show you how to make a simple DIY Wood Wall Organizer. There is something about the New Year that always motivates me to clean up and organize my home. ย Iโ€™m always looking for new ways to organize my things but I still want to have it look polished and well decorated. Only Iโ€™m not interested in spending a lot of money. (Which is why I tend to DIY everything!) Iโ€™ve been seeing these cute wall organizers everywhere and I thought: โ€œI could totally make that.โ€ย  So here I am with a new project! Letโ€™s get started, shall we?

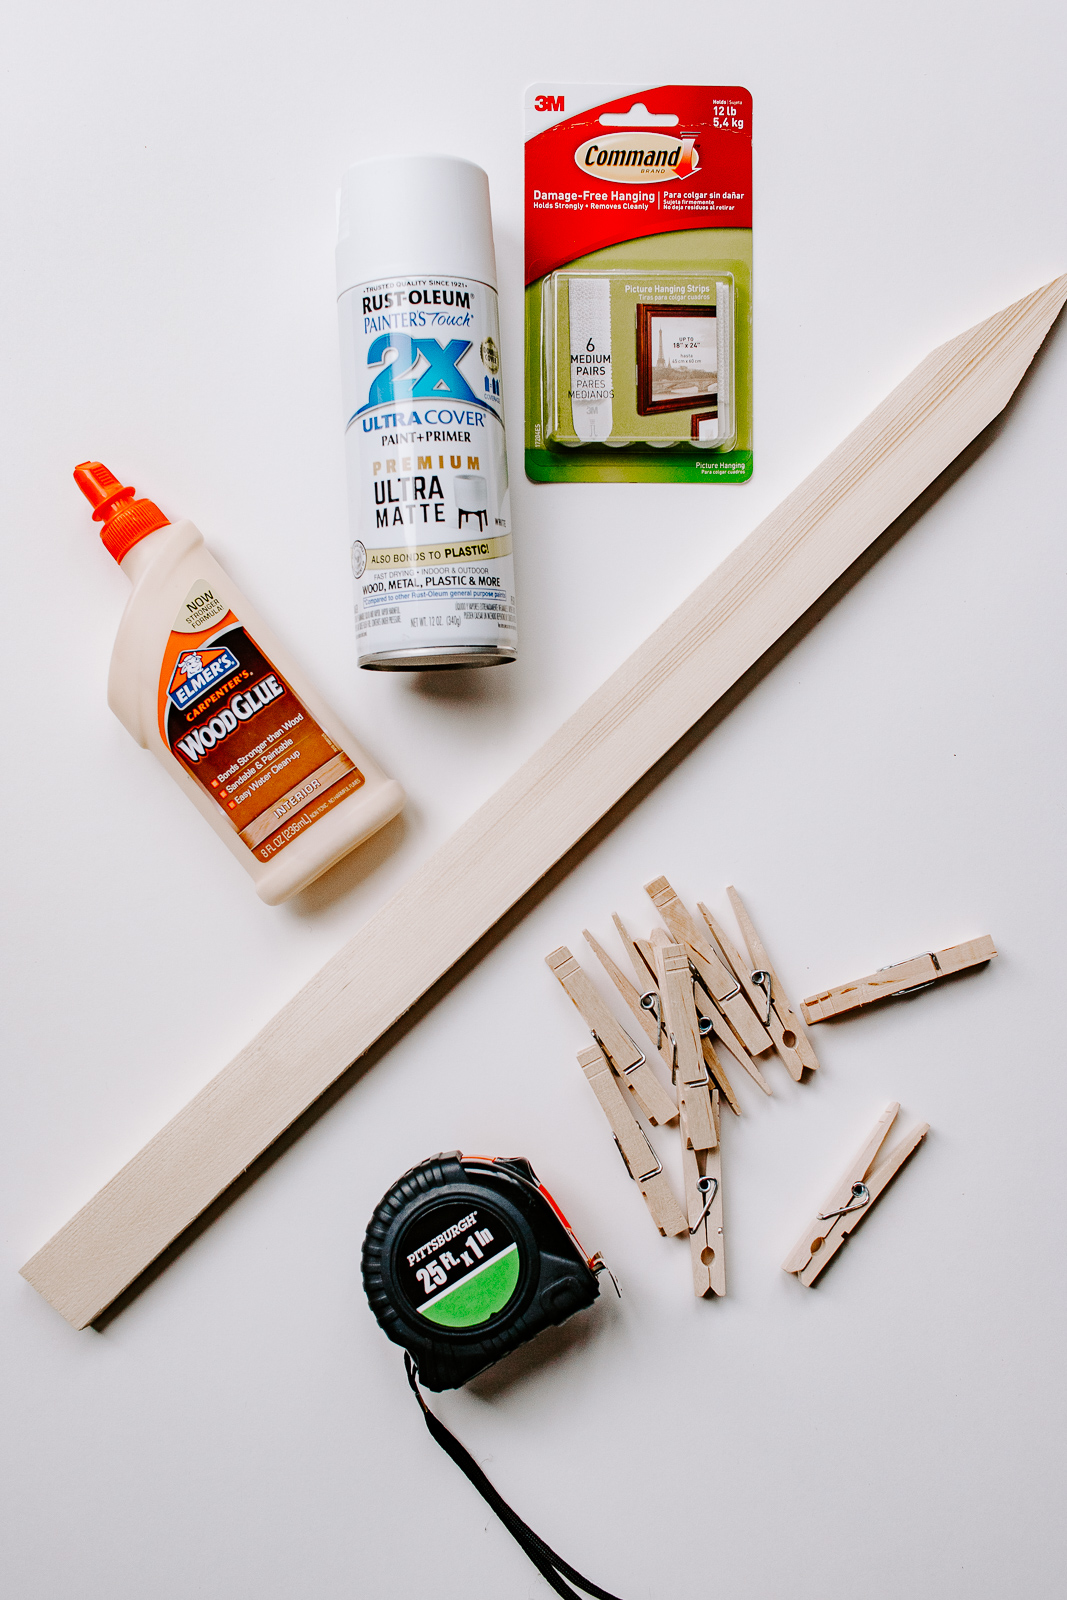
Materials:

  • Wood Garden Stake โ€“
    • This cost me a buck from my local hardware store! You could also use a regular piece of scrap wood and cut it down to the size you need. ย For dimensions, my garden stake is 2 inches wide by 24 inches long
  • Wood Glue
  • Wooden Clothespins
  • Q-Tip
  • Tape Measure
  • Spray Paint (Optional)ย ย 

Wood Wall Organizer Tutorial

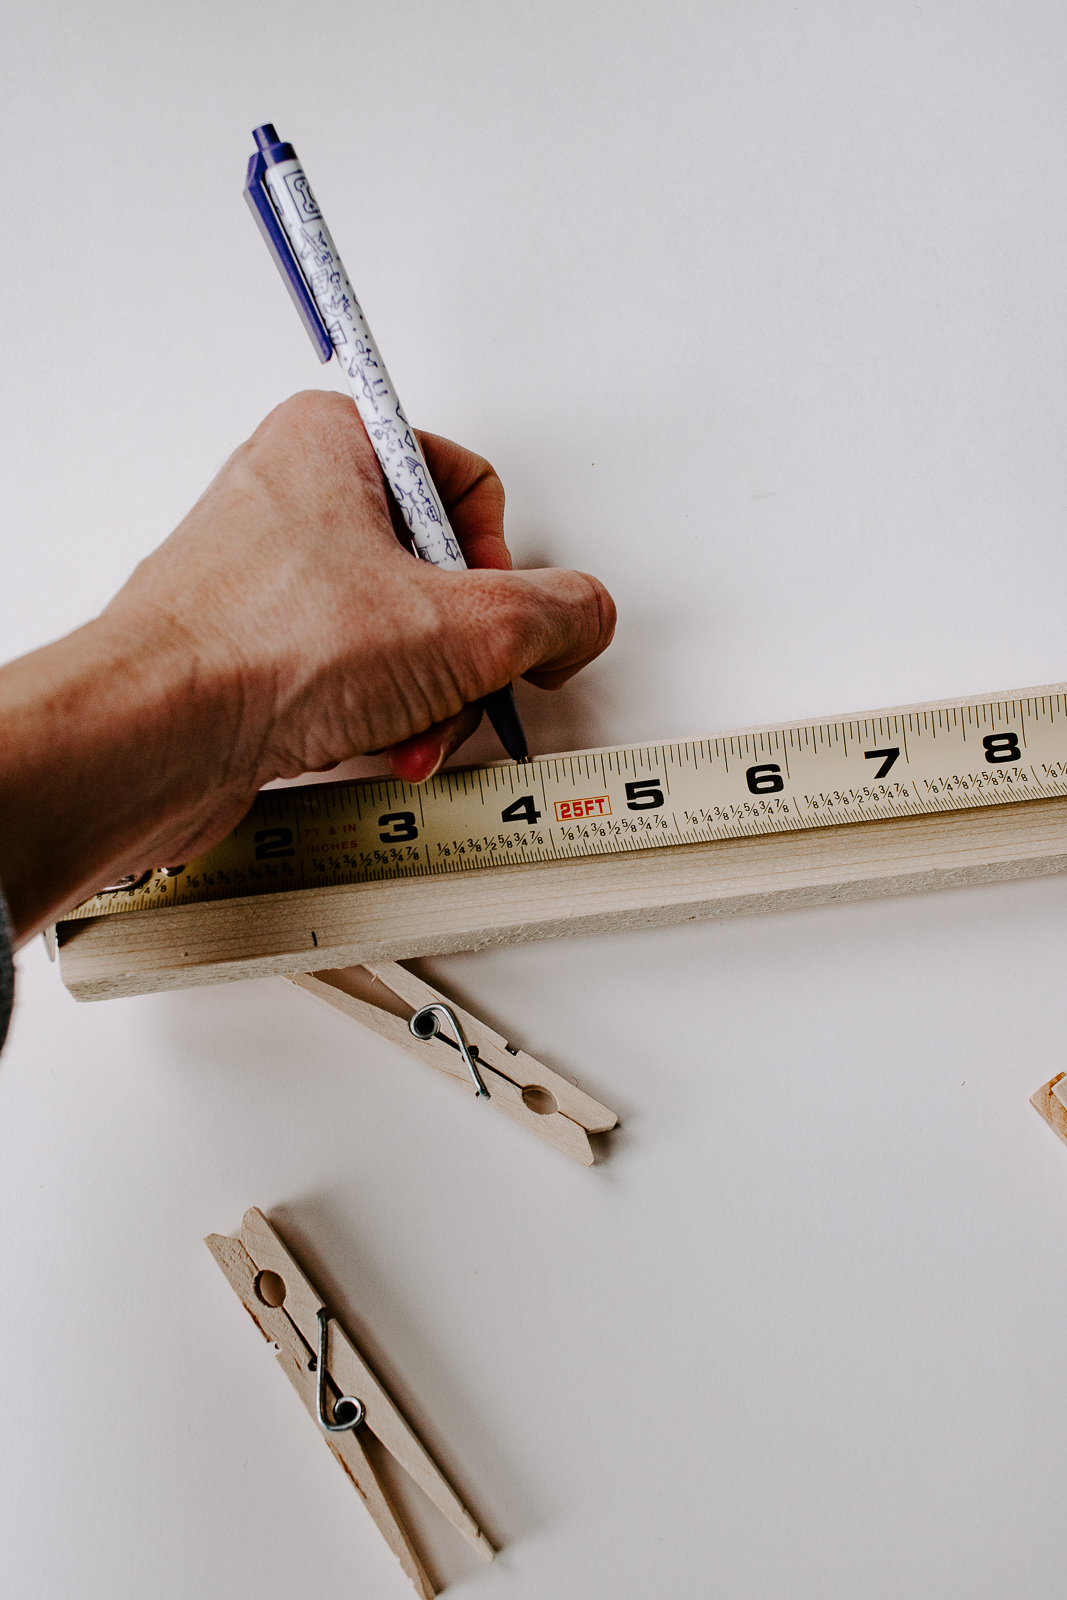
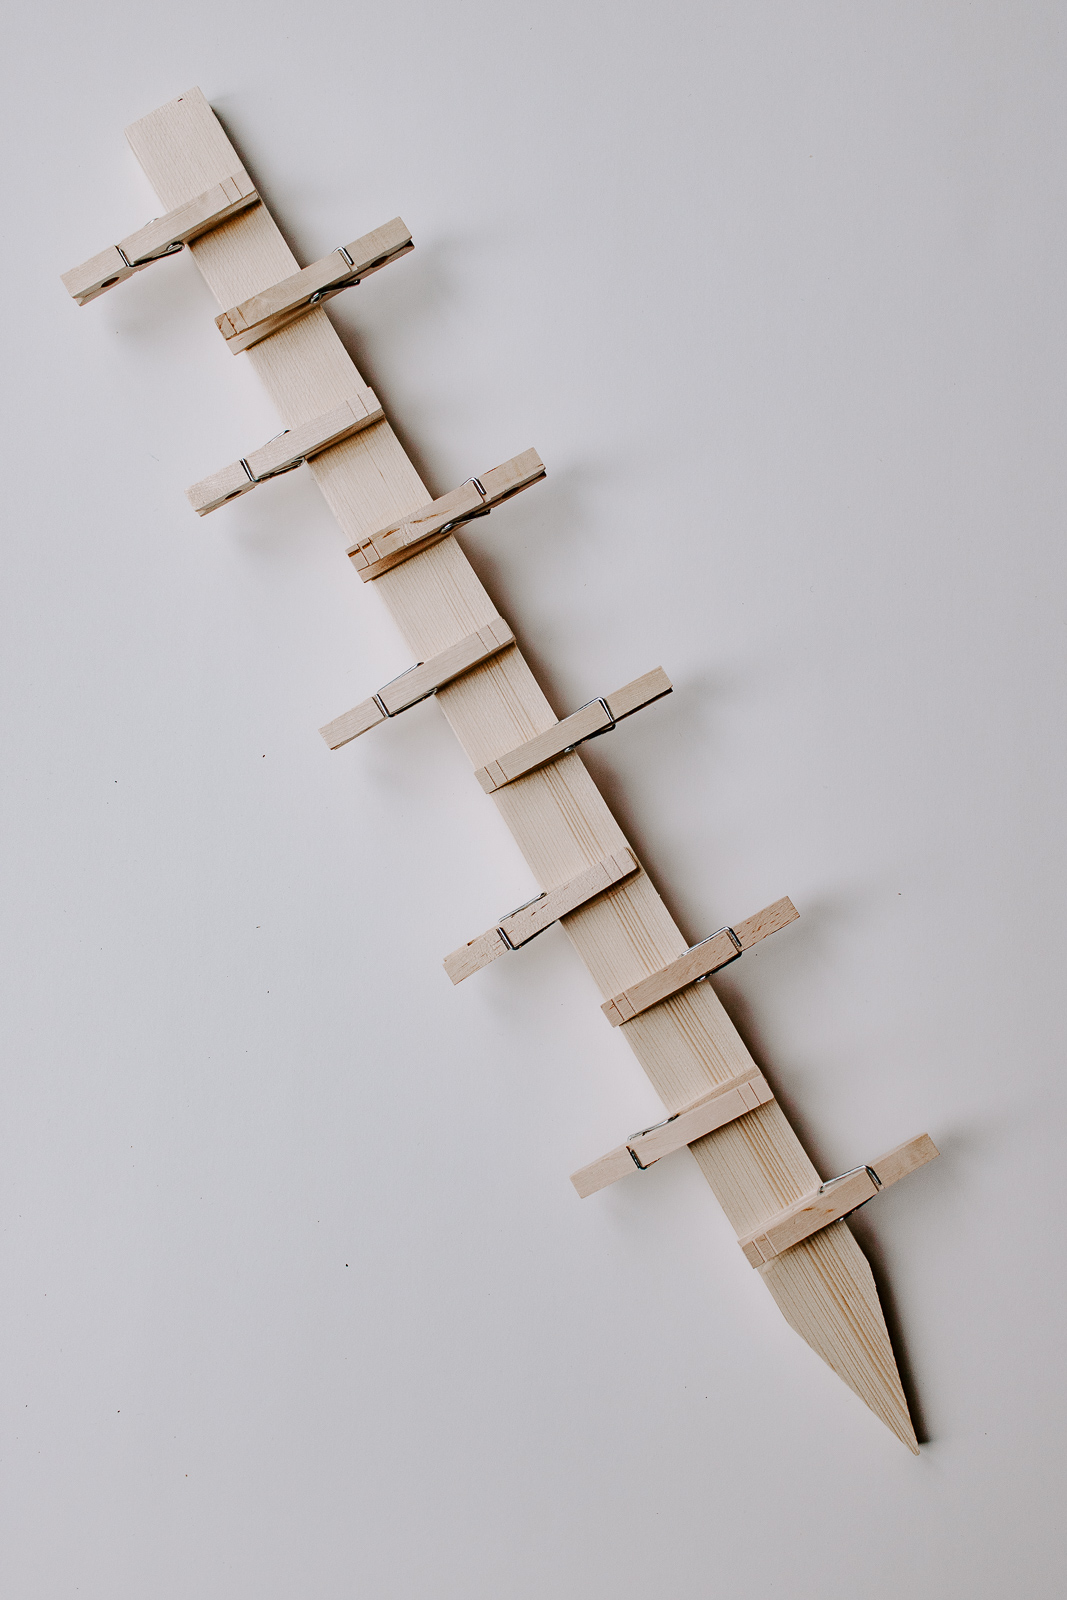
Step 1 :Take your tape measure and mark where you want your clothespins to be on your piece of wood. ย Two inches apart and alternated top and bottom is a good pattern.

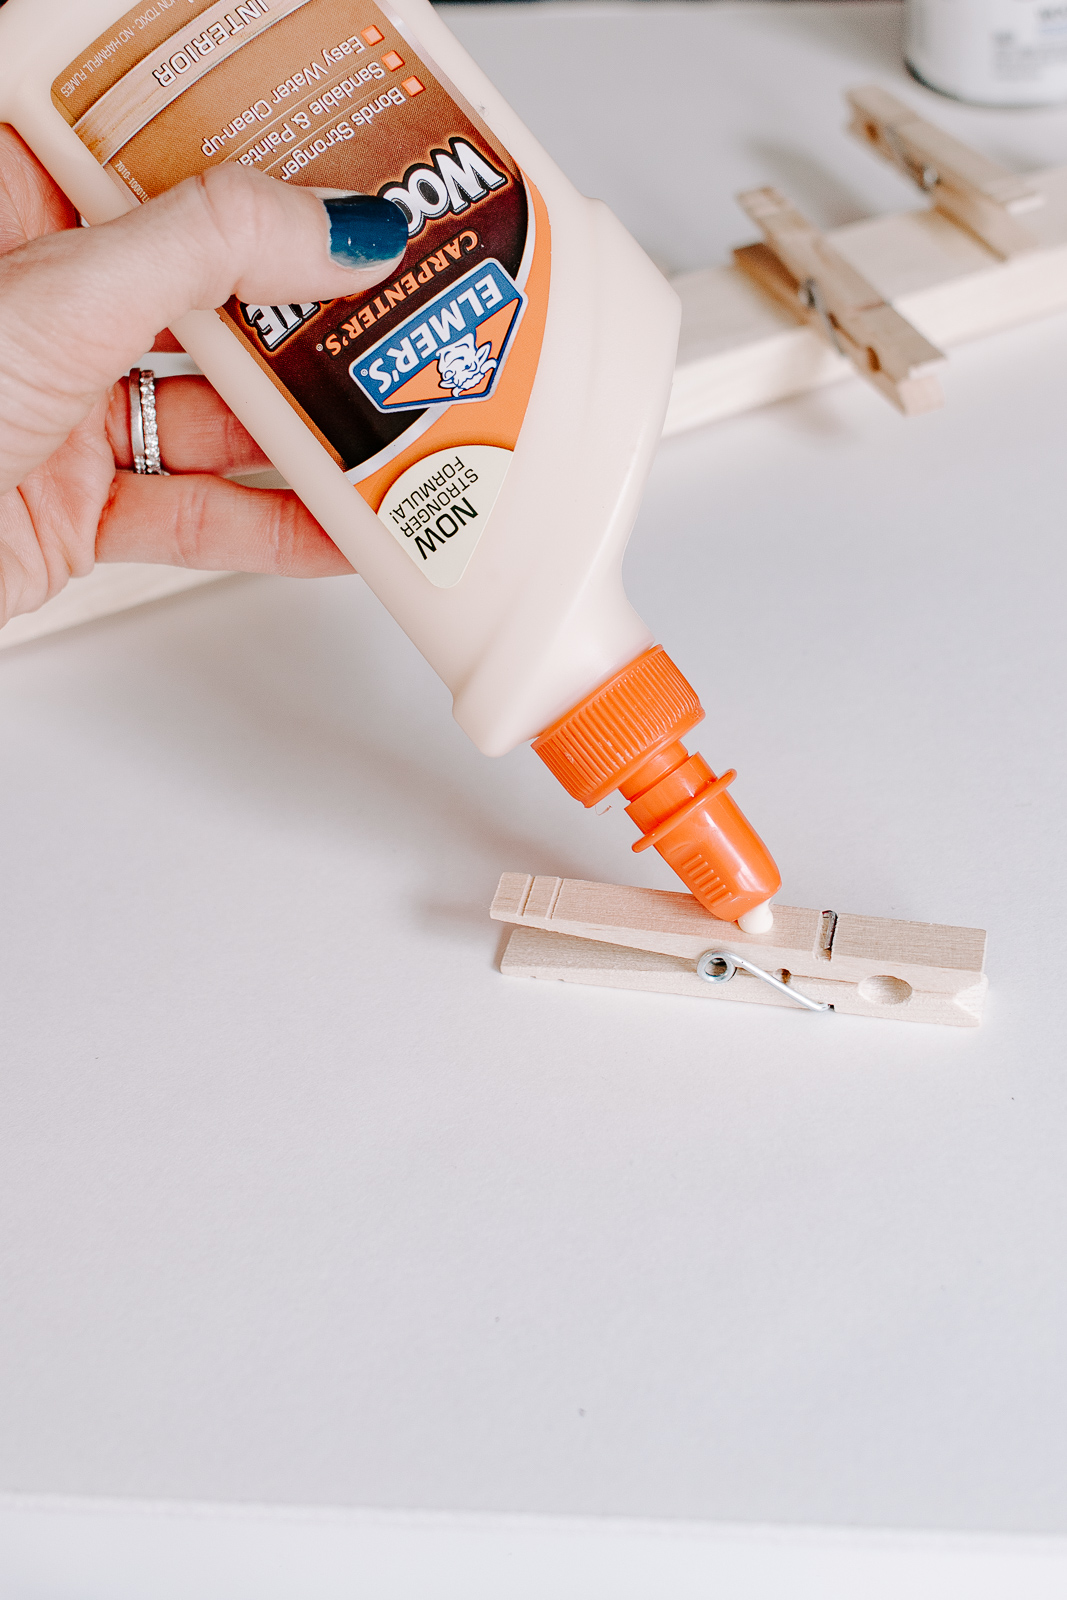
Step 2 : Attach the clothespins to your piece of wood or garden stake using wood glue. ย Use your pen marks as your guide. Squeeze a little wood glue on your wood piece and a little glue on your clothespins.

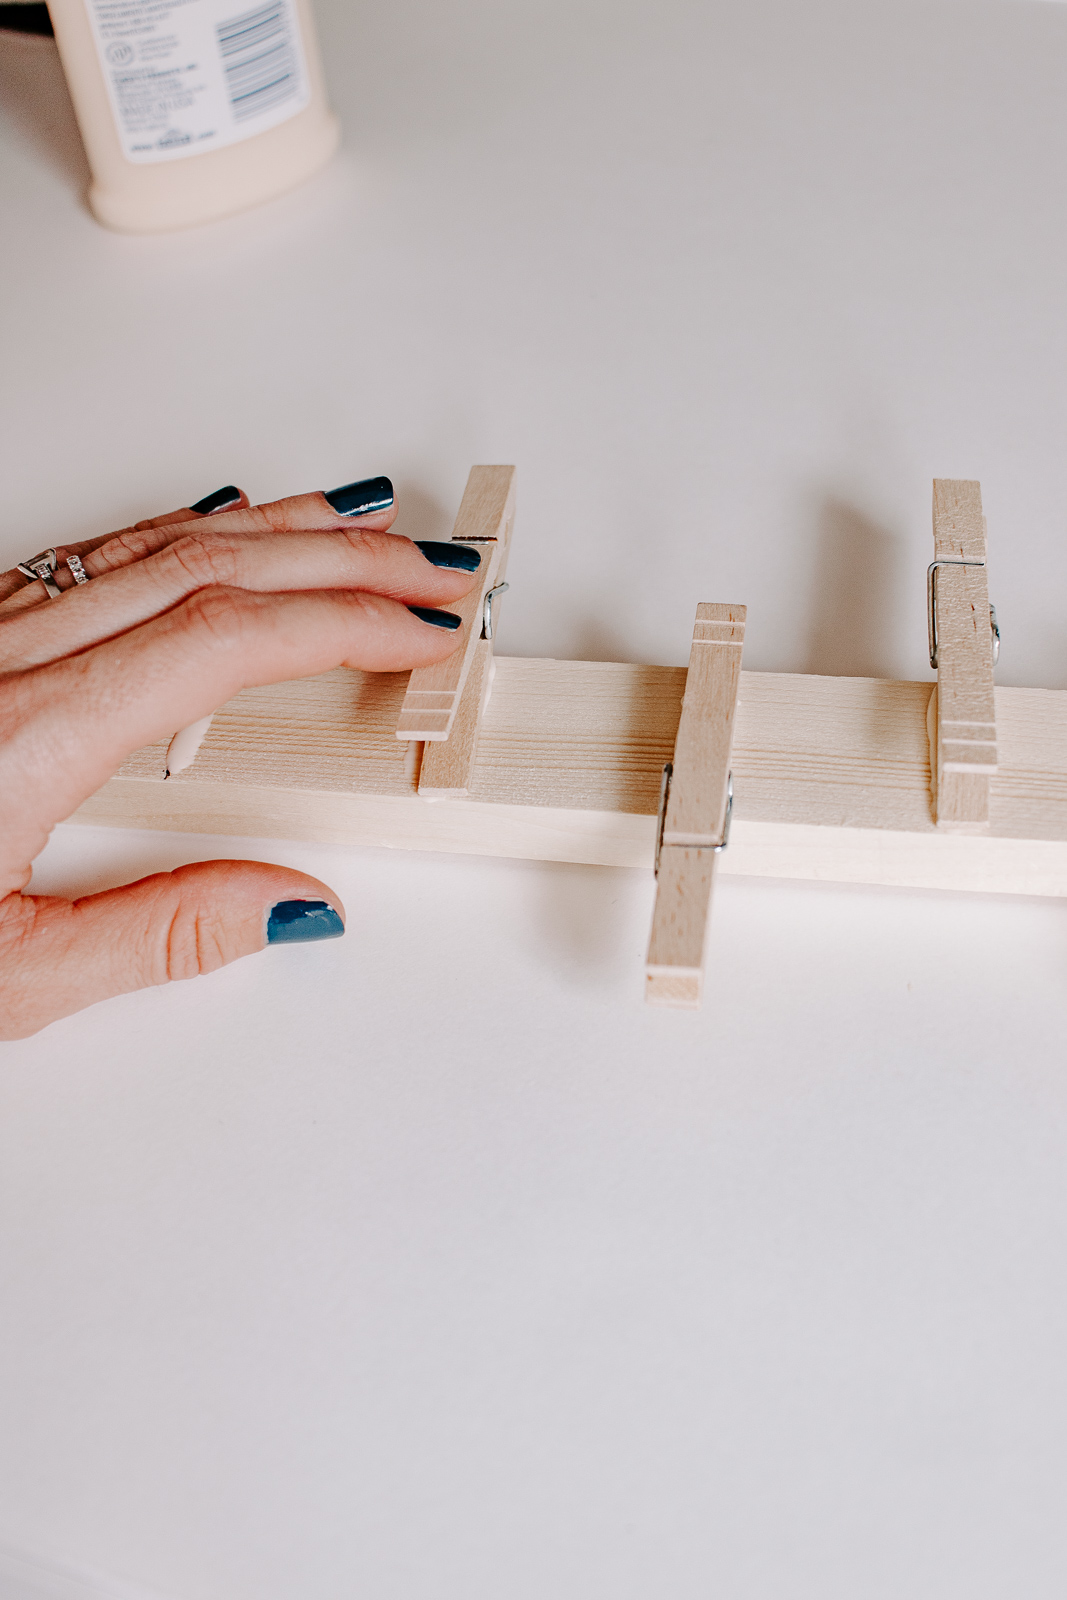
Place the clothespins onto the wood piece and press firmly for a few seconds. Make sure the โ€œmouthโ€ part of the clothespin faces out. If excess glue squeezes out, use a Q-tip to remove the excess. ย Repeat this step with each clothespin. Allow to dry overnight.

Hereโ€™s what it looks like so far!ย  Pretty cool, right?

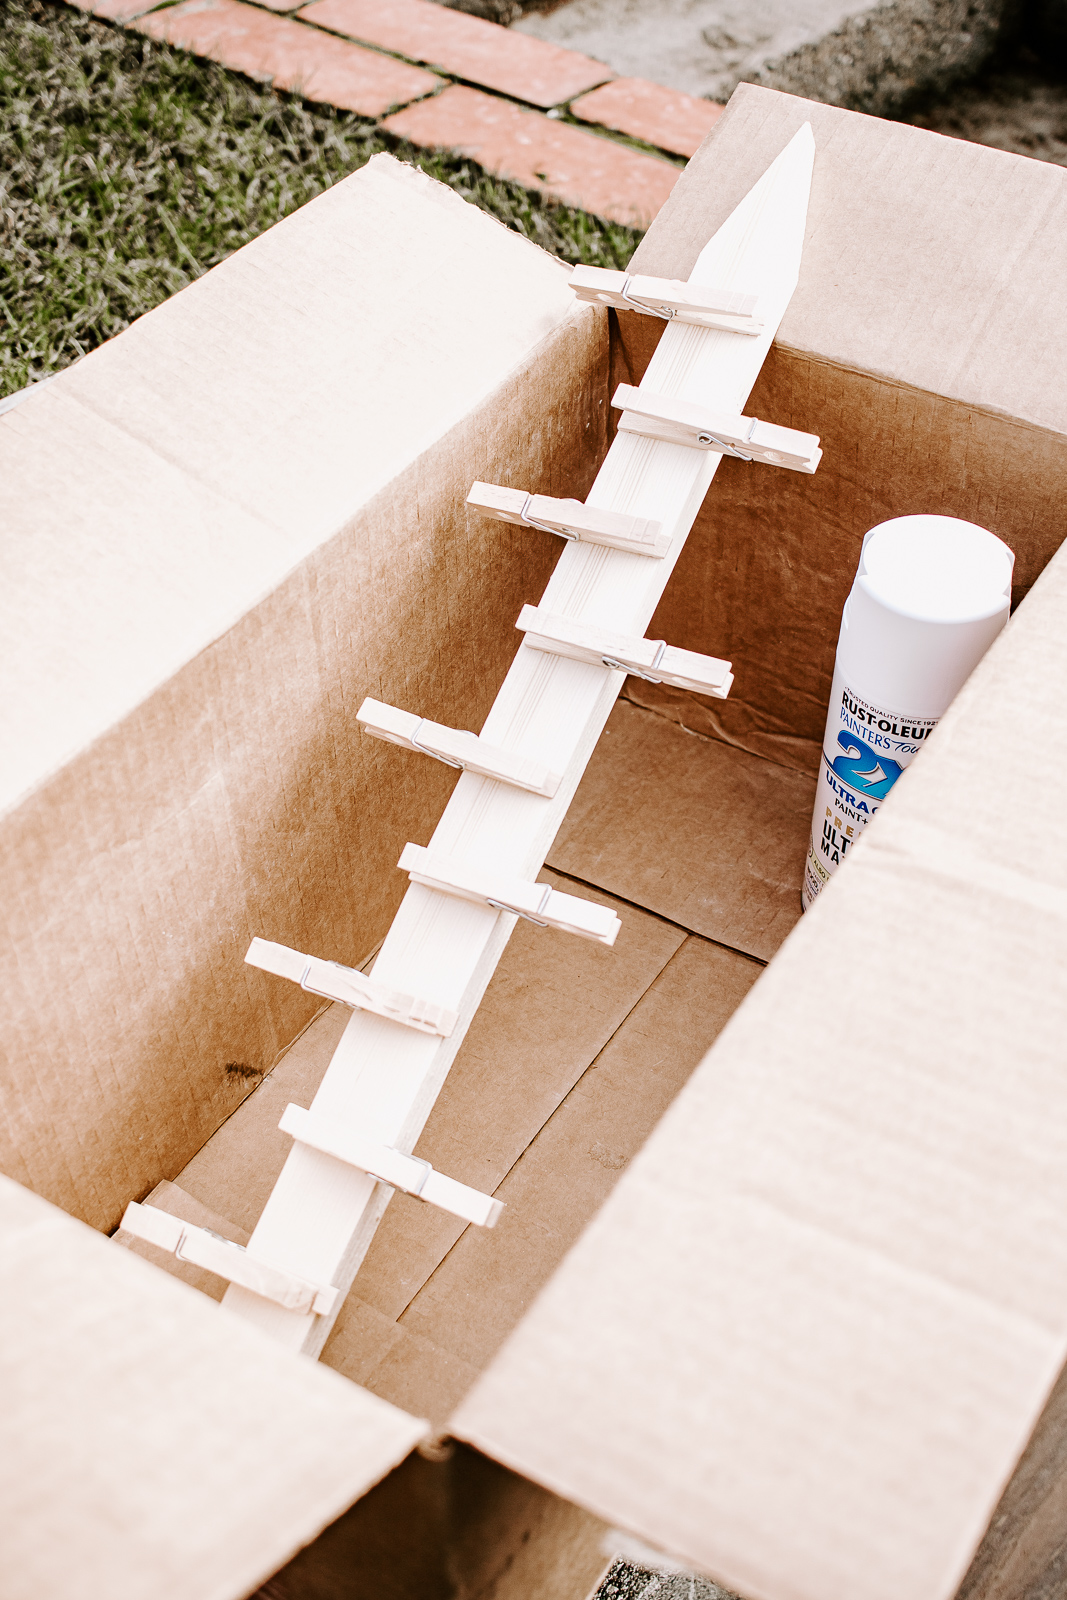
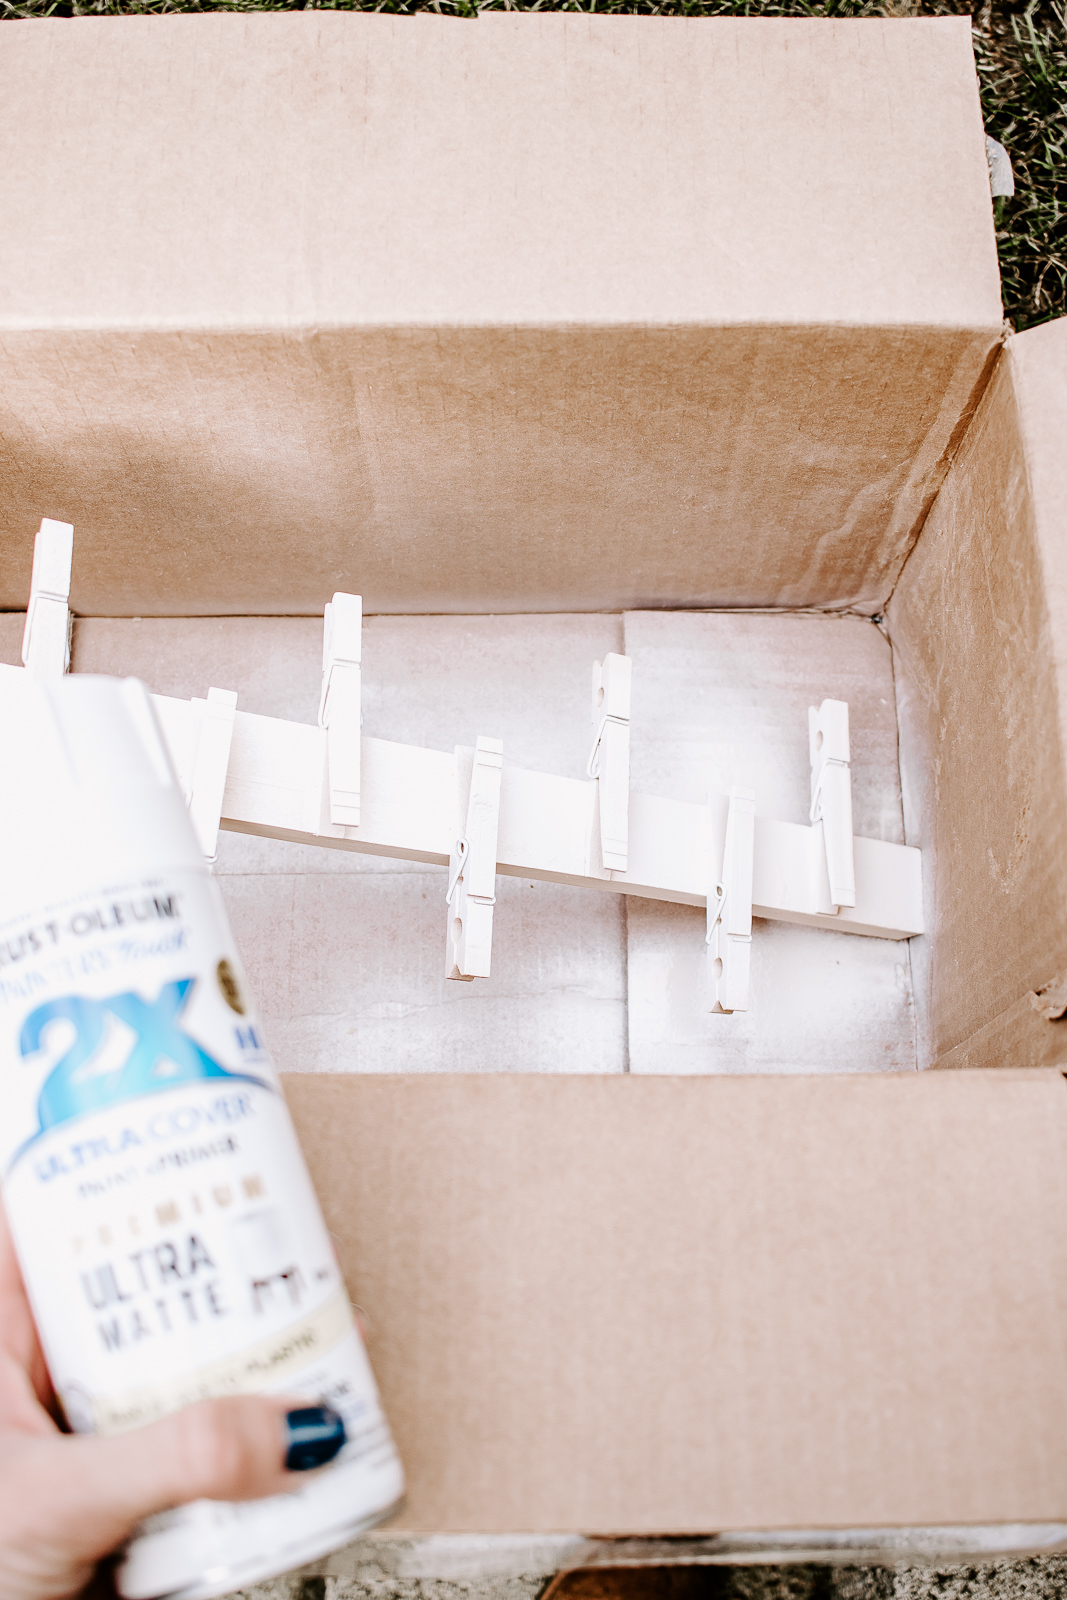
<Step 3: ย Once the wood glue is dry, itโ€™s time to paint it.ย  Of course, if you prefer the natural look of your wall organizer, you can keep it natural. ย If you decide to paint it, move outdoors or to an area with good ventilation while you are spray painting.ย  Place your wall organizer in a large cardboard box and spray paint it.ย This will save you from having white spray painted grass! A lesson Iโ€™ve learned many times โ€“ although mine was pink grass!ย  My husband really loved that project! ๐Ÿ™‚

You donโ€™t want to spray too much paint on your wall organizer at one time or it will get drippy. Itโ€™s best to spray several light coats in a sweeping motion to get smooth coverage.ย  Allow the paint to dry overnight.

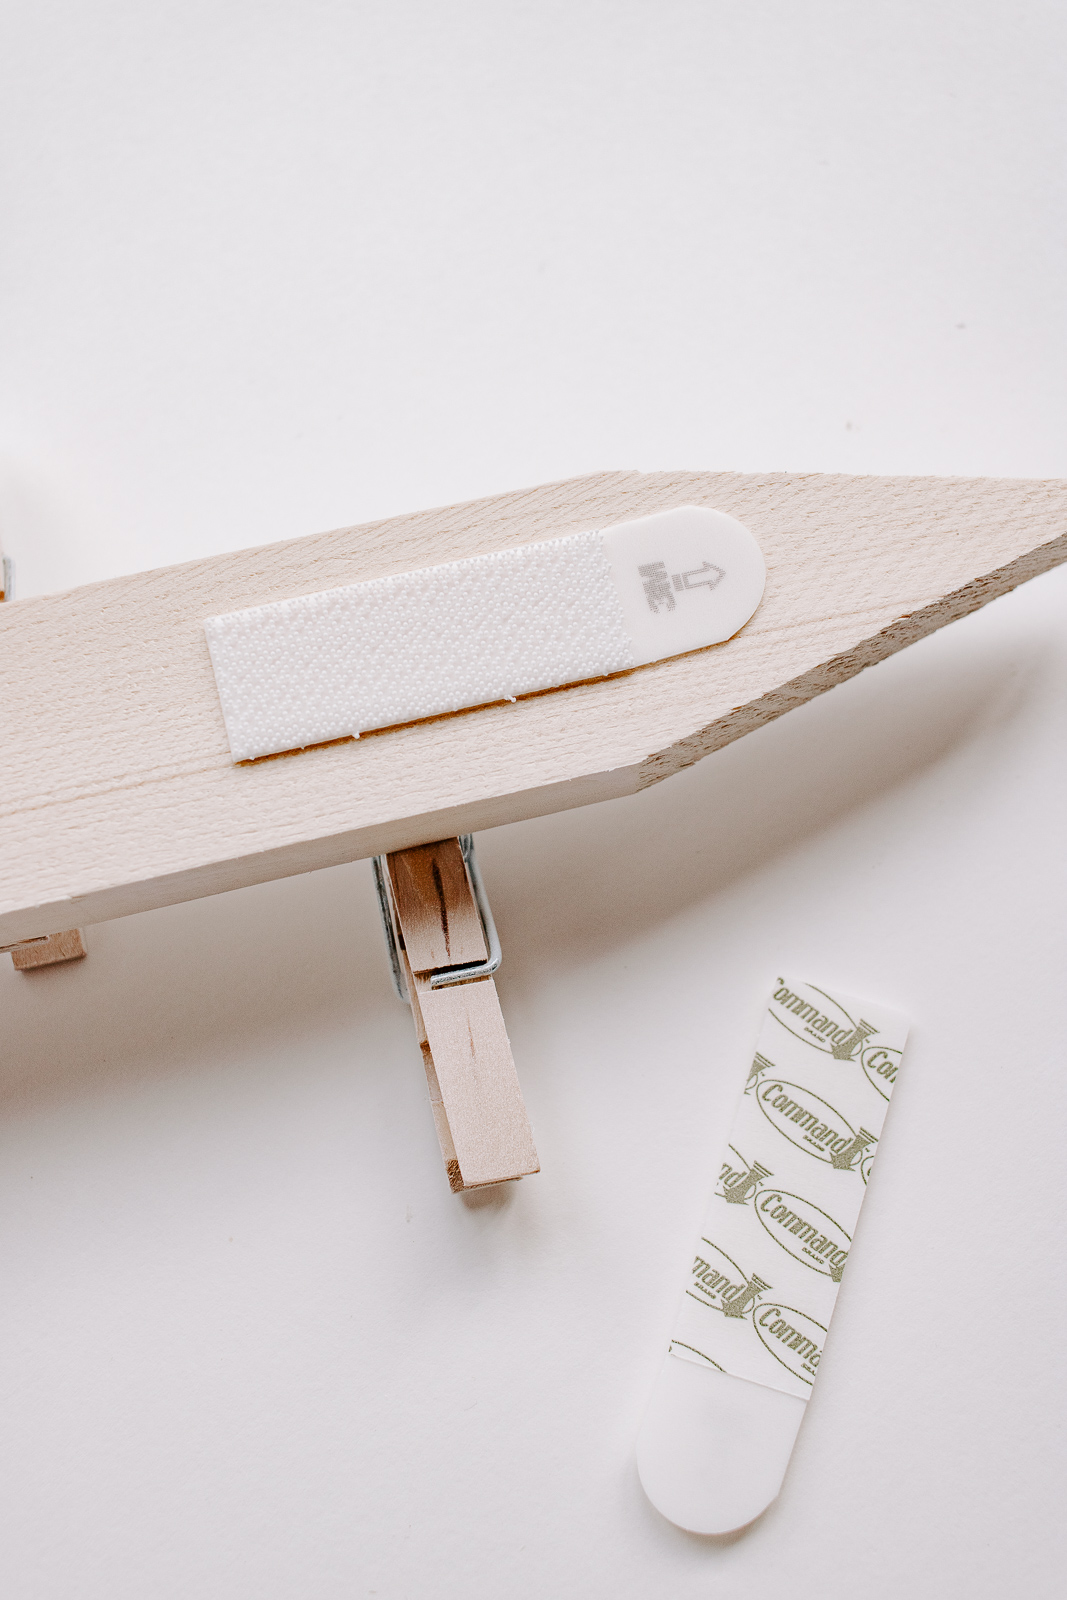
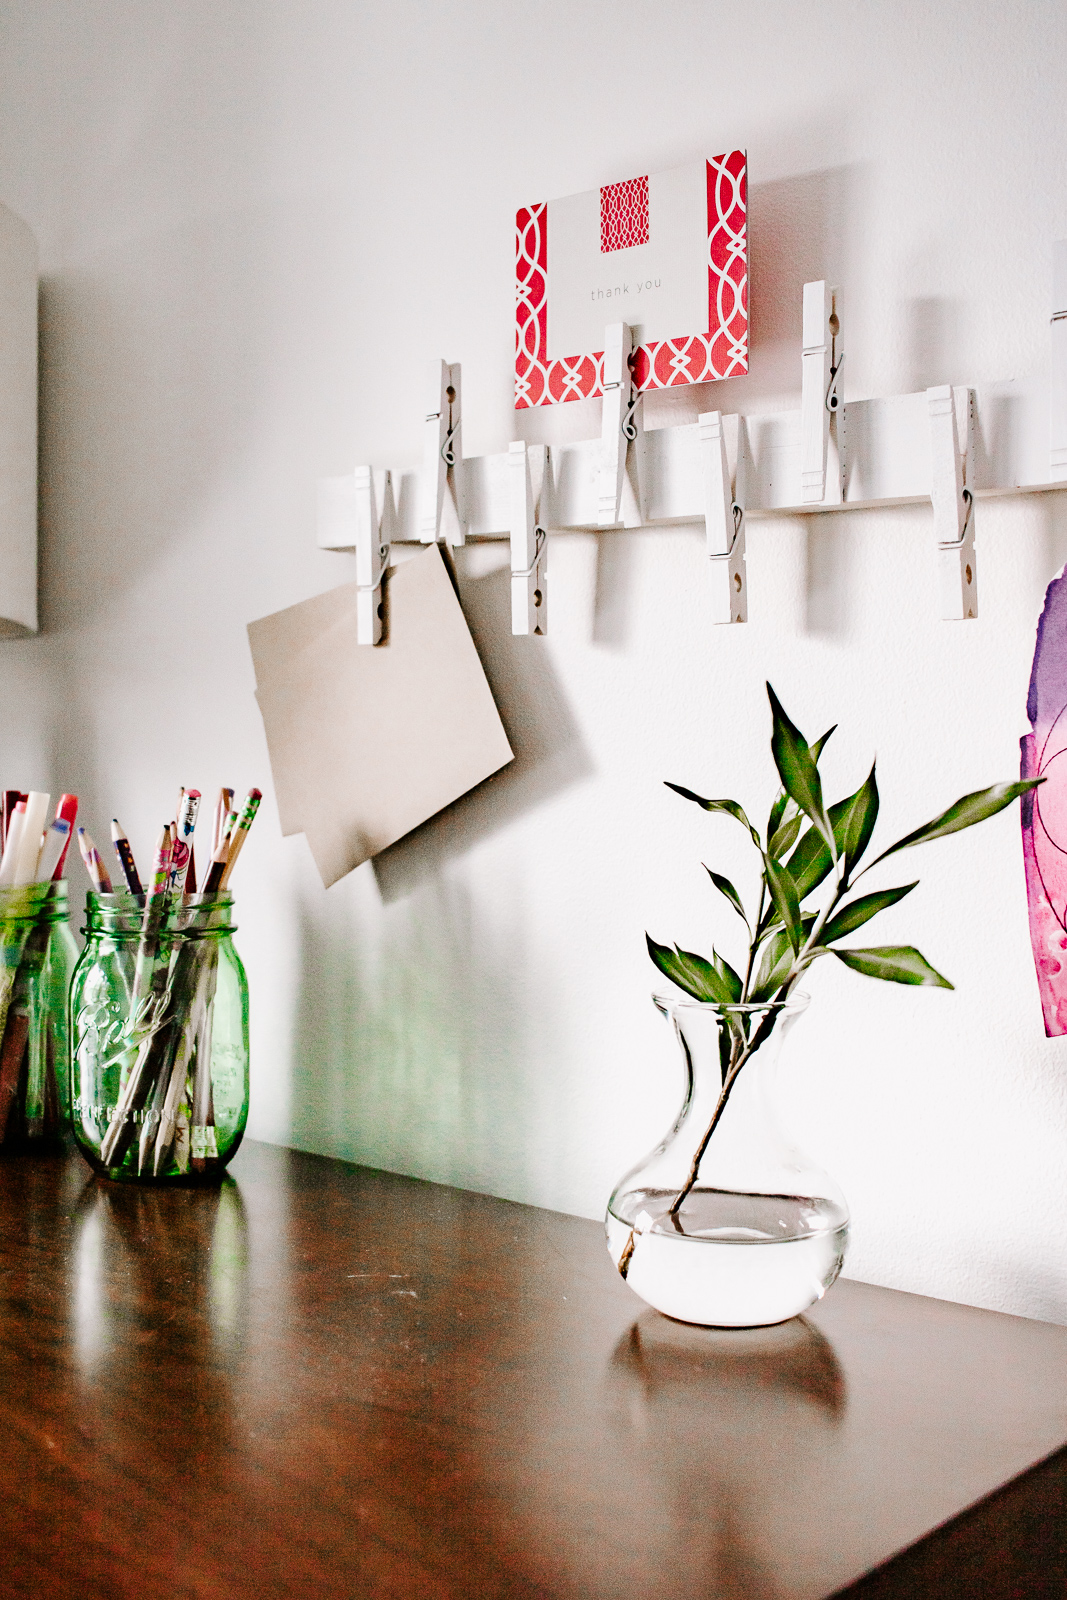
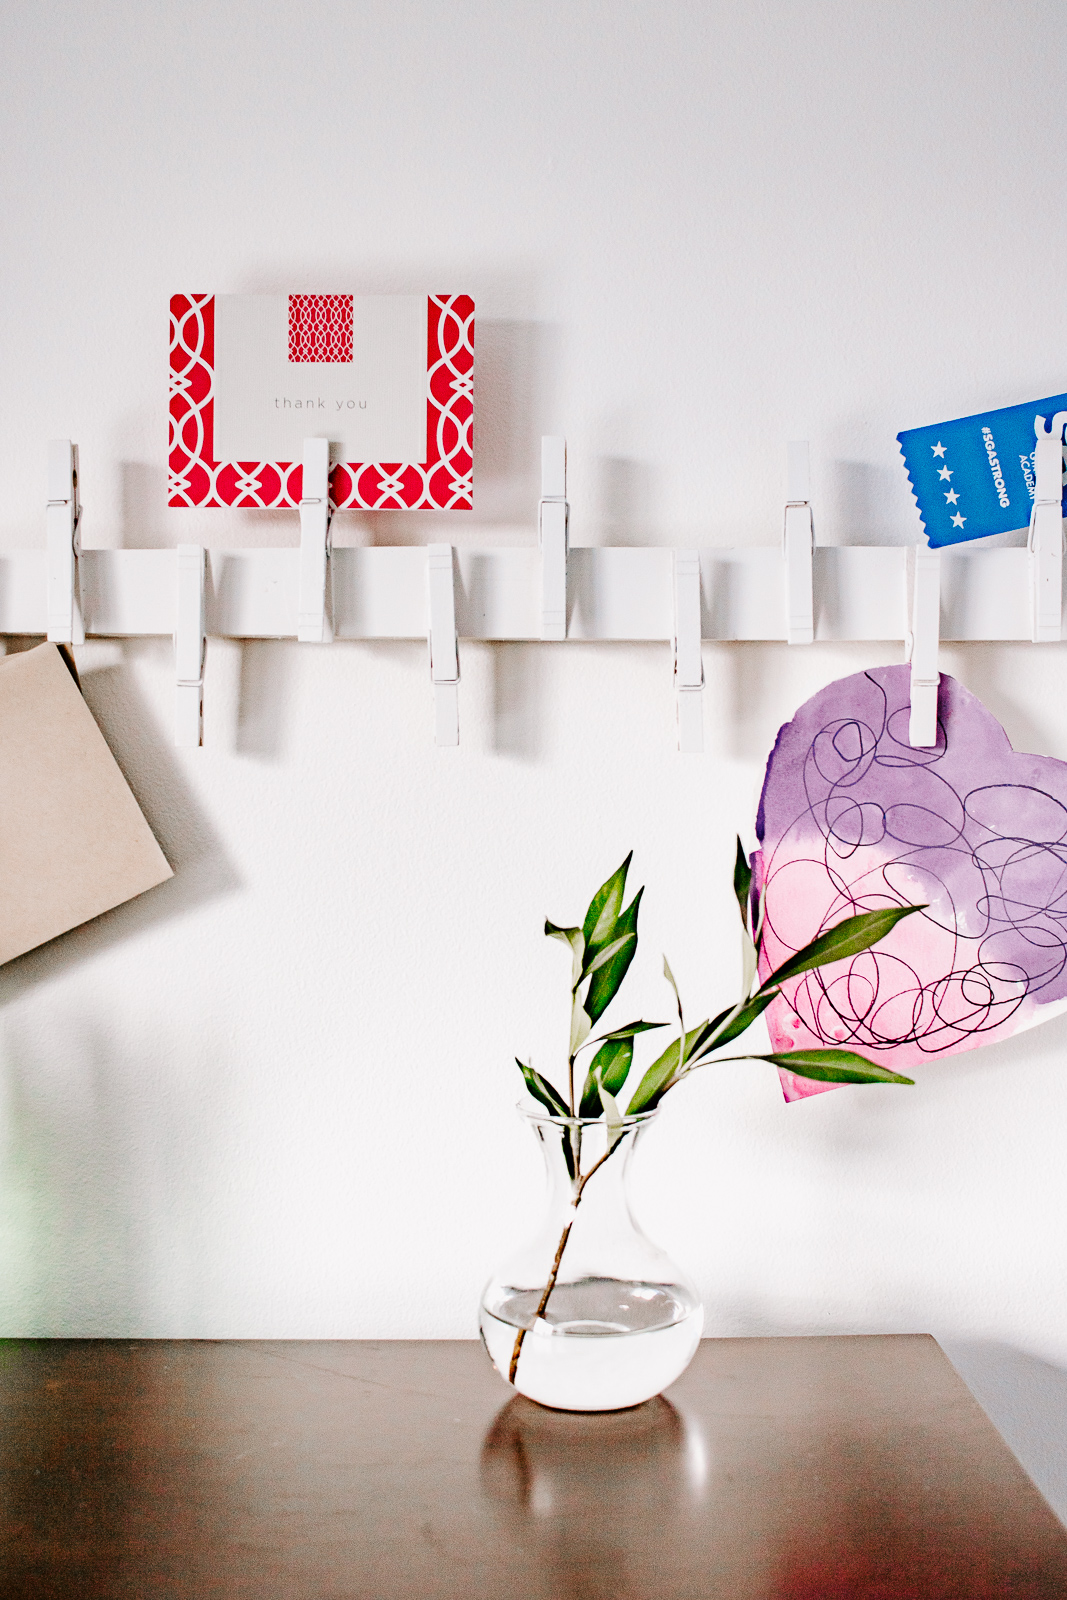
Step 4 : ย Youโ€™re done! ย Now itโ€™s time to hang your new wall organizer! I use mine to hold and organize stationary, photos, postcards, and my kids artwork. I donโ€™t plan on hanging anything too heavy on it so 3M velcro sticky tabs work perfectly.ย  You could always hang your wall organizer with a good olโ€™ hammer and nails too if you feel you need the extra support.

And thatโ€™s it! ย A stylish wall organizer that was made for just a few bucks. You canโ€™t beat that!

I love having a wall organizer like this that can help organize my papers. However, this isnโ€™t just for stationary! ย The DIY Wood Wall Organizer could be hung in your closet to hold necklaces or ties. Or try hanging it in your laundry room to hold all those socks with the missing pairs. Make one for Christmas and use it to display all those Christmas cards from loved ones.ย  I was even thinking this could hold spools or ribbons or washi tapes.

I hope you guys enjoyed this easy tutorial and I hope it gets you a little more organized this year!ย  To see more of what Iโ€™m decorating and DIYing, Iโ€™d love for you to visit me at my blog,ย ย Decor Hint. ย Iโ€™ll be back next month with a new project for you!
~ See More of Karenโ€™s Tutorials ~

karen from decor hint


Hello!ย  Iโ€™m Karen, the creator of the Home Decor and DIY Blog:ย Decor Hint.ย Iโ€™m a Native of the East Coast, but I currently live in beautiful Seattle with my hubby, our two wonderful children and our spunky wheaten terrier.ย 

You can usually find me with some sort of craft in one hand and a coffee in the other. And Iโ€™m always rearranging furniture or moving lamps from room to room. I have a passion (read: obsession) for decorating, DIY, and gardening. In short, I love making my house into a home. ย 

Like many, Iโ€™m inspired by what I see in home decor magazines, but Iโ€™m not so inspired by the price tags.ย  Consequently, I love finding and creating beautiful budget-friendly home decor items. In a head to head competition, I bet youโ€™d never know the difference between the designer items and my DIY creations!ย  Many of my DIY projects focus on sewing, crafting, upcycling and organizing. Some of my favorite projects have been making pretty wreaths, sewing my own tassel hand towels, and crafting these trendy wood bead garlands. I canโ€™t wait to inspire you and spark your creativity through my DIY projects.

You can always connect with me on Pinterest, Twitter or Instagram.

How to Build this Cute Garden Shed

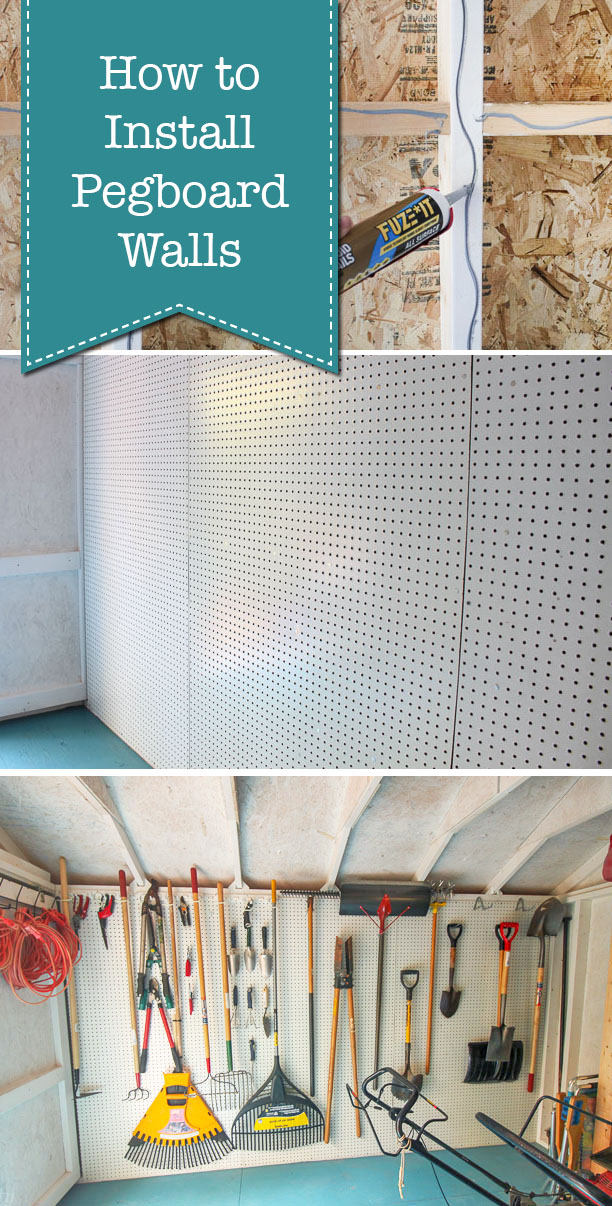
How to Install Pegboard Walls | Pretty Handy GirlHow to Install Pegboard Walls

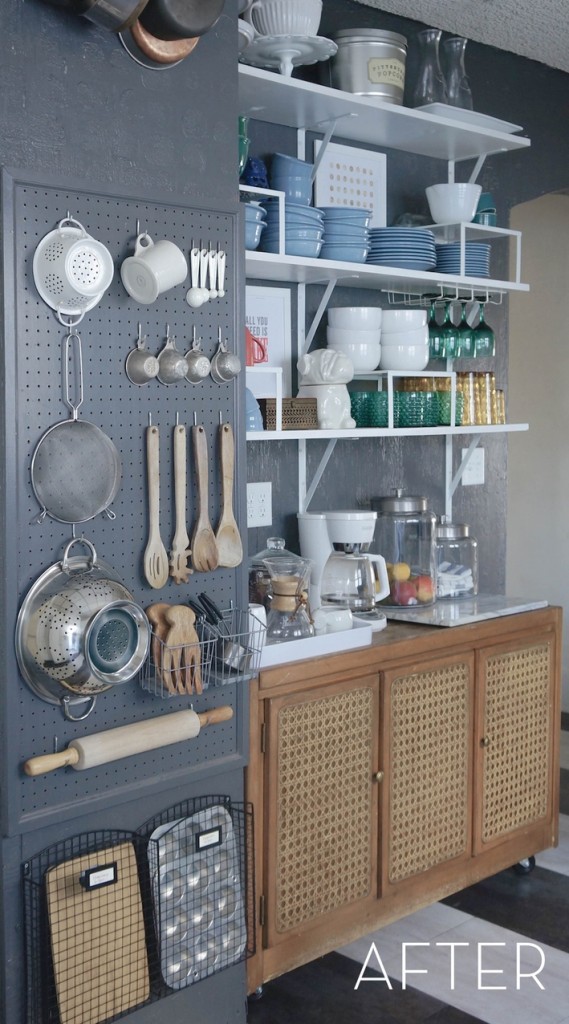
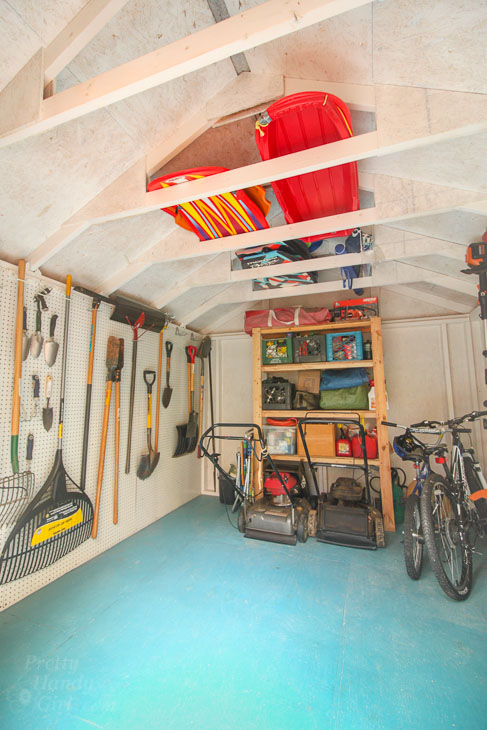
Pegboard walls are the bomb, arenโ€™t they? They provide a ton of storage organization without taking up valuable floor space. Pegboard can be used in a variety of spaces successfully. A garage or shed arenโ€™t the only places that can use this fantastic vertical storage. Iโ€™ve seen some amazing craft and sewing spots that utilize pegboards. Heck, even a kitchen can use some pegboard storage like this example from Curbly:

Pegboard storage solution in the kitchen

Today, Iโ€™ll show you how to install pegboard walls anywhere you want! Iโ€™ll be showing you the process on an open stud wall. If you have a finished wall, simply screw strips of wood into the studs before installing your pegboard. Easy peasy! Ready to get started?
Materials:

(Iโ€™ve includedย affiliate links for your convenience. I earn a small percentage from a purchase using these links. Thereย is no additional cost to you. You canย readย more about affiliate links here.)

Optional:

Instructions:

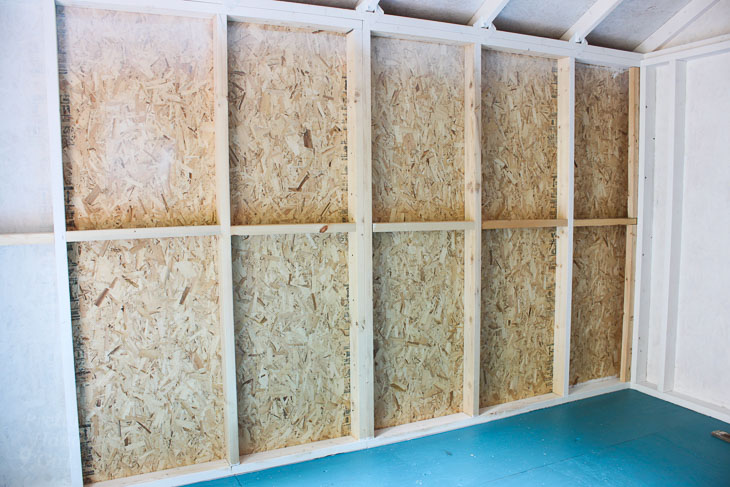
Installing pegboard is ideally done on exposed studs walls.ย  If you donโ€™t have exposed studs, you can secure 1โ€ณ x 2โ€ณ boards (or other wood strips) to the studs in your wall. This will create the hollow space behind the pegboard for the hooks set into.

How to Install PegBoard Walls | Pretty Handy Girl

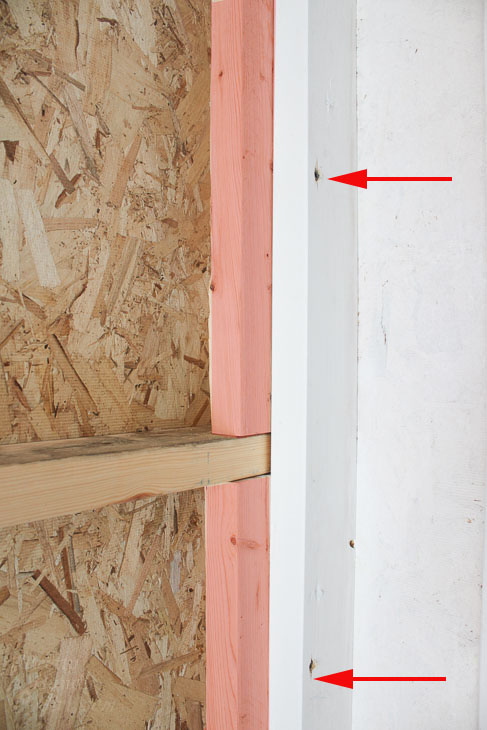
Add blocking to the corner if needed for something to nail into. To secure the blocking, drive screws through studs into the blocks as shown below.

How to Install Pegboard Walls | Pretty Handy Girl

Measure and cut your pegboard panels insuring that each side will line up on a stud.

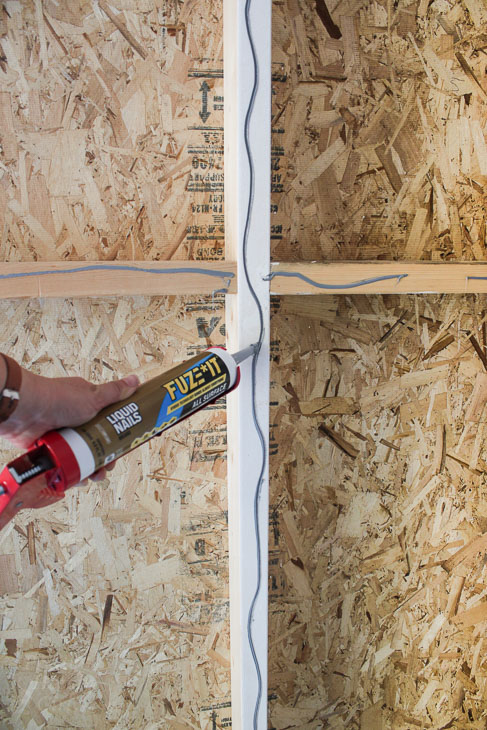
Start in one corner. Run a bead of construction adhesive along all the studs that will hold your first pegboard panel.

How to Install PegBoard Walls | Pretty Handy Girl

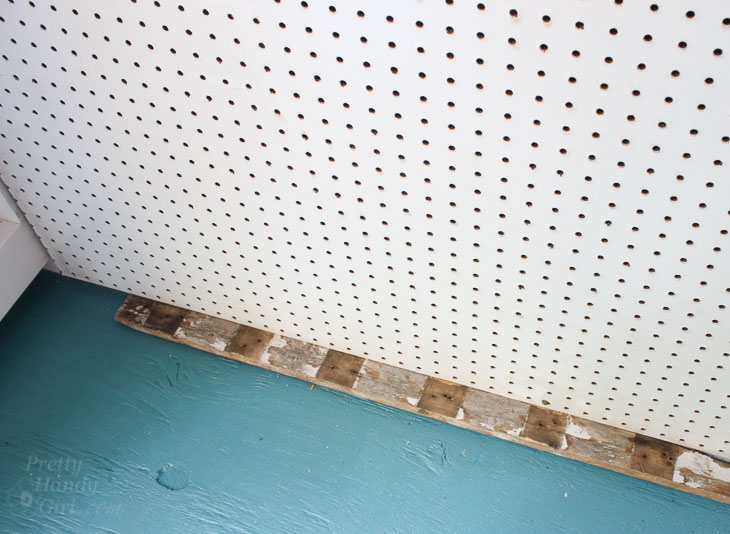
Set scrap wood below the pegboard to raise it off ground (this will prevent liquid spills from soaking into the pegboard. It will also allow for some expansion.)

How to Install PegBoard Walls | Pretty Handy Girl

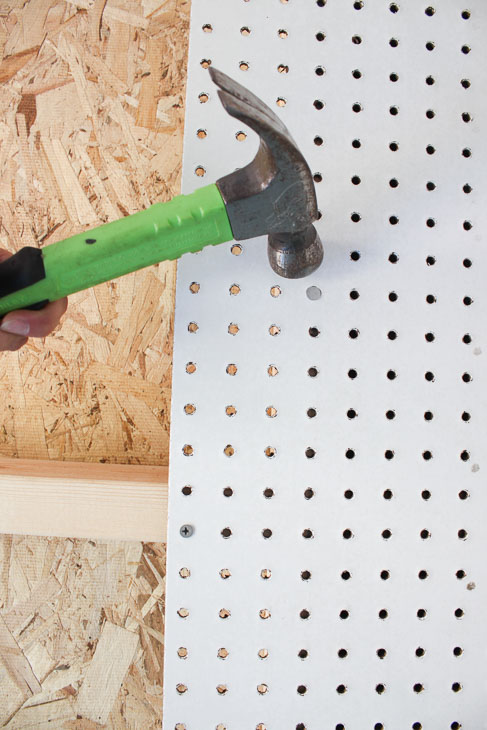
Nail one side of the pegboard to the end stud. Place nails every 9 โ€“ 12 inches.

How to Install PegBoard Walls | Pretty Handy Girl

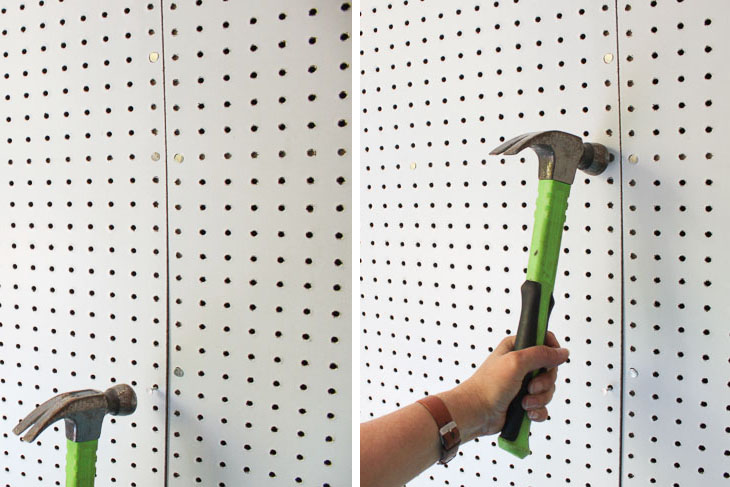
Continue adding pegboard panels following the same process (construction adhesive, then hammer nails to secure.)

How to Install Pegboard Walls | Pretty Handy Girl

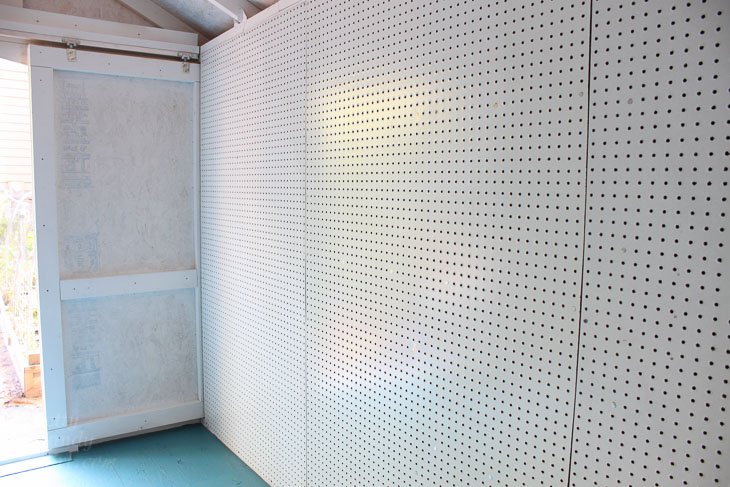
Continue until all your pegboard panels are hung.

How to Install PegBoard Walls | Pretty Handy Girl

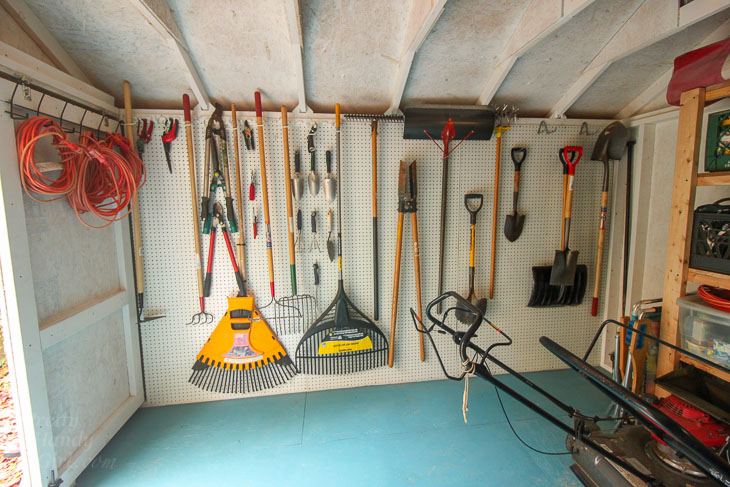
Add pegboard hooks and hangers. (To help me get my shed more organized, National Hardware sent me a wide selection of pegboard hooks and hangers. I can honestly say, they have all the bases covered with their assortmentย of storage products.) Hang all your items on the wall, for instant vertical storage.

How I Built this Adorable Garden Shed

Having all the lawn and garden tools on the wall frees up the floor for two mowers. Donโ€™t ask me why we have two mowers. Thatโ€™s Pretty Handsome Guyโ€™s department.

How I Built this Adorable Garden Shed

But, I guess I canโ€™t judge, I do have duplicate tools. Doesnโ€™t everyone need two drills and two power sanders?

Anyway, now that you know How to Install Pegboard Walls, are you ready to add some pegboard walls to your home?