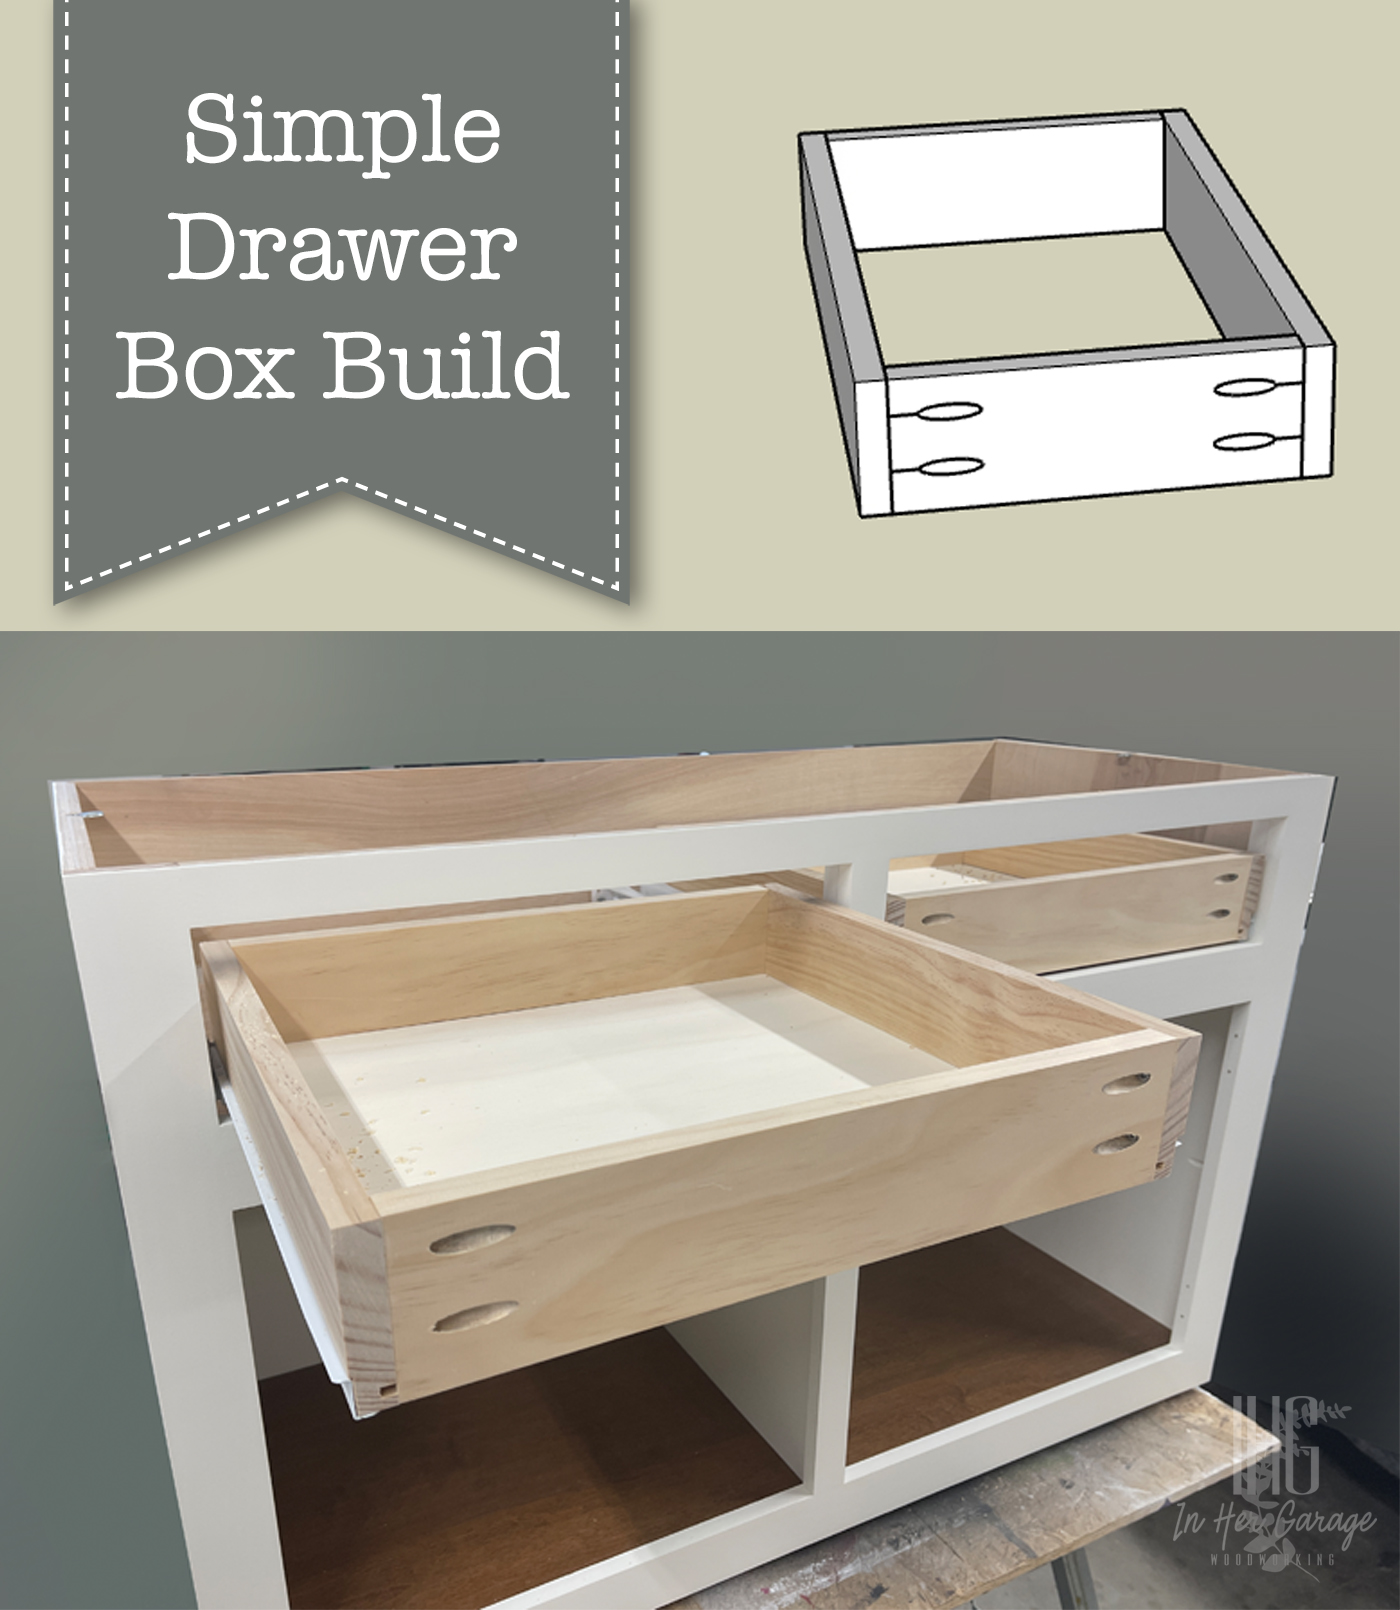
Learn the simplest and most accurate way to build drawer boxes with this easy tutorial.

Drawer Box Build

Welcome back, this is Kristen from In Her Garage Woodworking here with another build plan for you.ย ย When I first began my DIY woodworking journey over 5 years ago I was most intimidated by building drawers. I avoided them because I thought there were too many measurements and too much room for error. But, with a simple plan and a lot of practice, I now make drawers consistently and accurately.ย  These are the exact plans I use to this day to make drawer boxes for all of my commissioned furniture pieces because when youโ€™re able to make something quickly and easily that is solid and looks great, why would you ever change it?

Materials

(Iโ€™ve includedย affiliate links for your convenience. I earn a small percentage from a purchase using these links. Thereย is no additional cost to you. You canย readย more about affiliate links here.)

Tools

Instructions:

Your drawer can be any depth you wish, but before building the drawers, rip your 3/4โ€ณ material to the drawer height you desire (if you are using plywood or if your 3/4โ€ณ material is wider than your finished drawer.

Step #1: Cut drawer box sides

Using your miter or circular saw, cut two identical 3/4โ€ boards to the same length of the drawer slides youโ€™ll be using.

Step #2: Cut drawer box front and back

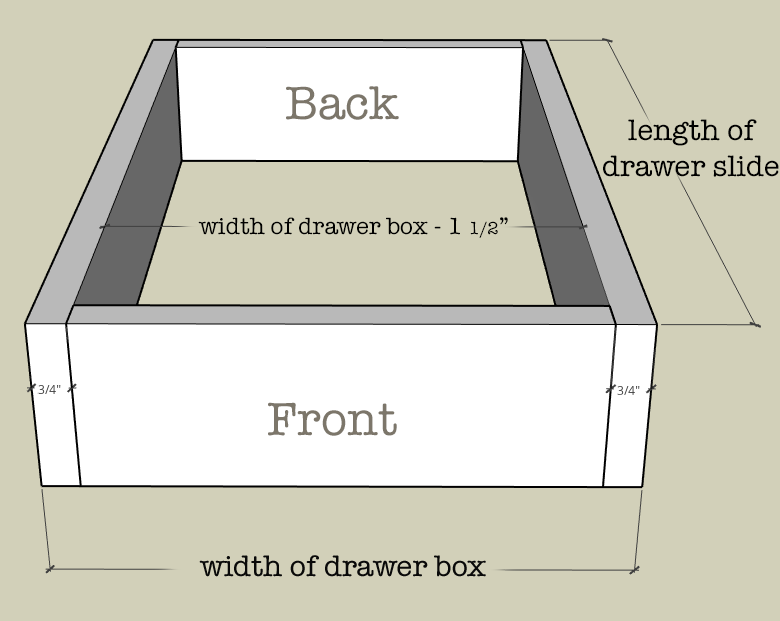
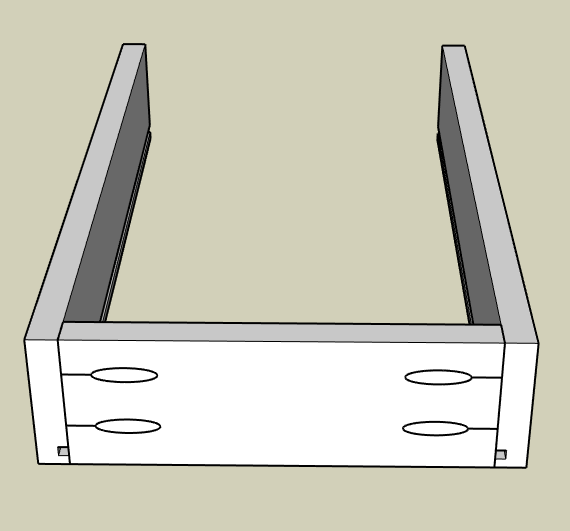
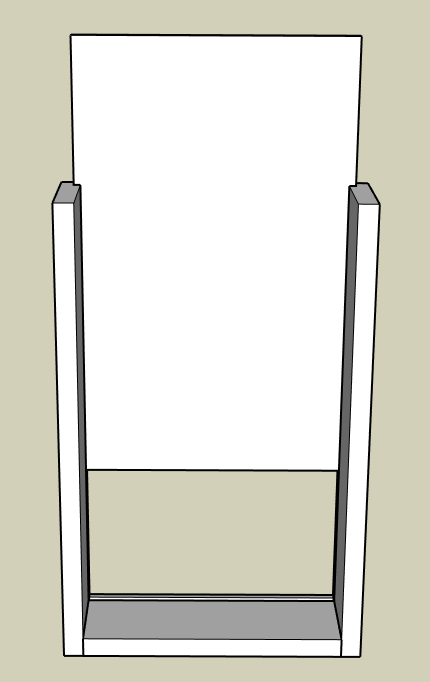
Cut two pieces of the 3/4 inch material for the front and back of the drawer box.ย  If youโ€™re using ยพโ€ material to build the drawer box then the length of the front and back can be calculated as follows (see equation and picture below):

Width of drawer box โ€“ 1ยฝโ€ = width of front and back drawer box boards

Drawer Box Diagram

Step #3: Add groove for drawer bottom (optional)

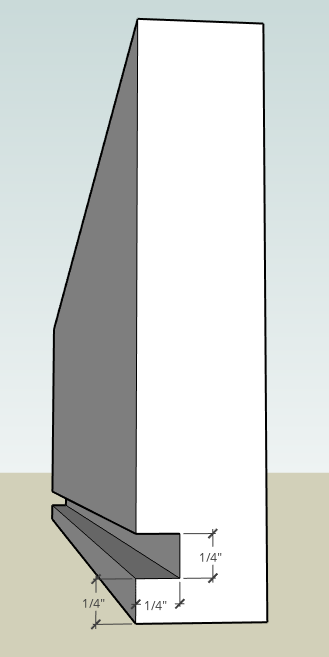
Taking all four 3/4โ€ณ boards to the table saw cut a groove 1/4โ€ from the bottom of all sides that is 1/4โ€ deep. Run the 3/4 board through one time, then adjust the fence (or your saw) to cut another groove next to the first. (A standard saw blade is 1/8โ€ wide so you will need to make two passes in each board to achieve a 1/4โ€ณ groove for the 1/4โ€ณ drawer bottom material.

Dry-fit the plywood to check for fit.


Step #4: Create pocket-holes

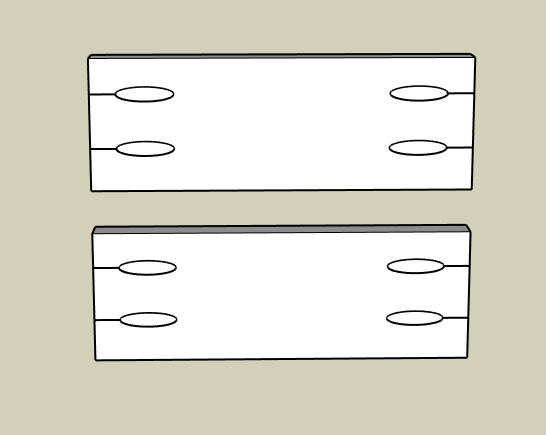
Using your Kreg jig make 2 pocket-holes at either end of the front and back boards on the opposite side as the plywood bottom groove if you chose to do this step. Be sure to avoid the groove.

Step #5: Assembly

If you DID NOT cut a groove to accept the plywood bottom, then you can assemble the drawer box using wood glue and 1 ยผโ€ pocket screws.

Then, you will cut your bottom 1/4โ€ณ panel to the length and width of the drawer box and simply glue and nail it to the bottom of the drawer box

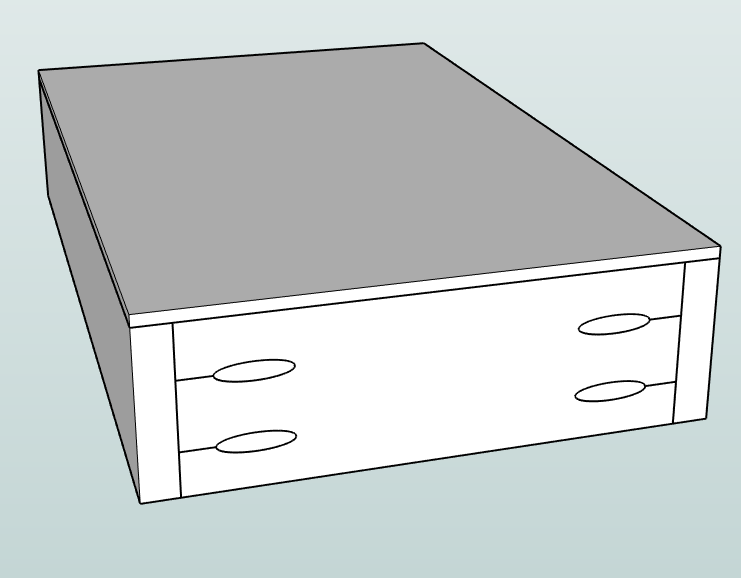
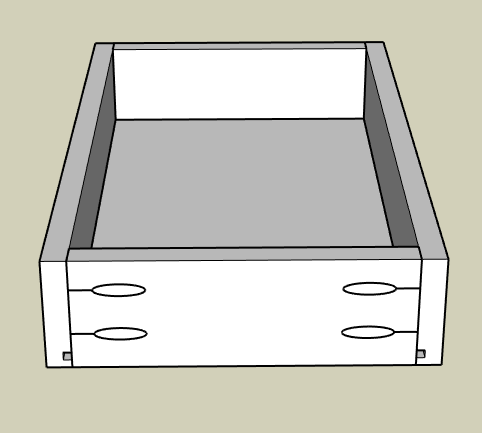
If you DID create a groove for the bottom panel assemble the front and both sides using wood glue and 1 ยผโ€ pocket screws.

Next, cut the ยผโ€ plywood to fit into the bottom of the drawer box groove dry fitting the back panel to check for fit.

Once you have the correct size for the plywood bottom then slide it into the groove and attached the back piece of the drawer box using wood glue and 1 ยผโ€ pocket screws. ย There is no need to apply glue into the panel groove.ย  The plywood bottom will โ€œfloatโ€ in place.

No need to worry about filling the pocket-holes because you will be applying a drawer face directly over them.

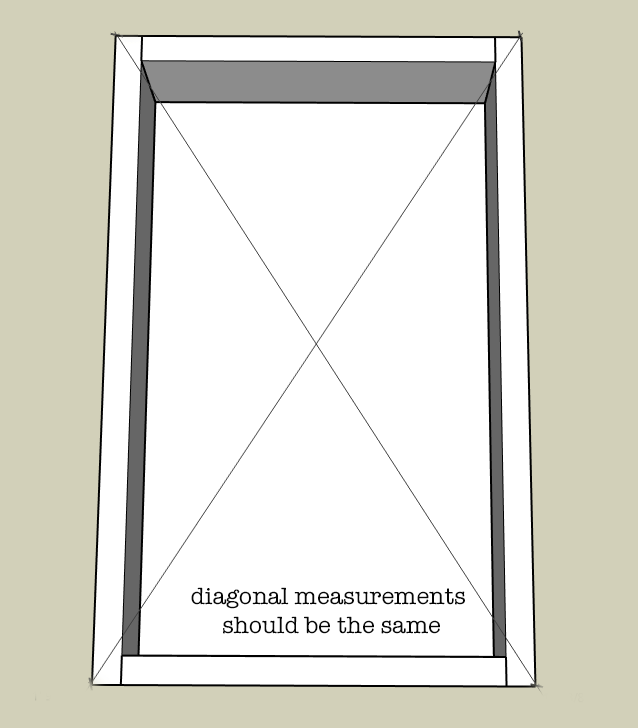
Be sure to check for square by measuring both diagonals of the drawer box.ย  If one measurement is longer simply squeeze the longer diagonal until both are the same.

Allow drawer box to dry.

That is the basic drawer box build that I use and it is strong and easy to put together. I hope this tutorial gives you the confidence to tackle that project youโ€™ve been putting off.ย  Next, I will teach you my favorite method for installing drawers and how I troubleshoot drawer boxes that just arenโ€™t quite the right fit!

Finishing Tips:

If you are making your drawer boxes out of plywood then check out Brittanyโ€™s Edge Banding Tutorialย and learn how to cover that unsightly plywood edge.

Wondering how, or if, you should apply a protective finish to the drawer box? If I am working with solid wood for the drawer sides then I will give the material a quick finish sanding and thatโ€™s it. But, for plywood, I typically do one of two things, depending upon what I have on hand at that time.

  • Option 1: Apply 1 or 2 coats of sanding sealer to raise the grain of plywood and sand smooth. Sanding sealer is clear, easy to apply, and dries quickly. If I have the time and patience I may also apply a quick spray of clear, semi-gloss, water-based topcoat to give it a little shine but it isnโ€™t necessary.
  • Option 2: Apply 2 to 3 coats of spray shellac to seal the plywood.ย  Spray shellac dries quickly and wonโ€™t leave any chemical smell behind. But be aware that it will give the plywood a slight amber tone which typically isnโ€™t big deal.ย  Remember to lightly sand between coats.

Hi! Iโ€™m Kristen, from In Her Garage,ย and I am a self-taught woodworker and DIY fanatic from Minnesota where I live with my husband and our two daughters. Between being a wife, mom and, registered nurse, I try to make as much time for DIY as possible. My love for building came after our family built our current home in 2015. After we moved in, we needed furniture and instead of spending massive amounts of money to order the pieces we wanted I decided that I would build them myself. I started with a buffet table plan from the fabulous Ana-white and quickly set out to remodel my entire home office.

Since then I have started a side business building furniture for the people in my community. I love hearing my clients talk about the pieces they wish they had whether it be aย rustic buffet table, aย one drawer side table, or aย toy box,ย and then making it a reality for them. While starting my small business it made perfect sense that I would document my building journey so I simultaneously launched theย In Her Garage blog and I love sharing my plans, tips, and tricks.

Making something beautiful with your own two hands through a little preparation and determination is an amazing feeling and I hope to bring inspiration and know-how to those looking to tackle a big or small project.

I am so glad that you found me here and please feel free to connect with me onย Pinterest,ย Instagram, and Facebook to see what I am working on right now. And check out the brand new In Her Garage Etsy shop for other plans or to have a furniture item made especially for you!

Folding Laptop or Writing Desk

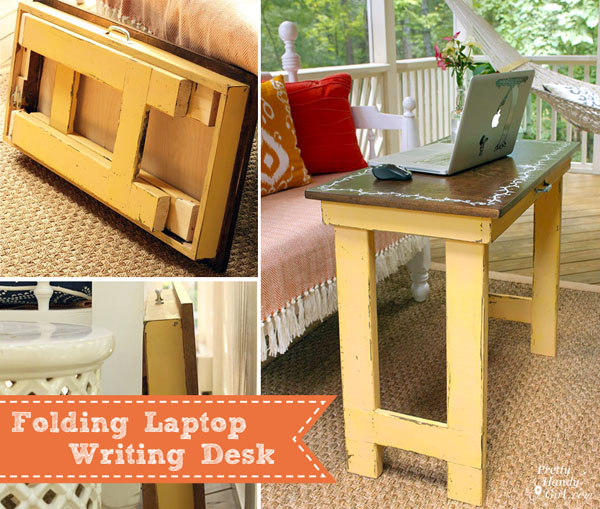
With more of us working from home and needing to create a space to work, this folding laptop and writing table is just the thing you need to make any room into an office!
Folding Laptop Writing Desk | Pretty Handy Girl

Folding Laptop and Writing Table Tutorial

My favorite place to write my tutorials is outside on our screen porch when the weather is pleasant. I love listening to the birds and feeling the breeze blow through the screens. Up until this weekend, I was using an old card table as a desk. But, it was large, awkward, and not the correct height for my needs. I wanted a table that was the perfect height and that could fold and store away when not in use. Enter the idea for thus folding laptop and writing table!

Folding Laptop Writing Desk | Pretty Handy Girl

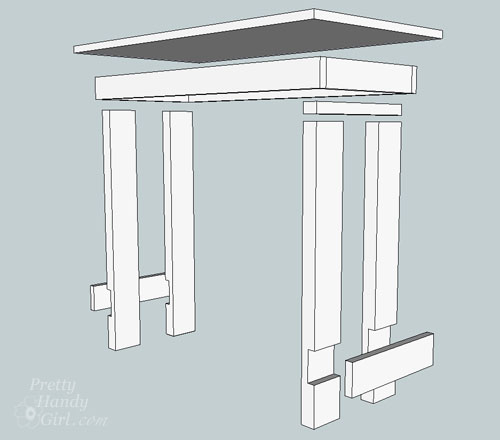
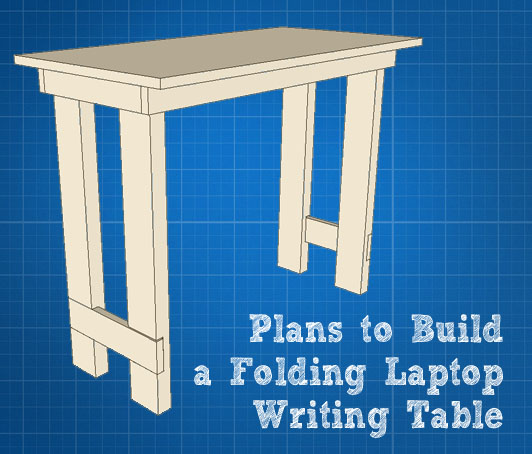
I enjoyed the challenge of designing plans for this simple farmhouse style folding laptop/writing table. The materials are simple 2 x 4โ€™s and 3/4 inch plywood. The majority of the steps can be done using simple handheld tools like a drill, multi-tool, and a circular saw. (Feel free to use other tools or alter the plans to fit your size preferences.)

Materials:

(Iโ€™ve includedย affiliate links for your convenience. I earn a small percentage from a purchase using these links. Thereย is no additional cost to you. You canย readย more about affiliate links here.)

Cut list:

Folding Laptop Writing Desk | Pretty Handy Girl

Top:

  • 3/4โ€ณ finish grade plywood cut to 18โ€ณ x 36โ€ณ

Apron (use 1โ€ณ x 3โ€ณ boards or you can rip excess plywood):

  • 2 โ€“ 1โ€ณ x 3โ€ณ cut to 14 1/2โ€ณ
  • 2 โ€“ 1โ€ณ x 3โ€ณ cut to 34โ€ณ

Legs:

  • 2 โ€“ 2โ€ณ x 4โ€ณ cut to 28 1/4โ€ณ
  • 2 โ€“ 2โ€ณ x 4โ€ณ cut to 26 3/4โ€ณ
  • 1 โ€“ 2โ€ณ x 2โ€ณ cut to 14 1/2โ€ณ (if ripping a 2โ€ณ x 2โ€ณ yourself, remember actual size is 1.5โ€ณ x 1.5โ€ณ)
  • 2 โ€“ 1โ€ณ x 4โ€ณ cut to 14 3/8โ€ณ

Hardware:

Tools:

Additional materials:

Instructions:

Cut your lumber per the above cut list.

Building the Apron:

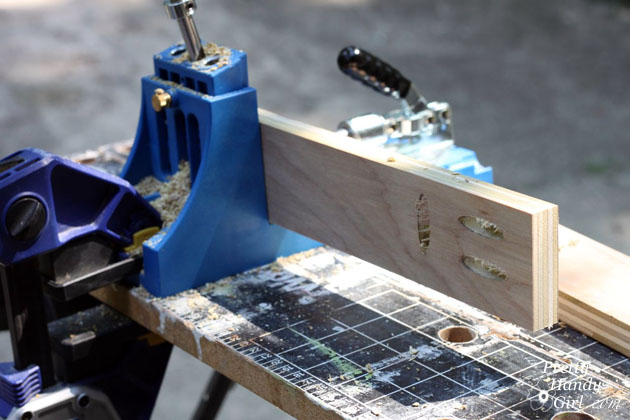
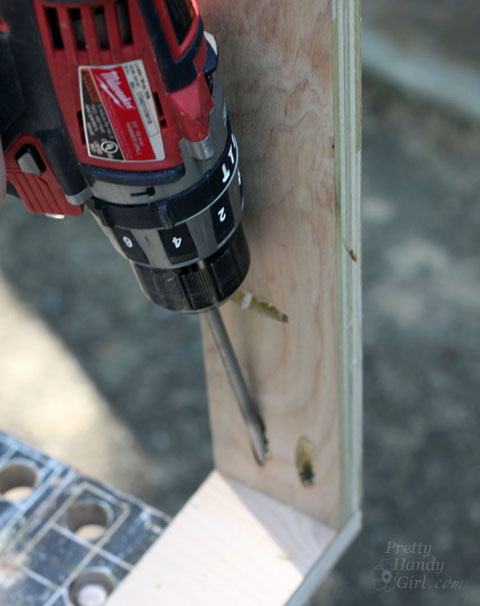
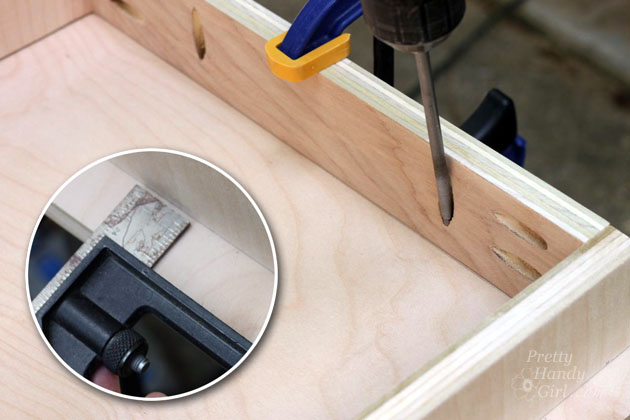
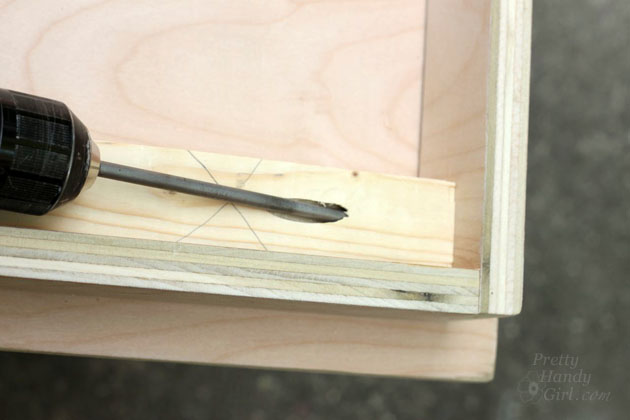
Drill two holes in the ends of the front and back pieces of the apron. Drill pocket holes into the top of all the apron pieces (spaced approximately 8โ€ณ apart.)

Folding Laptop Writing Desk | Pretty Handy Girl

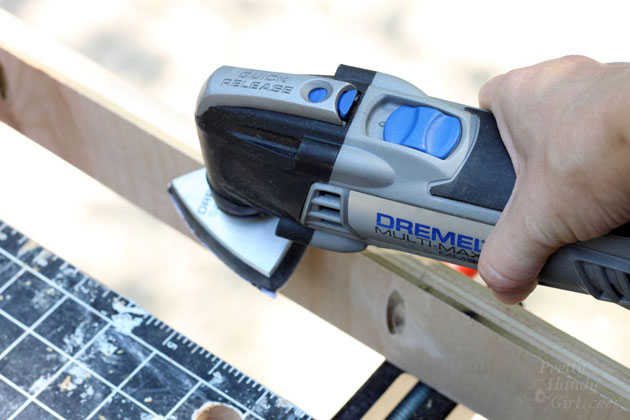
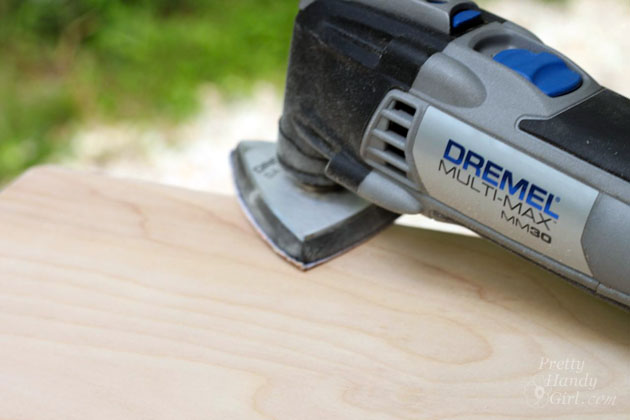
Sand all edges and pocket holes on the apron pieces with a 60 grit sandpaper on the Dremel MultiMax.

Folding Laptop Writing Desk | Pretty Handy Girl

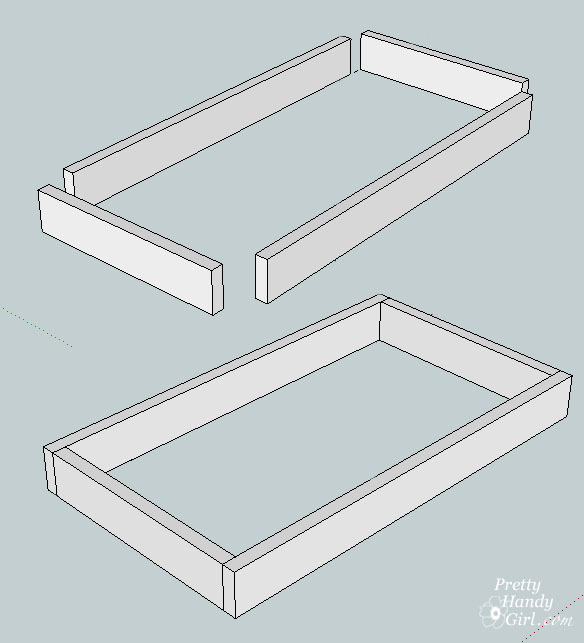
Assemble the apron pieces. Pay attention to make sure all the pocket holes are facing the same direction to attach to the underside of the tabletop. The sides of the apron should be set inside the front and back pieces as shown below:

Folding Laptop Writing Desk | Pretty Handy Girl

Secure the apron pieces with pocket hole screws.

Folding Laptop Writing Desk | Pretty Handy Girl

Center the apron on the bottom side of the tabletop. Measure all sides to make sure they are even. Attach the apron to the tabletop with pocket hole screws.

Folding Laptop Writing Desk | Pretty Handy Girl

Notching the legs:

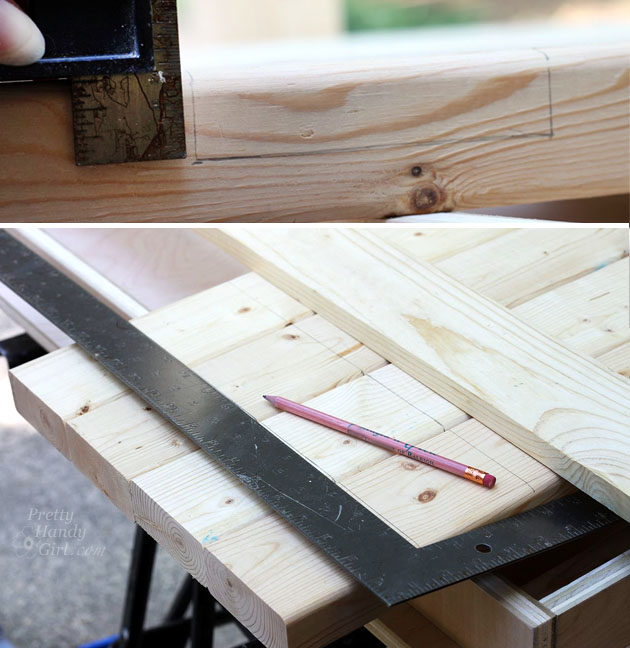
Line up all four legs next to each other. Use a carpenter square to square up the bottoms. Mark 4โ€ณ up from the bottom of the legs. Line up the 1โ€ณ x 4โ€ณ with the mark and trace the other side onto the legs.

Set the combination square to the depth of the 1×4โ€ณ board (it should be 3/4โ€ณ). Mark this depth on the sides of each leg to denote the area that needs to be removed.

Folding Laptop Writing Desk | Pretty Handy Girl

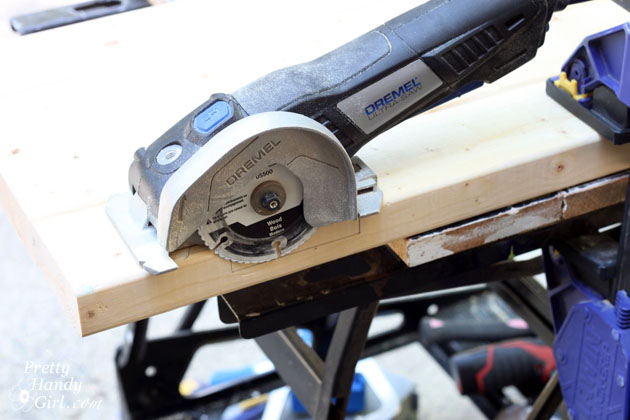
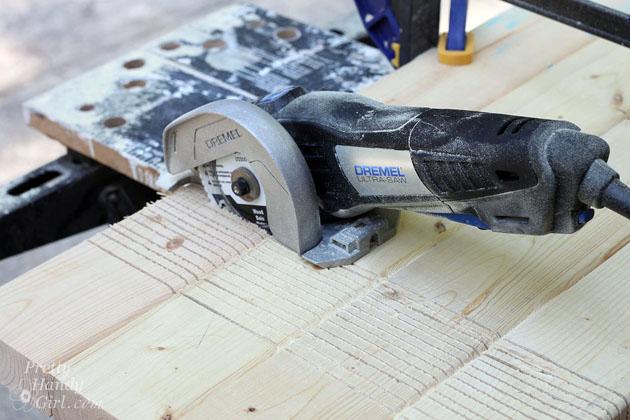
Set the depth of your circular saw (or Ultra-Saw) to 3/4โ€ณ deep.

Folding Laptop Writing Desk | Pretty Handy Girl

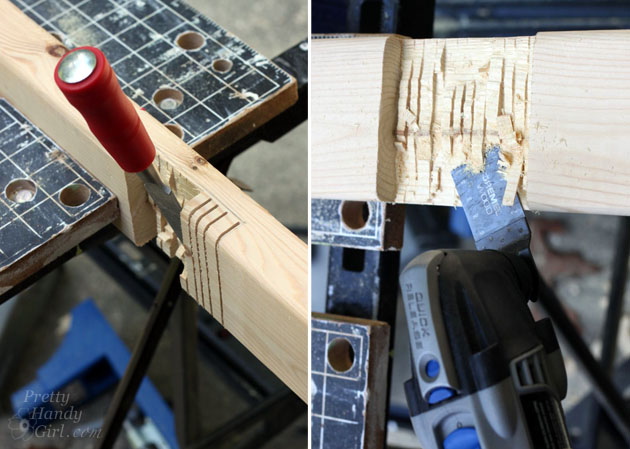
Cut stripes inside the guidelines you made on the legs with the Ultra-Saw.

Folding Laptop Writing Desk | Pretty Handy Girl

Use a hammer and chisel to knock out the strips. Use your oscillating multi-tool with a wood flush cut blade to clean up the edges of the notch.

Folding Laptop Writing Desk | Pretty Handy Girl

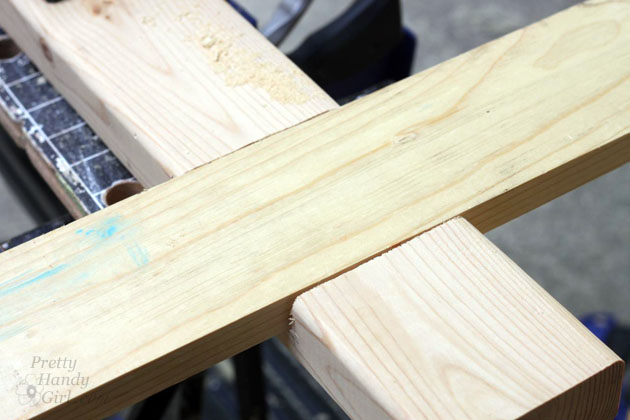
Test fit the 1×4โ€ณ boards into the legs. Shave off more if needed with the Multi-Max (or circular saw).

Folding Laptop Writing Desk | Pretty Handy Girl

Set the 1โ€ณ x 4โ€ณ boards into the leg notches.

Folding Laptop Writing Desk | Pretty Handy Girl

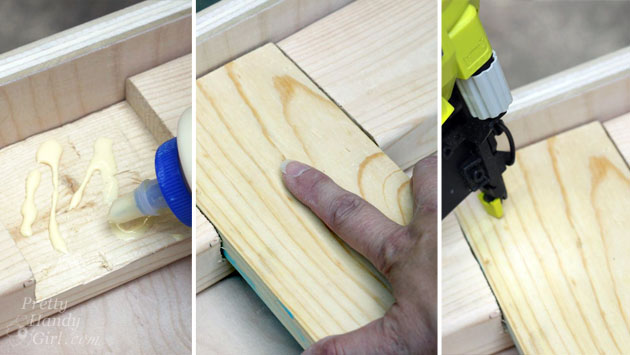
Secure the 1โ€ณ x 4โ€ณ boards with wood glue and finish nails.

Folding Laptop Writing Desk | Pretty Handy Girl

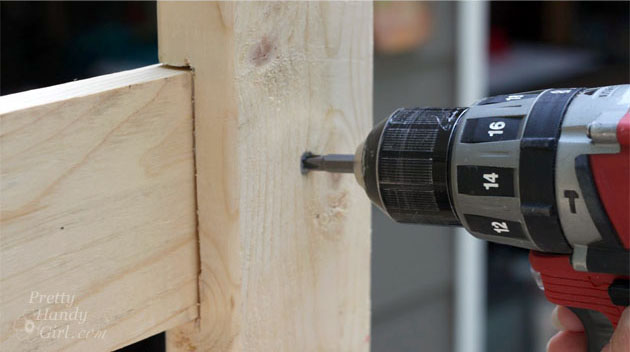
Secure the cross piece 1โ€ณ x 4โ€ณ from the back side with one wood screw into each leg.

secure-cross-piece

Connecting the Legs:

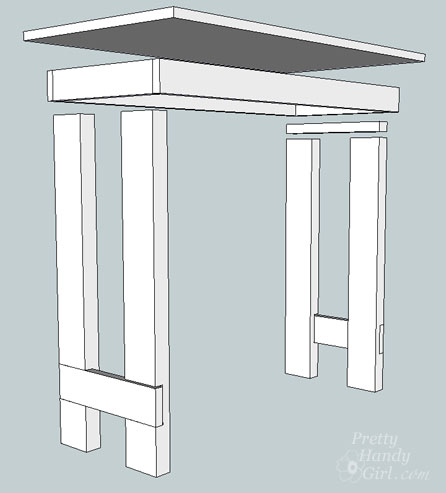
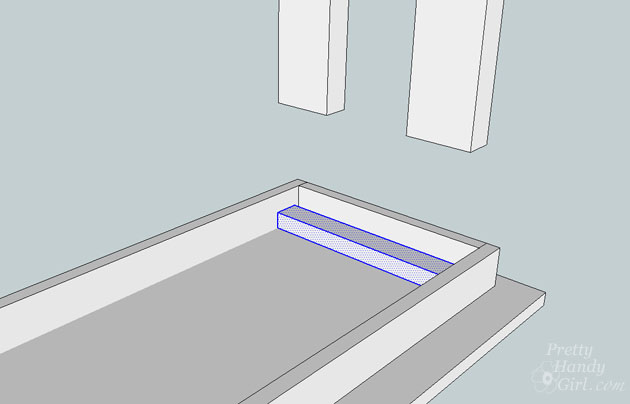
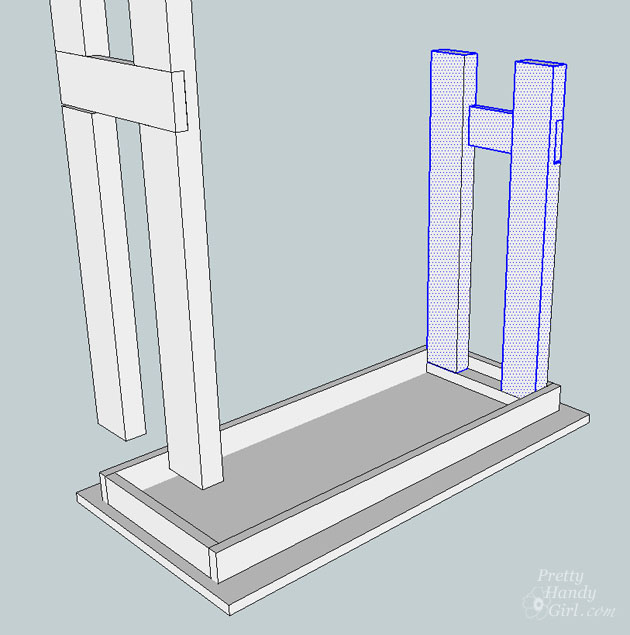
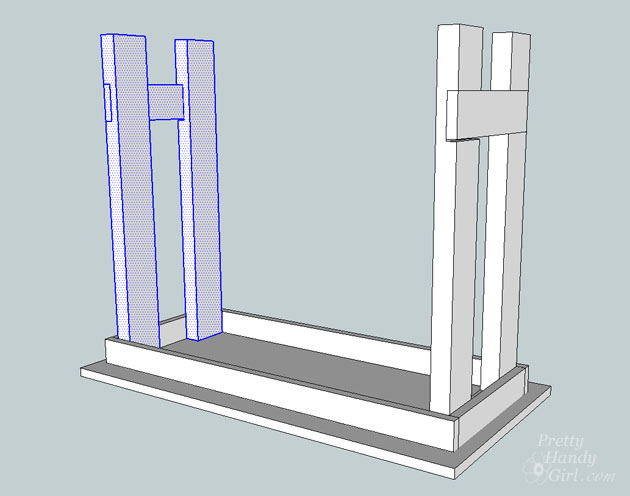
To allow the legs on the desk to fold neatly, one side has to be raised up to fold on top of the other legs. Use the 2โ€ณ x 2โ€ณ board you cut for this purpose.

Folding Laptop Writing Desk | Pretty Handy Girl

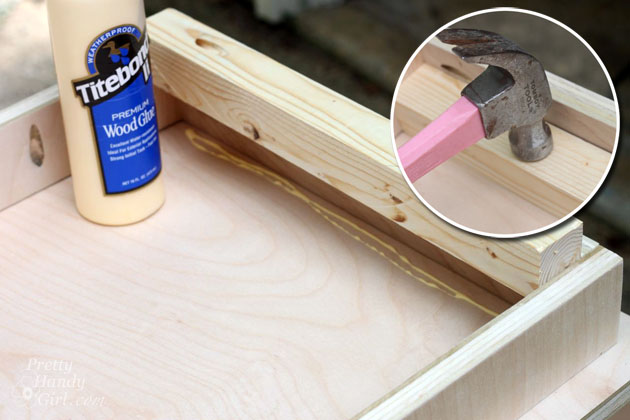
Drill a pocket hole into each end of the 2×2โ€ณ board. Add wood glue where the 2×2 will rest. Tap the board into place.

Folding Laptop Writing Desk | Pretty Handy Girl

Secure the board into the table apron with pocket screws.

Folding Laptop Writing Desk | Pretty Handy Girl

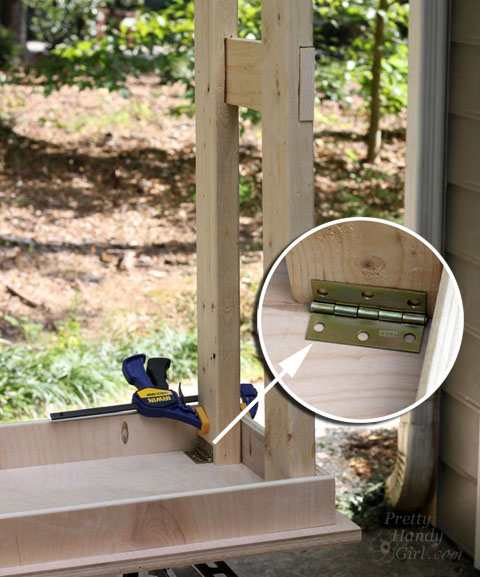
Rest the shorter legs on top of the 2×2 board. Clamp or support the legs in place.

Folding Laptop Writing Desk | Pretty Handy Girl

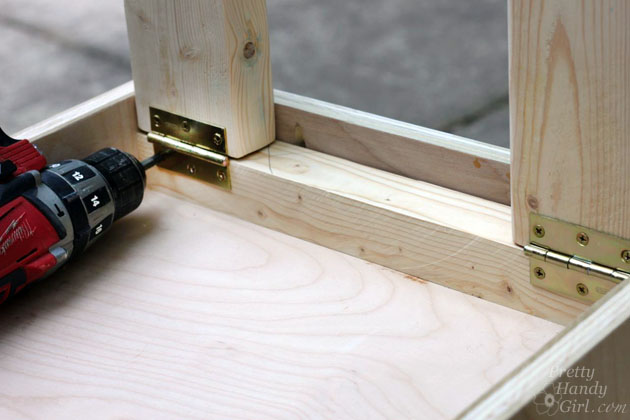
Attach the utility hinges to the top of the legs and the 2×2 support.

Folding Laptop Writing Desk | Pretty Handy Girl

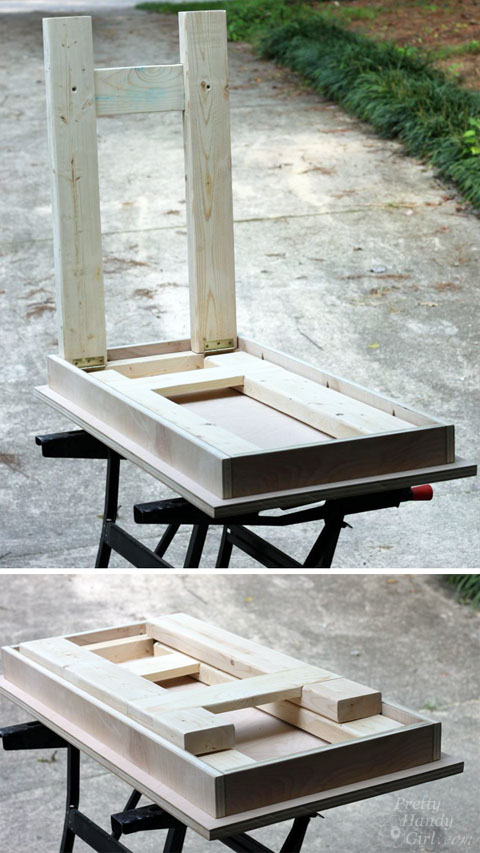
Rest the longer legs in place.

Folding Laptop Writing Desk | Pretty Handy Girl

Attach the remaining two utility hinges to the top of the legs and the underside of the tabletop as shown below.

Folding Laptop Writing Desk | Pretty Handy Girl

Test fold the legs to make sure they fold neatly and donโ€™t rub on the sides of the apron. Make any adjustments to the hinges or sand the legs to eliminate rubbing now.

Folding Laptop Writing Desk | Pretty Handy Girl

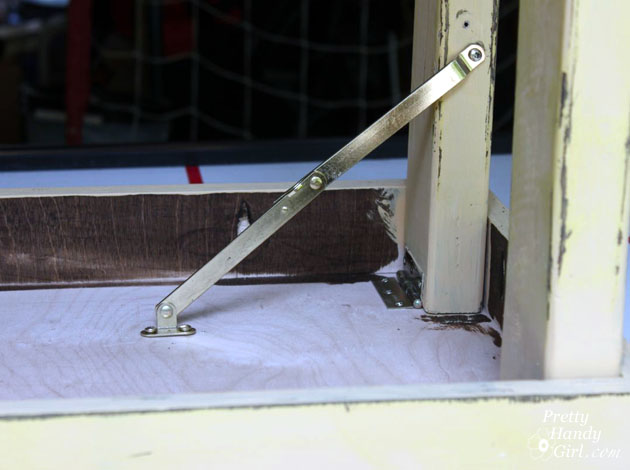
Add the lid support hinge to the bottom folding legs (the longer legs). Follow the directions on the package of the lid supportย for proper installation.

Folding Laptop Writing Desk | Pretty Handy Girl

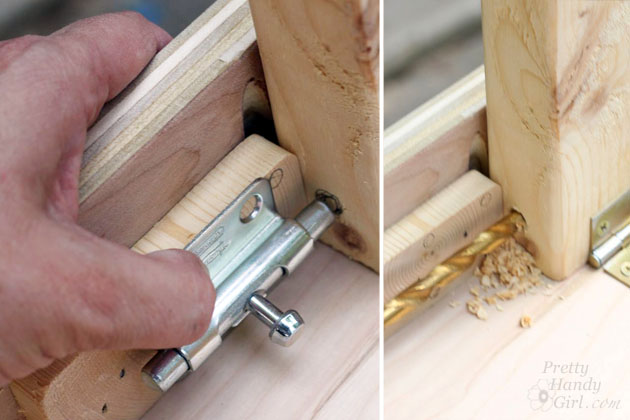
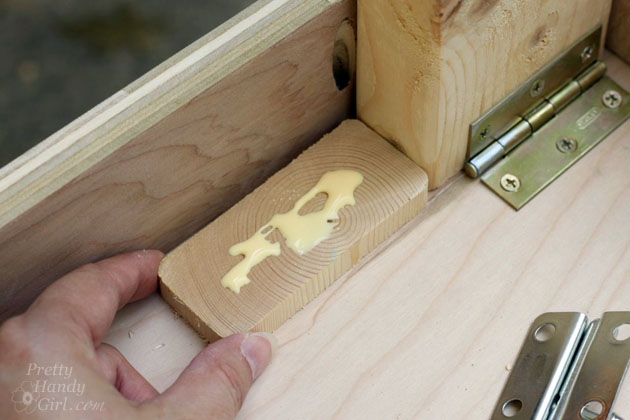
The opposite side will not accommodate a lid support. You need a barrel bolt to keep the legs from folding accidentally. Glue and nail a scrap of 2×4 to the inside of the table apron next to one of the legs (I added a barrel bolt to both sides, but you only need to add it to the one side when using the lid hinge support.)

Folding Laptop Writing Desk | Pretty Handy Girl

Rest the barrel bolt onto the scrap wood. Mark where the bolt hits the leg. Drill a hole into the leg to accept the bolt.

Folding Laptop Writing Desk | Pretty Handy Girl

Attach the barrel bolt to the scrap wood with the provided screws.

Folding Laptop Writing Desk | Pretty Handy Girl

Sand all parts of the desk starting with 80 grit sandpaper, then 120 and finish with a 220 grit sandpaper.

Folding Laptop Writing Desk | Pretty Handy Girl

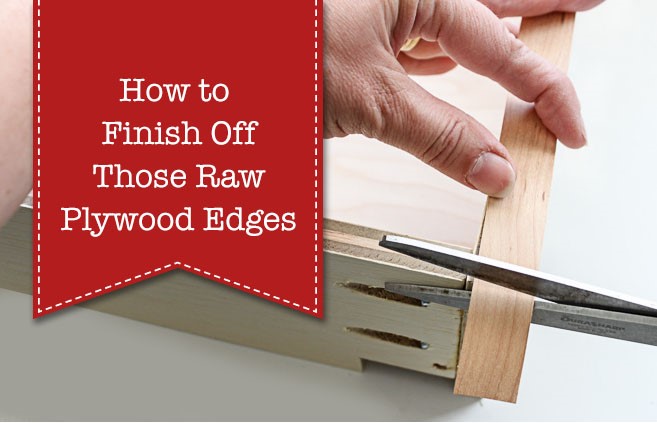
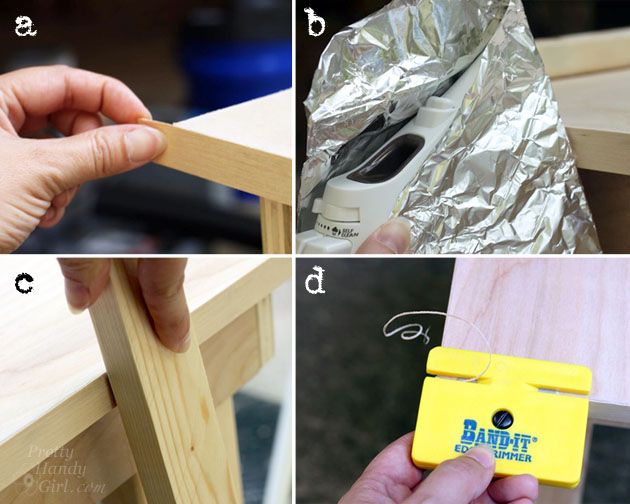
Add edge banding to the plywood top. You can watch my video below to learn how to finish off plywood edges!

Itโ€™s not hard and edge banding is a great way to finish off plywood to make it look like a more expensive board.

Folding Laptop Writing Desk | Pretty Handy Girl

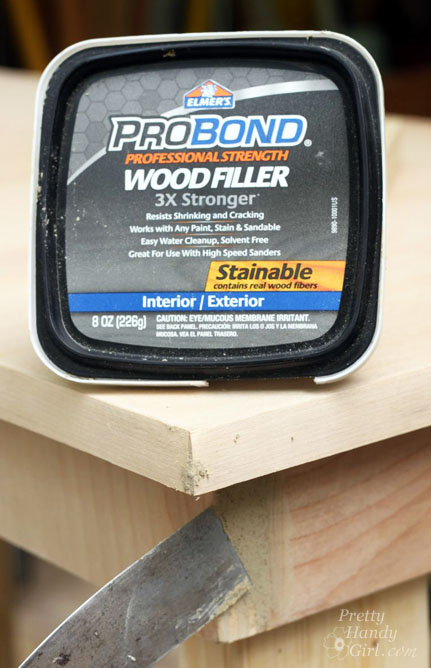
Fill any holes or seams with wood putty. Sand and wipe off the desk before staining or painting.

Folding Laptop Writing Desk | Pretty Handy Girl

Finishing touches:

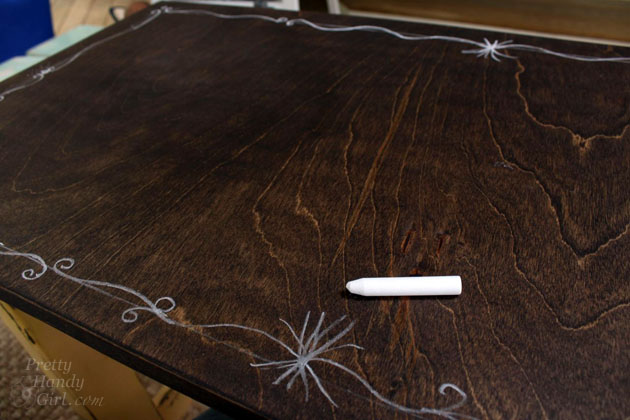
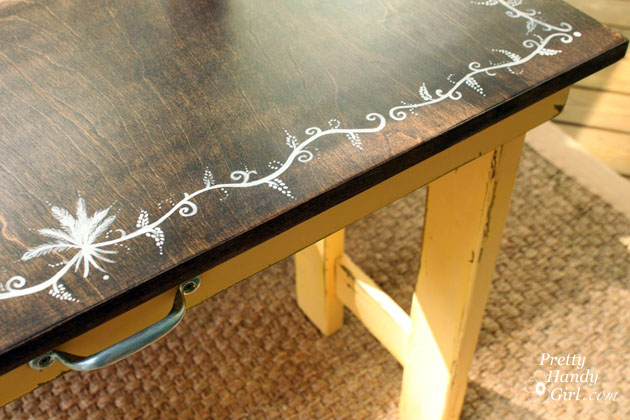
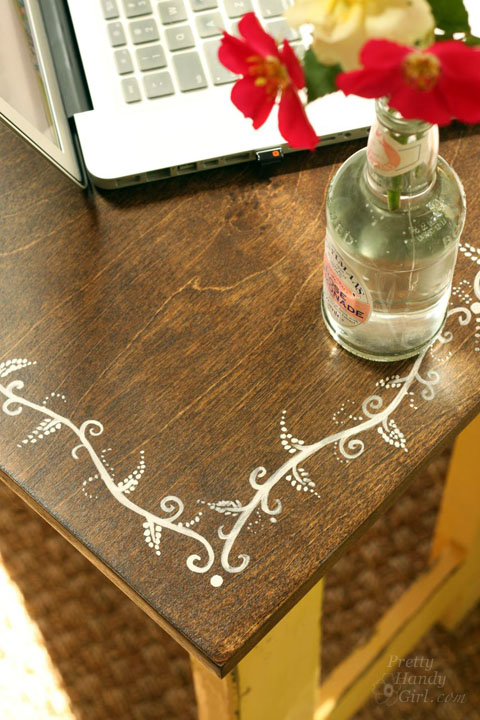
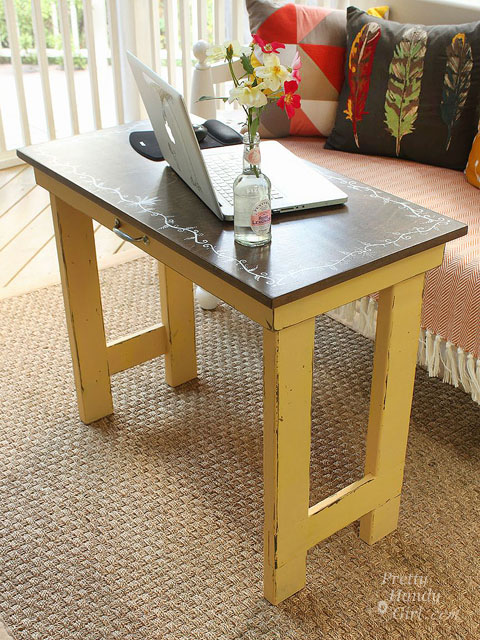
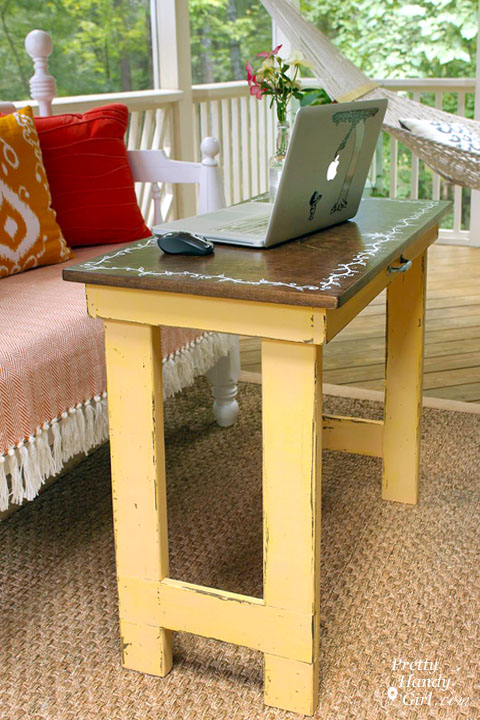
I stained my desk with Minwax Dark Walnut. After the stain dried, I added a hand-painted vine border. First, I sketched the design in chalk.

Folding Laptop Writing Desk | Pretty Handy Girl

Then I painted the design using a watered-down white chalk paint.

Folding Laptop Writing Desk | Pretty Handy Girl

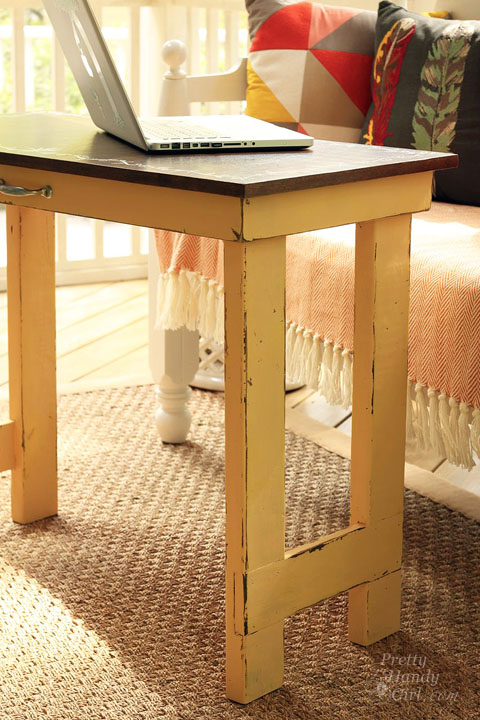
The apron and legs received a mixture of chalk paints in a yellow color. The edges were sanded off to reveal the dark stain beneath.

Folding Laptop Writing Desk | Pretty Handy Girl

Finally, the desktop received several coats of General Finishes High Performance water-based topcoat in the flat finish. The legs and painted areas were waxed.

Folding Laptop Writing Desk | Pretty Handy Girl

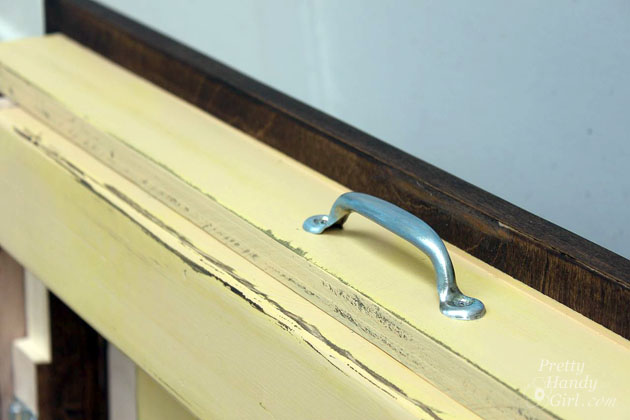
Add a handle to the center of the desk apron if you want to be able to transport it easily.

Folding Laptop Writing Desk | Pretty Handy Girl

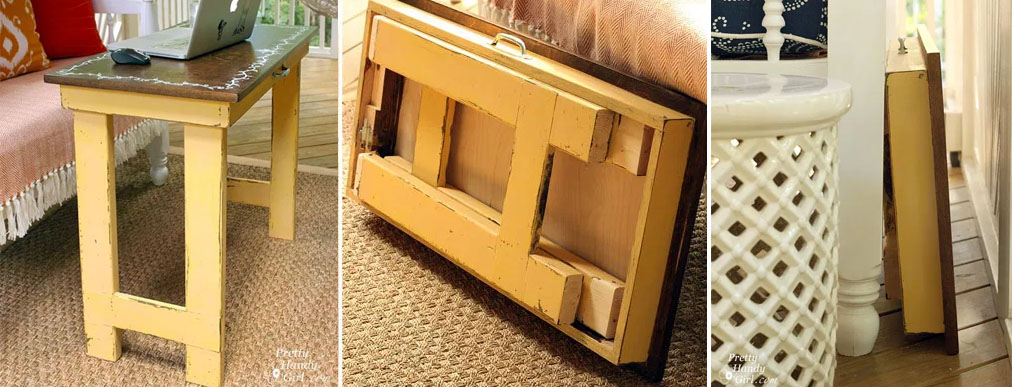
This table can be used anywhere! Itโ€™s sturdy, but doesnโ€™t take up much space.

Folding Laptop Writing Desk | Pretty Handy Girl

I can fold it up and bring it inside and work in front of the TV. Or it can be used as a small sewing table, crafting table, or just an extra buffet in the dining room.

Folding Laptop Writing Desk | Pretty Handy Girl

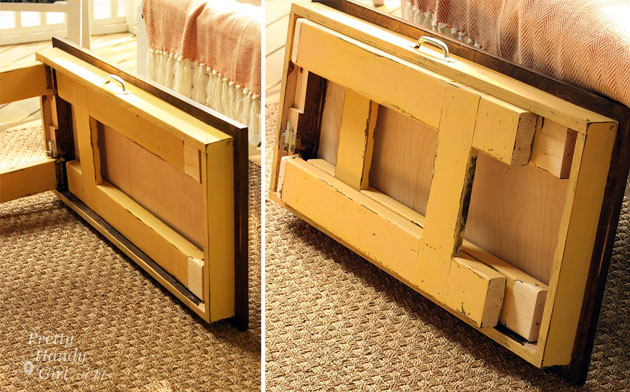
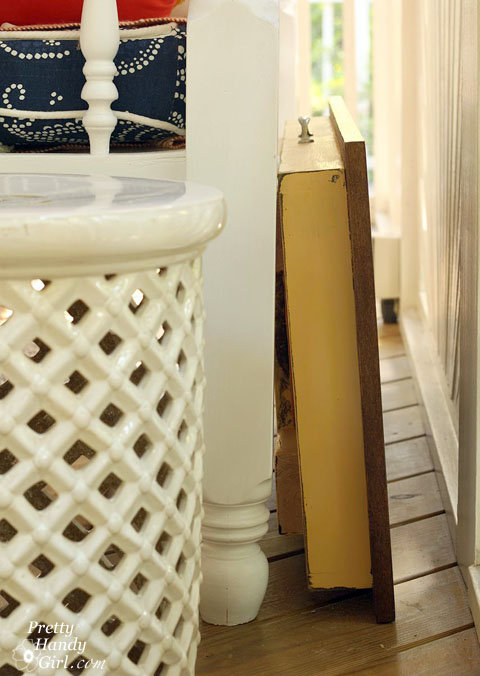
When Iโ€™m done, it folds up and stores behind a bench or sofa.

Folding Laptop Writing Desk | Pretty Handy Girl

If you like this tutorial, be sure to pin it for future use or to share! Cheers!

Folding Laptop Writing Desk | Pretty Handy Girl

Iโ€™d love to hear if you make your own folding laptop and writing table!

PHGFancySign

Many of you have suddenly found yourselves transitioning to a home office during this period of social distancing and feeling overwhelmed. No matter how much or how little space you have to work with, Iโ€™m here to help you create a cheerful and practical work space with these DIY Ideas for Setting Up a Home Office.

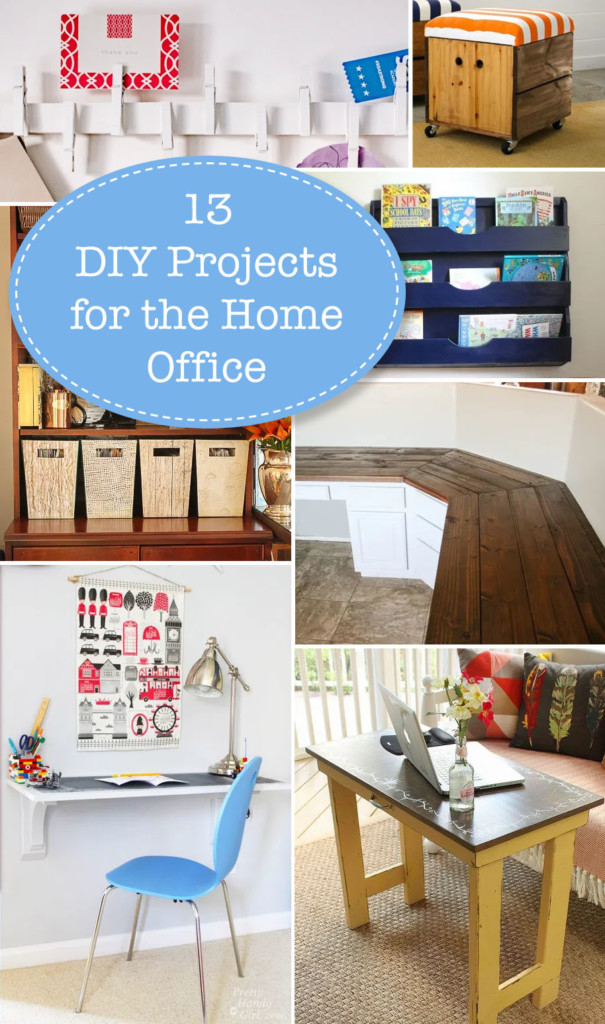
13 DIY Projects for Setting Up A Home Office
DIY Ideas for Setting Up A Home Office

I have been working out of a home office for quite a while now, so I thought I would share some of my most valuable ideas for getting organized to work at home. For inspiration, here are 13 easy, inexpensive, and practical projects to get you started.ย  Who knows, after you get set up, you may not want to return to your corporate office.

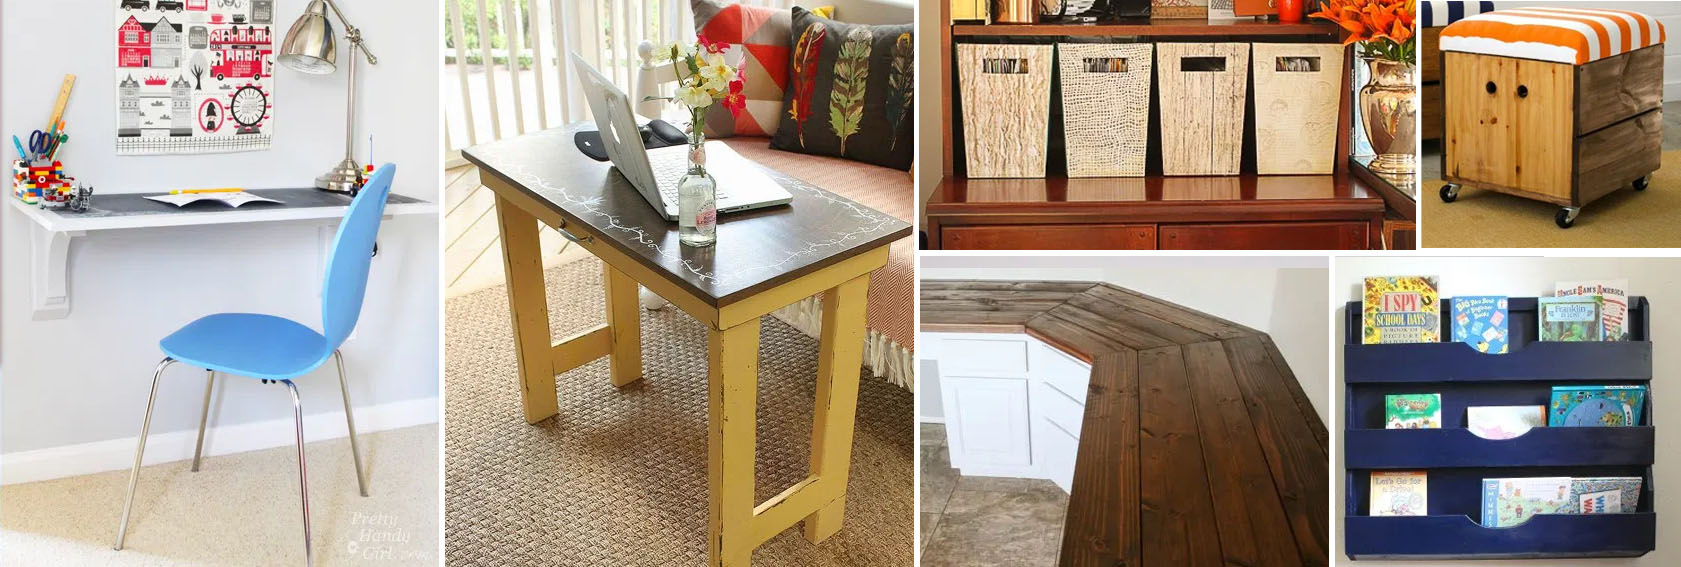
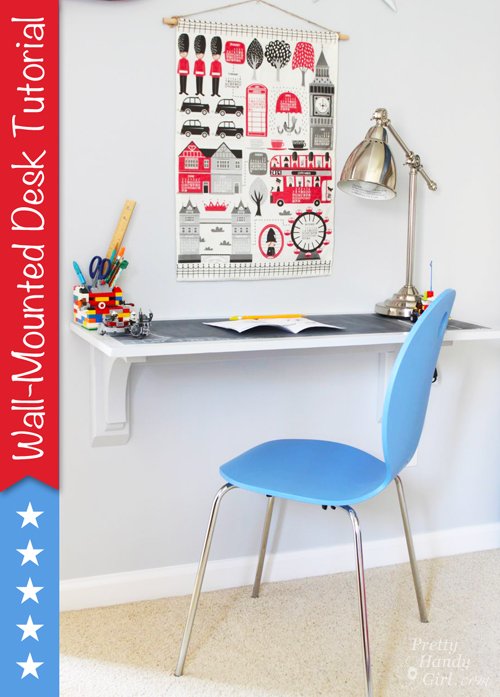
Wall-Mounted Desk Tutorial | Pretty Handy Girl

The great thing about this Wall-Mounted Deskย is it can be small or large and it wonโ€™t take up any floor space!


Folding Laptop Writing Desk | Pretty Handy Girl

This Folding Laptop Writing Desk is the perfect height, and can fold up and store away when youโ€™re not using it.


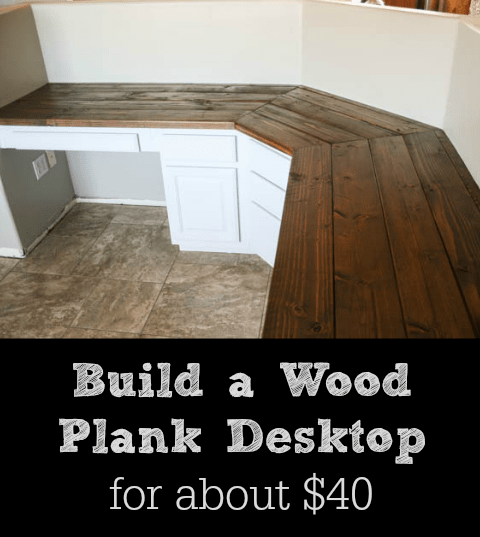
Build a Wood Plank Desktop for about $40

Hereโ€™s how you can create a simple (and most importantly, inexpensive) Wood Plank Desktop for about $40!


Magazine File Box Facelift | Pretty Handy Girl

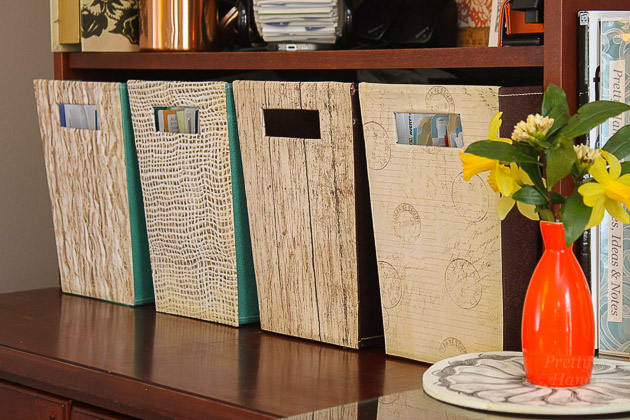
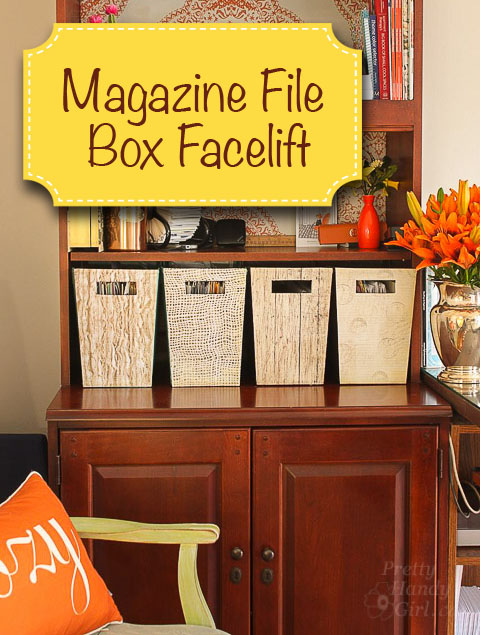
Tired of your boring home office decor? Within minutes you could give a Magazine File Box a Faceliftย (or a storage box)!
I saved a lot of money reusing the old. Put โ€˜er there fellow savers!


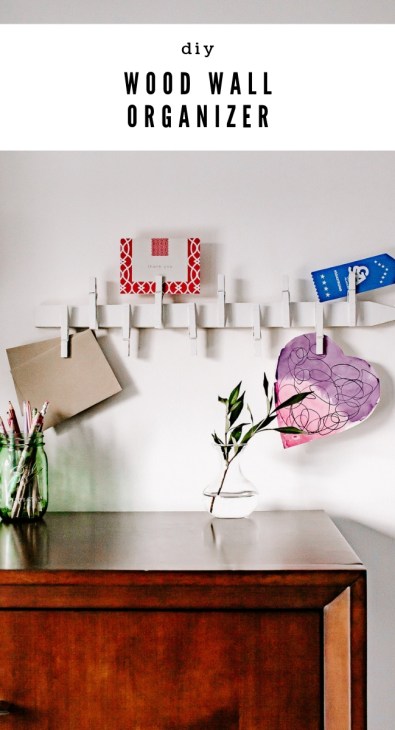
DIY Wood Wall Organizer

If youโ€™ve seen these cute Wall Organizers and thought: โ€œI could totally make that,โ€ Iโ€™m here to tell you, you can!


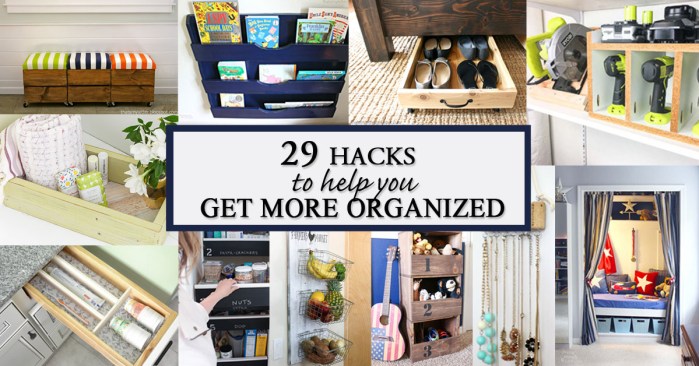
29 hacks to help you get more organized social media image

Here are 29 hacks to help you get more organized and help you transition to a better organized home office!


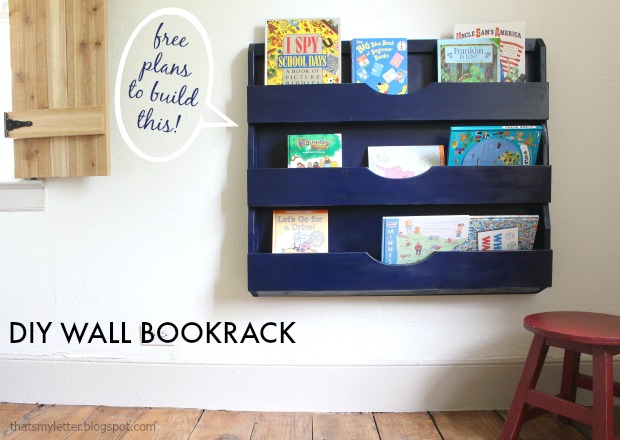
DIY Wall Bookrack

This Bookrack Building Project will have you organized and will free up space in no time. ย The shelves are tapered and have plenty of depth for multiple books, files, or magazines.


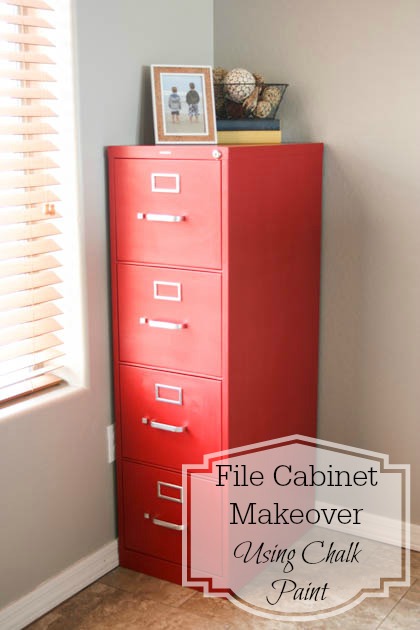
File Cabinet Makeover Using Chalk Paint

Give a boring beige File Cabinet a SUPER cheap and quick makeover using chalk paint! I bet you can score a free file cabinet on your local buy, sell, or trade group. Or look on FreeCycle.org or Craigโ€™s List.


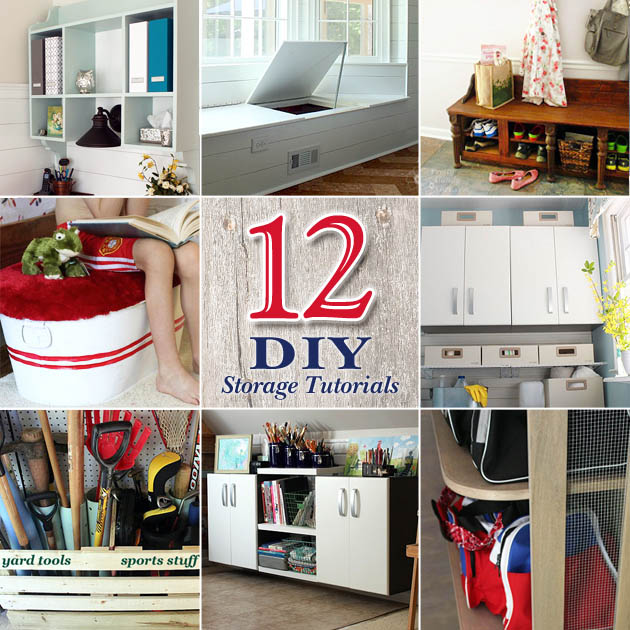
12 DIY Home Storage Tutorials | Pretty Handy Girl

Iโ€™m taking advantage of these days at home to do a big โ€œclean outโ€!ย  Youโ€™re sure to find one of these 12 DIY Storage Projects to help you organize your home useful.


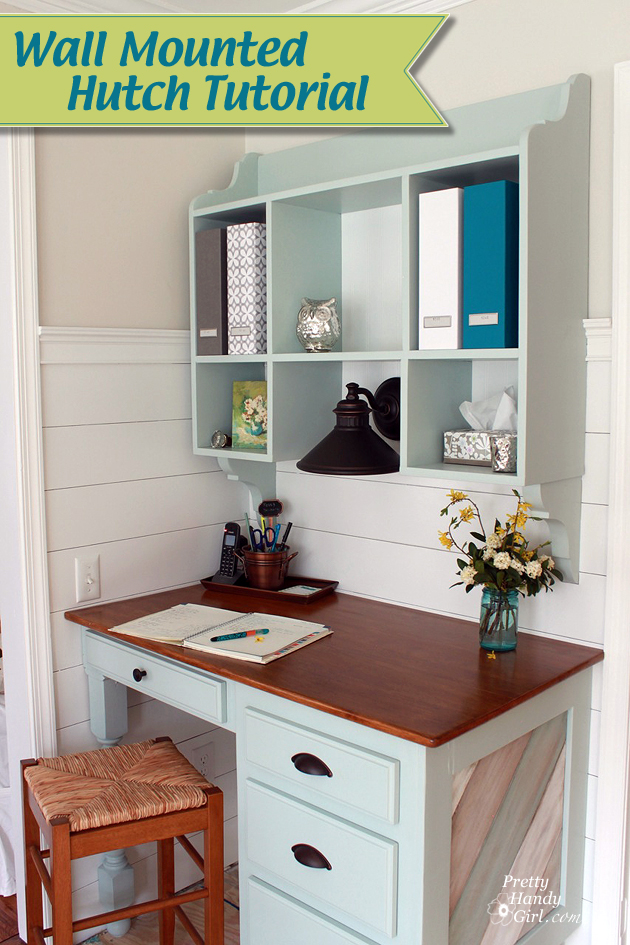
Wall-Mounted Hutch Tutorial

This charming Cottage Style Desk and hutch is where I keep our lives organized! It takes up otherwise wasted space in the corner of our kitchen.


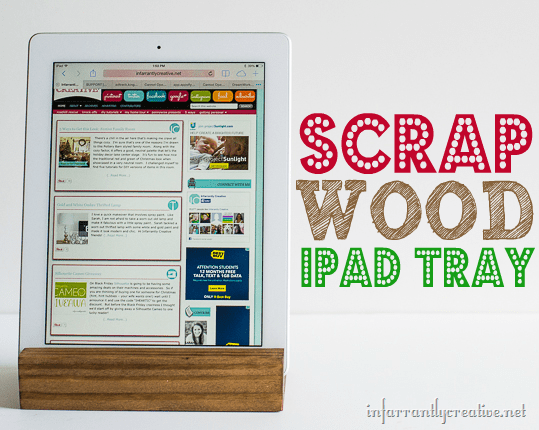
Scrap Wood iPad Tray

If you are accustomed to DIY projects, you probably amassed quite the stockpile of leftover wood. Youโ€™ll love this quick, easy, and cheap DIY iPad Holder!


rolling storage stool final

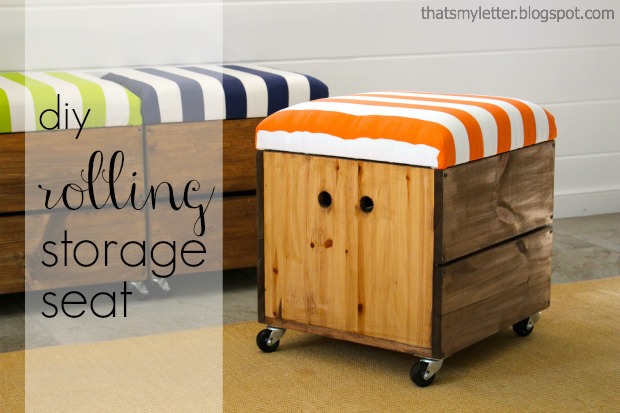
Whatโ€™s better than getting organized with more storage? How about combining it with additional seating! Check out this easy tutorial for how to build a Rolling Storage Seat.


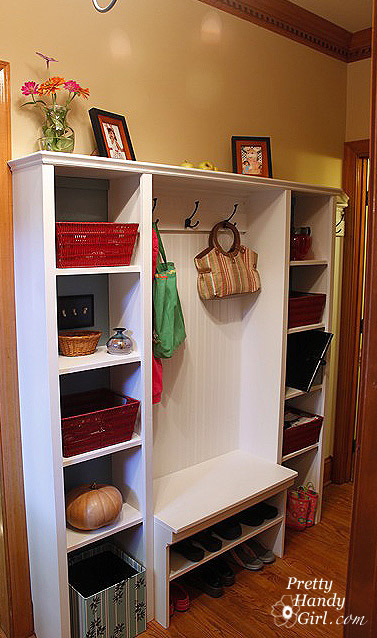
Although this wall Storage System was built custom for a mudroom, you can easily adapt it for a home office!

I hope you found some of these DIY Ideas for Setting Up a Home Office helpful. Gotta run and get set up for working tomorrow from home. Good luck to all of you, especially if you have family members who like to interrupt your workflow.

Magazine File Box Facelift | Pretty Handy Girl

Magazine File Box Facelift | Pretty Handy Girl

Itโ€™s a new year and I want to give a few rooms in our house a fresh new look. Our office was one of the first spaces I completedย when I started this blog (has it really been 5 1/2 years!)

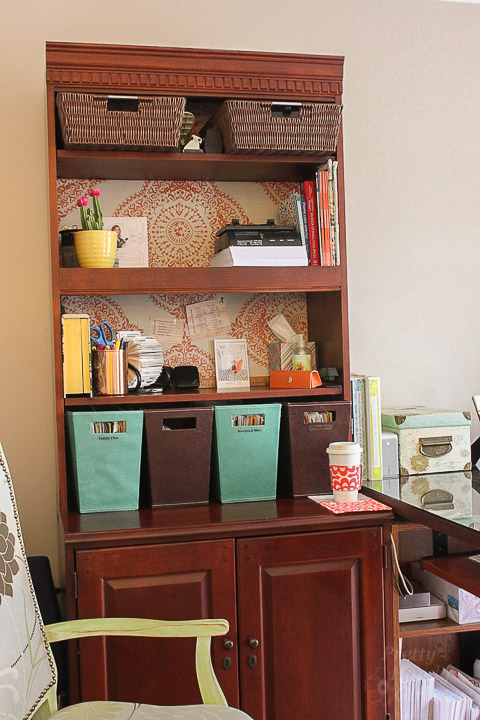
Iโ€™m tired of staring at the same room day after day. I know many of you feel the same way. You have that itch, or a burning desire to hop in the car and drive to your nearest Home Goods, World Market or The Container Store to buy cute colorful decor or storage bins. I almost caved into that desire because I was tired of looking at the two tone boxes I bought 6 years ago. ย But, that would mean discarding the old ones. You know how I feelย about throwing things away! If I can upcycle it, Iโ€™m going to!

Magazine File Box Facelift | Pretty Handy Girl

Within 10 minutes you could give aย Magazine File Box a Facelift (or a storage box)! I saved a lot of money reusing the old. Factor in the gas money I saved by not driving to the store. And the time I saved by not leaving the house. I think I deserve a big fat high five! Put โ€˜er there fellow savers!

Hereโ€™s How to Give Your Magazine File Box a Facelift: Read more

PB Knock Off Monogrammed Bulletin Board

edited-0510

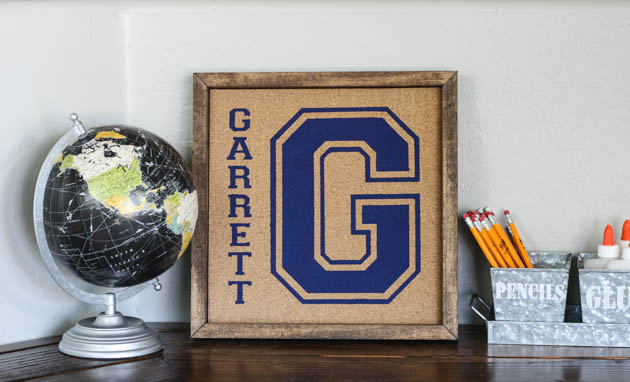
Hey everyone! ย If you remember, last month, I shared with you how I updated my boysโ€™ deskย in our den with a wood plank desktop. ย The den is just about ready for the big reveal and now Iโ€™m just working on adding little details. ย This includes these fun personalized bulletin boardsย I made for each of my boys. ย I was searching for desk organization ideas one day and saw theseย personalized pinboardsย on Pottery Barn Kids. ย I knew theyย would be perfect for my boys and that I could knock them off pretty easily. ย I made two of these pinboards, but my supply list will be for one pinboard.

Materials:

  • 12โ€ณ x 12โ€ณ wrapped canvas (mine was 3/4โ€ณ thick)
  • 12โ€ณ adhesive backed cork sheet
  • Adhesive vinyl
  • Transfer paper
  • Die-cutting machine
  • Acrylic aint
  • 2 โ€“ 1โ€ณ foam paintbrushes
  • 1โ€ณ x 2โ€ณ x 6โ€ฒ pine board
  • Wood stain
  • Sander w/ 220 grit sandpaper
  • Miter saw
  • Brad nailer
  • 1โ€ณ Brad nails
  • 24โ€ณ Bar clamps
  • Hot glue gun

Instructions:

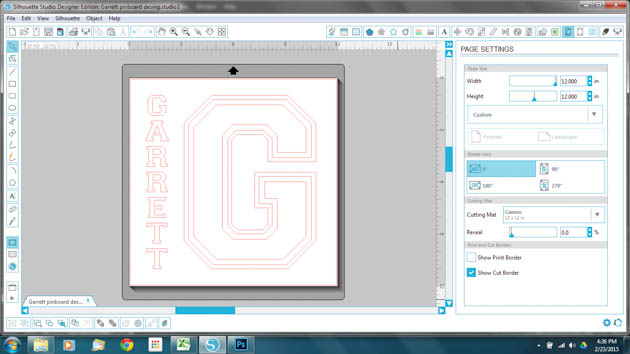
Start by designingย your stencil. ย To make it look just like the PB Kids version, use theย Varsityย font. ย (FYI, the letters are all capitalized, but when you use the shift key or CAPS lock, it will add the outline.)

Knockoff Personalized Pinboard

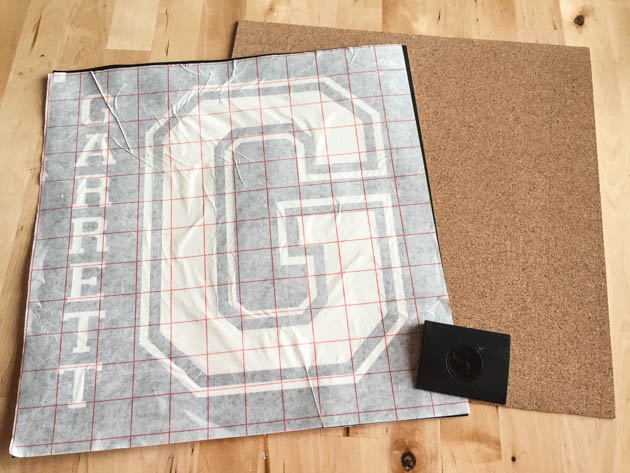
Cut your design out on the 12 x 12โ€ณ sheet of vinyl and weed the negative pieces out. ย Remember that this is a stencil, so make sure toย weed out the correct parts of your design. ย Place your transfer paper over the design and use a scraping tool or a credit card to get out any air bubbles.

edited-7687

Peel the backing off of your vinyl and very carefully center it onto your cork sheet. ย Use theย scraping tool or credit card again to firmly adhere the vinyl to the cork sheet. ย Carefully peel the transfer paper off. Stencilย your design using theย acrylic paint and foam brush. Read more