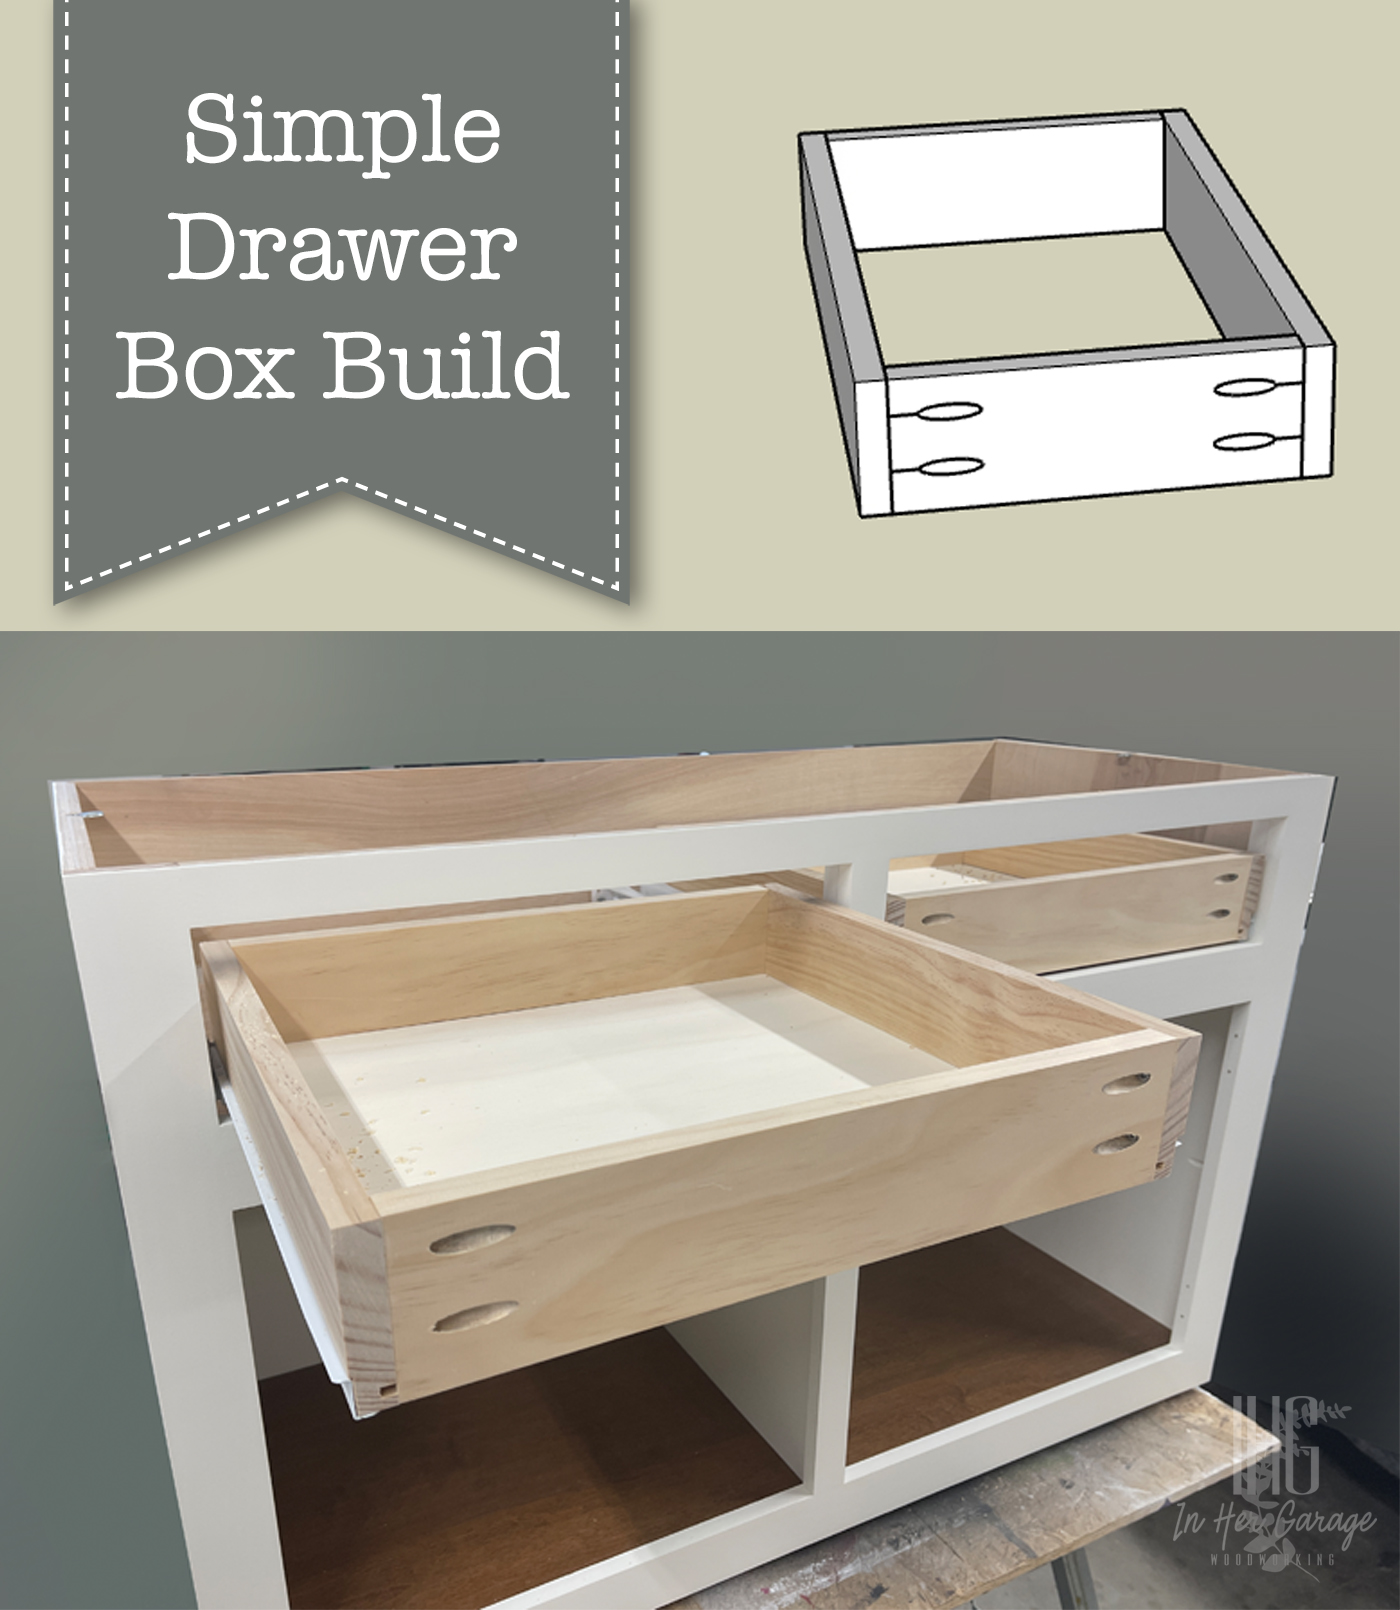
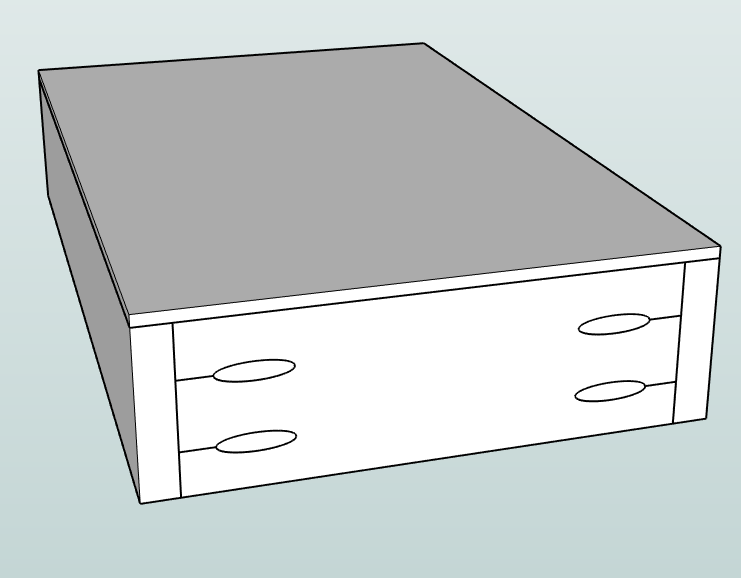
Learn the simplest and most accurate way to build drawer boxes with this easy tutorial.
Drawer Box Build
Welcome back, this is Kristen from In Her Garage Woodworking here with another build plan for you. When I first began my DIY woodworking journey over 5 years ago I was most intimidated by building drawers. I avoided them because I thought there were too many measurements and too much room for error. But, with a simple plan and a lot of practice, I now make drawers consistently and accurately. These are the exact plans I use to this day to make drawer boxes for all of my commissioned furniture pieces because when you’re able to make something quickly and easily that is solid and looks great, why would you ever change it?
Materials
(I’ve included affiliate links for your convenience. I earn a small percentage from a purchase using these links. There is no additional cost to you. You can read more about affiliate links here.)
- 3/4” thick board (or plywood) (purchase the width of your choice at the circumferential measurement of the drawer box needed)
- 1/4” plywood panel
- 1 ¼” pocket screws
- Titebond 3 wood glue
- Drawer slides
Tools
- Miter saw or circular saw
- Table Saw (or use your circular saw and this jig)
- Kreg Jig
- Brad nailer
Instructions:
Your drawer can be any depth you wish, but before building the drawers, rip your 3/4″ material to the drawer height you desire (if you are using plywood or if your 3/4″ material is wider than your finished drawer.
Step #1: Cut drawer box sides
Using your miter or circular saw, cut two identical 3/4” boards to the same length of the drawer slides you’ll be using.
Step #2: Cut drawer box front and back
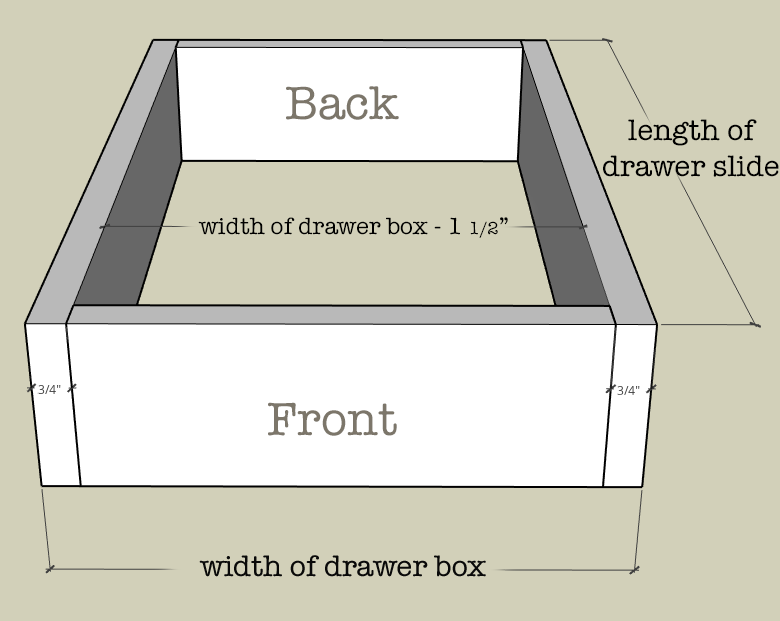
Cut two pieces of the 3/4 inch material for the front and back of the drawer box. If you’re using ¾” material to build the drawer box then the length of the front and back can be calculated as follows (see equation and picture below):
Width of drawer box – 1½” = width of front and back drawer box boards
Step #3: Add groove for drawer bottom (optional)
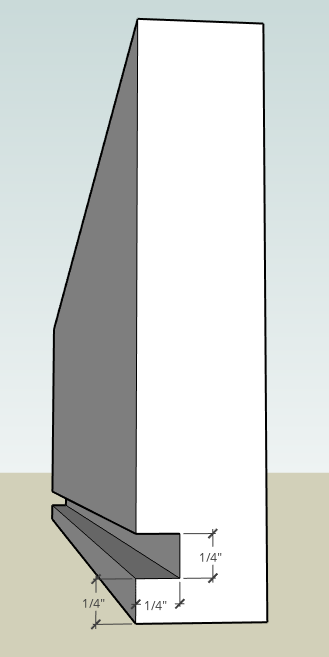
Taking all four 3/4″ boards to the table saw cut a groove 1/4” from the bottom of all sides that is 1/4” deep. Run the 3/4 board through one time, then adjust the fence (or your saw) to cut another groove next to the first. (A standard saw blade is 1/8” wide so you will need to make two passes in each board to achieve a 1/4″ groove for the 1/4″ drawer bottom material.
Dry-fit the plywood to check for fit.
Step #4: Create pocket-holes
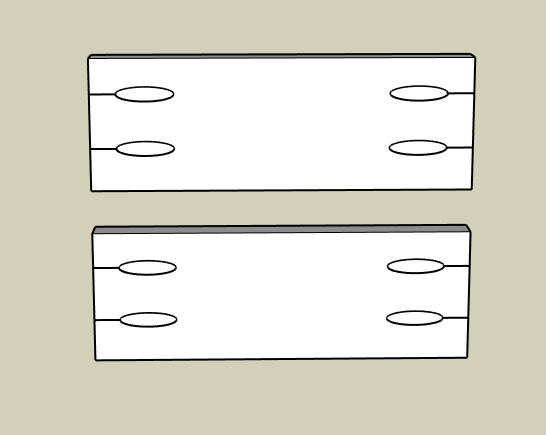
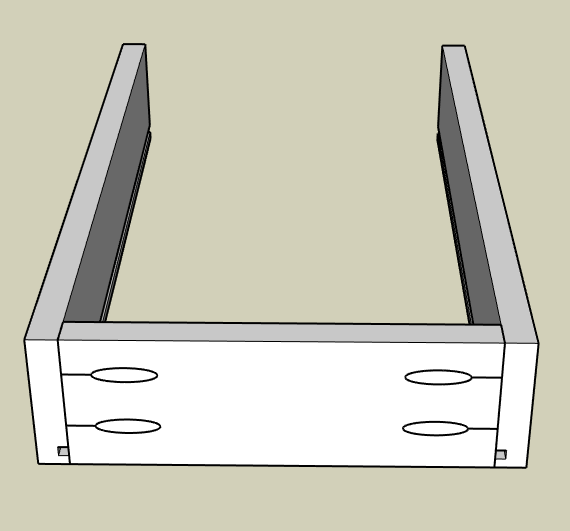
Using your Kreg jig make 2 pocket-holes at either end of the front and back boards on the opposite side as the plywood bottom groove if you chose to do this step. Be sure to avoid the groove.
Step #5: Assembly
If you DID NOT cut a groove to accept the plywood bottom, then you can assemble the drawer box using wood glue and 1 ¼” pocket screws.
Then, you will cut your bottom 1/4″ panel to the length and width of the drawer box and simply glue and nail it to the bottom of the drawer box
If you DID create a groove for the bottom panel assemble the front and both sides using wood glue and 1 ¼” pocket screws.
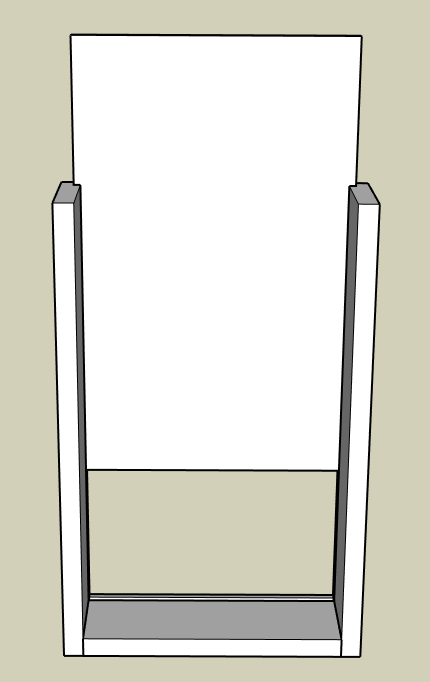
Next, cut the ¼” plywood to fit into the bottom of the drawer box groove dry fitting the back panel to check for fit.
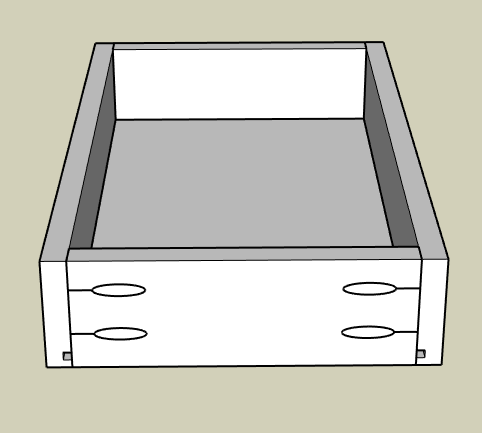
Once you have the correct size for the plywood bottom then slide it into the groove and attached the back piece of the drawer box using wood glue and 1 ¼” pocket screws. There is no need to apply glue into the panel groove. The plywood bottom will “float” in place.
No need to worry about filling the pocket-holes because you will be applying a drawer face directly over them.
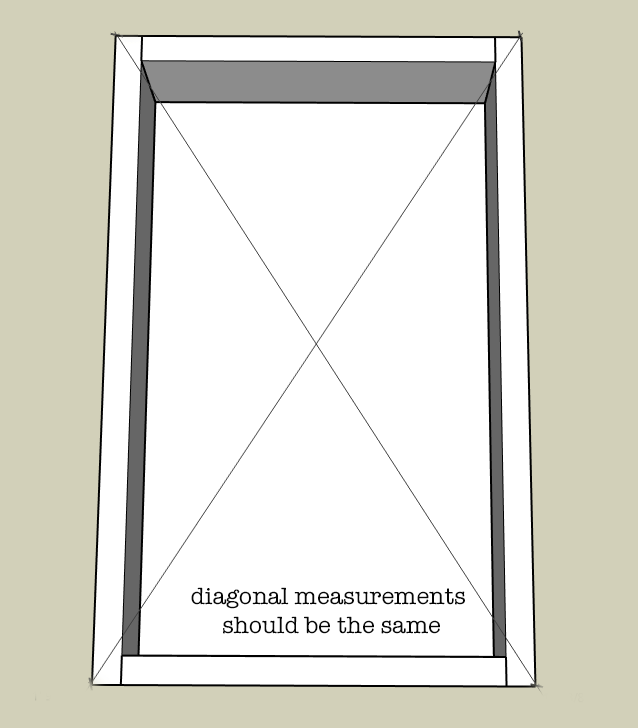
Be sure to check for square by measuring both diagonals of the drawer box. If one measurement is longer simply squeeze the longer diagonal until both are the same.
Allow drawer box to dry.
That is the basic drawer box build that I use and it is strong and easy to put together. I hope this tutorial gives you the confidence to tackle that project you’ve been putting off. Next, I will teach you my favorite method for installing drawers and how I troubleshoot drawer boxes that just aren’t quite the right fit!
Finishing Tips:
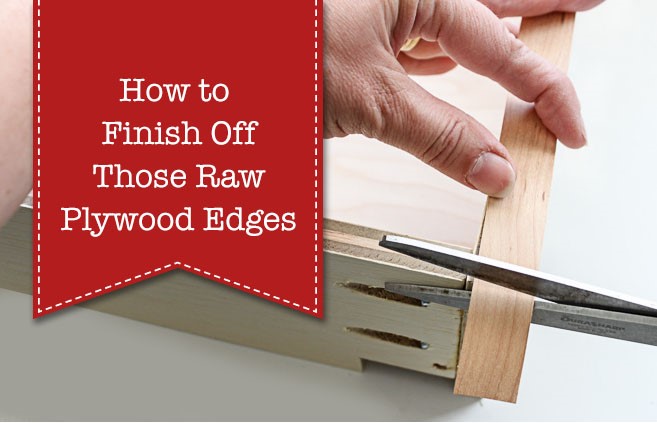
If you are making your drawer boxes out of plywood then check out Brittany’s Edge Banding Tutorial and learn how to cover that unsightly plywood edge.
Wondering how, or if, you should apply a protective finish to the drawer box? If I am working with solid wood for the drawer sides then I will give the material a quick finish sanding and that’s it. But, for plywood, I typically do one of two things, depending upon what I have on hand at that time.
- Option 1: Apply 1 or 2 coats of sanding sealer to raise the grain of plywood and sand smooth. Sanding sealer is clear, easy to apply, and dries quickly. If I have the time and patience I may also apply a quick spray of clear, semi-gloss, water-based topcoat to give it a little shine but it isn’t necessary.
- Option 2: Apply 2 to 3 coats of spray shellac to seal the plywood. Spray shellac dries quickly and won’t leave any chemical smell behind. But be aware that it will give the plywood a slight amber tone which typically isn’t big deal. Remember to lightly sand between coats.
Hi! I’m Kristen, from In Her Garage, and I am a self-taught woodworker and DIY fanatic from Minnesota where I live with my husband and our two daughters. Between being a wife, mom and, registered nurse, I try to make as much time for DIY as possible. My love for building came after our family built our current home in 2015. After we moved in, we needed furniture and instead of spending massive amounts of money to order the pieces we wanted I decided that I would build them myself. I started with a buffet table plan from the fabulous Ana-white and quickly set out to remodel my entire home office.
Since then I have started a side business building furniture for the people in my community. I love hearing my clients talk about the pieces they wish they had whether it be a rustic buffet table, a one drawer side table, or a toy box, and then making it a reality for them. While starting my small business it made perfect sense that I would document my building journey so I simultaneously launched the In Her Garage blog and I love sharing my plans, tips, and tricks.
Making something beautiful with your own two hands through a little preparation and determination is an amazing feeling and I hope to bring inspiration and know-how to those looking to tackle a big or small project.
I am so glad that you found me here and please feel free to connect with me on Pinterest, Instagram, and Facebook to see what I am working on right now. And check out the brand new In Her Garage Etsy shop for other plans or to have a furniture item made especially for you!

