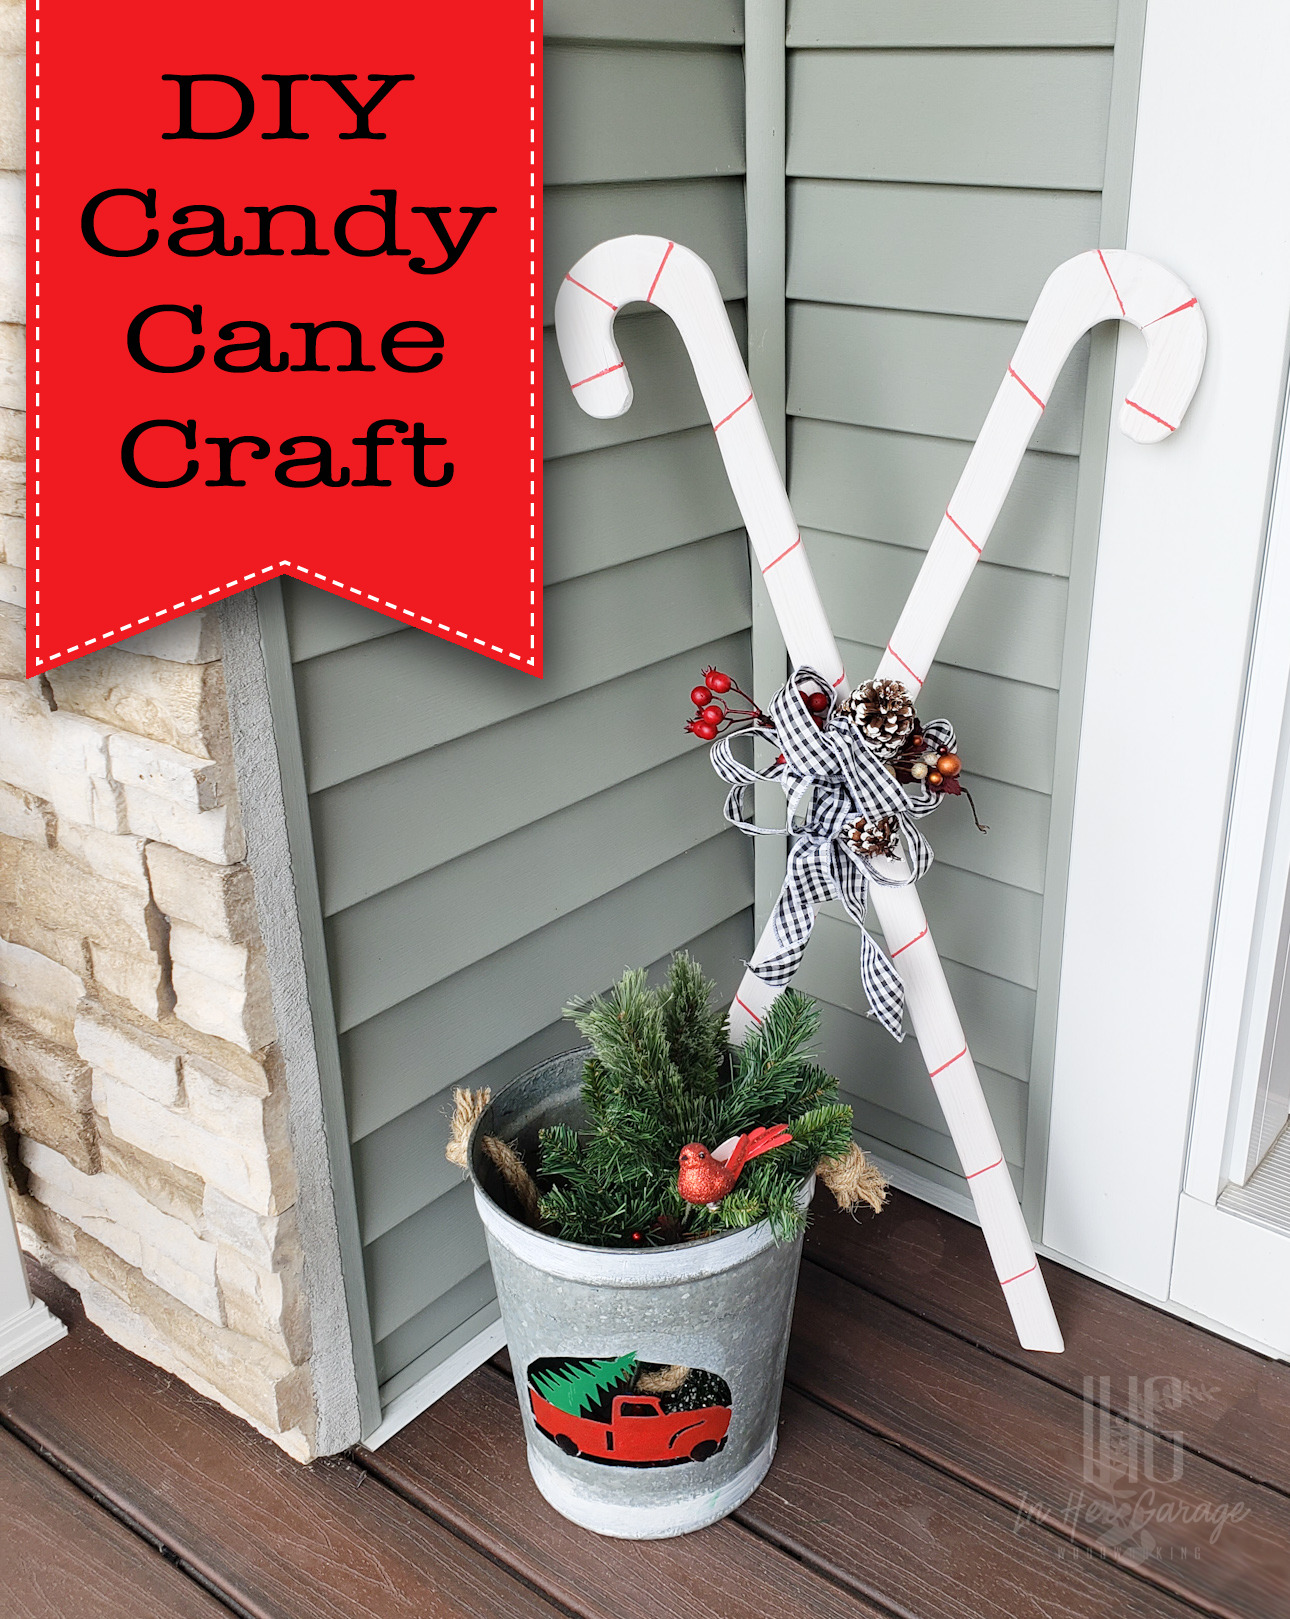
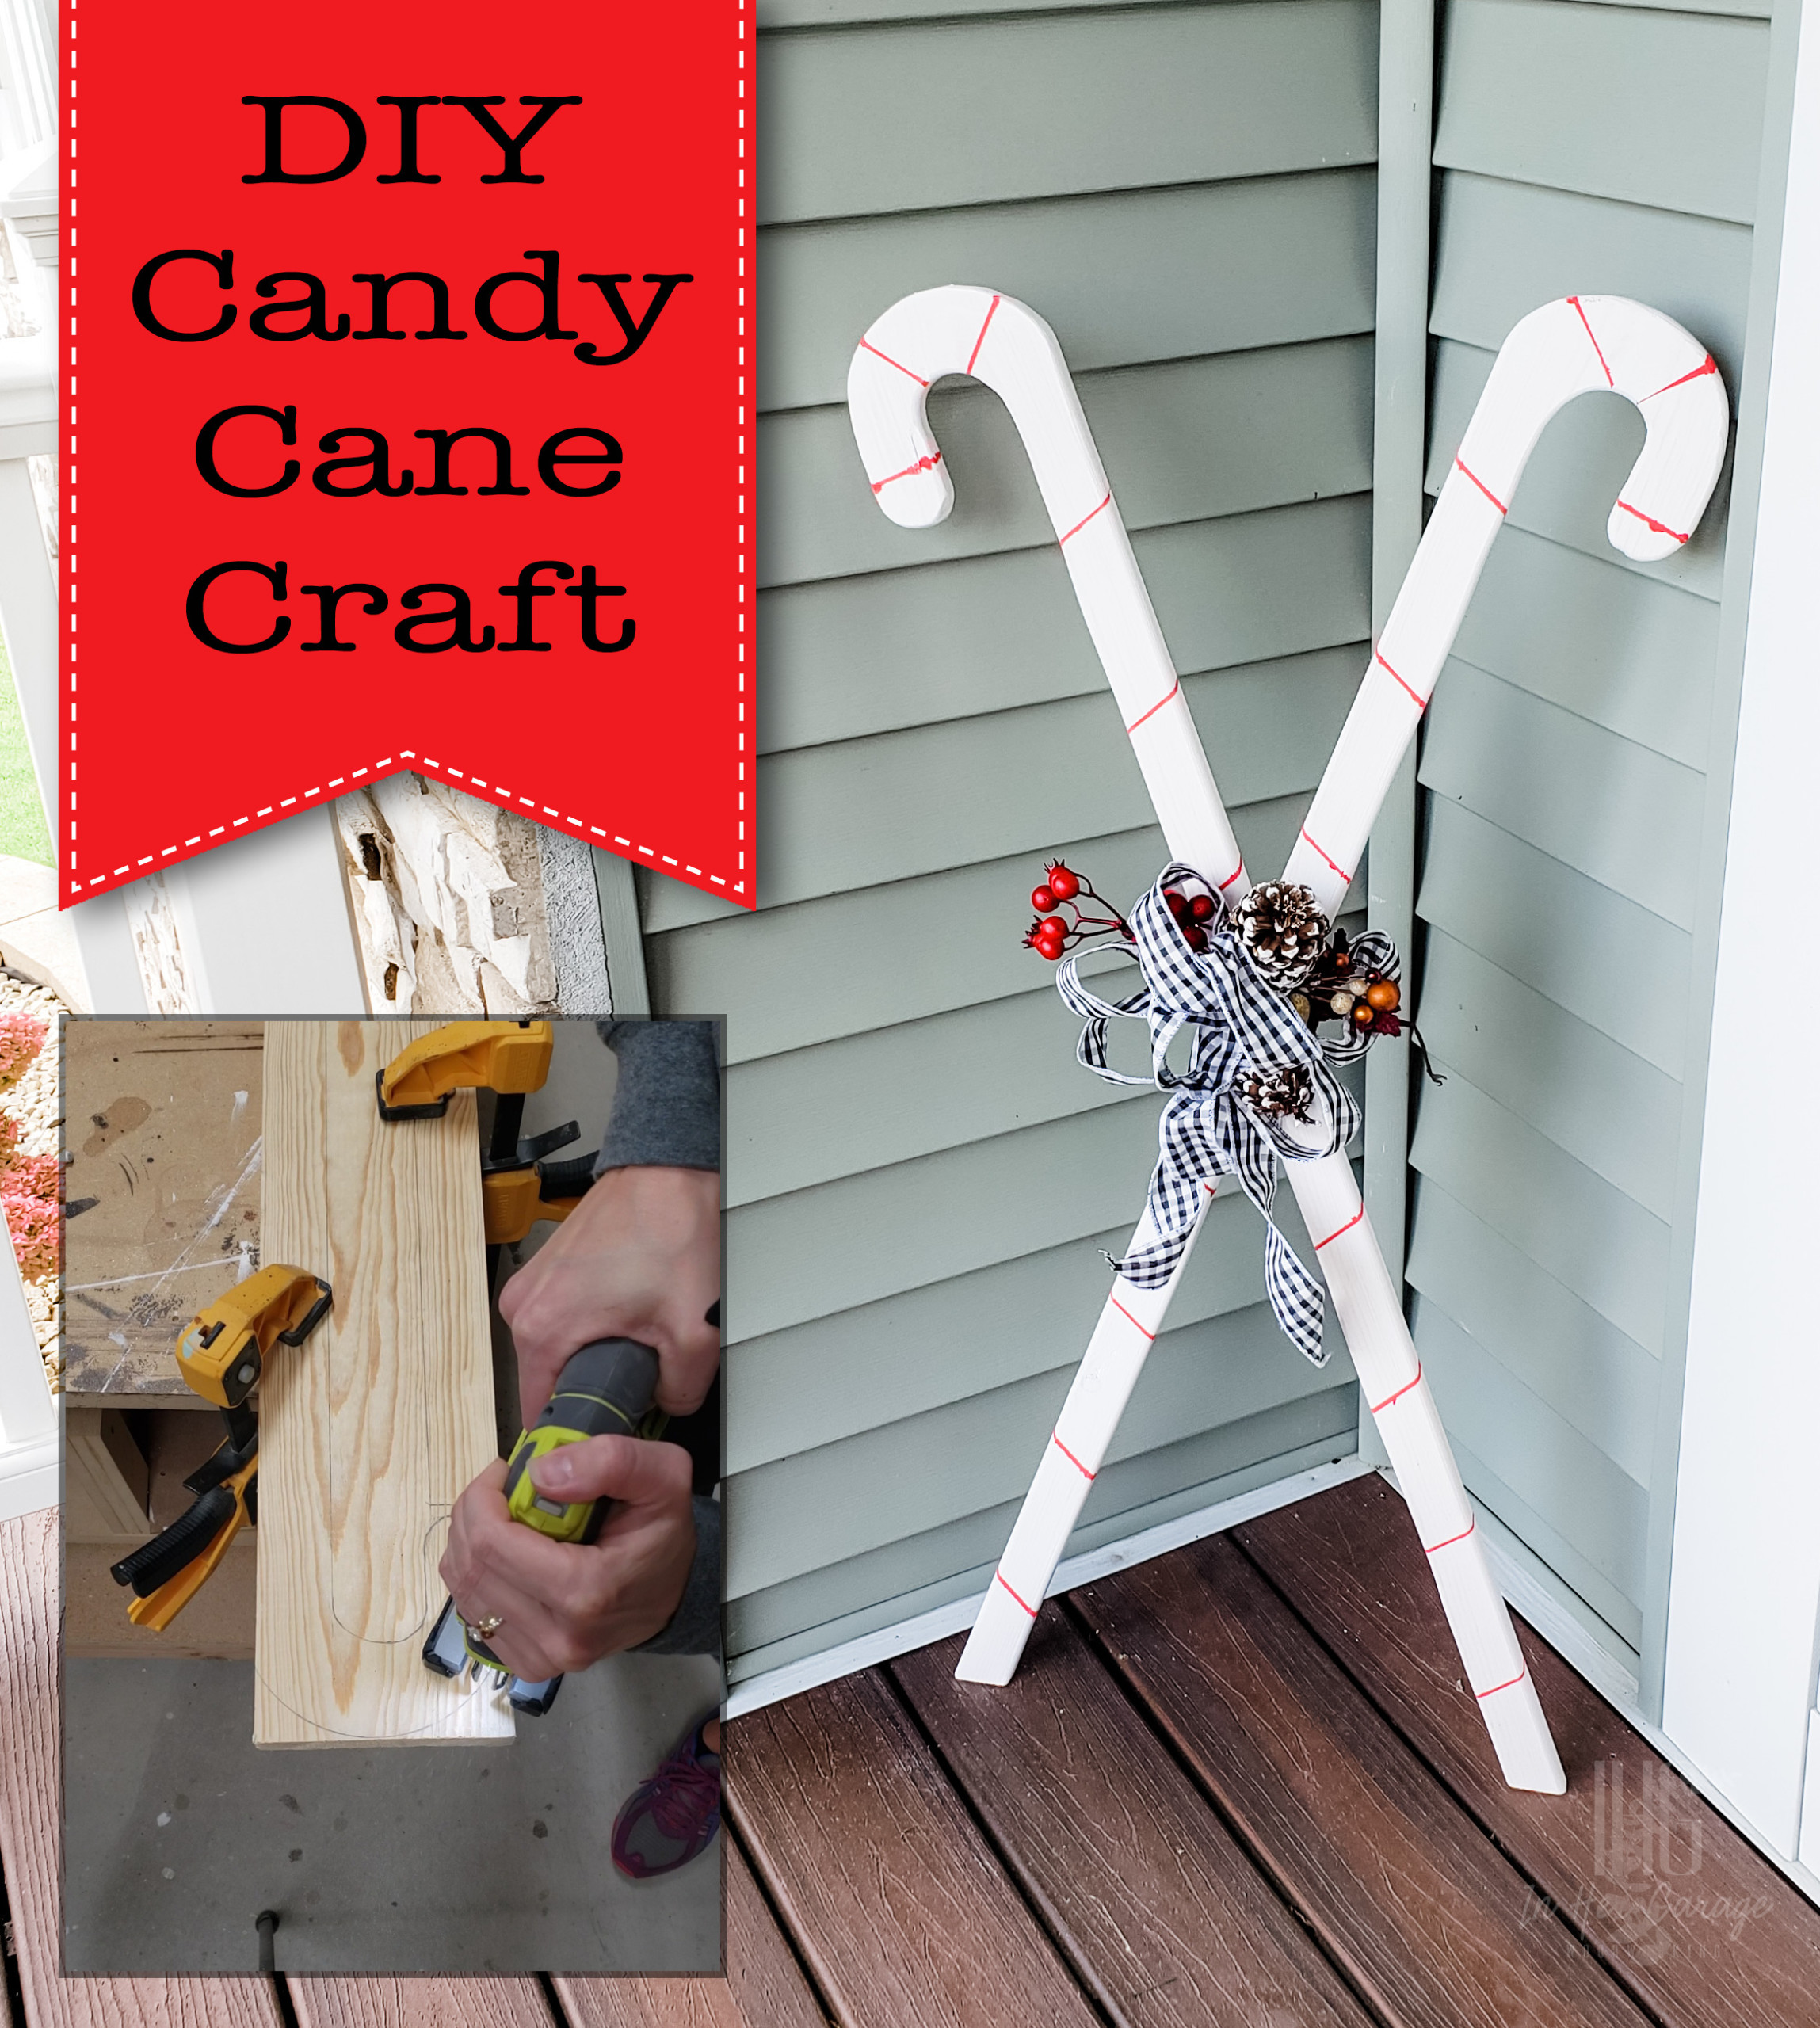
Make this adorable DIY Candy Cane craft using 1 board and 2 tools!ย  These DIY Candy Canes are the perfect complement to your holiday decorations.

DIY Candy Cane Decor

I love this craft because itโ€™s not only cheery but it also helps me add decor at a mid-height. I often find myself decorating something really tall like my Christmas tree or something short, like cute decor items near the ground. These candy canes are super simple to make and add medium height decorations to your home.

Material:

(Iโ€™ve includedย affiliate links for your convenience. I earn a small percentage from a purchase using these links. Thereย is no additional cost to you. You canย readย more about affiliate links here.)

  • 1- 1โ€ณ x 8โ€ณ x 6โ€ฒ pine board cut to 4โ€ฒ
  • Wood glue
  • Paint

Tools:

Instructions:

Step 1: Draw the candy canes

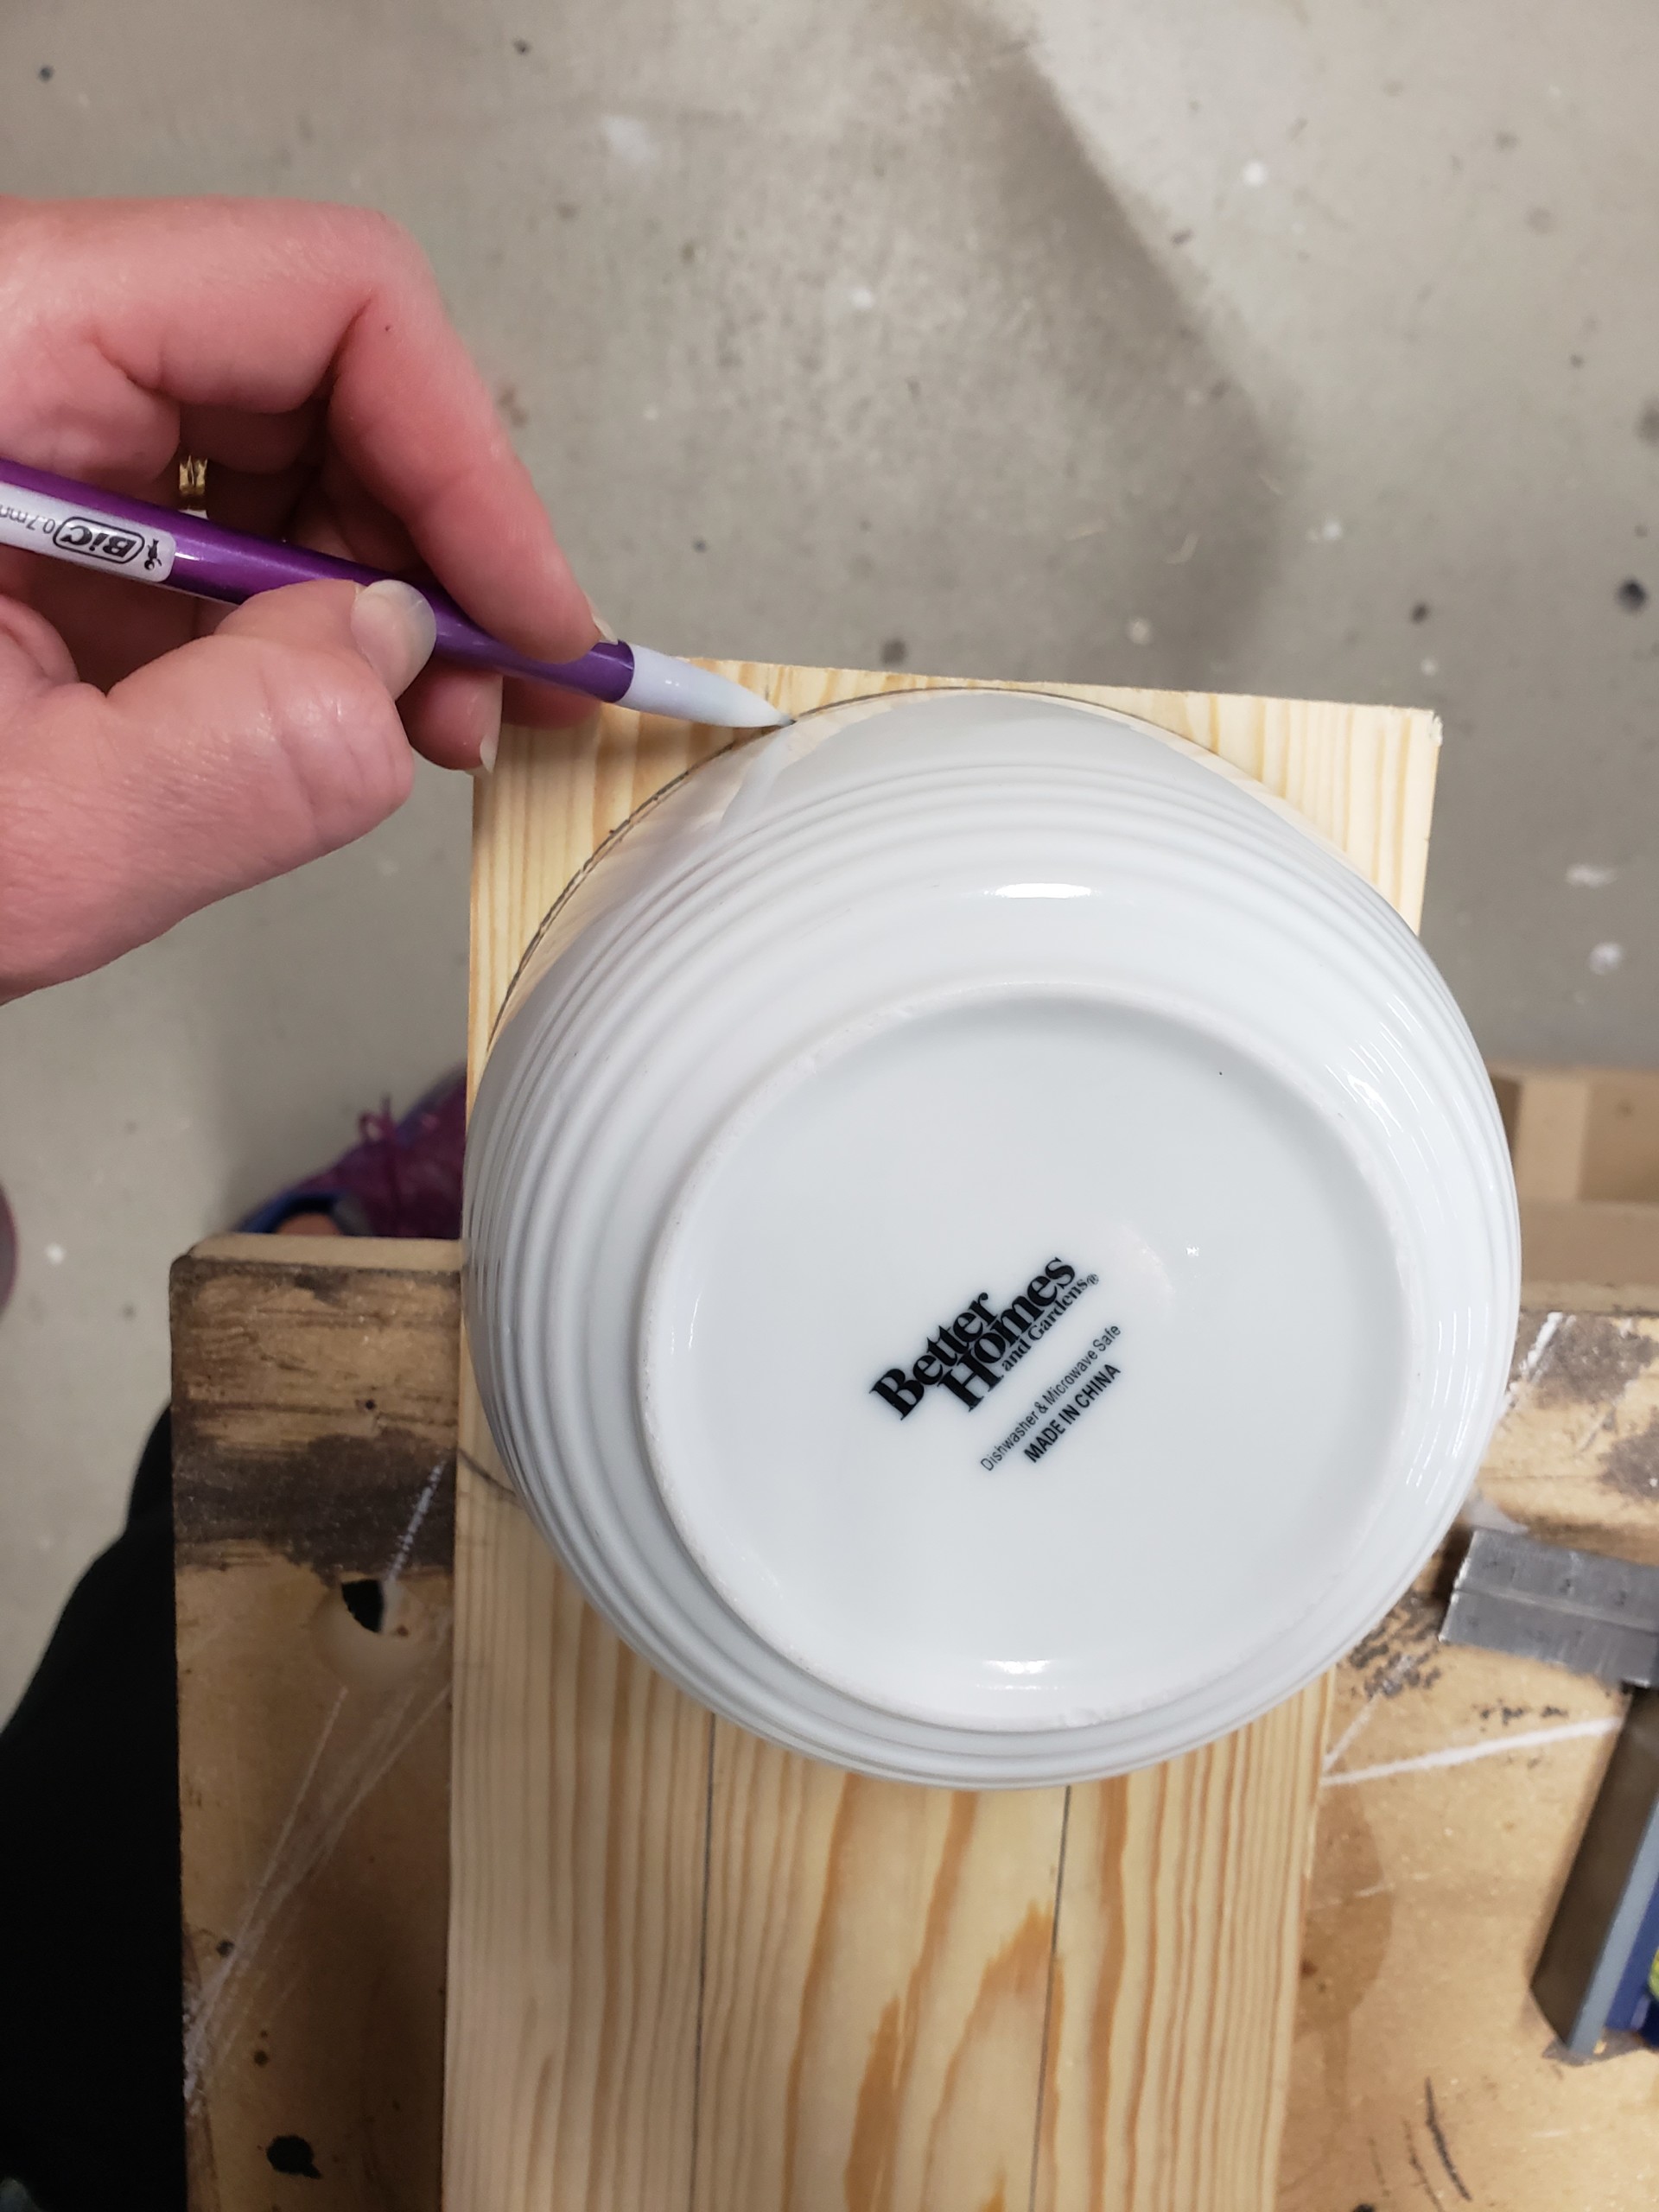
  • Find something round that is about as wide as your board. I used a cereal bowl from my kitchen.
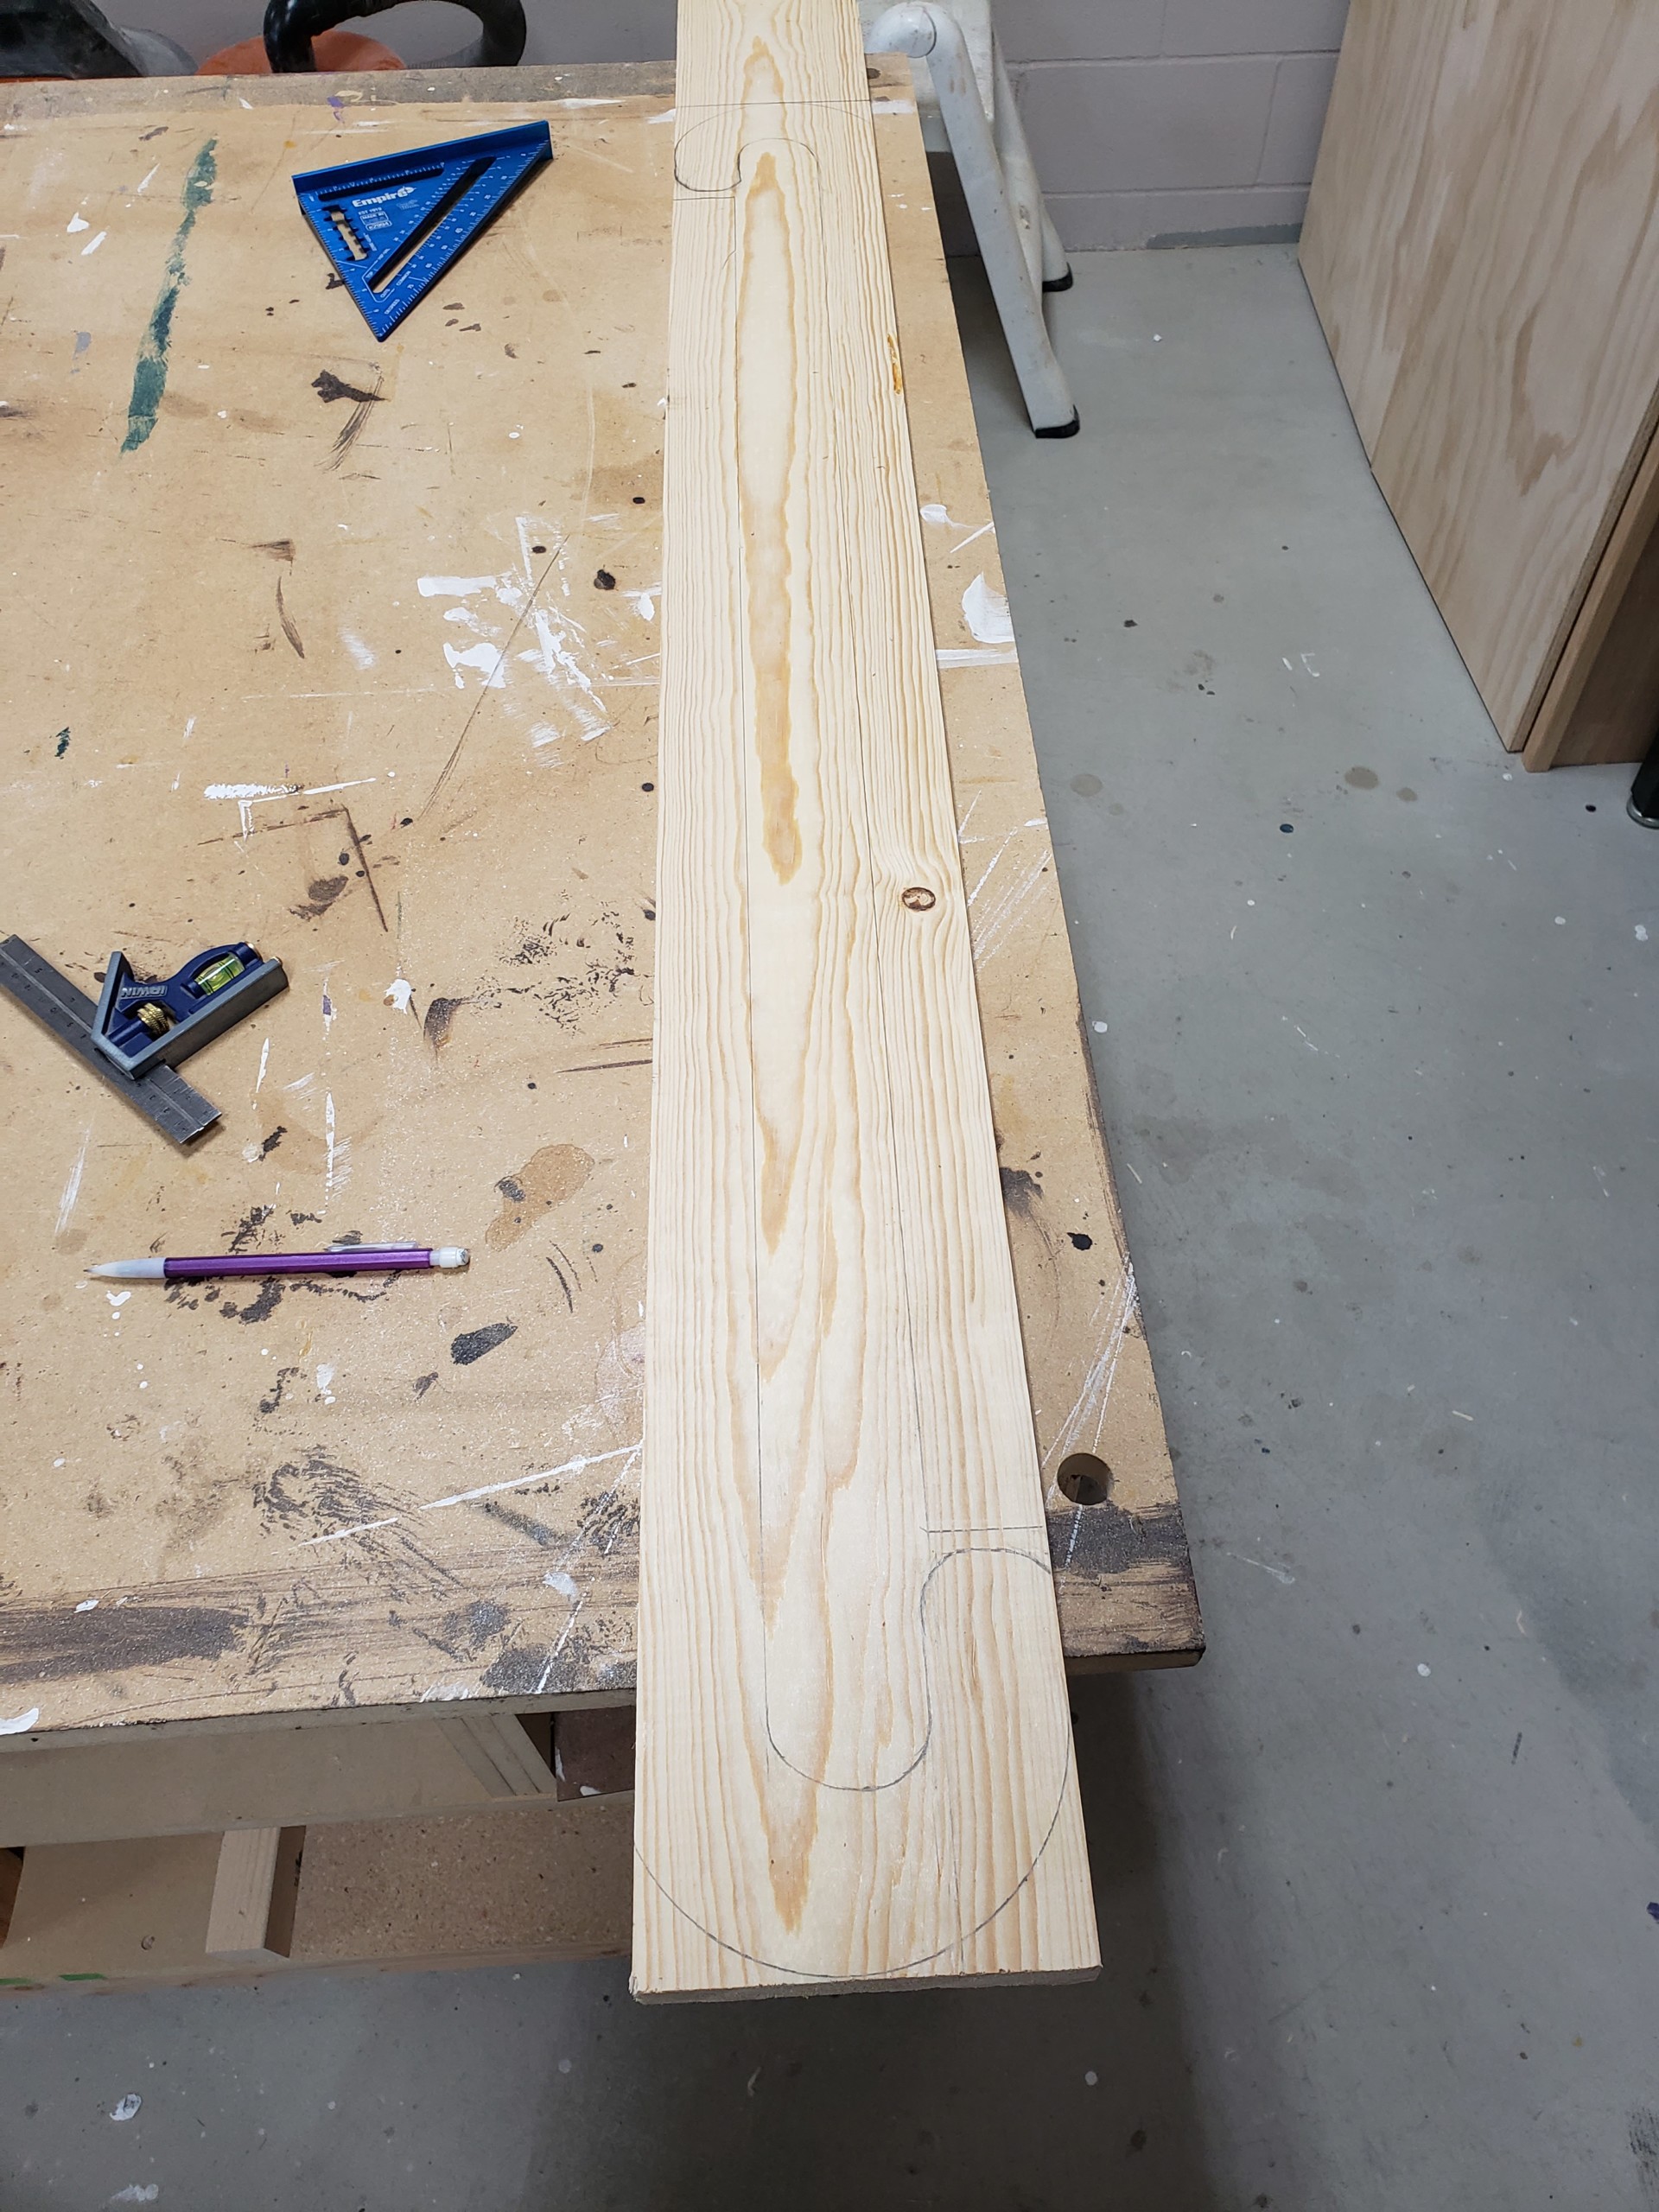
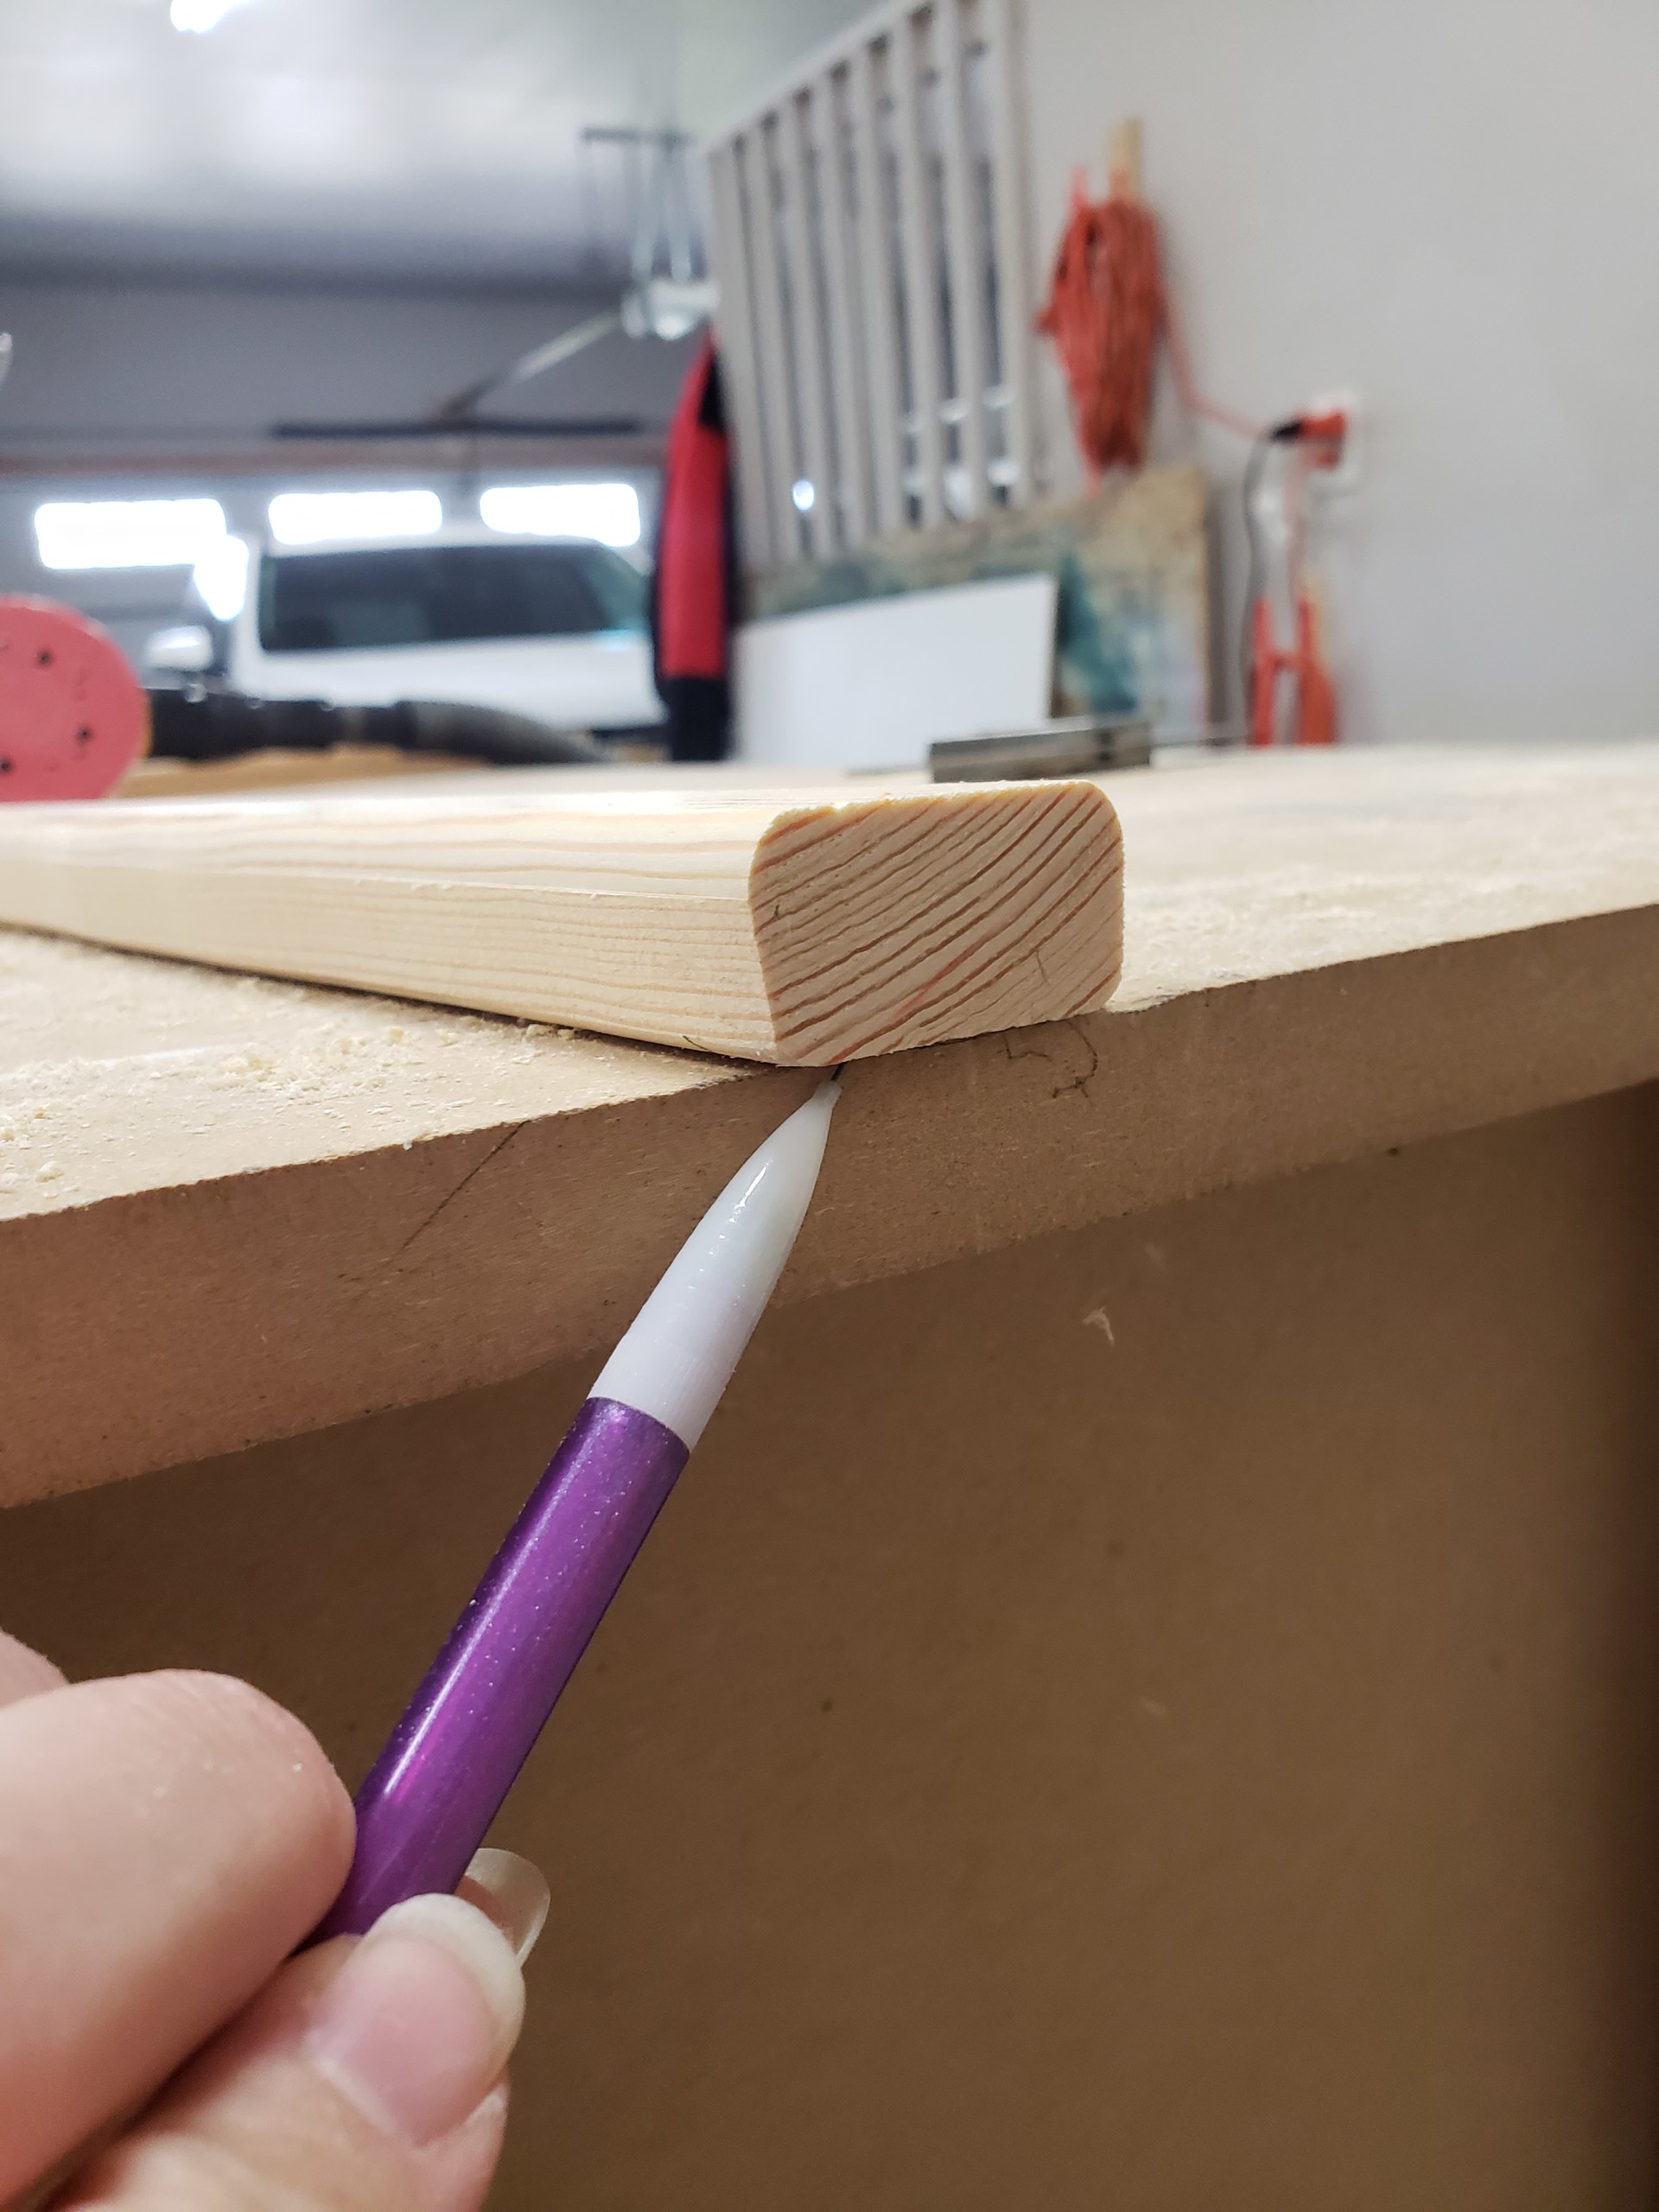
  • Draw the top curve of the candy cane, one on each end of the board
  • Then draw the candy cane stem coming down from the curve on either side of the board.
  • By rotating the board, you should be able to fit two candy canes on one board.

Step 2: Cut out the candy canes

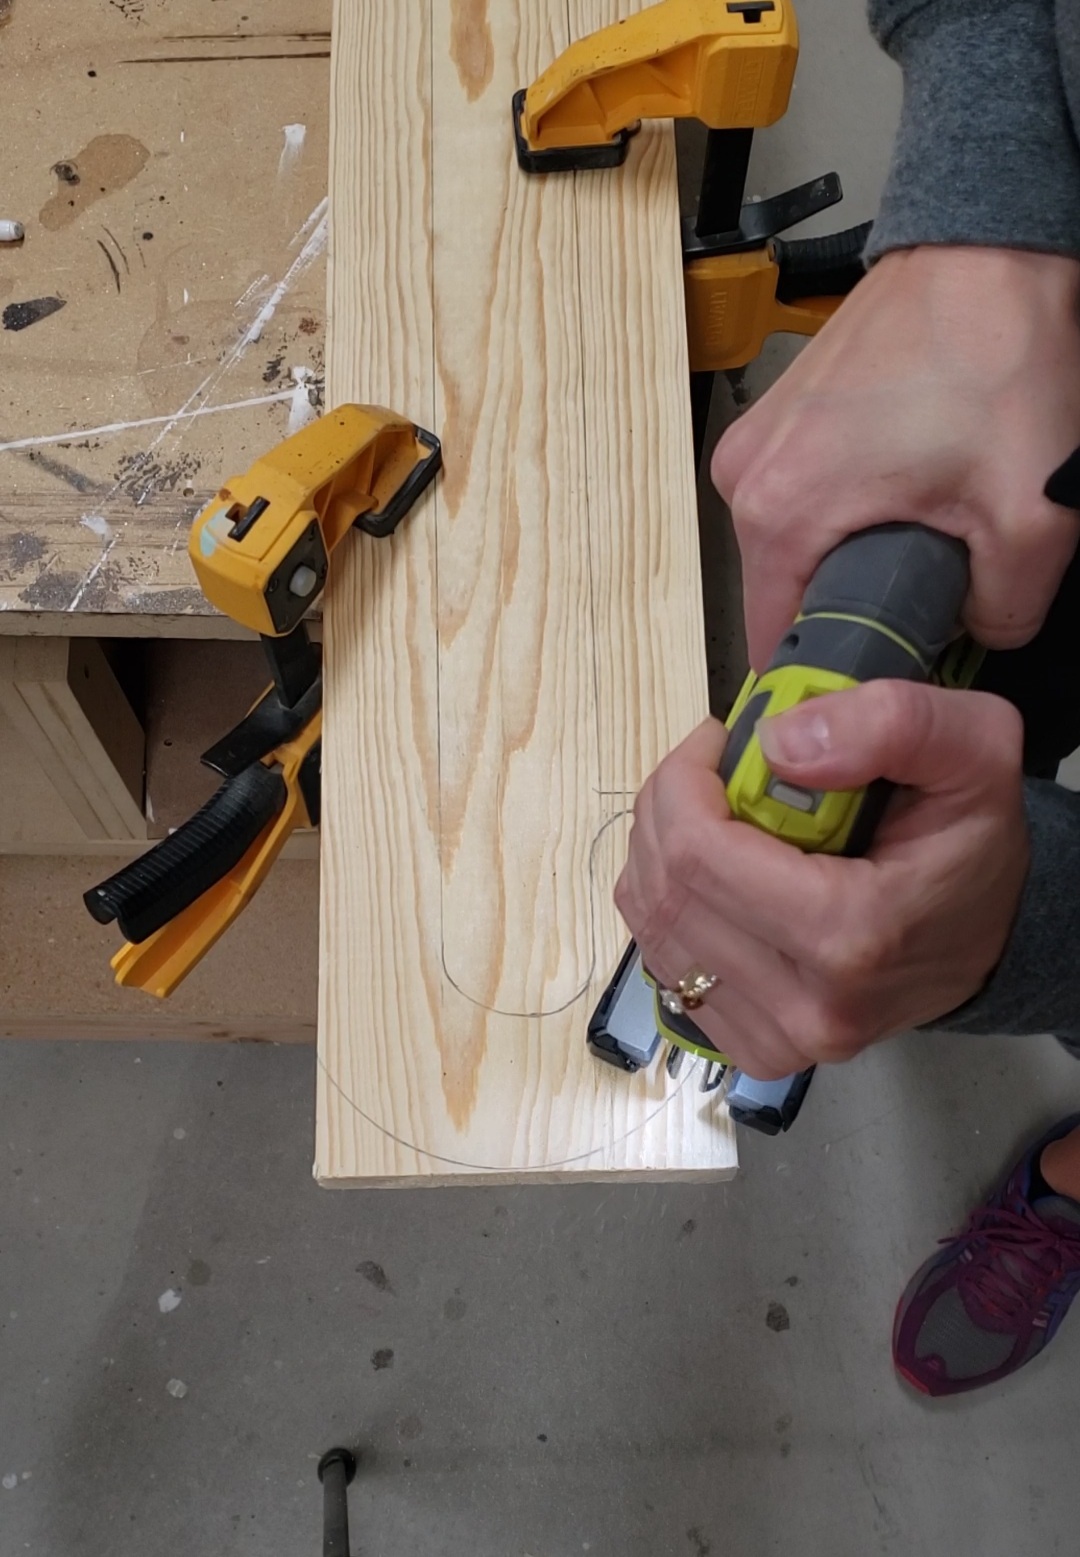
  • Clamp your board then use your jigsaw to cut out the candy cane. Mine looked pretty rough at first but no worries.

  • Sand the candy canes smooth.
  • Optional: If you have a trim router with a round-over bit, run along the edge of the candy canes to get nicely rounded edges.

Step 3: Paint

  • Paint the body of the candy canes white. (Or you can paint it red.)
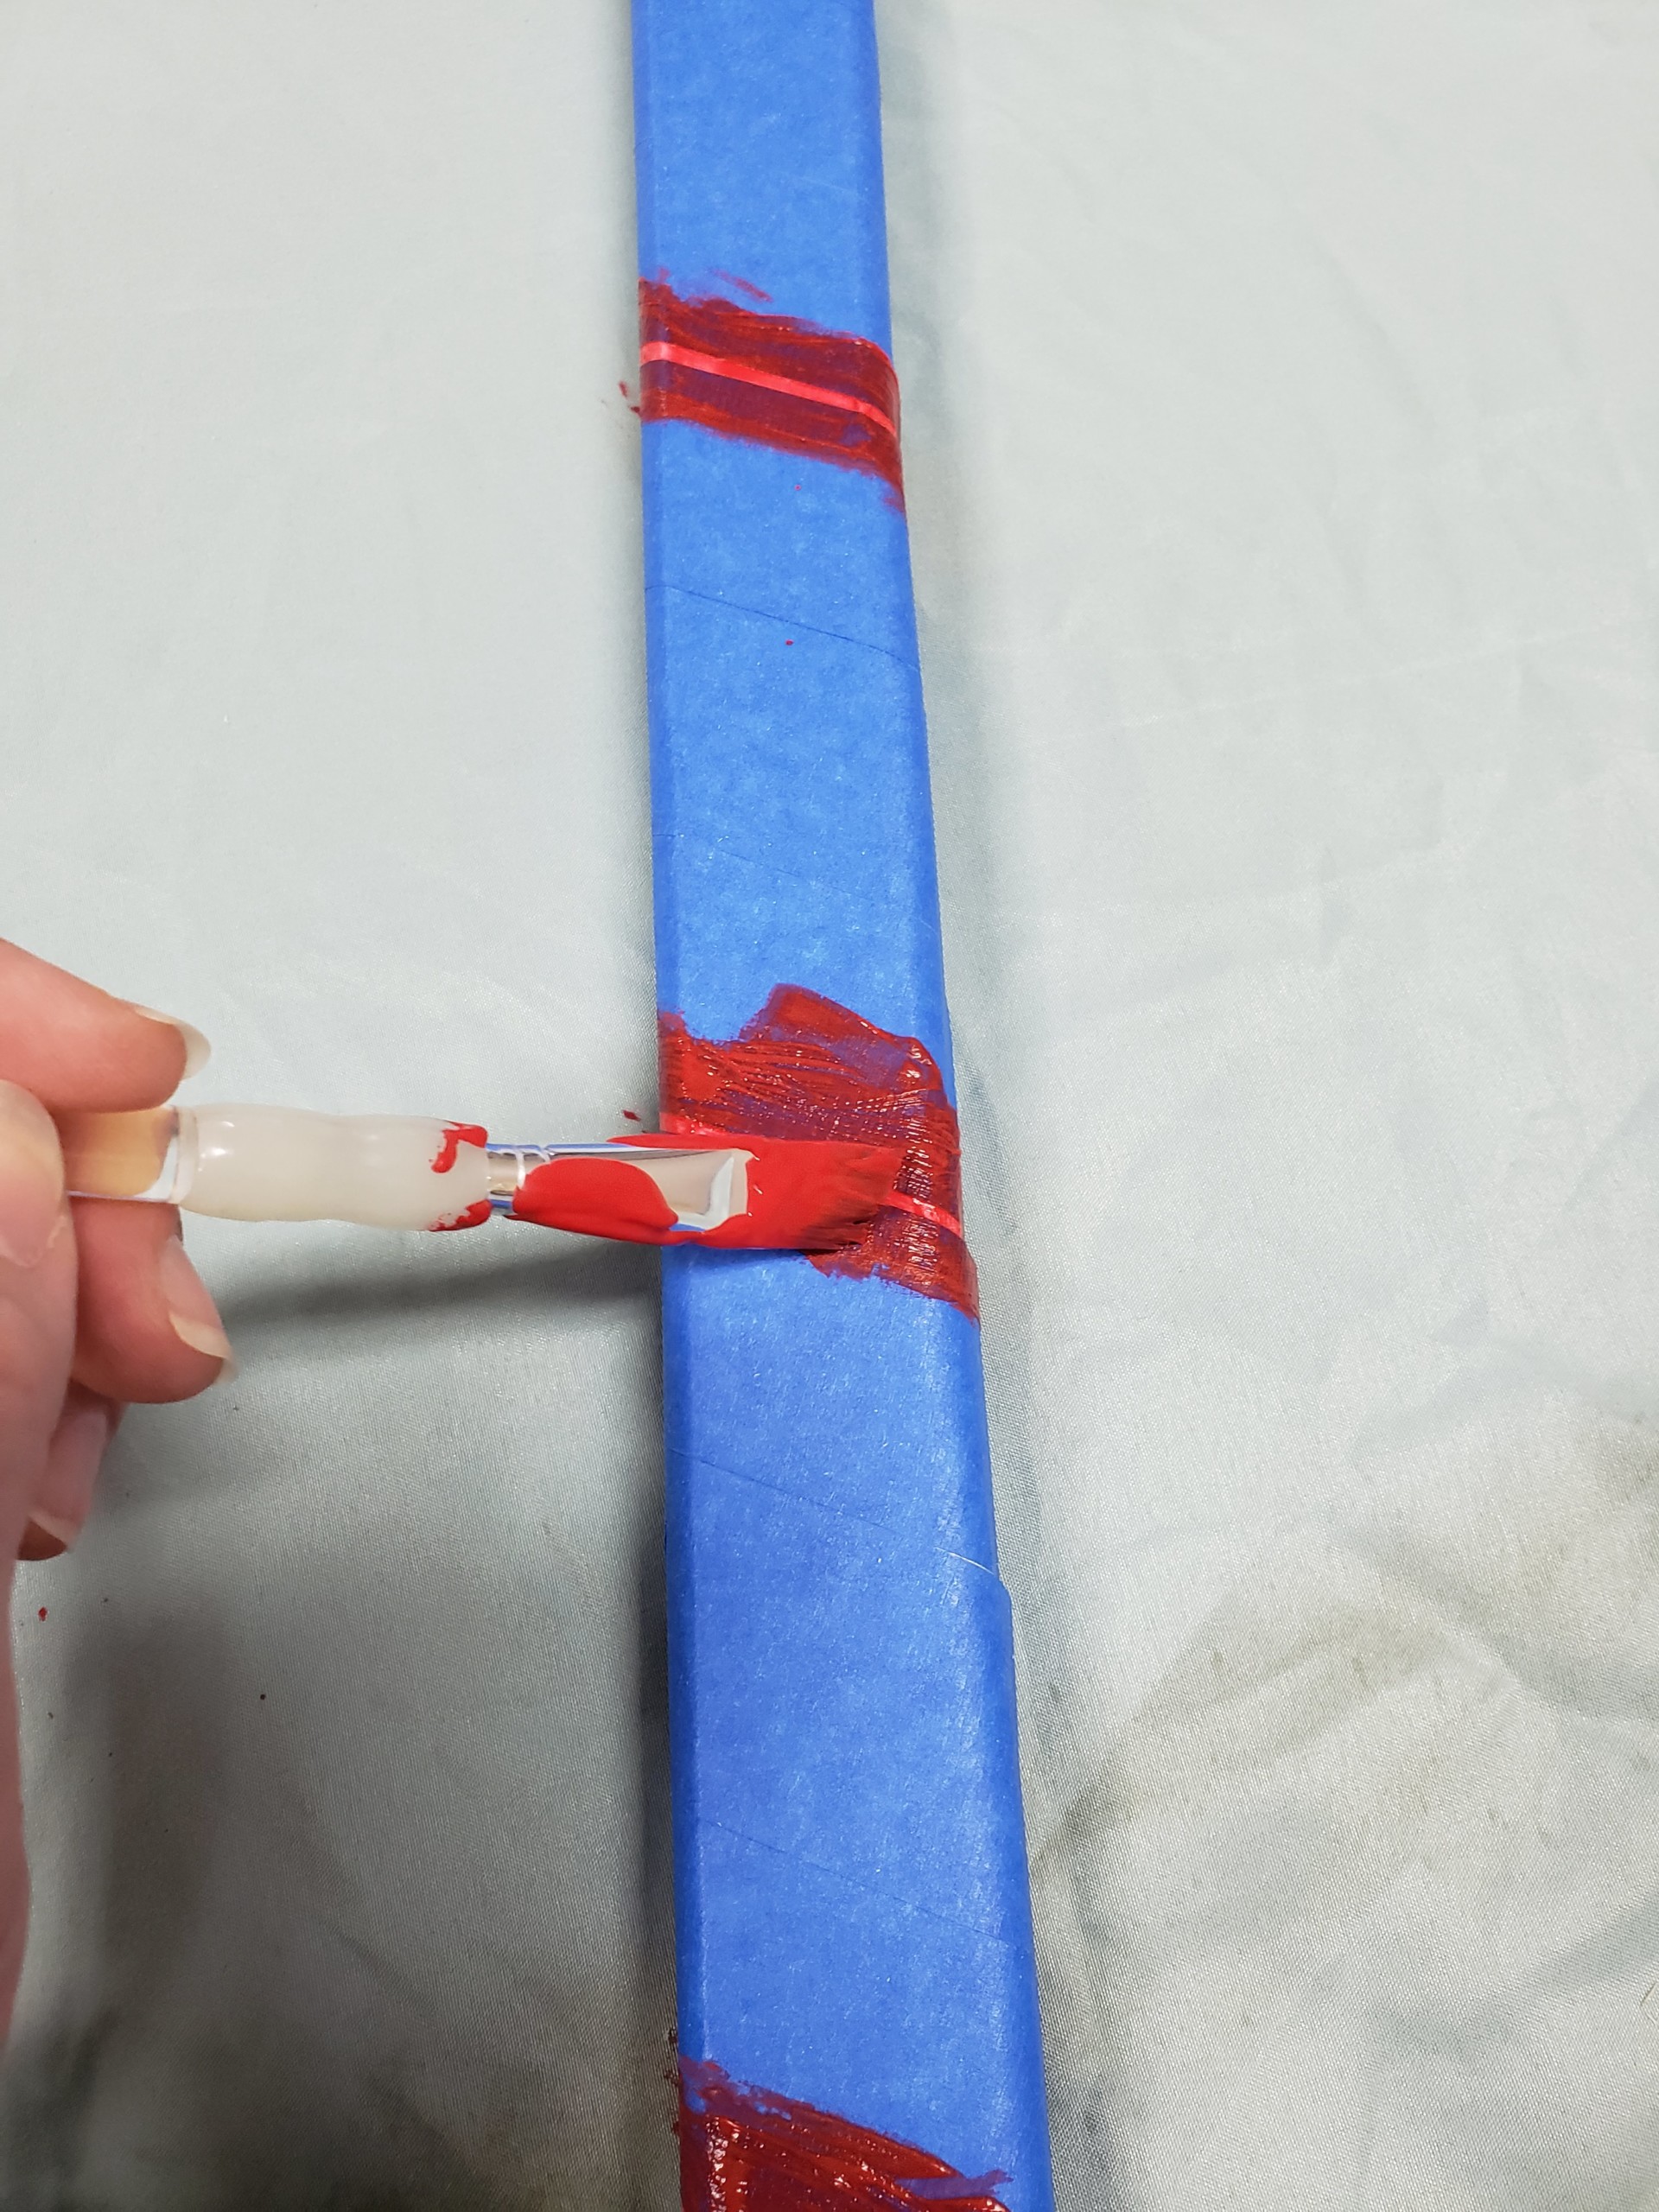
  • Using painterโ€™s tape, create candy cane stripes and painted them red (or paint them white if the body is painted red).

Step 4: Cross your candy canes

  • Place your candy canes, one over the other, in the way that looks best to you and use glue and brad nails to secure them together at their intersection. (No brad nailer? You can secure with a screw through the back.)
  • Cut the bottoms off at an angle so they stand up flat on the ground. (This step isnโ€™t necessary since they wonโ€™t stand on their own anyway.)

Step 5: Decorate your candy canes

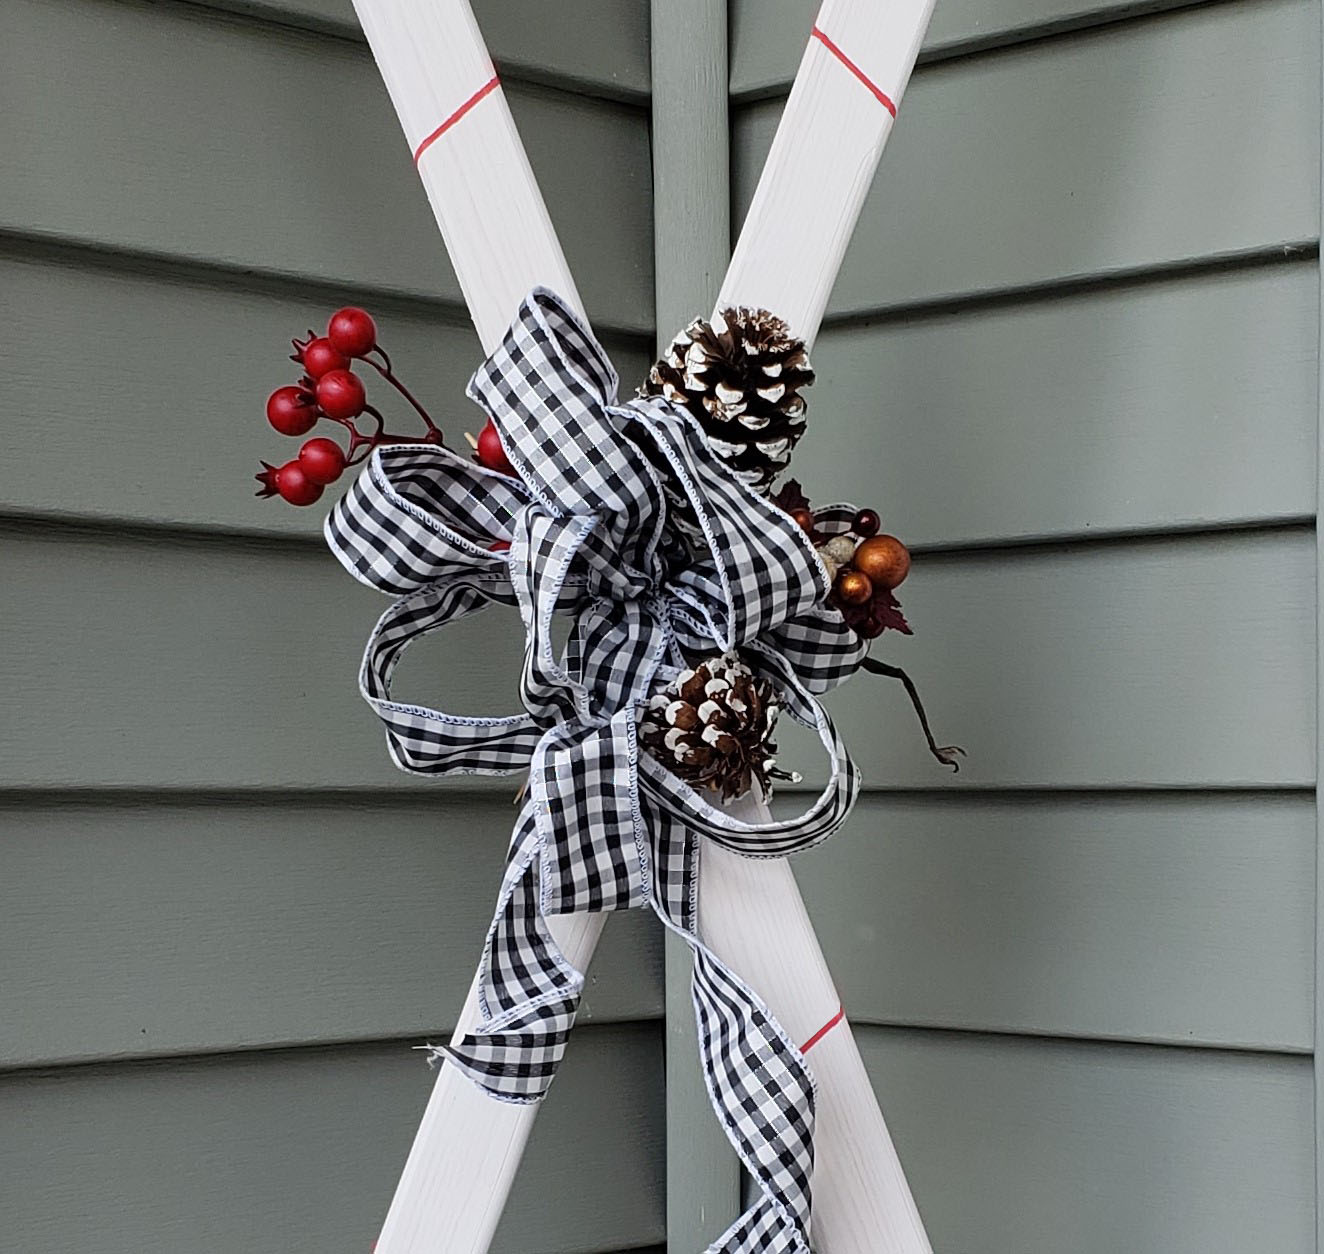
  • Using ribbon, ornaments, decor sprays, or picks you have in your Christmas decor box to decorate as it suits your decor style.
  • TIP: I like to wrap a rubber band around the candy near the intersection to hold the sprays and picks. This way you can change it up yearly.

Now incorporate these candy canes into your seasonal decor. They would look cute inside or outside.

That is about as simple as it gets for a fun DIY project you can do at home. Iโ€™m sure the kids would even love to help!


Hi! Iโ€™m Kristen, from In Her Garage, and I am a self-taught woodworker and DIY fanatic from Minnesota where I live with my husband and our two daughters. ย Between being a wife, mom, and registered nurse, I try to make as much time for DIY as possible. ย ย My love for building came after our family built our current home in 2015. After we moved in, we needed furniture, and instead of spending massive amounts of money to order the pieces we wanted I decided that I would build them myself. I started with a buffet table plan from the fabulous Ana-white and quickly set out to remodel my entire home office.

Check out all of my tutorials here on the Pretty Handy Girl and head over to my site to see more tutorials for making a Toy Box, Folding Craft Table, or a Rustic Buffet Table.ย  Making something beautiful with your own two hands through a little preparation and determination is an amazing feeling and I hope to bring inspiration and know-how to those looking to tackle a big or small project.

Not interested in making these items yourself?ย  Let me make them for you!! Feel free to contact me and I would be happy to talk with you about any idea you may have for your home.

I am so glad that you found me here and please feel free to connect with me on Pinterest, Instagram, ย Facebook, and Etsy to see what I am working on right now.


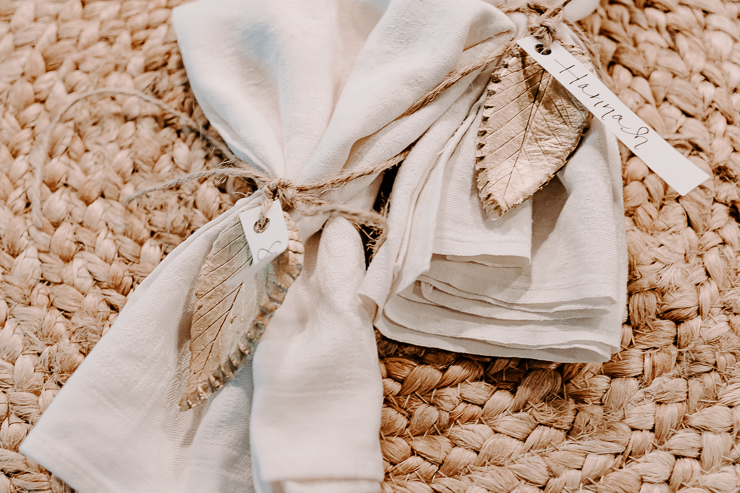
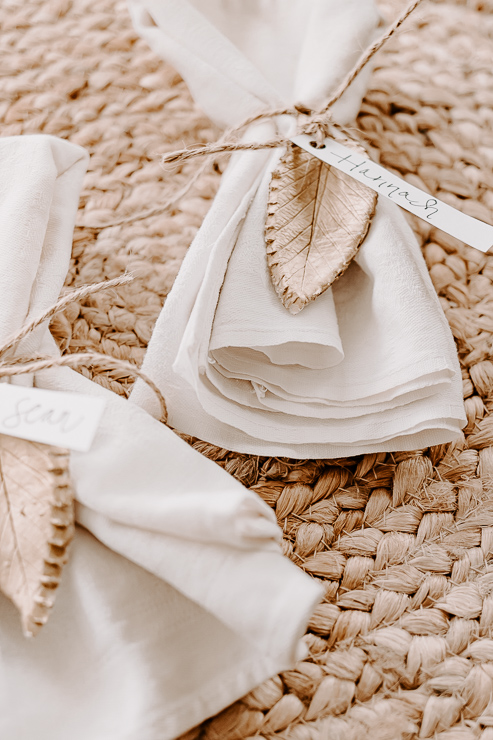
view of napkins tied with jute twine and a clay leaf place card

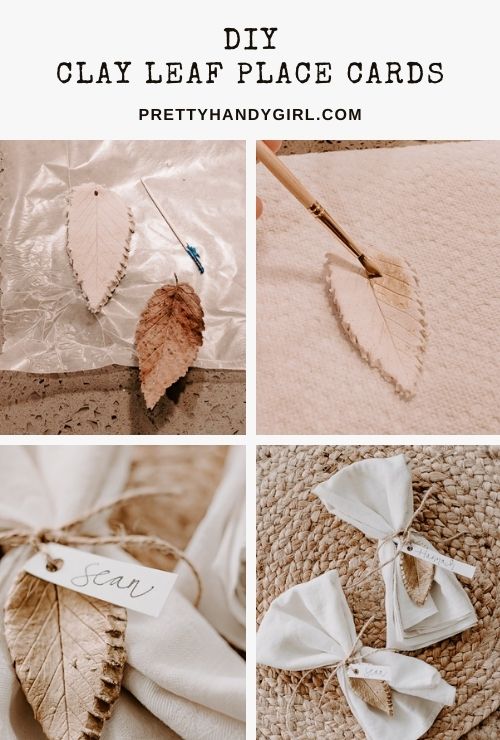
diy clay leaf place cards

DIY Leaf Place Cards for the Holidays

I hope your fall has been lovely so far.ย  The weather is just starting to turn here in NC.ย  I have to say, I love the weather here compared to Seattle.ย  We never experienced so much sun day after day!ย  Today, with Fall weather on my mind, Iโ€™m making you these DIY leaf place cards for the upcoming holidays.ย  These place cards are little clay leaves inspired by nature (hello, fall!) and painted in a beautiful gold color to elevate them for elegant dinners and parties.ย ย 

view of napkins tied with jute twine and a clay leaf place card

Youโ€™ll love my secret for getting those fancy leaf edges from your clay too โ€“ read on to find out how I do it.

These place cards can be used time and time again, just change out the name tag for each new guest.ย ย 

I hope you enjoy this craft!ย ย 

Materials:

  • Gold Paint
  • PaintBrush
  • Air Dry Clay
  • Flat Screwdriver
  • Rolling Pin
  • Toothpick
  • Leaves from Outside
  • Jute Twine
  • Wax Paper
  • Cardstock
  • Pen for Writingย 

Instructions:

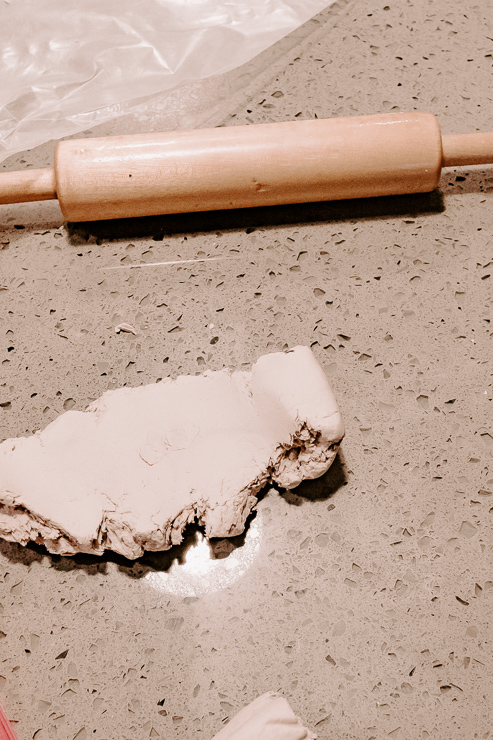
Step 1:ย  Roll our your Air Dry Clay

rolling out air dry clay

Grab a ball of air-dry clay and with slightly wet hands, roll it out using your rolling pin.ย  You want it to be about ยผ inch thick.ย  If you make it too thin, it will be too fragile and crack.ย ย 

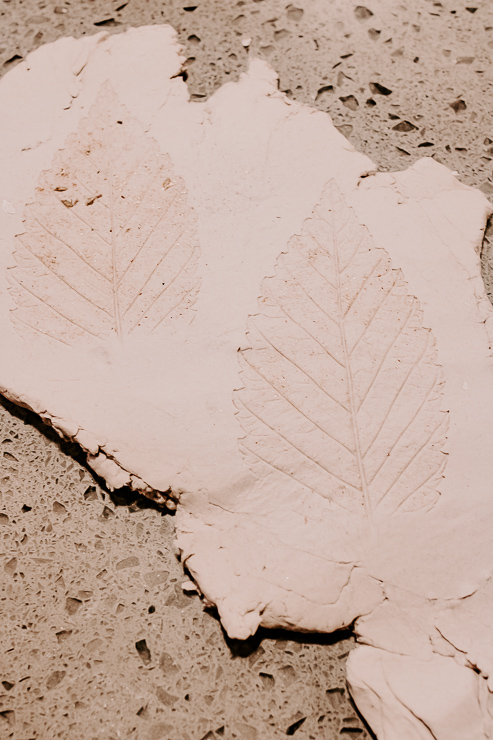
Step 2:ย  Make a Leaf Imprint

leaves imprinted in clay

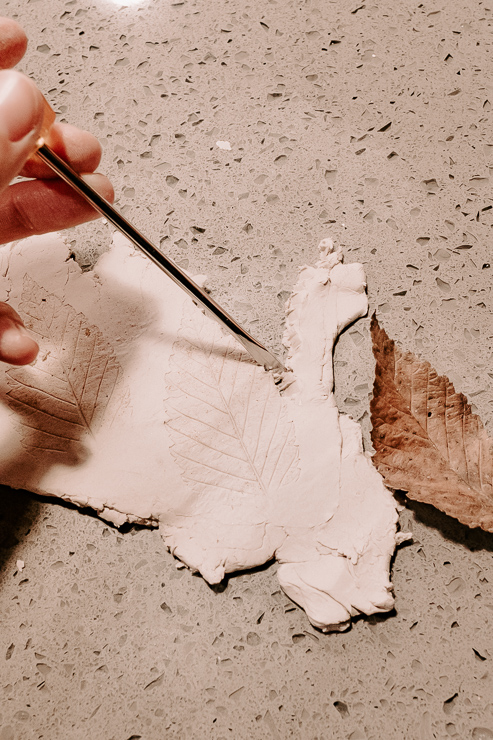
Take your leaf, and lay it on top of your clay.ย  Using your rolling pin, roll carefully over the leaf several times, creating an imprint of the leaf onto the leaf.ย ย 

Step 3:ย  Cut your Leaf Out

cutting out leaves from clay

Hereโ€™s where the magic happens!ย  You should see a beautiful leaf imprint in your clay.ย  Take a flat screwdriver and make little divots on the side of your clay leaf, where the leaf would naturally have edges.ย ย 

a leaf cut out of clay with a hole for hanging

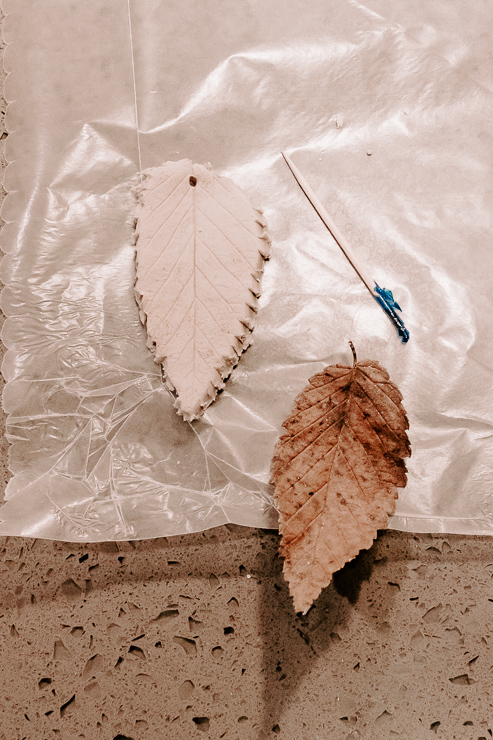
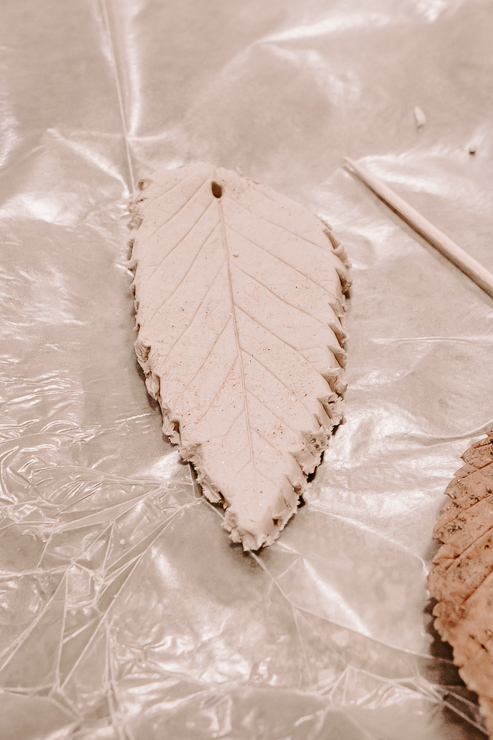
Do this all the way around, and then carefully remove your leaf.ย  Using a toothpick, make a hole in the top of your leaf.ย  This will be for tying your jute twine later.ย ย 

close up view of clay leaf

I take the leaf in my hands and slightly bend it to give it a more natural leaf shape, but you are welcome to keep it flat too.ย  Place your leaf on wax paper and allow it to air dry naturally for a couple of days.ย ย 

Step 4:ย  Paint your Clay Leaves

painting clay leaves gold

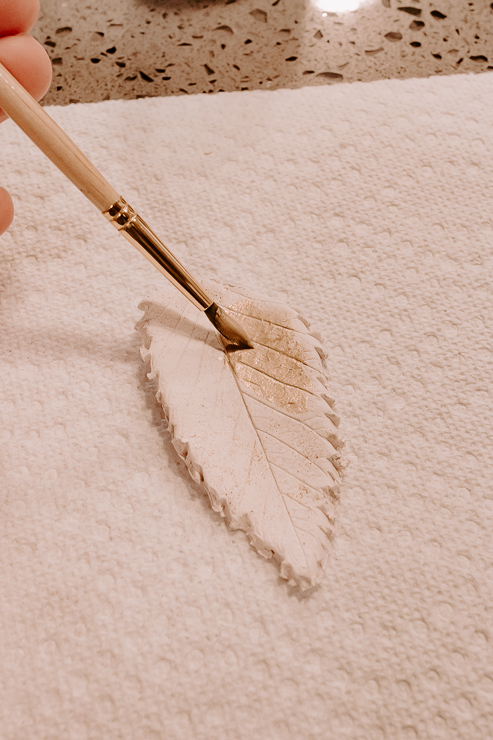
After your leaves dry, take a paintbrush and gold paint and lightly brush a few coats on the top and sides of your clay leaf.ย  Set them aside to dry.ย ย 

Step 5:ย  Tie on a Nametag

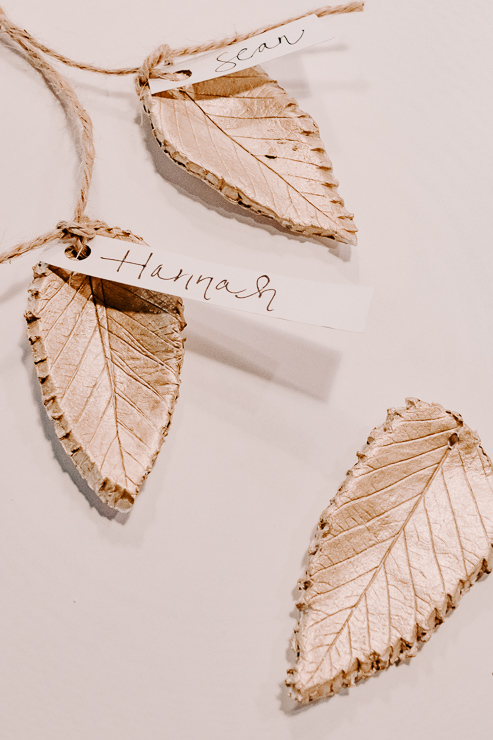
view of gold painted clay leaves

Our leaves are looking beautiful!ย  Now, all we need to do is cut a small tag of cardstock and write the guestโ€™s name on it.ย  Use a hole punch to cut a hole in the cardstock.ย  Tie this to your leaf by threading your jute twine through the hole we created in the leaf in Step 3.ย ย 

napkins tied with jute twine and clay leaves with names

Simply beautiful!ย ย 

I like to tie my cloth napkins with jute twine, and then tie the clay leaf name tag to it.ย ย 

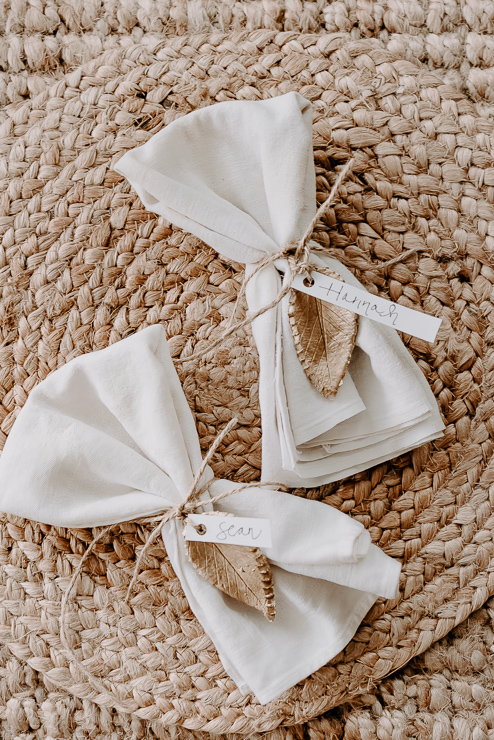
napkins tied with gold clay leaves and name tags

How pretty and unique are these!?ย  Iโ€™m sure you will get some comments from your guests.ย  And they will feel so special sitting at this elegant dinner with you.ย ย 

As I said earlier, you can reuse these DIY leaf place cards.ย  Once you get the hang of making one leaf, the rest donโ€™t take long.ย  You can also try this project with different shaped leaves, such as maple leaves.ย ย 

napkins tied with jute twine and clay leaves with names

My daughter and I foraged for some leaves together.ย  She happened to find the pretty ones I ended up using.ย  Thanks, Hannah!ย 

Grab the kids and make this a family project.ย  Itโ€™s a great craft to do around the holidays.ย ย 

karen signature

~ See More of Karenโ€™s Tutorials ~


karen from decor hintHello!ย  Iโ€™m Karen, the creator of the Home Decor and DIY Blog:ย Decor Hint.ย Iโ€™m a Native of the East Coast, but I currently live in beautiful Seattle with my hubby, our two wonderful children, and our spunky wheaten terrier.

You can usually find me with some sort of craft in one hand and a coffee in the other. And Iโ€™m always rearranging furniture or moving lamps from room to room. I have a passion (read: obsession) for decorating, DIY, and gardening. In short, I love making my house into a home.

Like many, Iโ€™m inspired by what I see in home decor magazines, but Iโ€™m not so inspired by the price tags.ย  Consequently, I love finding and creating beautiful budget-friendly home decor items. In a head to head competition, I bet youโ€™d never know the difference between the designer items and my DIY creations!ย  Many of my DIY projects focus on sewing, crafting, upcycling and organizing. Some of my favorite projects have been making pretty wreaths,ย sewing my own tassel hand towels, and crafting these trendy wood bead garlands.ย I canโ€™t wait to inspire you and spark your creativity through my DIY projects.

You can always connect with me on Pinterest,ย Twitter or Instagram.

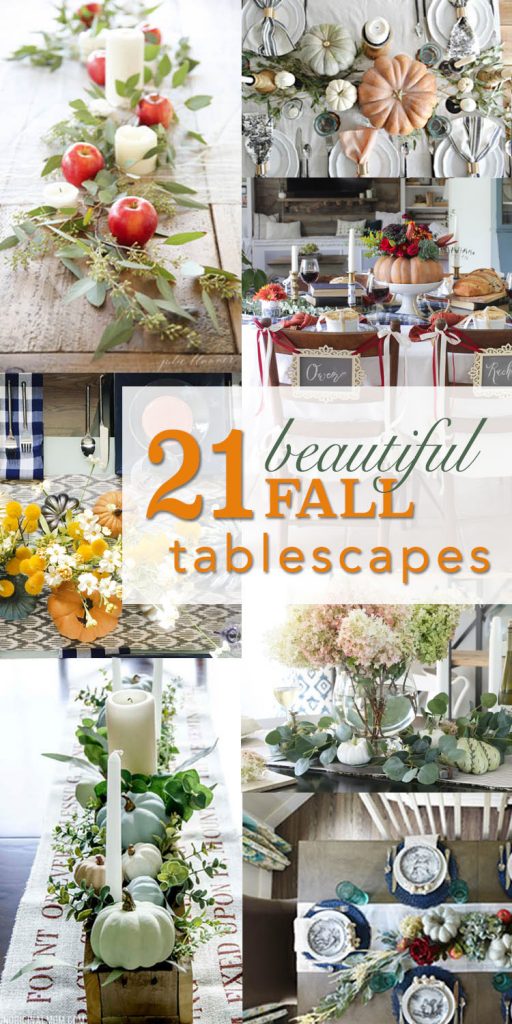
If you liked this tutorial, youโ€™ll love these fall tablescape ideas:

21 Beautiful Fall Tablescapes - Decorating Your Table for Fall

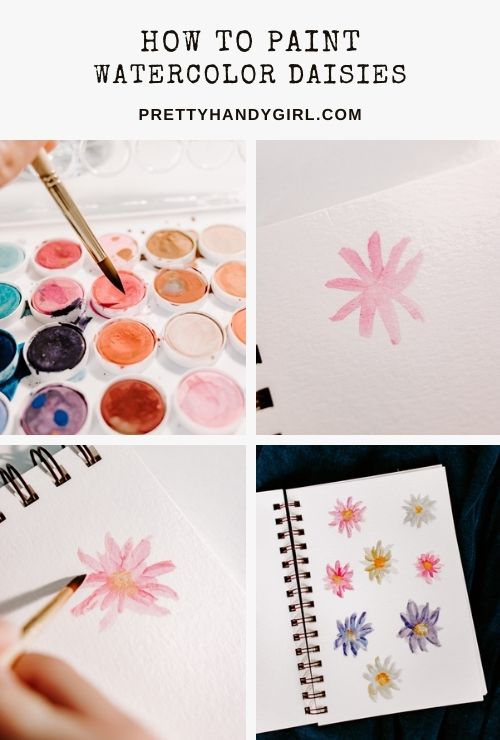
how to paint watercolor daisies

Learn how to paint these watercolor daisies with this easy tutorial!

tutorial for painting watercolor daisy flowers

Easy to Paint Watercolor Daisies

Hello, Pretty Handy Girl Readers! Guess what? I found my box of watercolors. If you remember, last month I moved from Seattle to NC and things were a bit crazy there (still are, actually.) Iโ€™m back with another watercolor tutorial and this one is easy. Well, actually, theyโ€™ve all been pretty easy so far, right?

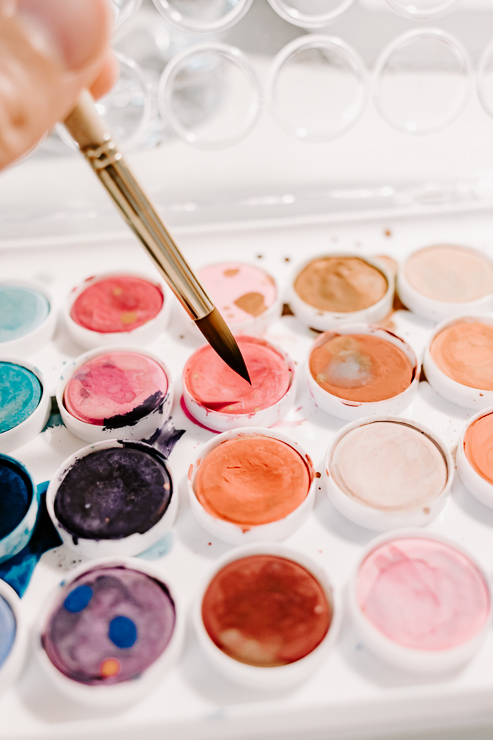
watercolors with a paintbrush

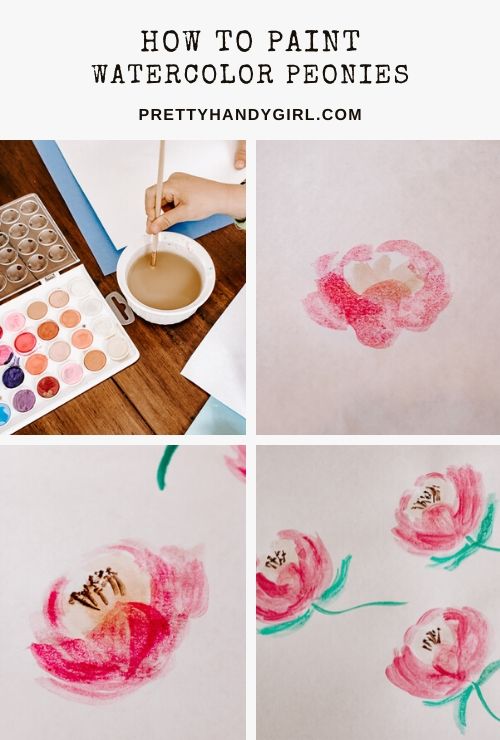
As a reminder, weโ€™ve learned how to paint pink peonies:

How to Paint Watercolor Peony Flowers

Then I taught you how to paint lavender in watercolor:

How to Paint Watercolor Lavender

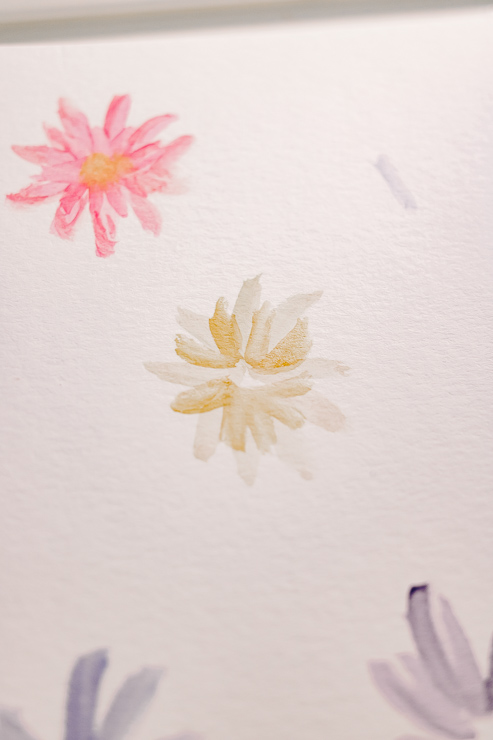
Now letโ€™s learn how to paint these daisies. Call them coreopsis. They are the cutest little flowers and so easy to create.

Letโ€™s get started!

How to Paint Watercolor Daisies

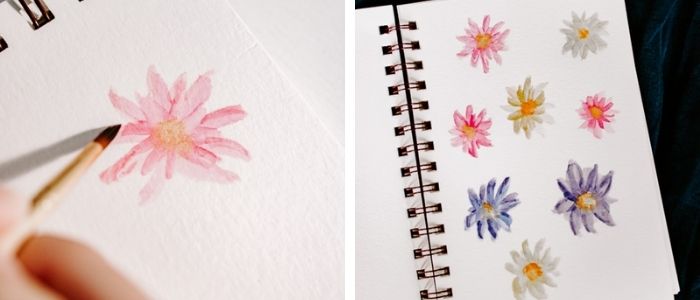
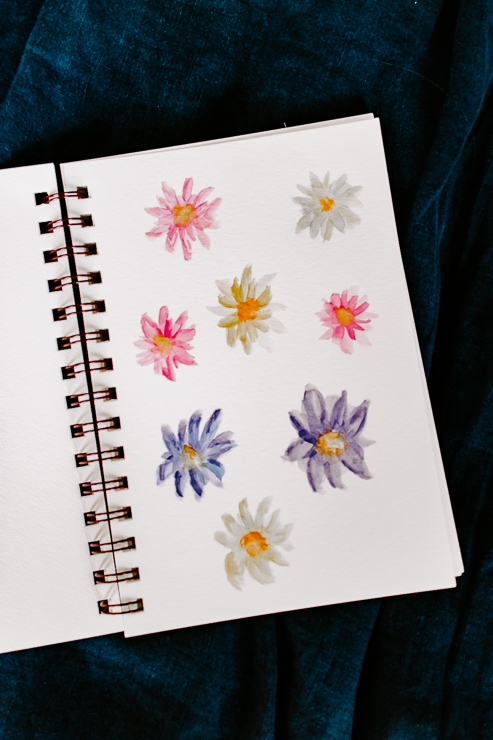
a page of yellow, purple and pink watercolor flowers

Materials:

(Iโ€™ve includedย affiliate links for your convenience. I earn a small percentage from a purchase using these links. Thereย is no additional cost to you. You canย readย more about affiliate links here.)

Instructions:

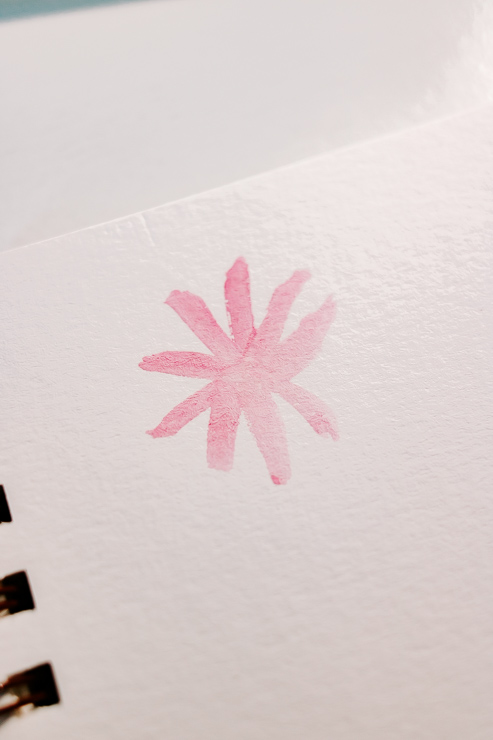
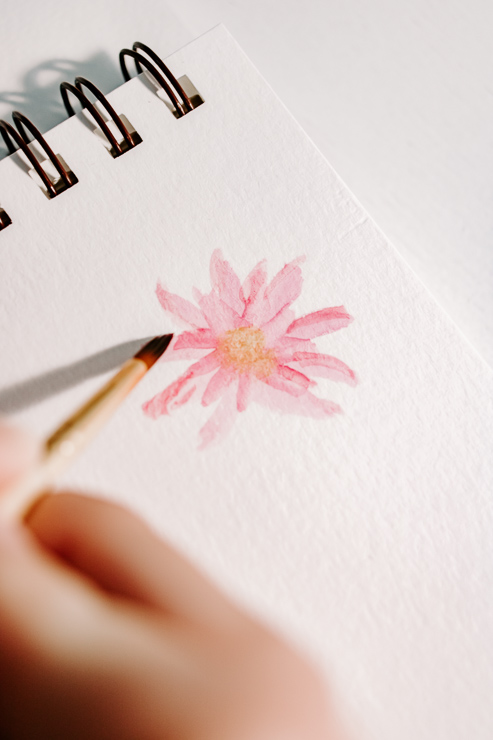
Step 1: Create a basic star flower shape

a pink watercolor flower being painted

Using a medium-sized brush, dip your brush in the water and then the color, and paint a few runny lines in a star shape. This is going to serve as the base for our flower. Donโ€™t worry if the petals donโ€™t look perfect right now. We are going to define them a little more at the end. Remember, watercolor is supposed to be kind of runny and imperfect.
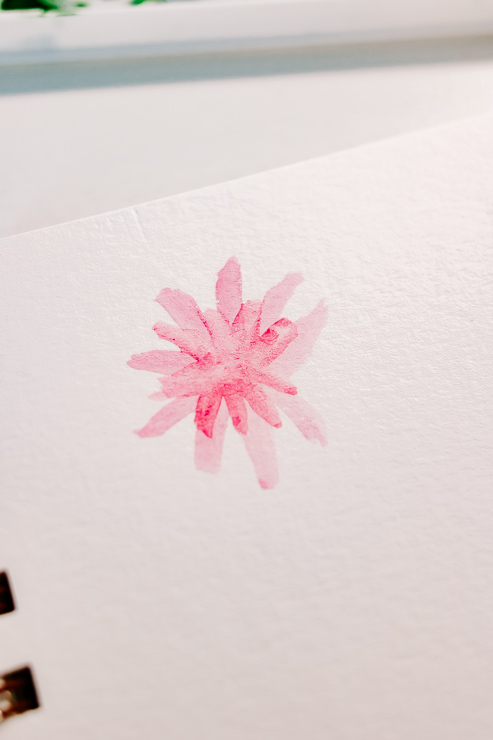
Step 2: Create more petals deeper in color

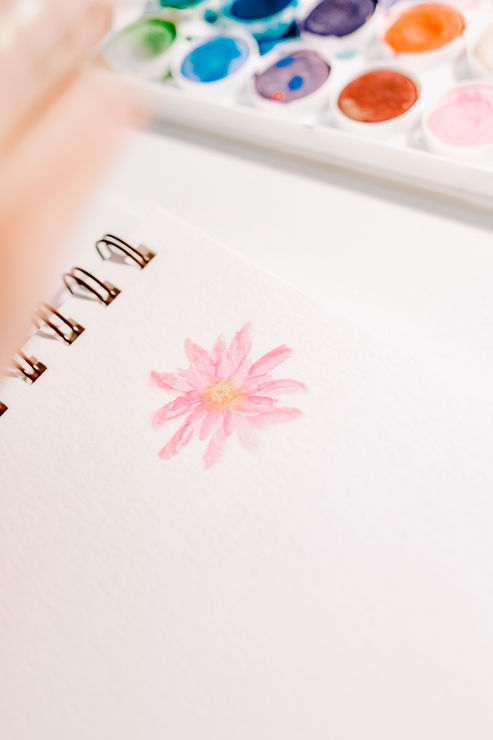
a pink flower being painted with watercolors

Working with the same brush we used in Step 1, grab some of the same watercolor paint. We want a richer, deeper color here so donโ€™t use as much water. Paint a smaller star shape on top of the star shape you painted in Step 1. Try to go in between the petals previous petals. We are creating dimension and depth of the flower.

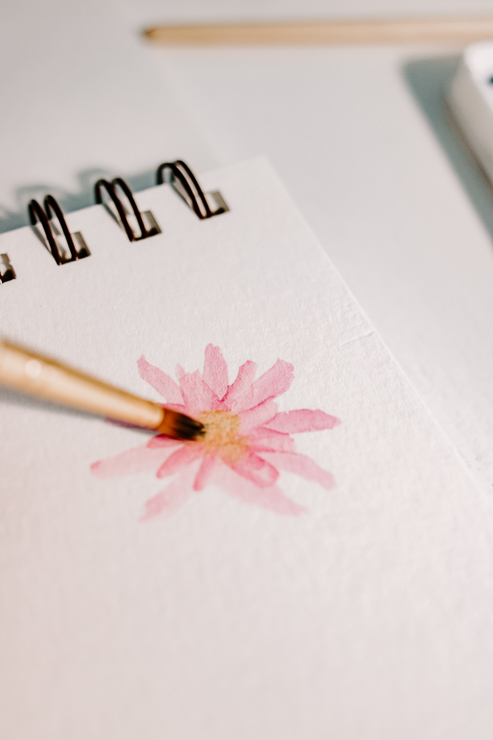
Step 3: Create the center of the flower

painting a pink watercolor daisy

Now we need to define that center part of the flower. Take a smaller brush and add a bit of yellow/orange color to it. Dot it in the center of your flower, using kind of a stippling motion. You can do this several times to create a deeper, darker center. Donโ€™t fret, it should look somewhat messy and imperfect.

Step 4: Define your petals

painting a watercolor petal on a daisy flower

Finally, letโ€™s take some of the petal color and define our petals a little more. You will want to use a smaller round brush for this. Dip a bit of water on the end of your brush, then dip it in the petal color. Define the ends of a few petals by outlining them. I donโ€™t think you need to outline all of them. Use your artistโ€™s eye here and determine what looks good.

pink watercolor daisy with yellow center

Thatโ€™s it!

Put on some music and just let your brushes carry you away for a little bit. Forget about the world for a moment. We could all use a little escape.

yellow and pink watercolor daisy flowers

Thoughts on Paper:

Watercolor paper really does make a difference in how your final art looks, but you can still just use regular paper until you find the time and budget to buy some. In other words, donโ€™t let not having the right materials hold you back. Watercolor painting is very relaxing and therapeutic.

If you make a page of these little flowers, you have yourself a little piece of frameable art for your walls. I hope you are enjoying these tutorials. Let me know if you are enjoying these watercolor tutorials in the comments below.
Stay safe out there, my friends! Iโ€™ll see you next month!

karen signature

~ย See More of Karenโ€™s Tutorialsย ~


karen from decor hintHello!ย  Iโ€™m Karen, the creator of the Home Decor and DIY Blog:ย Decor Hint.ย Iโ€™m a Native of the East Coast, but I currently live in beautiful Seattle with my hubby, our two wonderful children, and our spunky wheaten terrier.

You can usually find me with some sort of craft in one hand and a coffee in the other. And Iโ€™m always rearranging furniture or moving lamps from room to room. I have a passion (read: obsession) for decorating, DIY, and gardening. In short, I love making my house into a home.

Like many, Iโ€™m inspired by what I see in home decor magazines, but Iโ€™m not so inspired by the price tags.ย  Consequently, I love finding and creating beautiful budget-friendly home decor items. In a head to head competition, I bet youโ€™d never know the difference between the designer items and my DIY creations!ย  Many of my DIY projects focus on sewing, crafting, upcycling and organizing. Some of my favorite projects have beenย making prettyย wreaths,ย sewing my ownย tassel hand towels,ย and craftingย these trendy wood beadย garlands.ย I canโ€™t wait to inspire you and spark your creativity through my DIY projects.

You can always connect with me on Pinterest,ย Twitterย orย Instagram.

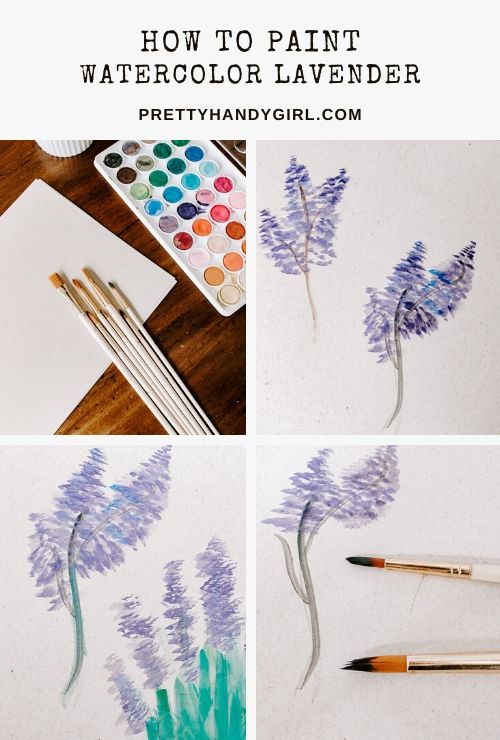
Iโ€™m back with another watercolor flower painting tutorial. Learn how to paint lavender (an easy flower to paint!)

How to Paint Watercolor Lavender

How to Paint Watercolor Lavender

I thought it would be fun to continue on with our watercolor summer flower tutorials! Last month, I taught you how to paint pretty pink peonies. For this monthโ€™s tutorial, youโ€™ll be learning how to paint an even easier flower โ€“ lavender!

Lavender was one of the first flowers I attempted to paint when I started with watercolors. Itโ€™s literally a few straight-line stems and some stippled brush dots and youโ€™re done. Iโ€™ll give you all the details below.

Letโ€™s get to it!

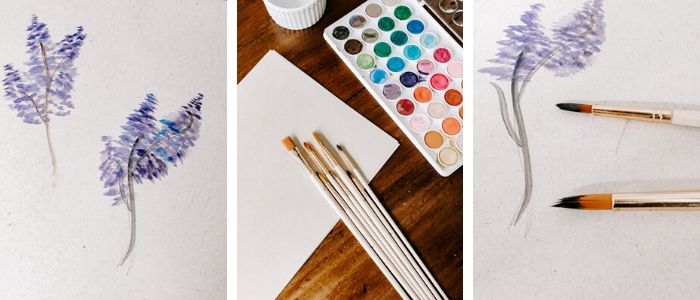
Use watercolor and watercolor brushes and paper to create your watercolor painted flowers

Materials:

(Iโ€™ve includedย affiliate links for your convenience. I earn a small percentage from a purchase using these links. Thereย is no additional cost to you. You canย readย more about affiliate links here.)

Instructions:

Letโ€™s make some lavender!ย  Once you get the hang of these flowers, feel free to use different colors.ย  Let your imagination be your guide.

Step 1: Create the stem

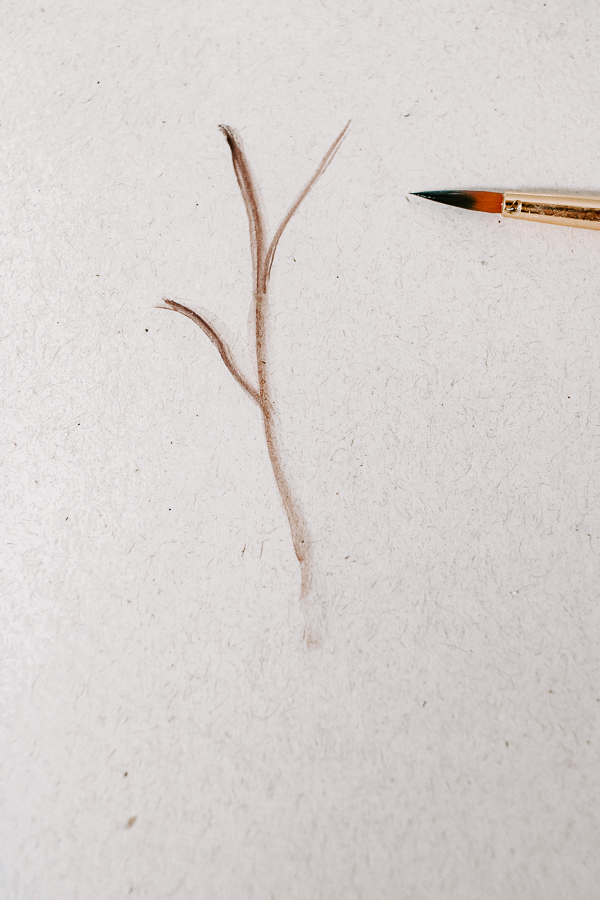
paint a stem using a small watercolor brush

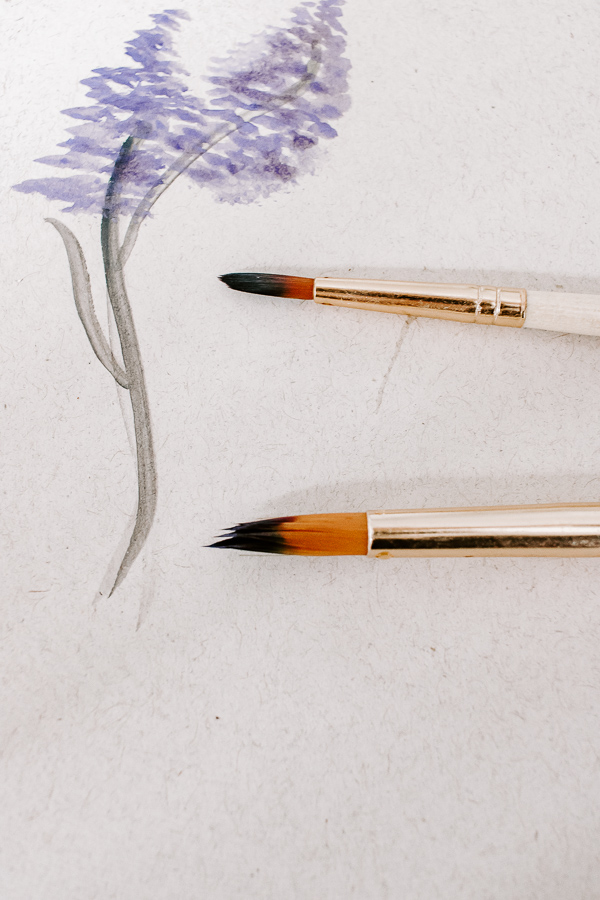
Iโ€™m using a small brush here and a brownish-black color. (Feel free to add some green if you like.) Use the tip of the brush to create a series of lines all coming to a single point at the bottom, like a stem. If your stem ends up too light, just add more watercolor paint and go over the line again.

Step 2: Create the lavender petals

Use a small and medium size brush to create your watercolor lavender

create a series of stippled marks to make the lavender

Remember when I said these are one of the easiest flowers to paint? You wonโ€™t even believe this!

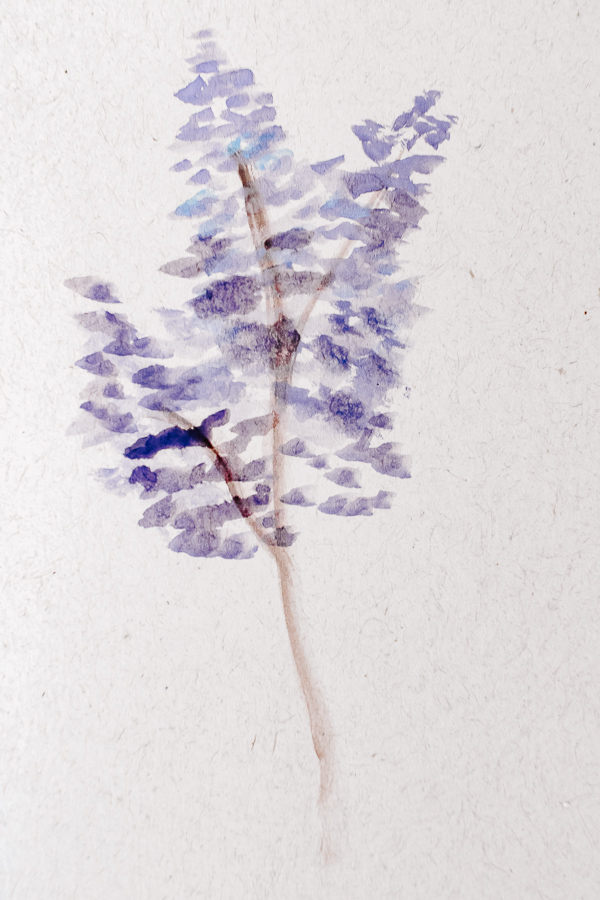
All you need to do is grab a medium-size brush. Add a little purple watercolor paint. Using the side of the brush, dot it along each stem (called stippling in the art world). Start narrow at the top and go a little wider towards the bottom. Youโ€™ll start to see the makings of your lavender! Imperfection is good here.

Step 3: Add some dimension

Watercolor painted lavender

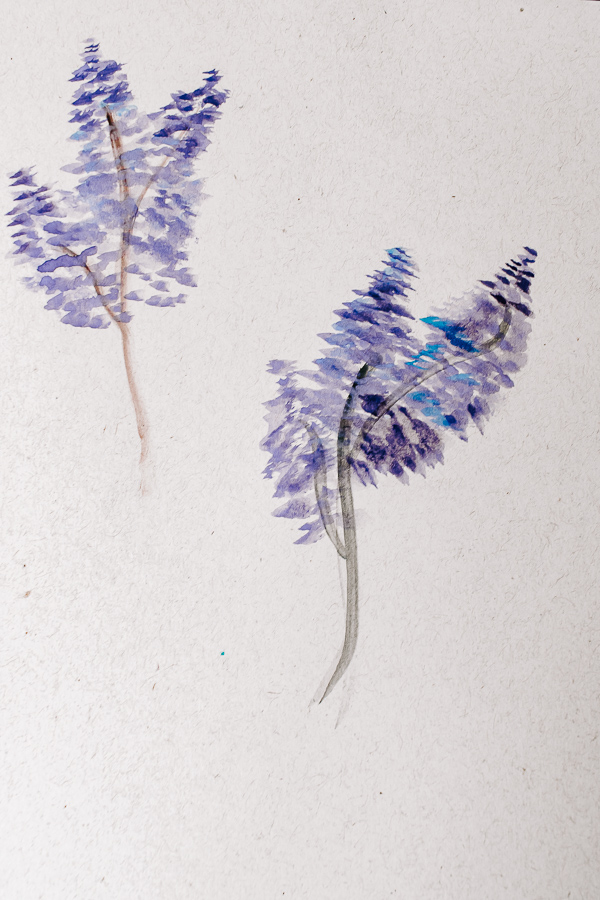
Now we want to add in a little dimension. Load up your brush with dark purple or blue watercolor paint on your brush. Create more stippled side brush marks as we did in Step 2. This will darken your lavender and create some depth.

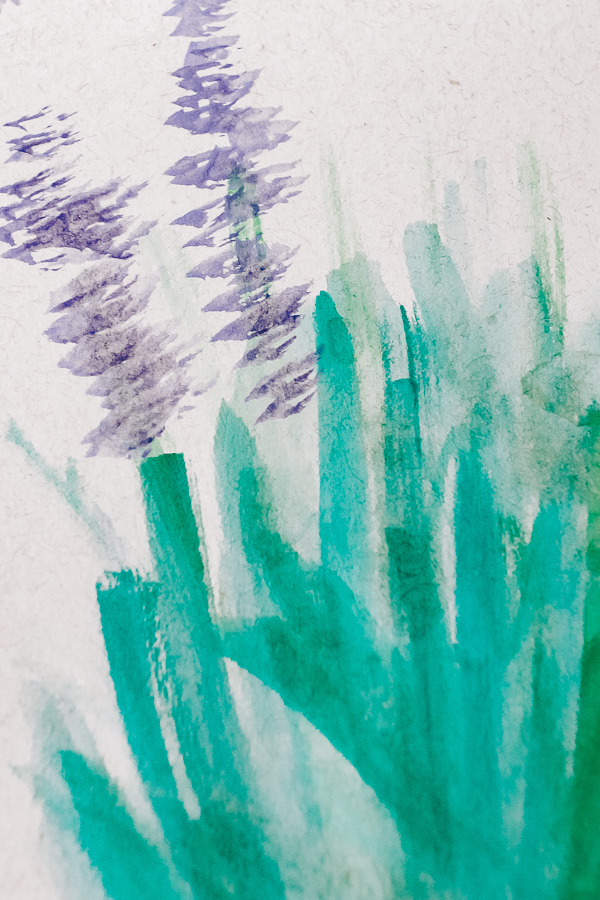
Another variation that you can create is a bushy lavender plant. Instead of starting with a stem, create a series of green lines as your lavender bush. Paint the watercolor lavender at the tops of these lines. Then darken the bottom of the plant with a darker green to create some depth.

Create stippled marks for lavender using the side of your brush

Your finished watercolor painted lavender plants!

And thatโ€™s it! I hope you enjoyed this tutorial for painting watercolor lavender.

Next month, Iโ€™ll show you another watercolor tutorial. Pretty soon, weโ€™ll put together all our flowers into one giant piece of floral art ready for framing. See you next month!

karen signature

~ย See More of Karenโ€™s Tutorialsย ~


karen from decor hintHello!ย  Iโ€™m Karen, the creator of the Home Decor and DIY Blog:ย Decor Hint.ย Iโ€™m a Native of the East Coast, but I currently live in beautiful Seattle with my hubby, our two wonderful children, and our spunky wheaten terrier.

You can usually find me with some sort of craft in one hand and a coffee in the other. And Iโ€™m always rearranging furniture or moving lamps from room to room. I have a passion (read: obsession) for decorating, DIY, and gardening. In short, I love making my house into a home.

Like many, Iโ€™m inspired by what I see in home decor magazines, but Iโ€™m not so inspired by the price tags.ย  Consequently, I love finding and creating beautiful budget-friendly home decor items. In a head to head competition, I bet youโ€™d never know the difference between the designer items and my DIY creations!ย  Many of my DIY projects focus on sewing, crafting, upcycling and organizing. Some of my favorite projects have beenย making prettyย wreaths,ย sewing my ownย tassel hand towels,ย and craftingย these trendy wood beadย garlands.ย I canโ€™t wait to inspire you and spark your creativity through my DIY projects.

You can always connect with me on Pinterest,ย Twitterย orย Instagram.

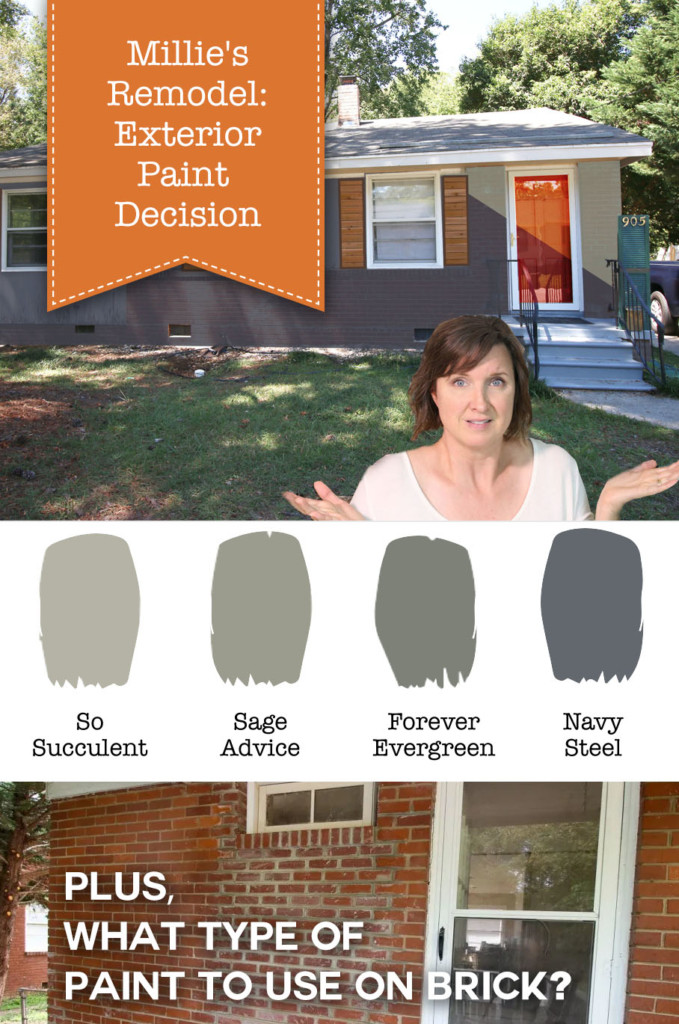
The time has come to pick paint colors for the exterior of the Millieโ€™s Remodel house. The majority of the house is brick so I have to choose a paint that is safe for exterior brick. If Iโ€™m not careful paint can cause the bricks to deteriorate or the paint to flake off easily.

Millieโ€™s Remodel: Exterior Paint Colors โ€“ Need Help Deciding

Welcome back to another Millieโ€™s Remodel update. Today I need your help deciding on exterior paint colors!

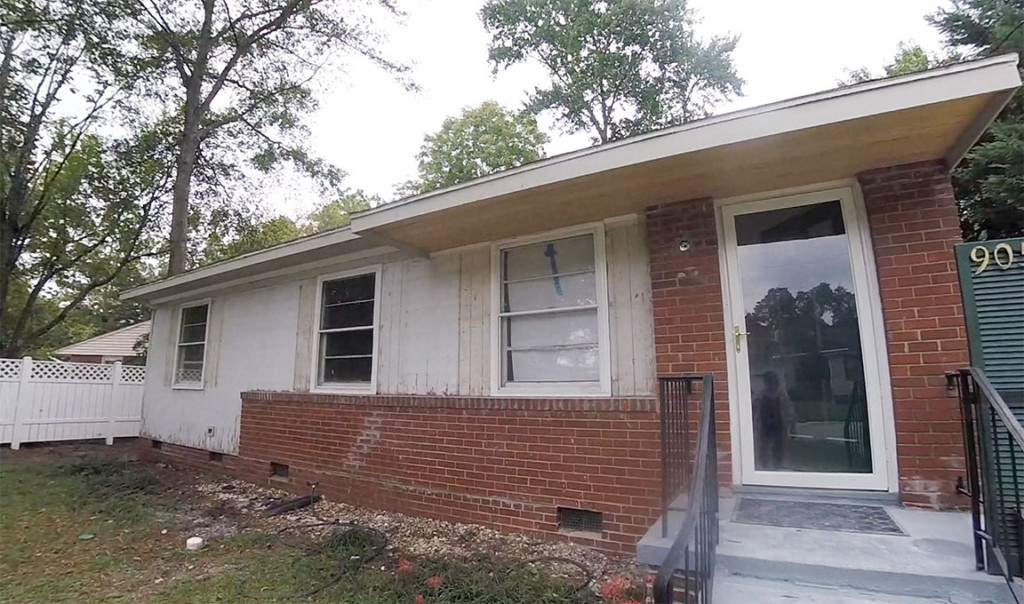
When I purchased the house, it had ugly khaki vinyl siding on the front.

The rest of the house was red brick. It was hard justifying painting the entire house untilโ€ฆ

โ€ฆmy siding contractor removed the vinyl siding to reveal the original wood siding underneath. Would you believe it was in pristine condition? No wood rot!

removed-old-siding to reveal wood siding white and brick front house

The paint was peeling, so I knew it had to be painted and I didnโ€™t like the two-tone look of siding and brick. I really wanted the house painted one color.

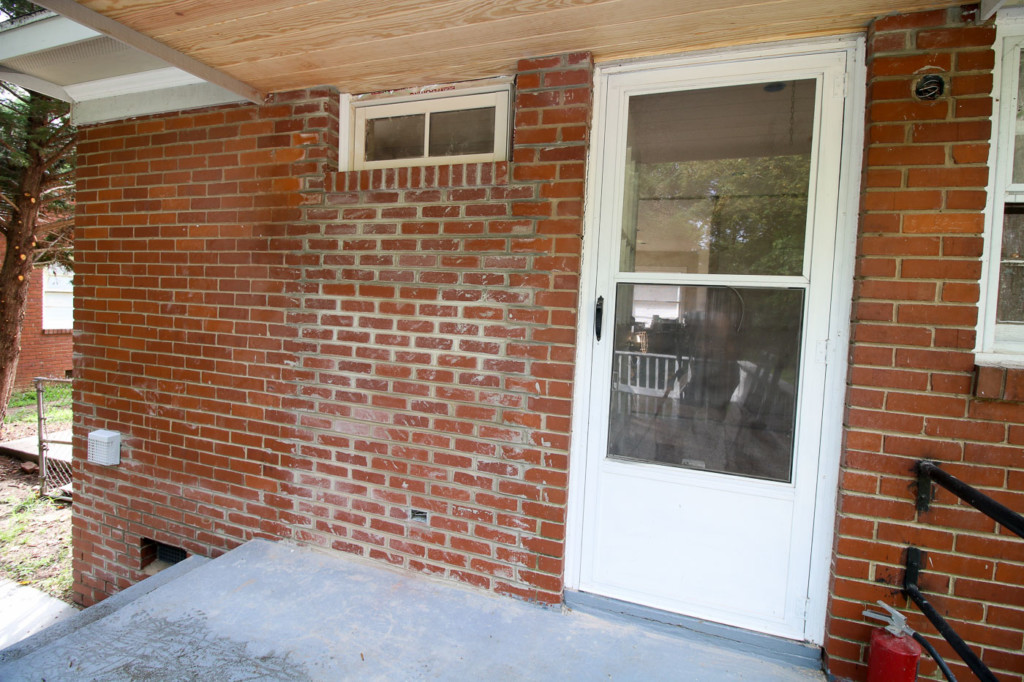
You may remember I had my mason brick up the back doorway leading to the laundry room. Anyone living in the house used to have to go outside the house and make a U-turn to go back inside to do laundry, which was just crazy.

back door bricked up with transom window installed

Now that room has a doorway from the inside so you can do laundry from inside the house. That makes more sense, doesnโ€™t it? Because who wants to walk outside in the rain to do laundry? The room is actually a dual purpose room. Itโ€™s a laundry room and powder room, which is why I opted for a transom light to allow some natural light in while still maintaining some privacy.

Anyways, now that this doorway is all bricked up, the mortar doesnโ€™t match and you can see where the doorway was. Iโ€™ve wanted to paint the exterior, and now this gives me a great excuse because as you can see, none of the mortar matches.

Masonry Paint Specifically for Brick:

Many people love the look of painted brick, but make the mistake of using regular latex paint. If the brick canโ€™t breathe, it forces the paint to flake off the house or traps moisture in which can damage the bricks. Either way, it leaves you with a maintenance issue.

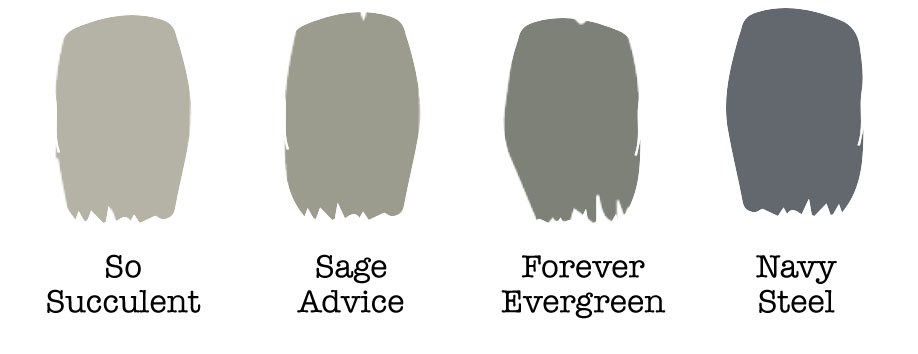
But, RomaBio is a mineral paint that allows the brick to breathe and prevents moisture from getting trapped. While I was researching RomaBio paints, I discovered they had several new colors in the Young House Love collection. Although it was hard to decide, I narrowed my choices down to four colors:

  • Forever Evergreen
  • Navy Steel
  • Sage Advice
  • So Succulent

As you can tell, Iโ€™m leaning toward greens and blues. But, I need to show you the other houses in the neighborhood so you get the full picture! Do me a favor and watch the video below to see the samples on the Millieโ€™s Remodel house and see what the surrounding houses look like.


As you can tell, Iโ€™ve narrowed the choice down to two colors: Sage Advice and Navy Steele.

Leave me a comment and let me know which is your favorite.

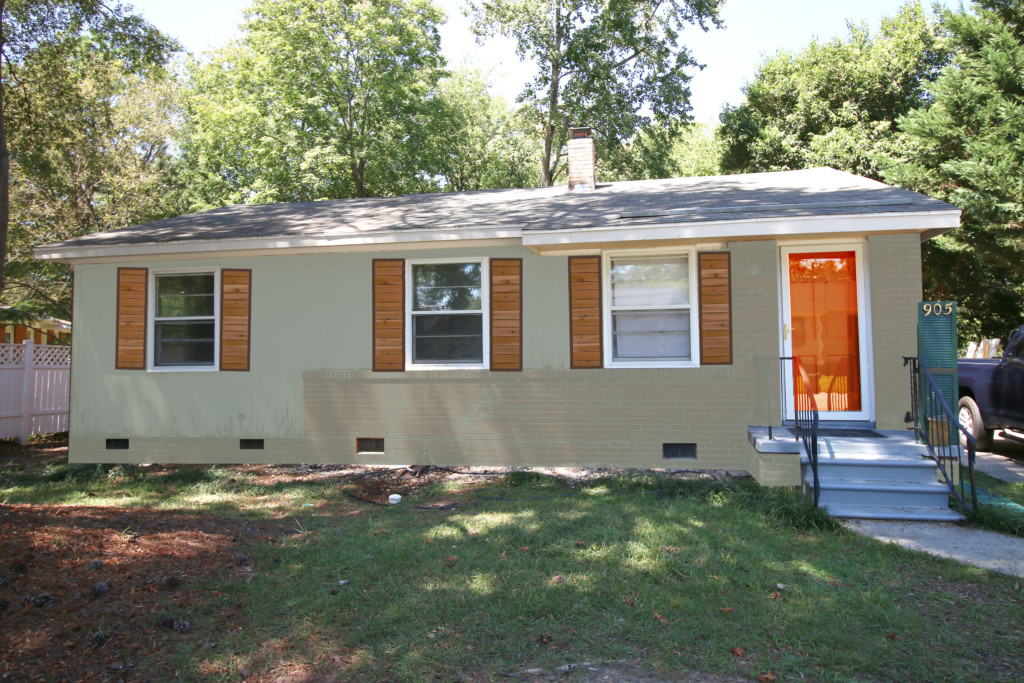
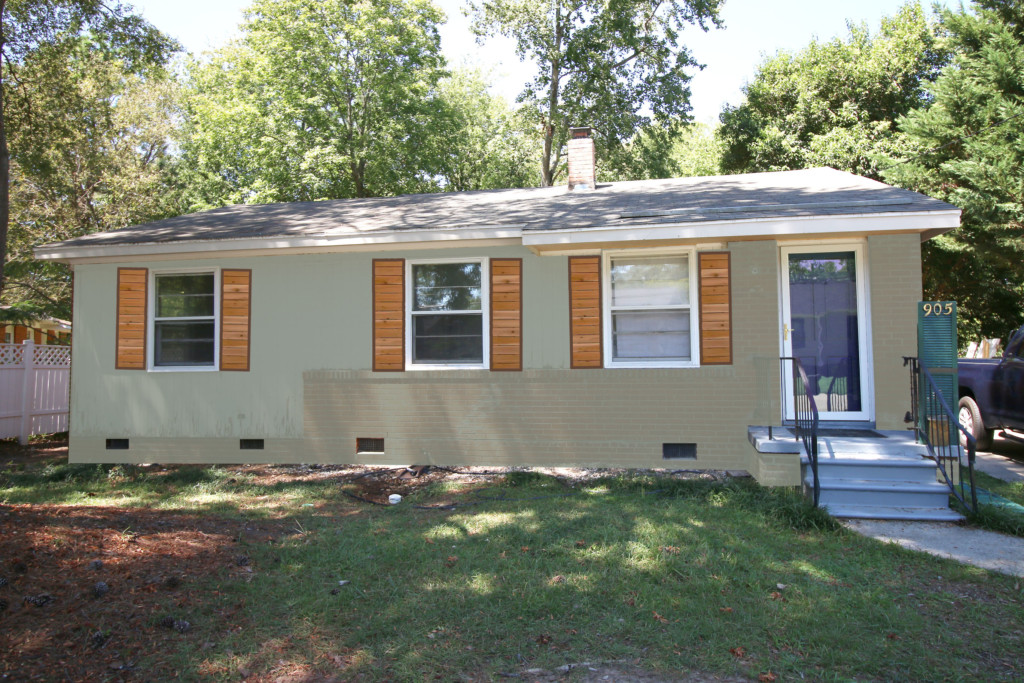
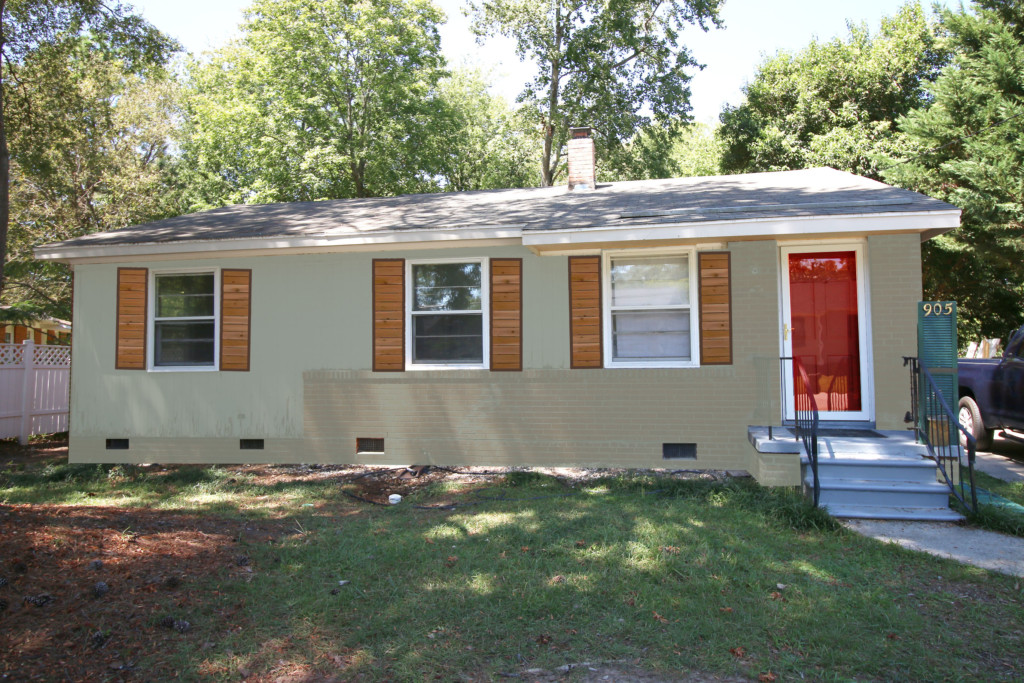
Oh but wait, I photoshopped some renderings of the house with different colored doors! Hopefully, this will help you make a decision!

Pumpkin Door on Navy Steel


Lime Green Door on Navy Steel


Cranberry Door on Navy Steel


Pumpkin Door on Sage Advice


Navy Door on Sage Advice


Cranberry Door on Sage Advice

Let me know your thoughts in the comment area. Iโ€™m all ears.

Disclosure: RomaBio is a Millieโ€™s Remodel sponsor. I reached out to them after doing lots of research on painting exterior brick and asked if they wanted to be a sponsor of the project. I was provided with complimentary products to use.

You can catch up on the Millieโ€™s Remodel project here.