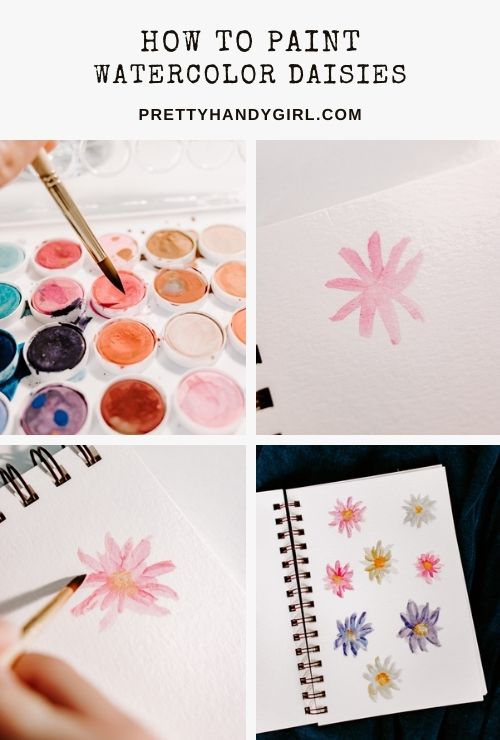
how to paint watercolor daisies

Learn how to paint these watercolor daisies with this easy tutorial!

tutorial for painting watercolor daisy flowers

Easy to Paint Watercolor Daisies

Hello, Pretty Handy Girl Readers! Guess what? I found my box of watercolors. If you remember, last month I moved from Seattle to NC and things were a bit crazy there (still are, actually.) Iโ€™m back with another watercolor tutorial and this one is easy. Well, actually, theyโ€™ve all been pretty easy so far, right?

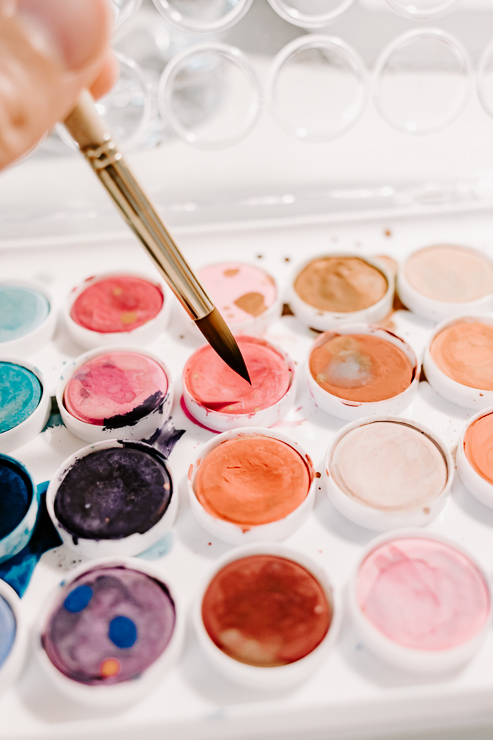
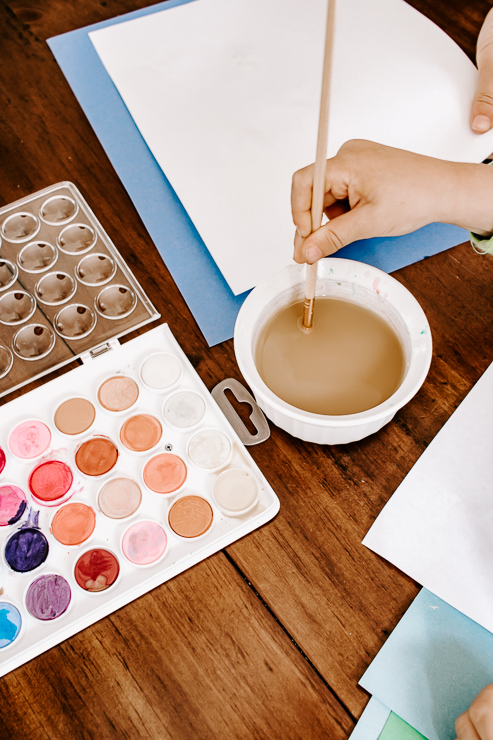
watercolors with a paintbrush

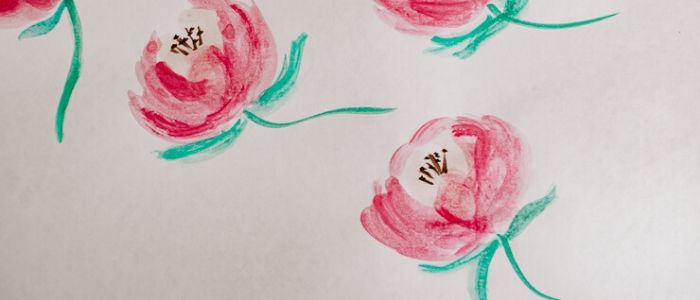
As a reminder, weโ€™ve learned how to paint pink peonies:

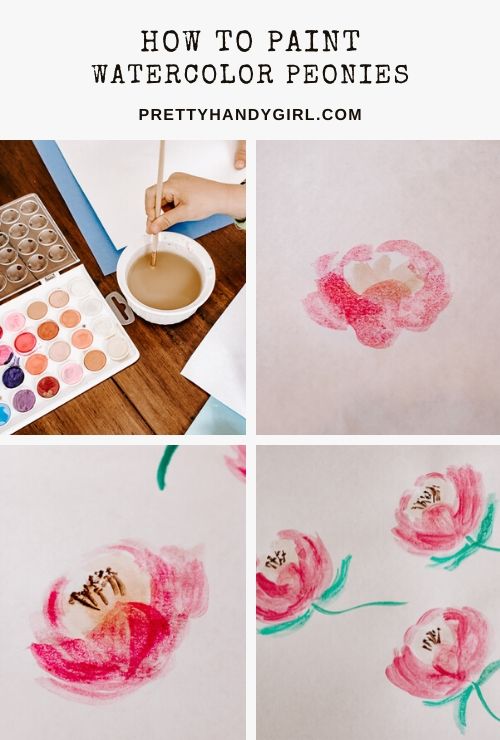
How to Paint Watercolor Peony Flowers

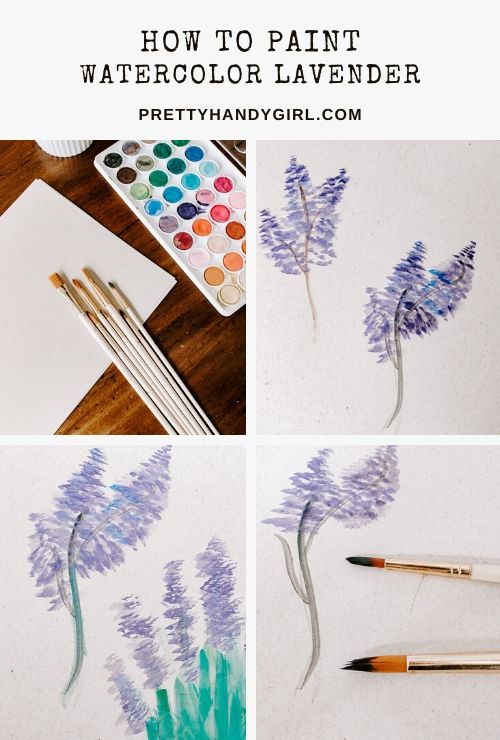
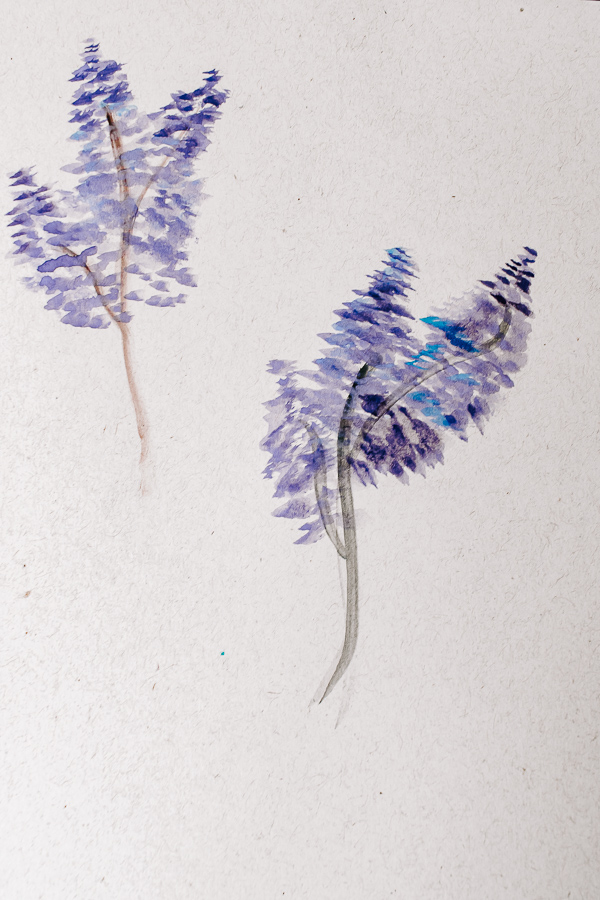
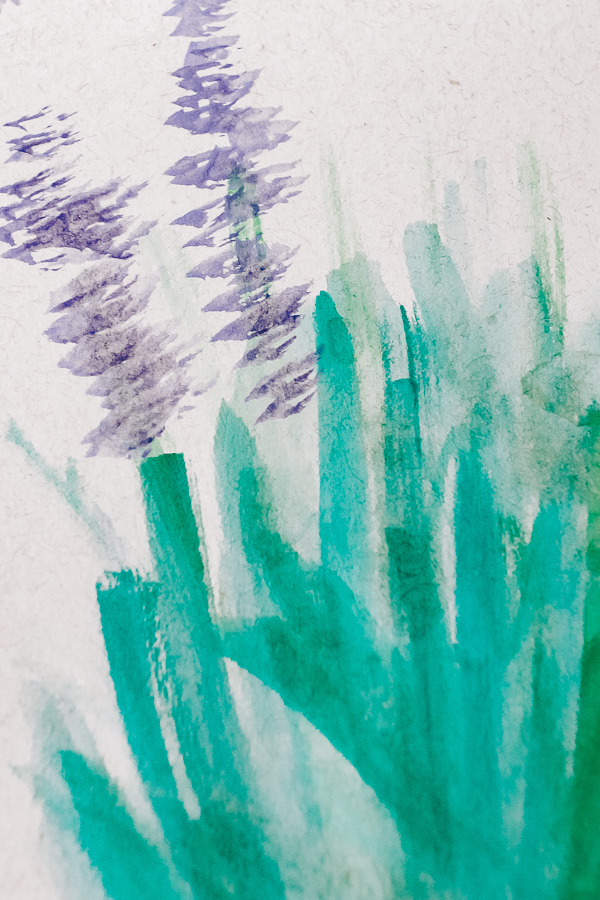
Then I taught you how to paint lavender in watercolor:

How to Paint Watercolor Lavender

Now letโ€™s learn how to paint these daisies. Call them coreopsis. They are the cutest little flowers and so easy to create.

Letโ€™s get started!

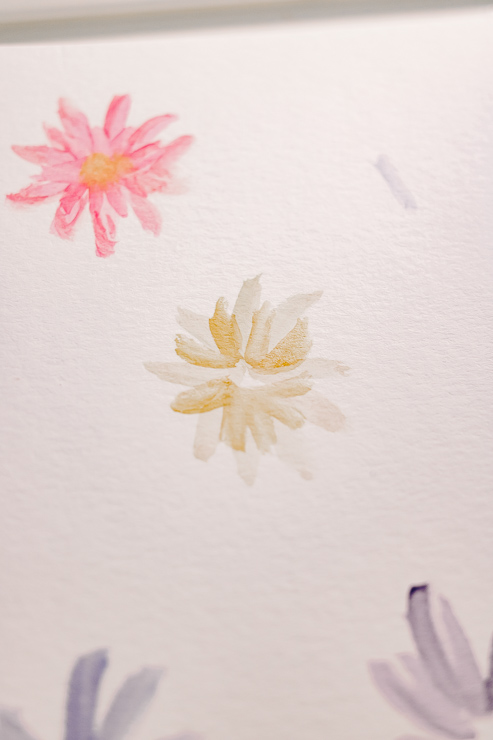
How to Paint Watercolor Daisies

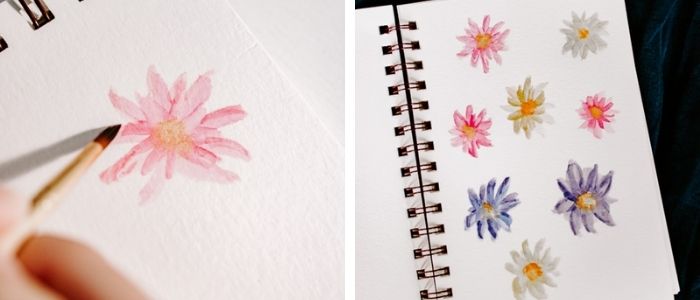
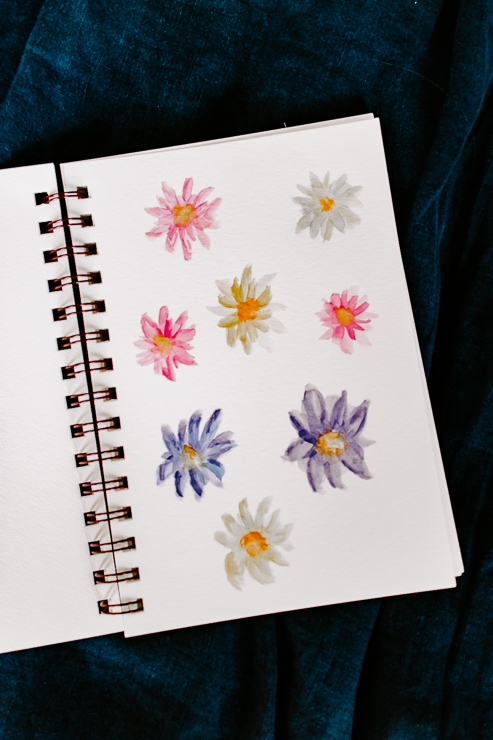
a page of yellow, purple and pink watercolor flowers

Materials:

(Iโ€™ve includedย affiliate links for your convenience. I earn a small percentage from a purchase using these links. Thereย is no additional cost to you. You canย readย more about affiliate links here.)

Instructions:

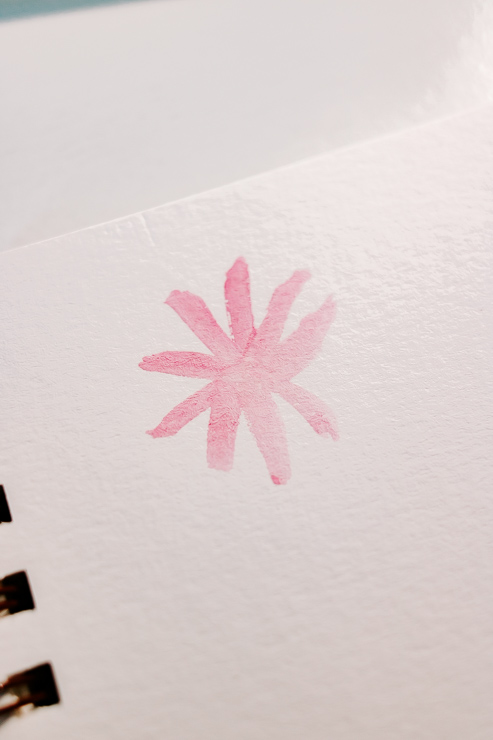
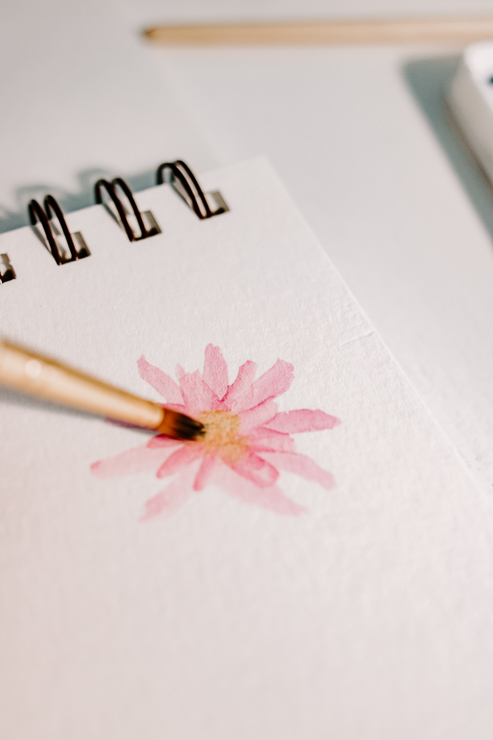
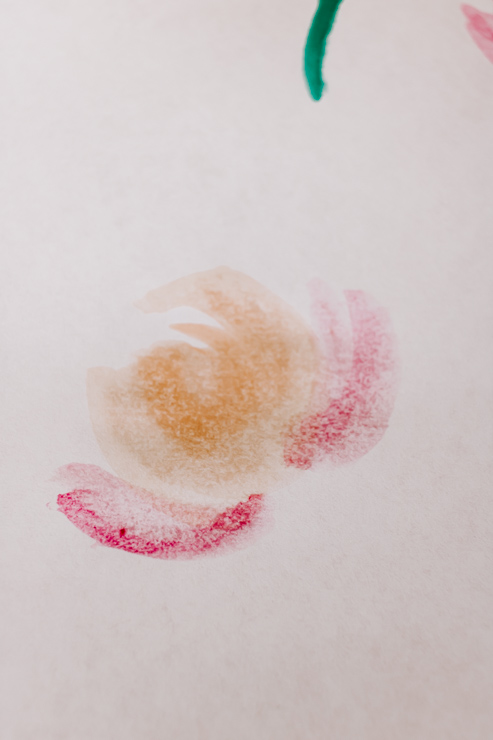
Step 1: Create a basic star flower shape

a pink watercolor flower being painted

Using a medium-sized brush, dip your brush in the water and then the color, and paint a few runny lines in a star shape. This is going to serve as the base for our flower. Donโ€™t worry if the petals donโ€™t look perfect right now. We are going to define them a little more at the end. Remember, watercolor is supposed to be kind of runny and imperfect.

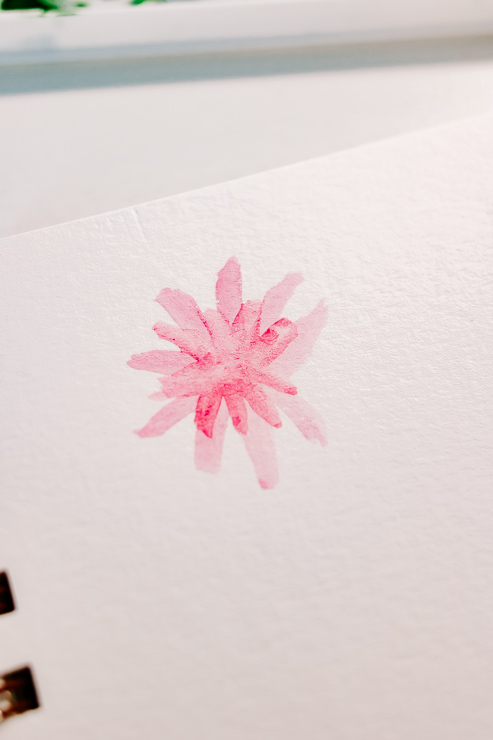
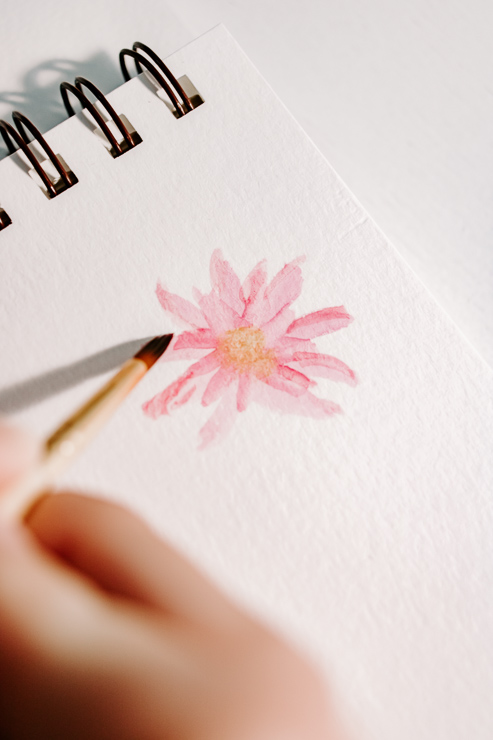
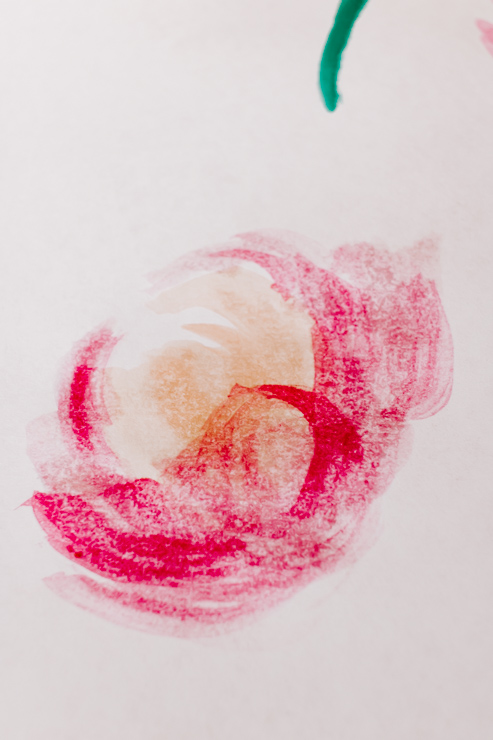
Step 2: Create more petals deeper in color

a pink flower being painted with watercolors

Working with the same brush we used in Step 1, grab some of the same watercolor paint. We want a richer, deeper color here so donโ€™t use as much water. Paint a smaller star shape on top of the star shape you painted in Step 1. Try to go in between the petals previous petals. We are creating dimension and depth of the flower.

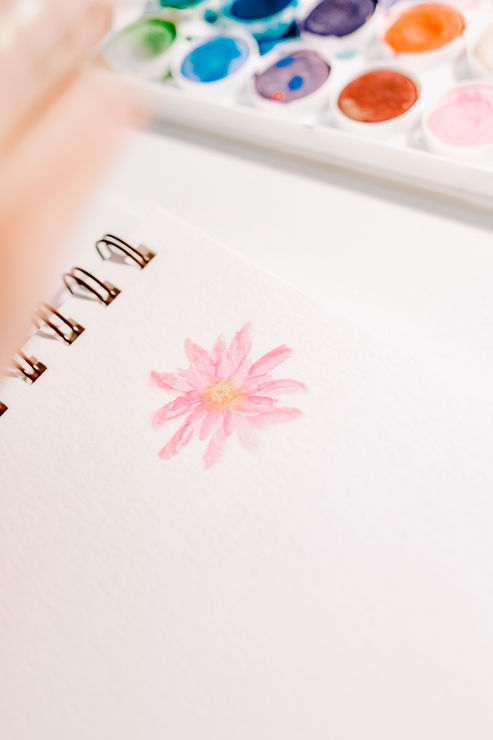
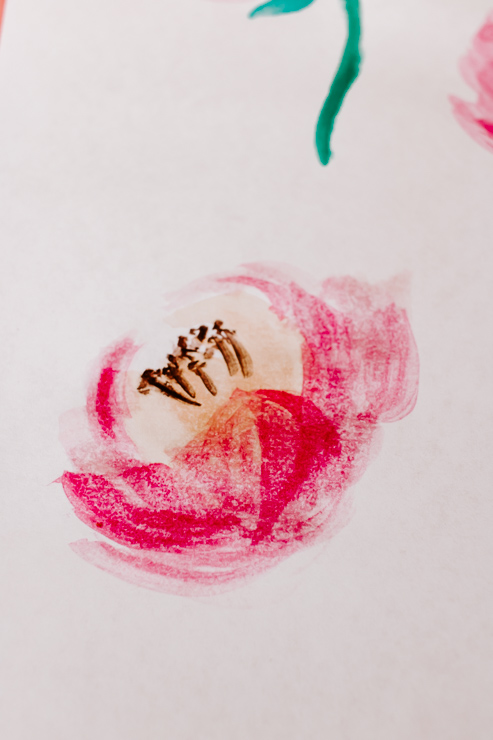
Step 3: Create the center of the flower

painting a pink watercolor daisy

Now we need to define that center part of the flower. Take a smaller brush and add a bit of yellow/orange color to it. Dot it in the center of your flower, using kind of a stippling motion. You can do this several times to create a deeper, darker center. Donโ€™t fret, it should look somewhat messy and imperfect.

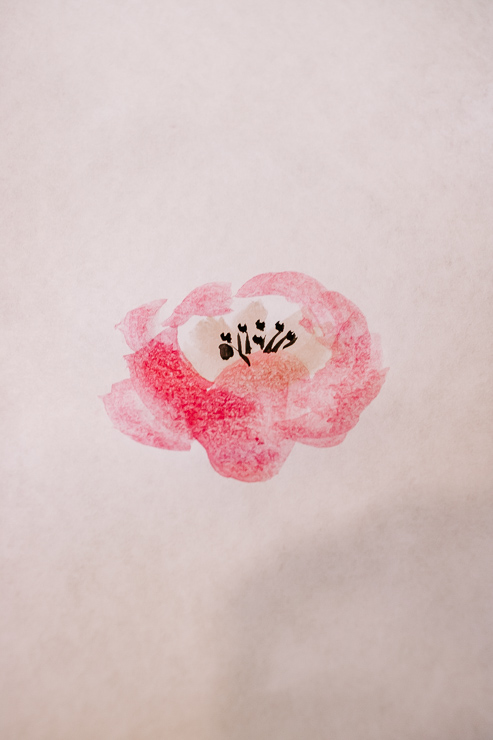
Step 4: Define your petals

painting a watercolor petal on a daisy flower

Finally, letโ€™s take some of the petal color and define our petals a little more. You will want to use a smaller round brush for this. Dip a bit of water on the end of your brush, then dip it in the petal color. Define the ends of a few petals by outlining them. I donโ€™t think you need to outline all of them. Use your artistโ€™s eye here and determine what looks good.

pink watercolor daisy with yellow center

Thatโ€™s it!

Put on some music and just let your brushes carry you away for a little bit. Forget about the world for a moment. We could all use a little escape.

yellow and pink watercolor daisy flowers

Thoughts on Paper:

Watercolor paper really does make a difference in how your final art looks, but you can still just use regular paper until you find the time and budget to buy some. In other words, donโ€™t let not having the right materials hold you back. Watercolor painting is very relaxing and therapeutic.

If you make a page of these little flowers, you have yourself a little piece of frameable art for your walls. I hope you are enjoying these tutorials. Let me know if you are enjoying these watercolor tutorials in the comments below.

Stay safe out there, my friends! Iโ€™ll see you next month!

karen signature

~ย See More of Karenโ€™s Tutorialsย ~


karen from decor hintHello!ย  Iโ€™m Karen, the creator of the Home Decor and DIY Blog:ย Decor Hint.ย Iโ€™m a Native of the East Coast, but I currently live in beautiful Seattle with my hubby, our two wonderful children, and our spunky wheaten terrier.

You can usually find me with some sort of craft in one hand and a coffee in the other. And Iโ€™m always rearranging furniture or moving lamps from room to room. I have a passion (read: obsession) for decorating, DIY, and gardening. In short, I love making my house into a home.

Like many, Iโ€™m inspired by what I see in home decor magazines, but Iโ€™m not so inspired by the price tags.ย  Consequently, I love finding and creating beautiful budget-friendly home decor items. In a head to head competition, I bet youโ€™d never know the difference between the designer items and my DIY creations!ย  Many of my DIY projects focus on sewing, crafting, upcycling and organizing. Some of my favorite projects have beenย making prettyย wreaths,ย sewing my ownย tassel hand towels,ย and craftingย these trendy wood beadย garlands.ย I canโ€™t wait to inspire you and spark your creativity through my DIY projects.

You can always connect with me on Pinterest,ย Twitterย orย Instagram.

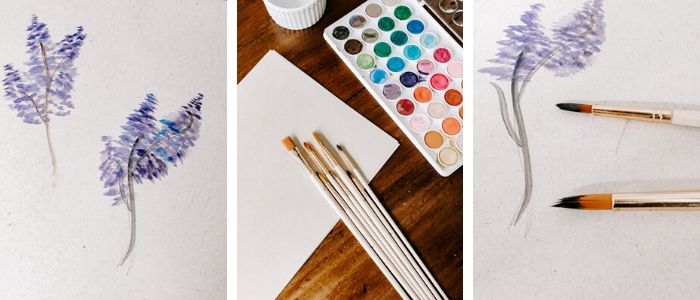
Iโ€™m back with another watercolor flower painting tutorial. Learn how to paint lavender (an easy flower to paint!)

How to Paint Watercolor Lavender

How to Paint Watercolor Lavender

I thought it would be fun to continue on with our watercolor summer flower tutorials! Last month, I taught you how to paint pretty pink peonies. For this monthโ€™s tutorial, youโ€™ll be learning how to paint an even easier flower โ€“ lavender!

Lavender was one of the first flowers I attempted to paint when I started with watercolors. Itโ€™s literally a few straight-line stems and some stippled brush dots and youโ€™re done. Iโ€™ll give you all the details below.

Letโ€™s get to it!

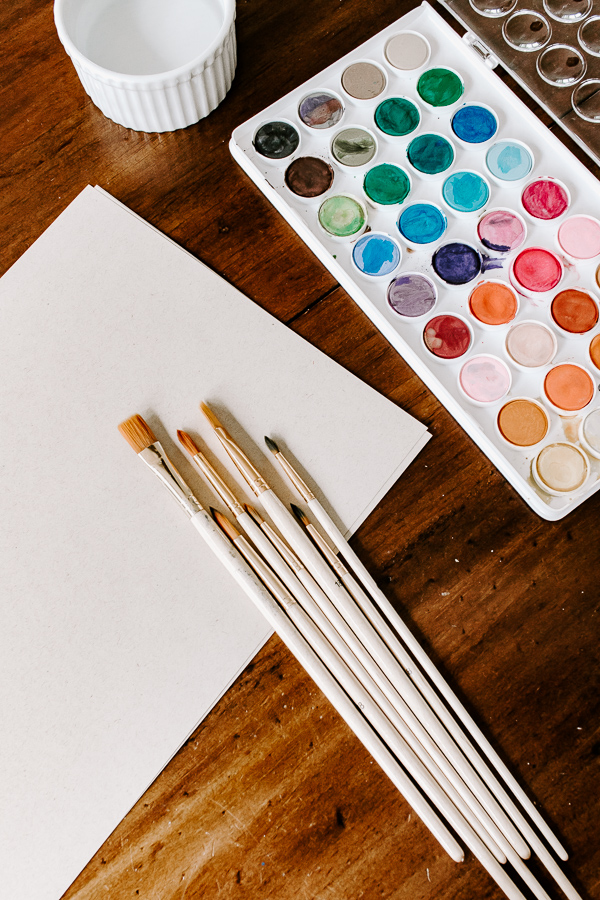
Use watercolor and watercolor brushes and paper to create your watercolor painted flowers

Materials:

(Iโ€™ve includedย affiliate links for your convenience. I earn a small percentage from a purchase using these links. Thereย is no additional cost to you. You canย readย more about affiliate links here.)

Instructions:

Letโ€™s make some lavender!ย  Once you get the hang of these flowers, feel free to use different colors.ย  Let your imagination be your guide.

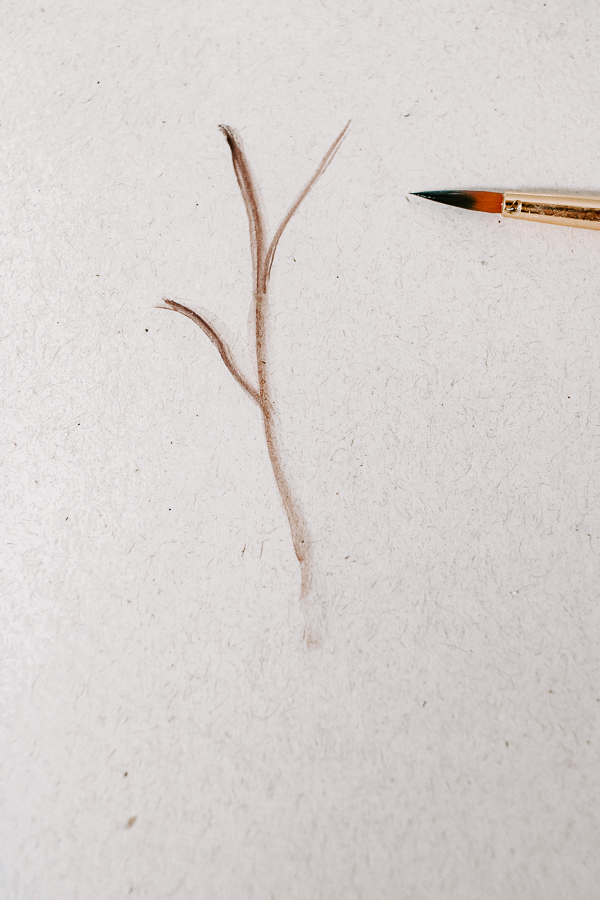
Step 1: Create the stem

paint a stem using a small watercolor brush

Iโ€™m using a small brush here and a brownish-black color. (Feel free to add some green if you like.) Use the tip of the brush to create a series of lines all coming to a single point at the bottom, like a stem. If your stem ends up too light, just add more watercolor paint and go over the line again.

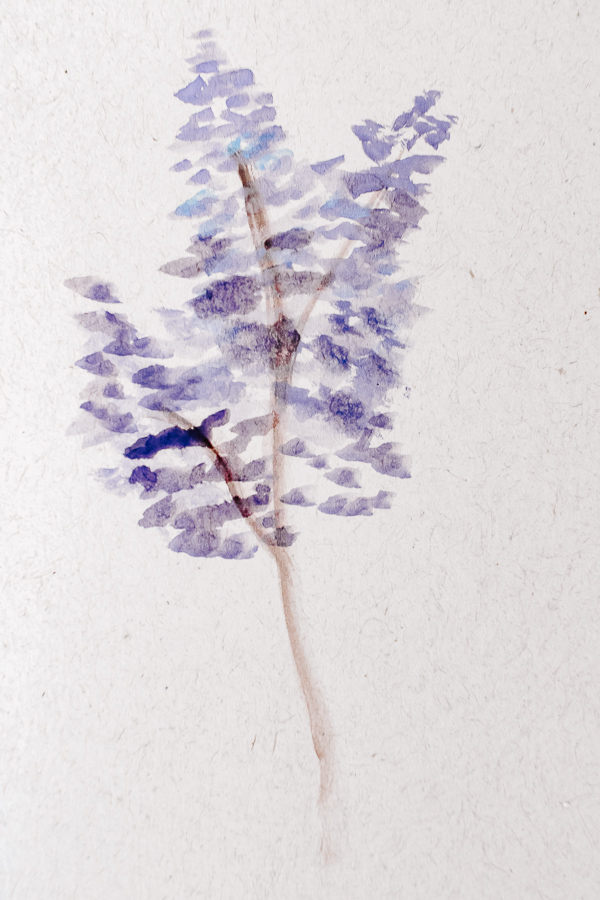
Step 2: Create the lavender petals

Use a small and medium size brush to create your watercolor lavender

create a series of stippled marks to make the lavender

Remember when I said these are one of the easiest flowers to paint? You wonโ€™t even believe this!

All you need to do is grab a medium-size brush. Add a little purple watercolor paint. Using the side of the brush, dot it along each stem (called stippling in the art world). Start narrow at the top and go a little wider towards the bottom. Youโ€™ll start to see the makings of your lavender! Imperfection is good here.

Step 3: Add some dimension

Watercolor painted lavender

Now we want to add in a little dimension. Load up your brush with dark purple or blue watercolor paint on your brush. Create more stippled side brush marks as we did in Step 2. This will darken your lavender and create some depth.

Another variation that you can create is a bushy lavender plant. Instead of starting with a stem, create a series of green lines as your lavender bush. Paint the watercolor lavender at the tops of these lines. Then darken the bottom of the plant with a darker green to create some depth.

Create stippled marks for lavender using the side of your brush

Your finished watercolor painted lavender plants!

And thatโ€™s it! I hope you enjoyed this tutorial for painting watercolor lavender.

Next month, Iโ€™ll show you another watercolor tutorial. Pretty soon, weโ€™ll put together all our flowers into one giant piece of floral art ready for framing. See you next month!

karen signature

~ย See More of Karenโ€™s Tutorialsย ~


karen from decor hintHello!ย  Iโ€™m Karen, the creator of the Home Decor and DIY Blog:ย Decor Hint.ย Iโ€™m a Native of the East Coast, but I currently live in beautiful Seattle with my hubby, our two wonderful children, and our spunky wheaten terrier.

You can usually find me with some sort of craft in one hand and a coffee in the other. And Iโ€™m always rearranging furniture or moving lamps from room to room. I have a passion (read: obsession) for decorating, DIY, and gardening. In short, I love making my house into a home.

Like many, Iโ€™m inspired by what I see in home decor magazines, but Iโ€™m not so inspired by the price tags.ย  Consequently, I love finding and creating beautiful budget-friendly home decor items. In a head to head competition, I bet youโ€™d never know the difference between the designer items and my DIY creations!ย  Many of my DIY projects focus on sewing, crafting, upcycling and organizing. Some of my favorite projects have beenย making prettyย wreaths,ย sewing my ownย tassel hand towels,ย and craftingย these trendy wood beadย garlands.ย I canโ€™t wait to inspire you and spark your creativity through my DIY projects.

You can always connect with me on Pinterest,ย Twitterย orย Instagram.

Painting with Watercolors - Peony Flowers

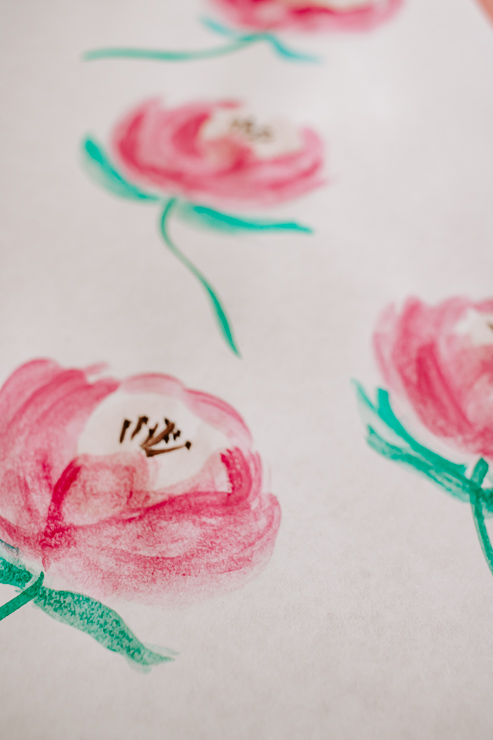
Summer is here and Iโ€™m in the mood for some summer flowers.ย  Instead of gardening โ€“ Iโ€™m going to teach you how to paint watercolor peonies!

How to Paint Watercolor Peony Flowers

How to Paint Watercolor Peonies

I love painting with watercolors because itโ€™s so forgiving. The watercolor artwork is not supposed to be super perfect โ€“ itโ€™s those little imperfections that give your piece so much character!

Today, I thought it would be fun to give you a little lesson in painting watercolor flowers, like some easy peonies. Itโ€™s really a step-by-step process and Iโ€™m breaking it all down to show you how simple this really is.

How to Paint Watercolor Flowers

You definitely get better at painting with watercolors the more you do it. In just one session, you will be amazed at how much you have improved and you wonโ€™t believe that you can paint this good!

Painting watercolor peonies is great way to keep your mind active and positive in these unprecedented times. All you will need are some watercolors, brushes and watercolor paper. I ordered everything off Amazon so no need to leave the house.

(Hereโ€™s a little secret though โ€“ you can even use printer paper if youโ€™re just starting out! It may ripple a little, but donโ€™t worry about it!)

This is a great activity for the kiddos too โ€“ so tell them to follow along and letโ€™s dive right in!

Materials:

(Iโ€™ve includedย affiliate links for your convenience. I earn a small percentage from a purchase using these links. Thereย is no additional cost to you. You canย readย more about affiliate links here.)

I ordered this set of brushes and paints and itโ€™s been the best thing ever! The brush quality is good and the watercolors are vibrant. If you are serious about watercolors, you will want to purchase the watercolor paper eventually โ€“ itโ€™s thicker and slightly textured and your artwork will look really good on it.

Instructions:

We are going to make beautiful watercolor peonies. I will show you the colors I used, but once you get the hang of it, you can use whatever colors you want! The steps are the same.

Step 1: Create the center of the peony

Paint the center of the flower first

Using a medium-sized brush to dip into a light, watery peachy pink color. With your brush, create a circular backward โ€œCโ€ shape on the paper โ€“ it doesnโ€™t have to be perfect! In fact, it shouldnโ€™t be. Keep this part light and airy. This is going to form the center of our open peony flower.

Rinse your brush in the water and wipe it on the paper towel.

Step 2: Create the petals surrounding the center

How to Paint Watercolor Flowers

Now grab a darker pink color with the same brush and form little curve shapes all around the โ€œCโ€ shape we created in step 1. These shapes should be rounded, like little smiles, and different in size. You are basically enclosing the center you created with these โ€˜smilesโ€™. Some of the shapes should go out โ€“ like petals opening up.

How to Paint Watercolor Flowers

To give the flower more dimension, paint one petal in the front thatโ€™s more rounded in shape. It looks like itโ€™s facing you. You can also add two smaller frown shapes in the back of the center to give the illusion of more petals in the back.

Step 3: Add the stamen

To finish, take a very small watercolor brush and a black or brown color and paint some small dots in the center. Then add a few thin lines coming down from these dots to represent the stamens. This final step will really help your flower come alive!

How to Paint Watercolor Flowers

All you need to do at this point is add a light green line down from the flower as your stem. Leaves are optional but are simple to paint. Create a few strokes of green with a medium-sized brush under your flower.

Once you get the hang of it, just changing the shape of the center can create a whole new flower look!

How to Paint Watercolor Flowers

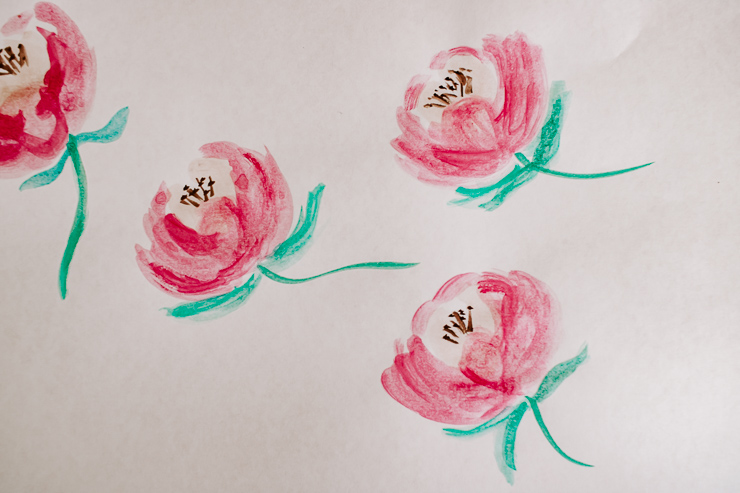
And thatโ€™s it! Arenโ€™t these watercolor peonies so beautiful?

A set of watercolor peony flowers

Paint a whole page of these beautiful flowers and frame it after they dry. I could sit here and paint all day โ€“ the time passes so quickly when Iโ€™m watercolor painting. I love these activities that help your mind focus, because I always feel so refreshed afterward!

A set of watercolor peony flowers

If you guys like this tutorial, Iโ€™d happily create more watercolor flower how-tos in the future, just let me know in the comments below.

Thanks so much for reading, see you next month!

karen signature

~ย See More of Karenโ€™s Tutorialsย ~


karen from decor hintHello!ย  Iโ€™m Karen, the creator of the Home Decor and DIY Blog:ย Decor Hint.ย Iโ€™m a Native of the East Coast, but I currently live in beautiful Seattle with my hubby, our two wonderful children, and our spunky wheaten terrier.

You can usually find me with some sort of craft in one hand and a coffee in the other. And Iโ€™m always rearranging furniture or moving lamps from room to room. I have a passion (read: obsession) for decorating, DIY, and gardening. In short, I love making my house into a home.

Like many, Iโ€™m inspired by what I see in home decor magazines, but Iโ€™m not so inspired by the price tags.ย  Consequently, I love finding and creating beautiful budget-friendly home decor items. In a head to head competition, I bet youโ€™d never know the difference between the designer items and my DIY creations!ย  Many of my DIY projects focus on sewing, crafting, upcycling and organizing. Some of my favorite projects have beenย making prettyย wreaths,ย sewing my ownย tassel hand towels,ย and craftingย these trendy wood beadย garlands.ย I canโ€™t wait to inspire you and spark your creativity through my DIY projects.

You can always connect with me on Pinterest,ย Twitterย orย Instagram.

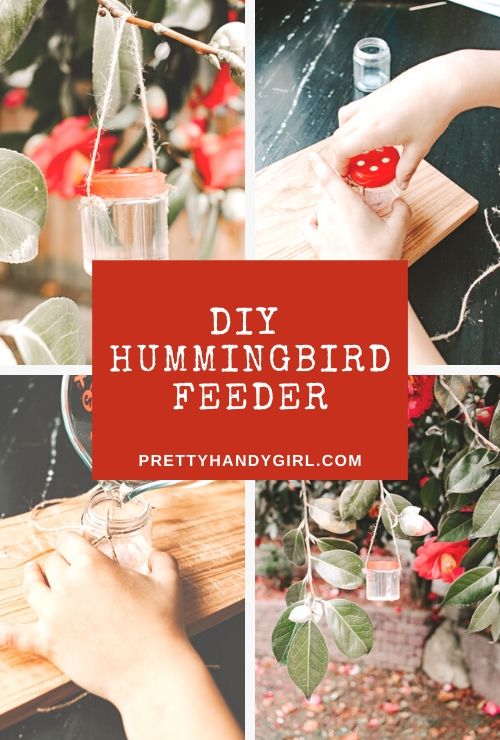
An idea for making your own hummingbird feeder! Great kids craft and perfect for Spring.

Happy Spring Everyone! What a difference a few weeks can make. Like many of you, I am grappling with the uncertainty of this challenging time. My children are now home with me every day, for the foreseeable future. In Seattle, life has completely changed. Almost everything is shut down, even playgrounds are closed at the moment. And so, Iโ€™ve been focused on creating little projects that my kids and I can do while stuck at home. Letโ€™s talk about DIY Hummingbird Feeder.

I came across these DIY hummingbird feeders with jelly jars and was instantly inspired! Iโ€™ve had a hummingbird feeder on my Amazon wishlist for quite some time. Iโ€™m not sure why I never considered making my own instead. This turned out to be a very kid-friendly project and they even learned a little bit about hummingbirds.

Make your own hummingbird feeder out of spice jars

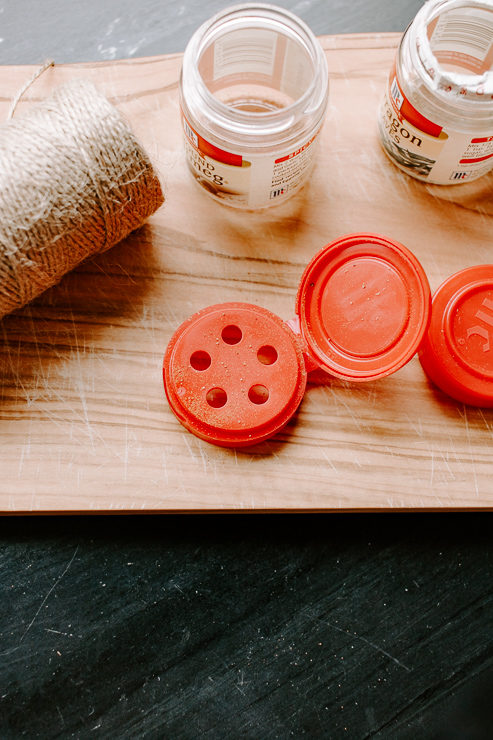
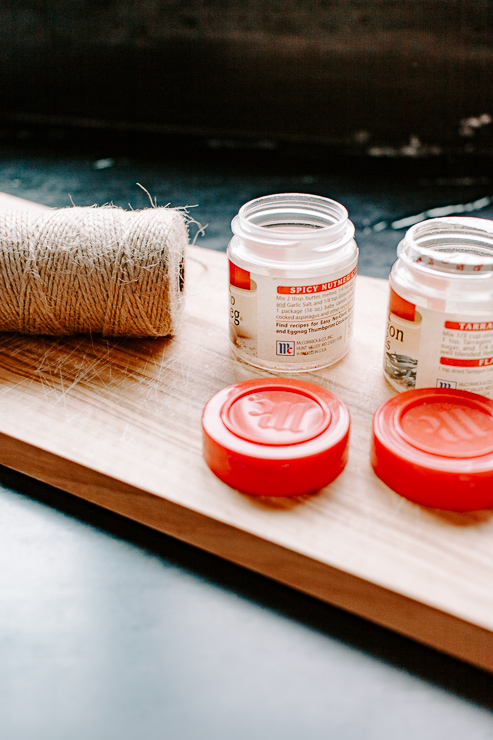
The only issue was, I didnโ€™t have jelly jars. So I improvised a bit and used these 1oz McCormick spice jars. I emptied out the contents and washed them out thoroughly. These little spice jars are the perfect size for those dainty hummingbirds.

Materials:

(Iโ€™ve includedย affiliate links for your convenience. I earn a small percentage from a purchase using these links. Thereย is no additional cost to you. You canย readย more about affiliate links here.)

DIY Hummingbird feeder from little spice jars

Instructions:

Follow these steps to make your own hummingbird feeder.

Step 1: Prepare your spice jars

Wash your spice jars with hot soapy water - they are the perfect size for little hummingbirds!

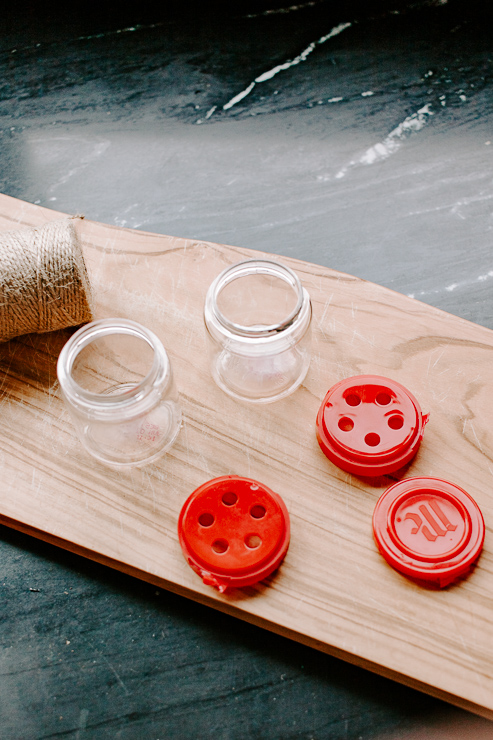
Thoroughly wash your spice jars and lids with hot, soapy water. You donโ€™t want any lingering spice odors or tastes that will turn off potential hummingbirds. I also removed the stickers from the jars with a little goo gone.

McCormick spice jars have a lid with holes in it, covered by a snap-top. All you need to do is rip off the snap-top section, we donโ€™t need it. Hummingbirds will use their long beaks to drink the nectar from each hole.

Step 2: Make Hummingbird Nectar

Make Hummingbird nectar - recipe in post - then pour into your jars!

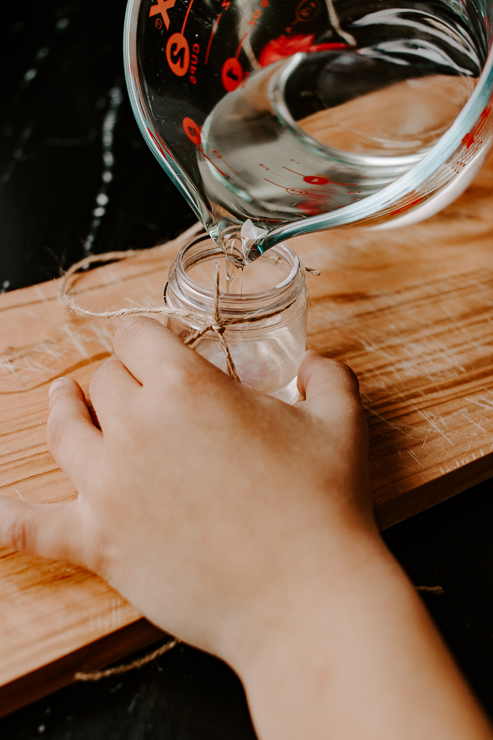
The recipe for making Hummingbird nectar couldnโ€™t be easier. Itโ€™s just sugar water โ€“ but you need to know the correct ratio. Too much sugar can be harmful to hummingbirds and too little sugar doesnโ€™t provide enough calories for them.

I followed the recipe from the Audubon website.ย ย Itโ€™s ยผ cup of refined white sugar and 1 cup of boiling water. Mix until the sugar dissolves. Cool the mixture and then fill your spice jars to the top. Now, just replace the lid with holes in it.

Replace the spice lid on your jar - hummingbirds feed on the nectar through the holes.

Step 3: Attach Jute Twine for Hanging

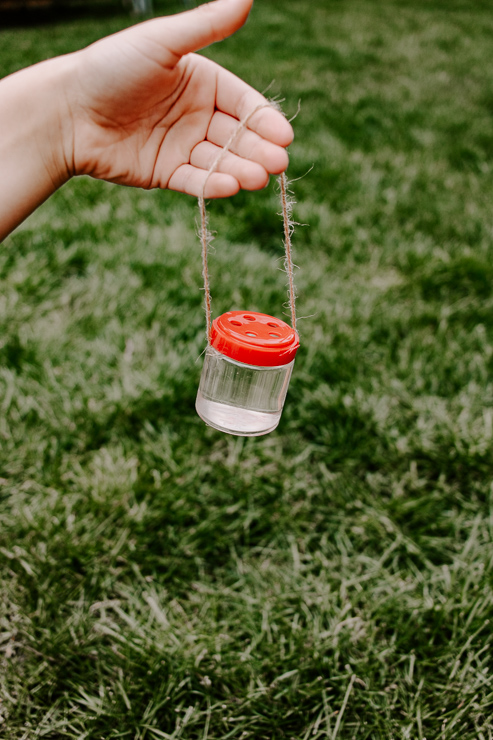
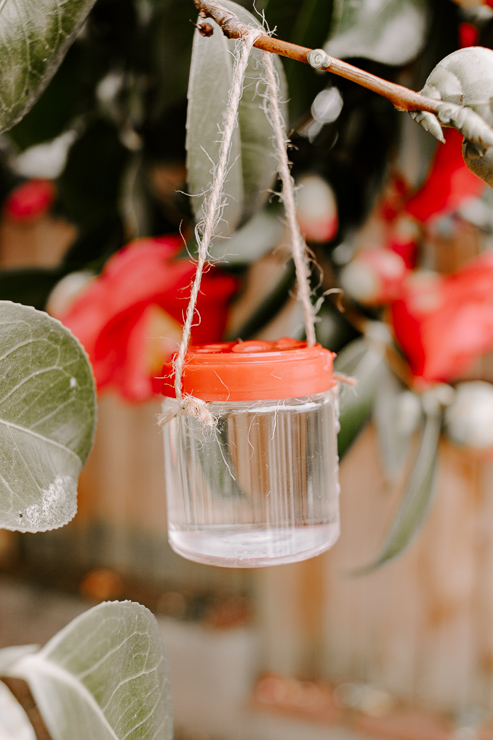
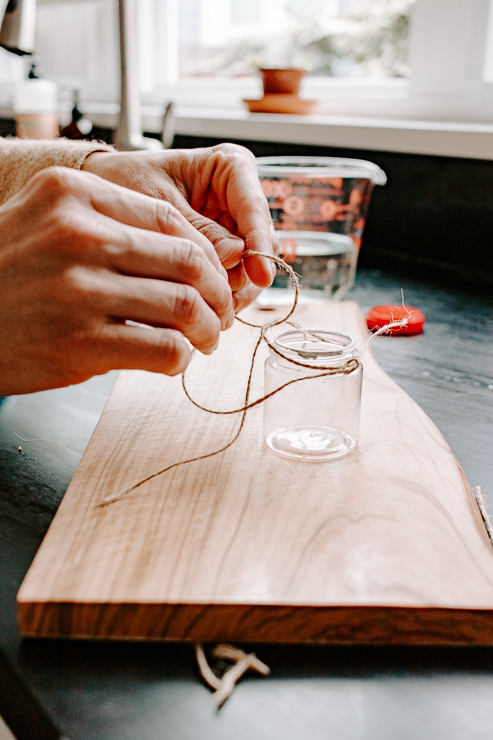
Tie some string or jute twine to your jars for hanging on a tree!

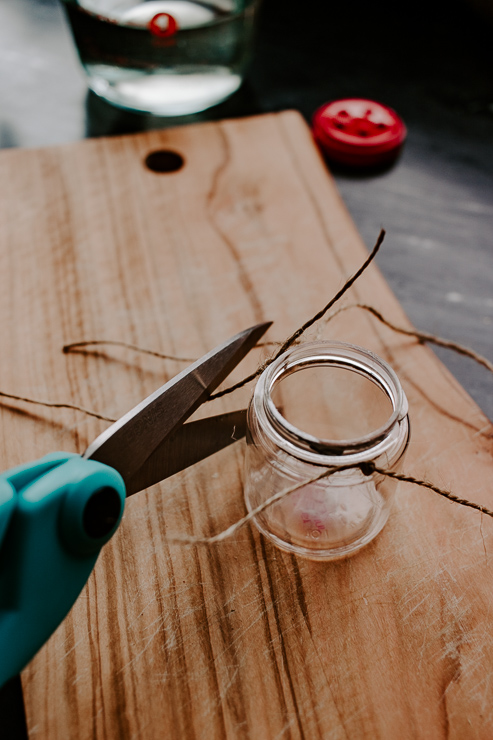
I used some jute twine to create a little loop for hanging. Tie your knots tight and make sure the lid is secure.

Cut excess string from hummingbird feeder jars before hanging.

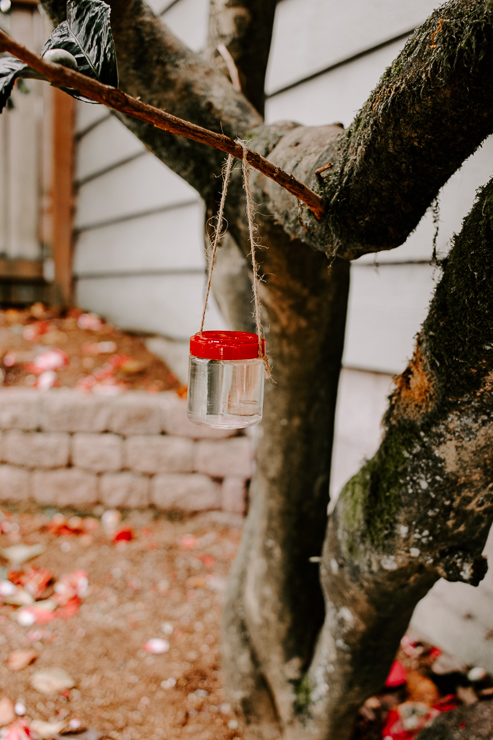
Now just hang it up somewhere outside and wait for those hummingbirds!

These spice jars make a great hummingbird feeder and it's the perfect activity for kids

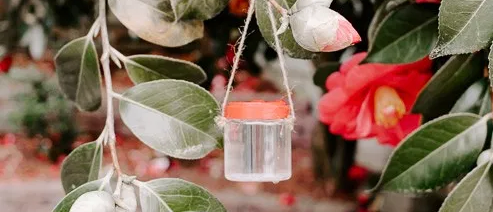
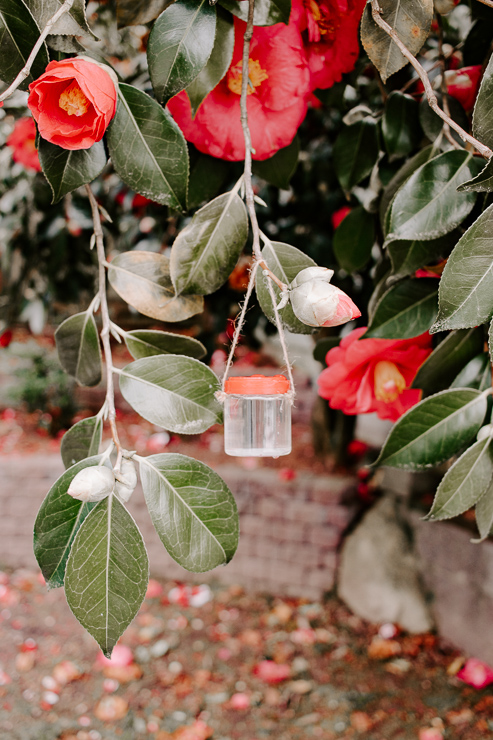
Hang your feeder from a tree, where you see hummingbirds visit

We havenโ€™t had a visitor yet that I could photograph, but I know those hummingbirds are on the way.

Hummingbirds love the nectar that you put in these jars

DIY Hummingbird Feeder from old spice jars!

Thanks so much for reading and being here today. Stay safe, stay healthy!

karen signature

~ See More of Karenโ€™s Tutorials ~


karen from decor hintHello!ย  Iโ€™m Karen, the creator of the Home Decor and DIY Blog:ย Decor Hint.ย Iโ€™m a Native of the East Coast, but I currently live in beautiful Seattle with my hubby, our two wonderful children, and our spunky wheaten terrier.

You can usually find me with some sort of craft in one hand and a coffee in the other. And Iโ€™m always rearranging furniture or moving lamps from room to room. I have a passion (read: obsession) for decorating, DIY, and gardening. In short, I love making my house into a home.

Like many, Iโ€™m inspired by what I see in home decor magazines, but Iโ€™m not so inspired by the price tags.ย  Consequently, I love finding and creating beautiful budget-friendly home decor items. In a head to head competition, I bet youโ€™d never know the difference between the designer items and my DIY creations!ย  Many of my DIY projects focus on sewing, crafting, upcycling and organizing. Some of my favorite projects have been making pretty wreaths,ย sewing my own tassel hand towels, and crafting these trendy wood bead garlands.ย I canโ€™t wait to inspire you and spark your creativity through my DIY projects.

You can always connect with me on Pinterest,ย Twitter or Instagram.
 

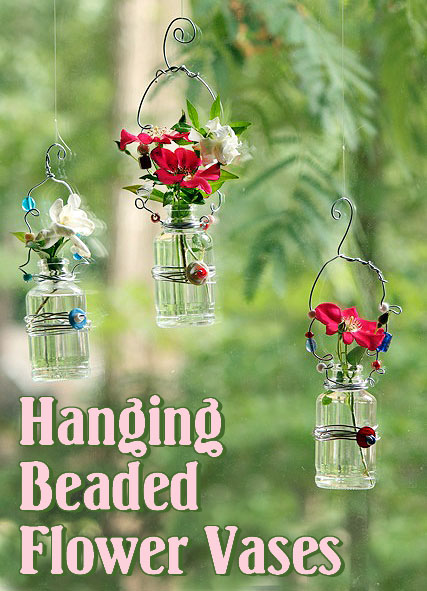
Liked this project? Check out these DIY Hanging Beaded Vases for another upcycled craft!


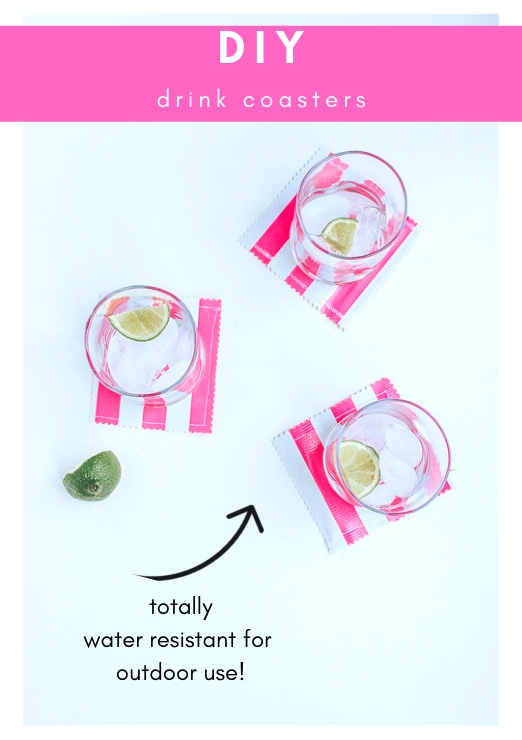
Tutorial for making these DIY oilcloth, water resistant drink coasters for Summer!

DIY Drink Coasters - Water Resistant fabric and perfect for Outdoor Use and Summer Parties!

DIY Oilcloth Drink Coasters

Hi there! ย Iโ€™m so thrilled to be back today with this super quick and easy project. ย The weather in Seattle has been totally amazing lately and itโ€™s got me thinking about summer.ย  And, summer entertaining is on the brain! This project will look great on your patios and outdoor spaces. Bonus, itโ€™s totally water resistant too. Letโ€™s take a mini-break and learn how to make these adorable DIY oilcloth drink coasters for gifting or entertaining.

What in the world is Oilcloth?

Oilcloth is a type of fabric. ย It has vinyl on one side and kind of a soft mesh of cotton on the other side. ย Vinyl has a slippery and plastic-like feel to it. The best part about vinyl is you can wipe it clean and itโ€™s water resistant! This makes oilcloth a perfect fabric choice for outdoor items like tablecloths, COASTERS, beach bags etc.

The other great thing about oilcloth is that it just happens to be made in a multitude of funky patterns and bright colors. ย This fabric was made for Summer!ย  When you get a minute โ€“ run a google search for โ€˜oilcloth fabricโ€™ and youโ€™ll see what I mean.ย  Such pretty patterns!

So this is the perfect little accessory for all those Summer fiestas and BBQโ€™ s you have in the works. ย Or even for gifting away as little favors.ย  Tie a cute burlap string around them and presto! You have a lovely handmade housewarming gift.

Perhaps you own a pool or live near the beach?ย  Or know someone who does?ย  These coasters make a fantastic DIY gift idea for them.
Hereโ€™s the best part: these stylish oilcloth coasters took me 10 minutes to make โ€“ start to finish.
Materials:

(Iโ€™ve includedย affiliate links for your convenience. I earn a small percentage from a purchase using these links. Thereย is no additional cost to you. You canย readย more about affiliate links here.)

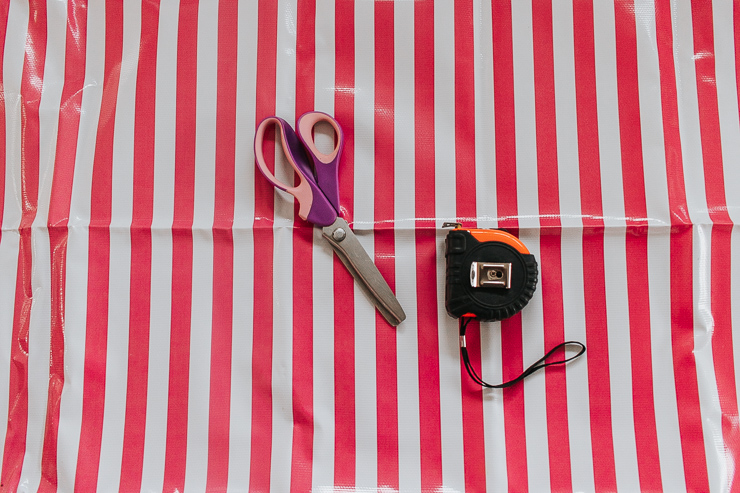
Gather materials needed to make oilcloth drink coasters

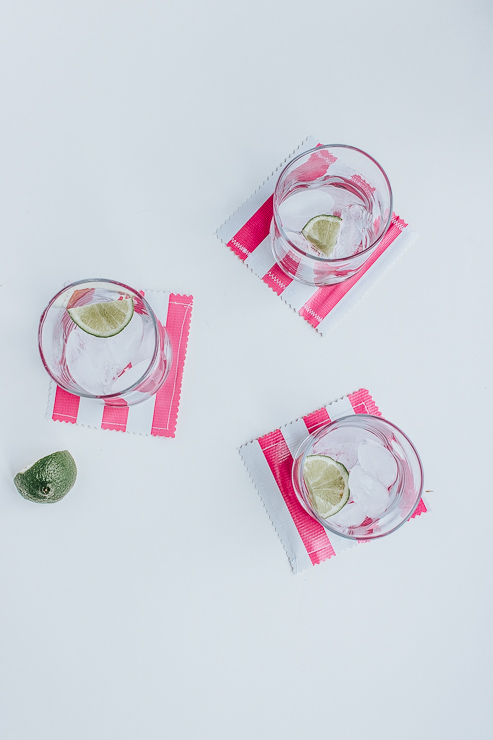
  • Oilcloth Fabric โ€“ I chose these hot pink stripes from Fabric.com
  • Sewing Machine
  • Pinking Shears โ€“ these are simply scissors with a serrated edge. ย They are used to cut a zig zag pattern in fabric to prevent fraying.
  • Tape Measure (for measuring your coasters to a perfect square)

Instructions:

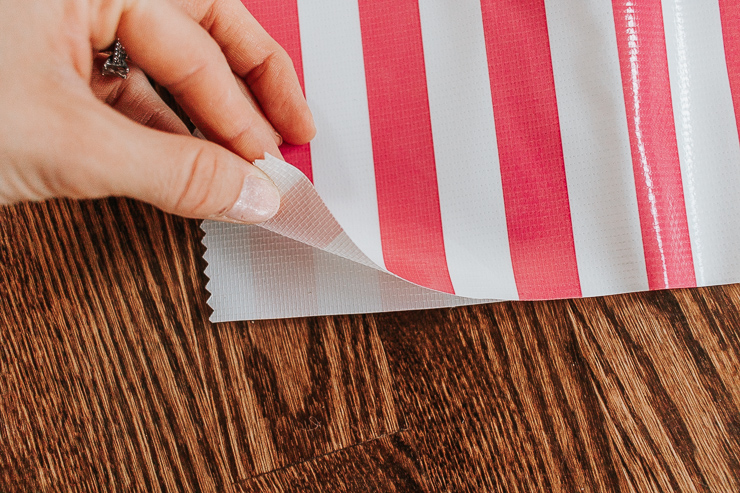
Start by folding your oilcloth in half. ย We need two exact squares to make one coaster (both front and back will be the vinyl, water-resistant side).

Fold your oilcloth fabric in half

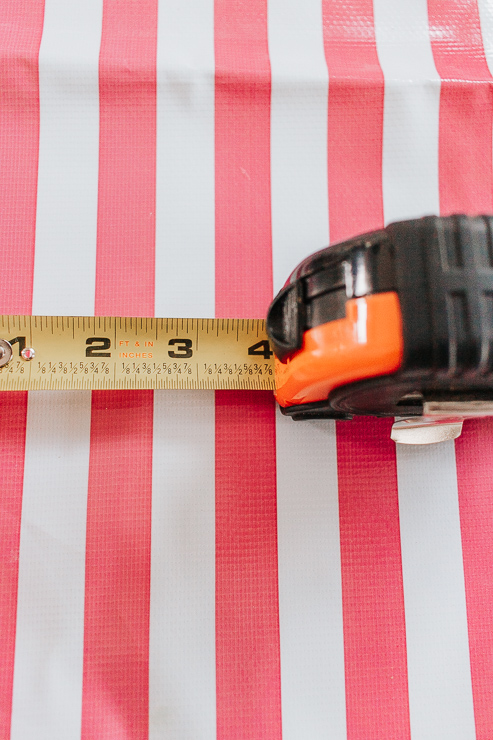
Step 1: ย Measure out a perfect square on your oilcloth fabric.

measure out your coasters using a tape measure or ruler

I measured approximately a 4 inch square coaster.ย  (Itโ€™s totally up to you on sizing. Most drink coasters are between 3-5 inches square.ย  For fun you can also cut circles instead of squares. Use a bowl or circle template to make a perfect circle.)

Step 2 : ย Use your pinking shears to cut out your measured square.

Cut out the two squares of oilcloth fabric that you previously measured

Since your fabric is folded in half โ€“ you can pretty much cut two squares at once.ย  You can also use regular scissors here and even them with pinking shears after sewing.

Step 3: ย Line up your two squares and sew them together vinyl sides out.

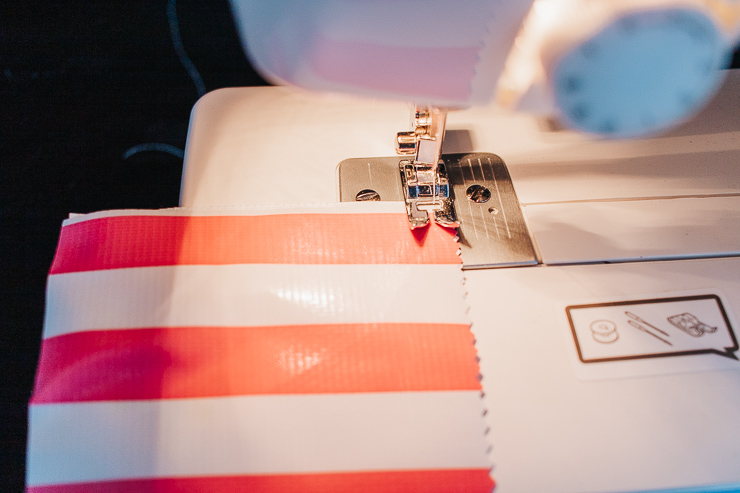
sew both layers or oilcloth fabric together

Use use small binder clips (another little sewing trick I use a TON) to hold your two pieces of fabric together while sewing. ย I wouldnโ€™t suggest using pins because the holes will be visible even after removing them.

A straight stitch is fine, but feel free to try something fun like a zig zag stitch.

Tips for sewing and working with oilcloth fabric :

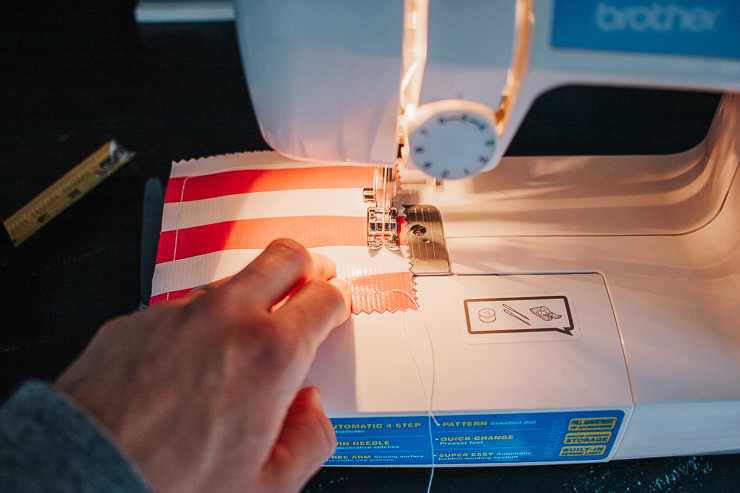
Gently feed oilcloth through your machine so it doesn't stick to the presser foot

  • Because oilcloth is vinyl and kind of plastic feeling, it will stick under your presser foot. ย To combat this,ย  use two hands to feed the coaster through.
  • An alternative is to purchase a Teflon presser foot โ€“ they are fairly inexpensive and wonโ€™t stick to the vinyl fabric as easily.
  • DO NOT IRON OILCLOTH.ย  It will melt and the mess wonโ€™t be pretty. ย If your oil cloth is wrinkled, lay it out and throw some heavy books on top for a few days. This usually presses the wrinkles out.ย  Oilcloth also โ€œreleasesโ€ more wrinkles when warmed up a bit.ย  Therefore you can try laying it by a sunny window.ย  Donโ€™t microwave your oilcoth. ๐Ÿ™‚

Step 4: ย Use your pinking shears to clean up the edges of your coasters

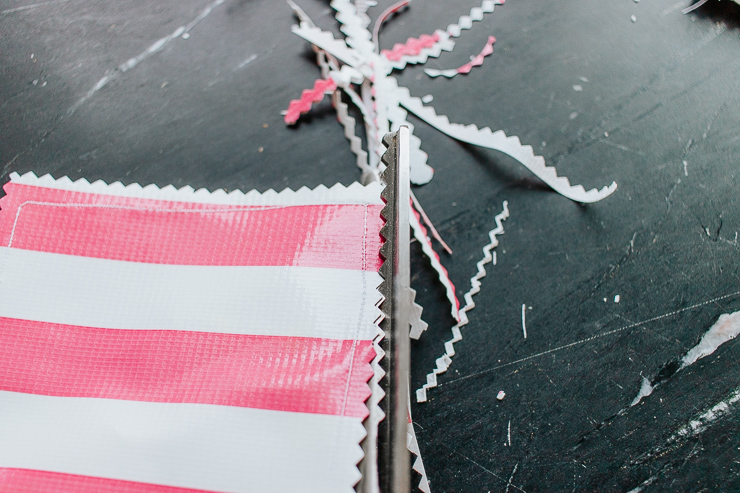
Even up the edges of your newly sewn coasters with your pinking shears

Simply snip along the edge without cutting through the seam to straighten and clean up the ends.

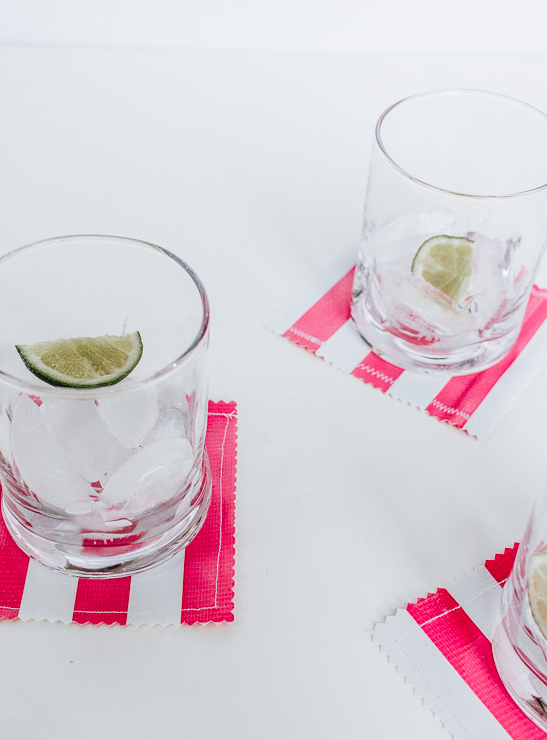
Guess what?ย ย All done!ย  See how fast it was making these DIY oilcloth drink coasters?

These coasters look so cute and are perfect for Summer! Pin this image to share with a friend:

Tutorial for making these DIY oilcloth, water resistant drink coasters for Summer!

I donโ€™t know about you, but I may need to mix up a batch of margaritas tonight.ย  I hope you guys enjoyed this tutorial!

Tutorial for making these DIY oilcloth, water resistant drink coasters for Summer!

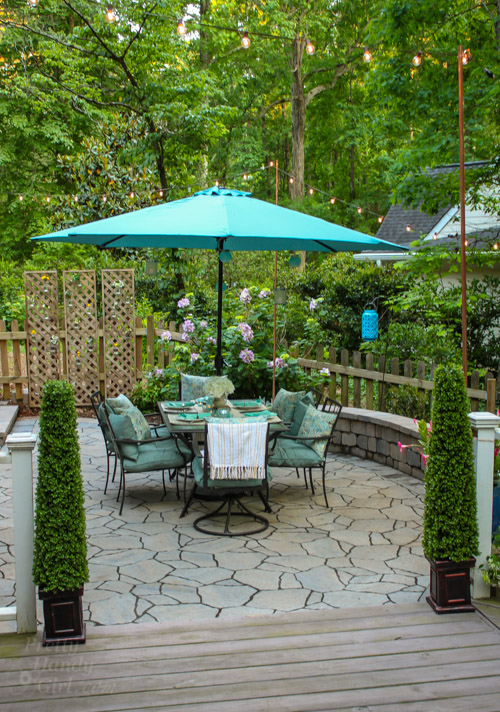
If you enjoyed this tutorial, you might want to check out my tutorial on DIY frayed napkins. ย They also make a nice gift and pretty setting for your tables. ย And for even more inspiration โ€“ be sure to check out Brittanyโ€™s amazing backyard and patio reveal, what a beautiful space!

Outdoor Garden Patio Party Decorating Ideas | Pretty Handy Girl

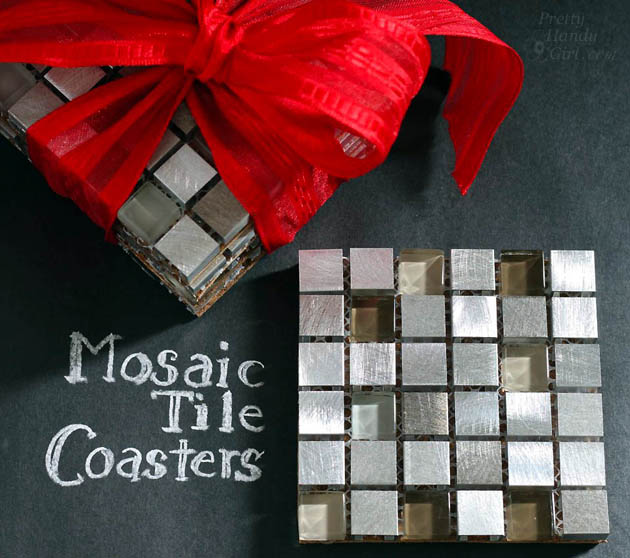
You may also like this tutorial for making mosaic tile coastersโ€ฆ

Mosaic Tile Coasters | Pretty Handy Girl

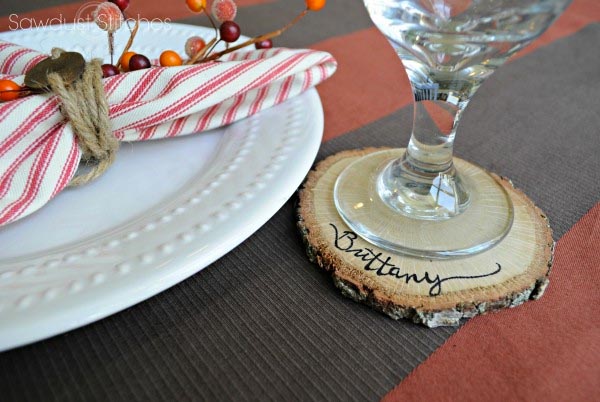
โ€ฆor DIY personalized wood slice coasters.

Iโ€™ll be back here next month and Iโ€™m looking forward to connecting with you all again soon.

karen signature

~ See More of Karenโ€™s Tutorials ~


karen from decor hintHello!ย  Iโ€™m Karen, the creator of the Home Decor and DIY Blog:ย Decor Hint .ย Iโ€™m a Native of the East Coast, but I currently live in beautiful Seattle with my hubby, our two wonderful children and our spunky wheaten terrier.

You can usually find me with some sort of craft in one hand and a coffee in the other. And Iโ€™m always rearranging furniture or moving lamps from room to room. I have a passion (read: obsession) for decorating, DIY, and gardening. In short, I love making my house into a home.

Like many, Iโ€™m inspired by what I see in home decor magazines, but Iโ€™m not so inspired by the price tags.ย  Consequently, I love finding and creating beautiful budget-friendly home decor items. In a head to head competition, I bet youโ€™d never know the difference between the designer items and my DIY creations!ย  Many of my DIY projects focus on sewing, crafting, upcycling and organizing. Some of my favorite projects have been making pretty wreaths , sewing my own tassel hand towels, and crafting these trendy wood bead garlands . I canโ€™t wait to inspire you and spark your creativity through my DIY projects.

You can always connect with me on Pinterest , Twitter or Instagram.