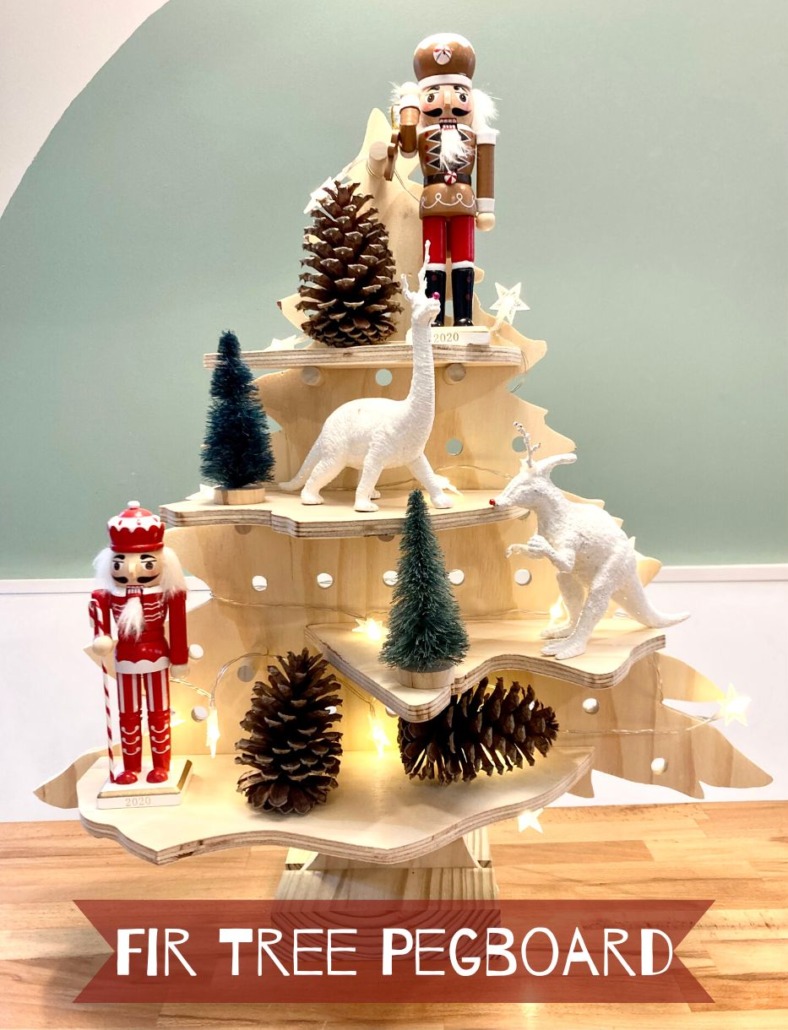
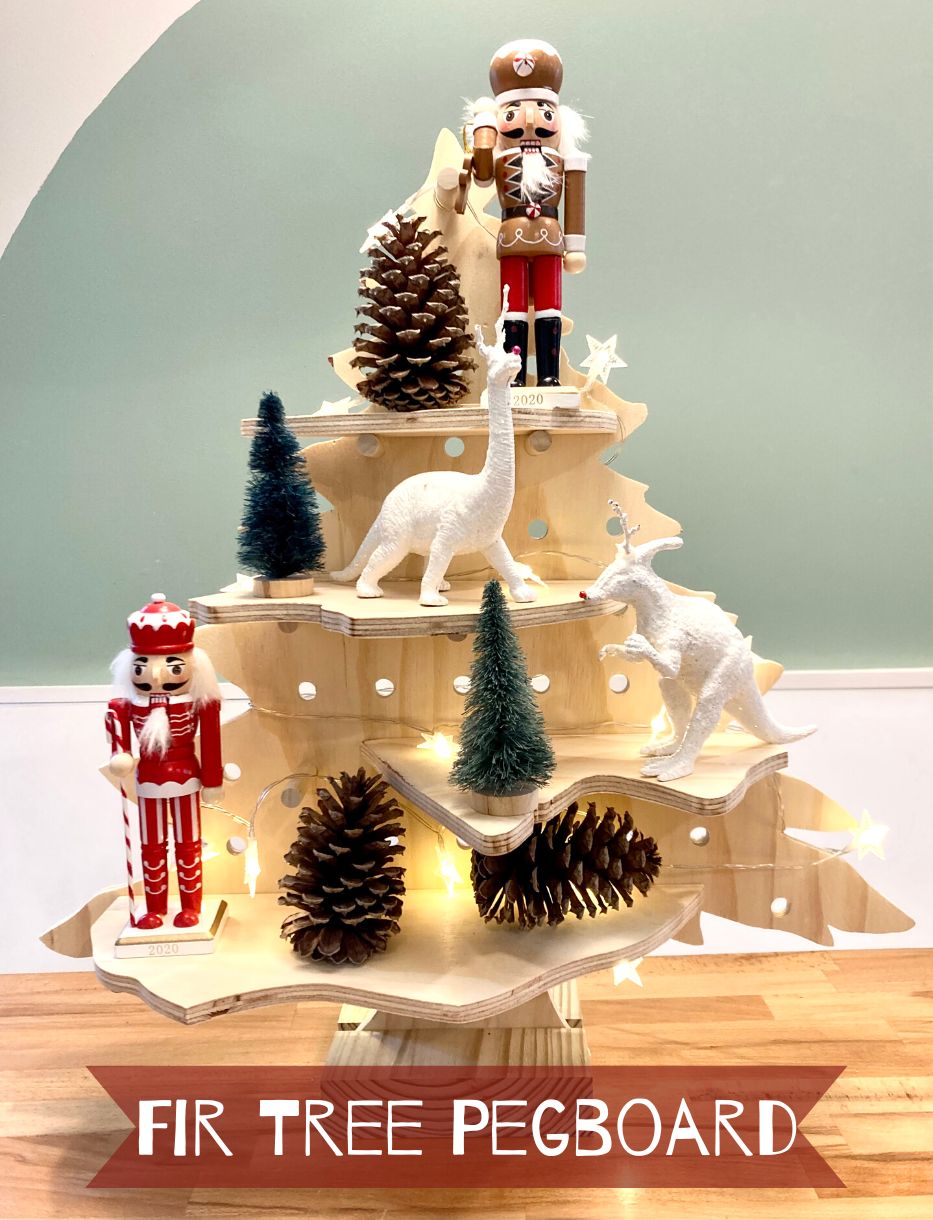
Looking for a last-minute holiday craft you can do with your kids (or alone in your own quiet spot)? How about a fir tree pegboard! This is a festive, fun project you can make in an evening.

Plywood tree with

How to Make a Fir Tree Pegboard

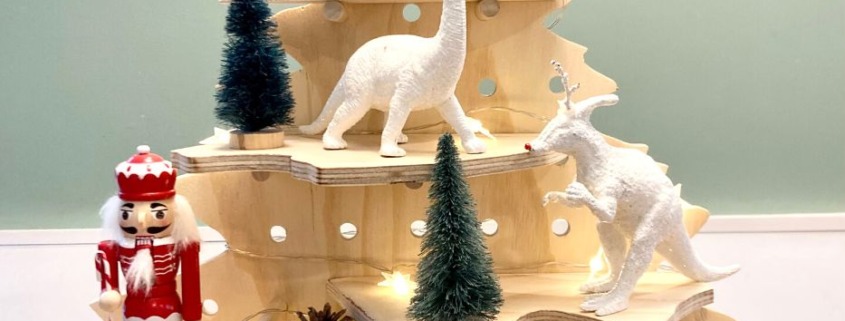
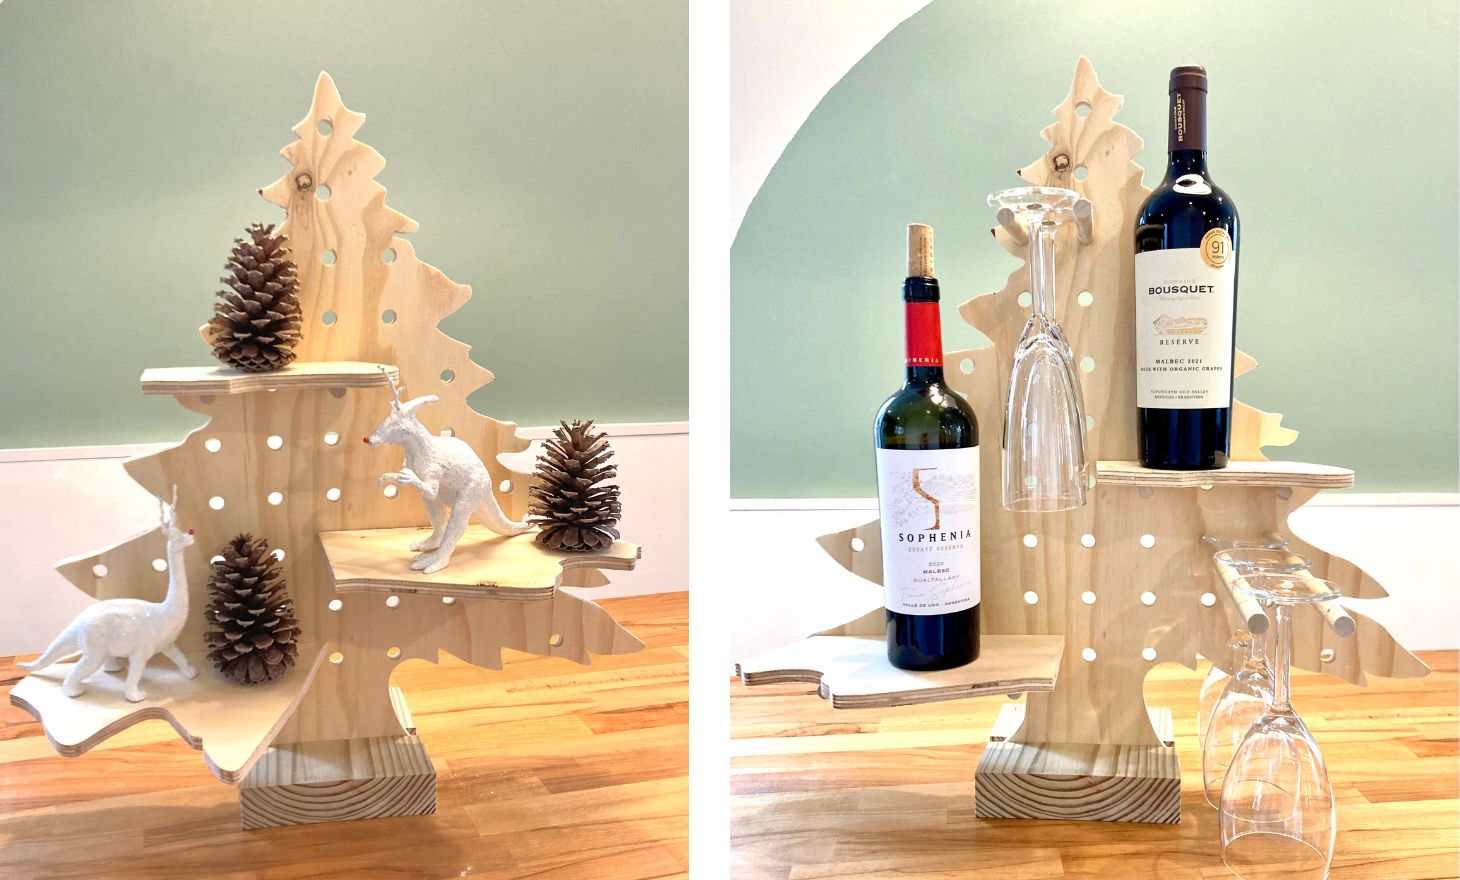
There are so many fun ways to use this pegboard tree! Weโ€™ve made a dino tree, a wino tree, and have big plans for a charcuter-tree (a.k.a. a vertical tree-shaped meat and cheese tray). I imagine even the Elf will find a โ€œshelfโ€ or two to relax on over the next few weeks. When the holidays are over, this tree can shed its twinkle lights and function as a nature-themed table display or become a donut tree! What are your creative ideas for this pegboard? Leave a comment below!

Materials:

  • 1/2โ€ plywood (only need a 2X2-foot piece)
  • 1/2โ€ dowel at 5 feet long
  • 2×6 at 7 inches
  • Paint (optional but not recommended)

(Iโ€™ve includedย affiliate links for your convenience. I earn a small percentage from a purchase using these links. Thereย is no additional cost to you. You canย readย more about affiliate links here.)

Tools:

Instructions:

Step 1: Determine the desired size of your fir tree peg board. I wanted something 2 feet tall and approximately 2 feet wide at the base with a 7-inch stump at the bottom. Using a table saw or a circular saw, trim down your plywood to a square or rectangular that will fit the outline of your tree. If you purchase plywood from your local hardware store, you can ask them to cut it down to your specifications.

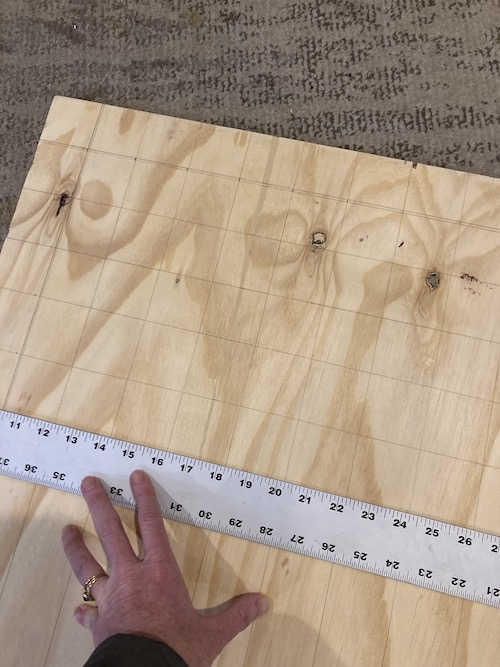
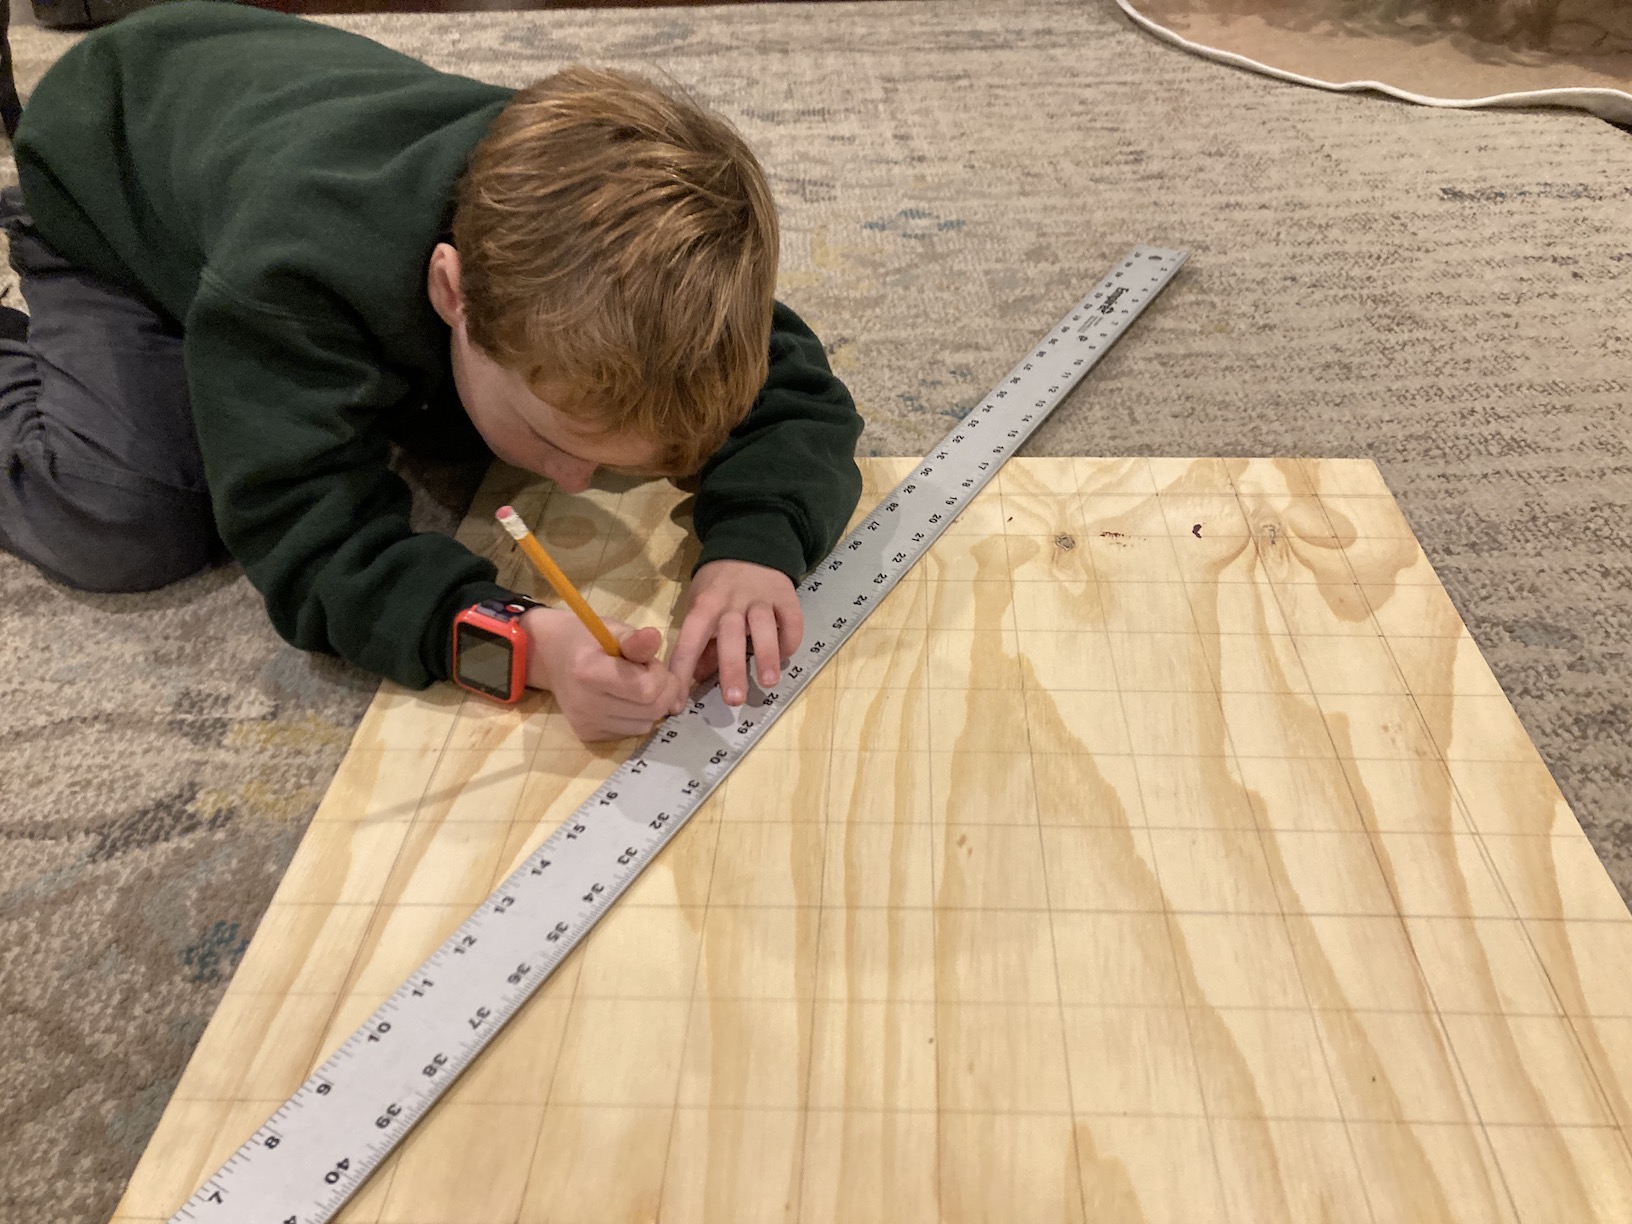
Step 2: With your plywood cut, determine how far apart you want your peg holes. Mine are spaced 2 inches apart from the center of each hole. Unpro tip: If you make the dimensions of your plywood section evenly divisible by the distance between the holes (for example, 24 inches wide with 2-inch hole spacing, or 21 inches wide with 3-inch hole spacing), this process is a breeze. If not, be prepared to do some 8thย grade level math. Use a pencil to mark the hole spacing along each edge of the plywood, then use a straight edge to connect the marks from side to side.

Step 3: You should have a grid on your 1/2โ€ plywood. If you are artistically inclined, use a pencil to freehand sketch the shape of a tree, starting from the center point at the top. The intersection of each grid line is where you will place a 1/2โ€ hole, so plan the edges of your tree accordingly. Of course, you always have the option of omitting holes too close to the edges. If you arenโ€™t artistically inclined, make a guide by drawing a triangle from the center at the top and down to each bottom corner.

Then sketch the tree branches following the lines on each side. I made a stump at the bottom because my son couldnโ€™t fathom a flat bottom tree (dramatic gasp!). I am NOT a gifted sketcher, but doing it this way was nearly foolproof. Alternatively, a simple triangle pegboard could make a stunning minimalist tree andย I love thatย for those of you who are overwhelmed by the thought of drawing and then cutting fir tree branches.

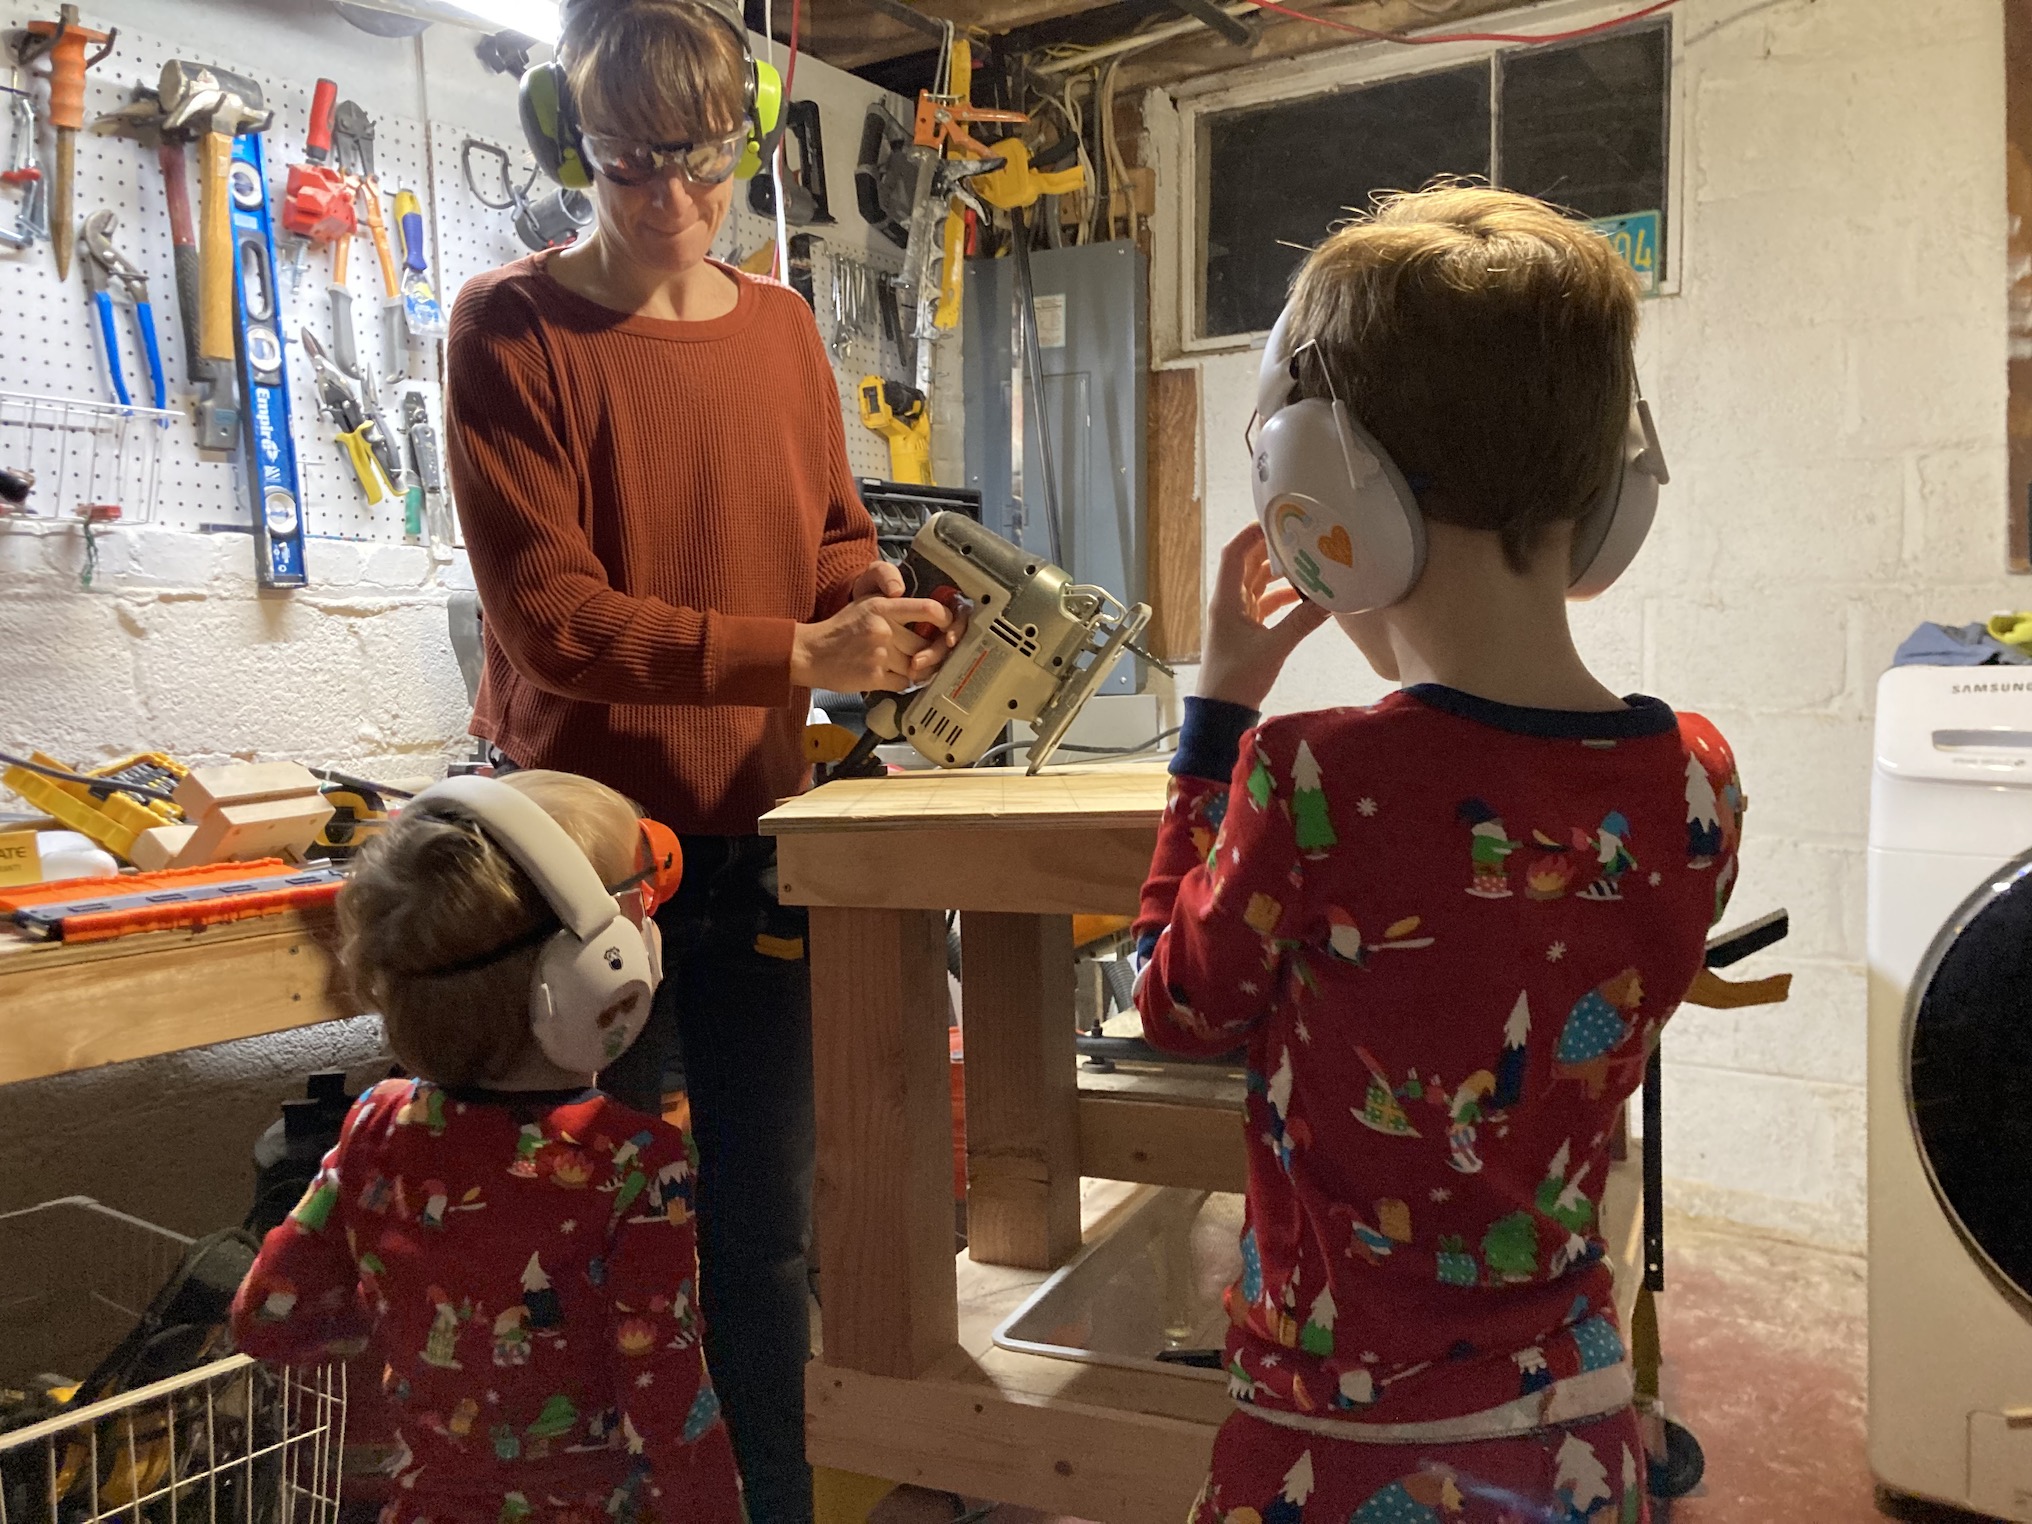
Step 4: Now for the tools. Both of my kids are notorious for following me into my workshop dungeon and I encourage it! But we have strict rules to keep everyone safe.

Rule number one is that no matter which tools we are using, everyone wears properly fitted (i.e. kid-sized) ear and eye protection. This creates good habits from an early age and prevents those โ€œwhoops!โ€ moments when you use the miter saw for โ€œjust a quick secondโ€ and now everyoneโ€™s ears are ringing. A quick hearing fact for the DIYers with kiddos: 1 in 6 school-aged in the children in the US suffers from noise-induced hearing loss. This is permanent hearing loss that can impact their social development and academic success and will ultimately need to be treated with hearing aids to offset the increased risk of early on-set dementia. Take a moment to let that sink in. This is why I am so cautious with my kids around loud tools (not to mention at loud events and on airplanes). My kids wear hearing protection made specifically for children.ย We useย Wise Little Earsย hearing protection from an audiologist and educator-owned company. In full disclosure, I am the educator half of this mom-owned business! We assure each pair is high quality and comes with guidance for how and when to use them. If you have children, I hope youโ€™ll look into our Wise Little Ears protective products for your little ones.

Now, with your safety gear on, clamp the plywood to a sturdy surface and use a jigsaw to cut out the shape of the tree on one side, then on the other side. Go slowly and make extra cuts to get into tight turns. Save the scraps, youโ€™ll use them for branch-looking shelves later.

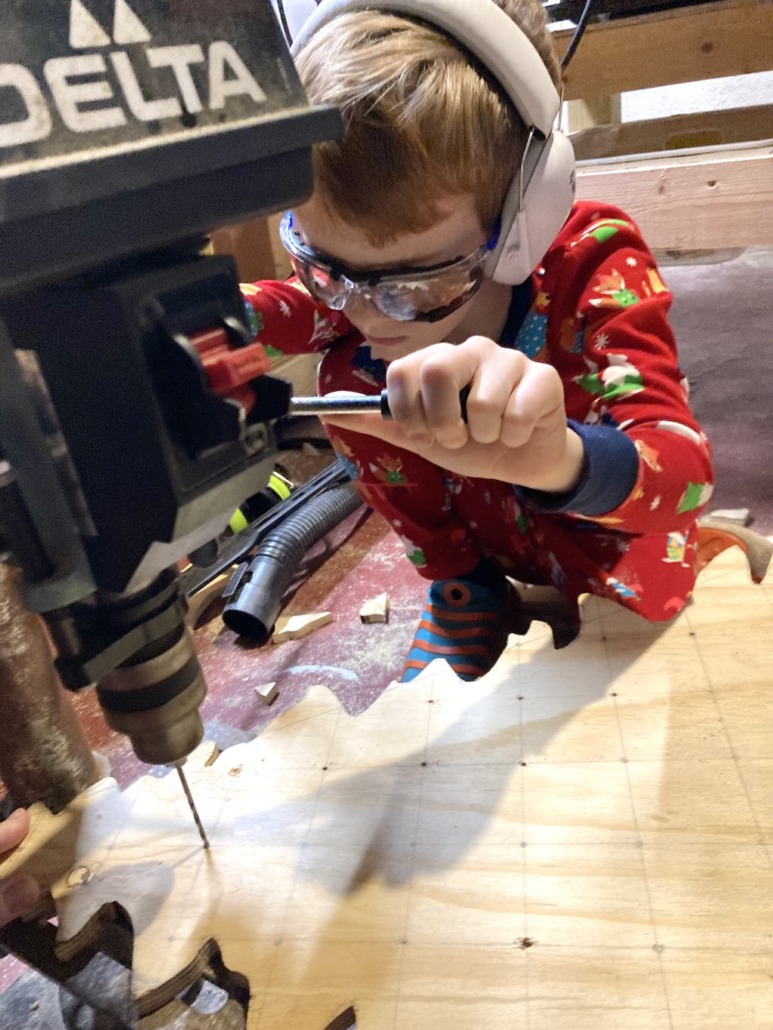
Step 5: You should have the outline of your tree with gridlines. Using a pencil, make a mark at all the intersections that are not close to an edge. Remember that the peg holes will be a 1/2โ€ in diameter, so they need a little space. Skip any hole that is too close to the edge. Using a drill, make small pilot holes at each mark. Pilot holes are optional, but they help guide the forstner bit.


(Drill press not necessary, a hand held drill would work fine.)

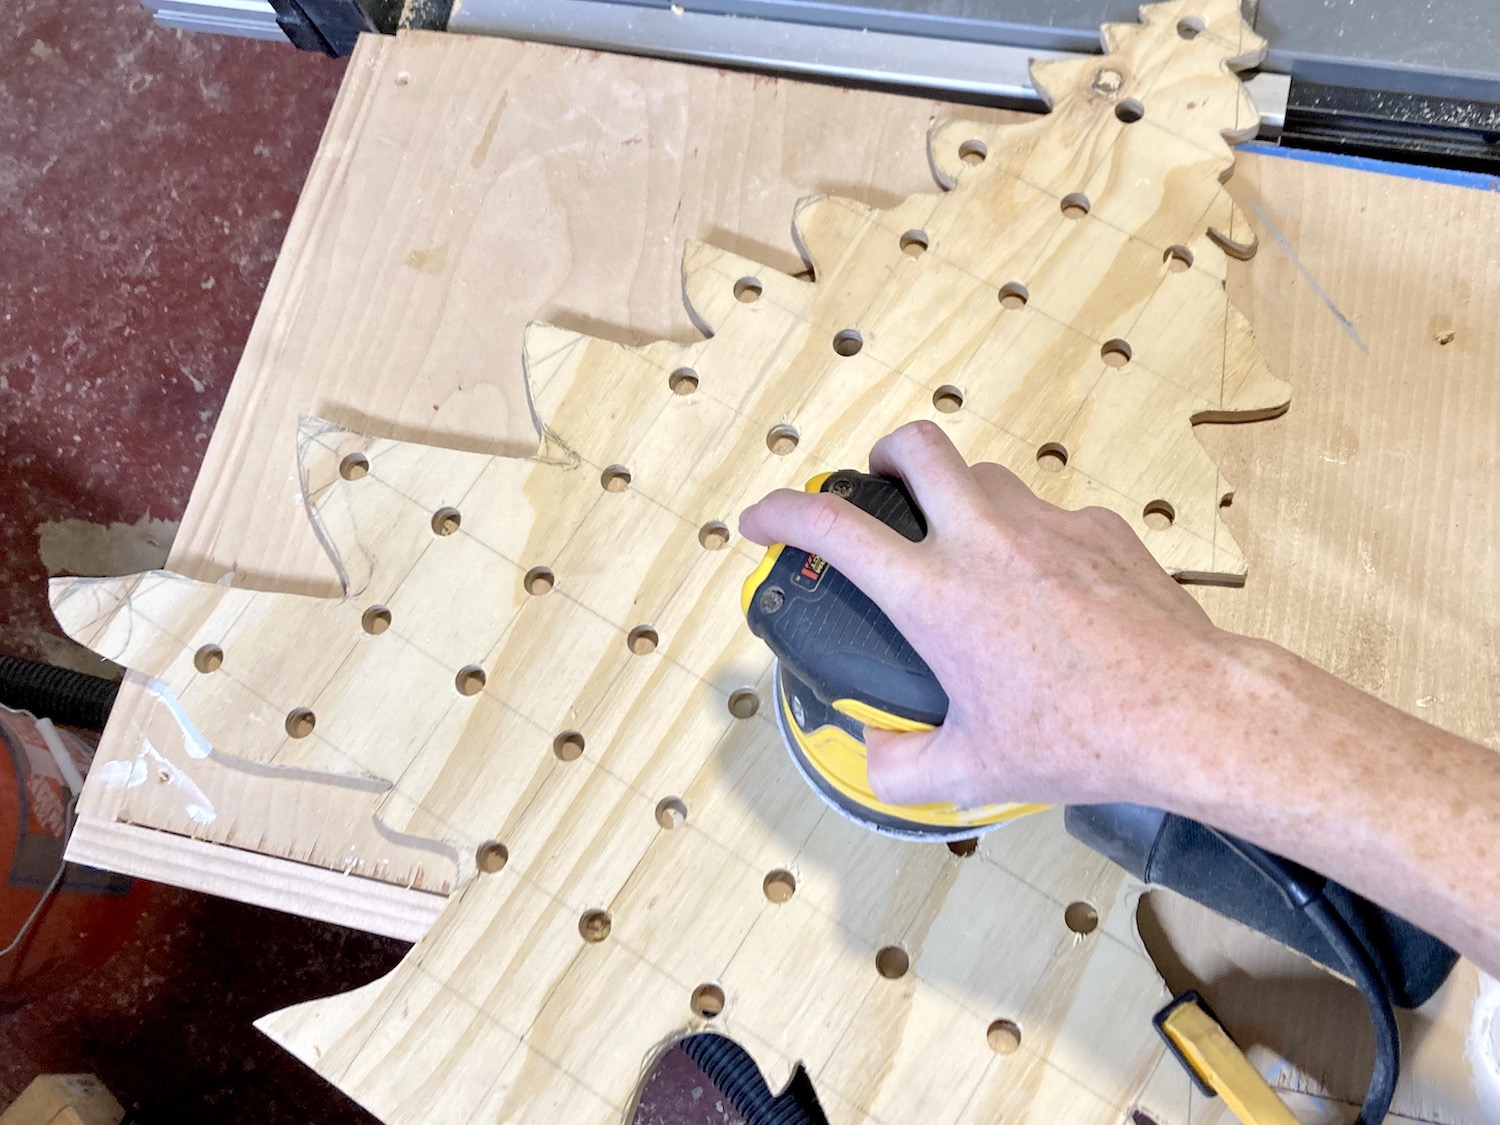
Then, using a sharp 1/2โ€ forstner bit, place the center of the bit into the pilot hole, drilling slowly at first, then speeding up through the plywood and out the back. When all the holes are drilled, lightly sand both sides of the plywood with 180-220 grit sandpaper to clean up and remove the pencil lines. Then lightly sand the edges and the bottom to remove splinters or sharp edges.

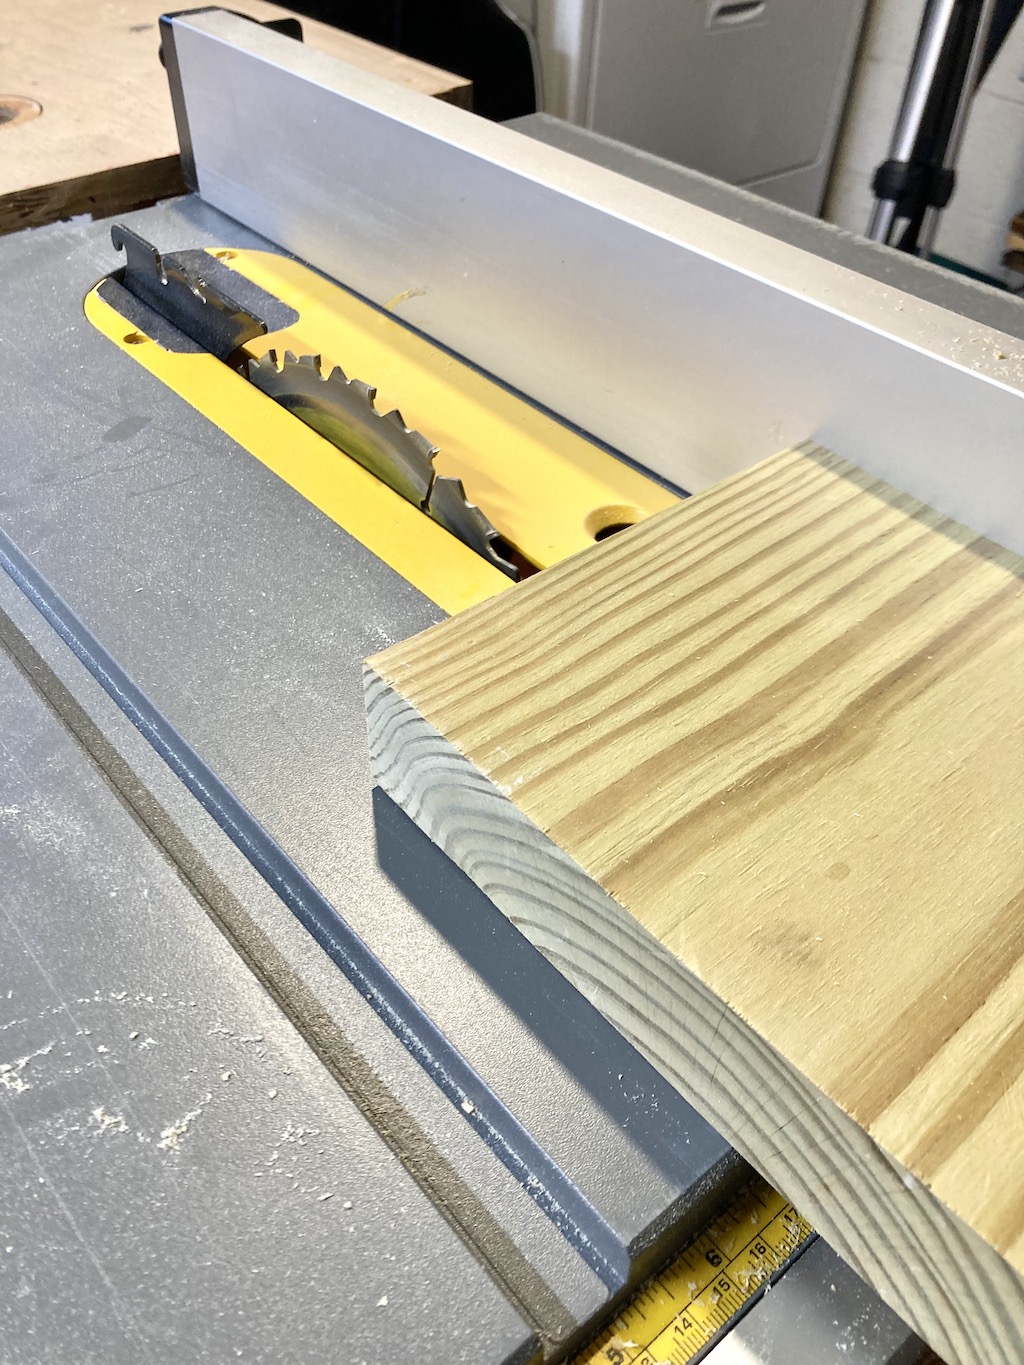
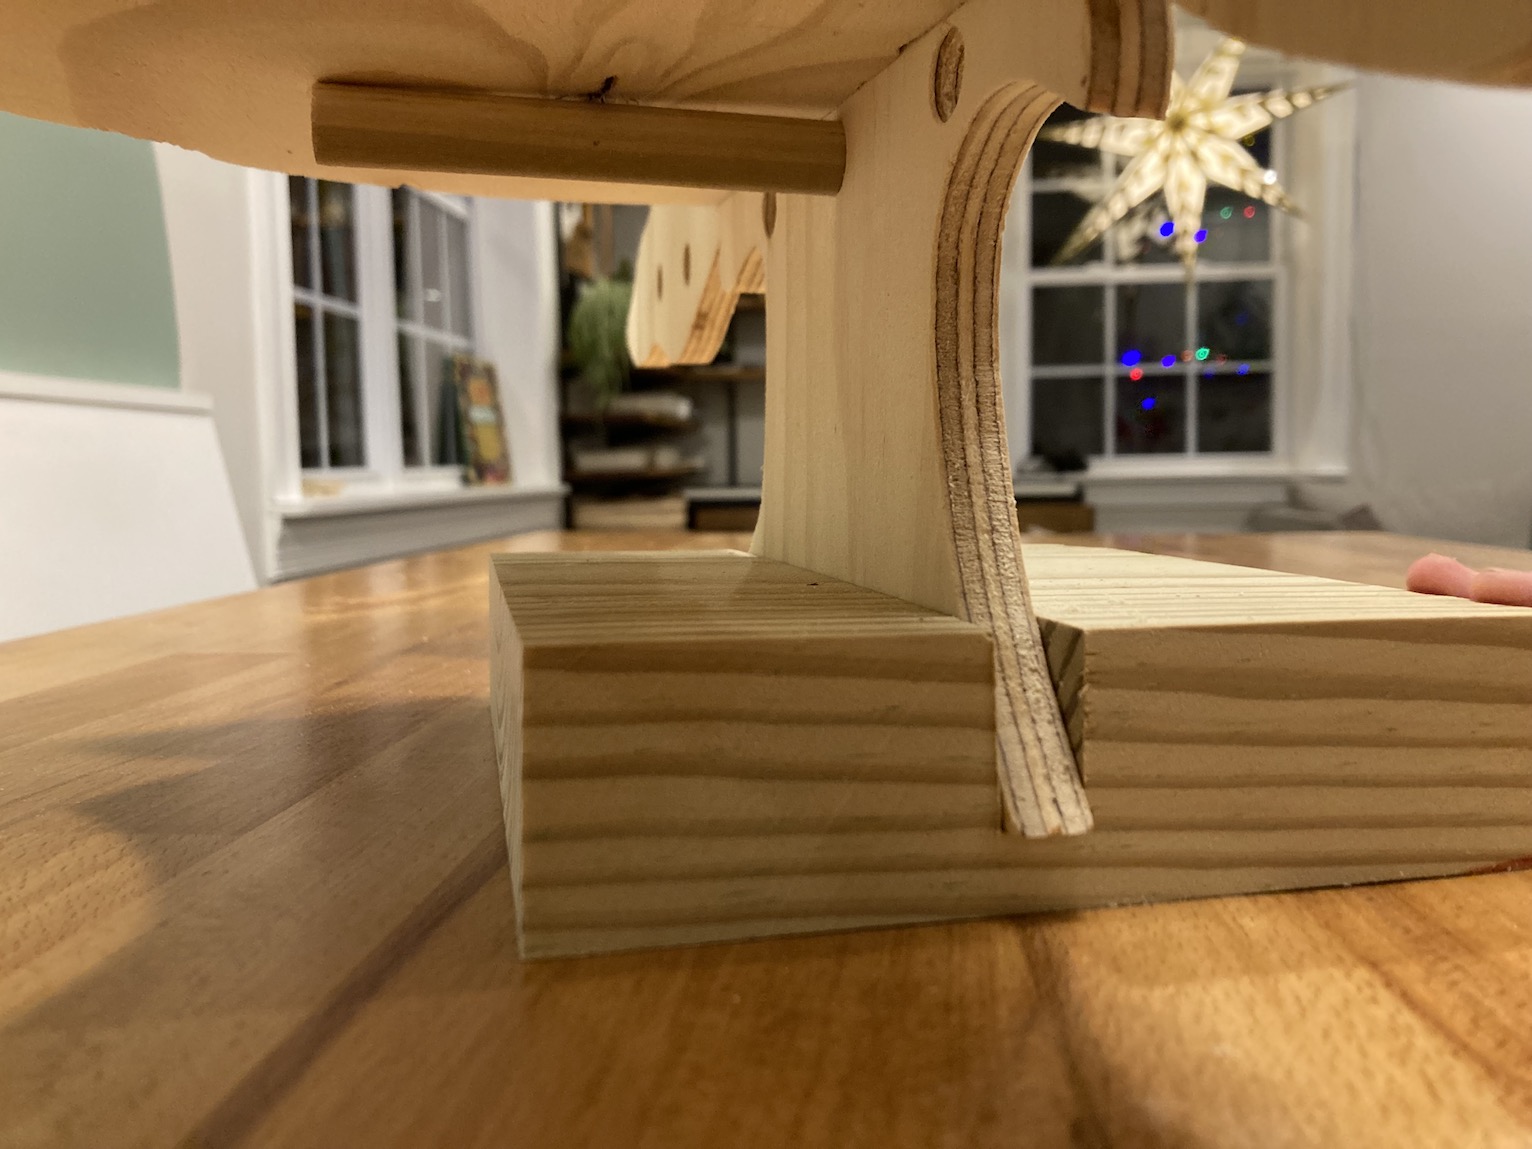
Step 6:ย To make a stand for your pegboard, cut a 2×6 the length of the bottom of your tree or stump and make a deep groove (also called a dado) through the middle of the 2×6 that is the same thickness of the plywood. You can do this with a router and a 1/2โ€ strait bit (be sure to clamp your wood for a hand held router. Alternatively, you can use a table saw.

To use a table saw, set the blade depth to about one inch so that when you pass the 2×6 flat over the blade, it cuts a channel instead of cutting all the way through the wood. Set the saw fence to the middle of the 2×6 (this doesnโ€™t have to be exact) and make your first pass over the blade. Turn the saw off, move the fence over slightly less than the width of the blade (typically 1/8โ€), then run your board in for another pass. Continue this process, checking the width of the groove after each pass with a scrap piece of the tree cutout, until the channel is the same thickness as the plywood. It is important that the tree fits snugly into the base, otherwise the tree will tip to one side or the other.

If you went big with the size of your tree, like REALLY BIG, you will need to modify the base to make it sturdier. For example, if your tree is in the 2-to-3-foot range, a 2×6 will work. Tree peg boards that are larger than 2-3 feet wide will need a larger base or create additional feet on the front and back.

Step 7:ย Now itโ€™s time to make your shelves and cut your pegs! Collect your leftover plywood scraps and determine which pieces would make good shelves. A good shelf must be longer than the distance between at least two peg holes and have a flat side that will sit flush against the tree. I picked the longest sections with interesting, branch like curves. If you didnโ€™t manage to get anything that fits this description, you can use your jigsaw to create a shape in any piece with at least one flat side. Or, if you prefer, you can cut standard 90 degree shelves.

Cut your pegs according to the depth of your shelves. The pegs should extend to the edge of the shelf for more stability. Cut a few long pegs to hang wine glasses and short pegs to hang coffee mugs, ornaments, or to string lights.

Optional step: Paint. Hereโ€™s the thing about paint and peg boards. Painted surfaces, especially with sheen, will stick together. There is also a good chance that a painted peg will fit not fit into painted hole because paint adds thickness to both surfaces, making the pegs slightly bigger and the holes slightly smaller. The easiest solution is to leave the tree and pegs completely unfinished. But if thatโ€™s not an option for you, your kids, or your wine glass, here are a few suggestions:

  • Pick a paint with a matte finish so there is less stick.
  • Donโ€™t paint the pegs OR the inside of the holes. Unpainted pegs and hole edges would look fun!
  • Thin out the (matte) paint and do a paint wash.
  • Sand the pegs and the holes. This is a risky option because if you sand too much, the pegs wonโ€™t be tight in the holes and if you donโ€™t sand enough, they wonโ€™t fit.
  • Use a sponge to make a textured accent rather than a solid coat of paint.

And there you have it! A fun festive project with endless options. Remember to check out Wise Little Ears for more information on protecting your little builderโ€™s ears.

Build scrappy and be safe!
~See More of Laraโ€™s Tutorials~

My 11 Favorite Gift Ideas for Anyone Who Works with Wood and Beyond

Last week I wandered into a local store for woodworkers. Without naming names, Iโ€™m sure you can guess which one (green logo and rhymes with Could Raft.) I was looking at dust collection equipment and a few new power tools (because a handy girl canโ€™t have too many saws, can she?) While eyeing up a new table saw, I watched a woman walk in the door with a lost look on her face. She made her way to the cashier and asked the elder gentleman behind the counter for gift ideas for her 16 year old son. Apparently he found a love for tinkering with wood and power tools. The guy behind the counter was NO HELP AT ALL! As I shook my head, thinking to myself, the cashier probably just summed her up as someone not worthy of help because she wouldnโ€™t know the difference between a dovetail or a tenon. (No worries if you donโ€™t know either, I didnโ€™t know until a few years ago.)

11 Favo

As the woman left the counter defeated and looked hopelessly around the store, I sidled up to her (at a socially acceptable distance of 6 feet).

โ€œExcuse me maโ€™am, I couldnโ€™t help overhearing your conversation with the cashier. Are you looking for a gift idea for someone?โ€ I said.

She looked at me and her face beamed upon seeing another woman in the store. The emotion in her eyes was sheer hopeful.

โ€œYes, I wanted to get my son something to indulge his passion, but I thought a gift card was too impersonal,โ€ she replied.

I told her a little about myself and then started scanning the store for my favorite things! We walked around and I pointed out several items I knew anyone who works with wood would love.

After leaving the store, it occurred to me, I really should share my favorite things with you too. This is a list of those items Iโ€™d show you if you wandered into my workshop (and they arenโ€™t all just for woodworkers and contractors.)

(Iโ€™ve includedย affiliate links for your convenience. I earn a small percentage from a purchase using these links. Thereย is no additional cost to you. You canย readย more about affiliate links here.)

My 11 Favorite Gift Ideas for Anyone Who Works with Wood and Beyond

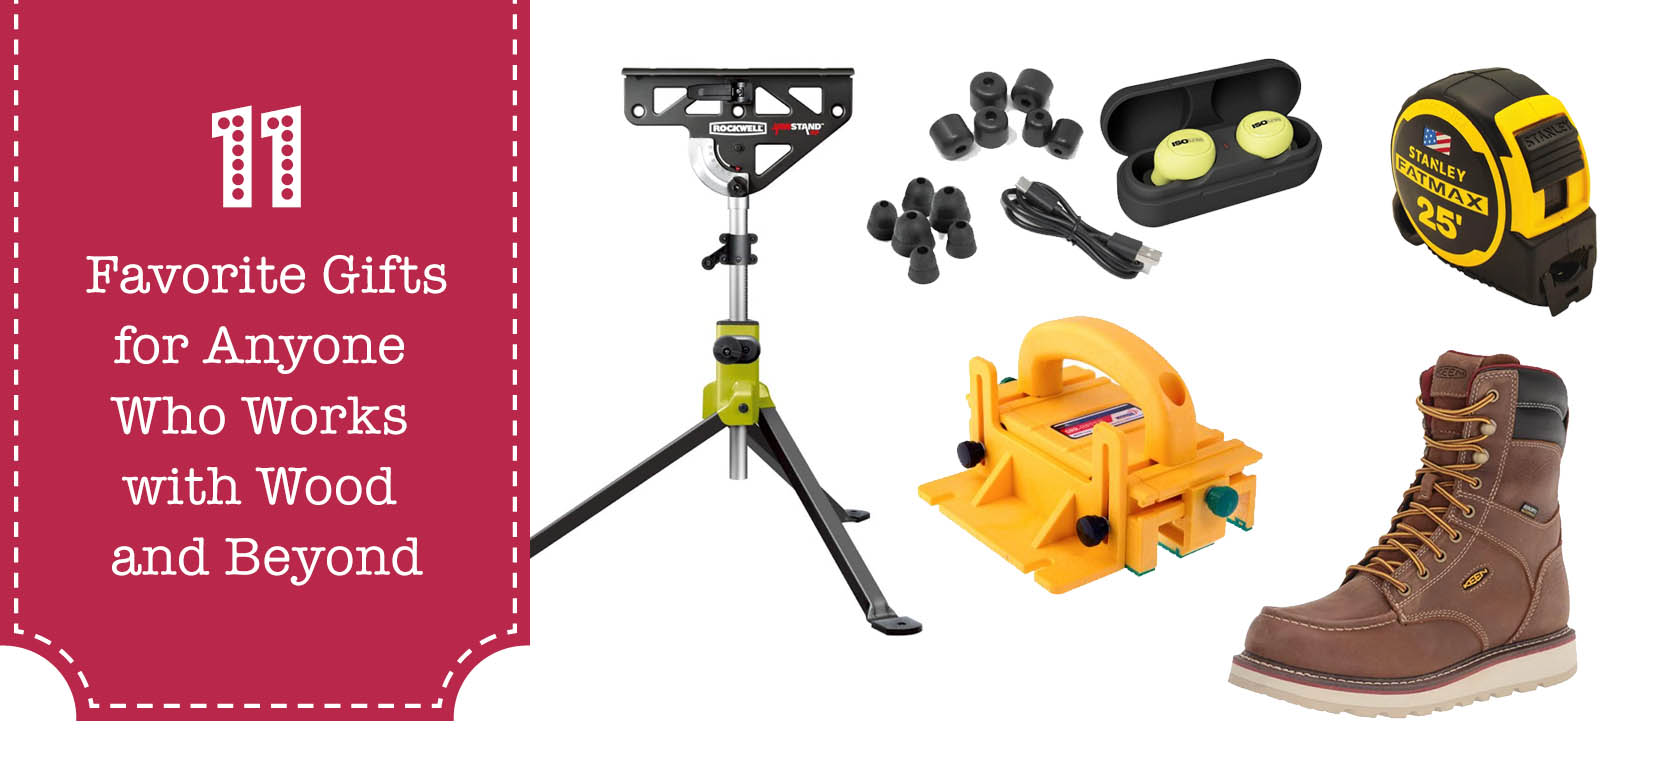
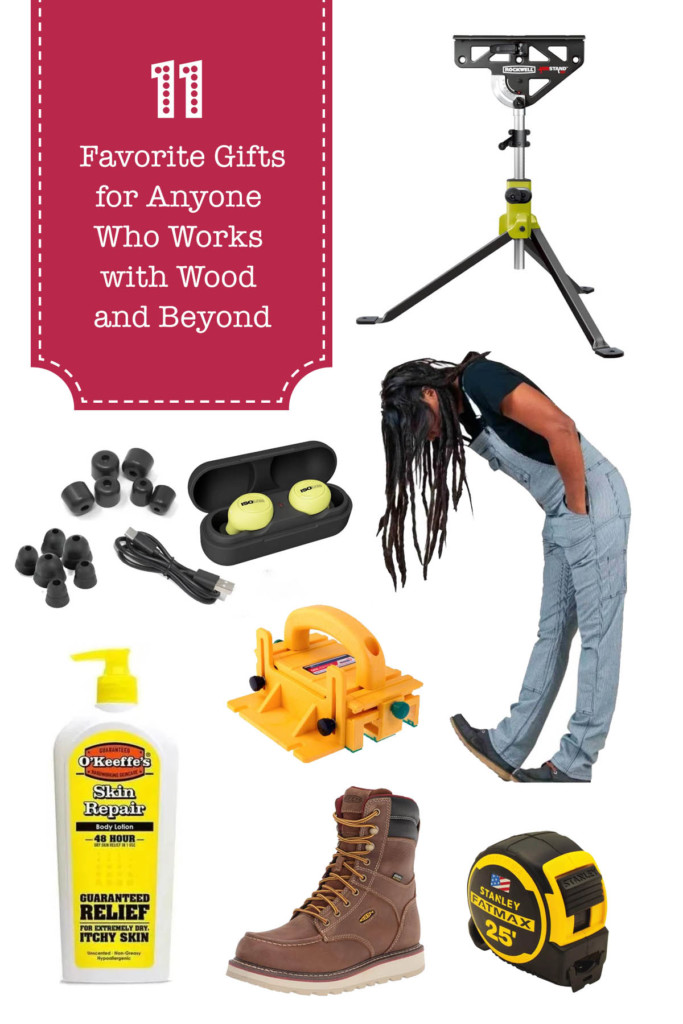
This past year, Iโ€™ve found myself using several items and thinking, โ€œI love this! I wish everyone knew about it.โ€ Well, today the time has come to share with you my top ten eleven favorite things in my arsenal of gear, tools, and then some. In no particular order here they are:

Sport Gear Storage Shelves in a Small Space | Pretty Handy Girl

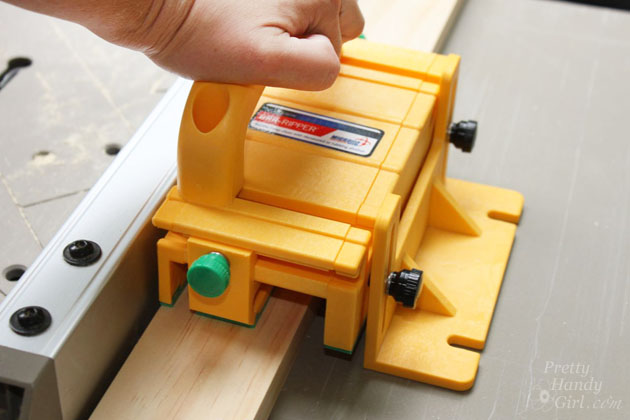
1. GRR-Ripper โ€“ Table Saw amputations are one of the top reasons people are afraid of a table saw (or other power tools for that matter). For anyone that uses a table saw (also great for router tables), Iโ€™m sharing with you my favorite 3-D Push block, the GRR-Ripper. I rarely use the push stick that came with my saw because the GRR-Ripper gives much more safe control over a workpiece. Although just one is nice, I highly recommend purchasing the set of two so you can use them to leapfrog when running longer lumber.

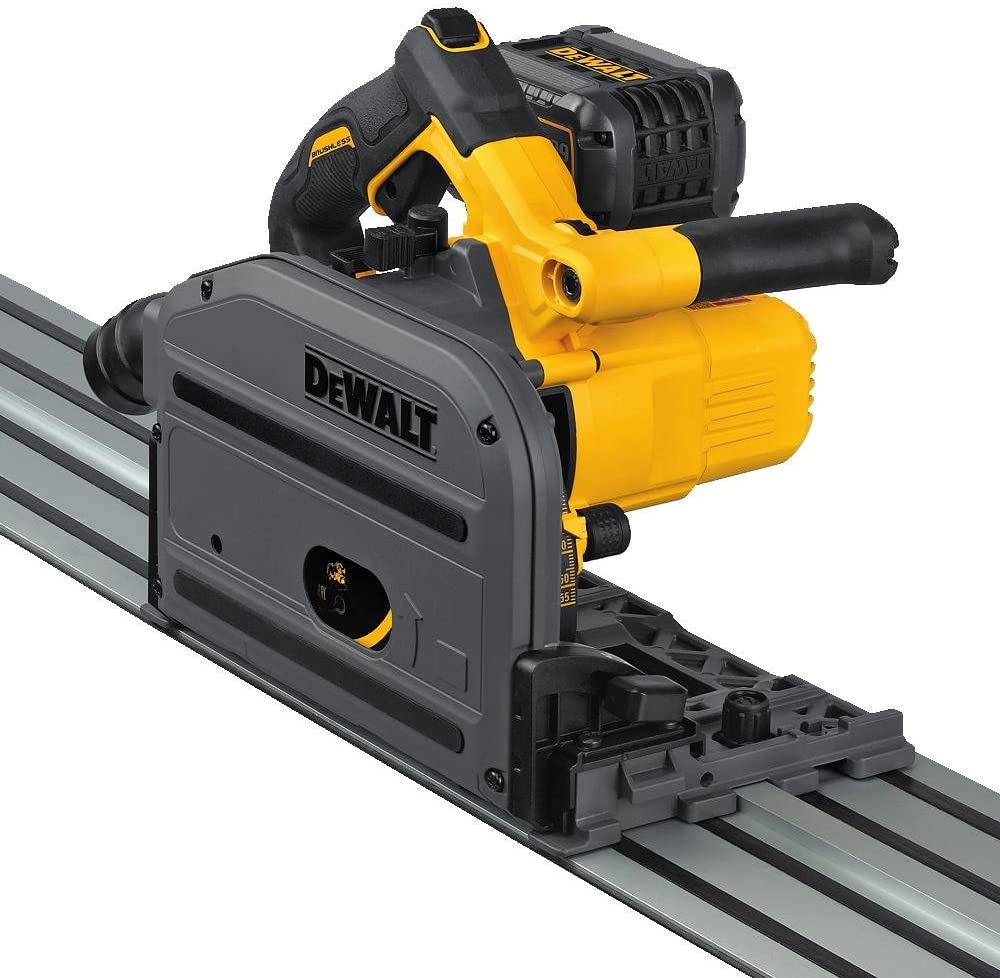
2. Track Saw โ€“ Speaking of safety, this year my table saw hasnโ€™t been getting as much use because Iโ€™ve been bringing out my track saw more and more. It does a lot of the same tasks I used to use my table saw for, but more safely and a lot more accurately. I have the DeWalt Cordless Tracksaw, which means I can take the saw and the track with me to the lumberyard and cut my sheet goods down to size in the parking lot if I like! I lay a big sheet of plywood on top of a rigid piece of insulation for support and cut it to a size more manageable for me. If a dedicated track saw is out of your budget, you can turn your circular saw into a track saw using the Kreg AccuCut.

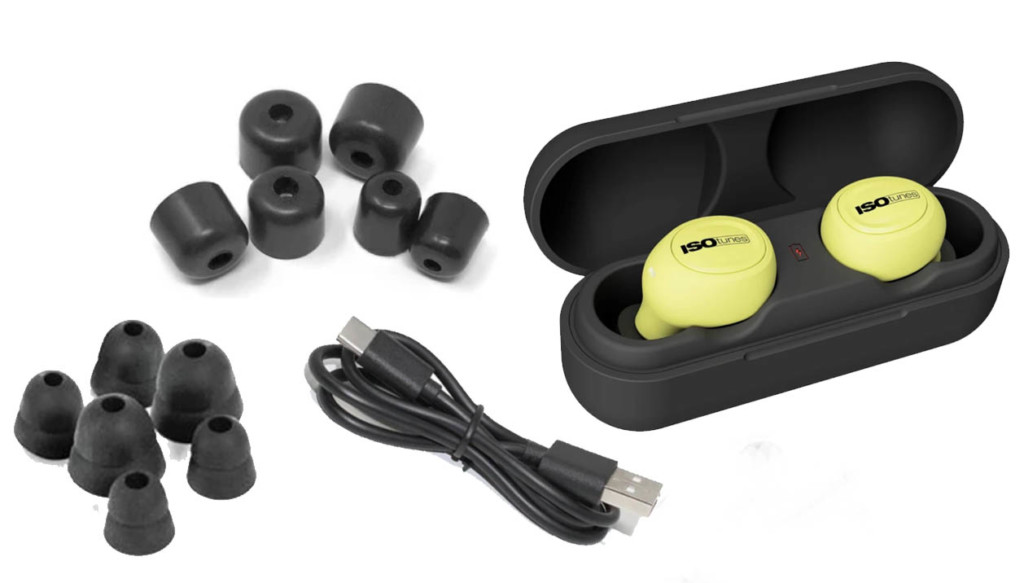
ISOtune Free Bluetooth Enabled Hearing Protection

3. ISOtune Free Ear Buds โ€“ Hearing protection is important, but finding a pair of earbuds that protect my hearing and are comfortable enough to wear all day is a huge win for me. But, what if I told you the ISOtune Frees are also Bluetooth enabled so you can listen to your tunes and work (or walk the dog!) By far my favorite purchase of 2020! (Use the Code: Handy10 to get $10 off!)

4. Dovetail Workwear Overalls โ€“ If I was being honest, Iโ€™d have to tell you the Dovetail Workwear Freshley overalls are my โ€œitโ€™s time to get dirtyโ€ and accomplish a project pants. Not only are they super comfy, but they are made of durable canvas that can hold up to the abuse in my workshop (or job site). And if Iโ€™m being really honest, staying at home has meant packing on a few COVID pounds. These overalls have the perfect amount of stretch allowing you to bend and squat down without feeling your organs being squeezed by a tight waistline. As Iโ€™m writing this, I just ordered another pair! Maybe this next pair will be my โ€œclean, just lounge aroundโ€ favorite outfit.

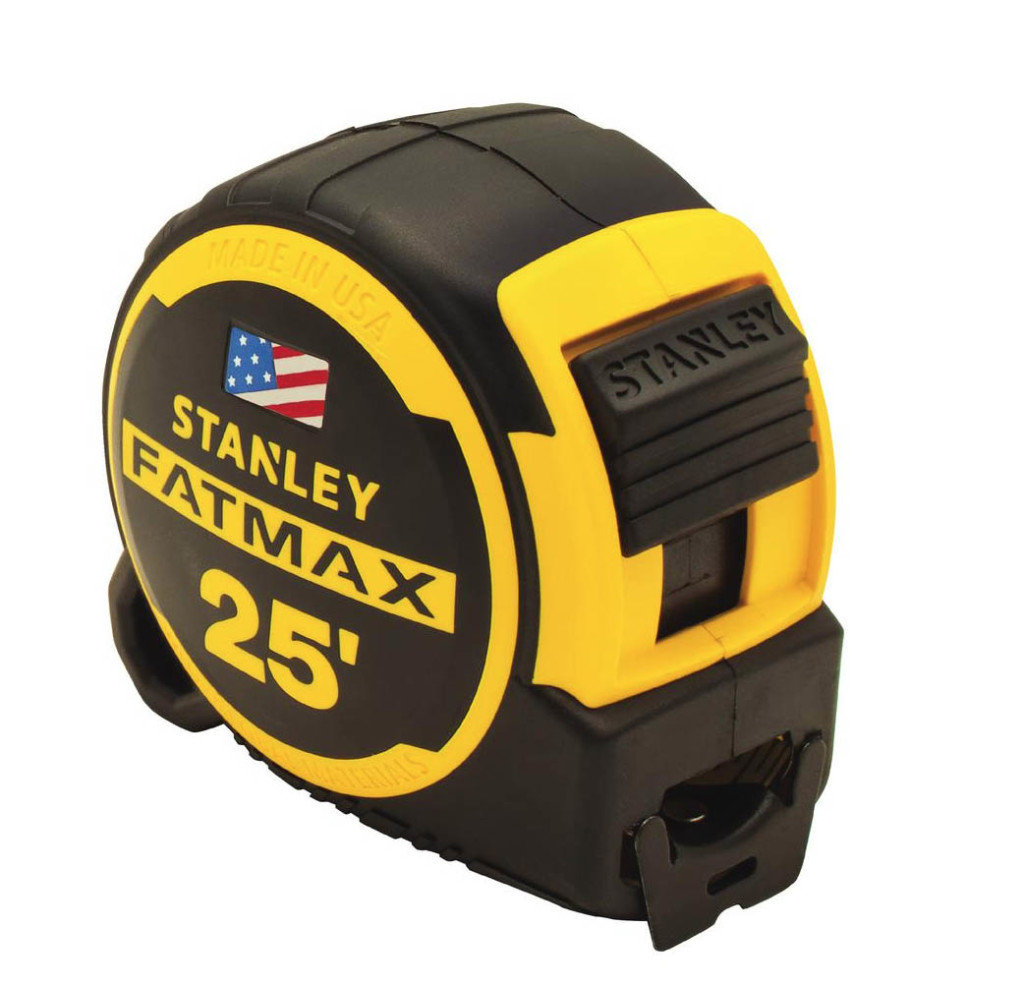
5. Stanley Ergonomic FatMax 25โ€ฒ Tape Measure โ€“ A tape measure? You might be thinking, โ€œSeriously Brittany? How amazing can a tape measure be?โ€ Put this tape measure in the palm of your hand and youโ€™ll immediately feel a difference. As a woman, I have smaller hands, and most beefy tape measures feel a bit clunky in my hand (and seem to slip out of my hands always while working on a ladder). The Stanley #FMHT36325S FatMax 25โ€ฒ tape measure is slightly curved on the side so it fits comfortably in your hand. It has an impressive standout of up to 13โ€ฒ and it is perfectly weighted so I can use it like a plumb bob by dropping it while holding on to the end of the tape like a yo-yo. A few months ago I misplaced this tape measure and found myself cursing all my other tape measures that were too big, wouldnโ€™t stand out as far, or wouldnโ€™t stay locked. Buy this tape measure, you wonโ€™t regret it! But, also put your name on it, because you will be so upset if it walks away.


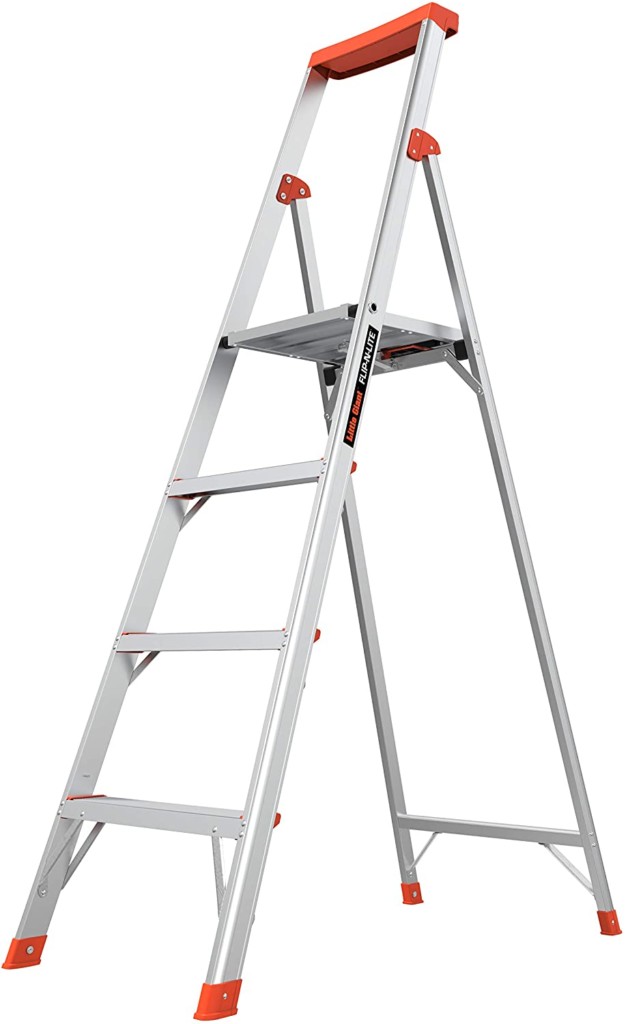
6. Lightweight Step Ladder โ€“ Hauling a step ladder up the stairs or across your house can be a bit awkward, especially if you have an old-style wooden or heavy ladder. Last year I purchased this Little Giant Lightweight ladder and now itโ€™s the only ladder I grab for working at ceiling height or lower. This ladder feels light as a feather when carrying it around the house or hoisting it into my truck bed. If you are in need of a new ladder, this one is a dream to use. Especially because it has a tray at the top to hold smalls screws and tools. And did I mention when folded, it has a super slim profile to tuck behind almost anything.


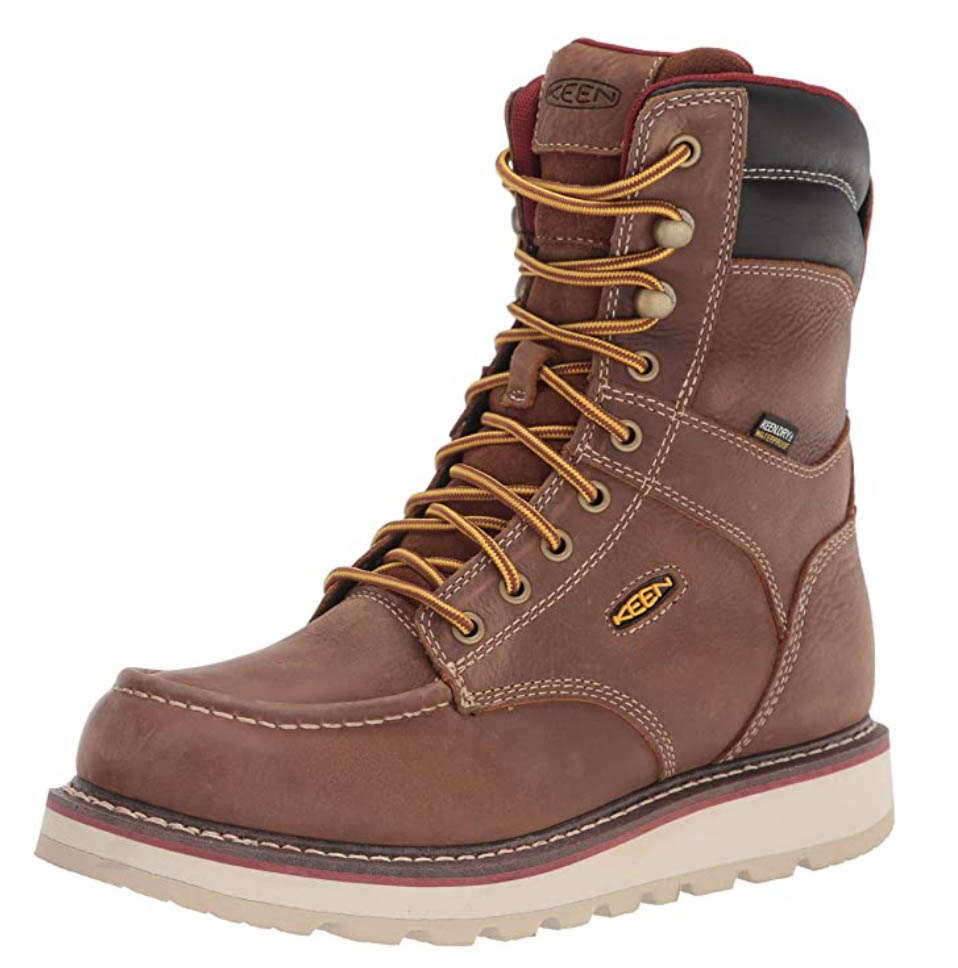
7. Womenโ€™s Work Boots โ€“ Remember moon boots? If not, they were comfy boots popular in the late 70โ€™s that made you feel like you were walking on clouds. (Oh wait, I just looked it up and Moon Boots are still available!) After slipping on my first pair of Keen Cincinnati Womenโ€™s work boots, I was instantly reminded of those moon boots I had as a child. I can wear these boots all day and know my feet wonโ€™t be sore at all! Seriously, these are the most cushy and soft work boots Iโ€™ve ever owned!


Kreg K5 pocket hole jig

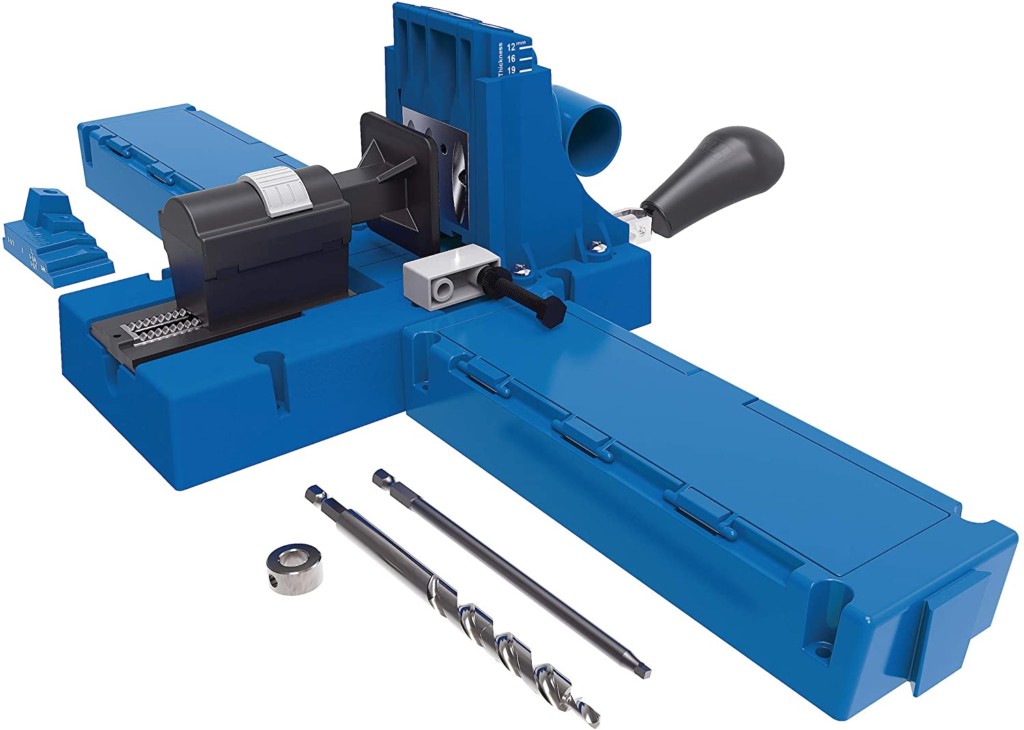
8. Kreg K5 Pocket Hole Jig โ€“ I know, I know, you already have a Kreg Jig. But, I recently upgraded from the K4 to the Kreg K5 Pocket Hole Jig and I wish I had bought this sooner! On the K5, you donโ€™t have to constantly adjust the clamp for different thicknesses of wood. Plus, the extendable wings on this pocket hole jig allow me to work faster and more accurately! The only thing missing is the nice hard case. But, I might use my K4 case for the K5. Is that wrong?


Rockwell Jaw Stand

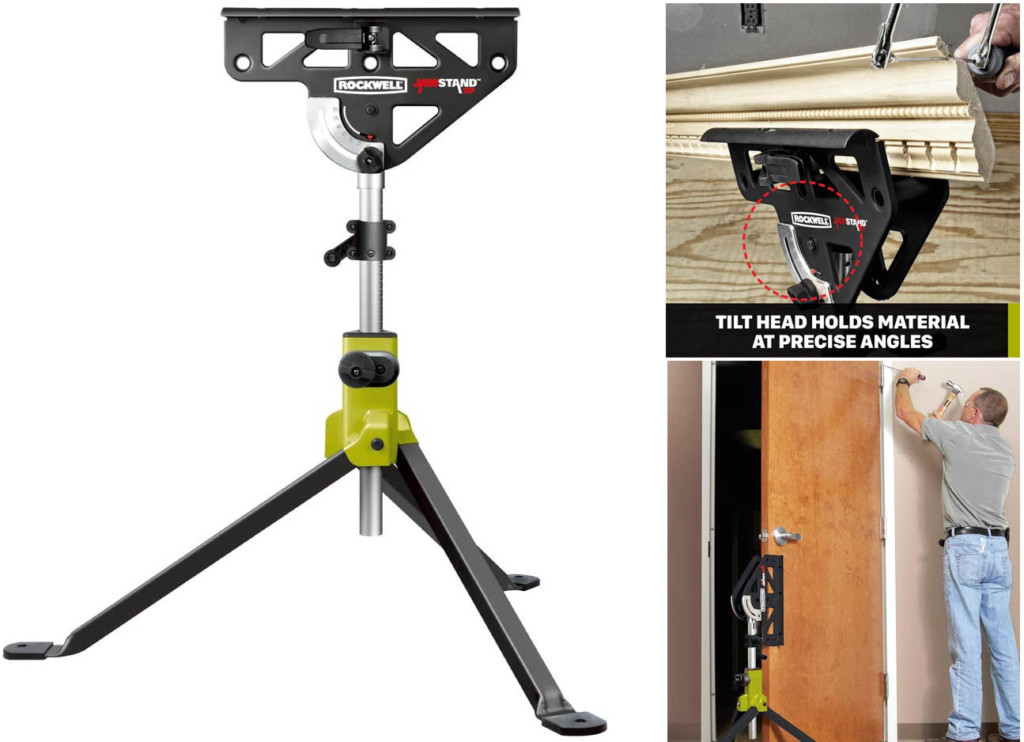
9. Clamping-Sawhorse-Stand โ€“ Do you work solo? Or want an assistant who is silent? This clamp, sawhorse, outfeed support, extra pair of hands, and so much more will be your new BFF! I love the Rockwell JawStand because itโ€™s a super sturdy and strong extra pair of hands on the job site or in my shop. I use these stands as outfeed supports for my table saw, as sawhorses, and with a 2×4 in the clamp you can turn the top into an extra-wide sawhorse (reason enough to own more than one). The best thing about these JawStands is they fold relatively flat and donโ€™t take up much more space than a 4×4 post in the corner of your shop. You can see how I used it to take down upper cabinets by myself here.


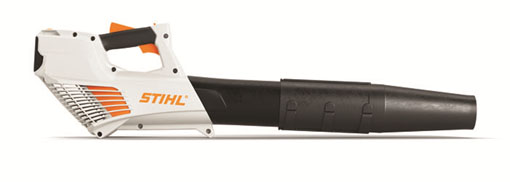
10. Lightweight Strong Leaf Blower โ€“ While this item is normally sold as a landscaping tool, the STIHL BGA56 battery-powered blower has found its home in my garage (instead of the shed with the other landscaping tools.) This lightweight, but seriously strong, blower is perfect for blowing sawdust out of the shop or cleaning out the bed of my truck. Iโ€™ve also used it to quickly blow dust off a large complicated workpiece like my garden obelisk I built recently.) Iโ€™ve even been known to grab it and blow dirt out the open door of our mudroom moments before my extended family arrives. Friends will tell you Iโ€™ve offered to let them try this powerful but lightweight blower to prove how amazing it is!


O'Keefes Skin Repair in 48 hours

11. 48 Hour Dry Skin Repair Cream โ€“ Say What? 48 hours to soft skin again? Winter is here and I spent the weekend cleaning out our garage. I wore gloves as much as possible, but by Sunday afternoon my fingertips felt like sandpaper. ๐Ÿ˜ข Thereโ€™s not much I hate more than the feeling of dry hands. When I was young I cringed at the texture of the dry cardboard lunch trays (seriously, thatโ€™s why I brought lunch so much). Sorry, I digress, after feeling how dry my hands were, I used Oโ€™Keefeโ€™s Skin Repair cream after each hand-washing and today, I realize my fingertips are smooth and soft like a babyโ€™s butt! Unbelievable. O(ne quick note: Iโ€™ve used Oโ€™Keefeโ€™s Working Hands, but am not crazy about the tacky feeling after using it. I think itโ€™s necessary because it acts like a barrier cream and moisturizer in one.) But, the Dry Skin Repair lotion absorbs neatly into the skin leaving them feeling super smooth and tack-free.

Okay, thatโ€™s my list of 11 things I use and love. Gotta run and get back to my garage renovation. You can keep up with the progress if you follow me on Instagram!

Have a Happy Holiday!

DIY Holiday Napkin Rings made from inexpensive Garland

Festive DIY Napkin Rings for your Holiday Table

Happy Holidays! I thought it would be very apropos to share this easy last-minute holiday napkin ring tutorial with you all. Itโ€™s that time of year when time is short and things are busy.ย  The last thing we need is to stress about table settings.ย  If you happen to need something quick to dress your tables,ย  these festive DIY napkin rings will have you covered!

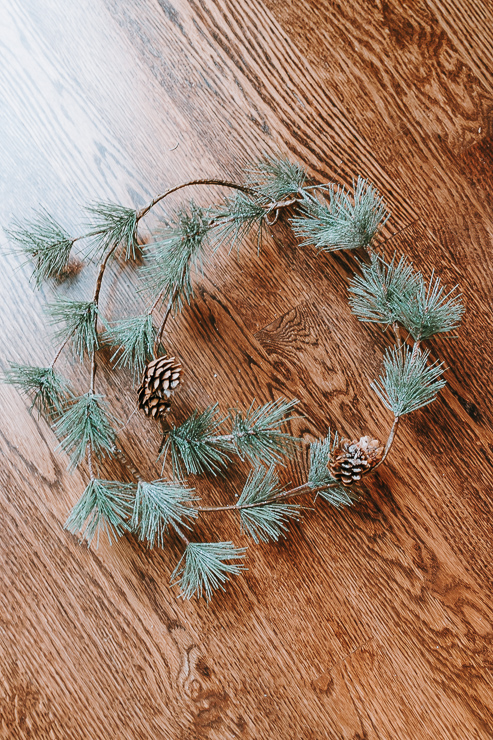
I got the idea for this while I was in Target. Of course, I love to peruse their home decor aisles, which are filled with holiday decor at the moment. I saw this lovely little green garland for $8! Bargain! I am picky about my faux greenery, but this one looked pretty good (especially for the price). I knew I could make this into a cool centerpiece or napkin rings.

Greenery Napkin Ring DIY

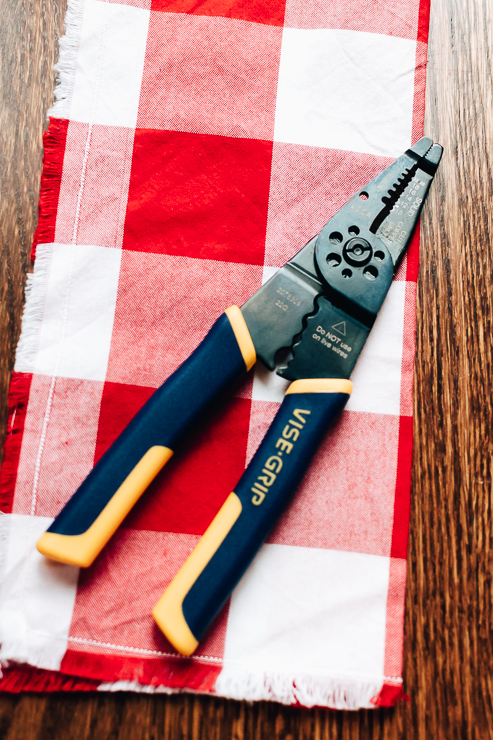
You can follow these same steps to make napkin rings out of any holiday garland.ย  Dollar Stores might be a good source for inexpensive garlands.ย  Itโ€™s helpful if your garland has a bendable wire with it, this makes shaping the rings easier.ย  I would also like to suggest that you use wire cutters for cutting the wire.ย  Strong scissors may do the job, but it can be tough. And why ruin your good scissors?

wire cutters for cutting wire garland

Letโ€™s get started, shall we?

Materials:

(Iโ€™ve includedย affiliate links for your convenience. I earn a small percentage from a purchase using these links. Thereย is no additional cost to you. You canย readย more about affiliate links here.)

inexpensive christmas garland

Instructions:

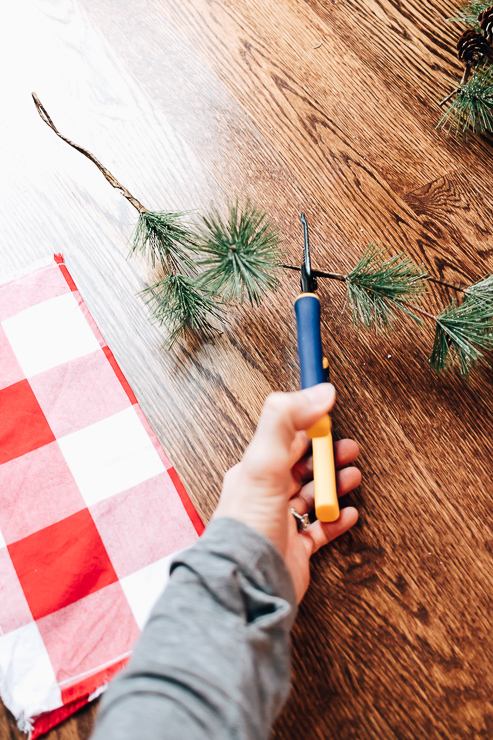
Step 1: Cut a small piece of garland.

cut off small piece of garland

Take your wire cutters and cut a piece of garland. The length will depend on how thick your napkins are. I have these frayed red buffalo check napkins that I made for the 4th of July, and Iโ€™m reusing them for the holidays! (You can check out the tutorial for those red napkins right here.) The material is somewhat thin, so I cut about a 4-inch piece of garland.

Step 2: Bend Garland Piece into a ring

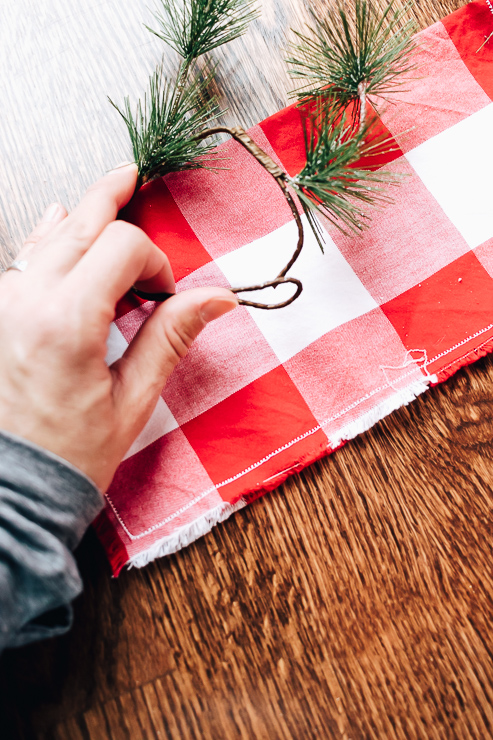
shape your garland piece into a ring

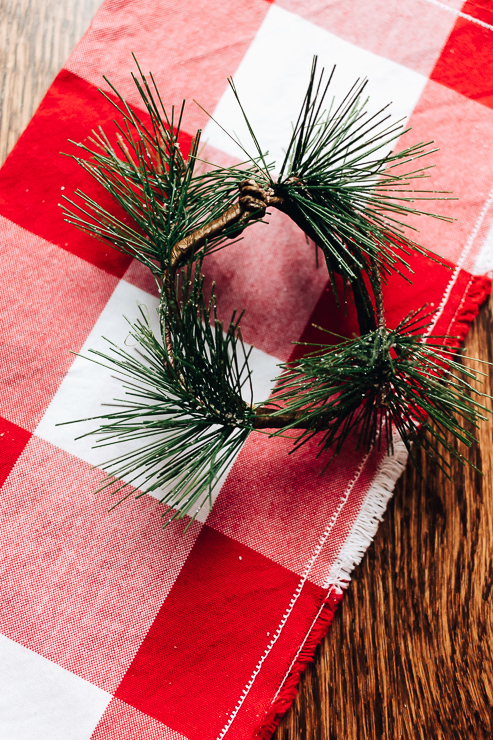
Bend your garland piece into a ring. This is why it helps to be using garland with wire! All you have to do is mold it in a circle and twist it together. Then you can fluff up the greenery on the ring any way you like.

ring of garland

Definitely ensure that your ring doesnโ€™t have any sharp, exposed wires. If so, just clamp it down with pliers.

Step 3: Insert your napkin

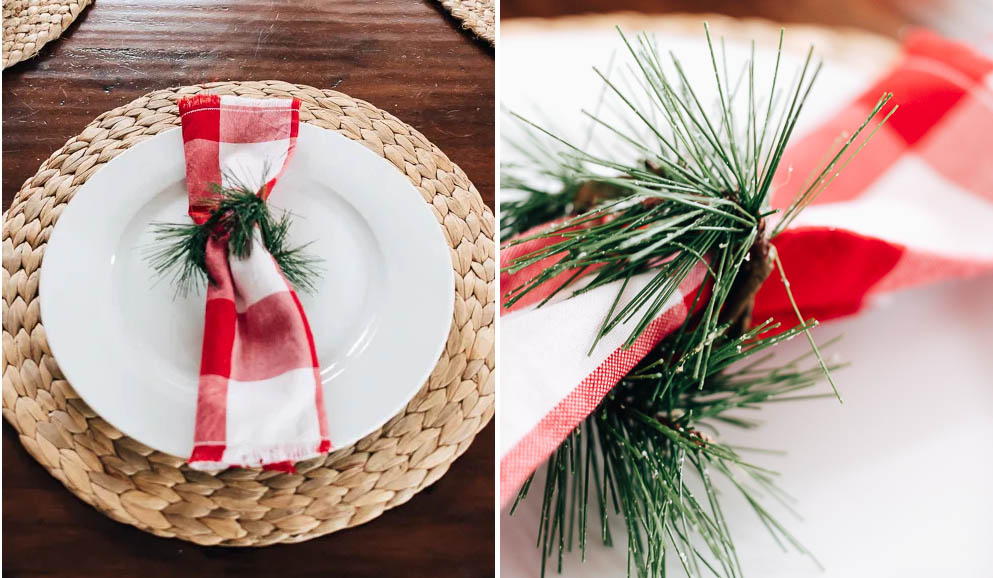
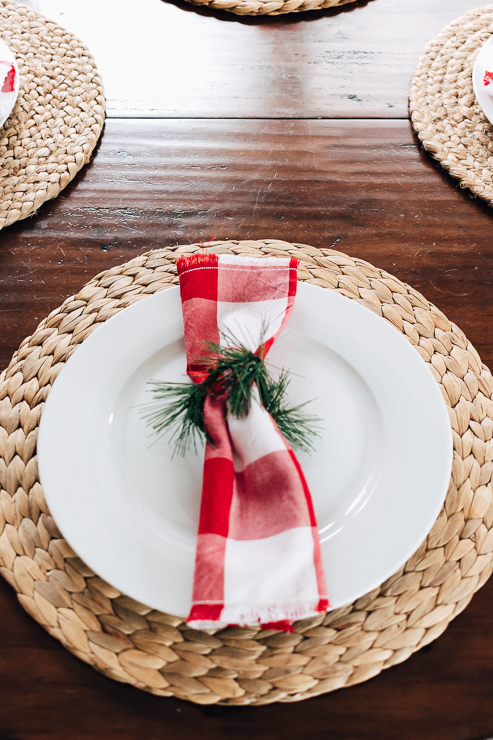
Red Napkins with DIY Napkin Rings made from garland

Now for the fun. Take the whole napkin and pull it through the ring. But hereโ€™s another way to do this.

Take your napkin and lay it out flat. Grab the napkin in the center and place your napkin ring over the center fold. Voila!

close up image of green napkin rings around a red holiday napkin

I think napkin rings really add to place settings, especially if youโ€™re like me and only have a small round table. Itโ€™s stylish without overcrowding the table. I think these extra touches really make the holidays feel special. And instead of spending $5 on each napkin ring, you spent $8 on the whole project. As a bonus, youโ€™ll probably have garland leftover to decorate with!

If you want more great ideas for your Holiday table, check out this gorgeous Holiday Tablescape.

Christmas Table with candles and red napkins and festive napkin rings

I want to take a moment to wish you all a Happy and safe Holiday and a Joyous New Year. Iโ€™ve now been writing for Pretty Handy Girl for a year, and I couldnโ€™t be more thankful for this opportunity to connect with you all. Thank you so much for being a reader! It means so much to me to have you here.

karen signature

~ See More of Karenโ€™s Tutorials ~


karen from decor hintHello!ย  Iโ€™m Karen, the creator of the Home Decor and DIY Blog:ย Decor Hint.ย Iโ€™m a Native of the East Coast, but I currently live in beautiful Seattle with my hubby, our two wonderful children, and our spunky wheaten terrier.

You can usually find me with some sort of craft in one hand and a coffee in the other. And Iโ€™m always rearranging furniture or moving lamps from room to room. I have a passion (read: obsession) for decorating, DIY, and gardening. In short, I love making my house into a home.

Like many, Iโ€™m inspired by what I see in home decor magazines, but Iโ€™m not so inspired by the price tags.ย  Consequently, I love finding and creating beautiful budget-friendly home decor items. In a head to head competition, I bet youโ€™d never know the difference between the designer items and my DIY creations!ย  Many of my DIY projects focus on sewing, crafting, upcycling and organizing. Some of my favorite projects have been making pretty wreaths,ย sewing my own tassel hand towels, and crafting these trendy wood bead garlands.ย I canโ€™t wait to inspire you and spark your creativity through my DIY projects.

You can always connect with me on Pinterest,ย Twitter or Instagram.


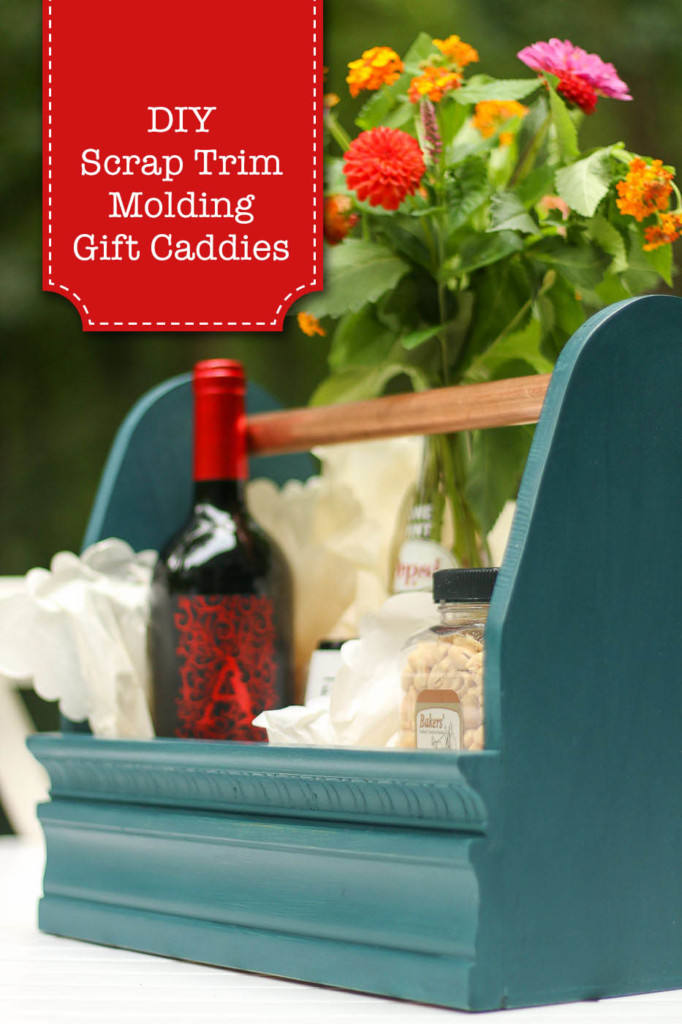
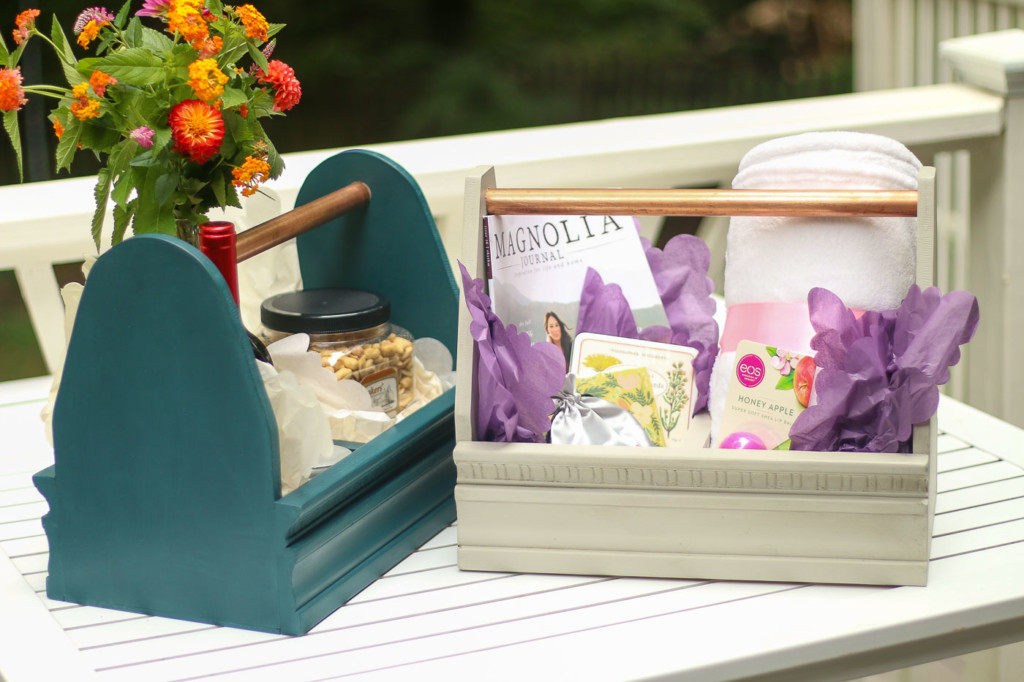
DIY gift caddies made from scrap trim is a great way to create an inexpensive gift basket AND use up all those little pieces of scrap trim in your wood pile.

DIY Gift Caddies using Scrap Molding

Christmas is a few weeks away and I donโ€™t feel like going shopping in the mall. Iโ€™m not really sure what to get everybody. But, after mulling over all the scrap trim in my scrap wood pile, I came up with a genius plan. Gift baskets are always a winning idea for anyone on your list because they can be filled with a variety of gifts in a theme. Fill these caddies with anything you like, but be sure to leave me a comment letting me know what you included in your gift caddies!

Ready to get started? Letโ€™s turn this scrap wood pile intoโ€ฆ

โ€ฆย beautiful DIY gift caddies!

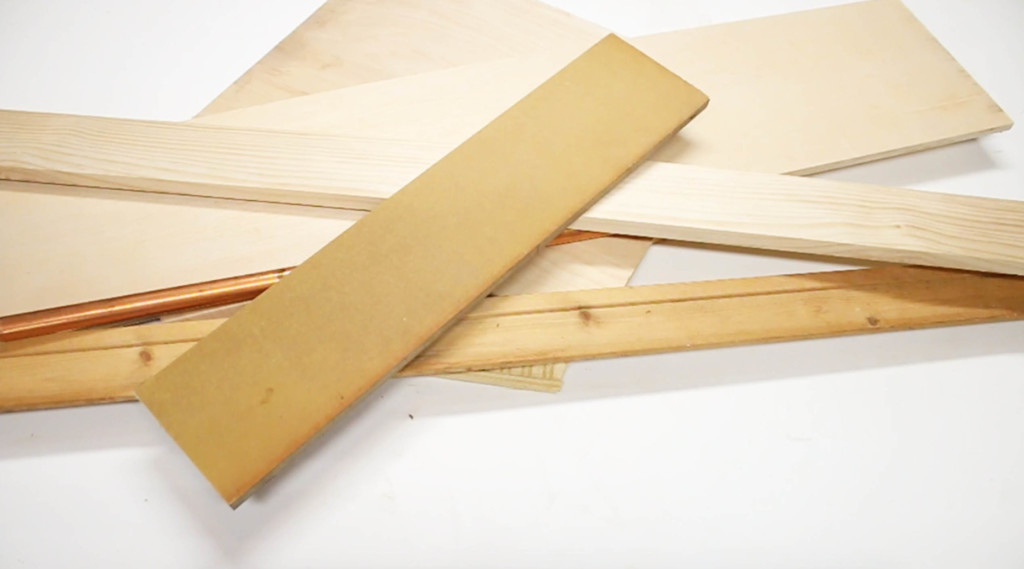
Gather these materials and tools and then we can get building!

Materials &ย  Tools:

(Iโ€™ve includedย affiliate links for your convenience. I earn a small percentage from a purchase using these links. Thereย is no additional cost to you. You canย readย more about affiliate links here.)

Protective Equipment:

Materials:

Tools:

Cut List:

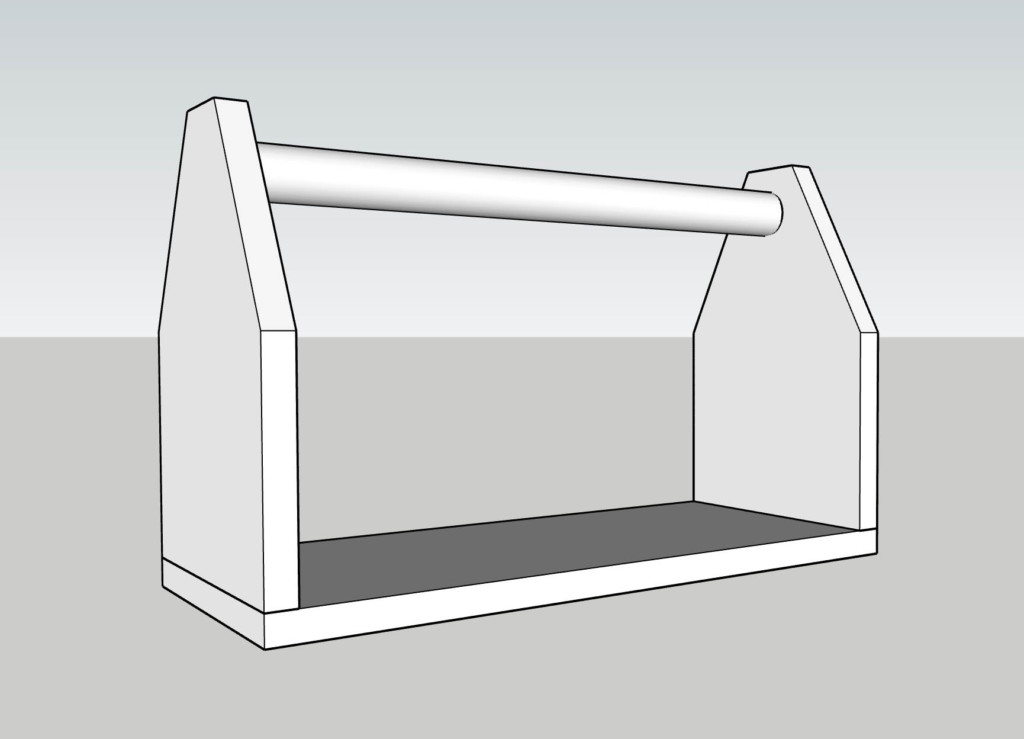
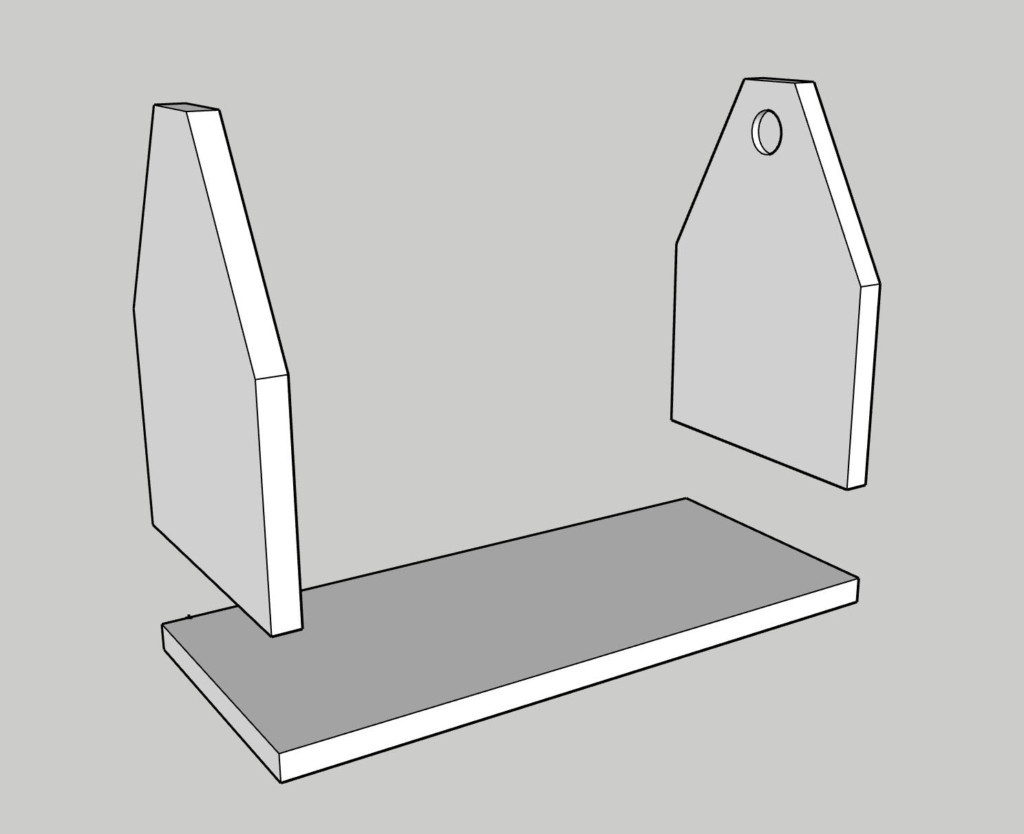
  • 1 โ€“ 3/4โ€ณ x 8โ€ณ x 18โ€ณ plywood
  • 2 โ€“ 3/4โ€ณ x 8โ€ณ x 11โ€ณ plywood
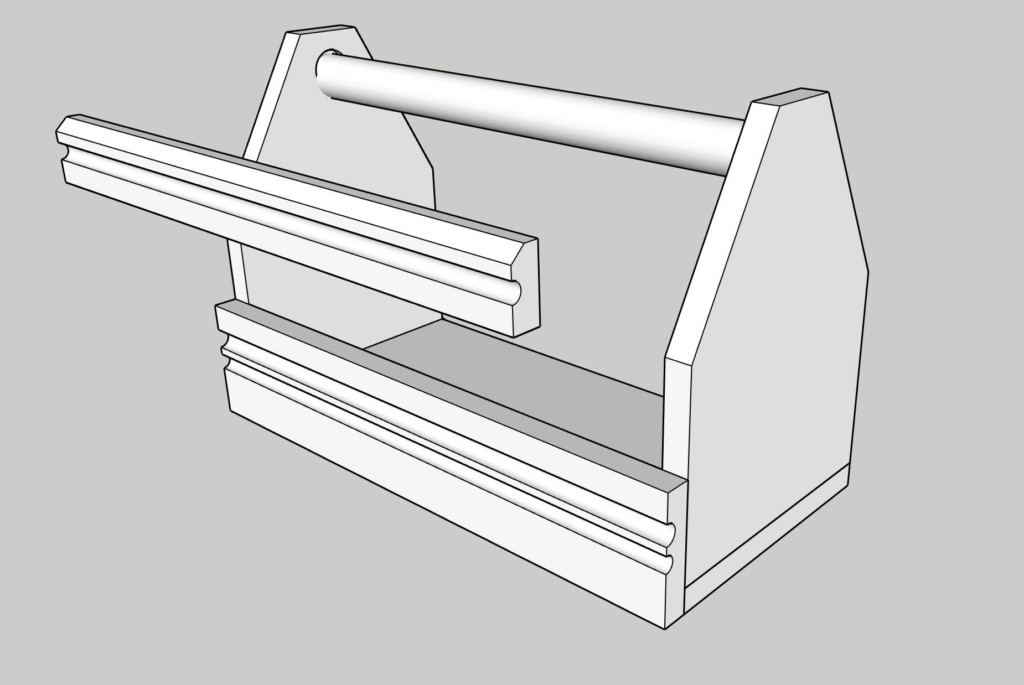
  • 4 โ€“ pieces of 18โ€ณ trim molding (egg & dart, colonial trim)
  • 1 โ€“ 3/4โ€ณ pipe or rod cut to 17 ยฝโ€

If you need tips for cutting metal pipe, click here to see how easy it is to cut metal pipes by hand or watch my video:

Scrap Trim Ideas:

You can use any scrap trim molding you have on hand. For a simple caddy, use flat door casing or door stop. For a more decorative look, use trim with more details. No scrap trim? No problem! At Home Depot, you can purchase trim by the linear foot, so feel free to head over there and purchase a 3 foot section of decorative trim for your 18โ€ณ long caddy.

Youโ€™ll probably want to steer clear of polystyrene trim since itโ€™s not as strong, nails will go right through it, and wood glue generally wonโ€™t hold it firmly.

Instructions:

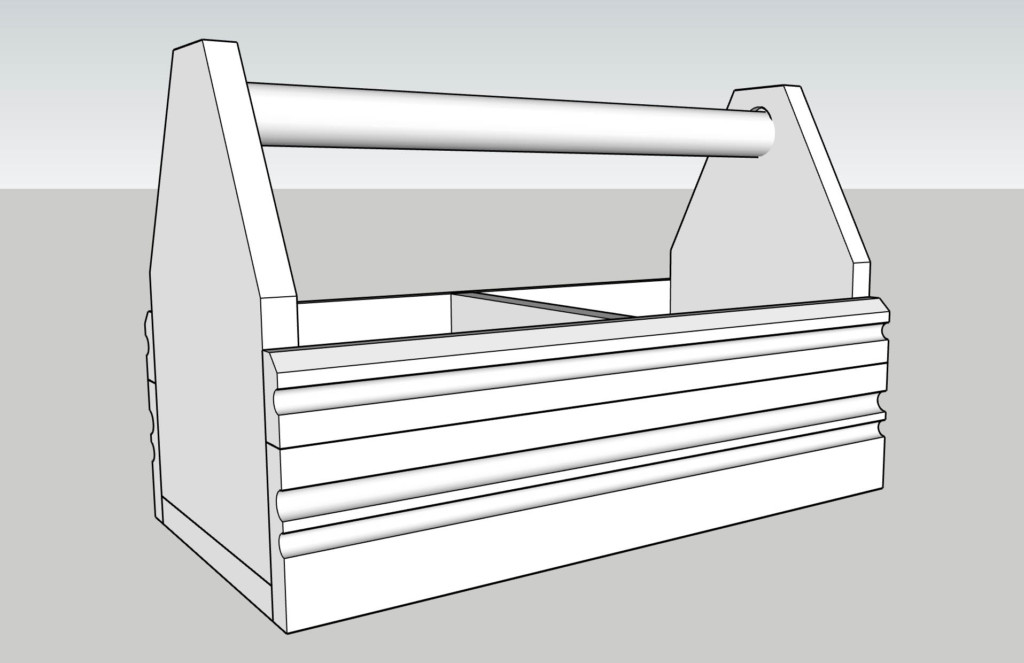
To start this project, cut your wood from the cut list above. Definitely watch my video to learn how to make these simple DIY Gift Caddies using Scrap Molding!

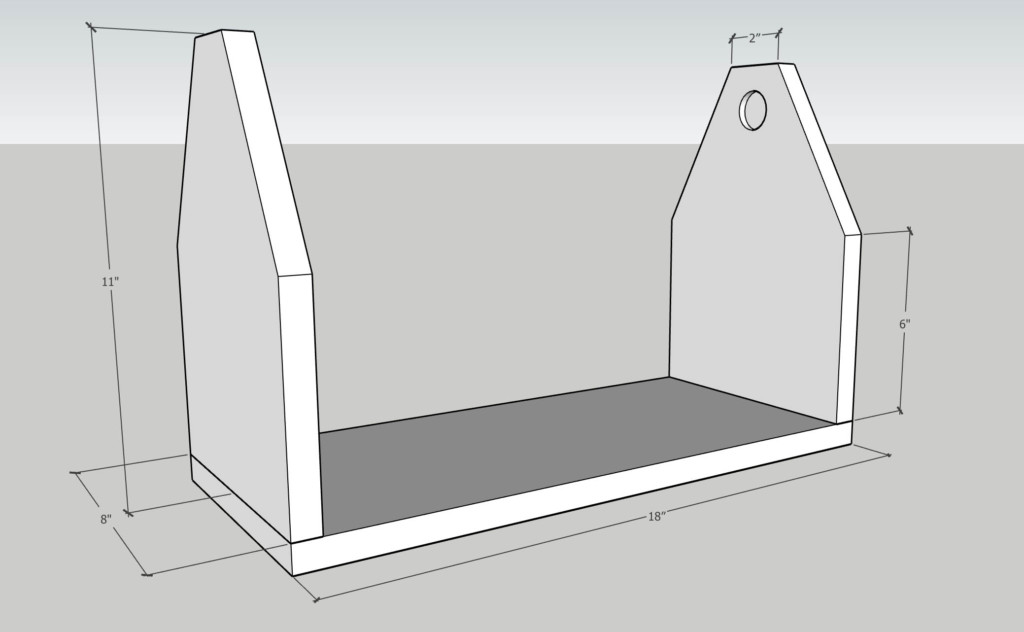
The base of my gift caddy isย  8โ€ x 18โ€, but feel free to make your caddy a custom size based on your scraps or your gifts.

Cutting the top of the sides:

You can curve the top of your caddy by tracing the perimeter of a paint can or another round object.

Make Your Own Street Sign | Pretty Handy Girl

Alternatively, you can cut straight angles off the top corners as shown in the diagram below. Simply mark off two inches at the top of the sides. Then make an angled line down to the location where your trim starts on the sides.

Cut the top profiles using a band saw or jigsaw. If you donโ€™t have either, you can use a coping saw.

Sand off any rough edges from your plywood pieces using a sander.

Adding Scrap Trim:

Now itโ€™s time to use all your fabulous scrap trim. You can use whatever trim you have laying around, there are no rules. I chose a piece of door trim and some decorative egg and dart trim for this caddy.

Cut your molding to 18โ€ (the same length as the base).

Caddy Handles:

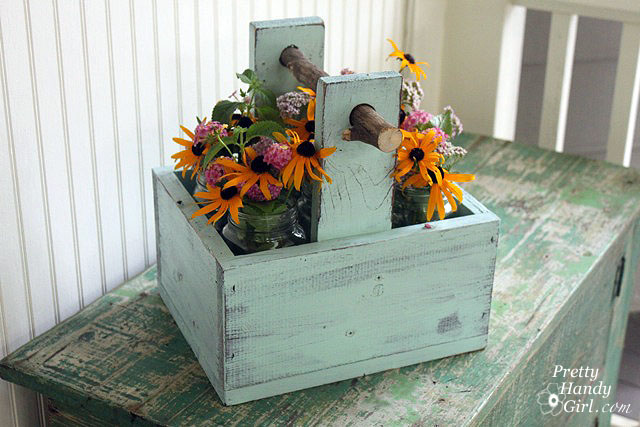
For the caddy handle, I happened to have some copper pipe in my scrap pile, but you can use a dowel, old closet rod, or even a branch like I used on this caddy.

rustic-wooden-caddy-with-branch-handle

Use a forstner bit the same width as your handle to drill halfway into the caddy sides. (For the branch, you might want to drill completely through the sides.) The 3/4โ€ณ copper pipe is equal to a 7/8โ€ณ forstner bit.

Dry fit the handle into the sides. Youโ€™ll need to measure to make sure the width of your caddy is the same at the top and bottom. You might have to drill a little deeper into the sides until the top is equal to the bottom when the handle is fitted into the holes.

Assemble the Caddy:

Run a bead of glue along each end of your base. Then set the sides on top of the base.

To secure the handle, add a bunch of construction adhesive into the holes you drilled into the sides.

Assemble the caddy. Clean up any glue squeeze-out. Flip your caddy onto its side and secure the base into the sides with several brad nails.

To secure the scrap trim sides. Use more wood glue along the edges of the side pieces. Then set the trim in place and secure it with a few more nails. Wipe off any glue squeeze-out.

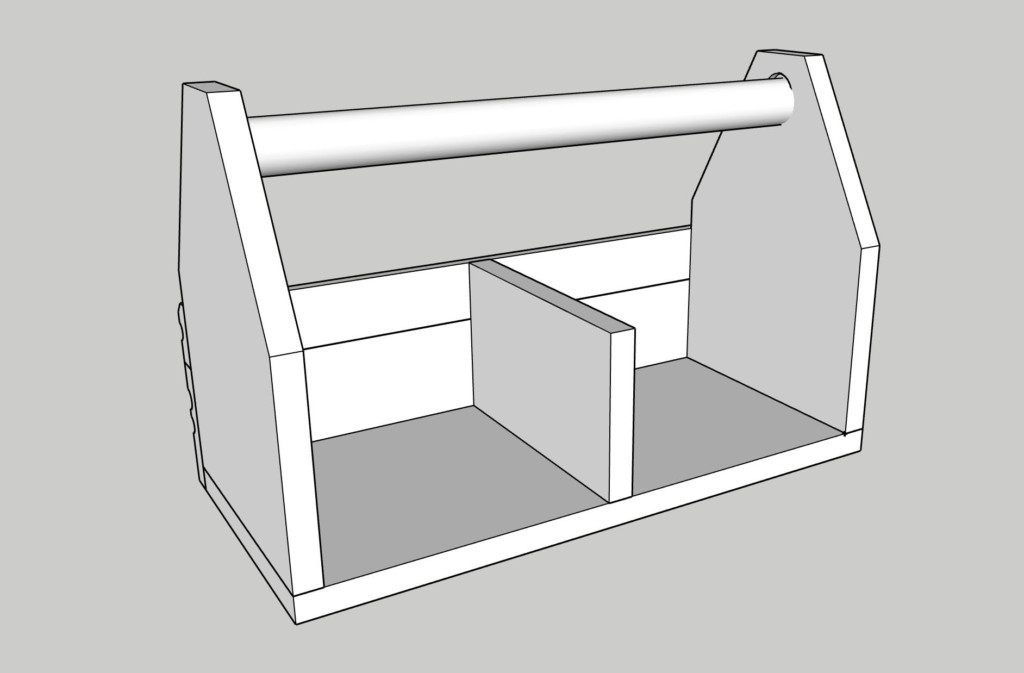
This next step is truly optional. I like to add a divider in larger caddies. If you want to do the same, cut a piece of one-by to fit inside the caddy. Add some wood glue onto the bottom and sides of the divider, then set it in place.

Finish off the caddy build by adding trim to the other side. Secure the trim and divider with nails.

Finishing the Caddy:

Use a wood putty to fill in the gaps and nail holes.ย After the wood putty dries, sand it smooth.

Paint or stain the caddy in the color of your choice. Finish the caddy with polyurethane or wax to protect it.

Fill Your Gift Caddy:

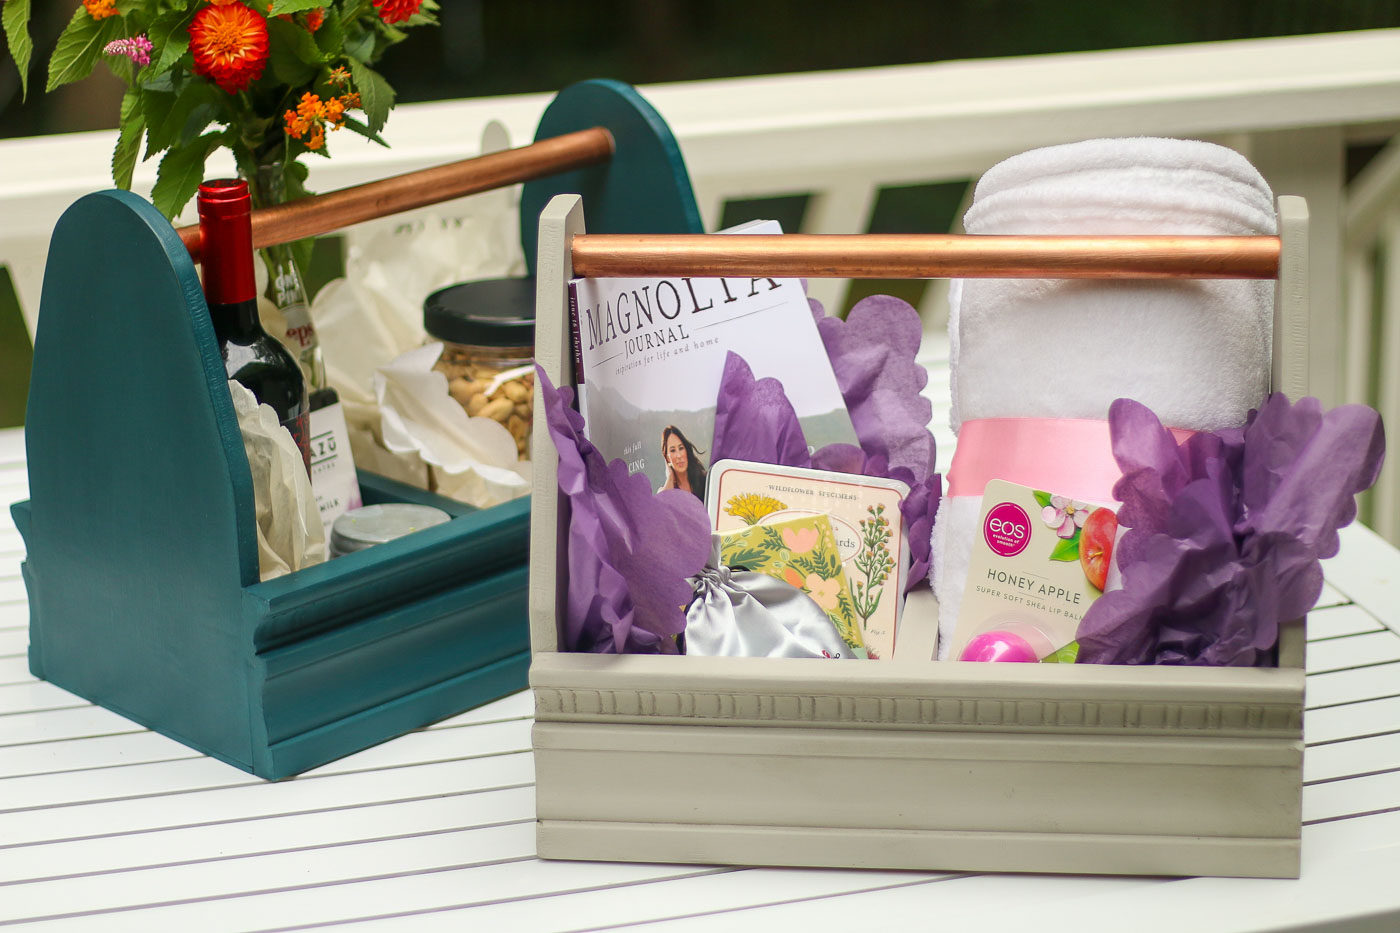
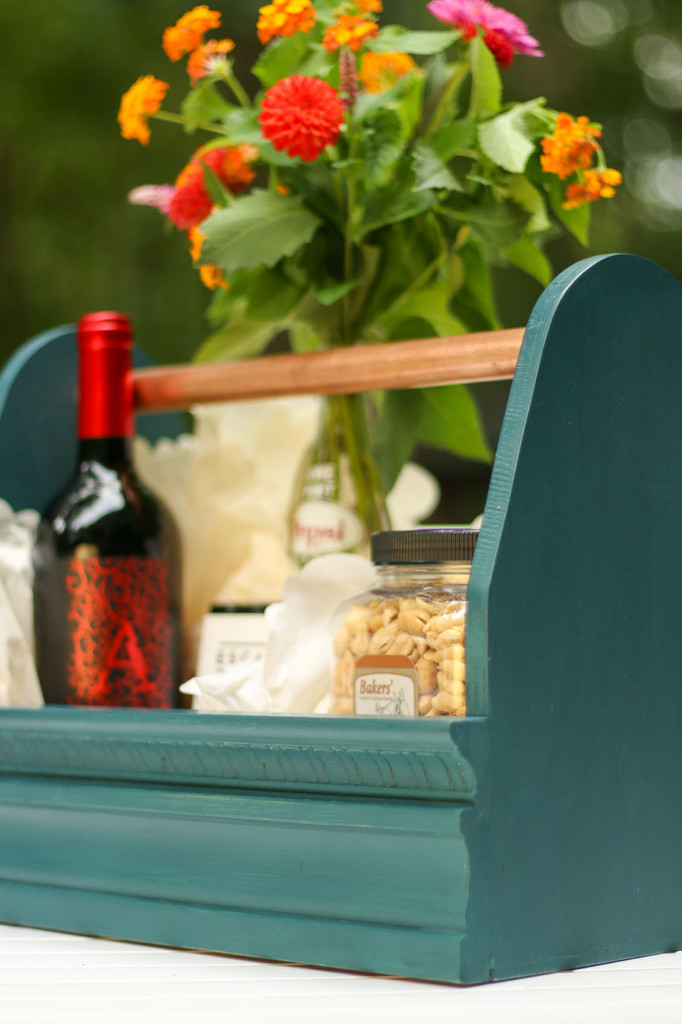
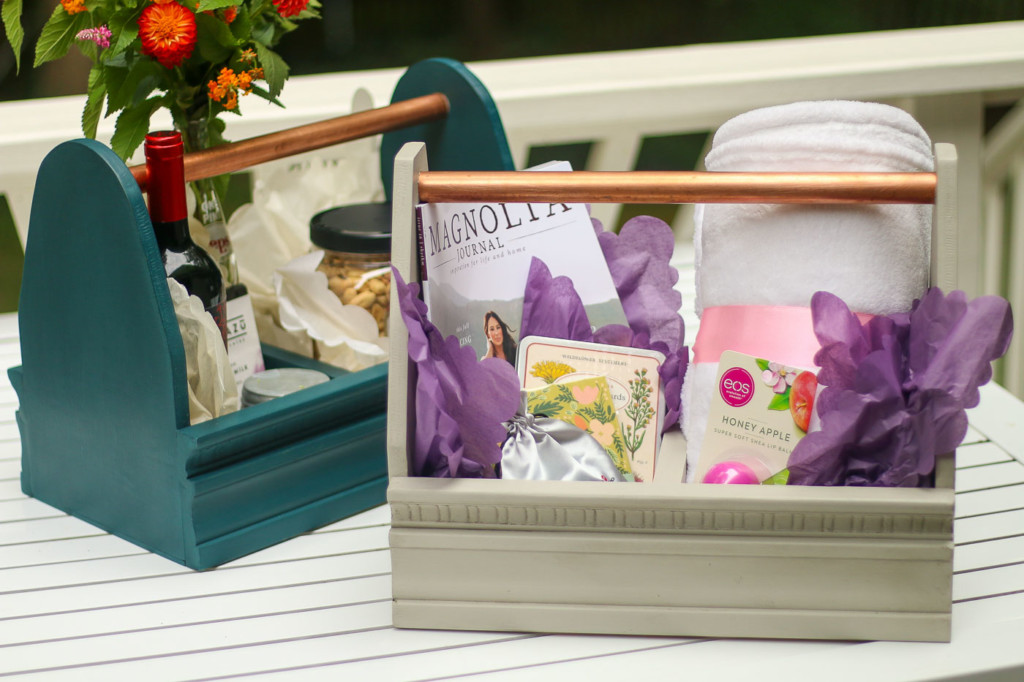
You can fill these caddies with just about anything! Create a snack basket:

Or a fill it with a candle, eye mask, cozy blanket, and a magazine for a relaxation basket.

I would honestly love to hear your suggestions for things to add to these gift caddies in the comments below! Until next time, hope you have a very Happy Holiday season!

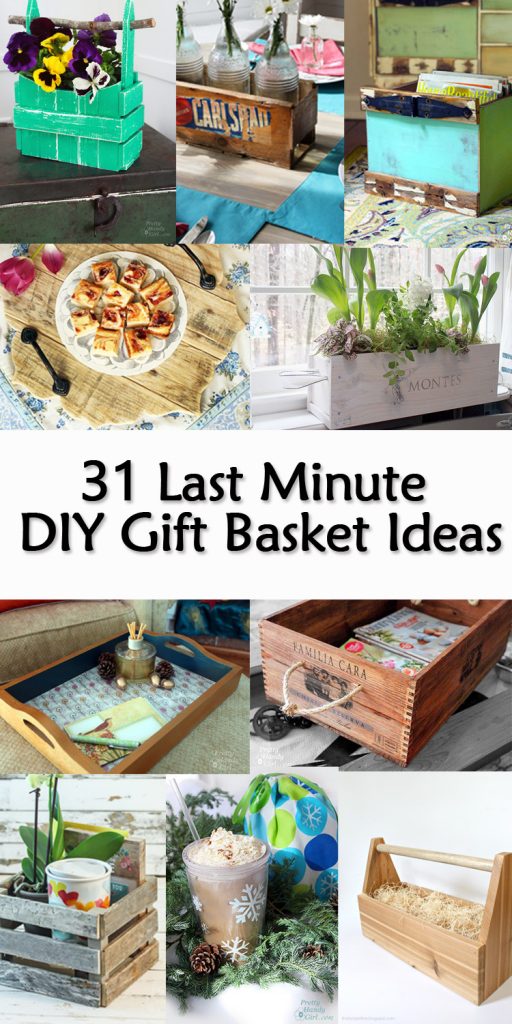
Like this gift idea? Then youโ€™ll love these additional gift basket ideas:

31 last minute gift basket ideas pinterest images

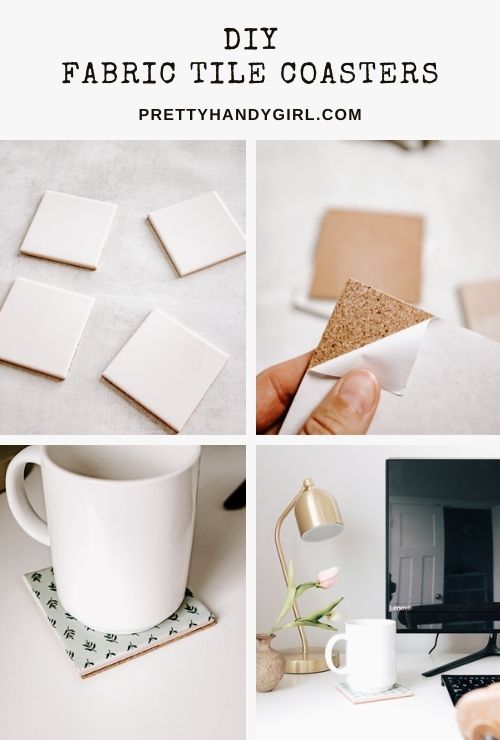
DIY fabric tile coasters

DIY Fabric Tile Coasters

Hello! How are we all doing?

The holidays may look a lot different this year, but the same sentiments and traditions are still here. If you have a tradition of making handmade holiday gifts, I have the perfect craft for you today! These DIY fabric tile coasters are a cinch to put together and you can customize them with any fabric you like.

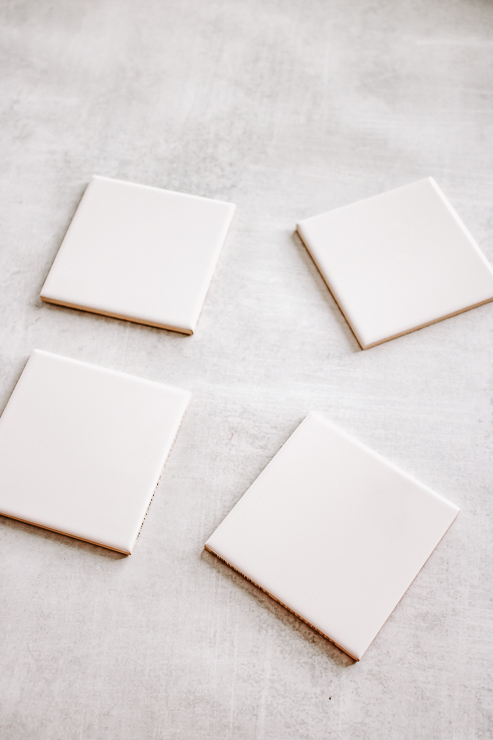
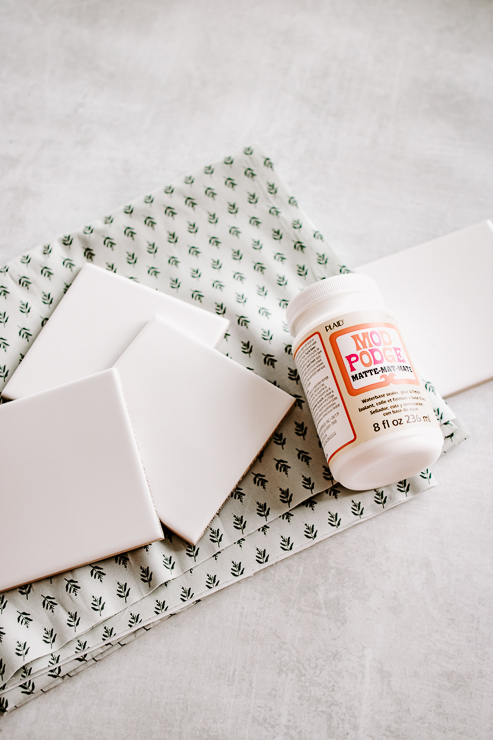
This project is not only easy, itโ€™s inexpensive too. Pick up square tiles from a home improvement store for as little as 15 cents. Then grab some fabric scraps to make these coasters come together.

Iโ€™m sharing the full tutorial plus some tips on making your coasters waterproof! So, letโ€™s get started.

How to Make DIY Fabric Tile Coasters

Materials:

(Iโ€™ve includedย affiliate links for your convenience. I earn a small percentage from a purchase using these links. Thereย is no additional cost to you. You canย readย more about affiliate links here.)

Instructions:

Step 1: Cut Fabric to Size

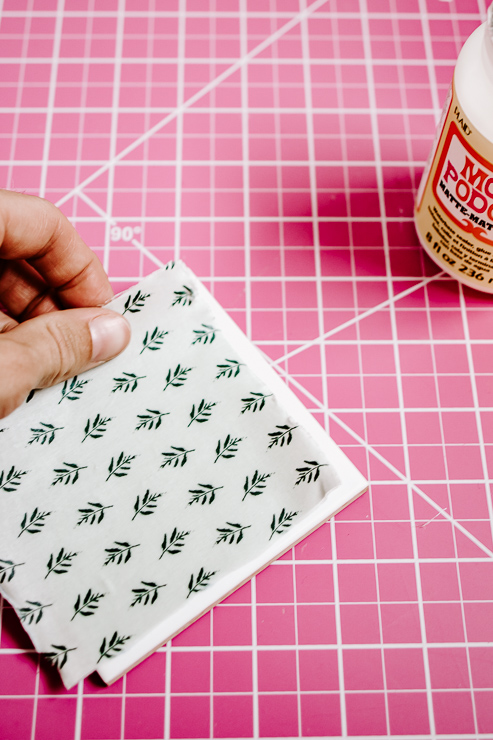
The first thing you need to do is cut your fabric to size. I tried this many different ways and by far the best looking option is to cut them slightly smaller than the tile. This will leave a small white border around the top of the coaster but it will look neater. Plus, it is much easier to apply this way.

Use a rotary cutter to get the neatest cuts, but if you donโ€™t have one, use a pair of very sharp scissors or fabric scissors.

Step 2: Apply Fabric to Tile

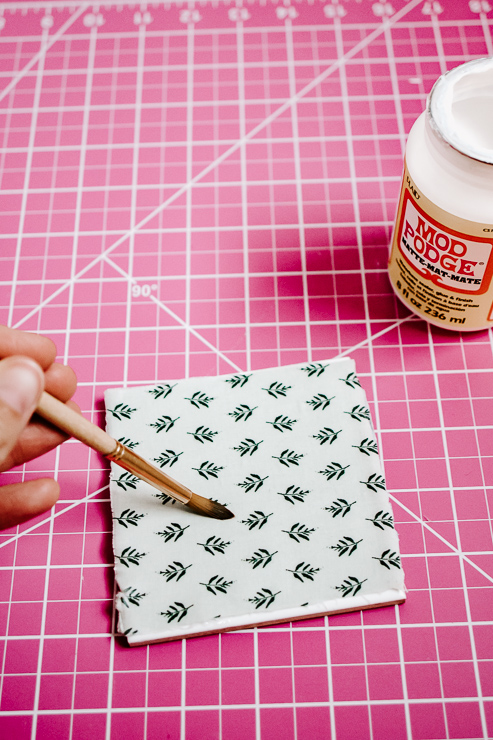
Take your foam brush and paint a layer of Mod Podge onto the top of your tile. Then, apply your fabric square to the tile, Smooth out bubbles as you apply.

Once your fabric is aligned properly and smooth, apply another layer of Mod Podge on top of the fabric.

Set aside your tile coasters to dry.

Step 3: Waterproof and Seal your Coaster

Once your Fabric and Mod Podge fully dries, you will notice it feels a little stiff and tacky. Eventually, this will go away but if you donโ€™t have time on your hands and you really want to waterproof them, youโ€™ll need to seal them.

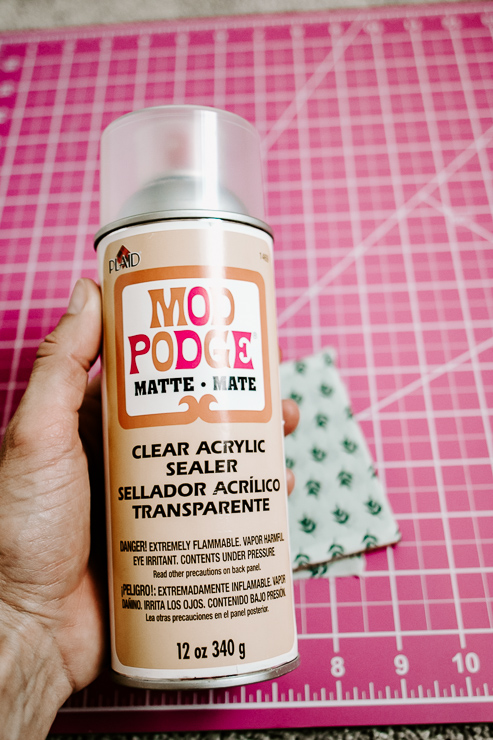
With any of these sealers, you want to spray outdoors or in an area with really good ventilation โ€“ as the fumes are pretty strong.

One way to seal them is to use an acrylic sealer spray from Mod Podge. You can buy this in gloss or matte. I only had matte on hand but I do think gloss is the way to go here.

Another sealer (which I havenโ€™t personally tried yet) is called Engine Enamel. This is made by Rustoleum and is actually for cars! But Iโ€™ve heard it works here too. It will give a glossy finish to your coasters and protect them from water and heat.

Finally, a third option is to use resin. Resins can be more expensive than the first two options, so keep this in mind. EnviroTex Lite is a resin sold at Michaelโ€™s and other craft stores and gives your finished coaster a very high gloss, polished look. Itโ€™s really beautiful so if you are serious about your coaster making, this is definitely the winner here.

Step 4: Apply Cork to Bottom of Tile

After your coasters are dried and sealed, letโ€™s finish the bottom. Tile squares can be a bit rough on the bottom, so we need to cover them.

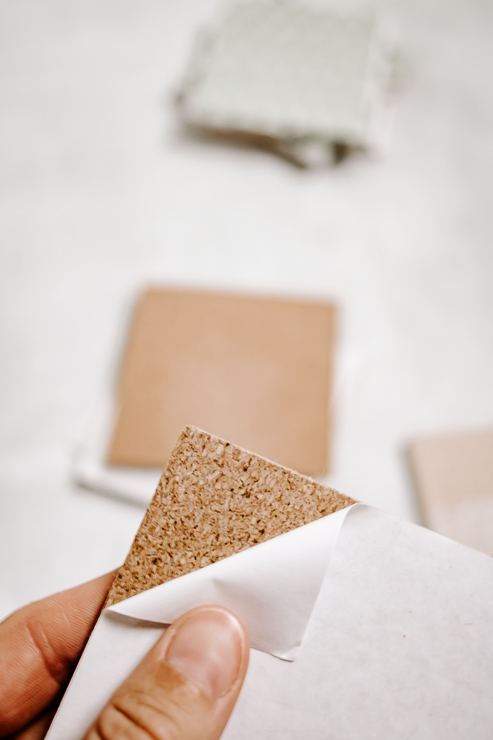
I found these cork squares on Amazon and they fit perfectly! They are also sticky on one side, so you just need to peel off the back and apply.

Another option is to use felt squares and hot glue them to the bottom.

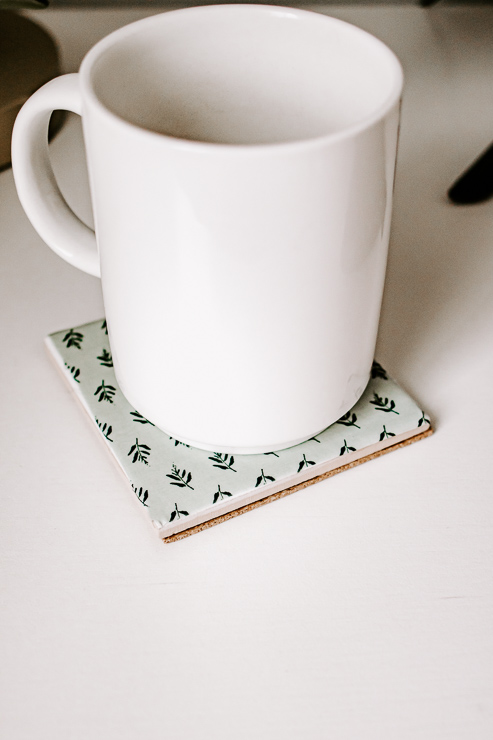
These coasters are easy to create and make wonderful handmade gifts โ€“ even for a hostess!

I hope you enjoyed this tutorial! Enjoy this holiday season, even if it does look a bit different. ๐Ÿ™‚

karen signature

~ See More of Karenโ€™s Tutorials ~


karen from decor hintHello!ย  Iโ€™m Karen, the creator of the Home Decor and DIY Blog:ย Decor Hint.ย Iโ€™m a Native of the East Coast, but I currently live in beautiful Seattle with my hubby, our two wonderful children, and our spunky wheaten terrier.

You can usually find me with some sort of craft in one hand and a coffee in the other. And Iโ€™m always rearranging furniture or moving lamps from room to room. I have a passion (read: obsession) for decorating, DIY, and gardening. In short, I love making my house into a home.

Like many, Iโ€™m inspired by what I see in home decor magazines, but Iโ€™m not so inspired by the price tags.ย  Consequently, I love finding and creating beautiful budget-friendly home decor items. In a head to head competition, I bet youโ€™d never know the difference between the designer items and my DIY creations!ย  Many of my DIY projects focus on sewing, crafting, upcycling, and organizing. Some of my favorite projects have been making pretty wreaths,ย sewing my own tassel hand towels, and crafting these trendy wood bead garlands.ย I canโ€™t wait to inspire you and spark your creativity through my DIY projects.

You can always connect with me on Pinterest,ย Twitter or Instagram.